
A Windows Server Failover Cluster (WSFC) is a group of independent servers collaborating to enhance the availability and reliability of applications and services. If you are an IT admin or an aspirant, you should know how to configure it. So, in this post, we will discuss how to install and configure Failover Cluster in Windows Server.
Failover Cluster holds utmost importance in a production environment. If you have configured WSFC in the environment, and for some reason, a node goes down, there will be a backup node ready to take up the load. So, let’s say we have a small environment containing a few nodes, if Node 1 goes down, the failover clustering will detect, and then change the state of Node 2 from passive to active.
If you want to install and configure the Failover Cluster in Windows Server, follow the steps below.
- Install Failover Cluster Feature
- Install File and Storage Service on the Storage Server
- Enable iSCSI Initiator
- Configure the Storage Server
- Configure Failover Cluster
Let us talk about them in detail.
1] Install Failover Cluster Feature

First of all, we need to install the Failover Cluster feature on every single node attached to your domain controller. If you have a way to deploy this feature to all the connected nodes, we recommend you use it, but if you don’t have a really large network, installing manually will not take a lot of time. To do so, follow the steps mentioned below.
- Open the Server Manager.
- Now, click on Add roles and features.
- Click on Next, make sure to select Role-based or feature-based installation, and click on Next.
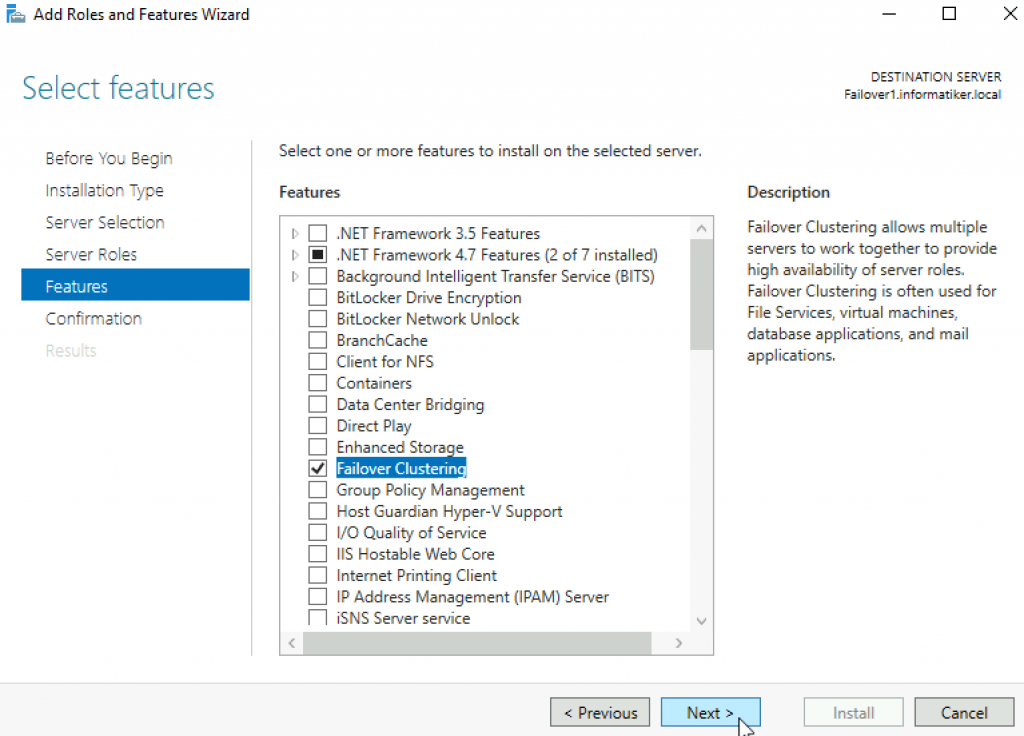
- Now, keep clicking on Next until you reach the Features tab, look for the Failover cluster, and tick it.
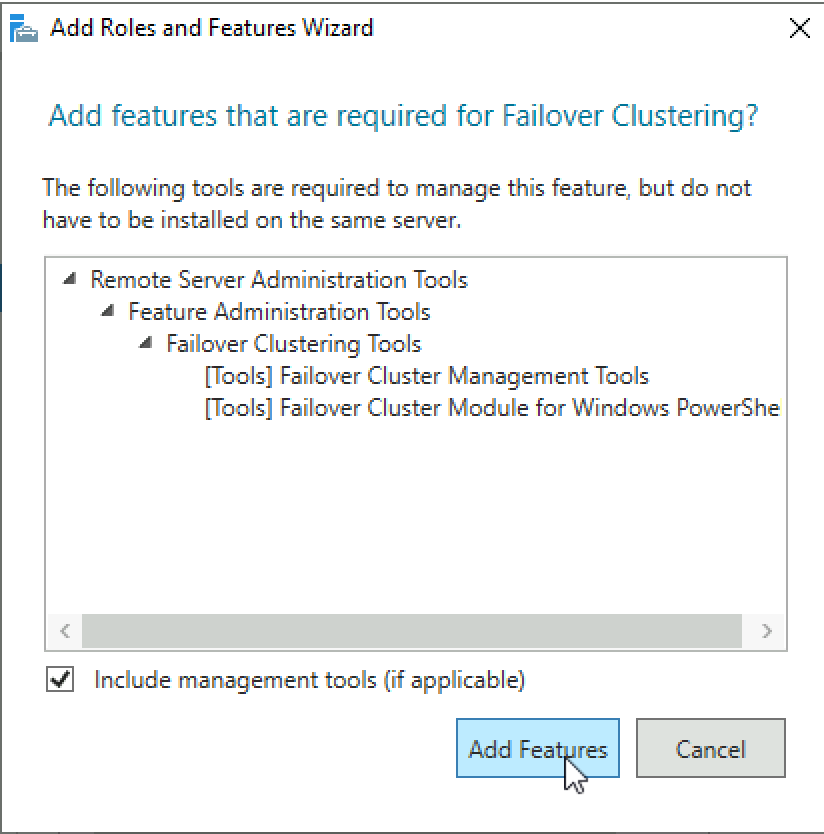
- A pop will appear asking you to click on Add features, do that, and follow the on-screen instructions to complete the installation process.
As mentioned, you must install this feature on all the nodes you want to be part of the failover cluster environment.
2] Install File and Storage Services on the Storage Server
Next, we need to configure the storage that both these servers will be using. That storage server may or may not be a member of the domain, as everything is IP-based. Follow the steps mentioned below to install the File and Storage services for them.
- Open Server Manager.
- Go to Add roles and features.
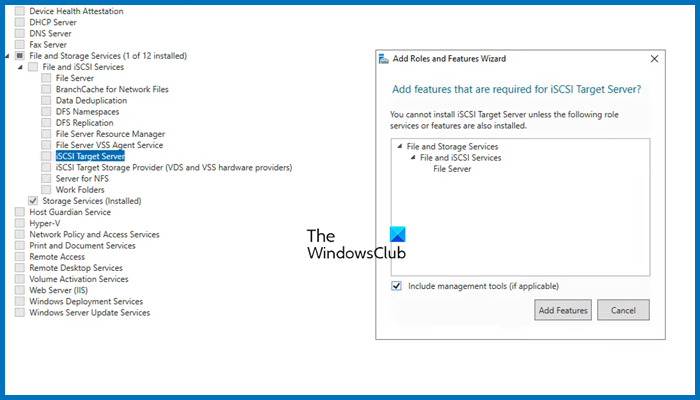
- Click on Next until you reach the Server Roles tab, expand File and Storage services, look for iSCSI Target Server, tick it, and then and then install it.
Wait for it to complete the installation process. Since we will have only one storage server, you need to install it on a single computer.
3] Enable iSCSI Intiator
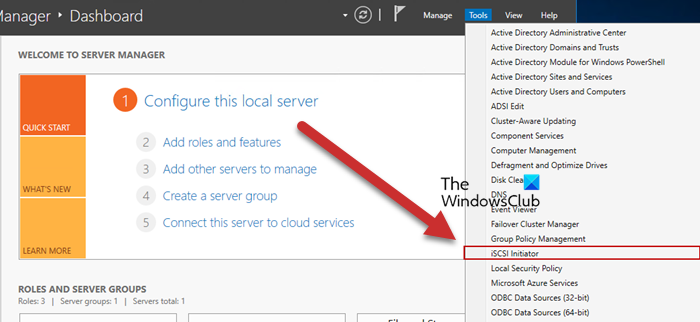
Now, we need to go back to the Failover Cluster nodes and then enable ISCSI Initiator. To do so, click on Tools > iSCSI Initiator in the node server, and then click Yes when prompted to enable the feature. You have to do this to all the servers attached to the node.
Read: How to install and use iSCSI Target to configure Storage Server
4] Configure the Storage Server

We enabled iSCSI Initiator on the node servers to make them accessible to the storage server. Now that we are done with that part, let’s add the nodes to the Storage Server. Follow the steps mentioned below to do so.
- Go to Server Manager > File and Storage Services.
- Click on iSCSI tab.
- Click on Tasks > New iSCSI Virtual disk.
- We can either select a hard drive or just a folder in the server, to do so, click on Type a custom path, then click on Browse, and select either the volume, an existing folder, or create a new folder.
- Click on Next, the virtual disk name, and click on Next.
- Select the size of the disk; Fixed is quicker but Dynamic gives you the flexibility of increasing the size when needed.
- Click on Next, give the target a name, and click on Next.
- When you reach the Access Server tab, click on Add.
- Make sure that the Query initiator computer for ID option is checked and click on Browse.
- Enter the name of the node computer and then click on Check names. Add all the nodes of your environment similarly.
- Click on Next.
- Enable CHAP if you want to add authentication between devices.
- Finally, create the connection.
This will create a storage environment consisting of the two nodes.
5] Connect nodes from the initiator back to the target
After configuring the storage environment, we can set the target for the initiator. Follow the steps mentioned below to do the same.
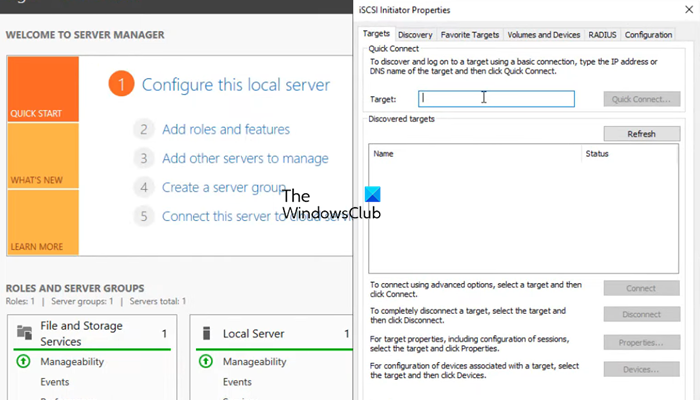
- Open Server Manager on the node computer.
- Go to Tools > iSCSI Initiator.
- In the Target field, enter the IP address of the iSCSI Target.
- Click on Quick connect > Ok.
You can go to the Discover tab to see the connection, then go to Volumes and Devices, and see if you can find the volume under the Volume list, if it’s not there, click on Auto Configure.
6] Configure Failover Cluster

Now that we have storage ready, we can just create a cluster and add the two nodes. Follow the steps mentioned below to do the same.
- Open the Server Manager.
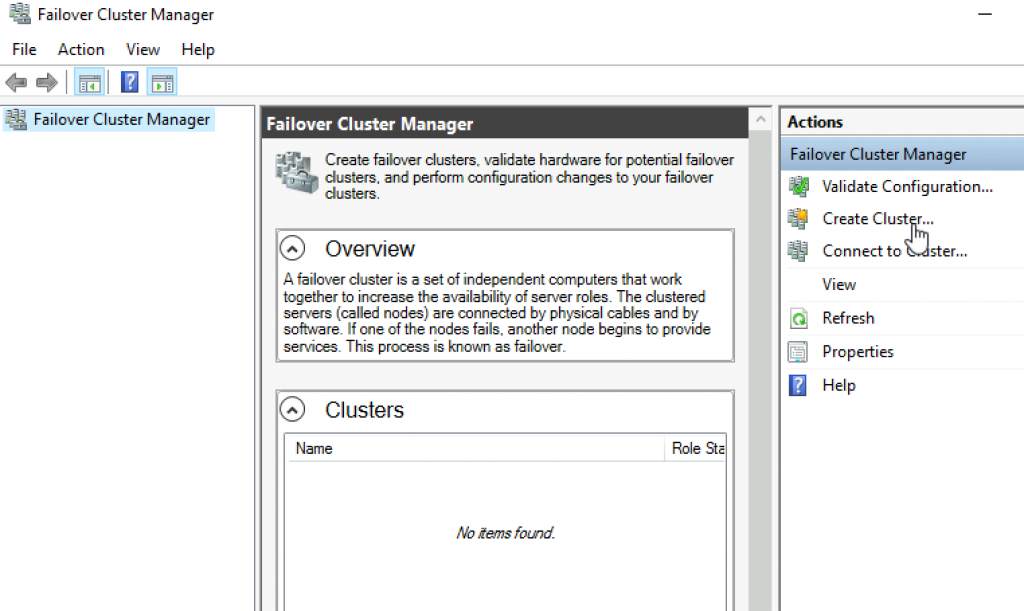
- Click on Tools > Failover Cluster Manager.
- This will launch the Failover Cluster Manager utility, so, right-click on the Failover Cluster Manager tab, and click on Create Cluster.
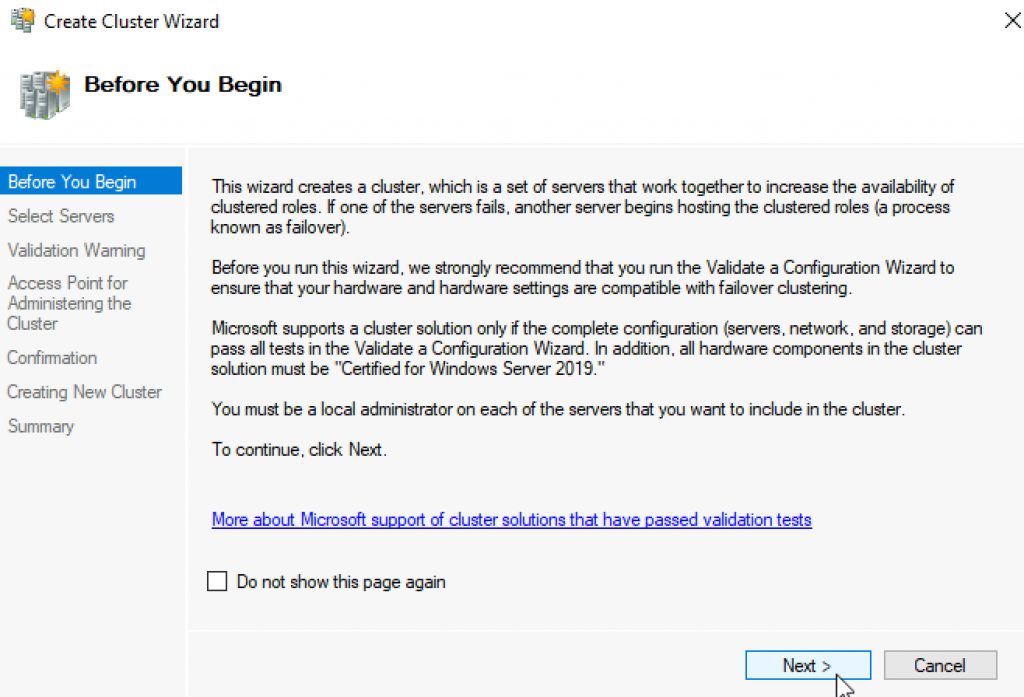
- In the Create cluster wizard, click on Next.
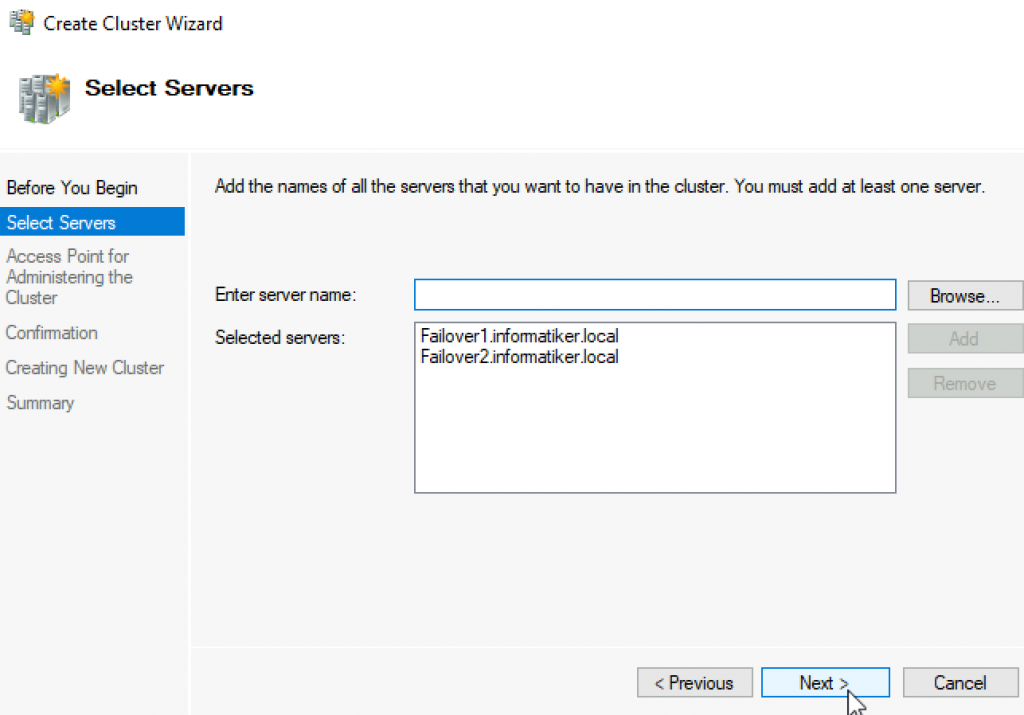
- In the Select Server tab, enter the name of the server and click on Add. You can also browse if you want.
- Run the validation test, once done, click on Next.
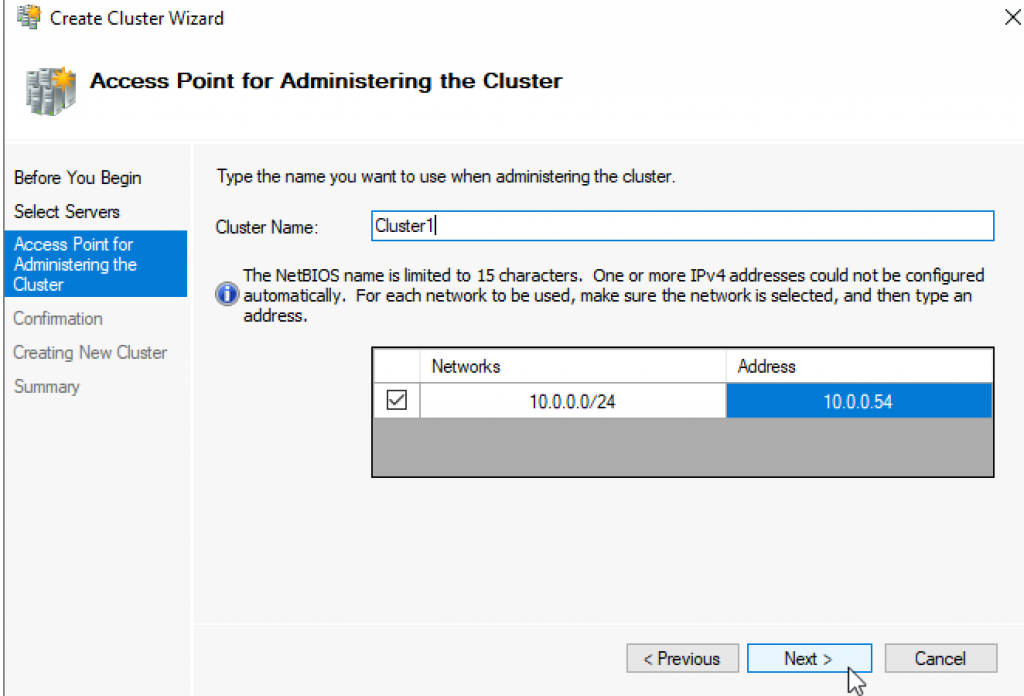
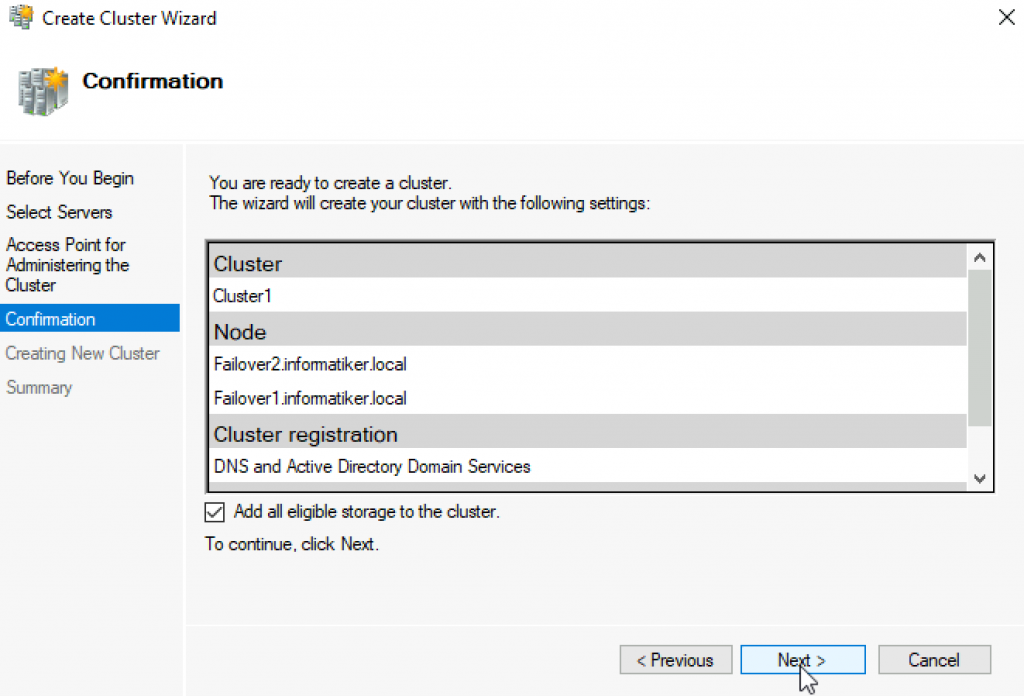
- Give the cluster a name and an IP address not currently used. Click Next.
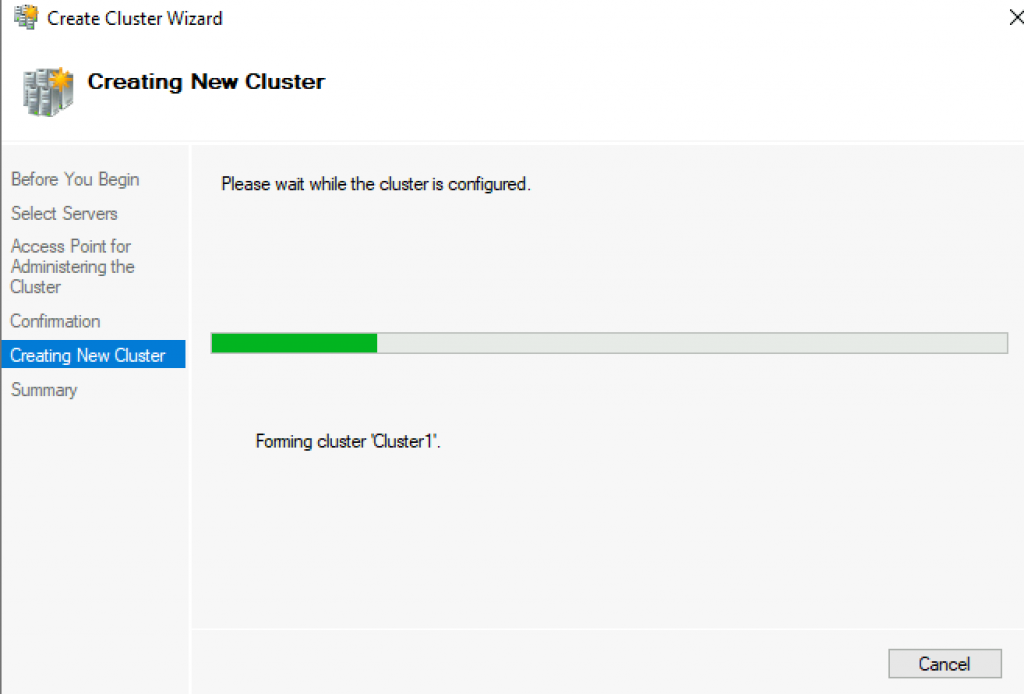
- Finally, click on Next and wait for the cluster creation to complete.
Then, in the upper left-hand corner, you will see that the cluster has been created. To access it, just click on it. Now, you can add roles and storage and make all the required configurations to the cluster.
That’s it!
Read: How to install and configure DNS on Windows Server
How to install Failover Cluster in Windows?
You need to use the Server Manager to install the failover cluster feature in Windows Server. In the Server Manager, go to Add roles and features, and then install the Failover Cluster from the Features tab. For more details, check out the guide above.
Read: How to set up an FTP Server on Windows 11
How to configure Failover Cluster in Windows Server?
To configure failover cluster in Windows Server, you need first install the Failover Cluster feature, configure Storage, create a cluster, and then add the servers. To know more, check out the guide mentioned in this post.
Also Read: Best free Encrypted Cloud Storage Services.
Failover clustering will enable you to make you Windows Server services highly available. In this guide we will go just through simple setup of failover clustering on Windows Server 2019 without setting up any services.
Before we begin
These are the resources you will need if you are completely new to Failover Clustering – https://docs.microsoft.com/en-us/windows-server/failover-clustering/create-failover-cluster
Prerequisites
I assume you know basic things about Windows Server before you attempt to do this.
DC
LAB for this guide consists of following:
Domain: informatiker.local
Domain Controller named DC1 – 10.0.0.31
ISCSI
One Windows Server ISCSI Target server named ISCSI1 (if you don’t know how to make ISCSI target server, here is the guide)
ISCSI1 – 10.0.0.50
That machine has one additional disk of 40GBs that will be assigned to ISCSI Target.
Optionally, you don’t have to bring up iscsi target server and configure iscsi for failover cluster – you can also bring up failover cluster without storage.
Failover cluster
We will have two nodes that will have failover clustering installed. These machines will have two network cards – one for communication with network, and another one for clustering communication.
Failover1 – NIC1 10.0.0.52 NIC2 192.168.4.2
Failover2 – NIC1 10.0.0.53 NIC2 192.168.4.3
192.168.4.xx network is only for internal cluster configuration (heartbeat). On netowrk cards that will serve you as heartbeat and internal cluster communication – Control Panel | Network and Sharing Center | Change Adapter Settings | right click on network adapter that will serve for cluster communication – Properties | under Networking tab select IPv4 – Properties | click on Advanced button | under DNS tab deselect Register this connection’s addresses in DNS | WINS tab – select Disable NetBIOS over TCP/IP. Do this ONLY ON network adapters that will server for internal cluster communication!
All of these machines should be part of domain.
Be sure to enable MPIO Feature and iSCSI Initiator on both Failover1 and Failover2 machines. Be sure to follow my guide I posted above for creating ISCSI target, it has all the details in it.
MPIO is very important when you use shared storage.
Connect one 40GB disk you defined as ISCSI target to both Failover1 and Failover2, leave it offline at failover2 node.
Cluster is going to be named Cluster1
Cluster1 – 10.0.0.54
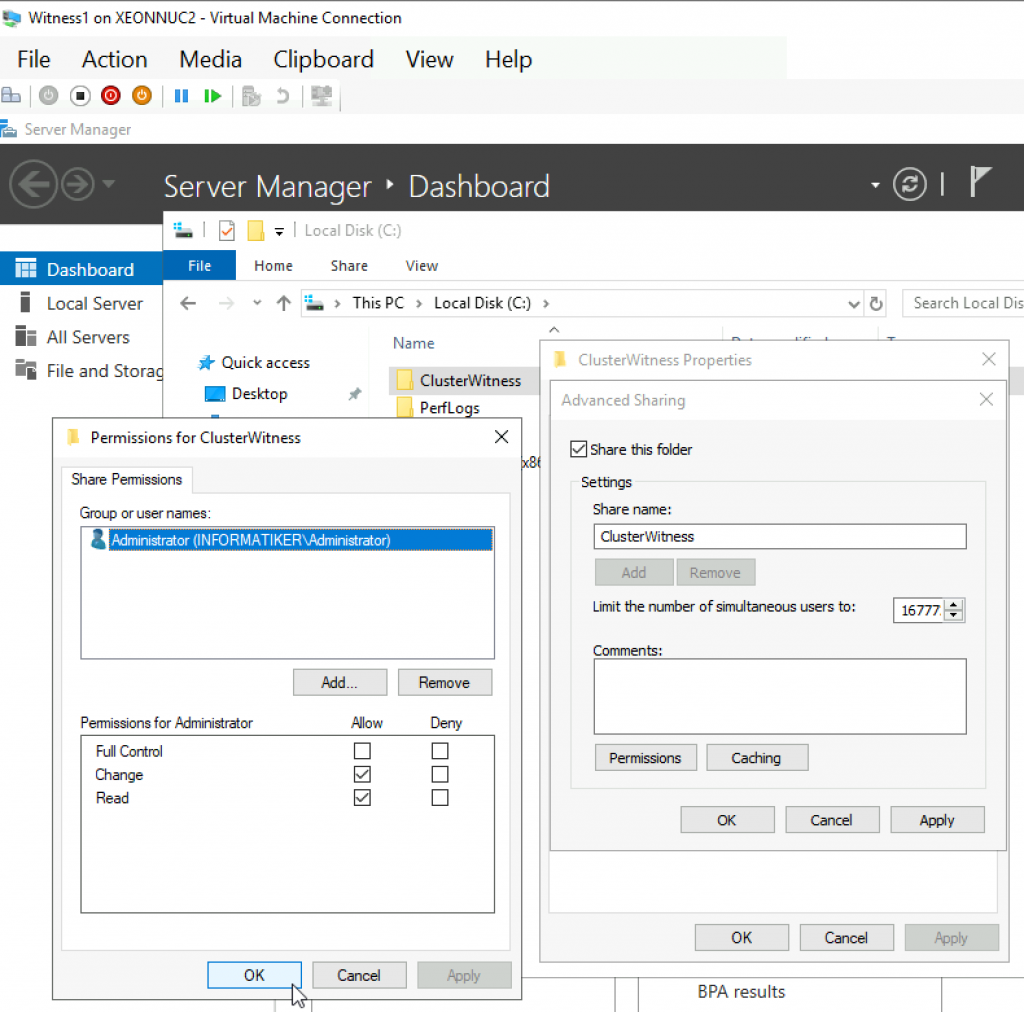
Cluster Witness. We need additional VM that will hold file share that ill be available to our cluster – Witness1
Witness1 – 10.0.0.55
Install Failover Clustering
We will go through the process on Failover1 node, you will repeat the process on Failover2 node. I will show you only important parts, I assume you know how to use Server Manager.
Open Server Manager | click on Manage | Add Roles And Features | on Features screen select Failover Clustering
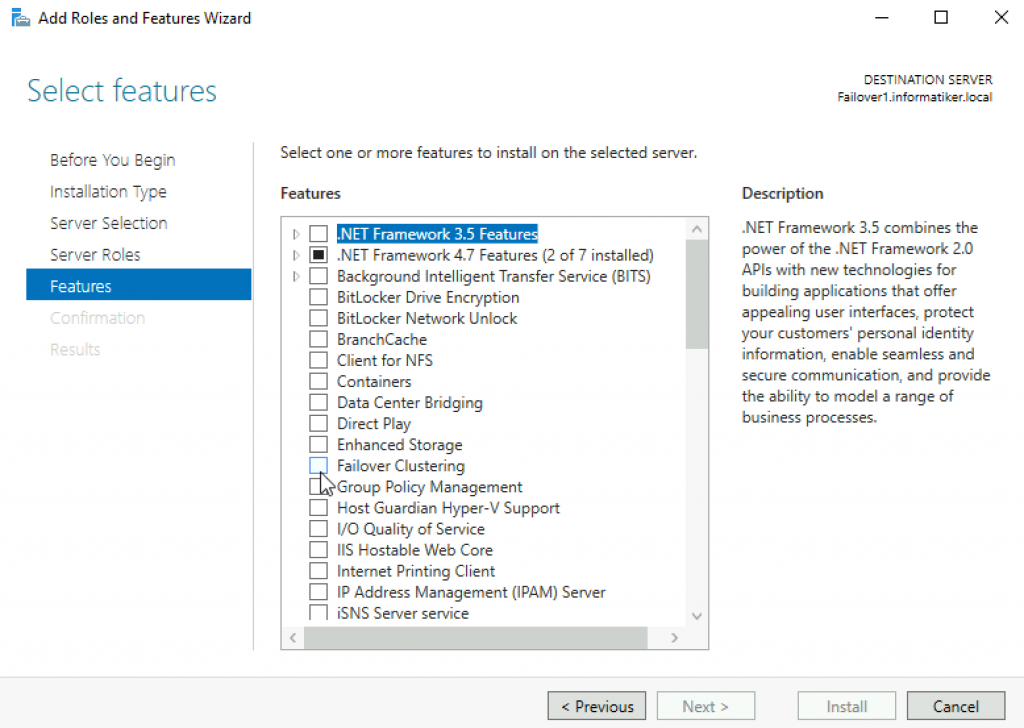
Additional pop-up will appear, click on Add Features
Next
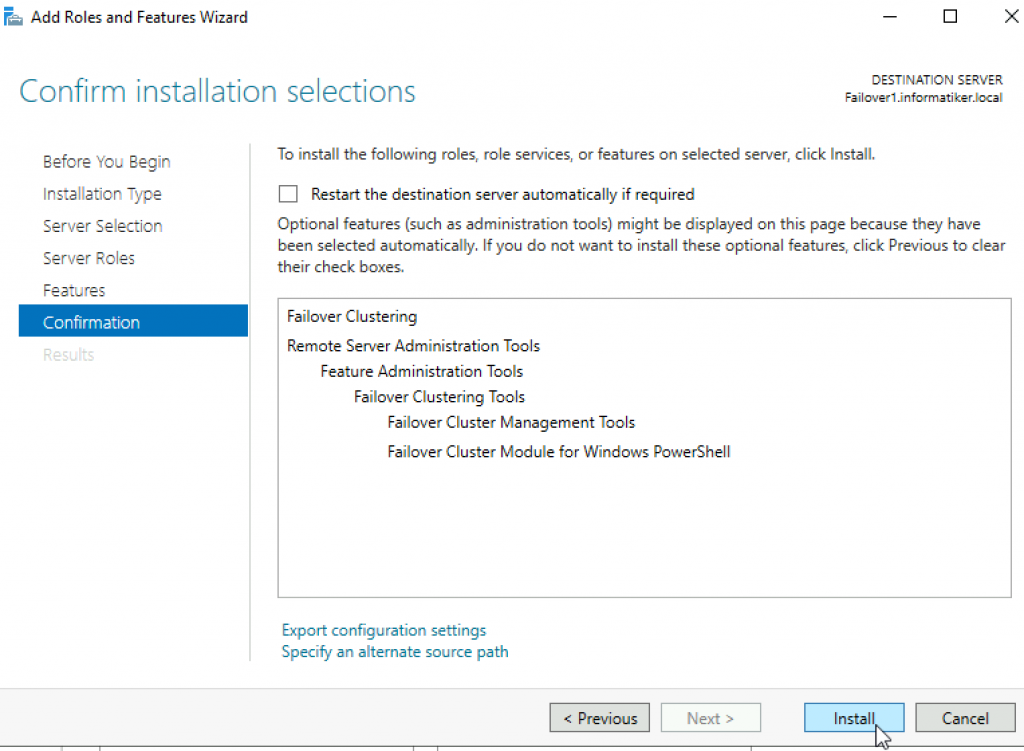
Install
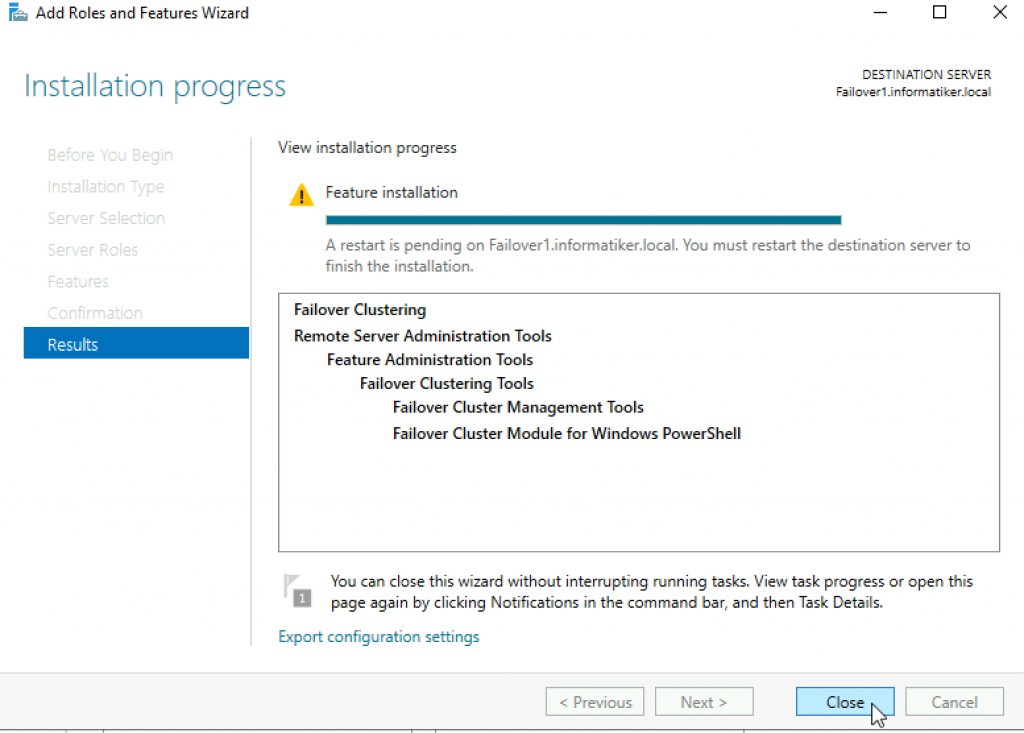
Close wizard and reboot server.
Repeat this process on Failover2 node.
Validate Cluster Configuration
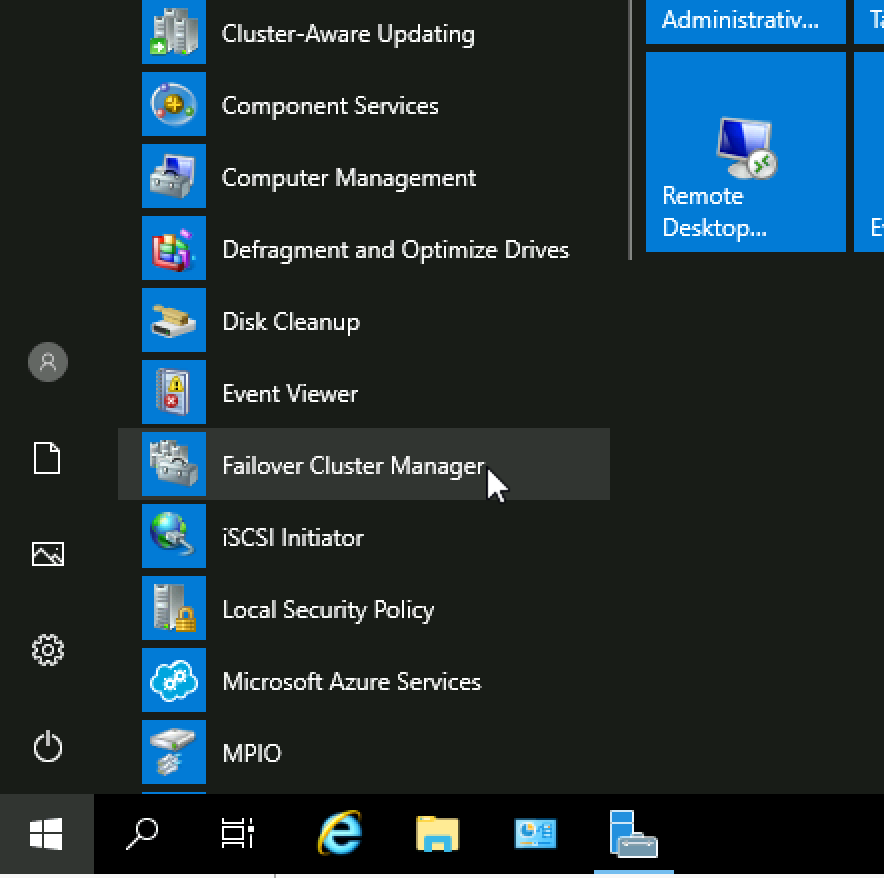
After you installed Failover Clustering on both nodes, login to Failover1 node, click on Start | Windows Administrative Tools | select Failover Cluster Manager
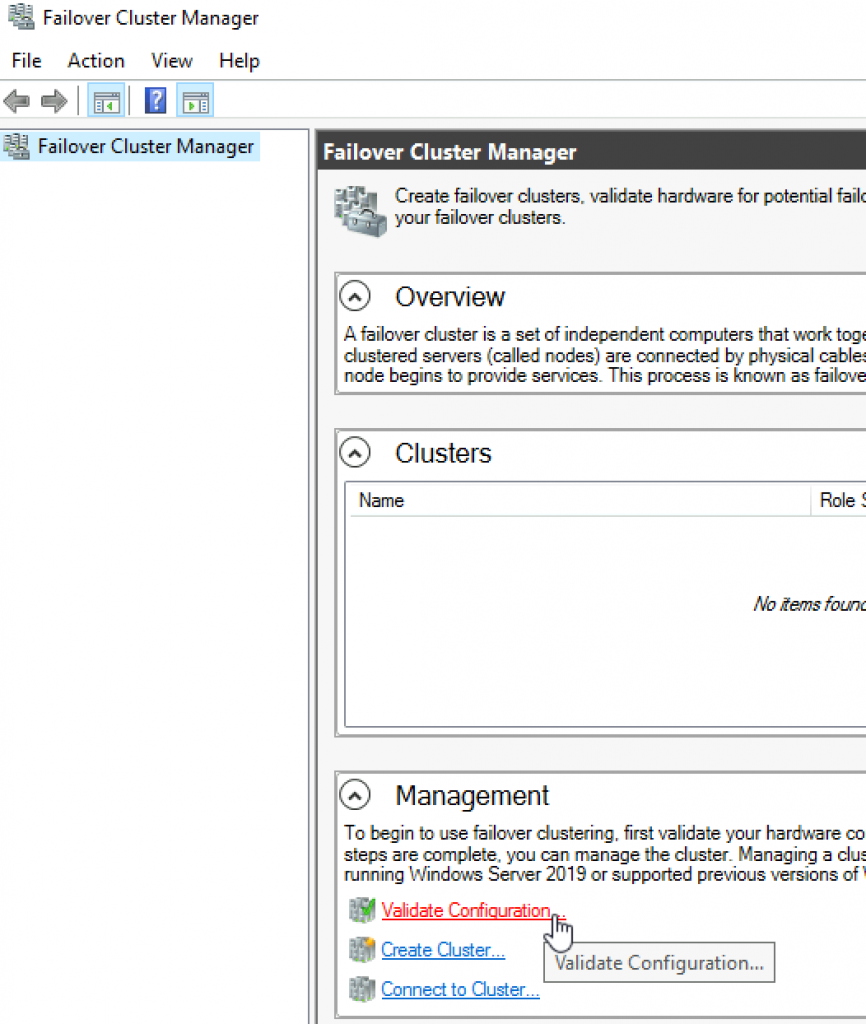
Click on Failover Cluster Manager, and from the middle screen select Validate Configuration…
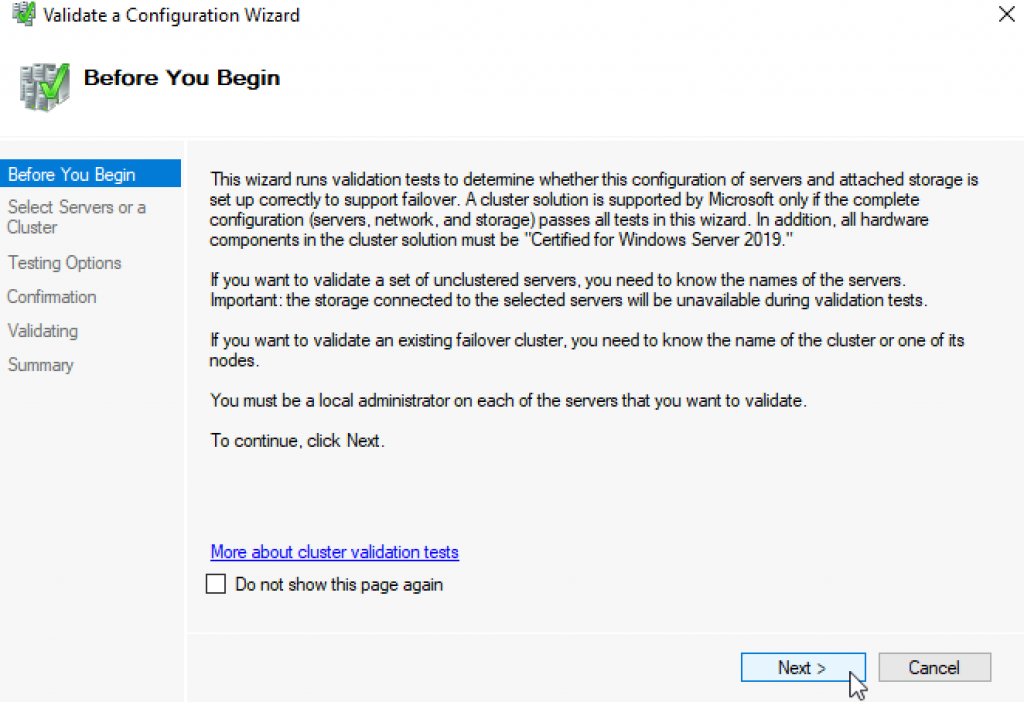
Next
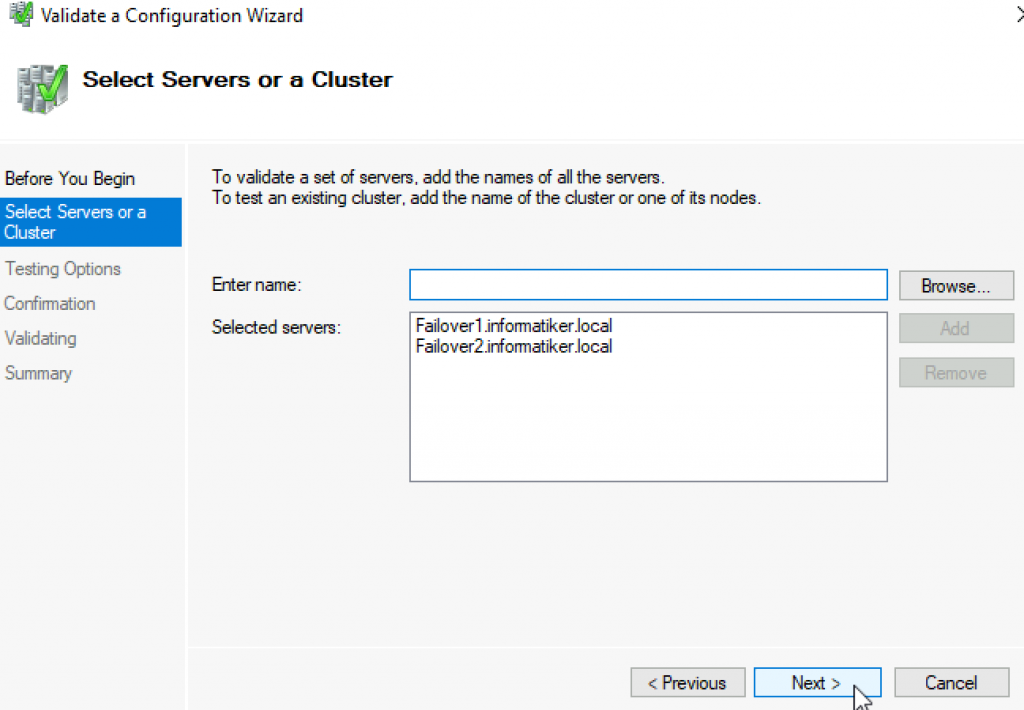
Select both servers (in my case Failover1 and Failover2) and select Next
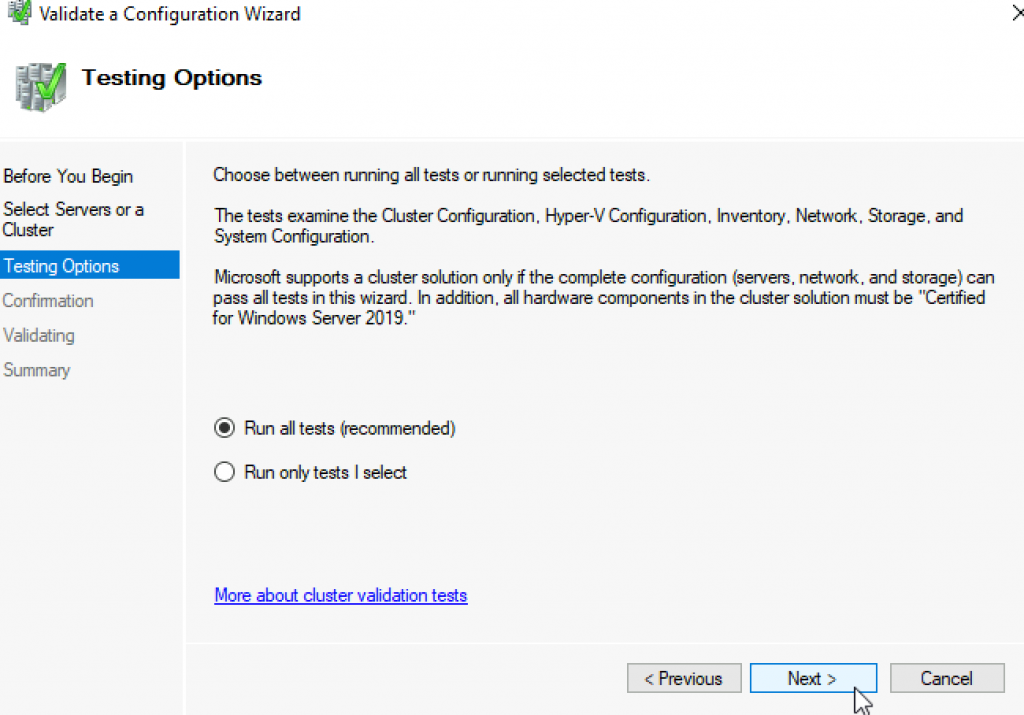
Run all tests | Next
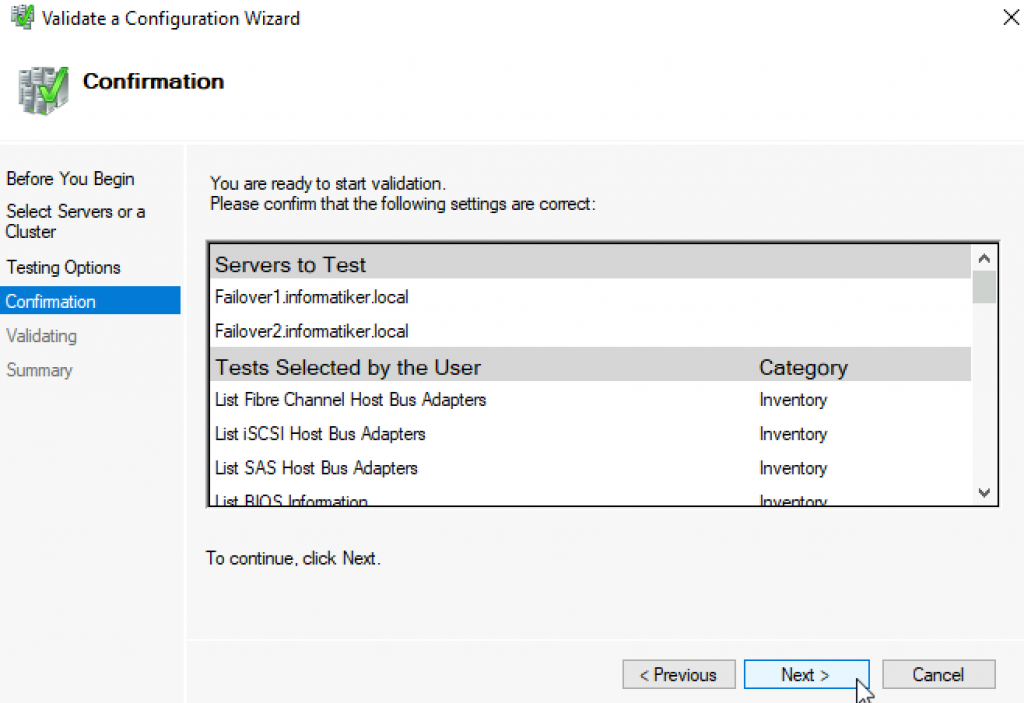
Next
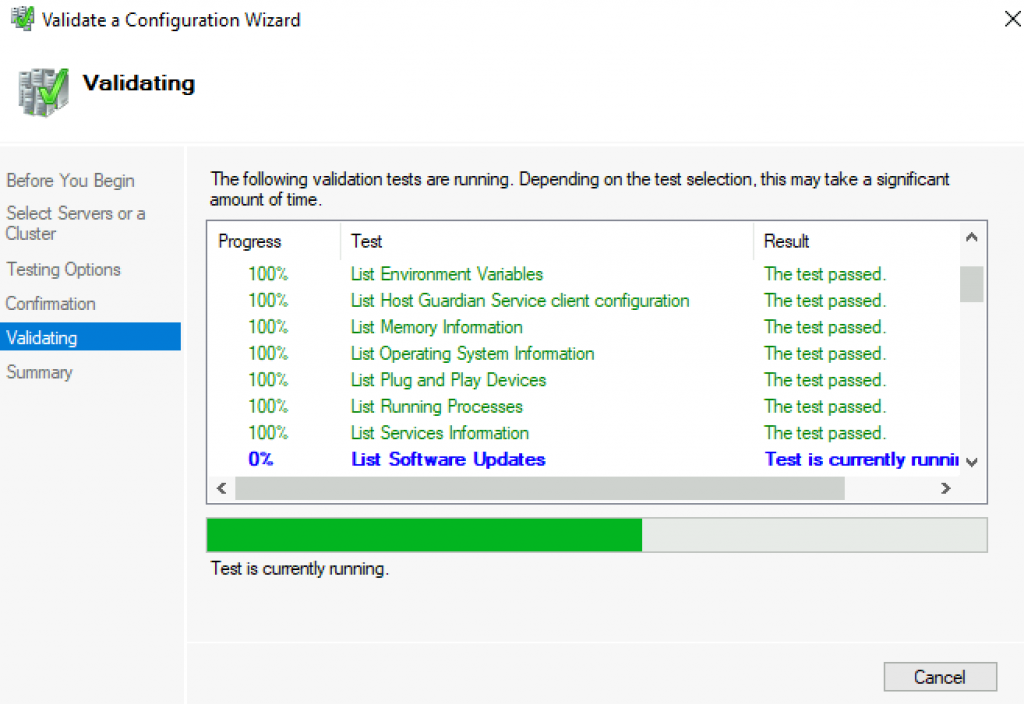
…
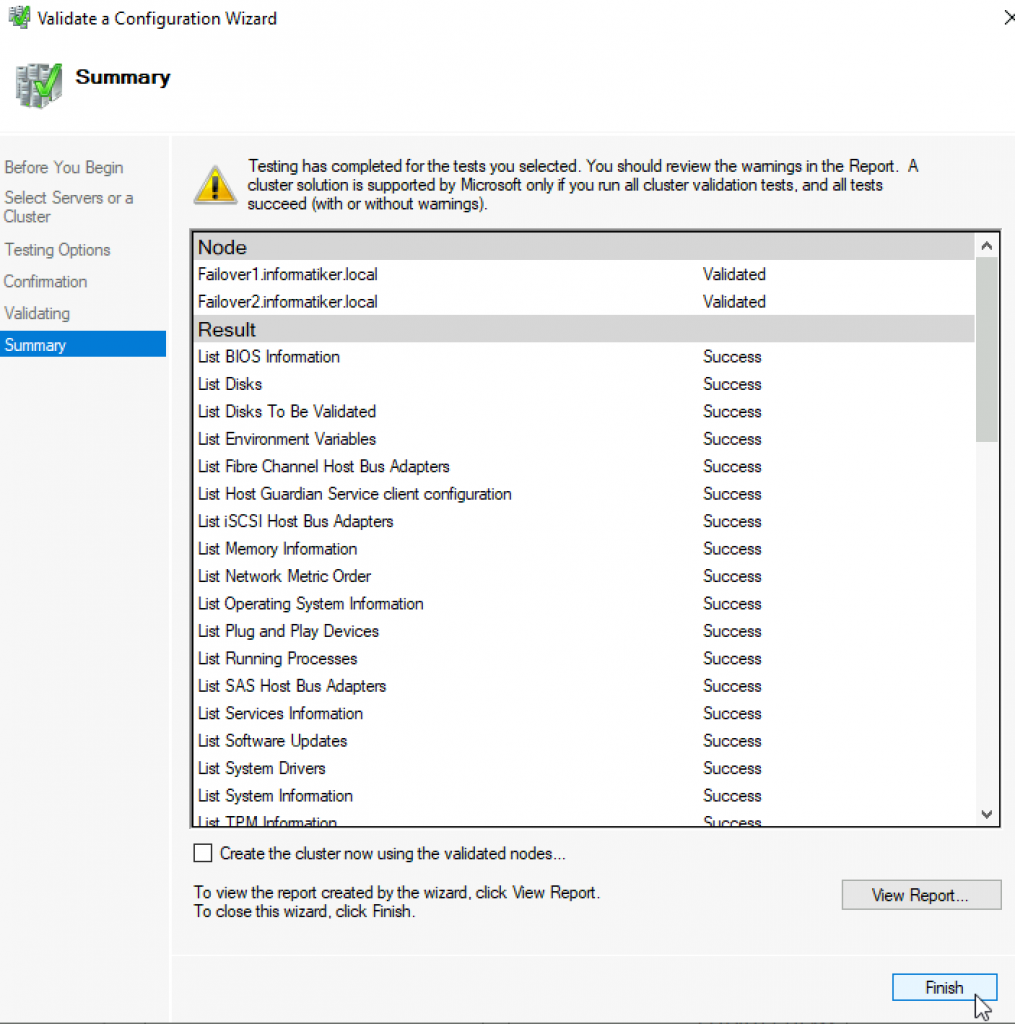
All test were success | Finish
We can proceed to creating cluster
Failover Cluster Manager | from Action screen, select Create Cluster
Next
Again select both servers that will be part of the cluster | Next
I will name cluster – Cluster1 and give it IP 10.0.54 | Next
Next
…
Success! Finish
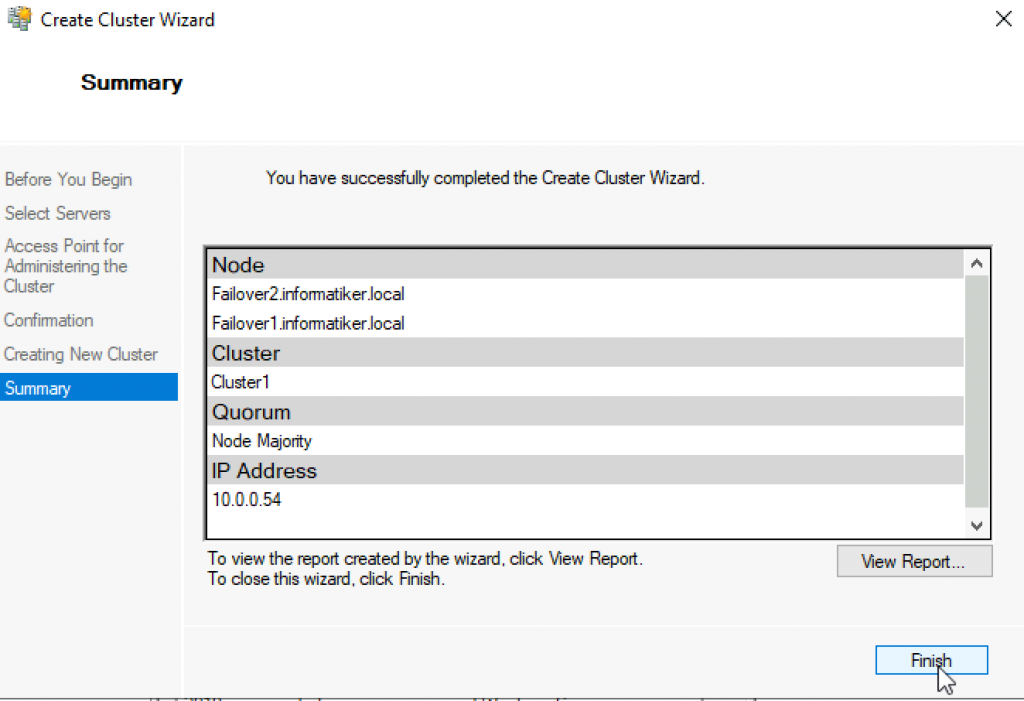
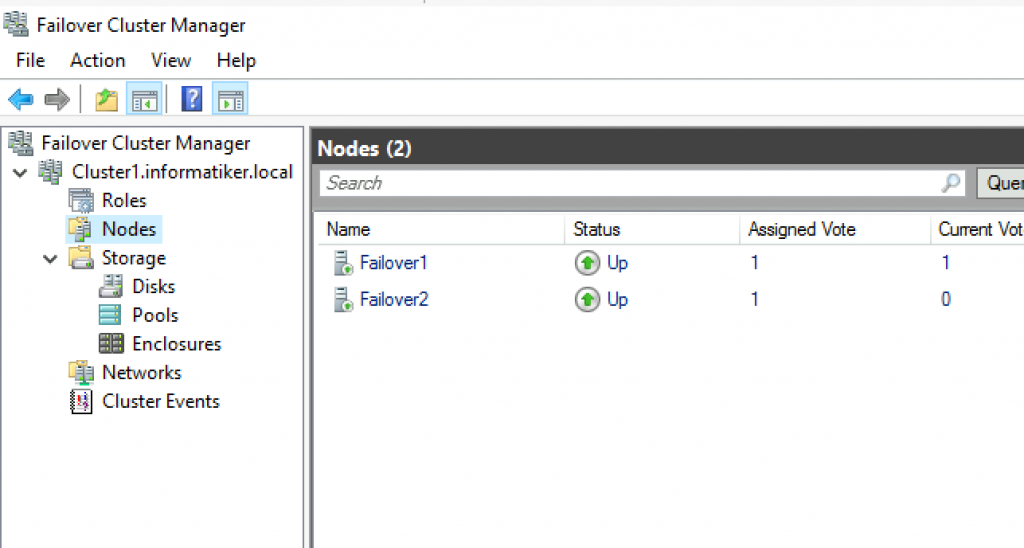
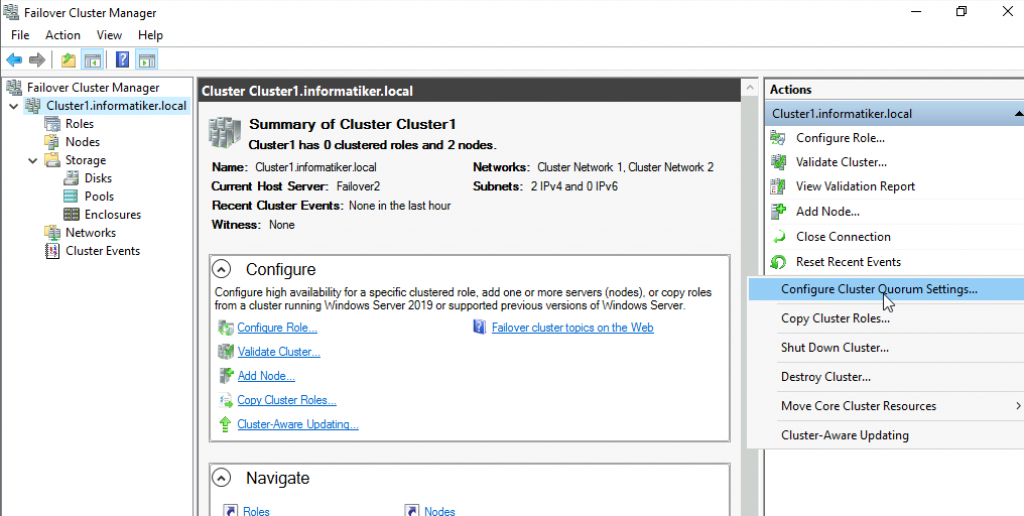
We can now see created cluster1 and two nodes as part of it.
Add Cluster Quorum Witness
Cluster Quorum Witness will enhance your Failover Cluster Availability. I will not go into detail about witness role, you can find many more details here – https://docs.microsoft.com/en-us/windows-server/failover-clustering/manage-cluster-quorum
In our scenario, we will add File Share as Witness. since we have only two nodes, witness and one node will always have to be up, for cluster to be valid. So, make sure you plan you outages and patching so that you always have two nodes up.
On Witness1 machine, I added folder named ClusterWitness and shared it. In the screenshot below – three things are MISSING – you should also add Failover1, Failover2 and Cluster1 computers to this fileshare with full rights. Also, visit security tab of the shared folder and repeat procedure there!!
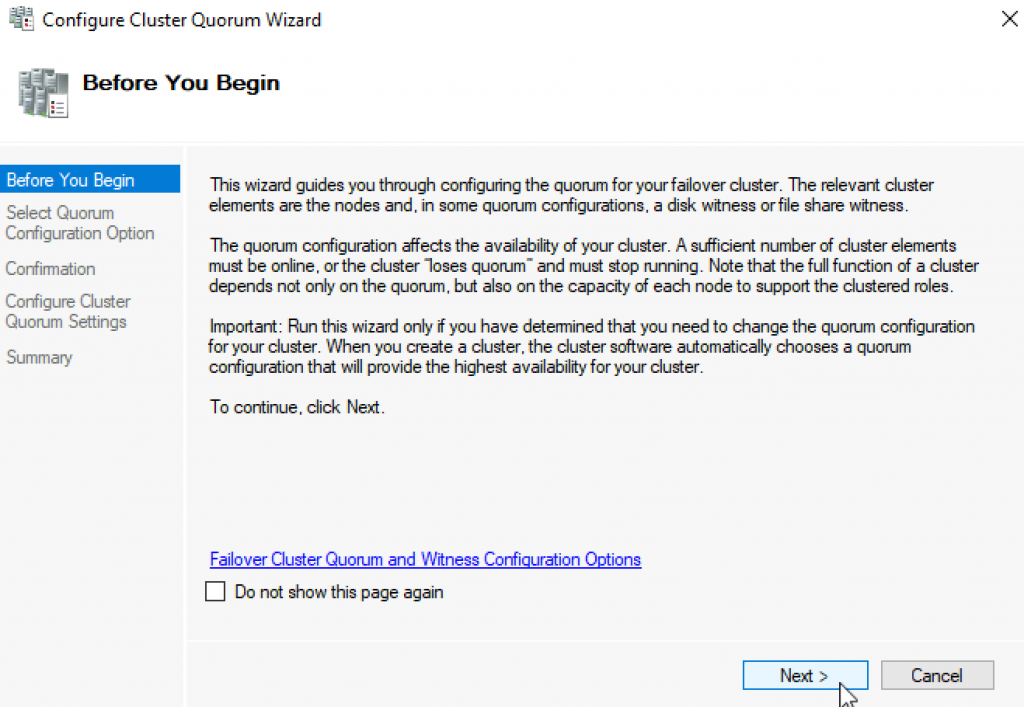
Back to Failover1 node – Open Failover Cluster Manager | select Actions | More Actions | Configure Cluster Quorum Settings
Next
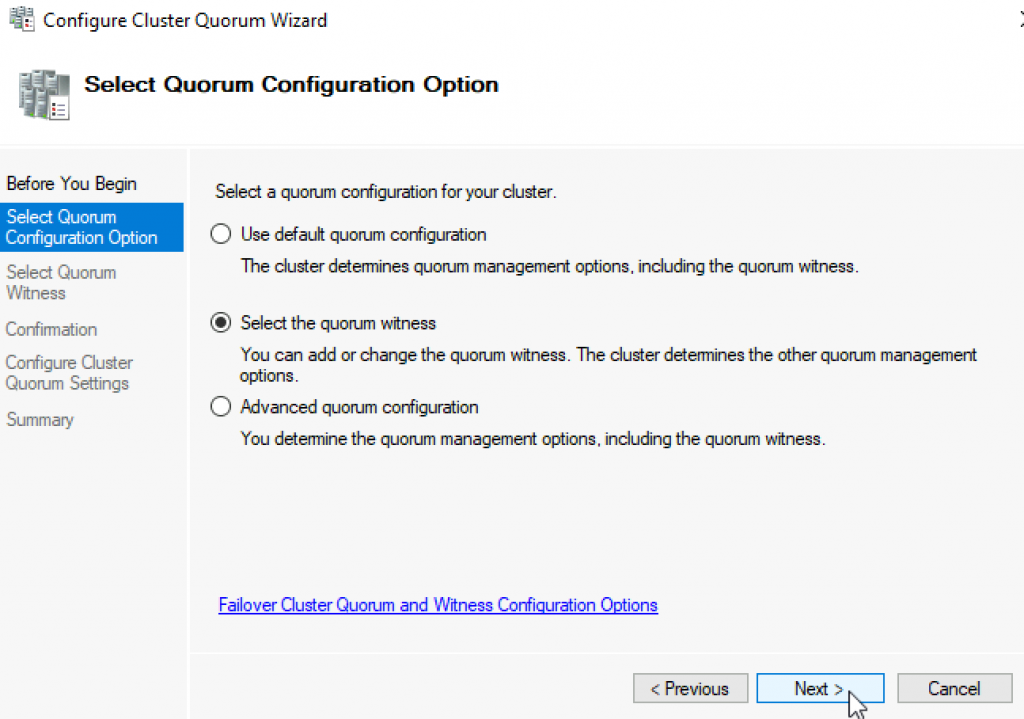
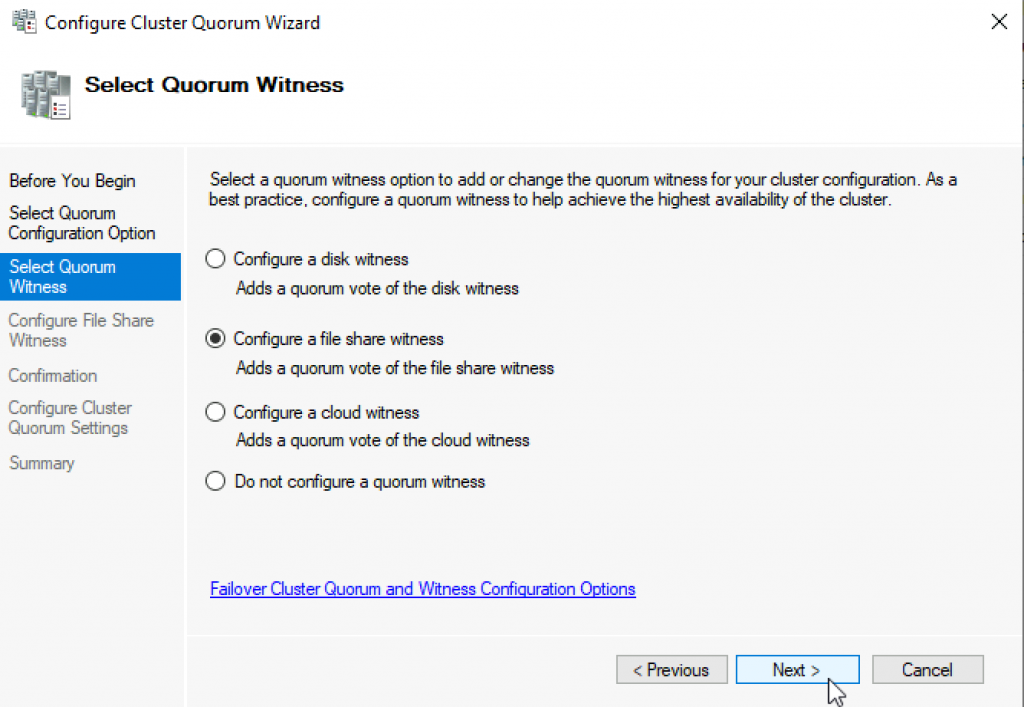
Select the quorum witness | Next
You have many options, today we will select “Configure a file share witness” Next
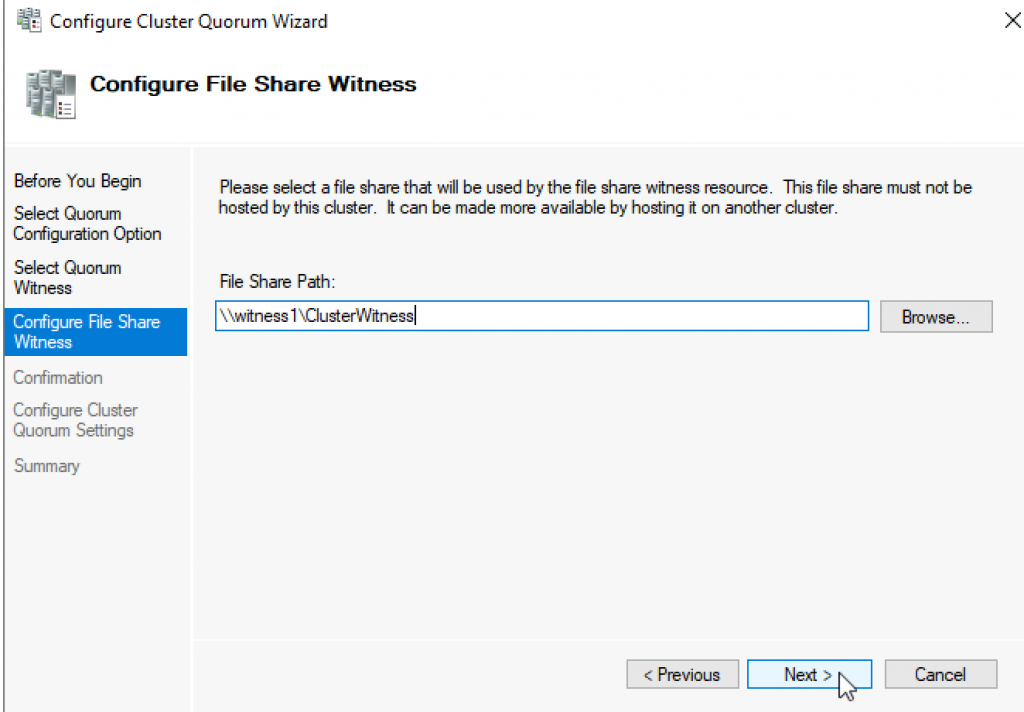
Enter FQDN to your file share on witness1. In my case it is \witness1\ClusterWitness | Next
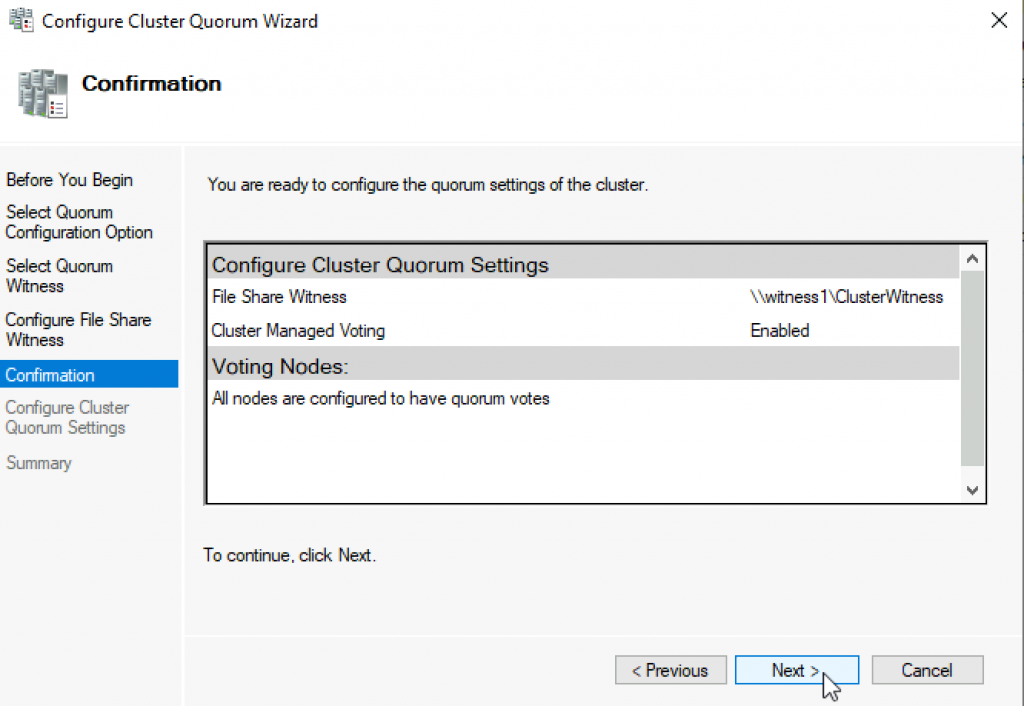
Review and click Next
Success! Finish
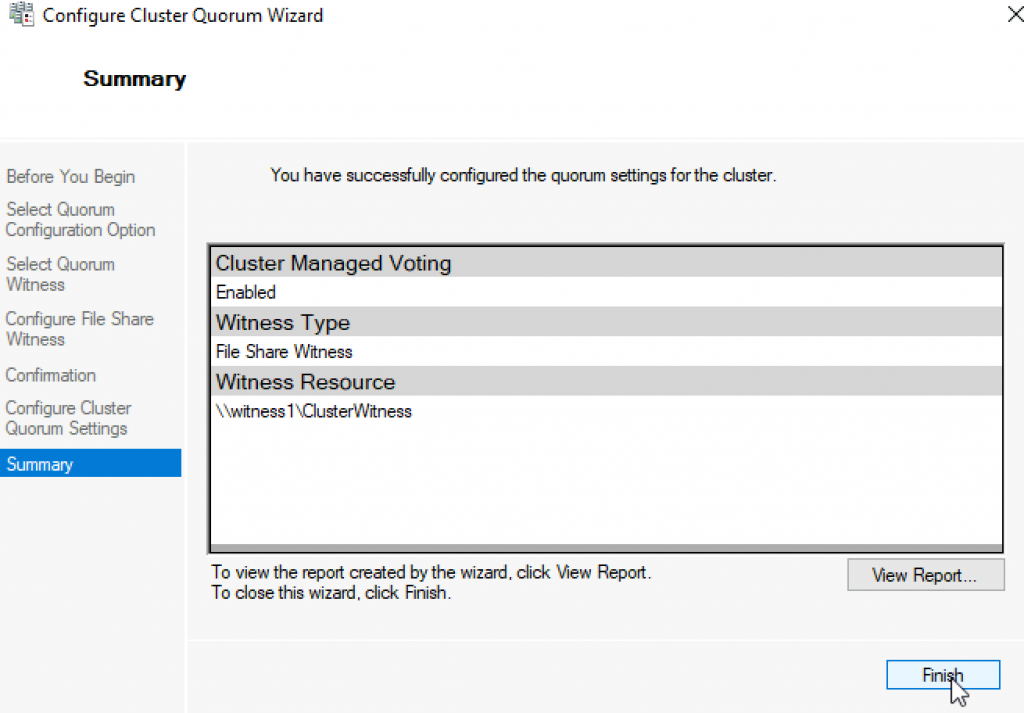
Now, we can see in Failover Cluster Manager that Witness is available.
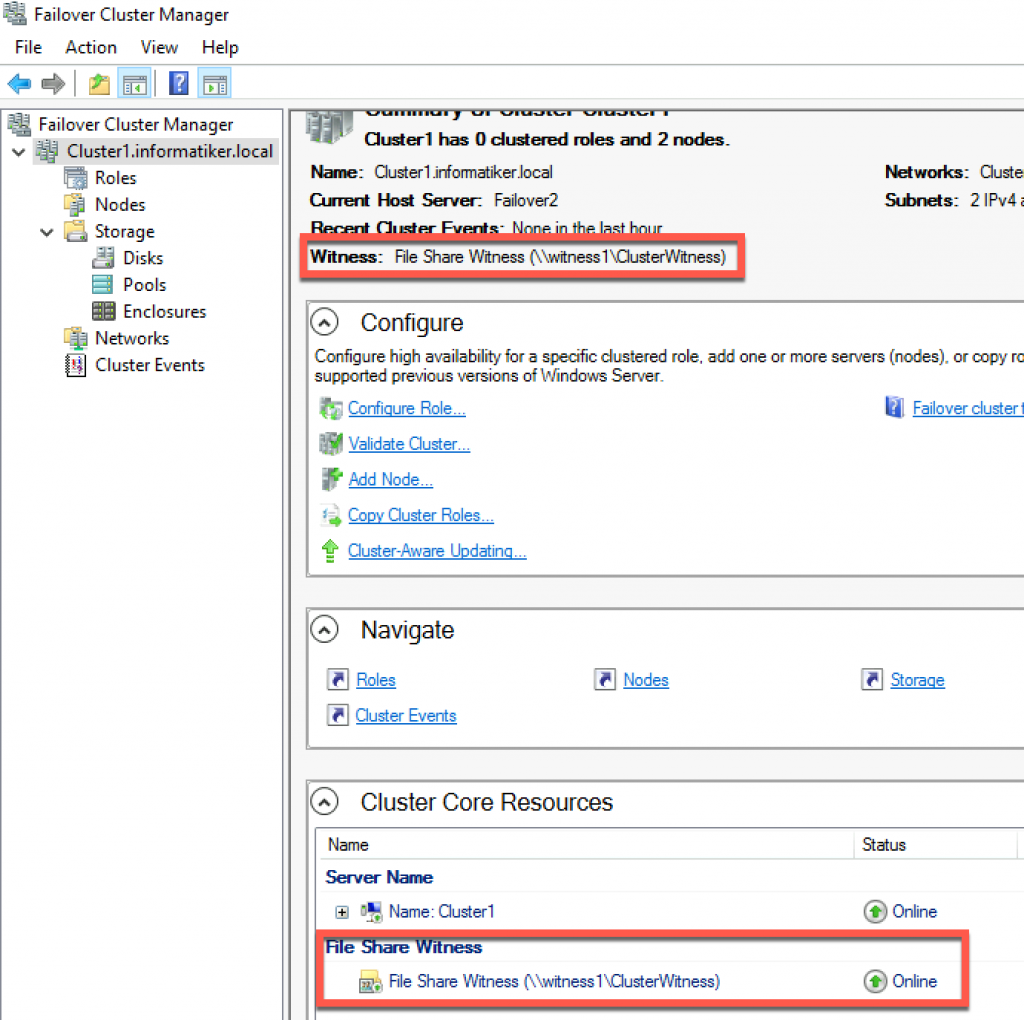
That is it, we covered the basics and we can now start deploying various services in our clustered scenario.
Disclaimer
Provide feedback
Saved searches
Use saved searches to filter your results more quickly
Sign up
Here is the FileServ.
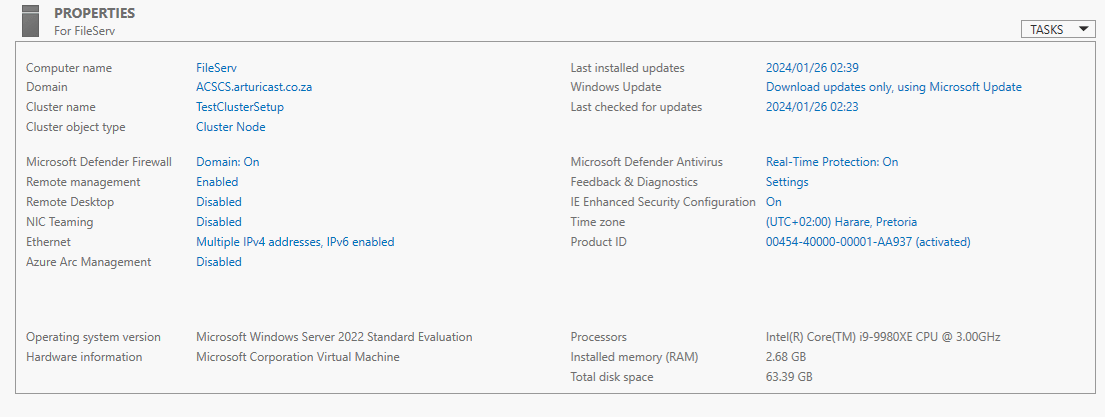
And the Local Server Properties for FileServ
Now we have a fully witnessed WSFC set up, any additional setup (e.g. FCI, HADR, BADR) is much simpler.
One last thing – Setting up Cluster-Aware Updating
Now that WSFC has been set up, we need to carefully consider how to apply updates. Do not just update haphazardly. Care needs to be exercised. To this end, once the Clustering Management tool has been installed, Cluster-Aware Updating should be applied.
Feature description
Cluster-Aware Updating is an automated feature that enables you to update servers in a failover cluster with little or no loss in availability during the update process. During an Updating Run, Cluster-Aware Updating transparently performs the following tasks:
- Puts each node of the cluster into node maintenance mode.
- Moves the clustered roles off the node.
- Installs the updates and any dependent updates.
- Performs a restart if necessary.
- Brings the node out of maintenance mode.
- Restores the clustered roles on the node.
- Moves to update the next node.
For many clustered roles in the cluster, the automatic update process triggers a planned failover. This can cause a transient service interruption for connected clients. However, in the case of continuously available workloads, such as Hyper-V with live migration or file server with SMB Transparent Failover, Cluster-Aware Updating can coordinate cluster updates with no impact to the service availability.
Practical applications
- CAU reduces service outages in clustered services, reduces the need for manual updating workarounds, and makes the end-to-end cluster updating process more reliable for the administrator. When the CAU feature is used in conjunction with continuously available cluster workloads, such as continuously available file servers (file server workload with SMB Transparent Failover) or Hyper-V, the cluster updates can be performed with zero impact to service availability for clients.
- CAU facilitates the adoption of consistent IT processes across the enterprise. Updating Run Profiles can be created for different classes of failover clusters and then managed centrally on a file share to ensure that CAU deployments throughout the IT organization apply updates consistently, even if the clusters are managed by different lines-of-business or administrators.
- CAU can schedule Updating Runs on regular daily, weekly, or monthly intervals to help coordinate cluster updates with other IT management processes.
- CAU provides an extensible architecture to update the cluster software inventory in a cluster-aware fashion. This can be used by publishers to coordinate the installation of software updates that are not published to Windows Update or Microsoft Update or that are not available from Microsoft, for example, updates for non-Microsoft device drivers.
- CAU self-updating mode enables a «cluster in a box» appliance (a set of clustered physical machines, typically packaged in one chassis) to update itself. Typically, such appliances are deployed in branch offices with minimal local IT support to manage the clusters. Self-updating mode offers great value in these deployment scenarios.
Important functionality
The following is a description of important Cluster-Aware Updating functionality:
- A user interface (UI) — the Cluster Aware Updating window — and a set of cmdlets that you can use to preview, apply, monitor, and report on the updates
- An end-to-end automation of the cluster-updating operation (an Updating Run), orchestrated by one or more Update Coordinator computers
- A default plug-in that integrates with the existing Windows Update Agent (WUA) and Windows Server Update Services (WSUS) infrastructure in Windows Server to apply important Microsoft updates
- A second plug-in that can be used to apply Microsoft hotfixes, and that can be customized to apply non-Microsoft updates
- Updating Run Profiles that you configure with settings for Updating Run options, such as the maximum number of times that the update will be retried per node. Updating Run Profiles enable you to rapidly reuse the same settings across Updating Runs and easily share the update settings with other failover clusters.
- An extensible architecture that supports new plug-in development to coordinate other node-updating tools across the cluster, such as custom software installers, BIOS updating tools, and network adapter or host bus adapter (HBA) updating tools.
Cluster-Aware Updating can coordinate the complete cluster updating operation in two modes:
- Self-updating mode For this mode, the CAU clustered role is configured as a workload on the failover cluster that is to be updated, and an associated update schedule is defined. The cluster updates itself at scheduled times by using a default or custom Updating Run profile. During the Updating Run, the CAU Update Coordinator process starts on the node that currently owns the CAU clustered role, and the process sequentially performs updates on each cluster node. To update the current cluster node, the CAU clustered role fails over to another cluster node, and a new Update Coordinator process on that node assumes control of the Updating Run. In self-updating mode, CAU can update the failover cluster by using a fully automated, end-to-end updating process. An administrator can also trigger updates on-demand in this mode, or simply use the remote-updating approach if desired. In self-updating mode, an administrator can get summary information about an Updating Run in progress by connecting to the cluster and running the Get-CauRun Windows PowerShell cmdlet.
- Remote-updating mode For this mode, a remote computer, which is called an Update Coordinator, is configured with the CAU tools. The Update Coordinator is not a member of the cluster that is updated during the Updating Run. From the remote computer, the administrator triggers an on-demand Updating Run by using a default or custom Updating Run profile. Remote-updating mode is useful for monitoring real-time progress during the Updating Run, and for clusters that are running on Server Core installations.
Configure the nodes for remote management
To use Cluster-Aware Updating, all nodes of the cluster must be configured for remote management. By default, the only task you must perform to configure the nodes for remote management is to Enable a firewall rule to allow automatic restarts. The following table lists the complete remote management requirements, in case your environment diverges from the defaults. These requirements are in addition to the installation requirements for the Install the Failover Clustering feature and the Failover Clustering Tools and the general clustering requirements that are described in previous sections in this topic.
| Requirement | Default state | Self-updating mode | Remote-updating mode |
| Enable a firewall rule to allow automatic restarts | Disabled | Required on all cluster nodes if a firewall is in use | Required on all cluster nodes if a firewall is in use |
| Enable Windows Management Instrumentation | Enabled | Required on all cluster nodes | Required on all cluster nodes |
| Enable Windows PowerShell 3.0 or 4.0 and Windows PowerShell remoting | Enabled | Required on all cluster nodes | Required on all cluster nodes to run the following:
— The Save-CauDebugTrace cmdlet — PowerShell pre-update and post-update scripts during an Updating Run — Tests of cluster updating readiness using the Cluster-Aware Updating window or the Test-CauSetup Windows PowerShell cmdlet |
| Install .NET Framework 4.6 or 4.5 | Enabled | Required on all cluster nodes | Required on all cluster nodes to run the following:
— The Save-CauDebugTrace cmdlet — PowerShell pre-update and post-update scripts during an Updating Run — Tests of cluster updating readiness using the Cluster-Aware Updating window or the Test-CauSetup Windows PowerShell cmdlet |
Enable a firewall rule to allow automatic restarts
To allow automatic restarts after updates are applied (if the installation of an update requires a restart), if Windows Firewall or a non-Microsoft firewall is in use on the cluster nodes, a firewall rule must be enabled on each node that allows the following traffic:
- Protocol: TCP
- Direction: inbound
- Program: wininit.exe
- Ports: RPC Dynamic Ports
- Profile: Domain
If Windows Firewall is used on the cluster nodes, you can do this by enabling the Remote Shutdown Windows Firewall rule group on each cluster node. When you use the Cluster-Aware Updating window to apply updates and to configure self-updating options, the Remote Shutdown Windows Firewall rule group is automatically enabled on each cluster node.
Note
The Remote Shutdown Windows Firewall rule group cannot be enabled when it will conflict with Group Policy settings that are configured for Windows Firewall. The Remote Shutdown firewall rule group is also enabled by specifying the –EnableFirewallRules parameter when running the following CAU cmdlets: Add-CauClusterRole, Invoke-CauRun, and SetCauClusterRole.
The following PowerShell example shows an additional method to enable automatic restarts on a cluster node.
Set-NetFirewallRule -Group "@firewallapi.dll,-36751" -Profile Domain -Enabled true
Enable Windows Management Instrumentation (WMI)
All cluster nodes must be configured for remote management using Windows Management Instrumentation (WMI). This is enabled by default.
To manually enable remote management, do the following:
- In the Services console, start the Windows Remote Management service and set the startup type to Automatic.
- Run the Set-WSManQuickConfig cmdlet, or run the following command from an elevated command prompt:
winrm quickconfig -q
To support WMI remoting, if Windows Firewall is in use on the cluster nodes, the inbound firewall rule for Windows Remote Management (HTTP-In) must be enabled on each node. By default, this rule is enabled.
Enable Windows PowerShell and Windows PowerShell remoting
To enable self-updating mode and certain CAU features in remote-updating mode, PowerShell must be installed and enabled to run remote commands on all cluster nodes. By default, PowerShell is installed and enabled for remoting. To enable PowerShell remoting, use one of the following methods:
- Run the Enable-PSRemoting cmdlet.
- Configure a domain-level Group Policy setting for Windows Remote Management (WinRM).
For more information about enabling PowerShell remoting, see About Remote Requirements.
Install .NET Framework 4.6 or 4.5
To enable self-updating mode and certain CAU features in remote-updating mode,.NET Framework 4.6, or .NET Framework 4.5 (on Windows Server 2012 R2) must be installed on all cluster nodes. By default, NET Framework is installed.
To install .NET Framework 4.6 (or 4.5) using PowerShell if it’s not already installed, use the following command:
Install-WindowsFeature -Name NET-Framework-45-Core
Best practices recommendations for using Cluster-Aware Updating
We recommend that when you begin to use CAU to apply updates with the default Microsoft.WindowsUpdatePlugin plug-in on a cluster, you stop using other methods to install software updates from Microsoft on the cluster nodes.
Caution
Combining CAU with methods that update individual nodes automatically (on a fixed time schedule) can cause unpredictable results, including interruptions in service and unplanned downtime. We recommend that you follow these guidelines: for optimal results, we recommend that you disable settings on the cluster nodes for automatic updating, for example, through the Automatic Updates settings in Control Panel, or in settings that are configured using Group Policy.
Caution
Automatic installation of updates on the cluster nodes can interfere with installation of updates by CAU and can cause CAU failures. If they are needed, the following Automatic Updates settings are compatible with CAU, because the administrator can control the timing of update installation:
- Settings to notify before downloading updates and to notify before installation
- Settings to automatically download updates and to notify before installation
However, if Automatic Updates is downloading updates at the same time as a CAU Updating Run, the Updating Run might take longer to complete.
Do not configure an update system such as Windows Server Update Services (WSUS) to apply updates automatically (on a fixed time schedule) to cluster nodes. All cluster nodes should be uniformly configured to use the same update source, for example, a WSUS server, Windows Update, or Microsoft Update.
If you use a configuration management system to apply software updates to computers on the network, exclude cluster nodes from all required or automatic updates. Examples of configuration management systems include Microsoft Endpoint Configuration Manager and Microsoft System Center Virtual Machine Manager 2008.
If internal software distribution servers (for example, WSUS servers) are used to contain and deploy the updates, ensure that those servers correctly identify the approved updates for the cluster nodes.
In this tutorial, we would learn how to install and setup Failover cluster in Windows Server 2019 step by step. In the previous tutorial, we configures an iSCSI storage server and created three virtual disk.
To install and configure a failover cluster, let’s look at our network setup, then we follow some steps
- Our Network Environment
- Determine the Cluster Disks
- Add Failover Clustering Role
- Create the Failover Cluster
- Add Disks to the Cluster
1. Our Network Environment
Our lab network is set up using VirtualBox and consists of 4 computers:.
How to set up a domain network is explained here.
DC (192.168.1.90) – This is our domain controller.
Node1 (192.168.1.91) – This is one of the failover cluster nodes and a iSCSI initiator.
Node2 (192.168.1.92) – This is the second failover cluster nodes and an iSCSI initiator.
Node3 (192.168.1.93) – This is out iSCSI target server. It hosts the virtual disks
2. Determine the Cluster Disks
Before you start creating the failover cluster, you need to determine the disk that hold the cluster data. This is so that if a member of the cluster fails, then the data would still be available. In our setup, we have decided to host the disks in another computer (Node3). This is configured as iSCSI target server and contain 3 virtual disk.
The figure below shows Node3 with the 3 iSCSI disks configured.
How to configure iSCSI target server and disks
Note: Ensure that the disks are iSCSI virtual disks are initialized on one of the failover nodes
3. Add the Failover Clustering Role
Now we have to install the Failover cluster role in Node1 and Node2. Follow the steps below to do that.
Step 1 – In Node1, click on Add Roles and Feature. This will launch the Add Roles and Features wizard. Follow the steps and select Failover Clustering as shown below. Then complete the installation.

Step 2 – Repeat the process for Node2
4. Create the Failover Cluster
We would now use the Failover cluster manager to create a cluster. Follow the steps below:
Step 1 – In Node1, click on Manager and select Failover Cluster Manager. The window is shown below

Step 2 – Click on Validate Configuration and follow the wizard steps to do the validation (this is done only in Node1). The wizard will ask you to specify the Servers you want to participate in the clustering. You will use AD to find Node1 and Node2 and select them.
At the end of the validation, you may have warning relating to unsigned drivers. Ignore these warnings because they come from VirtualBox Guest Additions.
Step 3 – Click on Create Cluster. You will have to select the Node1 and Node1. Then you need to specify the cluster name. The complete the cluster creation. The figure below shows the final screen indicating the cluster creation was successful.

5. Add Disks to the Cluster
Failover clusters require disks and in this case we would used virtual disks from the iSCSI target server.
Step 1– Add storage to the cluster. To do that open the Failover Cluster manager as shown below.

Step 2 – Click on Add Disk. The three iSCSI disks would be listed. Ensure that they are selected.

Click on OK.
At this point, the disks are added to the cluster and they are online as well. See the figure below

In subsequent tutorials, I discuss the concept of Witness in failover cluster and how to configure Quorum witness and Disk witness.
I also recommend you watch the video in my Youtube Channel.