
Setting up a print server on Windows 10 is simpler than you might think. Essentially, you’ll be sharing a printer that’s connected to your Windows 10 computer with other computers on the same network. By doing this, everyone on the network can send print jobs to the same printer without having to connect directly to it. Ready to start? Follow these easy steps!
The following steps will guide you through setting up a print server on a Windows 10 computer. This will allow multiple devices on the same network to access and use a single printer.
Step 1: Open Settings
First, go to your Windows 10 computer and open the Settings app.
To do this, click on the Start menu and then on the gear icon. The Settings app is where you manage many aspects of your computer, including devices like printers.
Step 2: Navigate to Devices
Next, in the Settings window, click on «Devices.»
This section includes all your connected gadgets, from your mouse and keyboard to any printers you’ve installed.
Step 3: Add a Printer
Now, click on «Printers & scanners» and then select «Add a printer or scanner.»
This action tells your computer to search for any printers connected to your network or directly to your machine. If your printer is already connected, it should show up here.
Step 4: Install Printer Drivers
If your printer appears, click on it and follow the onscreen instructions to install the necessary drivers.
Printer drivers are like translators between your computer and your printer. They make sure both devices understand each other. Windows 10 usually finds the right drivers automatically.
Step 5: Share the Printer
After installing the drivers, click on the printer’s name, then choose “Manage.” Select “Printer Properties” and click on the «Sharing» tab. Check the box that says, «Share this printer.»
By sharing the printer, you’re making it available to other devices on your network. You’ll need to give it a share name, which other users will use to find the printer.
Step 6: Connect Other Devices to the Printer
Go to each device that you want to connect to the printer. Open the Settings app, navigate to «Devices,» then «Printers & scanners,» and click «Add a printer or scanner.» Select the shared printer from the list.
This step ensures that other devices on your network can see and connect to the shared printer. Now, everyone can print to it without having to be directly connected.
After completing these steps, your printer is now a print server on your network. Any device connected to the same network can send print jobs to this printer.
Tips for Setting Up a Print Server on Windows 10
- Keep your computer on: Make sure the computer that the printer is connected to is always on for other devices to print.
- Use a stable network: A stable and strong Wi-Fi connection ensures smooth communication between devices and the printer.
- Regular updates: Keep your Windows 10 and printer drivers up-to-date to avoid compatibility issues.
- Check firewall settings: Sometimes, firewalls can block printer sharing. Make sure to configure your firewall to allow devices to connect.
- Secure your network: Ensure your network is secure to prevent unauthorized access to the printer.
Frequently Asked Questions
Do I need a special printer to set up a print server?
No, you can use any standard printer. The key is to make sure the printer drivers are installed on the host computer.
Can I share a printer with devices running different operating systems?
Yes, as long as the other devices support network printing, they should be able to connect to the shared printer.
What if my printer doesn’t show up in the list?
Check the printer’s connection and ensure it’s properly connected to your computer or network. Also, make sure the printer is turned on.
How do I stop sharing the printer?
Go back to the printer’s settings in the host computer, click «Printer Properties,» navigate to the «Sharing» tab, and uncheck «Share this printer.»
Is it safe to share my printer?
As long as your network is secure, sharing your printer is generally safe. Just make sure to manage permissions carefully.
Summary
- Open Settings.
- Navigate to Devices.
- Add a printer.
- Install printer drivers.
- Share the printer.
- Connect other devices to the printer.
Conclusion
Setting up a print server on Windows 10 is like setting up a hub for your printer. By following these steps, you’ve made it so anyone on your network can print documents easily. Think of it as creating a community printer that everyone can access without the hassle of connecting and disconnecting cables. It’s pretty nifty, right?
For more advanced users, you can explore additional configurations and settings to fine-tune your print server. Remember to keep everything updated and secure, and you’re all set. This small investment of time can save you loads of frustration down the road.
If you’re looking to dive deeper into the world of networking or want to explore more Windows 10 features, there’s a wealth of information out there. Don’t hesitate to keep learning and experimenting. Happy printing!
Kermit Matthews is a freelance writer based in Philadelphia, Pennsylvania with more than a decade of experience writing technology guides. He has a Bachelor’s and Master’s degree in Computer Science and has spent much of his professional career in IT management.
He specializes in writing content about iPhones, Android devices, Microsoft Office, and many other popular applications and devices.
Read his full bio here.
The print server plays an integral role in every company and organization. This function in Windows is responsible for executing print commands over the network or locally. The print server can be a software, network device, or computer and it can easily process the print jobs in the bulk by making a well-organized queue and execute one by one. If your business uses professional printers then, you must try this. If you don’t know how to start a print server in Windows 10? Well, you have come to the right place. Let’s proceed to the main part of this post.
- Part 1: Top 3 Ways to Start a Print Server in Windows 10
- Part 2: Extra Tips: What Should Do If You Forgot Windows Password
Starting the Print server on the Windows 10 is not difficult. You can easily start the print server by just going to the Print management. There are plenty of different ways to open the print management. In this part, we will talk about how to start a print server in Windows 10 through print management.
Way 1: Open print management using Run
Run is an integral part of the Windows operating system. Using this function, you can easily open any software on the program on Windows directly. Similar with print management, you can easily open the print management using the run.
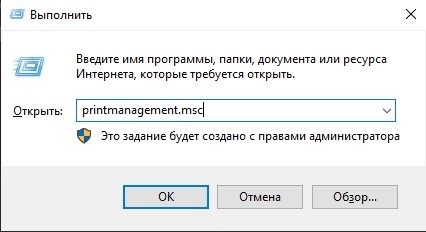
Step 1: First of all, you have to open the Run by pressing the Windows Key + R button at the same time.
Step 2: Run small interface will appear, you have to enter the printmanagement.msc and click on the «OK» button.
Step 3: This will open the Print Management Window, go to the print server to start or stop the Print server.
Way 2: Open the Print Management using Command Prompt
Command prompt work as a secondary way to operate the Windows computer. As the name suggests, you have to enter the commands in order to execute the task. The Command prompt is completely command-based aka Character user interface.
Step 1: Click on the «Start» button and search for the command prompt and hit on the «Enter» button.
Step 2: Command Prompt interface will appear, simply enter the following command and hit on the «Enter» button:
Printmanagement.msc
Way 3: Directly Open the Power Management from the Cortana Search bar
Using Windows 10? Well, you can use Cortana search bar in order to get the best solution to your problem how to start a print server in windows 10.
Step 1: Simply, click on the «Type here to Search» at the bottom left of the screen.
Step 2: Cortana will pop up, simply type the printmanagement.msc on the search bar and hit on the «Enter» button.
Step 3: Print Management Window will appear with Print server settings.
Way 4: Open Power Management using Windows PowerShell
Windows PowerShell is similar to Command prompt but, there are some changes. With the launch of Windows 8.1, Microsoft has added it to their OS.
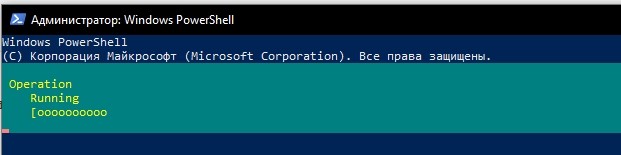
Step 1: You have to open the Windows PowerShell from the start menu.
Step 2: On the Windows PowerShell, enter the «printmanagement.msc» and hit on the «enter» button.
Extra Tips: What Should Do If You Forgot Windows Password
In a search of how to start a print server in windows 10/11, we find changing settings on the Print server require Windows password. It is not possible to change if you forget your Windows password. One can use a tool like PassFab 4WinKey in order to reset the Windows 10/11 password.
Reset Windows 10/11 Password in Minutes
Step 1: Download the PassFab 4WinKey on an accessable computer, then launch and tool.
Step 2: Insert CD/DVD/USB, and click «Next» button to start the burning process.
Step 3: Once completed, you will see Burning successfully message.
Step 4: Next, insert the disk to the locked computer and restart the computer, keep pressing F12 to enter safe mode.
Step 5: Select your disk name using the arrow key and press «Enter», then select «Save and Exit».
Step 6: Now, your comouter will reboot and you should choose your opertaing system.
Step 7: Then, select the locked Windows account and click «Reset Account Password» and hit «Next».
Last, your password will be reset and you can use the Print Server now.
Summary
The print server is a function or a computer which is responsible for printing service. It executes the printing jobs by sending the command from the computer to the remotely connected printer. Want to know how to start a print server in windows 10? This article is dedicated to you. Here, we have talked about best ways to start a print server in Windows 10 computer.
Setting up a print server on Windows 10 can greatly enhance efficiency and convenience in a workplace or home environment. A print server allows multiple computers to print to a shared printer, eliminating the need for each computer to have its own printer or for users to transfer files to a computer connected to a printer. Instead, users can send their print jobs directly to the print server, which manages the printing process. In this blog post, we will explore the various methods to set up a print server on Windows 10, providing step-by-step instructions and valuable insights along the way.
Video Tutorial:
Why You Need to Set Up a Print Server on Windows 10
There are several reasons why setting up a print server on Windows 10 is beneficial. Firstly, it allows for centralized management of printers, making it easier to monitor printing activities and control access to printing resources. This is particularly useful in a business setting where multiple employees need access to printers. A print server can provide a more organized and efficient printing environment, reducing the time and effort required to troubleshoot printing issues.
Secondly, a print server can enhance security by allowing administrators to set access permissions and monitor usage. This ensures that sensitive documents are protected and prevents unauthorized users from using the printer. Additionally, setting up a print server can also reduce costs by consolidating printers and minimizing the need for individual printers for each computer. This can result in lower maintenance and supply costs, as well as a reduced carbon footprint.
Method 1: Setting Up a Print Server via the Control Panel
Setting up a print server via the Control Panel is a straightforward process that can be done quickly. Here are the steps to follow:
Step 1: Open the Control Panel by right-clicking on the Start button and selecting Control Panel from the menu.
Step 2: In the Control Panel, click on «Devices and Printers» or «Printers and Scanners» depending on your Windows 10 version.
Step 3: Click on «Add a printer» or «Add a printer or scanner» depending on your Windows 10 version.
Step 4: Windows will search for available printers in your network. If the desired printer is listed, select it and click «Next.» If not, click on «The printer that I want isn’t listed.«
Step 5: Select the option «Add a local printer or network printer with manual settings» and click «Next.«
Step 6: Choose the port where the printer is connected (typically «Standard TCP/IP Port«) and click «Next.«
Step 7: Enter the printer’s IP address and port name, and then click «Next.«
Step 8: Windows will install the necessary drivers for the printer. If the driver is not found automatically, click on the «Windows Update» button to search for additional drivers.
Step 9: Give the printer a name that will be used to identify it on the network, and click «Next.«
Step 10: Choose whether to share the printer with other users on the network or not, and click «Next.«
Step 11: Print a test page to verify that the printer is working properly, and click «Finish» to complete the setup.
| Pros | Cons |
|---|---|
| 1. Easy and intuitive setup process. | 1. Limited options for advanced printer configuration. |
| 2. Allows for centralized printer management. | 2. Requires manual insertion of printer IP address and port. |
| 3. Provides seamless integration with the Windows operating system. | 3. May not support all printer models and brands. |
Method 2: Setting Up a Print Server Using PowerShell
Another way to set up a print server on Windows 10 is by using PowerShell. This method provides more advanced options for managing printers and allows for more granular control over settings. Here’s how to do it:
Step 1: Open PowerShell by searching for it in the Windows search bar and selecting «Windows PowerShell» from the results.
Step 2: Run PowerShell as an administrator by right-clicking on the Windows PowerShell icon and selecting «Run as administrator.«
Step 3: Enter the following command to install the necessary PowerShell module: «Install-Module -Name PrintManagement -Force«.
Step 4: Once the module is installed, enter the command «Import-Module PrintManagement» to import the module into PowerShell.
Step 5: Run the command «Add-Printer -ConnectionName \\\» to add the printer to the print server.
Step 6: To configure additional printer settings, use the command «Get-Printer | Set-Printer -Property -Value » and replace with the desired printer property and with the desired value.
Step 7: Print a test page to verify that the printer is working properly.
| Pros | Cons |
|---|---|
| 1. Offers more advanced options for printer configuration and management. | 1. Requires familiarity with PowerShell commands and syntax. |
| 2. Provides greater flexibility in printer setup and customization. | 2. May be overwhelming for users with limited technical knowledge. |
| 3. Allows for batch processing of printer setups and configurations. | 3. Some printer models may not be fully supported by PowerShell. |
Method 3: Setting Up a Print Server via Printer Manufacturer Software
In addition to using the built-in Windows tools for setting up a print server, many printer manufacturers offer their own software that simplifies the process. This software often provides additional features and customization options specific to the printer brand. Here’s how to set up a print server using printer manufacturer software:
Step 1: Download and install the printer manufacturer’s software from their official website.
Step 2: Open the software and follow the on-screen instructions to set up the printer.
Step 3: Connect the printer to the network using the provided instructions.
Step 4: Run the printer manufacturer’s software and select the option to set up a print server.
Step 5: The software will search for available printers on the network. Select the desired printer and follow the on-screen instructions to complete the setup.
Step 6: Once the printer is set up as a print server, other computers on the network can connect to it by adding a printer and selecting the network printer option.
| Pros | Cons |
|---|---|
| 1. Software provides specific features and options for the printer brand. | 1. Limited to the printer brand’s software and functionality. |
| 2. Streamlined setup process designed specifically for the printer. | 2. May not be available for all printer models or brands. |
| 3. Software may include additional tools and utilities for printer management. | 3. Can be dependent on the availability and compatibility of the software. |
Method 4: Setting Up a Print Server Using Third-Party Software
If the built-in Windows tools and printer manufacturer software do not meet your needs, there are also third-party software solutions available for setting up a print server on Windows 10. These software options often provide advanced features, centralized management, and additional security options. Here’s how to set up a print server using third-party software:
Step 1: Research and select a third-party print server software that meets your requirements.
Step 2: Download and install the software from the official website.
Step 3: Open the software and follow the on-screen instructions to set up the print server.
Step 4: Connect the printer to the network using the provided instructions.
Step 5: Configure the printer settings and access permissions according to your preferences.
Step 6: Once the print server is set up, other computers on the network can connect to it by adding a printer and selecting the network printer option.
| Pros | Cons |
|---|---|
| 1. Offers advanced features and customization options. | 1. May require a paid license or subscription for full functionality. |
| 2. Provides centralized management of printers and print jobs. | 2. Can be more complex to set up and configure compared to other methods. |
| 3. Offers enhanced security options and access controls. | 3. Compatibility may vary depending on the software and printer models. |
What to Do If You Can’t Set Up a Print Server
If you encounter difficulties setting up a print server on Windows 10, there are a few potential reasons and corresponding fixes to consider:
1. Ensure that the printer is properly connected to the network and powered on.
2. Check if the printer manufacturer provides support and troubleshooting resources, such as online guides or a support hotline.
3. Verify that the printer drivers are up to date and compatible with Windows 10. You can usually find the latest drivers on the manufacturer’s website.
4. Restart your computer and try the setup process again. Sometimes a simple restart can resolve minor issues.
5. Consider seeking assistance from an IT professional or contacting the printer manufacturer’s customer support for further guidance.
Bonus Tips
Here are three bonus tips to enhance your print server setup:
1. Regularly update the printer drivers to ensure compatibility and optimize performance.
2. Implement security measures, such as setting up user authentication or enabling print job encryption, to protect sensitive documents.
3. Monitor printer usage and implement print management software to track usage, allocate costs, and optimize resource allocation.
5 FAQs about Setting Up a Print Server on Windows 10
Q1: Is it possible to set up multiple print servers on Windows 10?
A: Yes, it is possible to set up multiple print servers on Windows 10. Each print server can manage different printers or printer groups.
Q2: Are there any limitations on the number of computers that can connect to a print server?
A: The number of computers that can connect to a print server is typically limited by the printer’s specifications, network bandwidth, and the capabilities of the print server software. It is best to consult the printer manufacturer’s documentation for specific limitations.
Q3: Can a print server be accessed remotely?
A: Yes, a print server can be accessed remotely if the necessary network and security configurations are in place. Remote access allows users to send print jobs to the print server from outside the local network.
Q4: Can print servers be set up wirelessly?
A: Yes, print servers can be set up wirelessly if the printer and print server both support wireless connectivity. This allows for greater flexibility in printer placement and eliminates the need for physical cables.
Q5: Can a print server be set up on a home network?
A: Yes, a print server can be set up on a home network, enabling multiple computers in the household to share a printer. This can be particularly useful for families or individuals who need to print from different devices.
Final Thoughts
Setting up a print server on Windows 10 can greatly simplify printing tasks and improve efficiency in a workplace or home environment. By using the built-in Windows tools, PowerShell, printer manufacturer software, or third-party software, you can easily set up a print server to centralize printer management, enhance security, and reduce costs. If you encounter any difficulties during the setup process, consider the troubleshooting steps outlined in this blog post or seek assistance from IT professionals or the printer manufacturer’s support team. With a well-configured print server, you can streamline printing workflows and enjoy greater convenience in your everyday tasks.
Позади те времена, когда для каждого работника или кабинета нужен был отдельный принтер. Теперь, с развитием интернет-протоколов, появилась возможность как физического подключения устройства печати (через провод), так и удаленного (через интернет). В Windows 10 для обоих этих методов существует одна специальная утилита – сервер печати. Расскажем о ее преимуществах и методах взаимодействия с ней.
Как открыть «Управление печатью»
Так как печать считается одних из базовых задач, сервер печати изначально входит в список системных компонентов Windows. Это значит, что его не нужно дополнительно устанавливать, а можно сразу запускать.
В окне «Выполнить»
Большинство системных утилит поддерживают запуск как из командной строки, так и из окна «Выполнить». Это довольно удобно, ведь эти утилиты открываются из любого окна, а потому к ним легко обратиться. Для этого необходимо выполнить следующие действия:
- Откройте окно «Выполнить». Для этого используйте сочетание клавиш «Win» + «R».
- В открывшемся окне введите команду «printmanagement.msc».
- Если вместо нужного окна отобразилась ошибка «Не удается найти команду», значит, эта возможность ограничена администратором либо отключен необходимый компонент.
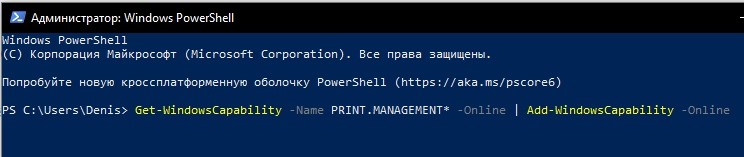
- Для подключения компонента введите во встроенном поиске текст «Управление дополнительными функциями». Нажмите «Добавить компонент». Найдите пункт «Консоль управления печатью» и поставьте галочку напротив пункта. Нажмите «Установить». Если нужного компонента не нашлось, то вам необходимо открыть PowerShell («Win» + «X») и ввести команду: «Get-WindowsCapability -Name PRINT.MANAGEMENT* -Online | Add-WindowsCapability –Online». Повторите алгоритм с первого пункта.
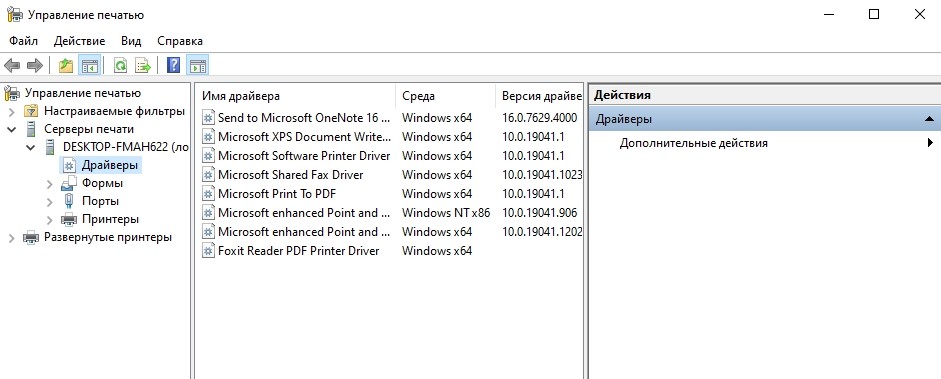
- Если команда, наконец, сработала, то у вас должно открыться окно с названием «Управление печатью». В активной области будут отображаться принтеры и их свойства.
В некоторых сборках Windows этот метод не всегда работает, да и добавление нового компонента ради одной команды – это нерационально (но необходимо). Потому предлагаем второй, более легкий способ.
Используя «Поиск»
Возможности «Поиска» в Windows 10 намного шире, чем в более старых версиях Винды. Через эту утилиту пользователь может выполнить команду, найти программу, встроенную утилиту, параметр, файлы или даже совершить поисковый запрос в интернет. Для запуска через опцию поиска необходимо следовать алгоритму ниже:
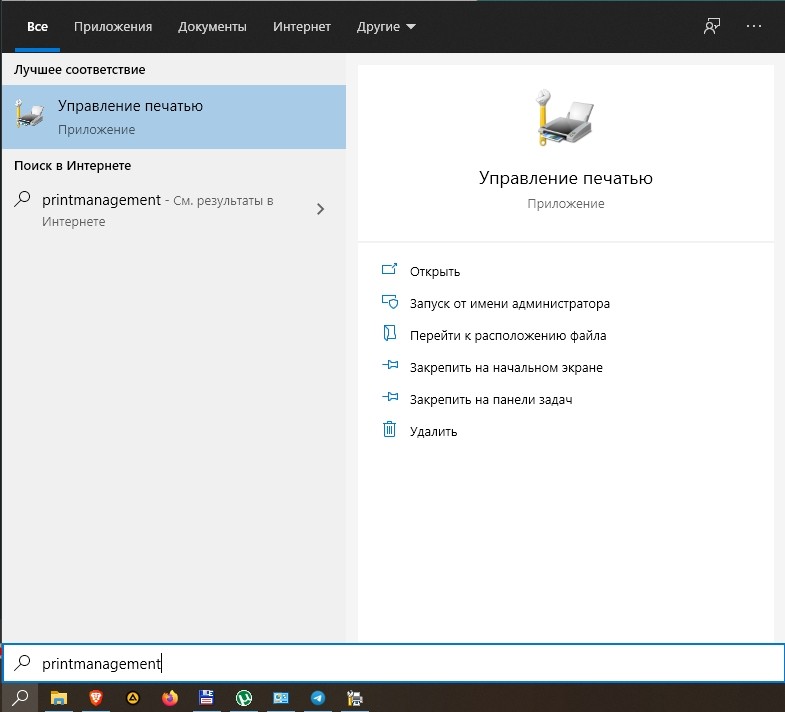
- Откройте строку поиска. Для этого кликните по значку лупы в панели задач, либо зажмите сочетание клавиш «Win» + «S».
- В открывшемся поле введите команду «printmanagement» либо фразу «Управление печатью».
- Откройте найденный результат.
Готово. Однако, если ничего не было найдено, то, скорее всего, вы некорректно установили нужный компонент либо ваша ОС не поддерживает описываемую возможность. Однако существует и третий метод, возможно, поможет именно он.
Средства администрирования Windows
Средства администрирования – это довольно мощный инструмент, предоставляющий быстрый доступ к множеству встроенных утилит для работы как с ОС, так и аппаратной составляющей. Алгоритм действий:
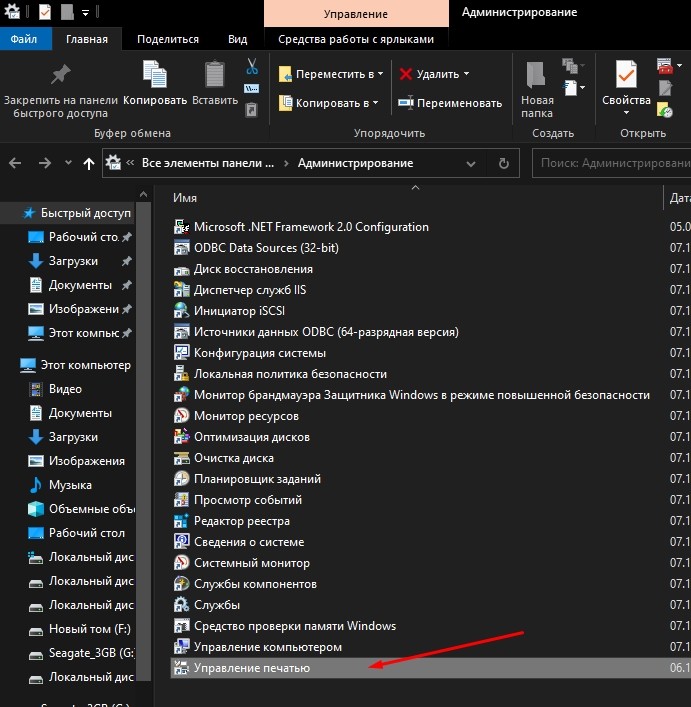
- В меню пуск найдите папку «Служебные». Раскройте ее.

- Внутри найдите раздел «Администрирование».
- Откроется новое окно, в котором нужно найти подраздел «Управление печатью».
Готово. По сути, все перечисленные выше методы приведут к одному и тому же результату. Примечание: эти методы не будут работать в ОС Windows 10 Home. В таком случае пользователь может использовать только утилиту «Принтеры и сканеры», которую легко найти через встроенный поиск.
Особенности управления принтерами
Теперь, когда нужное окно, наконец, открылось, необходимо подключить и настроить нужные принтеры. Расскажем о каждом этапе настройки по отдельности.
Добавление принтера
Как говорилось выше, с развитием интернета появилась возможность удаленного подключения некоторых компонентов не только через физический порт, но и удаленно. В обоих случаях для подключения следуйте инструкции ниже:
- Откройте окно «Параметры».
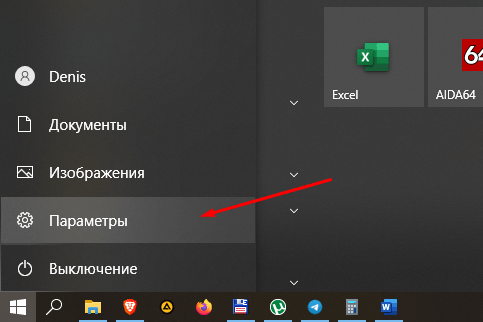
- Перейдите в раздел «Принтеры и сканеры».

- Нажмите «Добавить принтер».
- Windows в автоматическом режиме найдет устройство в локальной сети.
- Выберите найденное устройство.

Если нужный принтер не был обнаружен, то вам необходимо указать его вручную. Для этого выберите пункт «Устройство отсутствует в списке», а после вручную введите его название.
Настройки
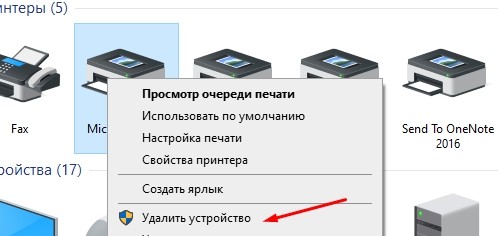
Для настройки самого устройства и способов печати (размер бумаги, формат, очередь и так далее) необходимо снова открыть утилиту «Принтеры и сканеры. После найдите нужный компонент в списке. Примечательно, что, помимо настоящего принтера, в списке могут находиться виртуальные устройства. Их настраивать пока нет смысла. Кликните по нужному устройству. Перед вами откроются следующие пункты:
- Открыть очередь печати.

- Пробная печать.
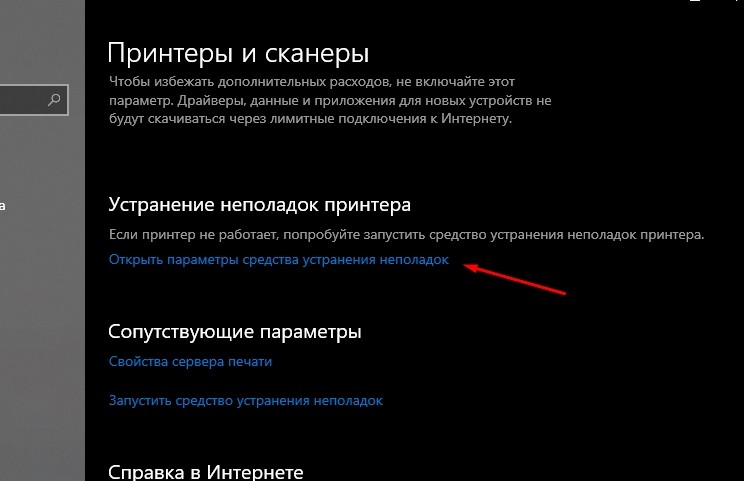
- Средство устранения неполадок.

- Свойства.
- Удалить устройство.
Нет необходимости описывать каждый пункт, ведь настройки имеют интуитивно понятный интерфейс, а потому с ними легко разобраться.
Управления очередью
Однако мы остановимся на одном из пунктов, а именно на управлении очередью. Это такой список задач, который должен выполнить принтер. В домашних условиях это не особо заметно, ведь устройству необходимо работать только с одним компьютером. В корпоративных сетях на печать приходят сразу несколько документов.
С помощью утилиты «Управление очередью» пользователь может задать приоритет для некоторых документов либо полностью очистить все пришедшие на печать задания. Для этого достаточно открыть раздел «Очередь печати». Перед вами отобразятся все документы, отправленные на печать.

Настройка профилей и общего принтера
Если установлен цветной принтер, но вас не устраивает качество цвета при печати, вы можете изменить настройки цветовой палитры через свойства оборудования. Внимание: работает это только в том случае, если в устройстве есть нужная краска (картридж). Алгоритм действий:
- Откройте настройки принтера (как это сделать, описано выше).
- Перейдите в раздел «Свойства принтера». После откройте вкладку «Управление цветом».
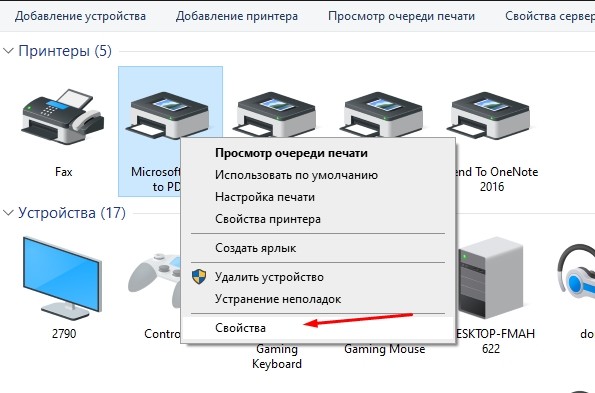
- Откройте подраздел «Управление цветом».
- Перейдите во вкладку «Все профили», а после нажмите кнопку «Добавить профили».

- Откроется окно проводника, где необходимо выбрать файл с профилем. Его можно найти на просторах интернета.
После выполнения этих действий рекомендуем перезагрузить компьютер.
Благодарим за прочтение.
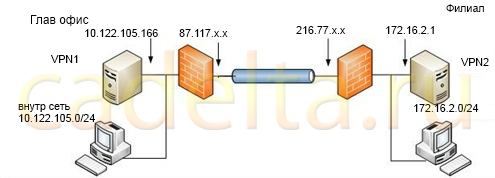
Рис. 1. Схема сети.
Настроить сервер печати для Windows Server можно следующим образом.
Выберите команду «Пуск» -> «Администрирование» -> «Управление данным сервером«.
В открывшемся окне нажмите кнопку «Добавить или удалить роль«, после чего нажмите кнопку «Далее» в открывшемся окне «Мастер настройки сервера«.
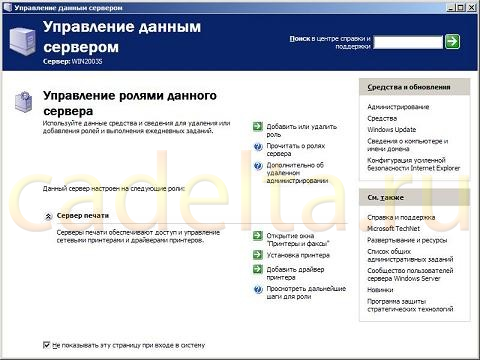
Рис. 2. Окно управления сервером.
В списке «Роль сервера» выберите параметр «Сервер печати» и нажмите кнопку «Далее«.
Рис. 3. Выбор ролей сервера.
В новом окне необходимо выбрать клиентскую операционную систему, для которой будут установлены логические принтеры и драйверы. Выберите переключатель «Все клиенты«. Щелкните на кнопке «Далее«.
В новом окне следует щелкнуть на кнопке «Далее«, после чего откроется окно «Мастер установки принтеров«. Эта программа установки используется для подключения локальных или сетевых принтеров к серверу на базе Windows Server. Щелкните в окне мастера кнопку «Далее«.
В следующем окне следует выбрать тип устанавливаемого принтера. При настройке сервера печати для отправки заданий непосредственно на принтер выберите переключатель «Локальный принтер» (принтер с собственным сетевым адаптером также считается локальным). Переключатель «Сетевой принтер, подключенный к другому компьютеру» следует выбрать при передаче заданий печати второму серверу печати. Например, с сервера печати регионального офиса можно передавать задания печати в центральном офисе. Щелкните кнопку «Далее«.
Если принтер, подключенный к серверу, не был обнаружен, откроется новое окно, в котором необходимо вручную выбрать локальный порт принтера. Если у принтера есть собственный сетевой адаптер, и вы отправляете задания для печати по сети, выберите тип порта в раскрывающемся меню «Создать новый порт«. Если тип порта неизвестен, рекомендуется выбирать параметр Standard TCP/IP Port.
При выборе параметра Standard TCP/IP запустится программа «Мастер добавления стандартного порта TCP/IP принтера«. С помощью этого мастера следует указать IP-адрес принтера и имя порта, к которому будет осуществляться подключение. При этом IP-адрес принтера обычно указываются в параметрах принтера системным администратором.
После указания IP-адреса мастер сделает попытку подключения к принтеру, после чего работа мастера будет завершена, и новый принтер станет доступным для печати.
После установки принтера необходимо настроить доступ к нему конечных пользователей. Принтер для операционной системы является таким же логическим ресурсом, как файл или каталог, поэтому в процессе поиска принтера конечные пользователи могут просмотреть ресурсы сервера печати (при наличии соответствующего разрешения доступа). Кроме того, на клиентской системе можно настроить доступ к принтеру с помощью мастера «Установка принтера» («Пуск«-> «Панель управления» -> «Принтеры и факсы«) или с помощью команды «net send«, используемой в командной строке Windows. Также принтер можно опубликовать в службе каталогов Active Directory, что пригодится при поиске нужного принтера в больших организациях, в которых работают тысячи сотрудников.
Для управления параметрами принтера в Windows Server нужно правой кнопкой мыши на значке принтера щелкнуть и выбрать команду «Свойства«. В новом окне можно настроить различные свойства принтера, включая разрешения печати, параметры доступа, порты и многое другое.
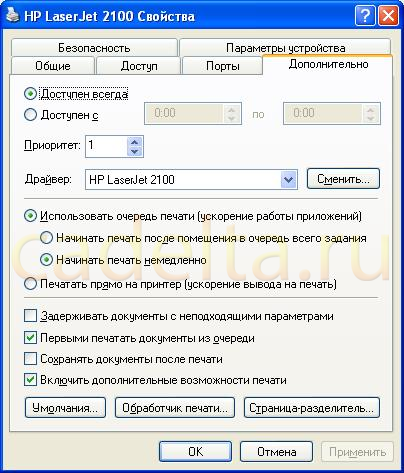
Рис. 4. Свойства принтера.
Выражаем благодарность автору Markuzya за предоставленный материал.