
Не так давно Microsoft выпустила очень интересный инструмент Диспетчер серверов (Remote Server Administration Tools). Данный пакет дал возможность системным администраторам наглядно видеть состояние всех Windows серверов и запущенных на них сервисов.
В интернете существует огромное количество статей про данный инструмент и причина для появления ещё одной, очевидно должна быть не тривиальной. И такая причина есть – это возможность мониторинга и управления серверами с ноутбука или компьютера, которые не входят в один домен с администрируемыми серверами, что может быть очень актуально, например, для приходящего сисадмина.
Установка
Прежде чем переходить к основному вопросу нашей статьи кратко разберём один из вариантов установки.
Для начала нужно скачать с сайта Microsoft соответствующий вашей операционной системе установочный пакет. Для Windows 10 для этого пройдите по следующей ссылке, выберите язык, после чего вам будет доступен список доступных пакетов для выбранного вами языка:
Обратите внимание, здесь вам нужно выбрать тип операционной системы x64 или x86, а также версию установленной ОС Windows. Версию ОС Windows можно узнать, выполнив, например, команду winver в командной строке Windows:

А моём случае это версия 1803, а так как у меня установлена 64-ёх разрядная версия, я буду скачивать установочный пакет WindowsTH-RSAT_WS_1803-x64.msu.
После установки данного пакета открываем папку C:\Windows\System32 и запускаем приложение ServerManager.exe
При необходимости вы можете создать ярлык для данного приложения на рабочем столе или закрепить его на Панели задач.
Добавление серверов в «Диспетчер серверов»
Для добавления серверов, которым мы хотим управлять открываем Управление -> Добавление серверов.
В открывшемся окне нам нужна вкладка DNS (ну или вы можете создать текстовый файл со списком IP-адресов ваших серверов и воспользоваться вкладкой Импорт). Вводим в строке поиска IP-адрес или имя нашего сервера, жмём лупу и добавляем нужный сервер в список:
После того, как все сервера добавлены в список жмём ОК:
Если серверы находятся в вашем домене и у вас есть права Администратора, то на этом настройку Диспетчера серверов можно заканчивать.
Если же серверы находятся в неродном для вашего ПК домене, придётся выполнить ещё ряд настроек.
Настройка доступа к серверам
Если после добавления серверов на странице «Все серверы» вы видите следующую картину:

То вам необходимо выполнить следующие действия:
- Убедиться, что пользователь, который осуществляет доступ к серверам обладает правами Администратора данных серверов или домена, при необходимости установить в настройках подключения соответствующего пользователя.
- Если ваш ПК и серверы находятся в разных доменах необходимо прописать все управляемы серверы в списке доверенных хостов вашего ПК.
Определяем пользователя
Для того, чтобы определить или изменить пользователя, кликаем правой кнопкой мыши на соответствующем сервере на странице «Все серверы» Диспетчера серверов и выбираем пункт меню «Управлять как…».
В открывшемся окне вводим полное имя пользователя включая домен, например admin@mytestdomen.ru и его пароль.
Добавляем серверы в список доверенных хостов
Для добавления сервера в список доверенных хостов, необходимо открыть командную строку с правами администратора, после чего выполнить в ней следующий запрос:
winrm set winrm/config/client @{TrustedHosts = «10.0.0.10»}
Где 10.0.0.10 – IP-адрес добавляемого сервера, вместо которого можно использовать имя соответствующего сервера, например sr-ad1.mytestdomen.ru
После чего в списке серверов у вас произойдут примерно такие изменения:

Но при попытке добавить следующий сервер, вы столкнётесь с тем, что запись предыдущего сервера будет затираться и активным будет оставаться только последний. Чтобы этого избежать необходимо запустить в командной строке команду, которая добавить в список доверенных хостов все необходимые нам сервера сразу. Для это перечисляем все наши серверы через запятую, примерно так:
winrm set winrm/config/client @{TrustedHosts = «10.0.0.10, 10.0.0.11, 10.0.0.12, 10.0.0.13»}
Если вы всё сделали верно наслаждаемся возможностью управлять серверами со своего рабочего ноутбука.
Надеюсь, данная статья была вам полезна.
How to Open Server Manager in Windows 10
Opening the Server Manager in Windows 10 is a straightforward process that will allow you to manage various server roles and features. Simply access the Start menu, type «Server Manager,» and click on the application to open it. This tool is essential for those managing a Windows server environment, enabling you to handle tasks such as monitoring server performance, configuring services, and deploying roles.
Opening the Server Manager allows you to manage server roles, features, and monitor server performance. Follow these steps to get started.
Step 1: Open the Start Menu
Click on the Start menu located at the bottom-left corner of your screen.
The Start menu is your gateway to all the applications installed on your computer. By accessing it, you can easily search for and launch the Server Manager.
Step 2: Search for Server Manager
Type «Server Manager» into the search bar that appears when the Start menu is open.
Using the search bar helps you quickly locate the Server Manager without having to scroll through a long list of applications.
Step 3: Click on Server Manager
When you see «Server Manager» appear in the search results, click on it to open the application.
Clicking on the application from the search results will launch Server Manager, bringing you to its main interface where you can manage your server.
Step 4: Wait for Server Manager to Load
The Server Manager may take a few moments to load, depending on your system’s speed.
Patience is key here. Once the Server Manager loads, you’ll have access to a comprehensive dashboard for managing your server roles and configurations.
Step 5: Explore Server Manager
Navigate through the Server Manager to find the tools and features you need.
Server Manager offers a wide range of functionalities, from adding roles and features to monitoring server performance. Familiarize yourself with its layout to make the most of its capabilities.
After you complete these steps, Server Manager will be open, allowing you to manage roles, features, and monitor server performance with ease.
Tips for Opening Server Manager in Windows 10
- Pin to Taskbar: Pin Server Manager to your taskbar for quick access in the future.
- Create a Shortcut: Create a desktop shortcut for even faster access.
- Use Cortana: Utilize voice commands with Cortana to open Server Manager.
- Keep Updated: Ensure your Windows 10 is up to date for optimal performance.
- Check System Requirements: Make sure your system meets the requirements for running Server Manager efficiently.
Frequently Asked Questions
What is Server Manager used for?
Server Manager is used to manage server roles, features, and monitor server performance.
Can I use Server Manager on Windows 10 Home Edition?
Server Manager is typically available on Windows Server environments, not on Windows 10 Home Edition.
How do I pin Server Manager to the taskbar?
Right-click on the Server Manager icon and select «Pin to taskbar.»
Is Server Manager necessary for managing a single server?
While not strictly necessary, Server Manager simplifies the management of server roles and features.
Can I open Server Manager using a command prompt?
Yes, you can open it by typing «ServerManager.exe» in the command prompt.
Summary
- Open the Start Menu
- Search for Server Manager
- Click on Server Manager
- Wait for Server Manager to Load
- Explore Server Manager
Conclusion
Opening Server Manager in Windows 10 is a simple yet important task for anyone involved in managing a Windows Server environment. By following the steps outlined, you can quickly access this powerful tool and begin configuring server roles, features, and monitoring performance. Whether you’re a seasoned IT professional or just starting out, familiarizing yourself with Server Manager is essential.
Remember to take advantage of tips like pinning the application to your taskbar or creating a desktop shortcut for quicker access. If you run into any issues, refer back to the frequently asked questions for additional guidance.
Server Manager is your command center for keeping your server running smoothly. So go ahead, open it up, and start exploring all the features it has to offer. Happy managing!
Matt Jacobs has been working as an IT consultant for small businesses since receiving his Master’s degree in 2003. While he still does some consulting work, his primary focus now is on creating technology support content for SupportYourTech.com.
His work can be found on many websites and focuses on topics such as Microsoft Office, Apple devices, Android devices, Photoshop, and more.
In this tutorial, we will list the simple steps to install the Server Manager feature on Windows 11 or 10 that will help the system administrators or IT professionals in managing the remote or locally running Windows server roles. This server feature in Windows desktop makes it easy to deploy roles, manage configurations, and monitor server performance across the network.
Steps for installing Server Manager on Windows 11 or 101. Access Windows 10 or 11 Settings2. View Features3. Installing Server Manager4. Access the Management ConsoleCMD or PowerShell to install Server Manager (optional)Uninstallation
Why Server Manager?
In layman’s language, Server Manager is a tool available on Windows to manage any Windows Server OS running system whether it is on a local or remote machine. Although as a management console, it is by default available on Windows Server OS, however, on desktop OS of Windows such as 11 or 10, users need to install it manually. The key task of SM is to allow users to manage the remote server without accessing it physically or using the RDP. Using a Server manager system administrators can perform various tasks such as server role and feature management, server group management, remote management, performance monitoring, multi-server management, role-based access, and security, and can perform integration with other tools.
So, being an IT Admin or just learning how the Windows server environment works, here in this guide we learn the steps to install the Server Manager on Windows 11 or 10 Desktops which is a part of the RSAT tool suite (Remote Server Administration Tools)…
What do we need?
To perform this tutorial, users’ Windows 11 or 10 systems must be using either professional or enterprise edition OS because Windows Home officially doesn’t support it. Apart from that, we need a working internet connection to download the required files for completing the installation process.
Steps for installing Server Manager on Windows 11 or 10
We will show both command prompt / PowerShell and GUI methods to activate Server Manager on Windows Desktops…
1. Access Windows 10 or 11 Settings
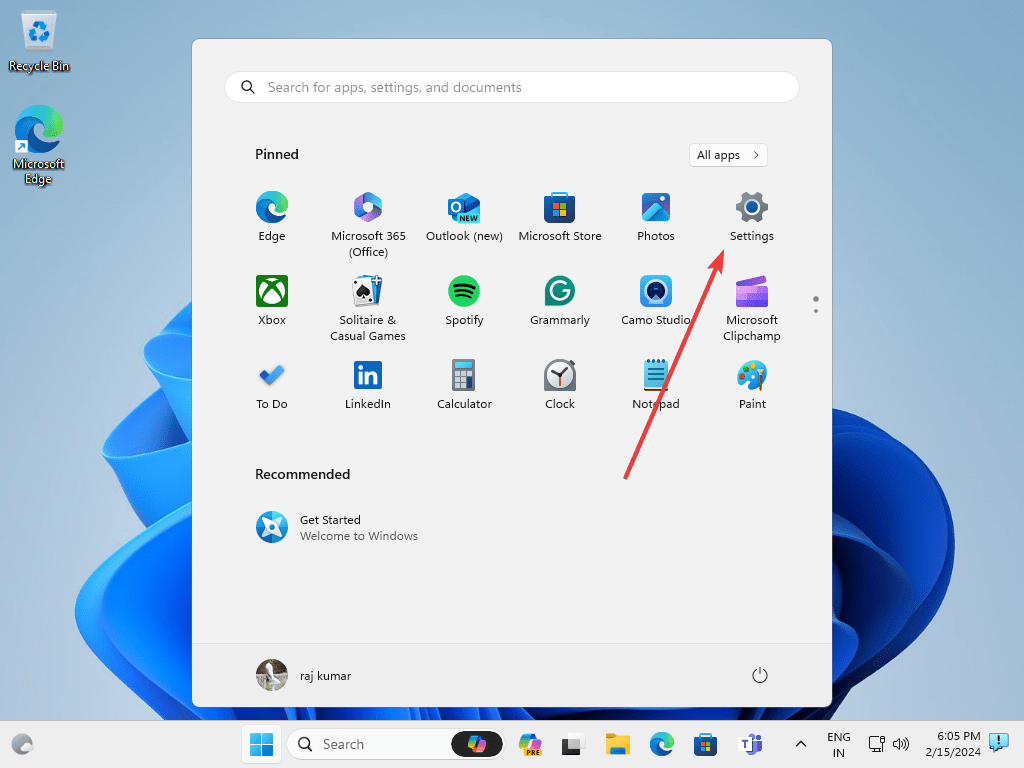
Instead of accessing the traditional “turn windows feature on or off”, here, we will use the common Settings window. You can either press Win key + I to open it or just click on the Start button and select the gear icon.
2. View Features
On the Settings page, access the “System” and then the “Optional Features” option given on the right-side panel. Alternatively, users can search for it using the box given at the top left side.

After that click on the “View features” button available on the top right side. It will reveal a section to search and install various available features on Windows 11 or 10.

3. Installing Server Manager
Now, in the search box of the “Add additional feature” window, type – server manager, and you will see – RSAT: Server Manager in the results, just select the box given in front of it and hit Next, and then the Install button. Soon, the server manager will be on your Windows 10 or 11 system.

4. Access the Management Console
As the system completes the installation process of “Server Manager“, you can close the Settings page and go to the Windows Start menu. Search for “Server Manager” and you will see it in the search results to get started with it.

So, this was the graphical user interface method to install and run the Server manager. Now, let’s also see the command that can be used to install it either via Command prompt or PowerShell.
CMD or PowerShell to install Server Manager (optional)
Those who prefer to use the command line can use the given command. However, before executing it, run the CMD or PowerShell as Administrator.
Add-WindowsCapability -Online -Name Rsat.ServerManager.Tools~~~~0.0.1.0Uninstallation
There might be a time when you don’t require this Windows 10 or 11 feature anymore on your system. At that time to uninstall Server Manager, go to Settings->System select Optional Features and from the list of the installed features select Server Manager to uninstall it.

Whereas, those who want to use the command line to remove it can use the given one:
Remove-WindowsCapability -Online -Name Rsat.ServerManager.Tools~~~~0.0.1.0Other Articles:
- Get back the Missing Show Desktop icon in Windows 11
- How to Display Features Required for Hyper-V Using PowerShell
- Get the Missing Hibernate Button Back on Windows 11 using CMD
- How to Reset Windows 11: A Step-by-Step Guide
- How to find the IP address in CMD using hostname?
В этой статье мы рассмотрим, что представляют собой инструменты RSAT в Windows 10, а также запустим «Диспетчер серверов» и попытаемся подключиться к удаленному серверу.
- Введение
- Удаленное администрирование серверов в Windows 10 — доступные средства
- Доступные инструменты
- Настройка доступных инструментов
- Запуск диспетчера серверов
- Профессиональные советы
- Известные ошибки
- Заключение
Ранние версии Windows Server имели графический интерфейс, похожий на другие аналогичные клиенты. Это упрощало администрирование, поскольку пользователю не нужно было изучать два разных интерфейса. Для удаленного администрирования нужно было подключиться к серверу с помощью удаленного рабочего стола. Однако информация сеанса терялась по завершении сеанса RDP. С переходом к версиям Windows Server без GUI-интерфейса возникла необходимость удаленного управления сервером без входа или выхода из сеанса RDP. Пакет, включающий в себя средства удаленного администрирования сервера (RSAT ), был создан специально для решения этой проблемы.
RSAT позволяет администраторам запускать инструменты на удаленном сервере для управления его функциями, ролями и службами. Windows 10 имеет встроенную поддержку RSAT. Ниже представлены различные возможности установки RSAT:
- Установлен по умолчанию в Windows Server 2016, Windows Server 2012, Windows Server 2012 R2 и более ранних версиях;
- Может быть загружен и установлен как автономный пакет обновлений на клиентах под управлением Windows 10 Professional, Windows 10 Enterprise и Windows 10 Education;
- Невозможно установить на клиентах под управлением Windows 10 Home или любой ARM-версии;
- Невозможно установить на любой из серверных версий операционной системы;
- Поддерживается удаленное администрирование Windows Server Core или минимального интерфейса Windows Server 2016, Windows Server 2012 R2 и в некоторых случаях Windows Server 2012.
Матрицу поддержки RSAT на платформе Windows 10 можно найти здесь. Ключевым моментом является то, что инструменты Hyper-V не являются частью RSAT для Windows 10, в отличие от более ранних версий. Hyper-V поставляется как часть Windows 10 и может использоваться без установки RSAT. Другие инструменты, которые недоступны в данном релизе:
- Утилиты администрирования BitLocker Drive Encryption;
- Direct Access;
- Routing and Remote Access;
- Remote Desktop Services;
- Windows PowerShell cmdlets for Cluster Aware Updating;
- Windows PowerShell cmdlets for Best Practices Analyzer.
Начнем с установки RSAT для Windows 10. Как уже было сказано, RSAT доступен только для Windows 10 Professional, Enterprise и Education. Он может работать как на 86-разрядной, так и на 64-разрядной версии Windows 10. Обратите внимание, что предыдущие версии RSAT следует удалить до установки актуальной версии. Чтобы получить доступ к версиям Windows Server 2012 и Windows Server 2008 и управлять ими, необходимы дополнительные обновления для этой версии RSAT. Также обратите внимание, что на удаленном сервере должно быть включено дистанционное управление Windows PowerShell и «Диспетчер серверов».
Средства удаленного администрирования активированы по умолчанию в Windows Server 2016, 2012 R2 и 2012. Следующие шаги были выполнены на устройстве с установленной операционной системой Windows 10 Enterprise x64, работающей в VMWare. Вы должны повторить их в собственной системе.
- Загрузите файл настройки RSAT:

- Необходимо выбрать программу установки, соответствующую используемой архитектуре. В данном случае это 64-разрядная система, поэтому мы загрузим файл WindowsTH-KB2693643-x64.msu;
- Дважды кликните по файлу установщика, чтобы начать инсталляцию. Примите условия лицензии и дождитесь окончания установки;
- В более ранних версиях Windows после установки пакета RSAT приходилось вручную активировать эти инструменты. Но в Windows 10 эти инструменты доступны для использования сразу после завершения установки. Флажок рядом с инструментами RSAT установлен. Это означает, что мы можем продолжать:

- Теперь перейдите в Панель управления — Система и безопасность — Администрирование, чтобы найти все установленные инструменты RSAT:

Чтобы удалить пакет RSAT:
- Перейдите в Панель управления — Программы — Удалить программу;
- Нажмите «Просмотр установленных обновлений»;
- Кликните правой кнопкой мыши по элементу «Обновление для Microsoft Windows (KB2693643) » и выберите пункт «Удалить»;
- Подтвердите действие, нажав кнопку «Да»:

Чтобы удалить определенные инструменты из пакета средств удаленного администрирования сервера:
- Перейдите в Панель управления — Программы — Программы и компоненты и нажмите «Включить компоненты Windows»;
- Снимите флажки напротив тех инструментов, которые вы хотите удалить:

Инструменты, включенные в пакет RSAT, не могут использоваться для управления локальным компьютером. В диспетчере серверов должен быть указан удаленный сервер. Большинство инструментов RSAT интегрированы в диспетчер серверов, поэтому рекомендуется сначала добавить в него пулы серверов перед развертыванием этих инструментов. Чтобы запустить диспетчер серверов:
- Откройте меню «Пуск», и кликните по элементу «Диспетчер серверов». Или кликните по полю поиска Cortana в панели задач и начните вводить «Диспетчер серверов». Вы должны увидеть соответствующую строку в Cortana. Нажмите на эту строку, чтобы запустить «Диспетчер серверов»:

- Откроется панель управления диспетчера серверов:

- В ней можно добавлять удаленные серверы и назначать роли для них;
- Если ПК является частью домена, можно выполнить поиск серверов в Active Directory вашей организации, или ввести IP-адрес по своему выбору. Также можно импортировать адреса серверов из файла;
- В меню «Инструменты» перечислены все инструменты RSAT, доступные для удаленного администрирования сети.
Иногда приходится работать на различных клиентах, и нужно иметь возможность управлять удаленным сервером с них. Но повторная настройка может занять много времени. Если версии диспетчера серверов на различных клиентах аналогичны, можно скопировать файлы из указанных ниже мест на исходном клиенте в те же места на новом клиенте. Таким образом, при последующем запуске диспетчера серверов на новом клиенте вы найдете конфигурацию, заданную на предыдущем клиенте.
Скопируйте файлы из следующих расположений:
%appdata%MicrosoftWindowsServerManagerServerList.xml
%appdata%LocalMicrosoft_CorporationServerManager.exe_StrongName_GUID6.2.0.0user.config
Помните, что версии диспетчера серверов на исходном и новом клиентах должны быть идентичны.
В настоящее время RSAT поддерживает только локализацию EN-US. Если вы инсталлируете RSAT на машине, для которой задан регион, отличный от EN-US, установка будет выполнена, но в диалоговом окне «Включение и выключение компонентов Windows» вы не увидите ни одного из инструментов. Чтобы решить эту проблему, установите языковый пакет EN-US. После того, как настроите инструменты в диалоговом окне «Включение и отключение компонентов Windows», можно вновь задать свой регион и язык.
В этой статье мы привели краткое руководство по работе с пакетом RSAT и Диспетчером серверов для Windows 10 удаленного администрирования. RSAT устанавливается и настраивается очень просто. Он позволяет эффективно администрировать удаленный сервер. «Диспетчер серверов» включает в себя большое количество различных функций, для полного рассмотрения которых требуется отдельное руководство.
Отказ от использования графического интерфейса на серверах является желательным, поскольку это минимизирует различные риски, а также разгружает ЦП и ОЗУ.
Вадим Дворниковавтор-переводчик
Yes, you can install server manager on windows 10 by following these steps:
1. Download the server manager installation file from the Microsoft website.
2. Run the installation file and follow the prompts to install server manager on your windows 10 machine.
3. Once the installation is complete, launch server manager from the start menu.
4. Follow the prompts to configure server manager on your machine.
Can you get Server Manager for Windows 10?
How do I add a Server Manager in Windows 10?
Adding a Server Manager in Windows 10 is a simple process that can be completed in just a few steps.
1. First, open the Server Manager console by clicking the Start button, then selecting Administrative Tools > Server Manager.
2. In the Server Manager console, click on the Add Roles and Features link in the left-hand pane.
3. On the Add Roles and Features wizard, select the Role-based or feature-based installation option and click Next.
4. On the next page, select the server on which you want to install the Server Manager role and click Next.
5. On the next page, select the Server Manager role from the list of available roles and click Next.
6. On the next page, review the list of features that will be installed along with the Server Manager role and click Next.
7. On the next page, click Install to begin the installation process.
8. Once the installation is complete, click Close to close the Add Roles and Features wizard.
How do I download Windows Server Manager?
1. Navigate to the Microsoft Download Center.
2. Search for “Windows Server Manager”.
3. Select the most recent version of Windows Server Manager.
4. Click “Download”.
5. Run the installer.
Does Windows 10 have a server Edition?
Windows 10 does not have a server edition, but it can be used as a server with the right configuration. To use Windows 10 as a server, you will need to install the Windows Server role using the Server Manager tool. Once the Windows Server role has been installed, you can then configure the server to meet your specific needs.
What is Server Manager in Windows 10?
Server Manager is a tool that provides a single, centralized console for managing servers in a physical or virtual environment. It enables you to view and manage server roles and features that are installed on a server, to add or remove server roles and features, to deploy or configure servers, and to monitor server health.
In Windows 10, Server Manager is located in the Start menu. To open Server Manager, click Start, and then click Server Manager.
When you first open Server Manager, the Dashboard will appear. The Dashboard is a central location from which you can access key tools and resources for managing servers. From the Dashboard, you can perform the following tasks:
-Add or remove server roles and features
-Deploy or configure servers
-Monitor server health
To add or remove server roles and features:
1. In Server Manager, click Manage, and then click Add Roles and Features.
2. The Add Roles and Features Wizard will appear. Click Next.
3. On the Select Installation Type page, select Role-based or feature-based installation, and then click Next.
4. On the Select Destination Server page, select the server on which you want to install the role or feature, and then click Next.
5. On the Select Server Roles page, select the server roles that you want to install, and then click Next.
6. On the Select Features page, select the features that you want to install, and then click Next.
7. On the Confirm Installation Selections page, review the roles and features that you have selected to install, and then click Install.
8. On the Results page, click Close.
To deploy or configure servers:
1. In Server Manager, click Manage, and then click Deployment Workbench.
2. The Deployment Workbench will appear.
3. In the Deployment Workbench, expand the Deployment Shares node, and then select the deployment share that you want to use.
4. In the Actions pane, click Properties.
5. The Properties dialog box for the selected deployment share will appear.
6. On the General tab, you can specify the name
How do I make my computer a server Windows 10?
In order to make your computer a server on Windows 10, you’ll need to install the Windows Server software. This can be done by downloading the software from the Microsoft website, or by using the Windows Server installation disc. Once the software is installed, you’ll need to configure it to work with your network. This can be done by setting up the server’s IP address, domain name, and other network settings.
How do I install IIS on Windows 10?
IIS (Internet Information Services) is a web server from Microsoft that runs on Windows systems. IIS can be used to host websites and web applications. In order to install IIS on Windows 10, you must first open the Control Panel.
To open the Control Panel, you can type “control panel” into the search bar on the Start menu. Once the Control Panel is open, you will need to select “Programs and Features.”
Under Programs and Features, there is a section called “Turn Windows features on or off.” You will need to select this option.
A list of Windows features will appear. Scroll down this list until you find “Internet Information Services.” You will need to select the checkbox next to this option and then select “OK.”
IIS will now be installed on your Windows 10 machine.
How do I get Server Manager?
In order to get Server Manager, you will need to be logged in as a user with administrator privileges. Once you are logged in, you can either search for “Server Manager” in the Start menu or locate it in the Administrative Tools folder. Once you have found the Server Manager application, double click on it to launch.
What is the difference between Windows desktop and Windows Server?
The Windows Server is a more powerful operating system than the Windows desktop, designed to handle the demands of a server environment. The Windows Server can be configured to provide services such as file and print sharing, email, web hosting, and database services. It can also be used as a platform for developing and deploying custom applications.
What is difference between server and desktop?
A server is a computer designed to process requests and deliver data to other computers over a local network or the Internet. A desktop computer is a personal computer designed for general use at a single location.
What are the advantages of using Windows Server Manager?
The advantages of using Windows Server Manager are that it is a central location for managing multiple servers, it provides a graphical interface for managing server roles and features, and it can be used to remotely manage servers. Additionally, Windows Server Manager can be used to monitor server performance and to generate reports on server activity.
How do I install Server Manager in Windows 11?
Windows Server Manager is a tool that allows you to manage multiple servers from a single console. You can use it to configure and monitor server roles and features, as well as to manage server groups.
To install Server Manager in Windows 11, you will first need to install the Remote Server Administration Tools (RSAT). RSAT is a tool that allows you to manage remote servers from your local computer.
Once RSAT is installed, you can launch Server Manager from the Start menu. To add a server to Server Manager, click on the “Add Servers” button.
In the “Add Servers” dialog box, you can either enter the name of a server, or you can click on the “Browse” button to select a server from the Active Directory.
Once you have added a server to Server Manager, you can manage it by clicking on the “Manage” button.
From the “Manage” menu, you can perform various tasks, such as configuring server roles and features, or managing server groups.
Windows Server Manager is a tool that allows you to manage multiple Windows servers from a single console. You can use it to view and configure server settings, as well as to monitor server performance. Additionally, Windows Server Manager can be used to deploy server roles and features, and to manage server groups.
How can I turn my PC into a server?
If you want to turn your PC into a server, there are a few things you need to do. First, you need to make sure your PC is running a supported operating system. Windows Server, Linux, and FreeBSD are all popular choices for servers. Second, you need to install server software. This can be done using a package manager like apt-get on Linux, or by downloading and installing the software manually. Finally, you need to configure your server software. This includes setting up users, permissions, and other options.
{“@context”:”https://schema.org”,”@type”:”FAQPage”,”mainEntity”:[{“@type”:”Question”,”name”:”How do I add a Server Manager in Windows 10?”,”acceptedAnswer”:{“@type”:”Answer”,”text”:”nnAdding a Server Manager in Windows 10 is a simple process that can be completed in just a few steps.nn1. First, open the Server Manager console by clicking the Start button, then selecting Administrative Tools > Server Manager.nn2. In the Server Manager console, click on the Add Roles and Features link in the left-hand pane.nn3. On the Add Roles and Features wizard, select the Role-based or feature-based installation option and click Next.nn4. On the next page, select the server on which you want to install the Server Manager role and click Next.nn5. On the next page, select the Server Manager role from the list of available roles and click Next.nn6. On the next page, review the list of features that will be installed along with the Server Manager role and click Next.nn7. On the next page, click Install to begin the installation process.nn8. Once the installation is complete, click Close to close the Add Roles and Features wizard.”}},{“@type”:”Question”,”name”:”How do I download Windows Server Manager?”,”acceptedAnswer”:{“@type”:”Answer”,”text”:”nn1. Navigate to the Microsoft Download Center.n2. Search for “Windows Server Manager”.n3. Select the most recent version of Windows Server Manager.n4. Click “Download”.n5. Run the installer.”}},{“@type”:”Question”,”name”:”Does Windows 10 have a server Edition?”,”acceptedAnswer”:{“@type”:”Answer”,”text”:”nnWindows 10 does not have a server edition, but it can be used as a server with the right configuration. To use Windows 10 as a server, you will need to install the Windows Server role using the Server Manager tool. Once the Windows Server role has been installed, you can then configure the server to meet your specific needs.”}},{“@type”:”Question”,”name”:”What is Server Manager in Windows 10?”,”acceptedAnswer”:{“@type”:”Answer”,”text”:”nnServer Manager is a tool that provides a single, centralized console for managing servers in a physical or virtual environment. It enables you to view and manage server roles and features that are installed on a server, to add or remove server roles and features, to deploy or configure servers, and to monitor server health.nnIn Windows 10, Server Manager is located in the Start menu. To open Server Manager, click Start, and then click Server Manager.nnWhen you first open Server Manager, the Dashboard will appear. The Dashboard is a central location from which you can access key tools and resources for managing servers. From the Dashboard, you can perform the following tasks:nn-Add or remove server roles and featuresn-Deploy or configure serversn-Monitor server healthnnTo add or remove server roles and features:nn1. In Server Manager, click Manage, and then click Add Roles and Features.n2. The Add Roles and Features Wizard will appear. Click Next.n3. On the Select Installation Type page, select Role-based or feature-based installation, and then click Next.n4. On the Select Destination Server page, select the server on which you want to install the role or feature, and then click Next.n5. On the Select Server Roles page, select the server roles that you want to install, and then click Next.n6. On the Select Features page, select the features that you want to install, and then click Next.n7. On the Confirm Installation Selections page, review the roles and features that you have selected to install, and then click Install.n8. On the Results page, click Close.nnTo deploy or configure servers:nn1. In Server Manager, click Manage, and then click Deployment Workbench.n2. The Deployment Workbench will appear.n3. In the Deployment Workbench, expand the Deployment Shares node, and then select the deployment share that you want to use.n4. In the Actions pane, click Properties.n5. The Properties dialog box for the selected deployment share will appear.n6. On the General tab, you can specify the name”}},{“@type”:”Question”,”name”:”How do I make my computer a server Windows 10?”,”acceptedAnswer”:{“@type”:”Answer”,”text”:”nnIn order to make your computer a server on Windows 10, you’ll need to install the Windows Server software. This can be done by downloading the software from the Microsoft website, or by using the Windows Server installation disc. Once the software is installed, you’ll need to configure it to work with your network. This can be done by setting up the server’s IP address, domain name, and other network settings.”}},{“@type”:”Question”,”name”:”How do I install IIS on Windows 10?”,”acceptedAnswer”:{“@type”:”Answer”,”text”:”nnIIS (Internet Information Services) is a web server from Microsoft that runs on Windows systems. IIS can be used to host websites and web applications. In order to install IIS on Windows 10, you must first open the Control Panel.nnTo open the Control Panel, you can type u201ccontrol panelu201d into the search bar on the Start menu. Once the Control Panel is open, you will need to select u201cPrograms and Features.u201dnnUnder Programs and Features, there is a section called u201cTurn Windows features on or off.u201d You will need to select this option.nnA list of Windows features will appear. Scroll down this list until you find u201cInternet Information Services.u201d You will need to select the checkbox next to this option and then select u201cOK.u201dnnIIS will now be installed on your Windows 10 machine.”}},{“@type”:”Question”,”name”:”How do I get Server Manager?”,”acceptedAnswer”:{“@type”:”Answer”,”text”:”nnIn order to get Server Manager, you will need to be logged in as a user with administrator privileges. Once you are logged in, you can either search for “Server Manager” in the Start menu or locate it in the Administrative Tools folder. Once you have found the Server Manager application, double click on it to launch.”}},{“@type”:”Question”,”name”:”What is the difference between Windows desktop and Windows Server?”,”acceptedAnswer”:{“@type”:”Answer”,”text”:”nnThe Windows Server is a more powerful operating system than the Windows desktop, designed to handle the demands of a server environment. The Windows Server can be configured to provide services such as file and print sharing, email, web hosting, and database services. It can also be used as a platform for developing and deploying custom applications.”}},{“@type”:”Question”,”name”:”What is difference between server and desktop?”,”acceptedAnswer”:{“@type”:”Answer”,”text”:”nnA server is a computer designed to process requests and deliver data to other computers over a local network or the Internet. A desktop computer is a personal computer designed for general use at a single location.”}},{“@type”:”Question”,”name”:”What are the advantages of using Windows Server Manager?”,”acceptedAnswer”:{“@type”:”Answer”,”text”:”nnThe advantages of using Windows Server Manager are that it is a central location for managing multiple servers, it provides a graphical interface for managing server roles and features, and it can be used to remotely manage servers. Additionally, Windows Server Manager can be used to monitor server performance and to generate reports on server activity.”}},{“@type”:”Question”,”name”:”How do I install Server Manager in Windows 11?”,”acceptedAnswer”:{“@type”:”Answer”,”text”:”nnWindows Server Manager is a tool that allows you to manage multiple servers from a single console. You can use it to configure and monitor server roles and features, as well as to manage server groups.nnTo install Server Manager in Windows 11, you will first need to install the Remote Server Administration Tools (RSAT). RSAT is a tool that allows you to manage remote servers from your local computer.nnOnce RSAT is installed, you can launch Server Manager from the Start menu. To add a server to Server Manager, click on the “Add Servers” button.nnIn the “Add Servers” dialog box, you can either enter the name of a server, or you can click on the “Browse” button to select a server from the Active Directory.nnOnce you have added a server to Server Manager, you can manage it by clicking on the “Manage” button.nnFrom the “Manage” menu, you can perform various tasks, such as configuring server roles and features, or managing server groups.”}},{“@type”:”Question”,”name”:”What can Windows Server Manager do?”,”acceptedAnswer”:{“@type”:”Answer”,”text”:”nnWindows Server Manager is a tool that allows you to manage multiple Windows servers from a single console. You can use it to view and configure server settings, as well as to monitor server performance. Additionally, Windows Server Manager can be used to deploy server roles and features, and to manage server groups.”}},{“@type”:”Question”,”name”:”How can I turn my PC into a server?”,”acceptedAnswer”:{“@type”:”Answer”,”text”:”nnIf you want to turn your PC into a server, there are a few things you need to do. First, you need to make sure your PC is running a supported operating system. Windows Server, Linux, and FreeBSD are all popular choices for servers. Second, you need to install server software. This can be done using a package manager like apt-get on Linux, or by downloading and installing the software manually. Finally, you need to configure your server software. This includes setting up users, permissions, and other options.”}}]}