
Здравствуйте.
Перед Новым годом установил на ПК новый SSD (Goodram Iridium Pro), а вместе с этим в голове родилась идея установки долгожданной Windows 10 x64 (Корпоративная). Терабайтный жёсткий диск, разумеется, решил использовать для файлов.
На первый взгляд, всё было бы хорошо, если бы не одно НО. При нажатии на кнопку завершения работы, компьютер иногда выключался, а иногда перезагружался. Перечитав форумы, я настроил электропитание в ПУ, накатил последние обновления Windows, обновил BIOS, обновил драйверы, а также поменял значение в ветке: HKEY_LOCAL_MACHINE\SYSTEM\CurrentControlSet\Control\WMI\Autologger\ReadyBoot на «4».
Теперь при нажатии кнопки выключения, компьютер выключается, но недавно в журнале ошибок Windows увидел ежедневную ошибку: Сеанс «ReadyBoot» остановлен из-за следующей ошибки: 0xC0000188
- System

  - Provider

   [ Name]  Microsoft-Windows-Kernel-EventTracing
   [ Guid]  {B675EC37-BDB6-4648-BC92-F3FDC74D3CA2}

   EventID 3

   Version 1

   Level 2

   Task 2

   Opcode 14

   Keywords 0x8000000000000010

  - TimeCreated

   [ SystemTime]  2017-01-05T10:39:11.649771400Z

   EventRecordID 159

   Correlation

  - Execution

   [ ProcessID]  4
   [ ThreadID]  176

   Channel Microsoft-Windows-Kernel-EventTracing/Admin

   Computer pc-pavel

  - Security

   [ UserID]  S-1-5-18


- EventData

  SessionName ReadyBoot
  FileName C:\Windows\Prefetch\ReadyBoot\ReadyBoot.etl
  ErrorCode 3221225864
  LoggingMode 276824064
  FailureReason 0
Может быть кто-то с подобным уже сталкивался? Буду рад помощи от профессионалов! 
Applies ToWindows XP Windows Vista Windows 7 Windows 8.1
An unsupported version of Windows doesn’t receive software updates from Microsoft. These updates include security updates that protect your PC from harmful viruses, spyware, and other malicious software, which can steal your personal information. Windows Update also installs the latest software updates to improve the reliability of Windows, which includes new drivers for your hardware.
If you have devices running an unsupported version of Windows, we recommend upgrading them to a more current, in-service, and supported Windows release. If your devices don’t meet the technical requirements to run a more current release of Windows, we recommend that you replace the device with one that supports Windows 11. For more information, see Windows 11 system requirements.
When does support end for my version of Windows?
|
Windows version |
End of support date |
|---|---|
|
Windows 8.1 |
January 10, 2023 |
|
Windows 10 Mobile |
January 14, 2020 |
|
Windows 7 |
January 14, 2020 |
|
Windows Vista |
April 11, 2017 |
|
Windows 8 |
January 12, 2016 |
|
Windows XP |
April 08, 2014 |
To check the end-of-support dates for all versions of Windows, see the product lifecycle information for Windows.
If your version of Windows is still supported, you should always install the latest updates for Windows. To download and install these updates, use Windows Update in the Settings app.
Devices running an unsupported version of Windows will still function, but Microsoft doesn’t provide the following:
-
Technical support of any issue
-
Software updates
-
Security updates or fixes
While you could continue to use your PC, without continued software and security updates your PC is at greater risk for viruses and malware. We recommend upgrading to a version of Windows that’s still supported. A new device that can run Windows 11 makes for an easy transition and a great experience.
Yes. If you continue to use an unsupported version of Windows, your PC will still work, but it’s more vulnerable to security risks and viruses. Your PC will continue to start and run, but you won’t receive software updates, including security updates, from Microsoft.
For more information about the support policy, see the Microsoft support lifecycle policy FAQ.
There are a few options for using a supported version of Windows:
-
Recommended: New PC with Windows 11 — Windows 11 is the most current version of Windows. If you have an older PC, we recommend you move to Windows 11 by buying a new PC. Hardware and software have improved a lot, and today’s computers are faster, more powerful, and more secure. View Windows 11 PCs
-
Installing Windows 11 on your current PC — You can also see if your current PC meets the minimum system requirements for Windows 11. PCs that are running an unsupported version of Windows are unlikely to meet these requirements, but if yours does, you can purchase and download a full version of Windows 11 Home or Windows 11 Pro or buy from a retailer. If you do choose this path, you’ll need to reinstall your apps. In some cases, a newer version of the app may be required. You also need to transition files, data, and settings. The installation overwrites the contents of your existing hard drive. It may be easier for you to first upgrade to Windows 10 and then upgrade to Windows 11.
-
Installing Windows 10 on your current PC — Windows 10 is still available and will be supported until October 14, 2025. You can check if your current PC meets the minimum system requirements for Windows 10. If it does, you can check with retailers to see if they still offer Windows 10 for sale.
There are two ways you can get Windows 11:
-
Recommended: New PC with Windows 11 — Windows 11 is the most current version of Windows. If you have an older PC, we recommend you move to Windows 11 by buying a new PC. Hardware and software have improved a lot, and today’s computers are faster, more powerful, and more secure. View Windows 11 PCs
-
Installing Windows 11 on your current PC — You can also see if your current PC meets the minimum system requirements for Windows 11. If it does, you can purchase and download a full version of Windows 11 Home or Windows 11 Pro or buy from a retailer. If you do choose this path, you’ll need to reinstall your apps. In some cases, a newer version of the app may be required. You also need to transition files, data, and settings. The installation overwrites the contents of your existing hard drive. It may be easier for you to first upgrade to Windows 10 and then upgrade to Windows 11.
There currently aren’t free upgrade paths from unsupported versions of Windows to either Windows 10 or Windows 11. You can purchase Windows 11 from Microsoft or contact a retailer to learn about more options. You can upgrade from Windows 10 to Windows 11 for free.
It’s easy to bring your files and photos to a new PC using OneDrive, a cloud storage service. You can back up and protect your files online in the cloud and then sync onto a new PC. Syncing the files between your new PC and the cloud allows you to store the file locally for offline use when you don’t have internet access. They’re also stored on the OneDrive service in the cloud where you can restore them if something happens. OneDrive can automatically keep the two versions in sync as changes are made.
Learn how to move files with OneDrive
If OneDrive isn’t the best fit for you, you can also use an external hard drive or USB key to copy over files.
Need more help?
Want more options?
Explore subscription benefits, browse training courses, learn how to secure your device, and more.
Readers help support Windows Report. We may get a commission if you buy through our links.
Read our disclosure page to find out how can you help Windows Report sustain the editorial team. Read more
Error 0xc0000188 is associated with an affected PC’s Event Viewer. The complete error message says Session Perfdiag Logger Stopped Due to the Following Error: 0xc0000188.
If you’re encountering this, we’ll explain why it’s happening and how to fix it, so stay with us.
Commonly, the error shows up if Superfetch is disabled, or if the max File Size of your Startup Event Trace Sessions is small. Follow the steps below to fix it.
How can I fix error 0xc0000188?
1. Enable the Superfetch Service
- Press the Windows + R keys on your PC’s desktop window to open the Run dialog box.
- In the box, type in services.msc and press Enter.
- Locate and right-click on the Superfetch service, and on the displayed options, select Properties.

- Go under the Startup type subsection and set it to Automatic.

- Click on Start to run the service (if it’s currently running, move to the next step), then click on Apply and OK.

- Exit the program and reboot your PC.


2. Expand the maximum file size for Startup Event Trace Sessions
- Click the Start button, type cmd, and click on Run as administrator to start Command Prompt with full privileges.
- Type the following command and press Enter to start the Performance Monitor app:
perfmon
- Double-click on the Data Collector Sets to expand it, then select Startup Event Trace Sessions.

- Now, double-click Ready Boot from the right pane.
- Go to the Stop Condition tab and replace the value in the Maximum Size field with 40.
- Hit the Apply and OK buttons to acknowledge the change, then restart your PC.


3. Run DISM and SFC scans
- On your desktop window, click the Windows icon, type cmd, and select Run as administrator.
- In the Command Prompt window, type the following command keys and hit Enter:
DISM.exe /Online /Cleanup-image /Scanhealth
- Now, type the following code and hit Enter:
sfc /scannow - Exit Command Prompt and reboot the PC.

If you want to try other methods for the above procedure, there is dedicated software to detect corrupt or missing OS files and automatically find healthy elements as replacements.
4. Run PC in Clean Boot State
- Press Windows + R to open the Run dialog, type msconfig, and press Enter.
- Navigate to the Services section, tich Hide all Microsoft services, and click on Disable all.

- Navigate to the Startup section; locate and click on Open Task Manager.
- Right-click on any task that is enabled, and select Disable.

- Click OK to finish up the process.
- Exit the program and restart your system.


That is as far as we will go with solutions to this error. If you have followed the guide, we hope you have successfully fixed it.
Some users have reported the error message Session perfdiag logger stopped due to the following error: 0xc0000188. You should note that the solutions we have given will also come in handy. If you also got a PerfDiag Logger 0xC0000188 error, you should try any of the above fixes.
Let us know in the comments what has worked for you.
Ivan Jenic
Windows Hardware Expert
Passionate about all elements related to Windows and combined with his innate curiosity, Ivan has delved deep into understanding this operating system, with a specialization in drivers and driver troubleshooting.
When he’s not tackling diverse driver-related problems, Ivan enjoys watching good movies and spending time hiking with his family and friends.
While Windows can be challenging to manage at times, it is remarkable to acknowledge the sheer variety of errors and issues that can arise within the Windows ecosystem.
As we’ve mentioned, many weird things will happen on your computer—but fortunately, most of them can be fixed with a quick Google search or by just plain old fiddling around with some settings.
If you’ve ever started your computer and seen the session “circular kernel context logger” stopped due to the following error: 0xc0000188, then you have discovered one of the most annoying Windows errors.
This guide will show you how to fix Session ‘Circular Kernel Context Logger’ Stopped Due to the Following Error 0xc0000188?
What Is the Session “Circular Kernel Context Logger” Stopped Due to the Following Error: 0xc0000188?”
This annoying error exists among Windows devices, where users, after using their computers for a certain period, see their displays suddenly become gray and unrecognizable. And when they check the Event Viewer to get more details of the issue, they see this message: “session “circular kernel context logger” stopped due to the following error: 0xc0000188″.
Well, it is understandable if you feel concerned, as this usually renders the computer unusable, at least temporarily. But it is a common Windows error that you should not worry about.
There are various culprits behind this error, including display drivers not correctly working, corrupt files, outdated Windows operating system, and many more. And while this issue was first discovered on Windows 7, other Windows operating system versions may also experience it. We’ll talk more about this in the next section.
What Causes 0xc0000188 Error Code on Windows?
Here are some common culprits behind the 0xc0000188 error code:
- Disabled Superfetch Service – In some cases, the error is triggered because the Superfetch service is disabled. Some Windows users disable this service to improve the performance of their devices, not knowing it can cause problems with the operating system.
- Lower File Size – If the file size in the Startup Event Trace Sessions setting is set to a lower amount than what is required by the operating system, the error code 0xc0000188 may appear. Hence, increase the file size to resolve the problem.
- Malware Attacks – Malware attacks are also known to cause Windows errors like this. It helps to get rid of the malware entities once and for all to prevent causing more severe problems.
- Outdated Display Drivers – Some affected users say that an obsolete display driver causes the error. To resolve this, updating the drivers will do the trick.
Luckily, though, there are many ways to solve it. And we’ll go through the solutions below.
Basic Troubleshooting
Before you proceed with the complicated fixes, let’s begin with the basic steps that can help get rid of error code 0xc0000188.
Restart your computer.
Restarting your computer is one of the most common fixes for display errors. To restart your Windows computer, press the Windows key, type shut down in the search box, and then click on Shut Down. After shutting down, turn off your monitor and unplug it from the wall outlet. Leave it off for at least 20 minutes before turning it back on.
Check your computer’s resolution.
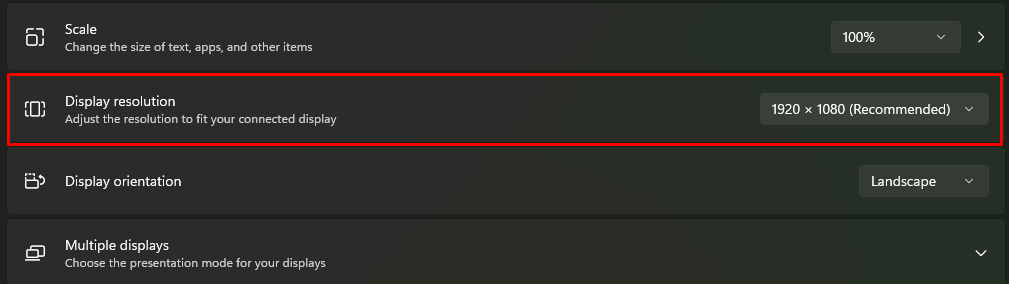
If you need to find out what resolution your screen is set at, open your Control Panel and click on Display. In the box that pops up, check the Settings tab. If it says something like 800×600 or 1024×768, you’re probably running at a lower resolution than you want.
You can usually change this setting by right-clicking on an empty part of your desktop and going into properties. Click on the Settings tab in the window that pops up, and then choose what sort of resolution you want to run in. Once that’s set, save it by clicking OK and restarting your computer.
Fix #1: Install any available Windows updates.
Installing any available Windows updates is vital to keep your computer secure and running smoothly. Updates often include bug fixes and security updates to help protect you against viruses and malware.
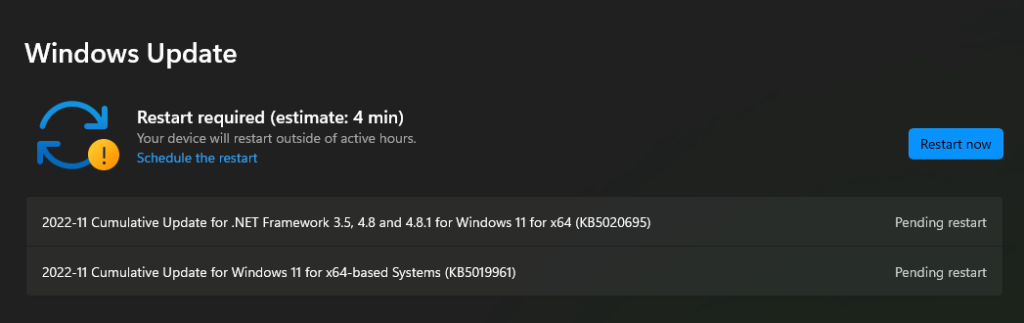
You can check for Windows updates by going to Settings > Update & Security > Check for Updates in your Control Panel. If updates are available, you’ll be prompted to install them.
You should also set up a system restore point before installing an update to quickly get back to a stable point if something goes wrong.
Here’s how to create a system restore point on Windows 10:
- Go to Start > Settings > System > Backup; under Create a system image of this PC, select System Image Backup and click Next.
- Select whether or not you want an extra copy of your files saved with the system image (we recommend selecting this), and then click Next again.
- Click Create now, wait while it creates the backup, then click Close when finished.
Fix #2: Update your outdated display driver.
A display driver is a software component that enables your computer to interact with your graphics card. It is responsible for taking information from the operating system and translating it into instructions that the graphics card can understand. The driver then sends these instructions to the GPU, which processes them.
Sometimes, when your display driver is outdated, it can cause an error in Windows called Session ‘Circular Kernel Context Logger’ stopped due to the following error 0xC0000188.
This is often resolved by updating your display drivers again. To do this:
- Go to Device Manager, right-click on the name of your graphics card, and select Update Driver Software.
- Select Search automatically for updated driver software to let your system find new driver versions.
- After installing the new version of your display driver from a list of manufacturers (e.g., Intel), reboot your computer to finish installing everything needed for the new driver to work correctly.
Alternatively, you can use a third-party driver updater tool to install any outdated driver automatically. This will also keep you from installing incompatible driver versions that will only cause more problems.
Fix #3: Perform malware scans.
Malware can sometimes cause error 0xC0000188 and crashes. You can try the following steps if you think your computer has malware.
- Run a virus scan by downloading an antivirus program such as AVG, Avast, or Avira.
- Check for any suspicious programs that may have been installed on your computer. If any are found, they should be removed using the manual uninstallation procedure from the website of the program’s developer or Windows Control Panel in Programs and Features.
- Try booting in Safe Mode to see if that fixes your problem. If it does, it’s likely a driver problem, and you can fix it by following the previous fix.
Fix #4: Check if the Superfetch service is up and running.
You could see the session “circular kernel context logger” stopped due to the following error: 0xc0000188 because the Superfetch service is disabled for some reason. And to fix this, all you have to do is enable the service, and the error code 0xc0000188 will be nowhere to be seen.
Here’s a detailed guide to enabling the Superfetch service:
- Press the Windows logo + R on your keyboard to open and access the Run applet.
- Input services.msc into the blank field and hit Enter.
- Navigate to the Services section, scroll down, and find Superfetch.
- Right-click on the service and select Properties.
- Click on the dropdown menu that says Startup Type.
- Select Automatic.
- If the service is disabled, select Start to enable the Superfetch service. Otherwise, skip this step.
- Hit the Apply button, then OK.
- Exit the Services manager and reboot your Windows computer.
Fix #5: Roll back your display driver.
The display driver is a piece of software that allows Windows and other programs on your computer to communicate with hardware components.
If you’ve had a recent hardware component installed, such as a second display or a keyboard, the problem may be due to a problem with the driver for this new hardware. To fix this, roll back the display driver by following these steps:
- Right-click on Computer and select Properties.
- Select the Device Manager option from the left-hand menu.
- In the Device Manager window, select Display adapters.
- Click on the + symbol next to your display adapter and then click on Roll Back Driver.
- Restart your computer after completing this step.
Fix #6: Increase the Startup Event Trace Session’s maximum file size.
The maximum file size of the Startup Event Trace Sessions is set at 250 MB by default.
To increase this size, do this:
- Right-click on Computer and click Properties.
- Click Advanced System Settings, then click the Advanced tab.
- Click Settings in the Performance section, then click Change in the Virtual Memory section. Increase the Maximum Size (KB) from 250 to 524288 or higher.
If you can’t find these options, take this route instead:
- Launch the Start menu and input cmd into the Search field.
- Click on the most relevant result and select Run as Administrator to launch Command Prompt with administrator privilege.
- Then input perfmon and hit Enter. This will launch the Performance Monitor window on your screen.
- Navigate to the Data Collector Sets section and double-click on it to expand it.
- Select Startup Event Trace Sessions.
- Find the ReadyBoot entry and double-click on it.
- Go to the Stop Condition tab and replace the value with 40.
- Hit Apply, then OK.
- Exit the Performance Monitor window and the Command Prompt.
Fix #7: Use a PC repair tool.
PC repair tools are a great way to fix display errors on a Windows machine. Even if you’re not an expert, you can use these to resolve all kinds of errors.
The best part about a PC repair tool is that it is easy to use and doesn’t cost a lot. It’s worth trying before taking your computer into the shop!
You might find it hard to believe, but these PC repair tools really do work. All of them provide a quick and easy way to scan your system to check for any issues that may be causing the problem with your display.
In Conclusion
The session “circular kernel context logger” stopped due to the following error: 0xc0000188 can be easy to fix for some, but others may require step-by-step help from guides like this. That is why we outlined this to be as detailed and clear as possible so that you can get back on track in no time!
Let us know which of the above fixes worked. Comment below!
Give us some love and rate our post!
Imagine, while restarting or turning on your PC, suddenly you experience a Blue of Death screen containing a message, Readyboot stopped due to 0xc0000188 error. This problem was first experienced by Windows 7 users and now it’s common in all versions of windows. Generally, you can see this problem when you start your pc or during restarting time.

It may cause a slow boot time when you turn on your PC. On the other hand, the operation of the device won’t be affected because it is just related to boosting the boot time of a computer. There is nothing to worry about this, by following some easy steps, this issue can be solved in a minute. So, without any further discussion let’s see the steps to solve this issue.
What Is ReadyBoot and Why Does The Error Happen?
Readyboot is a feature of Microsoft Windows which is implemented in Windows to boost the performance without embedding additional RAM. It boosts up the boot time of the computer. It is suggested according to users, that the maximum size should be set to 256 MB but not more than that. However, storage of 128 MB is inch perfect for avoiding any circumstances.
“ReadyBoot Stopped” or “Kernel Event Tracing- Error 3” this issue occurred when the allocated storage size is less than the required one. Default size of 20 MB is allocated for ReadyBoot, and when the file size exceeded more than the allocated storage, an error arises.
The one and only solution is to increase the allocated size of Readyboot. There are some easy steps by which you can fix this.
Step 1: Go to the search option manually or press Windows + S and type Performance Monitor.
Step 2: Open Performance Monitor and expand Data Collector Sets.
Step 3: After expanding, click on Startup Event Trace Sessions and look for ReadyBoot on the right side of the screen. Double click on ReadyBoot
Step 4: Select Stop Condition and set the allocated size to 128 to 256. At the bottom of near the screen, the option of increasing the can be found.
Step 5: Then apply the changes and click ok.
Now exit and restart the PC. If you want to check if the issue is solved or not then open the Run dialog box by pressing Windows + R then type “eventvwr.msc” and press enter.
Frequently Asked Questions
What Prefetch folder actually is?
Prefetch is known as a file that is used to help windows load faster. Readyboot system, a feature of Microsoft windows that traces boot time history and analyze boot time. It helps to speed up the booting time by tracing previous boot history and the programs while starting your computer. Windows save this information in a form of small files. These files are kept in the Prefetch folder.
Can the Prefetch files be deleted?
Yes, you can delete the files. But it is suggested to do not to delete them as it helps windows to speed up the boot time. Prefetch files take a little space and it won’t bother you unless you are running out of space and then you can delete them to regenerate the space.
Will there be any issue if ReadyBoot is disabled?
No, there will be no issue if you disable the ReadyBoot feature. It just helps to speed up the boot time and nothing else. If you want to disable it:
Step 1: Go to the search option manually or press Windows + S and type Performance Monitor.
Step 2: Open Performance Monitor and expand Data Collector Sets.
Step 3: After expanding, click on Startup Event Trace Sessions and look for ReadyBoot on the right side of the screen and disable it.
Conclusion
Without adding extra RAM, you can speed up the boot time just by using this feature of windows. When this feature crosses the allocated size then it stopped and the error arises. You can follow the mentioned steps by which you can solve this issue in a minute. After following the steps, if there arrive any questions or you face any issues then feel free to comment below.