
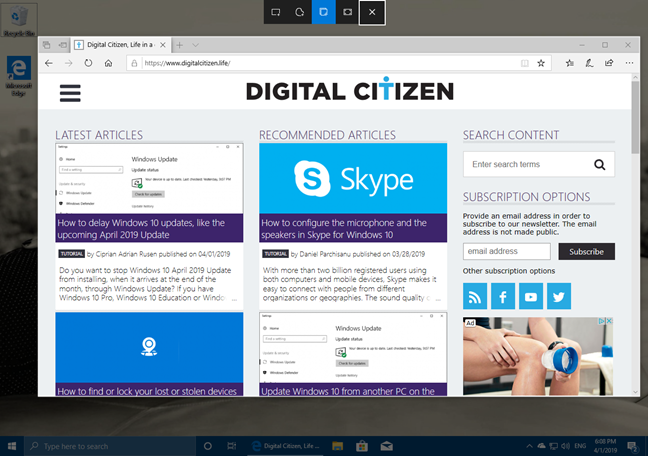
В осеннем обновлении Windows 10 версии 1809 появился новый инструмент для создания скриншотов экрана или его области и простого редактирования созданного снимка экрана. В разных местах системы этот инструмент называется слегка по-разному: Фрагмент экрана, Фрагмент и набросок, Набросок на фрагменте экрана, но имеется в виду одна и та же утилита.
В этой простой инструкции о том, как сделать скриншот Windows 10 с помощью новой функции, которая в будущем должна будет заменить собой встроенную утилиту «Ножницы». Остальные способы для создания снимков экрана продолжают работать так же, как и раньше: Как создать скриншот Windows 10.
Как запустить «Фрагмент и набросок»
Я нашел 5 способов запустить создание скриншотов с помощью «Фрагмент экрана», не уверен, что все они пригодятся вам, но поделюсь:
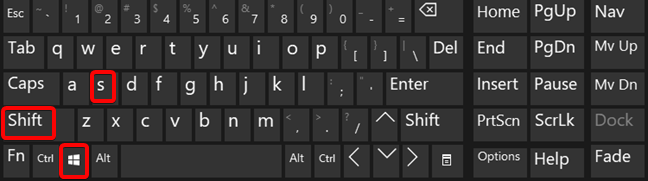
- Использовать горячие клавиши Win + Shift + S (Win — это клавиша с эмблемой Windows).
- В меню пуск или в поиске на панели задач найти приложение «Фрагмент и набросок» и запустить его.
- Запустить пункт «Фрагмент экрана» в области уведомлений Windows (может отсутствовать там по умолчанию).
- Запустить стандартное приложение «Ножницы», а уже из него — «Набросок на фрагменте экрана».
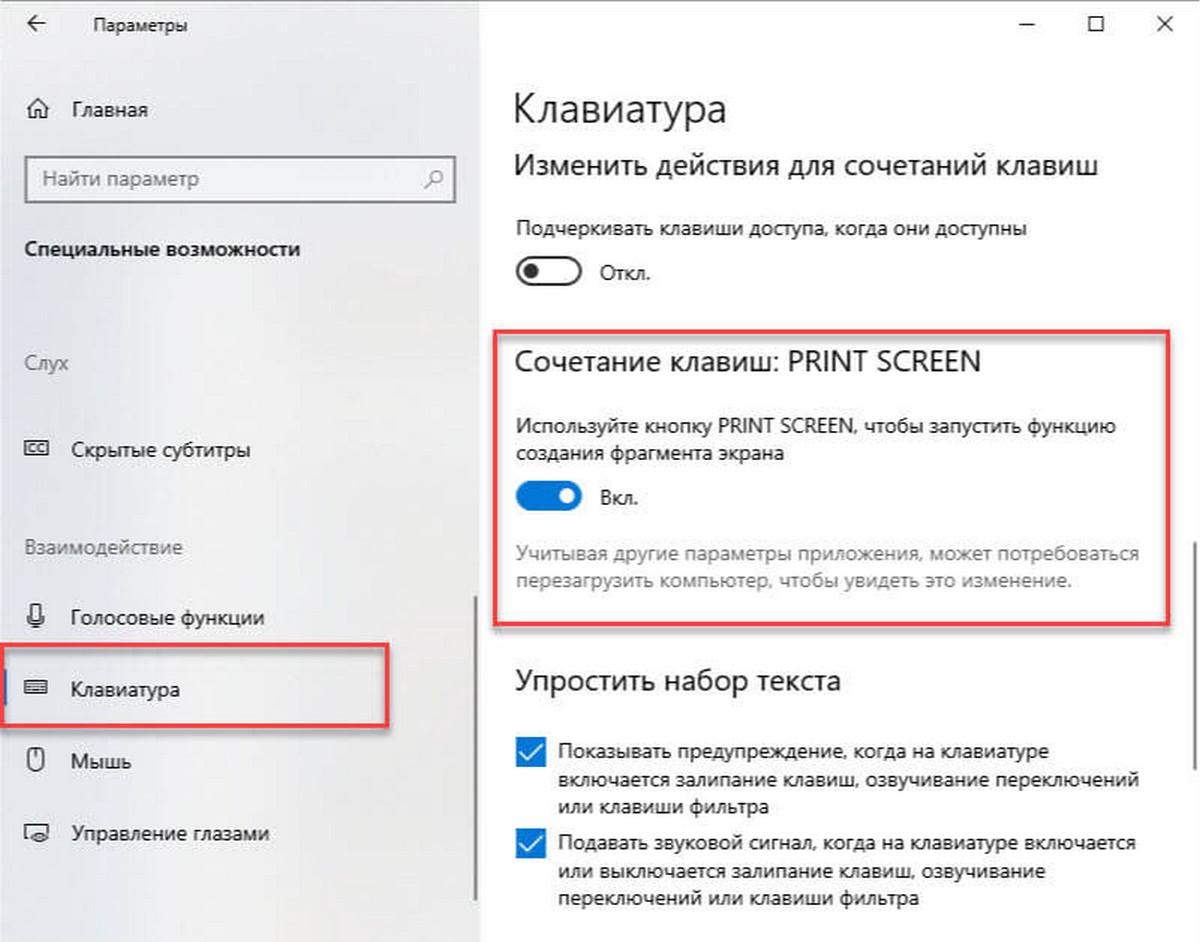
Также есть возможность назначить запуск утилиты на клавишу Print Screen: для этого зайдите в Параметры — Специальные возможности — Клавиатура.
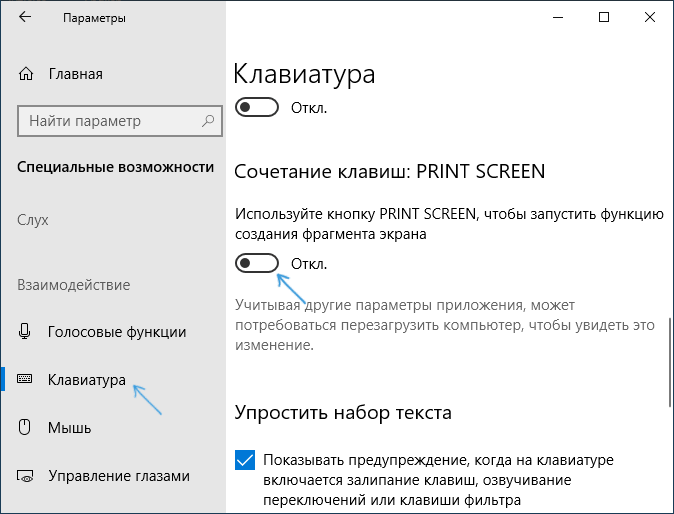
Включите пункт «Используйте кнопку Print Screen, чтобы запустить функцию создания фрагмента экрана».
Создание снимка экрана
Если запускать утилиту из меню Пуск, поиска или из «Ножницы», откроется редактор созданных скриншотов (где нужно нажать «Создать» для того, чтобы сделать снимок экрана), если же использовать остальные способы — сразу откроется создание скриншотов, работают они слегка отличающимся образом (будет отличаться второй шаг):
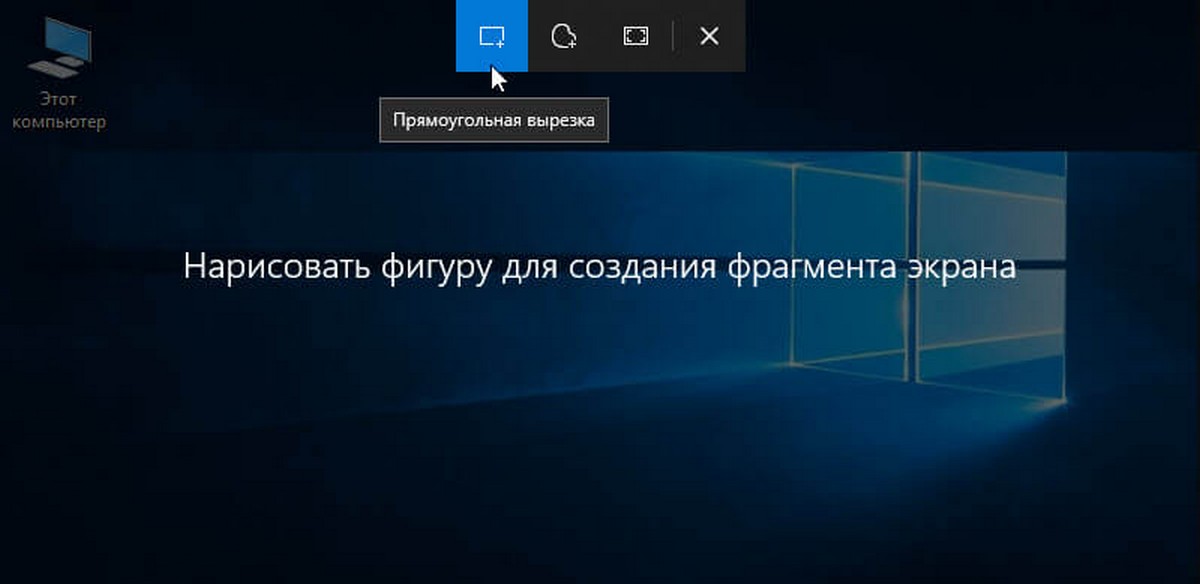
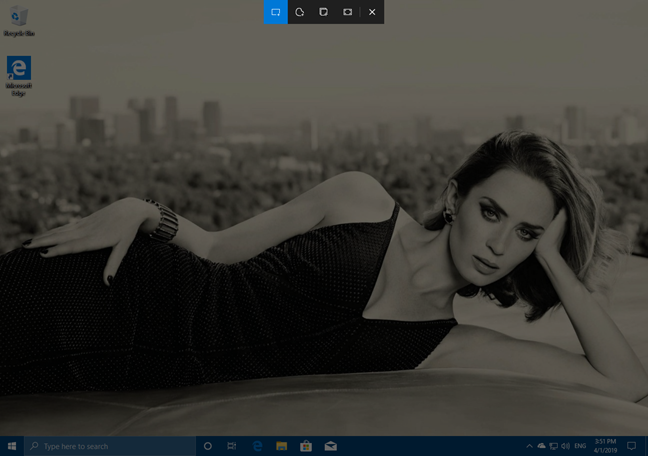
- Вверху экрана вы увидите три кнопки: для создания снимка прямоугольной области экрана, фрагмента экрана произвольной формы или скриншота всего экрана Windows 10 (четвертая кнопка — для выхода из инструмента). Нажмите по нужной кнопке и, если требуется выберите нужную область экрана.

- Если вы запускали создание скриншота в уже запущенном приложении «Фрагмент и набросок», вновь созданный снимок откроется в нём. Если с помощью горячих клавиш или из области уведомлений, скриншот будет помещен в буфер обмена с возможностью вставить в любую программу, а также появится уведомление, по нажатию на которых откроется «Фрагмент экрана» с этим изображением.

В приложении «Фрагмент и набросок» вы можете добавить надписи на созданный скриншот, удалить что-то с изображения, обрезать его, сохранить его на компьютер.
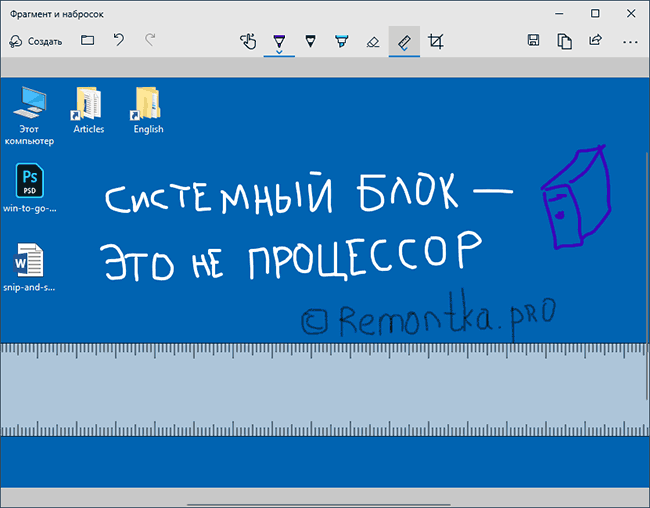
Здесь же присутствуют возможности для копирования отредактированного изображения в буфер обмена и стандартная для приложений Windows 10 кнопка «Поделиться», позволяющая отправить его через поддерживаемые приложения на компьютере.
Не берусь оценить, насколько новая возможность удобна, но, думаю, для начинающего пользователя будет полезна: большинство функций, которые могут потребоваться, присутствуют (кроме, разве что создания скриншота по таймеру, эту возможность вы можете найти в утилите «Ножницы»).
How to Use Snip and Sketch in Windows 10
In today’s digital age, capturing and sharing screens has become a vital part of productivity and communication. Whether it’s for providing feedback, collaborating with colleagues, or even creating instructional content, screenshots have a myriad of applications. Among the various tools available for this purpose, Snip and Sketch is one of the most user-friendly and efficient screen capture utilities built into Windows 10. This article will guide you through all the essential aspects of using Snip and Sketch, including its features, how to access it, and some tips and tricks to enhance your experience.
Understanding Snip and Sketch
Snip and Sketch is a versatile tool that allows users to capture screenshots in various formats, annotate them, and share them directly from the application. It consolidates and improves upon the functionality of its predecessor, the Snipping Tool, enabling users to take screenshots with greater flexibility and efficiency. The tool supports snapping rectangular selections, free-form shapes, window captures, and full-screen captures. With built-in annotation capabilities, including drawing and highlighting tools, Snip and Sketch is tailored for both casual users and professionals.
Accessing Snip and Sketch
There are multiple ways to access Snip and Sketch in Windows 10:
-
Using the Keyboard Shortcut:
- The quickest method to invoke Snip and Sketch is by using the keyboard shortcut
Windows Key + Shift + S. This will bring up a small toolbar at the top of your screen with various snipping options.
- The quickest method to invoke Snip and Sketch is by using the keyboard shortcut
-
Using the Start Menu:
- Click on the Windows icon in the lower-left corner of your screen to open the Start Menu. Search for «Snip & Sketch» and select it from the search results to launch the application.
-
Using the Action Center:
- You can also access Snip and Sketch from the Action Center. Click on the Action Center icon (the speech bubble icon in the lower-right corner) and look for the «Screen Snip» tile. Once clicked, it will activate the screen capture mode.
Taking a Screenshot with Snip and Sketch
Once you have accessed Snip and Sketch, you can begin taking screenshots. Here’s a detailed guide on different snipping options:
-
Rectangular Snip:
- Select the rectangular option from the snipping toolbar. Click and drag your mouse to create a rectangular selection over the area you wish to capture. Once released, the captured image will be copied to your clipboard and will also appear as a notification in the lower-right corner.
-
Freeform Snip:
- This option allows you to draw any shape around the area you want to capture. Click on the freeform snip button and use your mouse or stylus to outline the desired area. Similarly, the snip will be copied to your clipboard for immediate use.
-
Window Snip:
- If you want to capture an entire window, select this option. After clicking this button, you can click on the specific window you wish to capture, and it will automatically be snipped.
-
Full-Screen Snip:
- For capturing the entire screen, select this option. It instantly captures everything displayed on your screen, which can be especially useful when documenting an entire desktop interface.
Annotating Your Snip
After capturing a screenshot, Snip and Sketch provides several tools for annotating your image:
-
Drawing and Sketching:
- Use the pen tool to draw on your screenshot. You can customize the thickness and color of the pen according to your preference, allowing for easy markings, circles, lines, or any custom illustrations.
-
Highlighter:
- The highlighter tool is perfect for drawing attention to specific parts of your screenshot. Choose a vibrant color to make your highlights stand out.
-
Eraser:
- If you make a mistake or want to remove something, the eraser tool will allow you to erase specific parts of your annotations quickly.
-
Ruler:
- For precision drawing, the ruler tool can be used to create straight lines. You can rotate the ruler for angled lines.
-
Text Tool:
- By selecting the text tool, you can add comments, labels, or instructions directly onto your screenshot. The text box allows for editing and formatting options like size and font.
-
Crop and Save Options:
- You can also crop the image further if needed, and after completing your annotations, use the save icon to store your snip on your computer, in various formats, including PNG, JPG, and others.
Saving and Sharing Your Screen Snips
Once you have captured and annotated your screenshots, it’s essential to know how to save or share them for maximum utility:
-
Saving Your Snips:
- Click on the save icon located on the top toolbar of Snip and Sketch. You can choose your preferred file format (usually PNG), name your file, and select the destination on your computer where you want to save it.
-
Copying to Clipboard:
- If you wish to paste your screenshot into a document or email, you can simply copy your captured image to the clipboard by using the keyboard shortcut
Ctrl + Cand then pasting it (Ctrl + V) wherever needed.
- If you wish to paste your screenshot into a document or email, you can simply copy your captured image to the clipboard by using the keyboard shortcut
-
Sharing Options:
- You may directly share the screenshot using the Share button in Snip and Sketch, which provides options to send it via email, social media, or other applications installed on your Windows 10. This is particularly useful for collaborative environments.
-
Accessing Snips after Capturing:
- All captured snips remain available to you within the Snip and Sketch app. You can access previously taken screenshots by opening the app and navigating to the “All Snips” section, ensuring you never lose a crucial capture.
Tips and Tricks to Enhance Your Experience
While Snip and Sketch provides a straightforward interface, there are some tips and tricks you can utilize to maximize your efficiency and effectiveness with the tool:
-
Keyboard Shortcuts:
- Familiarize yourself with keyboard shortcuts, such as
Ctrl + Nfor a new snip,Ctrl + Sto save, andCtrl + Zfor undo. Knowing these shortcuts will significantly speed up your workflow.
- Familiarize yourself with keyboard shortcuts, such as
-
Quick Access via Windows Ink Workspace:
- If you are using a touchscreen or a stylus, you can also access Snip and Sketch through the Windows Ink Workspace for a more intuitive experience.
-
Integrate with Other Applications:
- Consider using Snip and Sketch alongside other productivity tools like Microsoft OneNote or Microsoft Teams to enhance collaboration. Screenshots often serve as effective visuals for discussions or presentations.
-
Use the Delay Feature:
- Snip and Sketch has a delay feature that allows you to take a screen snip after a set interval (3 or 10 seconds). This is particularly useful if you need to capture contextual menus that would disappear with immediate screenshots.
-
Check for Updates:
- Microsoft frequently updates its software. Ensure your Windows 10 is up to date to access the latest features and improvements in Snip and Sketch.
Troubleshooting Common Issues
While Snip and Sketch is generally reliable, sometimes users might encounter issues. Here are some common problems and their solutions:
-
Snipping Tool Not Opening:
- If Snip and Sketch fails to open, check for any pending Windows updates. Restart your system or run the Windows Store apps troubleshooter to resolve the issue.
-
Cannot Save Snips:
- Ensure you have sufficient disk space available on your drive. If you’re still having trouble, try running the app in compatibility mode or resetting it via the App settings.
-
Missing Features:
- Occasionally, some functionalities might feel absent. Make sure you have enabled all necessary permissions within your settings, and confirm that Snip and Sketch is set as your default screenshot tool.
Conclusion
Snip and Sketch is an essential tool for anyone working on Windows 10 who needs to capture screenshots effectively and efficiently. Its combination of annotation features, flexibility in capturing, and sharing options makes it a valuable asset in both personal and professional settings. By understanding its functionalities and applying the tips and tricks mentioned, you can enhance your productivity and streamline your workflow. Whether you’re a student, professional, or simply someone who frequently shares digital content, mastering Snip and Sketch will undoubtedly augment your digital communication toolkit. Embrace this powerful utility and transform the way you capture and share information across your digital devices.
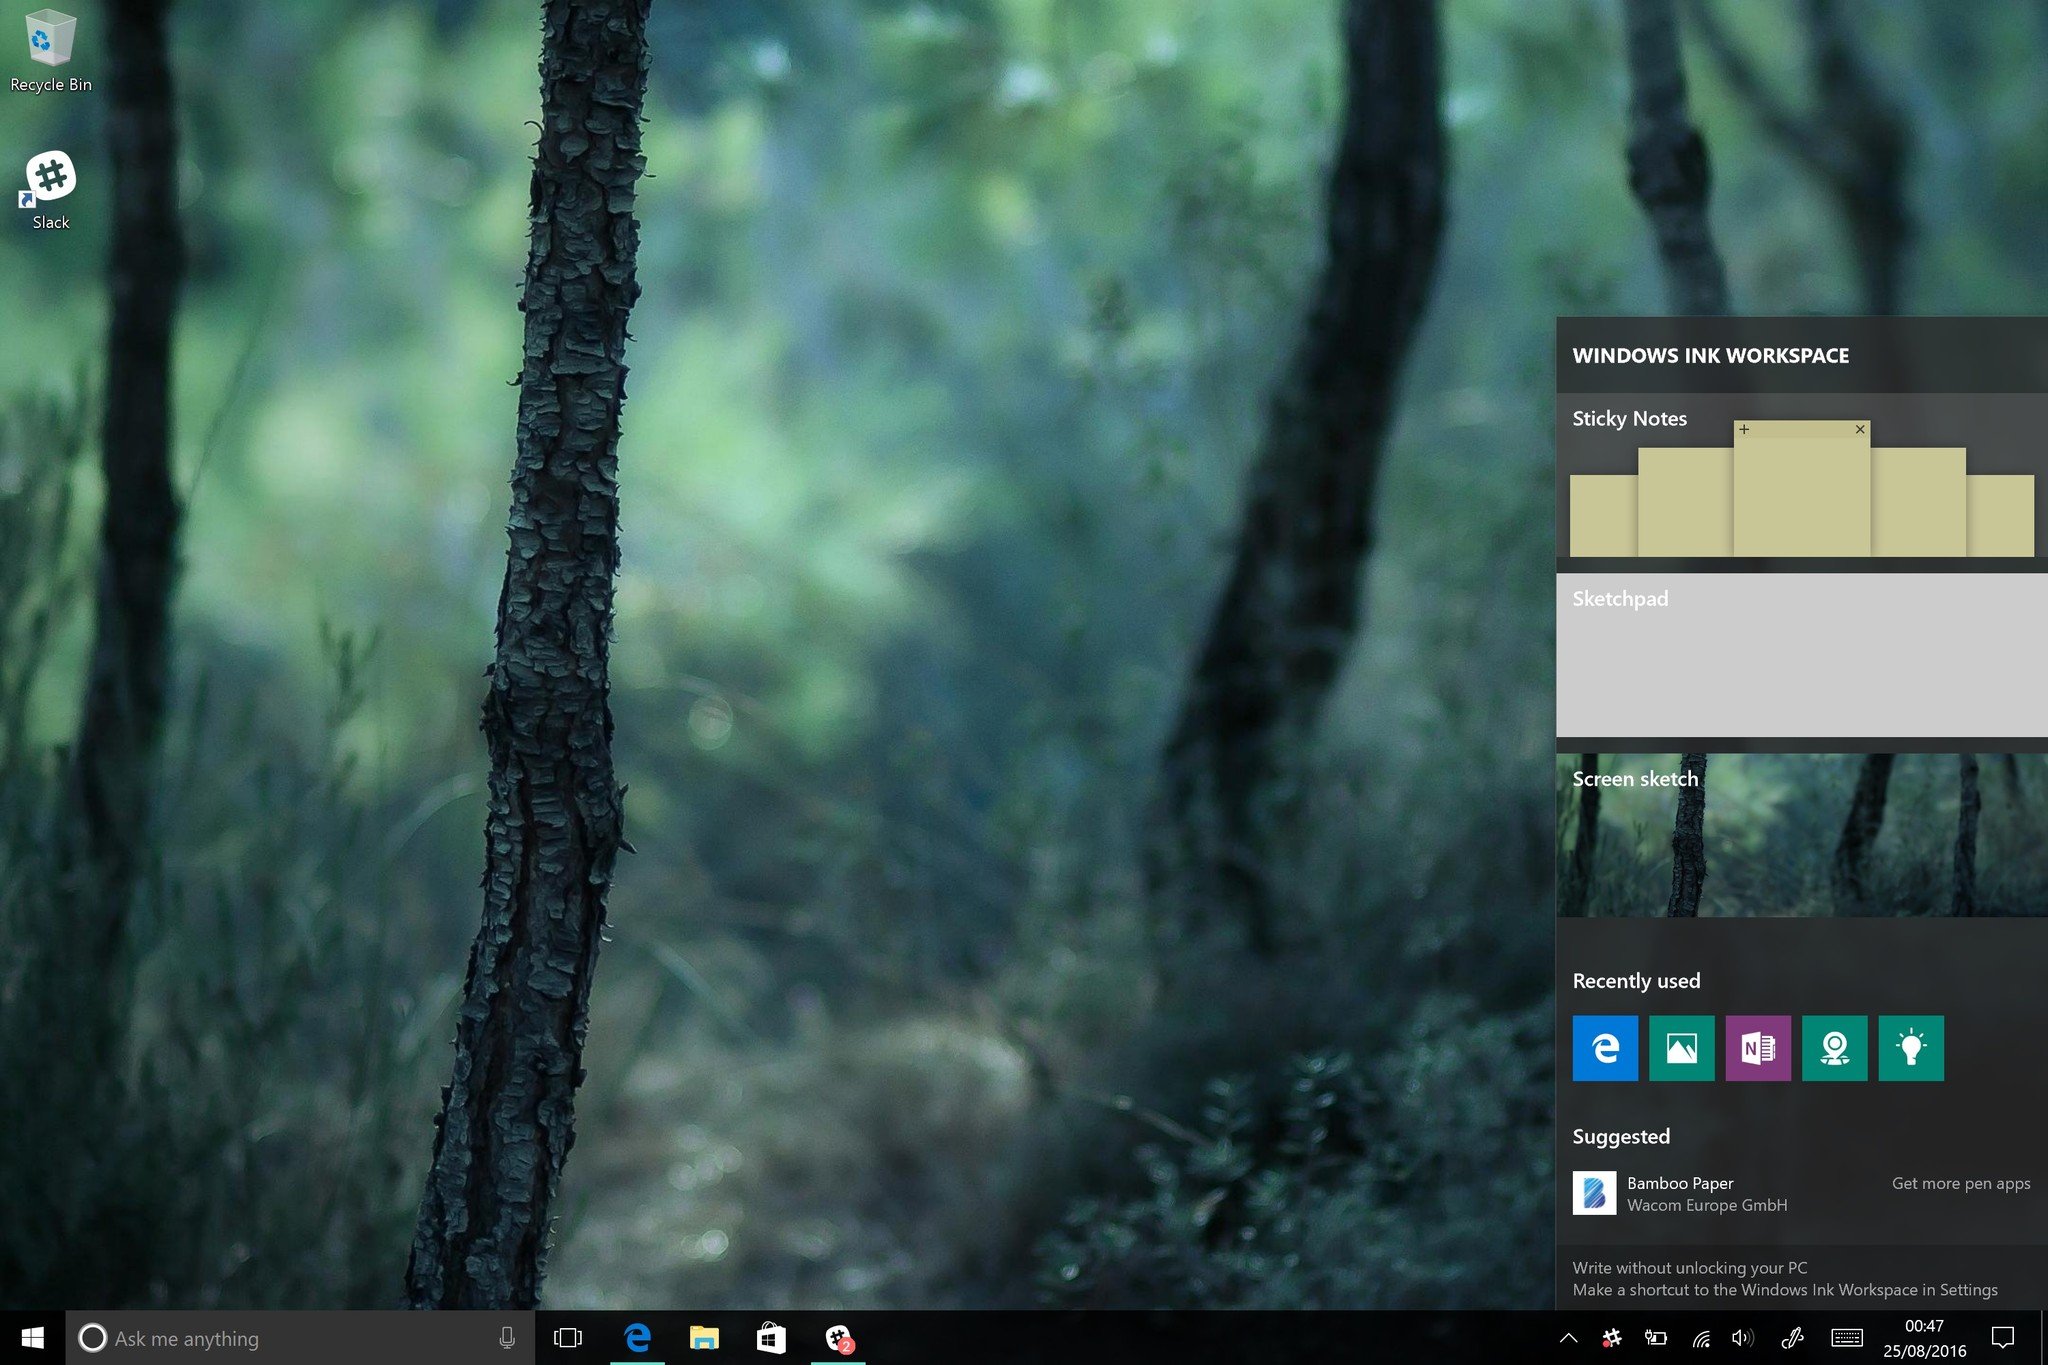
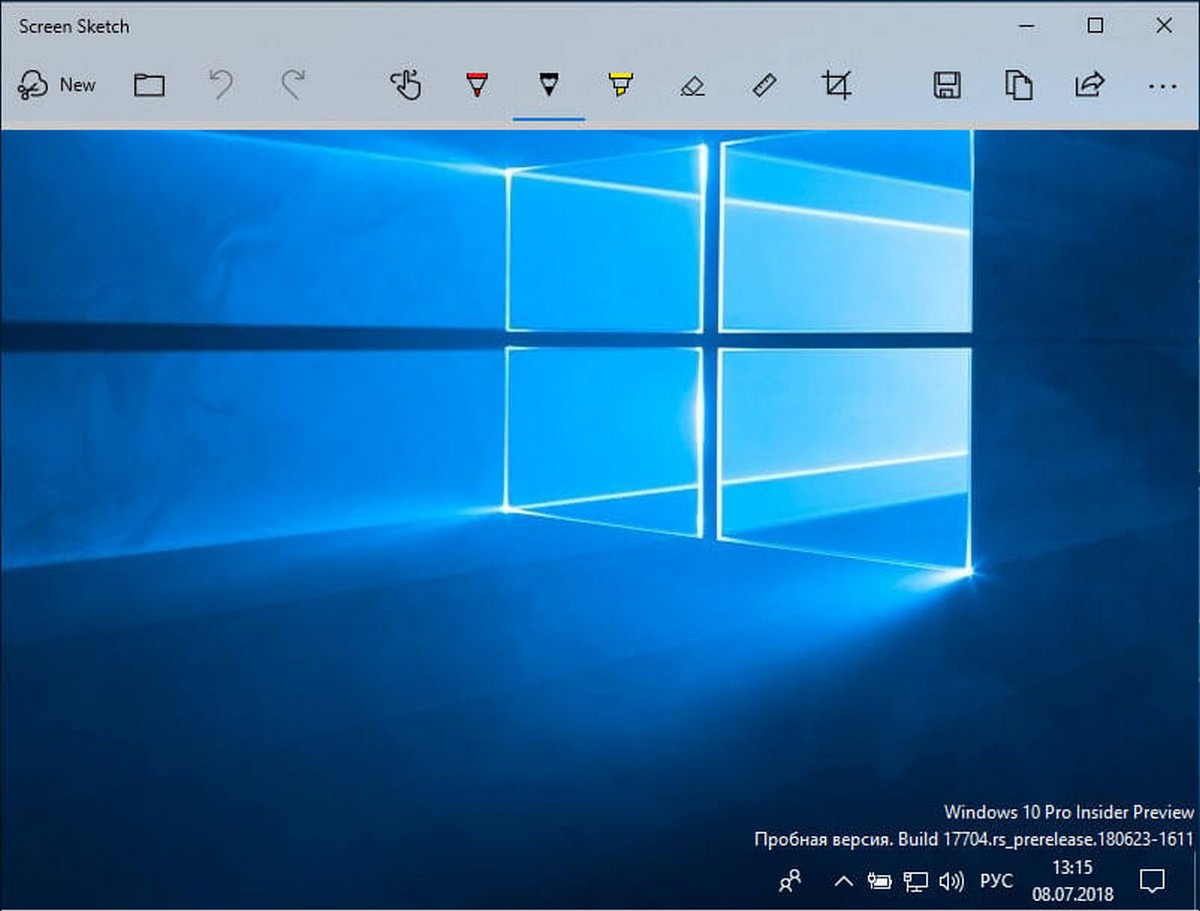
Screen Sketch is a new feature available in the Windows 10 Anniversary Update, part of the new Windows Ink Workspace feature-set. It allows tablet users to doodle and take notes on their screen directly on their tablets in a dedicated inking environment, equipped with virtual rulers, pen-types and more. Here’s how to use it.
How to open Screen sketch
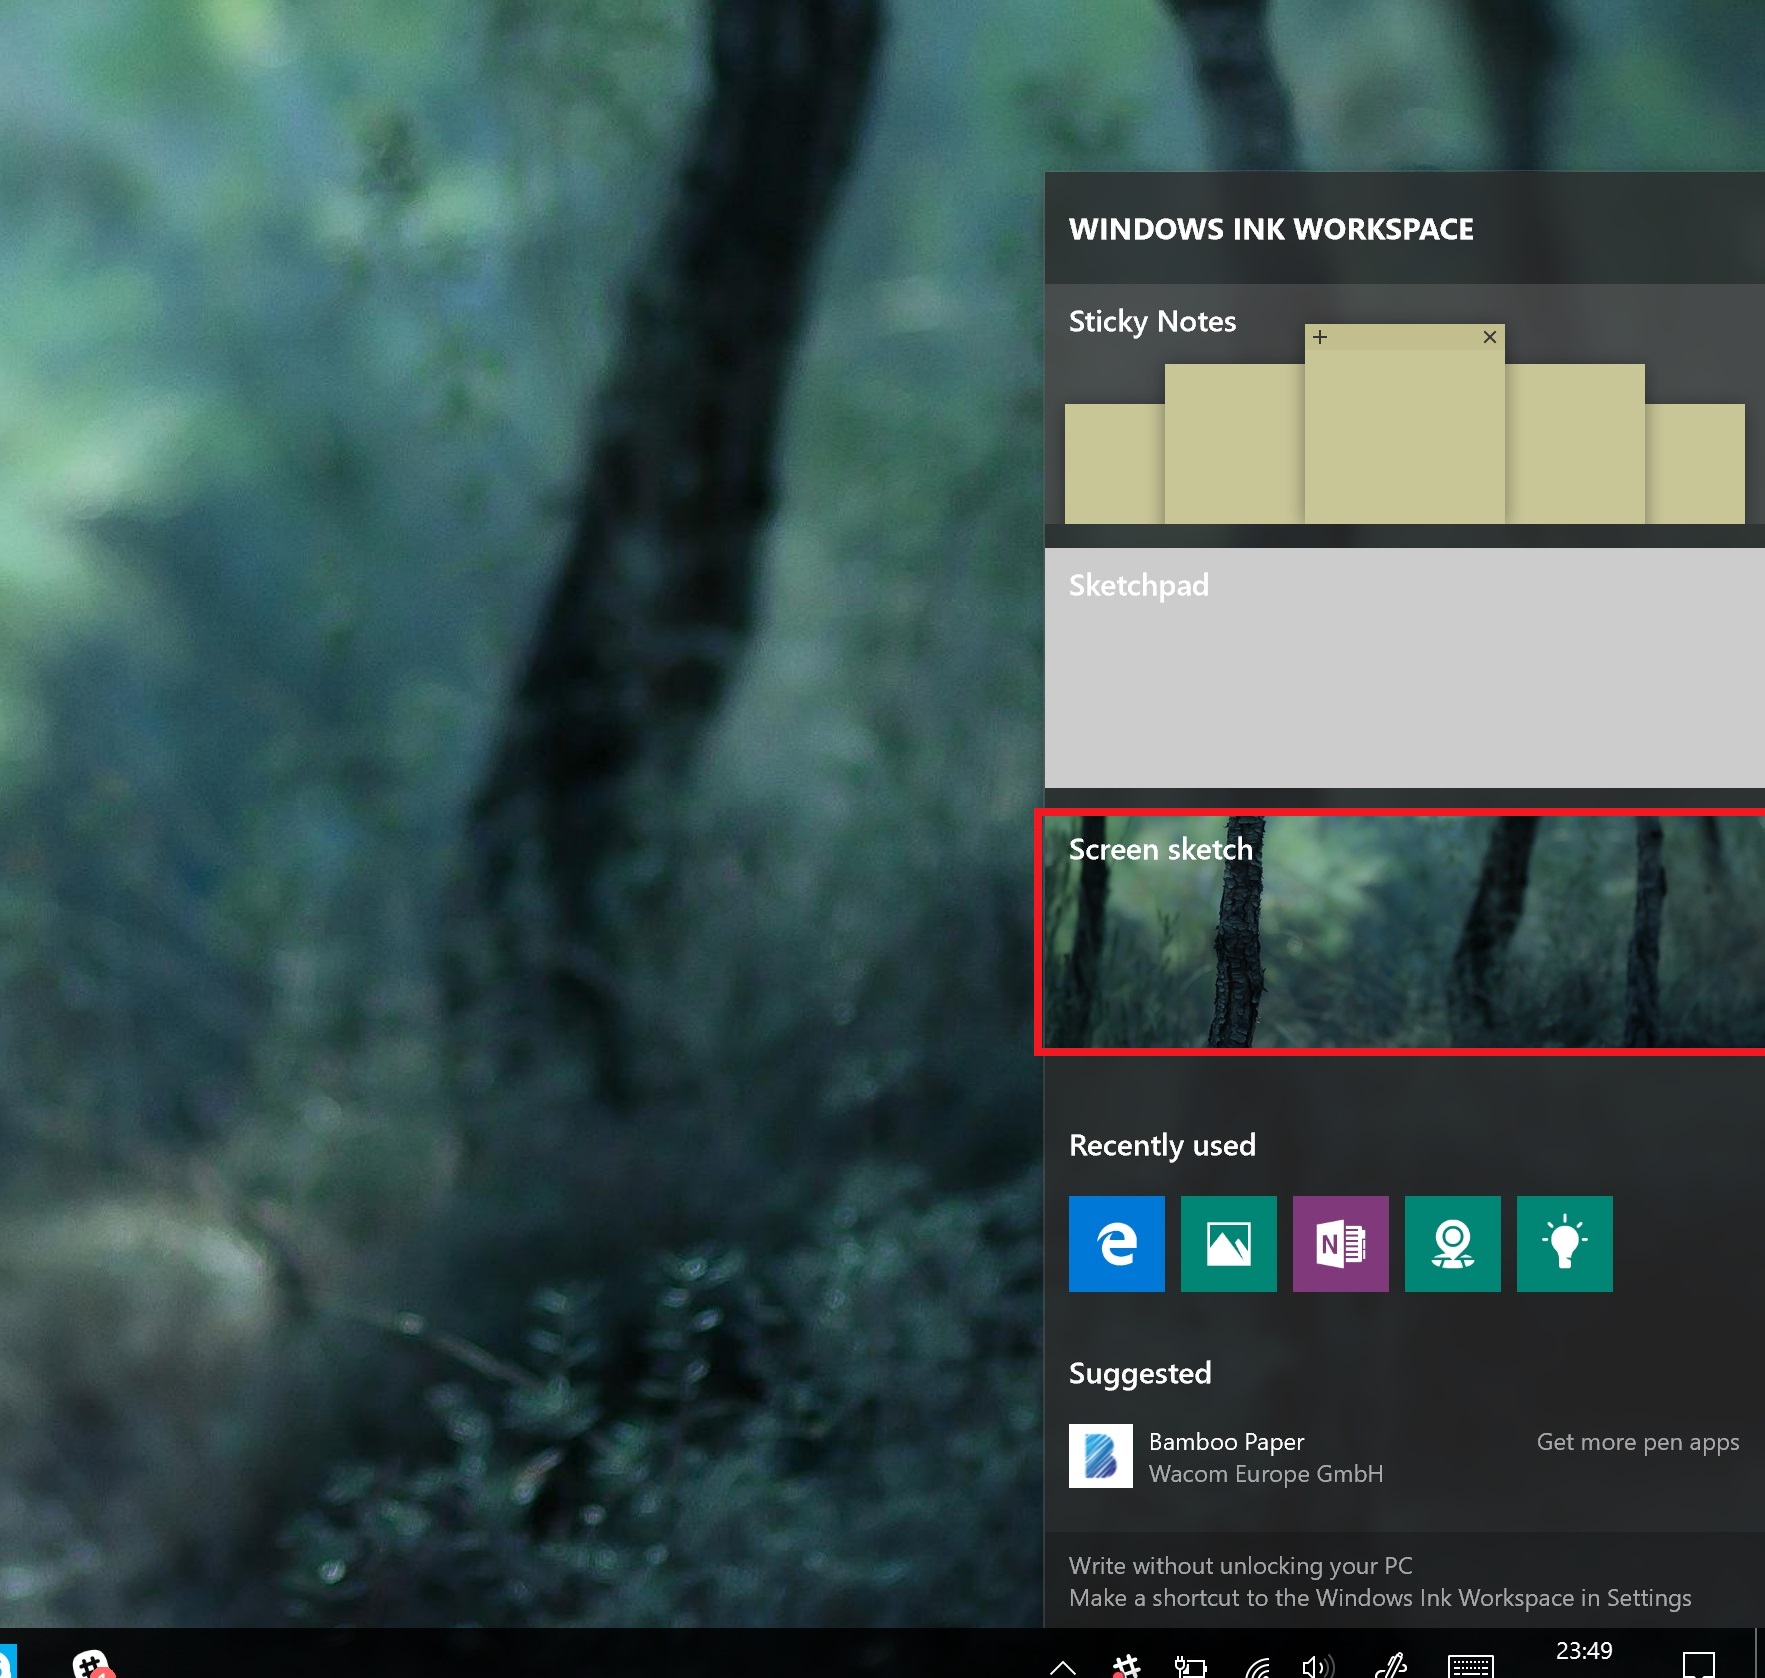
- Tap the Pen icon on the taskbar to open the Ink Workspace.

- Tap the «Screen sketch» block. It will be the third block in the list. It will automatically take a screenshot of your display and load it for your sketching.
How to change pen type
- Navigate to top right of screen where pen bar is.
- Select either of the first three icons located on left of the bar. These icons look like different variations of a pen.
The first three icons are different kinds of pen-types. You have the option of the following:
- Pen
- Pencil
- Highlighter
How to change color and size of selected pen
- Tap the icon of the pen you have selected.
- Choose color from dropdown menu.
- Slide «size» slider to the left to decrease the size of the pen ink and to the right to increase.
How to use the eraser
- Navigate to the pen bar at the top right of the screen.
- Select the eraser icon. This icon looks like an eraser erasing a line.
- Drag the pen tip of your sketch to erase that potion.Tapping the eraser icon a second time will erase all ink on the screen.
How to use the virtual ruler
The Sketch pad features a new virtual ruler that makes drawing straight lines super easy on a touch screen. Here’s how to use it.
- Navigate to the pen bar at the top right of the screen
- Select the ruler icon. This looks like a diagonal ruler.
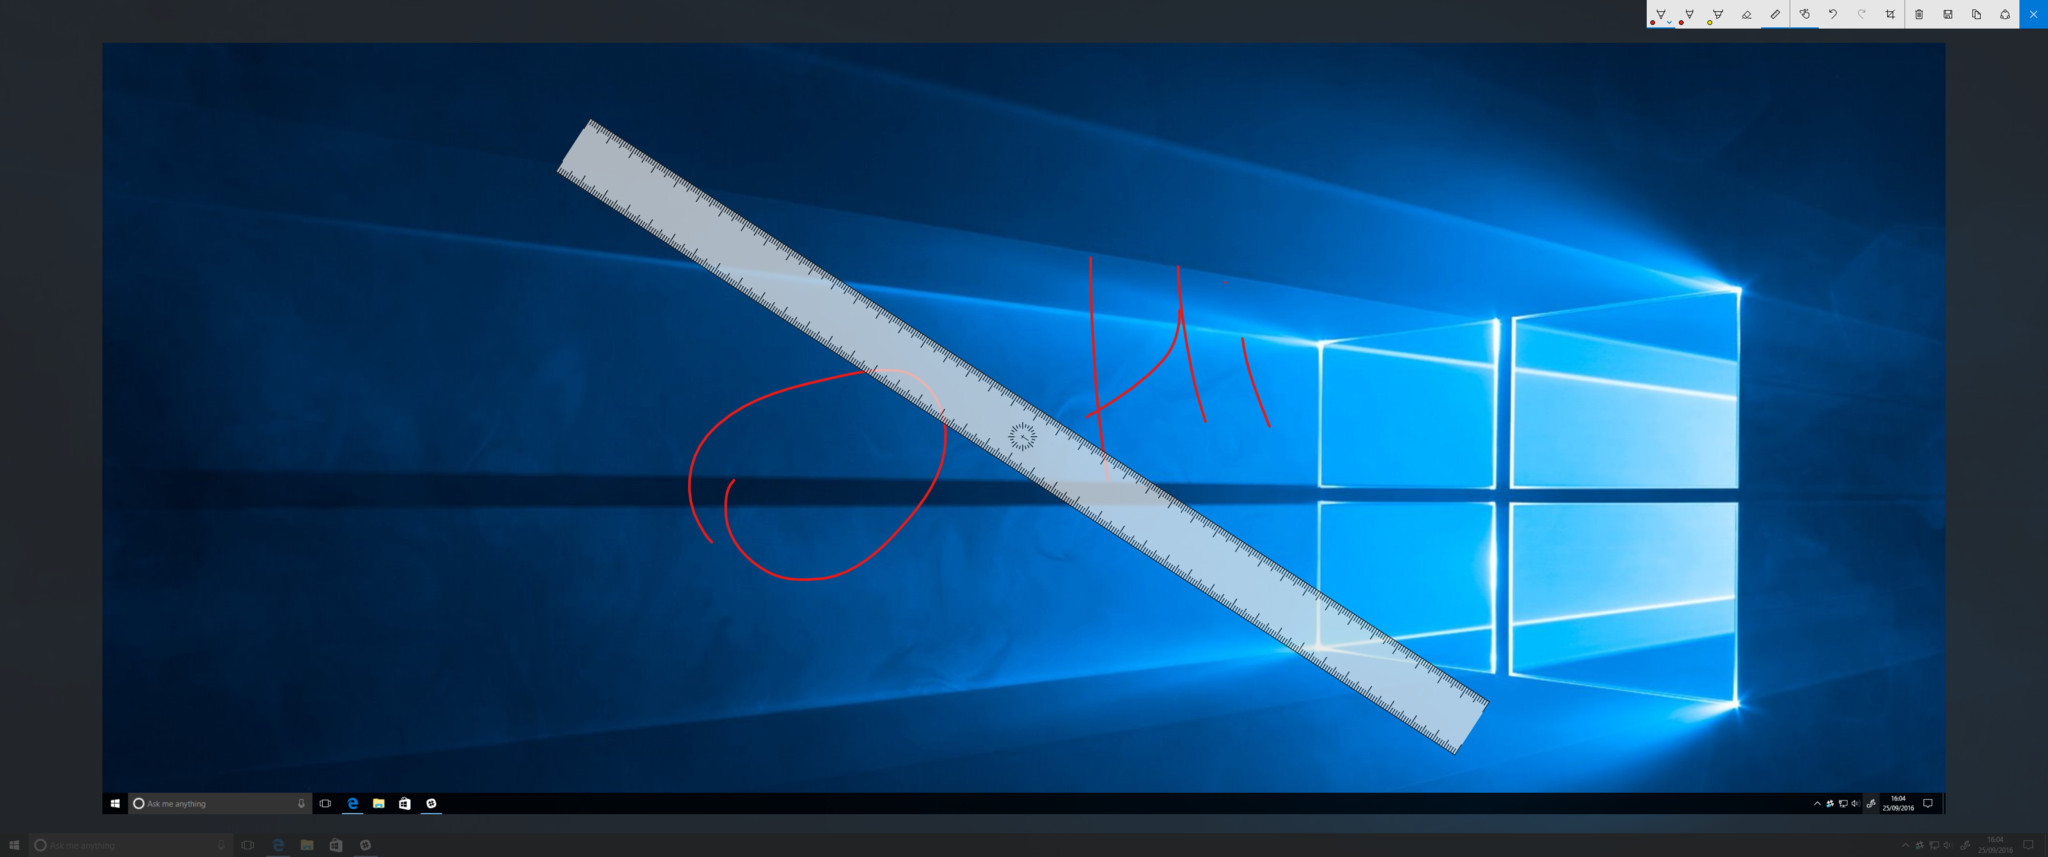
- Use two fingers or mouse scroll wheel to rotate and position the ruler.
- Select your pen.
- Draw a line down side of ruler. The line will automatically snap to the ruler.
How to switch between pen input and touch input
- Navigate to the pen bar at the top right of the screen.
- Select **input switch button* to switch between pen and touch input. It looks like a hand pointing up.
How to undo and redo Ink strokes
- Navigate to the pen bar at the top right of the screen.
- Select the undo button to undo the last action. It looks like an arrow icon looping back to the left.
- Select the redo button to undo the last undo. It looks like an arrow icon looping to the right.
How to crop your sketch
- Navigate to the pen bar.
- Select the crop button, which looks like two right angles overlapping each other with a line going diagonally through them.
- Position the crop area by dragging the white circles at each corner to resize the highlighted area.
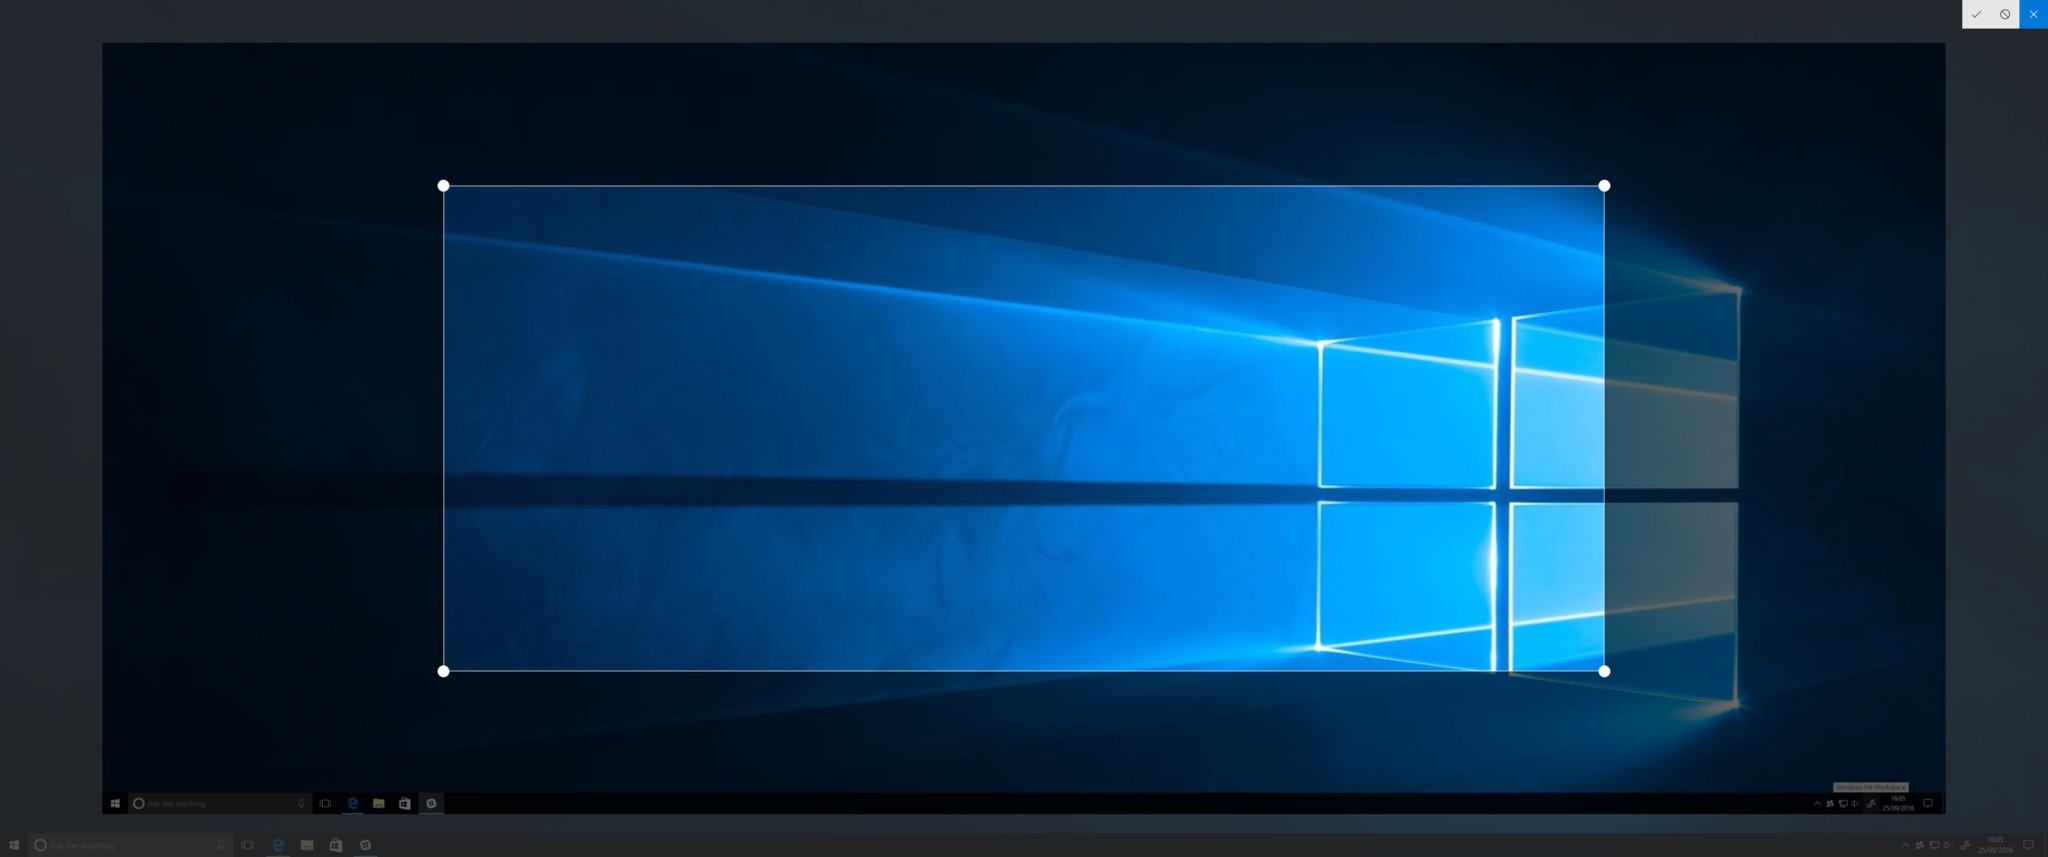
- Select the check button at the top right of the screen to apply the crop.Select the cancel button to cancel the cropping. The pen bar will return to its full toolset.
- Navigate to the pen bar
- To save, tap the save button. This icon looks like a floppy disk.
- To delete, tap the trash button. This icon looks like a trashcan.
- To copy, tap the copy button. It looks like two rectangles (i.e. copying paper)
- To share, tap the share button. This icon is a circle with three smaller circles on it.
All the latest news, reviews, and guides for Windows and Xbox diehards.
Zac Bowden is a Senior Editor at Windows Central. Bringing you exclusive coverage into the world of Windows on PCs, tablets, phones, and more. Also an avid collector of rare Microsoft prototype devices! Keep in touch on Twitter and Threads
Опция «Фрагмент экрана» замена старого инструмента «Ножницы». В новых сборках Windows 10 можно с легкостью делать скриншоты, комментировать и делиться ими с вашими друзьями или коллегами.
Что касается функций, новый инструмент «Фрагмент экрана» более совершенен в сравнении с «Ножницами», и предлагает больше вариантов для удобства работы. Инструмент может, сделать снимок всего экрана, произвольной области и прямоугольный снимок, снимок активного окна.
Пользователи, которые часто делают скриншоты предпочитают для этого использовать сочетания клавиш. Если вы также любите делать снимки экрана с помощью сочетаний клавиш, вы будете рады узнать, что новый инструмент поддерживает сочетания клавиш для открытия и доступа к своим функциям.
Ниже приведены сочетания клавиш, доступные для инструмента «Фрагмент экрана».
Открыть функцию создания снимка экрана в Windows 10, можно нажав клавиши:
- Win + Shift + S – запуск функции создания фрагмента экрана
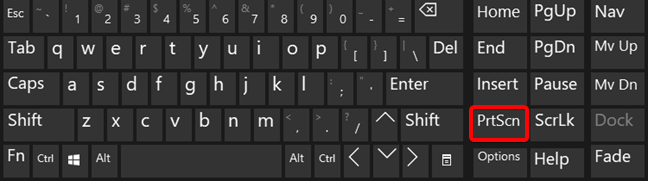
- или Print Screen (PrtScn)
Примечание: С настройками по умолчанию Windows 10 не открывает функцию, при нажатии клавиши PrtSc. Если вы хотите использовать клавишу PrtSc, необходимо перейти в «Параметры» → «Специальные возможности» → «Клавиатура» в разделе «Сочетание клавиш: Print Scren» — передвиньте ползунок переключателя в положение «Вкл.», это разрешит использовать клавишу для запуска функции создания фрагмента экрана.
После открытия, используйте клавишу Tab для перехода между доступными режимами, после чего нажмите клавишу Enter для выбора нужного режима.
Другие сочетания клавиш для функции создания снимка экрана Windows 10.
Alt + N – Вернутся из редактора Screen Sketch для создания нового снимка
ALT + O – Открыть файл для редактирования
Ctrl + O – Открыть файл (альтернатива)
ALT + U – Отменить
Ctrl + Z — Отменить
Ctrl + Y – Повторить
ALT + U – Отменить
Alt + D – Повтор
ALT + T – Touch writing
Alt + B – Шариковая ручка
Alt + P – Выбрать карандаш
ALT + H – Маркер
Alt + E – Ластик
ALT + R – Обрезка изображения
ALT + S— Сохранить
Alt + C— Копировать
Alt + A – Поделиться снимком
Alt + M – Открыть с помощью
Ctrl + P – Печать
Эти сочетания клавиш на данный момент, доступны для данного инструмента. Мы будем обновлять эту статью, если и когда Майкрософт добавит дополнительные сочетания клавиш.
Snip & Sketch is a Windows 10 screenshot tool that Microsoft has introduced with the October 2018 Update. In the future, it is going to replace the Snipping Tool, but so far both apps continue to exist in Windows 10 until Snip & Sketch reaches feature-parity with the Snipping Tools or it outperforms it. Here is how to open Snip & Sketch, the keyboard shortcut for Snip & Sketch, and how to use the app to take screenshots:
What is Snip & Sketch?
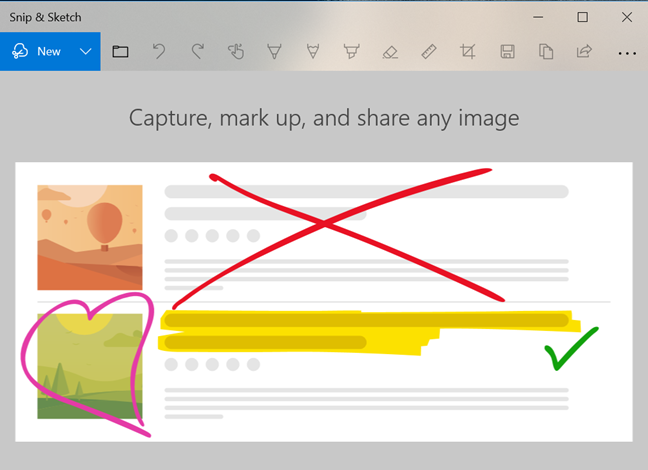
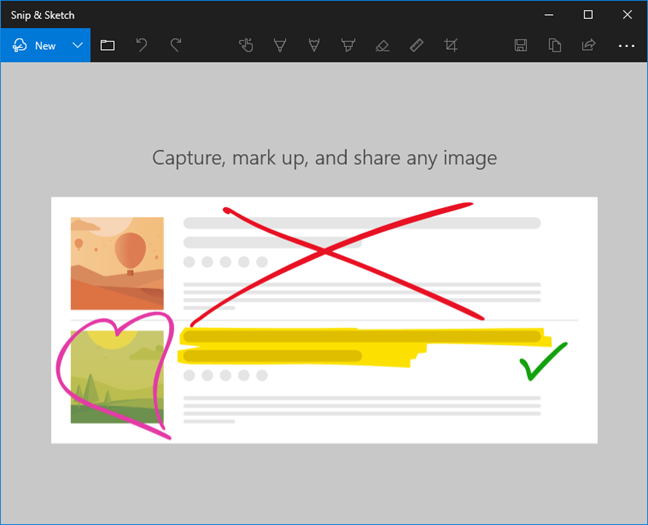
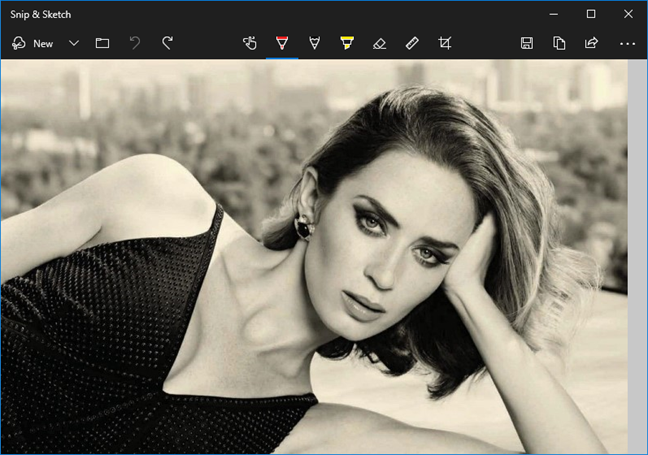
Snip & Sketch is a Windows 10 app that was introduced with the October 2018 Update. The app can be used to take screenshots (snip) and make changes to the resulting images (sketch). The Snip & Sketch app refers to screenshots as snips. With it, you can capture the entire screen, an app window, or a region of the screen. You can also use Snip & Sketch to edit screenshots and add annotations and other elements. The sketch capabilities are designed for light editing that people do on a screenshot. You can see how the Snip & Sketch app looks, in the screenshot below.
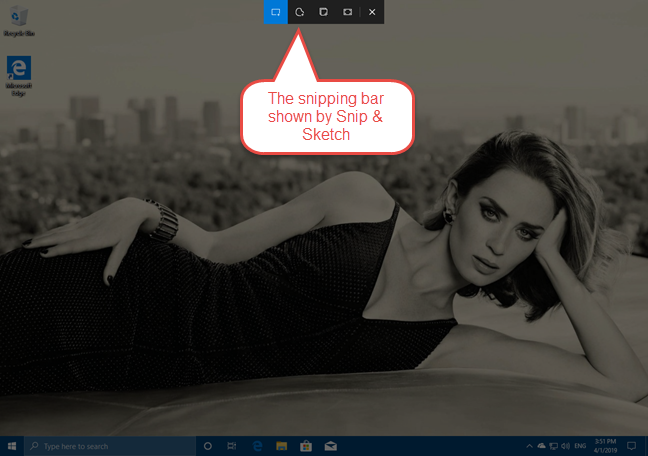
When you take screenshots, the window of the Snip & Sketch app is hidden and you get a snipping bar on the screen that helps with the screen capturing process. When the screen capture is over, you are back to the Snip & Sketch app with the screenshot loaded and ready for further processing.
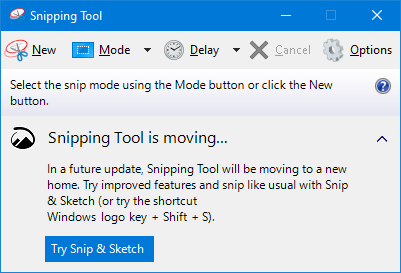
Snip & Sketch is an evolution of the old Snipping Tool app that has been around since Windows 7. Microsoft plans to phase out the Snipping Tool in a future Windows 10 update. When you open the Snipping Tool in Windows 10, you get a message saying: «In a future update, Snipping Tool will be moving to a new home. Try improved features and snip like usual with Snip & Sketch (or try the shortcut Windows logo key + Shift + S).»
Let’s learn how to open the Snip & Sketch app, how to use the snipping bar, and how to take different types of screenshots.
How to open the Snip & Sketch app in Windows 10
One of the easiest ways to open the Snip & Sketch app is to click or tap on its shortcut from the Start Menu. You can find it in the list of apps that start with the letter S.

An alternative method to open Snip & Sketch is to use search. In the search field on your taskbar, enter the word snip and then click or tap the Snip & Search result.
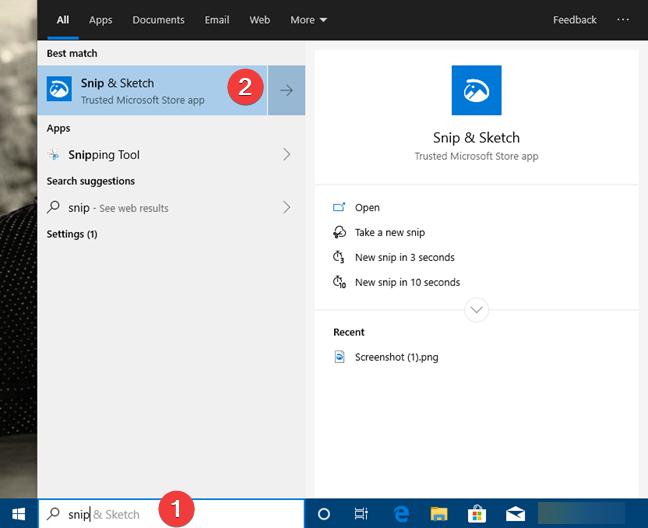
If you have opened the Snip & Sketch app, you should see a window similar to this one:
You are now ready to take a screenshot or to edit an image using Snip & Sketch.
How to open the snipping bar of the Snip & Sketch app
To take screenshots using Snip & Sketch, you have to use its snipping bar. In the Snip & Sketch window, on the top-left corner, there is a button called New. Click or it. Alternatively, you can also use the Ctrl + N keyboard shortcut.
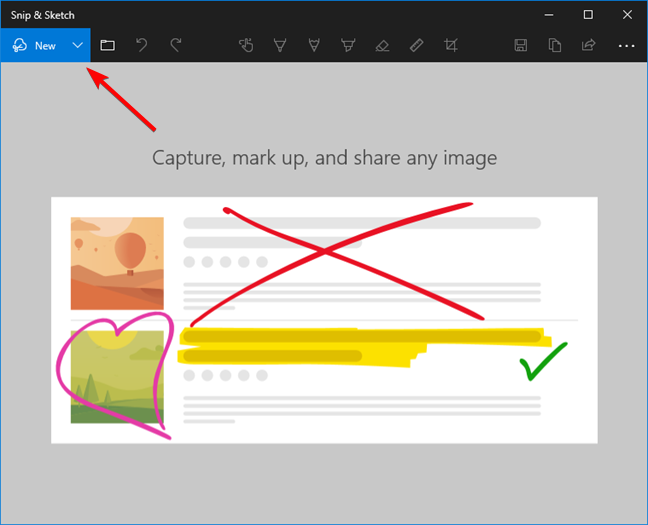
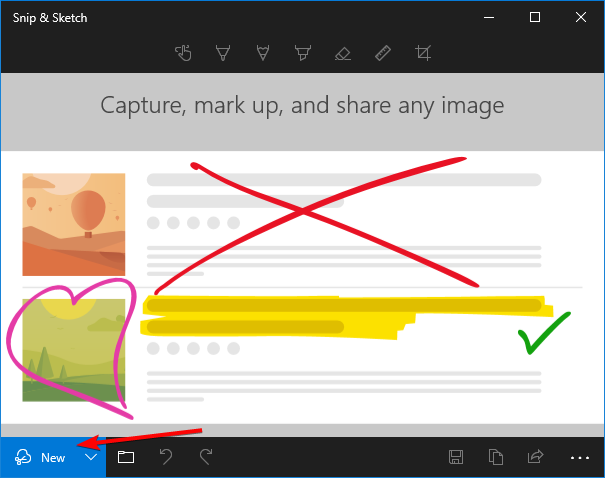
Note that, if the Snip & Sketch window has been resized to be small, the New button and the rest of the menu might be displayed in the lower part of the app window.
After you have pressed the New button, the entire screen dims and, on the top-center area, the snipping bar appears.
Snip & Sketch keyboard shortcut: How to open the snipping bar using the keyboard
Windows 10 has a built-in keyboard shortcut that you can use to open Snip & Sketch directly in its screenshot-taking mode: Windows + Shift + S. Press the keys simultaneously on the keyboard.
Once you have pressed Windows + Shift + S, the entire screen dims and, on the top-center area, the snipping bar appears.

The Windows + Shift + S shortcut is handy, but it may affect your screen before you have a chance to take your screenshot. For example, if you want to capture an open menu, the Windows + Shift + S shortcut may close it before the screen is captured.
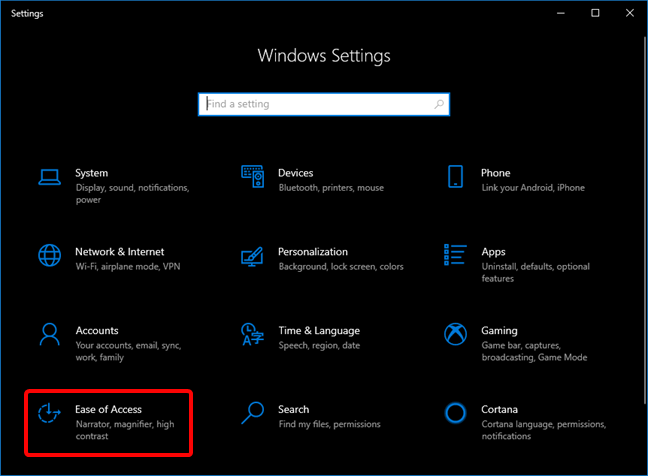
Windows 10 offers the alternative of using the PrtScn key on your keyboard to take screenshots using the Snip & Sketch app. This is not however, enabled by default. You have to change a Windows 10 setting for that to happen. Start by launching the Settings app. The fast way to do it is to press the Windows + I keys on your keyboard simultaneously. Then, head to Ease of Access.
On the left side of Settings, choose Keyboard. On the right side of the window, scroll down until you find a setting called «Print Screen shortcut» and enable the switch that says «Use the PrtScn button to open screen snipping.»
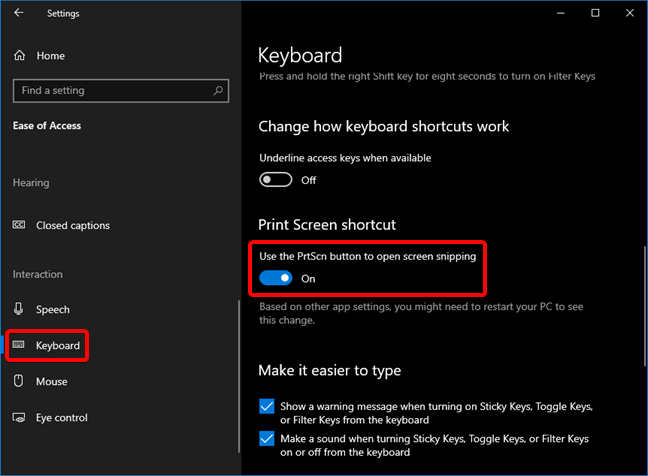
Right under that setting, Windows 10 also tells you that «Based on other app settings, you might need to restart your PC to see this change.» Although it is not mandatory, it is best to reboot so that Windows 10 has no issues in assigning the Print Screen to the Snip & Sketch app. After that, press the PrtScn key on your keyboard to take screenshots with this app.
Then, the snipping bar is displayed on the top side of the screen and you can take a screenshot.
How to open the snipping bar in Windows 10 using its Quick Action button
The Snip & Sketch app also offers a button in the Quick actions panel, which you can use to open the snipping bar. To get to it, open the Notifications & actions panel by clicking/tapping on its button from the bottom-right corner of the screen, or by sliding your finger from the right side of the screen (if you have a touchscreen). You can also press the Windows + A keys on the keyboard. Then click/tap on Expand, and you should see the Screen snip button.
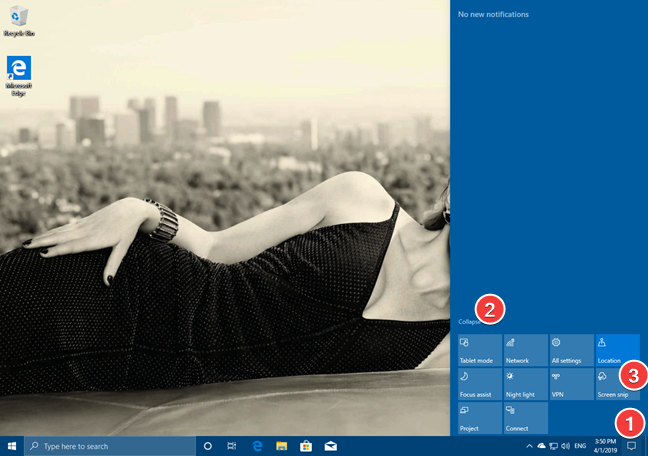
Once you click/tap the Screen snip button, Snip & Sketch loads the snipping bar on the top-center edge of your screen, and you can use it to take a screenshot.
How to take screenshots with Snip & Sketch in Windows 10
Once the snipping bar is shown on the screen, the Snip & Sketch app offers four different ways of choosing which part of the screen is captured:
- Rectangular Snip — take a screenshot of a region of the screen by drawing a rectangular shape with the mouse or using touch.
- Freeform Snip — take a freeform screenshot of the screen by drawing an unrestricted shape.
- Window Snip — take a screenshot of one of the app windows that are found on your screen. This option is available only in Windows 10 with May 2019 Update or newer. It was not available when Snip & Sketch was first released in Windows 10 October 2018 Update.
- Fullscreen Snip — take a screenshot of your entire screen.

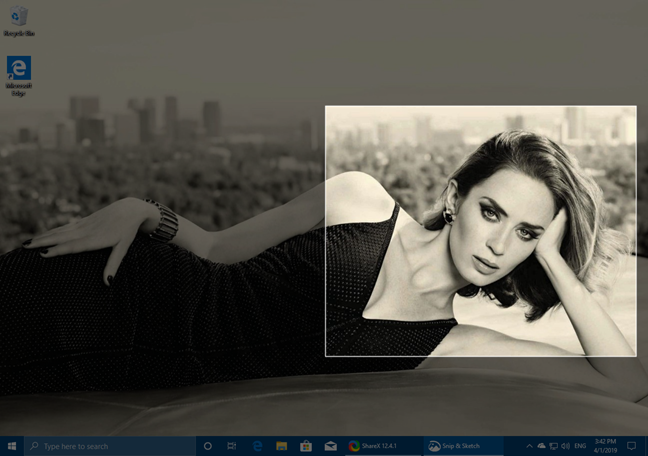
By default, the first option — Rectangular Snip — is the one enabled. When you use it, dragging the mouse cursor on the screen takes a screenshot with a rectangular shape, such as in the image below.
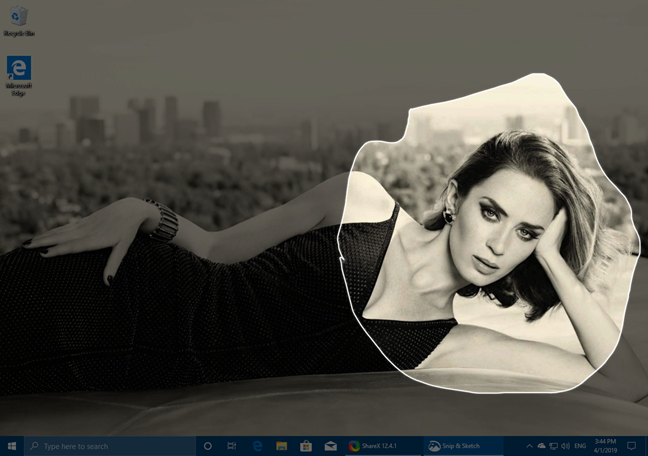
If you choose the Freeform Snip, you can drag the mouse cursor on the screen any way you want, to take a screenshot with any shape and size. Here is an example:
If you choose Window Snip, the app is going to dim the whole screen except the window you hover with your mouse cursor (or finger). Click or tap on the window you want to take the screenshot.
If you choose the Fullscreen Snip, the app immediately takes a screenshot of your entire screen. Once you have taken a screenshot, the Snip & Sketch app opens and shows your newly created screenshot. Now you can use the app to edit the screenshot if you wish so.
Read How to edit screenshots and images using Snip & Sketch, for more details on the apps image editing features.
Do you like the way Snip & Sketch takes screenshots in Windows 10?
The new Snip & Sketch app is better integrated with Windows 10 than the former Snipping Tool and it is easier to use. You can rely on Snip & Sketch on all devices with Windows 10 October 2018 Update or later, and you can start using it right away without the need to purchase or install additional software. Do you like what it has to offer and the way it works? Do you believe it could be further improved? Tell us your opinion in the comments section below.