
Download Article
A quick and simple guide to controlling the brightness of your display with Windows 7
Download Article
- Using the Brightness Slider
- Restoring a Missing Brightness Slider
- Video
- Expert Interview
- Q&A
- Tips
- Warnings
|
|
|
|
|
|
This wikiHow teaches you how to raise or lower your computer’s brightness on Windows 7 laptop. Most desktop computers use an external monitor, meaning that the brightness must be altered by using the monitor’s physically built-in buttons or brightness switch.
-

It’s the battery-shaped icon in the bottom-right corner of the screen.
- You may first have to click ▲ in this area.
- If you don’t see this icon anywhere in the bottom-right side of the screen, open Start and click Control Panel.[1]
-

This link is near the bottom of the pop-up window. Doing so will open the Power Options menu.
- If you had to open Control Panel, click Power Options here instead.
Advertisement
-
This slider is at the bottom of the window. Dragging it left will reduce your laptop’s screen brightness, while dragging it right will increase the brightness.[2]
- If you don’t see the «Screen Brightness» slider at the bottom of the Power Options window, you’ll need to restore it before you can adjust your laptop’s brightness.


Advertisement
-

Click the Windows logo in the bottom-left corner of the screen.
-

This will search your computer for the Device Manager program.
-
It should be the top result in the Start window. Clicking it will open the Device Manager.
-
Click ► on the left side of the «Monitors» heading.
- You may have to scroll down to find this option.
-
When you expand «Monitors», you should see a monitor name indented below it; click this monitor to select it.
-
It’s at the top of the Device Manager window.
-

This option is at the bottom of the Action drop-down menu. Doing so opens your monitor’s properties.
-
It’s at the top of the Properties window.
-

It’s near the bottom-left corner of the window.
-
This only take a moment. Once the driver has uninstalled, your Device Manager list will refresh, and you will notice that the «Monitor» category is gone.
-

It’s the square, computer monitor-shaped button at the top of the Device Manager window. Doing so will reinstall and update the driver that you just removed.
-
Once the Device Manager scans for changes, it will automatically reinstall the basic Microsoft driver for your monitor. This should re-enable the brightness slider.
-
This may not be necessary for your changes to take effect, but can’t hurt and may save you a step later.
-
Try to adjust your brightness. Once your computer reboots, click the Power Options button in the System Tray to find your restored brightness options.[3]
- If you still don’t have a brightness slider, your graphics adapter may not support it. You can try to update the drivers for your graphics adapter, or you can try to upgrade to Windows 10.


Advertisement
Add New Question
-
Question
I can’t find the «Monitor» option, where can I find it?
Zuubytron
Community Answer
You can find it in «control panel.» Press the start icon with the flag in the bottom left and then select something called «control panel.» Once in there, type, «Display Brightness» on the search bar and it should pull up a setting to change it!
-
Question
I was reducing the brightness on the monitor and it went all black. How do I fix it?
First, make sure you didn’t turn the brightness all the way down. If that’s not the issue, reboot your PC or try to update your graphics driver.
Ask a Question
200 characters left
Include your email address to get a message when this question is answered.
Submit
Advertisement
Video
-
Almost every laptop has a «Brightness Up» key and a «Brightness Down» key on the keyboard. These keys are usually found at the top of the keyboard. You may have to hold down the Fn key to use them.[4]
Thanks for submitting a tip for review!
Advertisement
-
High screen brightness will drain your computer’s battery faster than will lower brightness settings.
Advertisement
About This Article
Thanks to all authors for creating a page that has been read 914,976 times.
Is this article up to date?

The general rule for adjusting screen brightness is to match it with the ambient light. In well-lit environments, it’s best to increase screen brightness for better visibility. Conversely, in dim settings, lowering the brightness is recommended to reduce eye strain.
Given the ever-changing lighting conditions, it’s crucial to regularly fine-tune the screen brightness.Failing to adjust the screen brightness accordingly can result in eye fatigue and potential vision problems.
Failing to control the brightness of Windows 7 can have negative effects on both eye health and sleep quality.
There are plenty of tutorials on the web for Windows 7 brightness control. But they can’t help you solve the problem, because the brightness adjustment feature of Windows 7 is not always displayed in the control panel, and sometimes even if we update the display driver, the brightness cannot be adjusted.
This is really annoying, but by using the third-party application CareUEyes, you can easily adjust the brightness on Windows 7.
Control screen brightness on Windows 7 the easy way
CareUEyes is an eye protection software that can easily help you adjust the brightness on Windows 7. You can use the brightness slider to adjust the brightness. Swipe to the left to decrease the brightness, and to the right to increase the brightness.
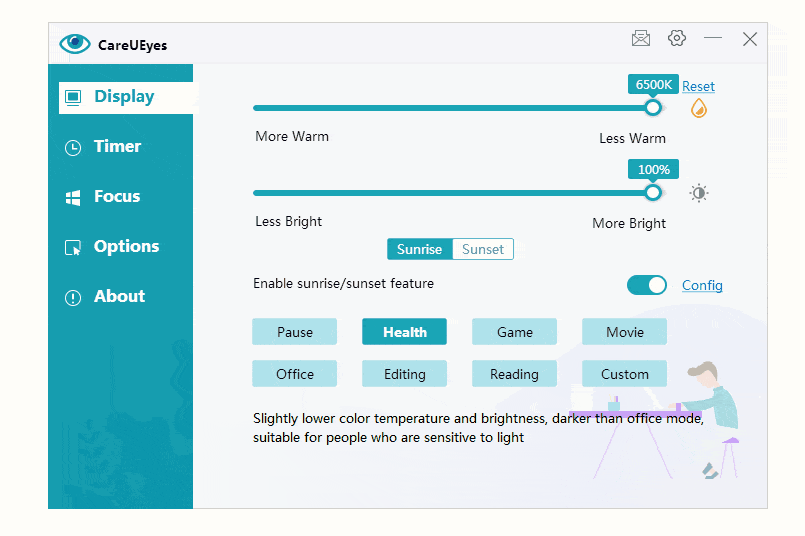
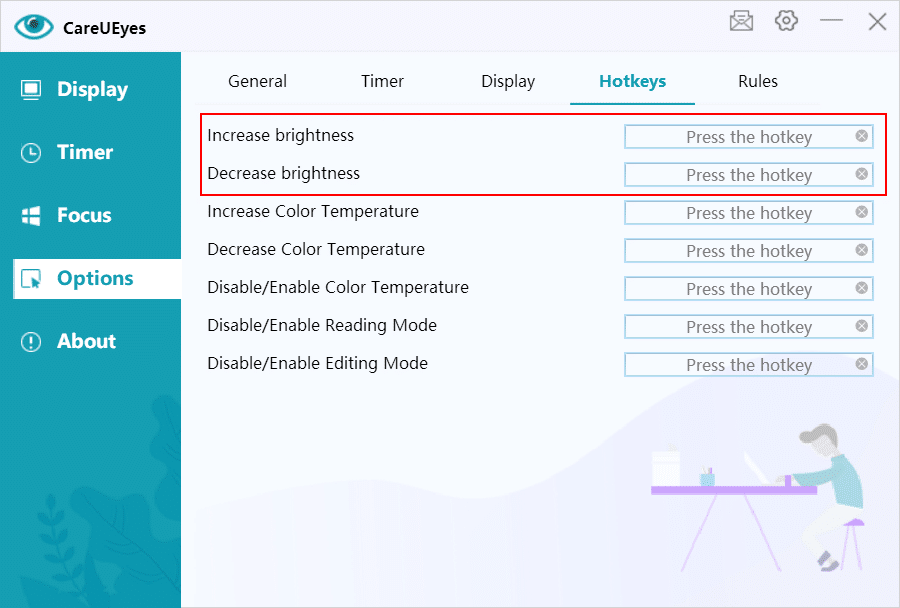
CareUEyes also supports hotkeys to adjust the brightness. You can customize hotkeys on CareUEyes’ Options page, and then you can use the keyboard to increase or decrease brightness.
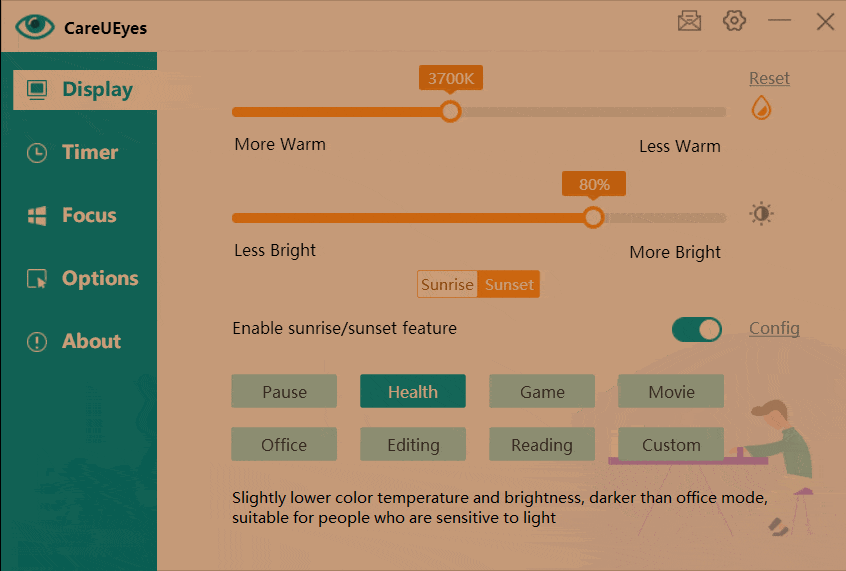
CareUEyes has eight preset modes, each of which can set different brightness for day and night. CareUEyes will help you switch the brightness according to the preset sunrise and sunset time. You can directly select the preferred mode or modify the preset brightness by the slider.
Download
In addition, CareUEyes also has a blue light filter feature, which can filter harmful blue light and help you relieve eye fatigue and pain.
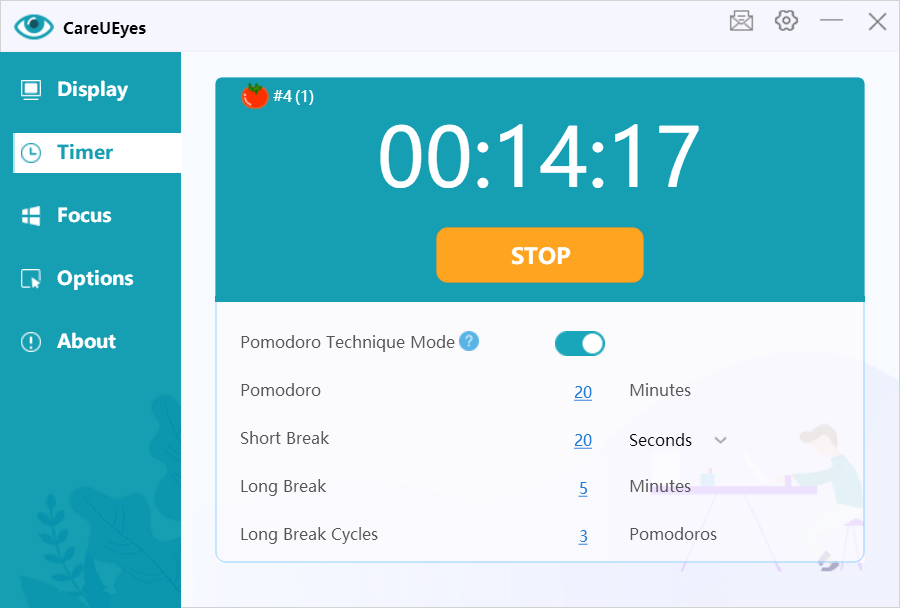
Cooperate with taking regular breaks feature to better protect your eyes and prevent eye fatigue.

Download
How to use the built-in brightness adjustment adjust screen brightness on windows 7
Step1: Open the windows 7 control panel
Step2: Select “Hardware and Sound”
Step3: Select “Power Options”
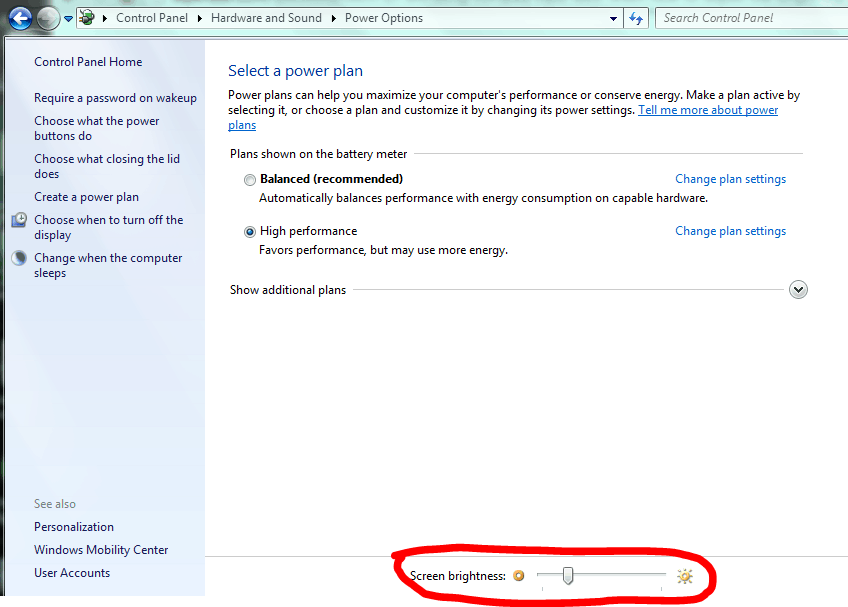
At the bottom of the power options window, you will see the “Screen brightness” slider, left and right drag Change brightness slider to adjust the brightness of the display.
On most laptop keyboards, you will find shortcut keys that can quickly increase and decrease brightness. Usually, these keys are function keys (from F1 to F12) and are usually located at the top of the keyboard. If you want to adjust the screen brightness, look for the brightness symbol (usually a logo).
Since the F keys are function keys, you must hold down the Fn key on the keyboard (usually located near the lower-left corner of the keyboard) when you press them to work.

READ NEXT:
> how to change brightness on windows 10
Download
If you’ve ever wondered how to make your screen brighter or dimmer, you’re in the right place. This guide will show you how to adjust your screen’s brightness on your Windows 7 computer or laptop.
Changing your screen brightness is a useful skill. It can help reduce eye strain, save battery life on laptops, and make your screen more comfortable to view in different lighting conditions. Whether you’re using a desktop PC or a laptop, you’ll find the process straightforward.
In this guide, you’ll learn step-by-step how to adjust your screen brightness. By the end, you’ll be able to easily control your screen’s brightness whenever you need to.
Adjusting your screen brightness on Windows 7 is a straightforward process. There are different methods for laptops and desktop PCs, so you can choose the one that fits your device.
The method you’ll use depends on whether you’re using a laptop or a desktop PC:
- If you’re using a laptop, you’ll have some built-in options for quick brightness adjustment.
- For desktop PCs, you’ll use the monitor settings to change the brightness.
Let’s explore both methods so you can easily adjust your screen brightness to a comfortable level.
Whether you want to reduce eye strain in low light or make your screen more visible in bright settings, you’ll soon be able to do it with ease.
How to Adjust Brightness on Your Windows 7 Desktop PC
Changing the screen brightness on your Windows 7 desktop PC is a simple process. Here’s how you can do it:
- Start by turning on your monitor and clicking the “Start” button on your desktop.
- In the Start menu, look for and click on “Control Panel“.
- Once in the Control Panel, find and click on “Display“. This is where you’ll find settings related to your screen.
- Under the Display options, you’ll see “Adjust brightness“. Click on this option.
- You’ll now see a brightness slider. This is the tool you’ll use to adjust your screen’s brightness.
- Move the slider to the right to increase brightness or to the left to decrease it. As you move the slider, you’ll see the changes on your screen in real time.
Take some time to adjust the brightness until it feels comfortable for your eyes. Remember, the ideal brightness can depend on your surroundings. You might want a brighter screen in well-lit rooms and a dimmer one in darker environments.
If you can’t find these options or if adjusting the brightness this way doesn’t work, you might need to use the buttons on your monitor instead. Most monitors have physical buttons that allow you to adjust brightness directly.
How to Adjust Brightness on Your Windows 7 Laptop
If you need to change your laptop’s screen brightness, you have two easy options. Let’s explore both methods:
Method 1: Using Keyboard Shortcuts
Your laptop keyboard likely has built-in brightness controls:
- Look for keys with “sun icons”. These are usually near the “F6” and “F7” keys.
- To decrease brightness, press the key with a “smaller sun icon” (often F6).
- To increase brightness, press the key with a “larger sun icon” (often F7).
Note: You might need to hold down the “Fn” key while pressing these brightness keys.
Method 2: Adjusting Through Settings
If you prefer using the laptop’s settings, follow these steps:
- Click the “Start” button and open the “Control Panel”.
- In the Control Panel, click on “Hardware and Sound”.
- Find and click on “Power Options”.
- Look for the “brightness slider” under Power Options.
- Move the slider left to decrease brightness or right to increase it.
Quick Tip: You can also press “Windows + X” on your keyboard for fast access to the Display Brightness menu.
Remember, the right brightness level depends on your environment and personal comfort. In brighter rooms, you might need a higher brightness setting, while in darker spaces, a lower setting could be more comfortable for your eyes.
By using these methods, you can easily adjust your screen brightness to suit your needs, whether you’re working, watching videos, or just browsing the web.
Wrapping Up
Now you know how to adjust your screen brightness on Windows 7, whether you’re using a desktop PC or a laptop. Remember, the right brightness can make your computing experience more comfortable and reduce eye strain.
For desktop PCs, you can adjust brightness through the Control Panel. On laptops, you have the option of using keyboard shortcuts or adjusting through settings. Choose the method that works best for you.
Don’t forget to adjust your brightness as your environment changes. A brighter screen might be needed in well-lit areas, while a dimmer setting could be more comfortable in darker rooms.
We hope this guide has been helpful. Enjoy your perfectly lit screen! Feel free to share your thoughts or ask questions in the comments below.
Adjusting the brightness of your screen on Windows 7 is a straightforward task. You can quickly change the brightness to a comfortable level that suits your working environment. Whether you’re looking to reduce eye strain or save energy, the process is simple and can be done in just a few clicks.
Step by Step Tutorial: Adjusting Screen Brightness on Windows 7
Before diving into the steps, it’s important to know that adjusting your screen brightness can help reduce eye strain, especially during prolonged computer use. It can also save energy and extend the life of your display.
Step 1: Open the Control Panel
Navigate to the Start Menu and click on the Control Panel.
The Control Panel is the central hub where you can modify various system settings on your Windows 7 computer.
Step 2: Select «Hardware and Sound»
In the Control Panel, click on the «Hardware and Sound» category.
This section contains settings related to your computer’s physical components, like printers, audio devices, and of course, the display settings.
Step 3: Click on «Power Options»
Under «Hardware and Sound», find and select «Power Options».
Power Options lets you manage your computer’s power consumption and includes settings for screen brightness.
Step 4: Adjust the Screen Brightness Slider
On the bottom of the Power Options window, you’ll find a screen brightness slider. Move the slider to the left to decrease and to the right to increase the brightness.
As you move the slider, your screen’s brightness will change immediately, allowing you to find the perfect level of brightness as you adjust.
After completing these steps, your screen will now be set to your preferred brightness level. If you ever need to readjust, simply follow these steps again to find your ideal setting.
Tips: Fine-Tuning Your Screen Brightness on Windows 7
- If your computer is on a power-saving mode, you might notice the screen dims automatically. This helps save energy when the computer is not in active use.
- You can create custom power plans that automatically adjust the screen brightness depending on your activities.
- If you’re using a laptop, the function keys (usually marked with a sun icon) can often adjust brightness without going through the Control Panel.
- For desktop monitors, physical buttons on the monitor itself can also adjust brightness and other display settings.
- Adjusting brightness isn’t just about comfort; it can also significantly impact battery life on portable devices.
Frequently Asked Questions
How do I adjust brightness if the slider is missing or not working?
Check to make sure your display drivers are up to date, as an outdated driver can cause issues with brightness settings.
Can I adjust the brightness on an external monitor?
Yes, you can usually adjust the brightness of an external monitor using the physical buttons on the monitor itself.
Will adjusting screen brightness affect my computer’s performance?
No, screen brightness does not directly impact your computer’s performance. However, reducing brightness may help extend battery life on portable devices.
Is there a keyboard shortcut to adjust screen brightness on Windows 7?
Some laptops have function keys (Fn) that allow you to adjust the brightness quickly. For desktops, it depends on the keyboard model.
Can adjusting screen brightness help with eye strain?
Yes, setting the appropriate screen brightness can reduce eye strain, especially in environments with varying light conditions.
Summary
- Open the Control Panel
- Select «Hardware and Sound»
- Click on «Power Options»
- Adjust the Screen Brightness Slider
Conclusion
Adjusting your screen brightness on Windows 7 is a breeze once you know where to look. With just a few clicks, you can find that sweet spot that’s easy on the eyes and perfect for your working environment. Remember to consider the surrounding light conditions and adjust accordingly to avoid eye strain. Whether you’re working late into the night or just starting your day, the right brightness setting can make all the difference in your comfort and productivity. So go ahead, give your eyes a break, and optimize your screen brightness on Windows 7 today.
Matt Jacobs has been working as an IT consultant for small businesses since receiving his Master’s degree in 2003. While he still does some consulting work, his primary focus now is on creating technology support content for SupportYourTech.com.
His work can be found on many websites and focuses on topics such as Microsoft Office, Apple devices, Android devices, Photoshop, and more.
Readers help support Windows Report. We may get a commission if you buy through our links.
Read our disclosure page to find out how can you help Windows Report sustain the editorial team. Read more
Struggling with screen brightness on your Windows 7 PC? Whether you’re trying to reduce eye strain or just need a brighter screen, here are some simple steps to adjust your screen brightness.
How do I increase or decrease brightness on Windows 7?
1. Using the Power Options
- Click on the Start button type control panel and select the app from the results.
- In the Control Panel window, click on Hardware and Sound.
- Now, click on Power Options.
- At the bottom of the Power Options window, you will see a slider labeled Screen Brightness.
- Drag the slider to the left to decrease brightness or to the right to increase brightness.
Adjusting the brightness through Power Options is straightforward and helps optimize your screen for different lighting conditions, reducing eye strain.
2. Using the Brightness keys on your keyboard
- Find the brightness adjustment keys on your keyboard. These are usually function keys (marked with a sun icon) and are located at the top, typically between F1 and F12.
- Hold down the Fn key, usually found near the bottom-left corner of your keyboard.
- While holding the Fn key, press the key with the sun icon and up arrow to increase brightness, or the sun icon and down arrow to decrease brightness.
Using keyboard shortcuts allows for quick adjustments without navigating through menus, ideal for on-the-go brightness changes.
How do I restoring a missing brightness slider on Windows 7?
- Click on the Start button and type Device Manager into the search bar, then select the app from the search results.
- In the Device Manager window, click the arrow next to Monitors to expand the category.
- Click on the monitor listed under the Monitors category.
- Click on the Action tab at the top of the window and select Properties.
- Go to the Driver tab and click Uninstall. Confirm any prompts to uninstall the driver.
- Click on the Scan for hardware changes button in the Device Manager toolbar. This will reinstall the driver.
- Reboot your computer to ensure the changes take effect.
- Once your computer restarts, go back to the Power Options to see if the brightness slider has been restored.
Restoring the brightness slider by reinstalling the monitor driver can fix issues where the brightness control is missing, ensuring you can adjust the screen lighting as needed.
Each of these methods provides a way to adjust screen brightness on Windows 7, ensuring you can find the right brightness level for your environment and usage needs.
If the brightness level is stuck on high, click the highlighted link to fix it. You might also be interested in reading our guide on what to do if the monitor brightness keeps changing.
We hope that our guide helped you adjust the brightness on Windows 7, but if you have more questions, feel free to use the comments below.
Claudiu Andone
Windows Toubleshooting Expert
Oldtimer in the tech and science press, Claudiu is focused on whatever comes new from Microsoft.
His abrupt interest in computers started when he saw the first Home Computer as a kid. However, his passion for Windows and everything related became obvious when he became a sys admin in a computer science high school.
With 14 years of experience in writing about everything there is to know about science and technology, Claudiu also likes rock music, chilling in the garden, and Star Wars. May the force be with you, always!