Provide feedback
Saved searches
Use saved searches to filter your results more quickly
Sign up
Appearance settings
Home
Windows
By
abhinash
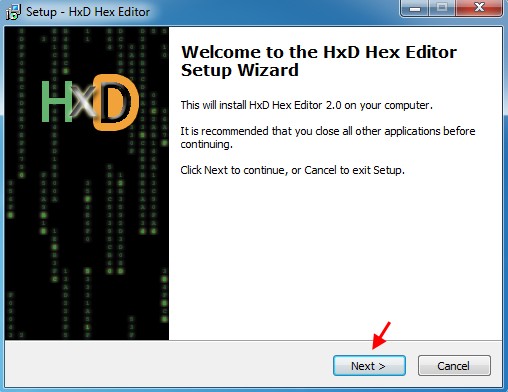
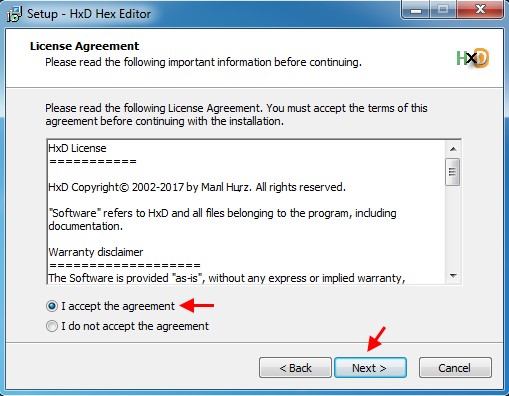
BIOS checks the hardware and peripherals’ availability and provides a pathway for them to receive instructions from the CPU.
If the BIOS gets corrupted or damaged, the hardware will have no gateway to receive initiation signals. Then, your system will not boot at all and your motherboard will be considered bricked.
Having said that, it is also not an everyday thing for the BIOS to get damaged. We most often corrupt the firmware while updating BIOS. But your customized BIOS settings do get lost most of the time due to a faulty CMOS battery, by changing to default settings manually, or automatically because of system error.
Whatever the case, be it for recovery of BIOS or for loading your customized settings, it is better to backup the BIOS. It is quite easy to backup BIOS for some motherboards but for others, it can be quite tricky and you might need a few workarounds.
Nevertheless, you will be comfortable to backup the BIOS in your system after going through this article.
Before Backing Up the BIOS
You are probably looking to backup the BIOS as a preventive measure if something goes wrong while updating it. However, if you are able to resolve the issues on the motherboard or revert the settings that are causing you problems beforehand, you will not need to update or backup the BIOS.
If the problem lies on the motherboard setting, you may reset the board. To do so, you can either change the settings to default either from the BIOS page or clear the CMOS by removing the CMOS battery from the motherboard.

Similarly, if you are unable to boot your system, you can try to boot into secondary BIOS as some motherboards provide such dual-BIOS nowadays. Apart from these, sometimes changing boot mode to either UEFI or Legacy in BIOS also does the trick.
See if your problem is resolved after trying these steps. And if not, let’s move towards backing up the BIOS.
Backup Only The BIOS Settings of Motherboard
If you just want to backup your modified BIOS settings for future, you can manually note them down on your notebook or phone. You can also use a Frame Grabber to capture your BIOS or record the settings on your phone. Then, use that as your reference to change the BIOS settings.

Some motherboards also provide a list of changed settings when you try to load default settings on BIOS. After you press the key to Load Default settings, it will show you your customized settings that will be changed to default. You can take a screenshot of the settings there.
But, you should not apply the changes after pressing the Load Default key, otherwise, you might accidentally reset them without noting the modifications.
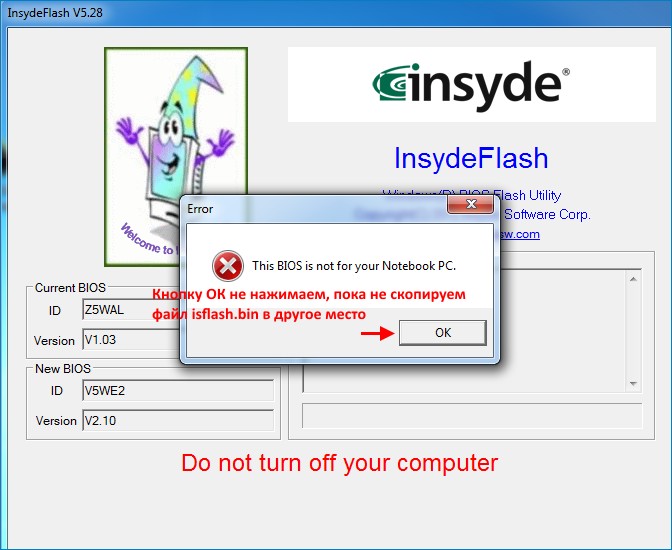
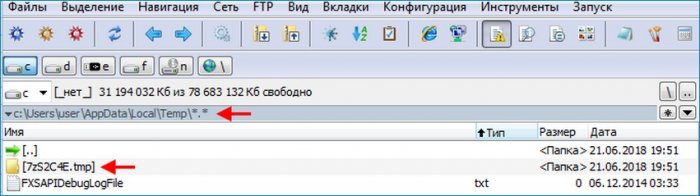
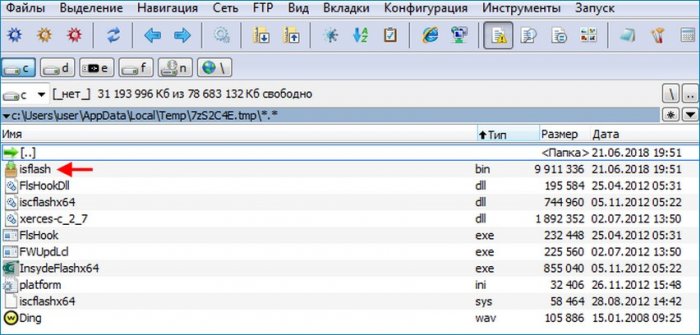
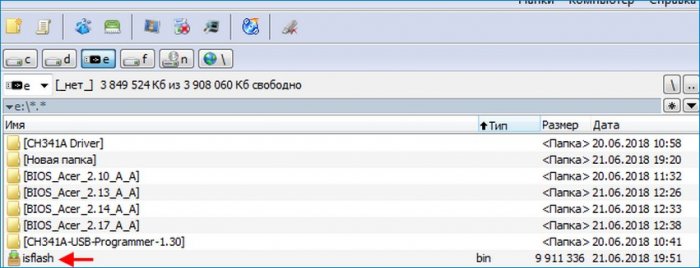
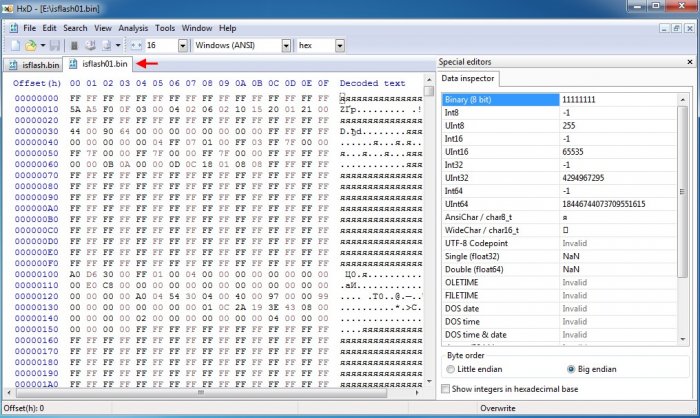
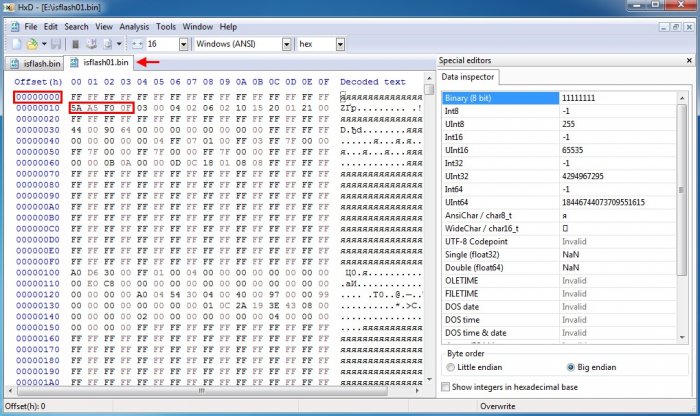
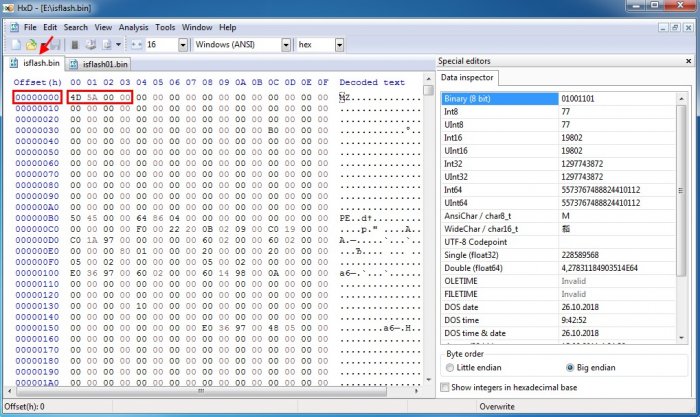
Note: Make sure to use the USB port from your motherboard. The front USB is connected through a hub inside and it can fail sometimes. If the port fails while saving backup, then it might create a corrupt BIOS image. This will brick your system when you restore the backup image next time.
Backup BIOS of Your Motherboard
Flashing a motherboard’s BIOS involves a few dangers. As we said earlier, if you installed the BIOS using a corrupted file, your system might get permanently damaged. So, most of the motherboards do not provide the feature to backup their BIOS to prevent users from updating BIOS from a corrupted backup, in case.
However, all motherboards have a function to update BIOS. You might be looking to backup BIOS to get back to this version at the time of need later. So, you can take advantage of the Update BIOS feature to downgrade your BIOS to the one you want.
Let’s see what you need for this and the process of doing it.
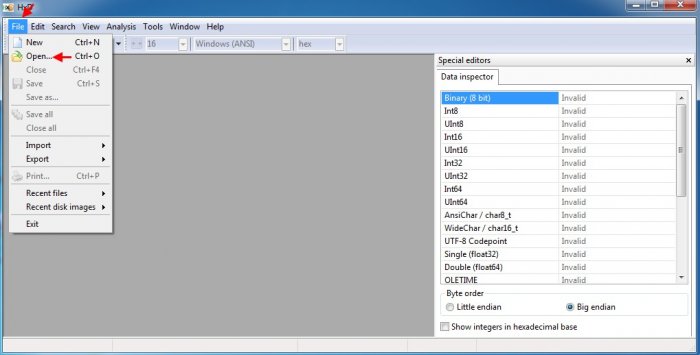
- Press Windows + ‘R’ to open the Run dialogue box.
- Type
msinfo32and press Enter. - You will see a window that has your motherboard’s name, current BIOS version, and other information. Note the current BIOS version.

- Go to your motherboard’s website and look for that particular version of BIOS.
- Download the BIOS file.
- Use the motherboard’s utility tool or BIOS page to update that version of BIOS.

Since it requires few precautions and has several methods, we have prepared a separate comprehensive guide for updating the BIOS.
Backup BIOS in Motherboard with Q-Flash Feature
If your system’s BIOS has a Q-Flash feature, you are in luck here. It is a feature provided in some motherboards with the primary purpose of updating the BIOS. But it also has the function to back up your system’s BIOS.
One of the motherboards to feature Q-flash is Gigabyte. Hence, we are using the system with a Gigabyte motherboard to explain the process. You will just need a USB drive to save the backup with this method.
- First, get a USB flash drive and insert the drive into your Laptop. On a desktop, make sure you have inserted the USB on the motherboard’s USB port on the back of your system.
- Restart your system and press repeatedly the Delete, Esc, F2, or the corresponding key that opens BIOS in your PC right after the system starts.
- A BIOS page will appear on your screen. Inside the page, find the Q-flash option in it. You can also press F8 while remaining on the BIOS page to open the Q-flash page.

- Alternatively, press TAB repeatedly while your system is booting up and you will land on the Q-flash page directly.
- There, you can see the Update BIOS and Save BIOS options. Click on the Save BIOS to Drive option.

- Follow the instructions and save the backup on your USB flash drive.


You now have a backup image of your current BIOS version. You can perform this process using the BIOS utility or Motherboard utility tool provided by your vendor if it has the Q-flash option. The steps are similar and you can open the utility from Windows itself.
Backup BIOS in Windows
If your motherboard is the one that does not provide the option to backup BIOS, you can do it directly from Windows. You will have to take help from third-party applications to do it for you.
One of such programs that accommodate the function of backup BIOS is the Universal BIOS Backup Toolkit.
Let’s see how you can do this using the Universal BIOS Backup Toolkit on your system.
- Download Universal BIOS Backup Toolkit on your PC and Install the application.
- Search with the keyword BIOS Backup on the search box on your windows.
- Right-click on Universal BIOS Backup Toolkit and click Run as administrator to open the application.
- When the program runs, click on the Read option.

- After the process completes, click on Ok and select the Backup option.

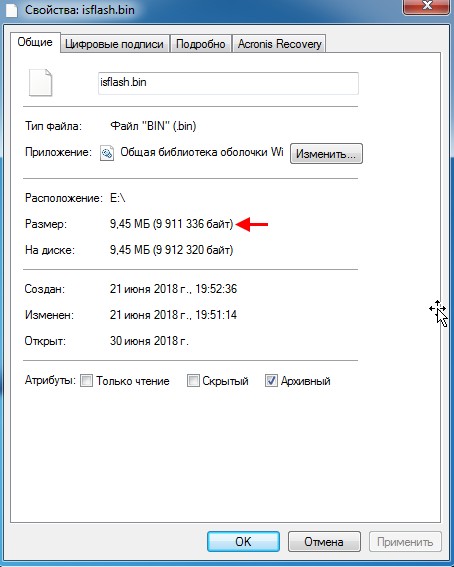
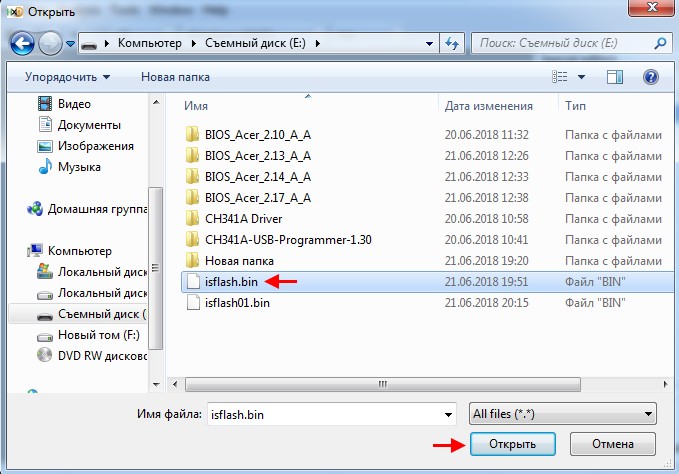
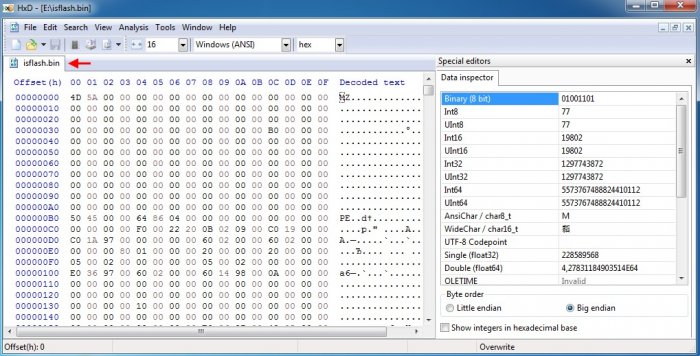
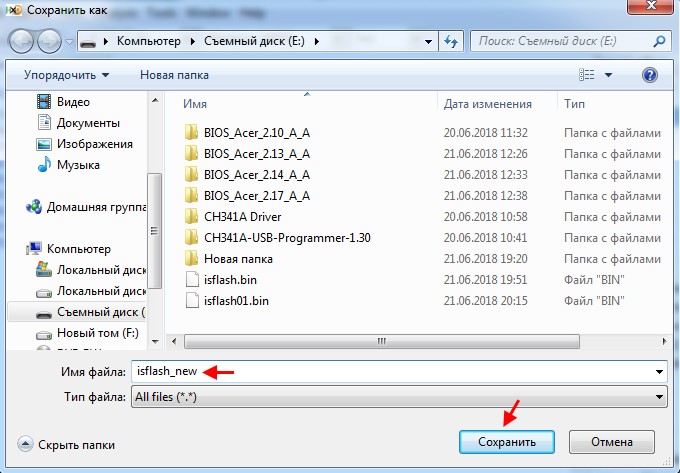
- Save the
.binfile on the drive of your choice.


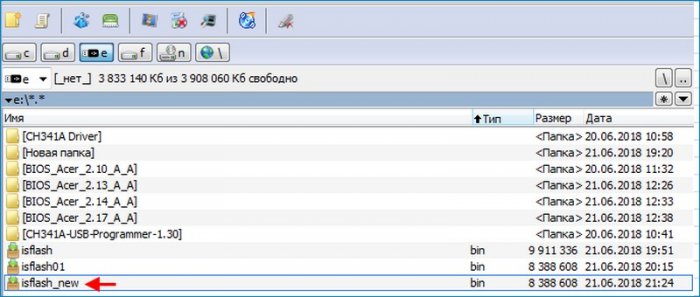
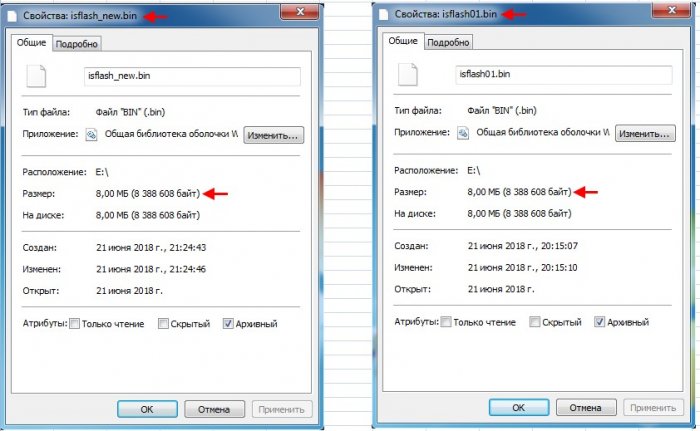
You will find the backup file of your BIOS in the drive.
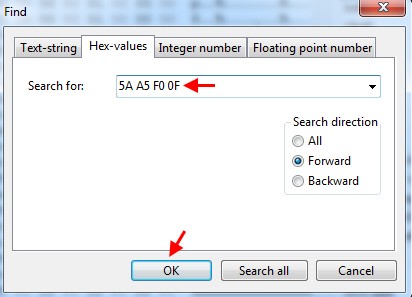
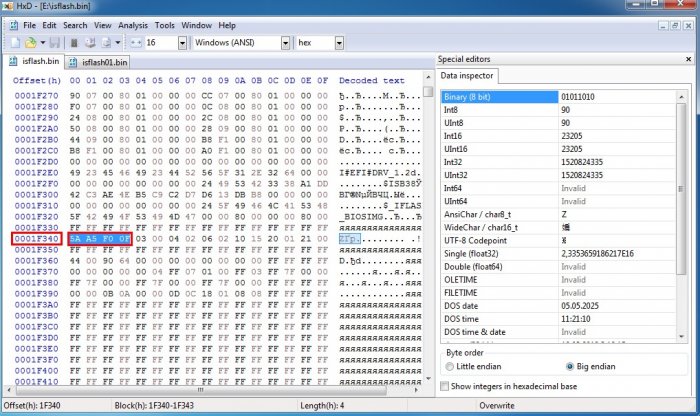
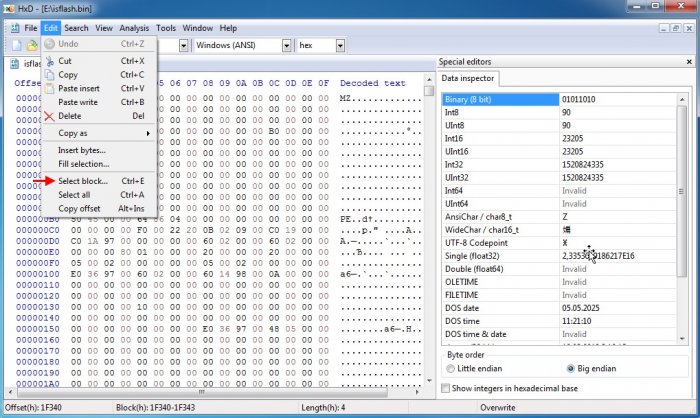
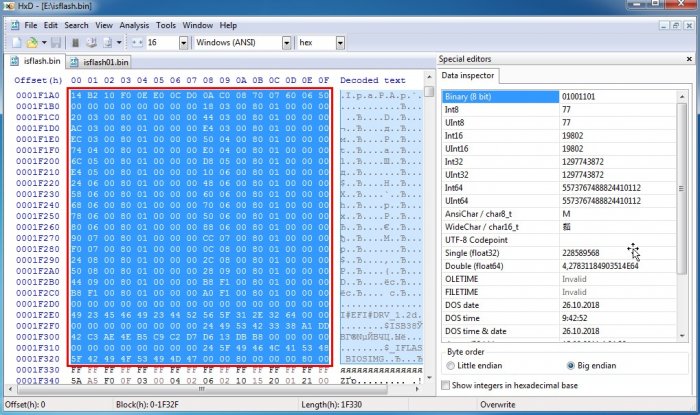
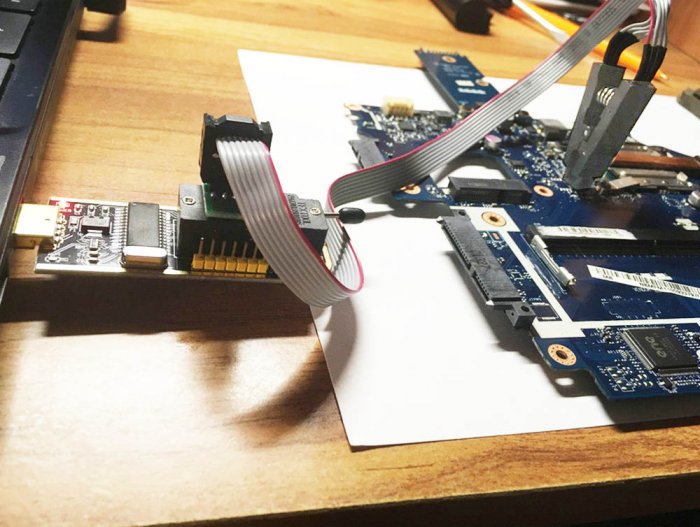
Backup BIOS Using CH341a Programmer
CH341a programmer is a USB-like device that is used to flash the IC of several electronics including the EEPROM of a computer. The BIOS is contained in the EEPROM of a computer.
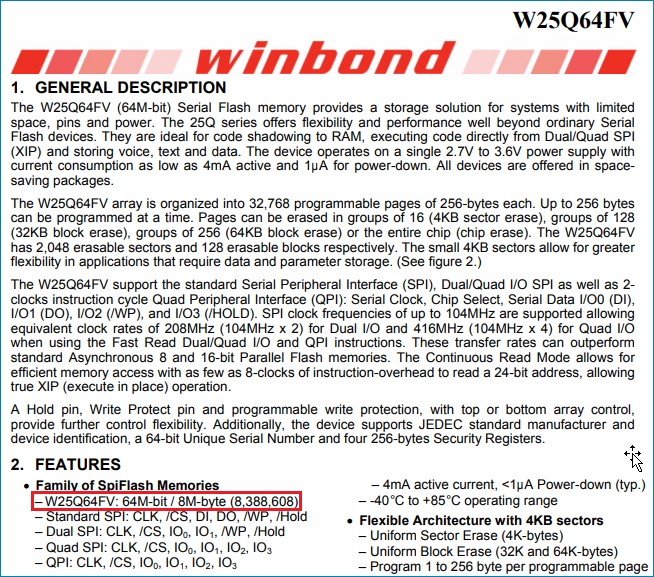
Hence, you can use the CH341a programmer to detect, change, backup as well as update the BIOS of your motherboard. The programmer can be used for 24-series I2C and 25-series SPI IC chips of any system.
Let’s look at the connection you have to make and the steps to be followed to backup BIOS using the CH341a programmer.
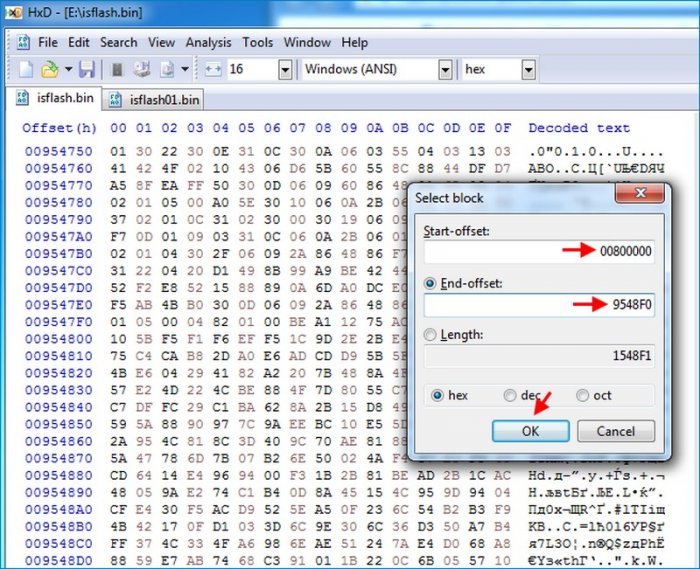
- Buy a CH341a programmer or mini programmer from the nearest electronics vendor or online.
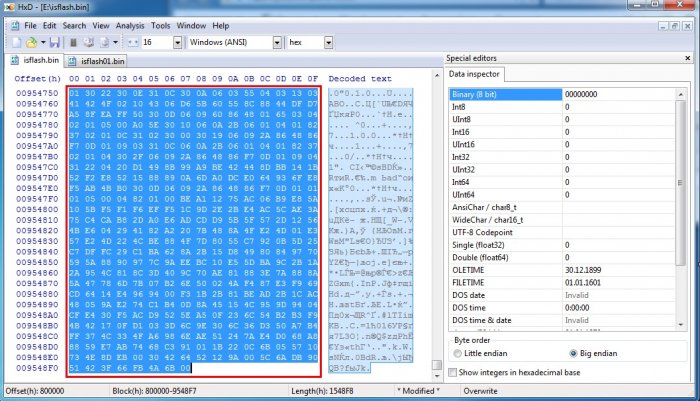
- You will find a circuit board connected to a USB dongle with a handle consisting of a yellow jumper connected to pins 1 and 2 for USB detection. Similarly, you will see a converter for a 25-series IC, another PCB where you can solder the IC, and an 8-pin clip converter with a PCB. We will be using this clip converter and PCB to connect to our BIOS chip.

- On the PCB, you will find pins with numbers from 1 to 8. Insert the connector to the pins such that the red color wire lies on pin 1. Remember a wrong connection can damage the BIOS chip.
- Now connect the PCB to the CH341a programmer in such a way that pin 1 of the circuit lies on the side near the handle.

- Disconnect all the connections to the motherboard whose BIOS you want to backup. Find the BIOS chip and connect the clip to it such that the pin of the red wire is connected to pin 1 of the BIOS.

- We advise you to use another computer to save the BIOS. Insert the programmer into the USB port keeping the handle downwards. Install the drivers for the device.

- Run the driver software after installing. If the installer does not appear, you can go to Device Manager and install it manually.
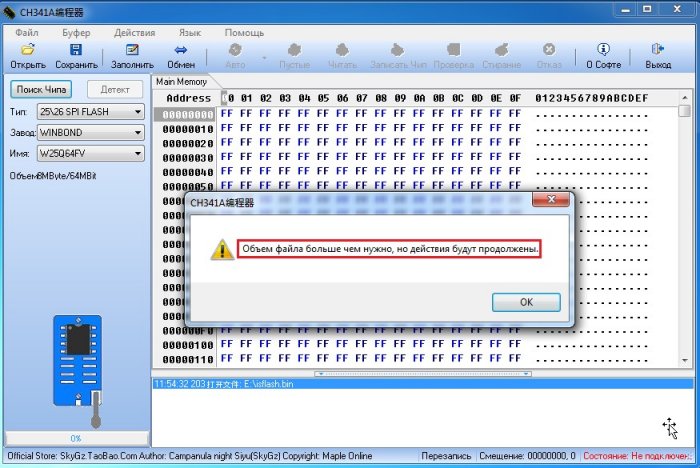
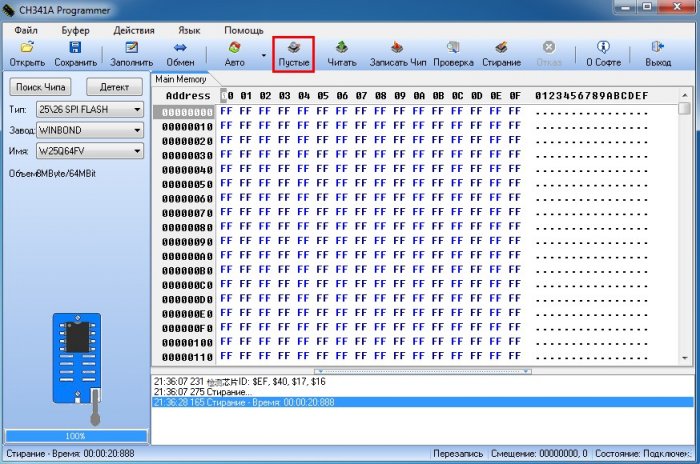
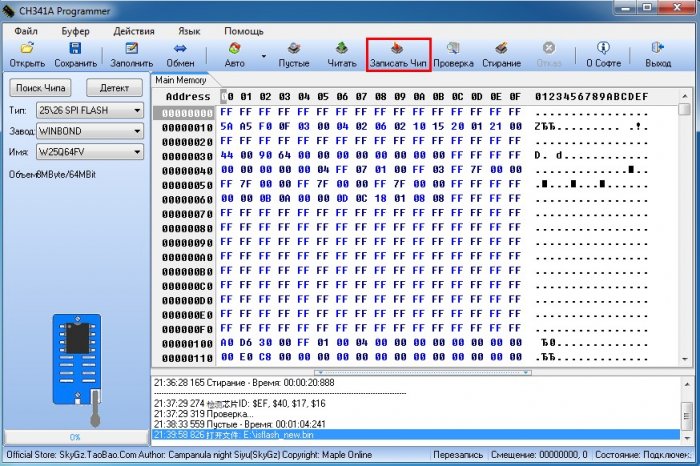
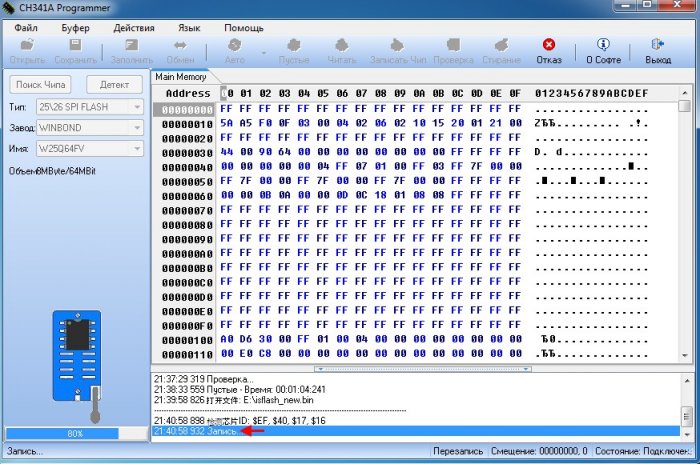
- Click on the Detect option to show the code of the BIOS file.

- Uncheck the Blank Check and Erase option on the Auto menu.
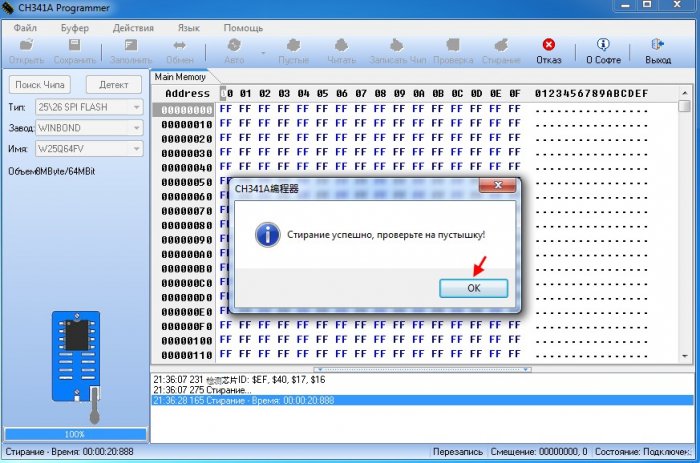
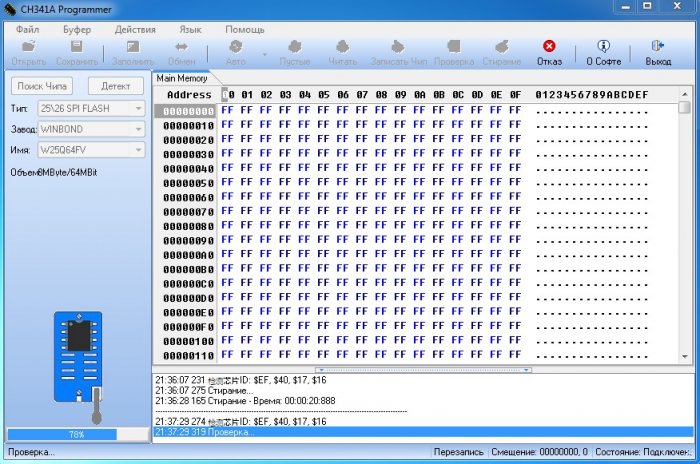
- Click on Read and then Verify after you see 100 % on the progress bar at the lower end.

- You see the Chip Main Memory and Buffer Same dialogue box at the end.

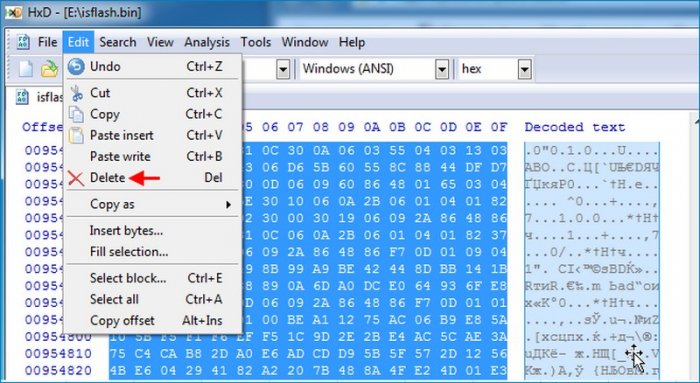
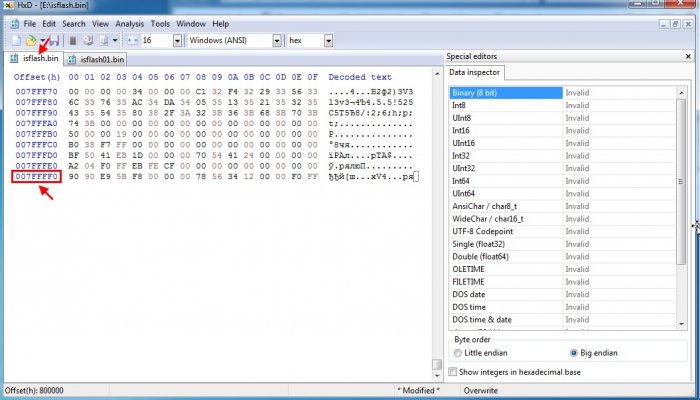
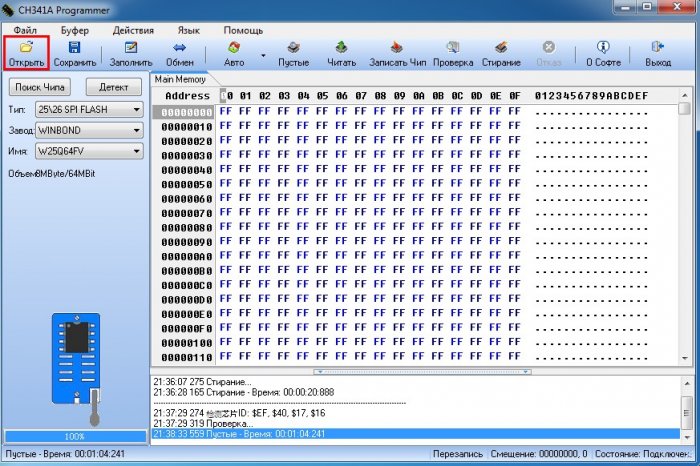
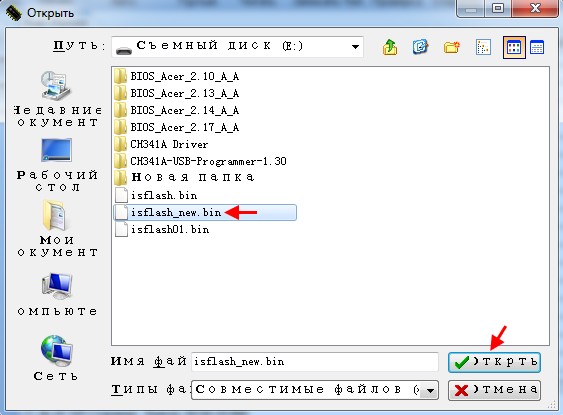
- Click Save and enter the file name to save the backup BIOS image of your motherboard.


You can use this backup image to flash your BIOS later.
How to Restore the Backup BIOS in Windows?
It is not helpful to backup your BIOS and not know how to install it in the time of need. But installing the BIOS from the backup image is pretty much the same as updating the BIOS. Some motherboards like Gigabyte automatically boot into backup bios if the current BIOS fails and re-flashes it.
You must know that updating or restoring BIOS is risky and it might permanently damage your computer. Hence, you have to make sure to have a stable power supply. You can use a UPS for a desktop computer while reinstalling BIOS. Also, please do not close the system in the middle of the process.
Now that you know about the risk and the safety measures, you will just need a USB drive and software called Rufus to make the drive bootable. Let’s see the way to install the backup .rom file to your system.
- Download Rufus on your system. If your system is not working, then use a working system.
- Insert the USB drive and Open Rufus on the PC either through its icon on the desktop or by searching it in windows.
- On the opened window, select the USB drive and choose FreeDOS on the Boot Selection Menu. Click Start.

- Copy the Backup file you saved earlier to the USB.
- Restart your system and press F8 or the corresponding key repeatedly to go to the Boot Options.
- Choose the USB drive which you have kept the file in.

- You will see a window similar to the command prompt.
- Enter
dirin the window and find the.romfile you saved earlier as the BIOS backup.
- Type the name of the file along with the extension name at the end and press Enter.
- Go through the instructions on the installation window and complete the restoring process.


You will find your BIOS restored from the backup file that you created earlier.
Skip to content
How many times people have told me to update the BIOS or the UEFI firmware of motherboards or the graphics card to make sure that you have the best support for the hardware. But sometimes after you have updated the firmware to a new version, it starts to show some problems and then you may want to downgrade the firmware to an earlier version. This is why you should always make a backup of your original firmware before performing an update. And as far as the graphics cards are considered, you can use the well known tool GPU-Z to create a backup of your graphics card’s BIOS or UEFI.
First of all you have to download the GPU-Z tool which is free and can be used on any version of Windows. As you launch this tool, it will ask you whether you wish to install it or run it in a portable mode. No matter which option you choose, you will see the familiar GPU-Z window displaying you all the features and properties of your graphics card.

You have to click on the small shortcut icon shown under the logo of your graphics card manufacturer like Intel, AMD or NVidia. After this you can choose the option to Save to file. This will launch a small tool that reads the BIOS/UEFI and saves it in the same folder where the GPU-Z program is located.
GPU-Z uses a command line utility to perform this operation. For example, in the case of NVidia graphics cards it uses the command nvflash.exe -b bios.rom to pull the BIOS/UEFI from the graphics card. For other cards manufactured by other corporations, it uses other similar utilities. But these utilities do not support all the cards or all the manufacturers and perhaps they might fail to work on your system.
You can download GPU-Z from https://www.techpowerup.com/download/gpu-z/.
Tagged with GPU
We use cookies on our website to give you the most relevant experience by remembering your preferences and repeat visits. By clicking “Accept”, you consent to the use of ALL the cookies.
Вы можете использовать PowerShell для просмотра или изменения настроек BIOS/UEFI на компьютере Windows. В этой статье мы рассмотрим, как получить или изменить настройки BIOS компьютера через Windows PowerShell на обычном компьютере и на брендовых устройствах популярных производителей (HP, Lenovo, Dell, Toshiba).
Содержание:
- Получаем информацию из BIOS/UEFI с помощью PowerShell
- Получить и изменить настройки BIOS с помощью модуля Get-BIOS
- Управление BIOS из PowerShell на компьютерах Lenovo
- Доступ к настройкам BIOS из PowerShell на компьютерах Hewlett-Packard
- Настройка BIOS на устройствах DELL из PowerShell
Получаем информацию из BIOS/UEFI с помощью PowerShell
Базовая информация о BIOS (UEFI) компьютера доступна в WMI классе Win32_BIOS. Вы можете вывести всю доступную информацию о BIOS с помощью командлета Get-WmiObject.
Get-WmiObject -Class Win32_BIOS
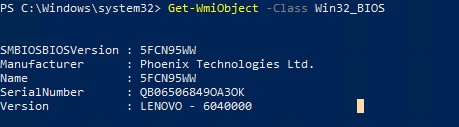
По умолчанию команда возвращает информацию о версии BIOS (SMBIOSBIOSVersion + Manufacturer), серийный номер и модель компьютера (SerialNumber, Version).
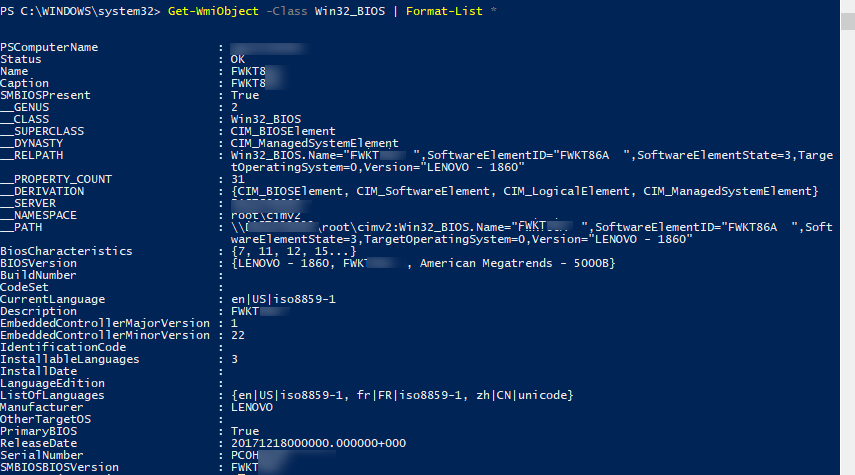
Полный список параметров BIOS, который доступен в WMI классе Win32_BIOS можно вывести командой:
Get-WmiObject -Class Win32_BIOS | Format-List *
Можно вывести только интересующие вас настройки BIOS. Например, версию BIOS, серийный номер компьютера, производителя и дату выпуска:
Get-WmiObject -Class Win32_BIOS | Select SMBIOSBIOSVersion, Manufacturer, SerialNumber, ReleaseDate
Можно получить информацию BIOS удаленного компьютера:
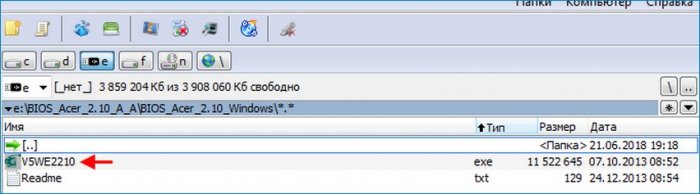
Get-WmiObject -Class Win32_BIOS -ComputerName MSK-WKS2210
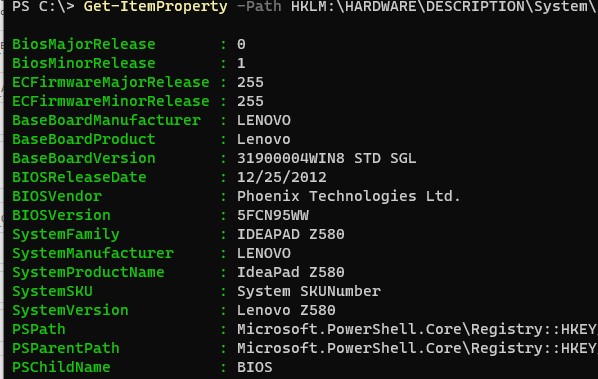
Информация о BIOS компьютера хранится в реестре Windows. Вы можете получить нужную информацию BIOS напрямую из реестра с помощью PowerShell:
Get-ItemProperty -Path HKLM:\HARDWARE\DESCRIPTION\System\BIOS
Класс Win32_BIOS является универсальным и может быть использован для получения базовой информации о BIOS на любом устройстве Windows.
Однако, некоторые производители оборудования предоставляют специальные WMI классы для обращения к BIOS из Windows (необходимо, чтобы на компьютере были установлены родные драйвера от производителя).
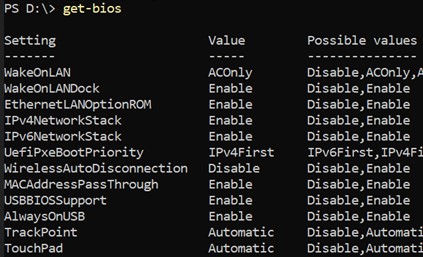
Получить и изменить настройки BIOS с помощью модуля Get-BIOS
Для получения настроек BIOS/UEFI брендовые компьютеров Dell, HP, Lenovo, Toshiba можно использовать отдельный модуль из PSGallery, который называется Get-BIOS.
Установите модуль из онлайн галереии PowerShell (также вы можете установить PowerShell модуль офлайн):
Install-Module GetBIOS
Чтобы вывести настройки BIOS вашего компьютера, выполните команду:
Get-BIOS
На компьютерах Dell можно вывести описание настроек BIOS с помощью параметра:
Get-BIOS -ShowDescription
Также от этого же разработчика есть модуль, который позволяет изменить настройки BIOS на устройствах Dell/Lenovo/HP.
Install-Module SetBIOS
Для изменения настроек BIOS вашего устройства, нужно сформировать CSV файл в формате {Setting, Value}.
Чтобы применить CSV файл с натсройками BIOS, выполните команду:
Set-BIOS -Path "YourPath.csv"
Если BIOS защищен паролем, добавьте в параметр -Password.
Управление BIOS из PowerShell на компьютерах Lenovo
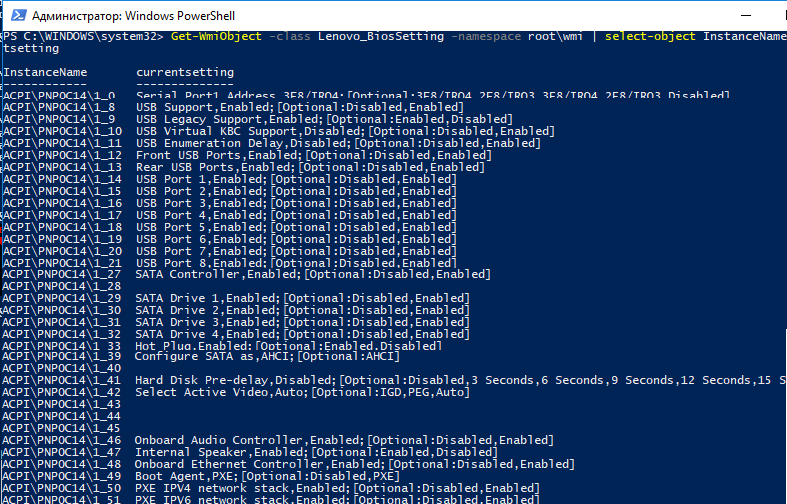
На компьютерах Lenovo текущие настройки BIOS хранятся в оттельном WMI классе. Вы можете вывести список параметров BIOS и их текущие значения так:
Get-WmiObject -class Lenovo_BiosSetting -namespace root\wmi | select-object InstanceName, currentsetting
Проверим, что на компьютере Lenovo установлен пароль для входа в BIOS:
(gwmi -Class Lenovo_BiosPasswordSettings -Namespace root\wmi).PasswordState
Если команда вернула 0, значит пароль для входа в BIOS не установлен.

Изменить пароль BIOS на устройстве:
(gwmi -Class Lenovo_SetBiosPassword -Namespace root\wmi).SetBiosPassword("pap,oldPassword,newPassword,ascii,us")
Вы можете изменить некоторые параметры BIOS на компьютерах Lenovo. Например, включим на компьютере WOL:
$getLenovoBIOS = gwmi -class Lenovo_SetBiosSetting -namespace root\wmi
$getLenovoBIOS.SetBiosSetting("WakeOnLAN,Enable")
$SaveLenovoBIOS = (gwmi -class Lenovo_SaveBiosSettings -namespace root\wmi)
$SaveLenovoBIOS.SaveBiosSettings()
Сбросить настройки BIOS устройства Lenovo на заводские:
$DefaultSettings = Get-WmiObject -Namespace root\wmi -Class Lenovo_LoadDefaultSettings
$DefaultSettings.LoadDefaultSettings("CurrentBIOSPassword,ascii,us")
Доступ к настройкам BIOS из PowerShell на компьютерах Hewlett-Packard
На компьютерах/ноутбуках от HP можно использовать следующую команду для получения параметров BIOS, их значений и доступных опций:
Get-WmiObject -Namespace root/hp/instrumentedBIOS -Class hp_biosEnumeration | select Name, value, possiblevalues –AutoSize
Вы можете изменить некоторые настройки BIOS на компьютерах HP из PowerShell. Например, отключить загрузку компьютера с USB устройств.
$getHPBios = gwmi -class hp_biossettinginterface -Namespace "root\hp\instrumentedbios"
$getHPBios.SetBIOSSetting('USB Storage Boot','Disable')
Если для изменения настроек BIOS требуется указать пароль, вы можете использовать следующий скрипт:
$HPBIOSPassword = "<utf-16/>"+"P@$$w0rd"
$getHPBios = gwmi -class hp_biossettinginterface -Namespace "root\hp\instrumentedbios"
$getHPBios.SetBIOSSetting(‘Network (PXE) Boot','Disable',$HPBIOSPassword)
Если последняя команда вернула “Return 0”, значит она отработала успешно. Можно сделать простейший обработчик:
$ChangeBIOS_State = $bios.setbiossetting(Network (PXE) Boot', 'Disable' , $HPBIOSPassword)
$ChangeBIOS_State_Code = $ChangeBIOS_State.return
If(($ChangeBIOS_State_Code) -eq 0)
{
write-host "OK"
}
Else
{
write-host "Error - (Return code $ChangeBIOS_State_Code)" -Foreground Red
}
Если вы хотите включить в BIOS LAN/WLAN Switching на ноутбуке HP для автоматического отключения от Wi-FI при наличии Ethernet подключения, выполните команду:
$getHPBios.SetBIOSSetting('LAN/WLAN Switching','Enable')
Кроме того, вы можете установить на устройство Hewlet Packard расширение HP Client Management Script Library, CMSL (https://www.hp.com/us-en/solutions/client-management-solutions/download.html). В состав CMSL входят несколько PowerShell модулей, который позволяют получить или изменить настройки BIOS/UEFU, обновить прошивку и т.д.
Экспорт настроек BIOS в текстовый файл:
Get-HPBIOSSettingsList | Out-File -FilePath ‘C:\ProgramData\HP\CMSL\Logs\CurrentBIOSSettings.txt’
Включить WLAN Auto Switch:
Set-HPBIOSSettingValue -Name "LAN/WLAN Auto Switching" -Value Enable -Password BiosPass000rd
Настройка BIOS на устройствах DELL из PowerShell
На компьютерах DELL для просмотра и управления параметрами BIOS вы можете использовать WMI класс DCIM-BIOSService или более новый класс root\dellomci (доступен после установки пакета OMCI — Open Manage Client Instrumentation).
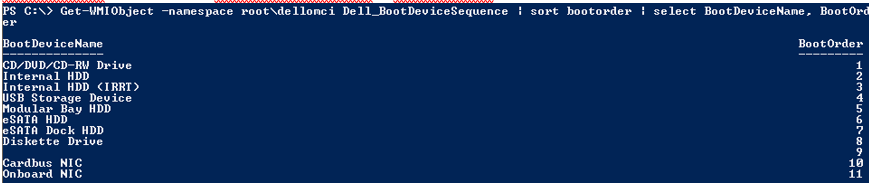
Чтобы вывести порядок использования загрузочных устройств в BIOS на компьютерах Dell, выполните:
Get-WmiObject -NameSpace root\dellomci Dell_BootDeviceSequence | sort bootorder | select BootDeviceName, BootOrder
Например, вы можете включить Wake on LAN в BIOS следующим образом:
(Get-WmiObject DCIM-BIOSService -namespace rootdcimsysman).SetBIOSAttributes($null,$null,"Wake-On-LAN","4")
Кроме того, для компьютеров Dell можно использовать официальный PowerShell модуль DellBIOSProvider, который устанавливается при установке драйверов либо вы можете установить его вручную командой:
Install-Module -Name DellBIOSProvider -Force
С помощью этого модуля вы можете получить порядок загрузки на компьютере Dell:
Get-Item DellSmbios:\BootSequence\Bootsequence
Проверить, задан ли пароль BIOS:
Get-Item -Path DellSmbios:\Security\IsAdminPasswordSet
Изменить пароль BIOS на устройстве Dell:
Set-Item -Path Dellsmbios\Security\AdminPassword –Value 0ldDellP@ss –Password Newde11P@ss
Мы рассмотрели, как получить и изменить настройки BIOS на устройствах Windows с помощью PowerShell. Это позволит вам стандартизировать настройки BIOS/UEFI на всех компьютерах в вашей сети (с помощью SCCM, Intune, MDT, и т.д.