
Столкнулись с проблемой, когда нужно восстановить забытый или потерянный пароль к Windows? Или просто нужно получить доступ к чужому компьютеру? =) Не суть важно, главное — нужен доступ к компьютеру под управлением Windows. Существует немало программ и способов обойти или сбросить пароль Windows, но самым действенным способом я считаю сброс пароля через Linux. В данной статье я расскажу о двух способах: первый — с помощью утилиты для Ubuntu, второй — с помощью CD-образа.
Итак, способ первый:
Необходимо установить утилиту chntpw:
sudo apt-get install chntpwДалее нужно примонтировать раздел с Windows, и перейти в него из консоли. Например, раздел с Windows мы примонтировали по адресу /media/win. Таким образом, в консоли переходим в данную директорию:
cd /media/win/Windows/system32/configОбратите внимание, регистр символов имеет значение, «WINDOWS», «Windows» и «windows» — не одно и то же.
Если нам нужно сбросить пароль системной учетной записи Администратора, запускаем:
sudo chntpw SAMЕсли же нужно сбросить пароль пользователя (администратора) vasya, то пишем:
sudo chntpw –u vasya SAMПосле выполнения команды вам будет предложено несколько вариантов: сбросить пароль, установить новый, сделать пользователя администратором, разблокировать пользователя.
Способ второй:
Воспользовавшись любой программой, записывающей ISO-образы, создаем загрузочный диск с утилитой (скачать которую можно отсюда). После чего перезагружаем компьютер, грузимся с диска (в BIOS должна быть включена первоочередная загрузка с CD-ROM), и следуем подсказкам утилиты.
Вот, собственно, и все =)
В связи с вирусами в винде и невозможностью запусить regedit, понадобилась возможность редактировать реестр извне. Нашел, пока, единственную утилиту в линуксе chntpw, которая изначально разрабатывалась для сброса паролей, а потом приобрела функцию редактирования реестра.
Редактирование реестра:
1. Загружаемся с LiveCD или устанавливаем второй системой Ubuntu
2. Устанавливаем утилиту chntpw
sudo aptitude install chntpw
3. Подключаем раздел windows
Смотрим где он:
sudo fdisk -l
ищем ntfs раздел и монтируем:
$ sudo mkdir /media/windows

$ sudo mount /dev/sda2 /media/windows
4. Редактируем реестр
chntpw -l /media/windows/Windows/system32/config/software
Редактирование осуществляется перемещением по веткам, например:
cd Microsoft\Windows NT\CurrentVersion\Winlogon
и самим редактированием ключей, например:
ed Shell
Сброс пароля:
1. Пункты 1-3 предыдущего параграфа
4. Смотрим у какого пользователя будем менять пароль
chntpw -l /media/windows/Windows/system32/config/SAM
5. Сбрасываем пароль
chntpw /media/windows/Windows/system32/config/SAM -u Administrator
Сразу привожу места в реестре где могут скрываться записи о запуске вирусов:
HKLM\SOFTWARE\Microsoft\Windows NT\CurrentVersion\Winlogon\Notify

HKLM\SOFTWARE\Microsoft\Windows NT\CurrentVersion\Winlogon\Userinit

HKLM\SOFTWARE\Microsoft\Windows NT\CurrentVersion\Winlogon\Shell

HKLM\SOFTWARE\Microsoft\Windows\CurrentVersion\Run HKLM\SOFTWARE\Microsoft\Active Setup\Installed Components

HKLM\SOFTWARE\Microsoft\Windows\CurrentVersion\Explorer\SharedTaskScheduler

HKLM\SOFTWARE\Microsoft\Windows\CurrentVersion\ShellServiceObjectDelayLoad

HKCU\Software\Microsoft\Windows\CurrentVersion\Run
Значения по умолчанию в Regedit:
[HKLM\Software\Microsoft\Windows NT\CurrentVersion\Winlogon]

"Shell"="Explorer.exe"

"Userinit"="C:\WINDOWS\system32\userinit.exe"
Проверьте файл Explorer.exe на наличие двойника… правильно лежать ему в папке Windows\ но не в Windows\System32\...
Эта статья была написана в дополнение темы борьбы с вирусами и sms-вымогателями
Очистка windows от вирусов с помощью Ubuntu
Если эта публикация вас вдохновила и вы хотите поддержать автора — не стесняйтесь нажать на кнопку
This post was written by eli on July 29, 2013
Posted Under: Linux,Microsoft
What happens if a Windows user loses his or her password? No problem, Windows was never meant to be secure. Only appear as if it was.
There are several automatic tools out there. I preferred running my Fedora-based LiveUSB and fix it while actually seeing what I’m doing. The whole thing is about modifying the SAM file used on authentication.
Note that the flow shown below failed. What did work, eventually, was unlocking the Administrator account, which doesn’t have any password to begin with. Why I failed to reset a user’s password is beyond me. Maybe because it had administrator’s privileges? Maybe because it was Windows 8?
Anyhow, first I installed chntpw. It’s an offline registry editor it says somewhere, but I never checked that.
# yum install chntpw
Following this guide, mount the partition and change directory to where the SAM file is (Windows/System32/config, like any NT machine). Note the capital letters in Windows and System32.
Then go (possibly as root)
$ chntpw SAM
chntpw version 0.99.6 080526 (sixtyfour), (c) Petter N Hagen
Hive <SAM> name (from header): <\SystemRoot\System32\Config\SAM>
ROOT KEY at offset: 0x001020 * Subkey indexing type is: 666c <lf>
Page at 0x6000 is not 'hbin', assuming file contains garbage at end
File size 262144 [40000] bytes, containing 5 pages (+ 1 headerpage)
Used for data: 222/17400 blocks/bytes, unused: 14/2920 blocks/bytes.

* SAM policy limits:
Failed logins before lockout is: 0
Minimum password length        : 0
Password history count         : 0
| RID -|---------- Username ------------| Admin? |- Lock? --|
| 01f4 | Administrator                  | ADMIN  | dis/lock |
| 01f5 | Guest                          |        | dis/lock |
| 03e9 | myself                         | ADMIN  | dis/lock |

---------------------> SYSKEY CHECK <-----------------------
SYSTEM   SecureBoot            : -1 -> Not Set (not installed, good!)
SAM      Account\F             : 0 -> off
SECURITY PolSecretEncryptionKey: -1 -> Not Set (OK if this is NT4)
Syskey not installed!

RID     : 0500 [01f4]
Username: Administrator
fullname:
comment : Built-in account for administering the computer/domain
homedir :

User is member of 1 groups:
00000220 = Administrators (which has 2 members)

Account bits: 0x0211 =
[X] Disabled        | [ ] Homedir req.    | [ ] Passwd not req. |
[ ] Temp. duplicate | [X] Normal account  | [ ] NMS account     |
[ ] Domain trust ac | [ ] Wks trust act.  | [ ] Srv trust act   |
[X] Pwd don't expir | [ ] Auto lockout    | [ ] (unknown 0x08)  |
[ ] (unknown 0x10)  | [ ] (unknown 0x20)  | [ ] (unknown 0x40)  |

Failed login count: 0, while max tries is: 0
Total  login count: 10

- - - - User Edit Menu:
 1 - Clear (blank) user password
 2 - Edit (set new) user password (careful with this on XP or Vista)
 3 - Promote user (make user an administrator)
 4 - Unlock and enable user account [probably locked now]
 q - Quit editing user, back to user select
Select: [q] > q
This shows a lot of info, including the list of users. The point is to reset a specific user. Changes made like this will affect all users.
To get just the list of users,
$ chntpw -l SAM
chntpw version 0.99.6 080526 (sixtyfour), (c) Petter N Hagen
Hive <SAM> name (from header): <\SystemRoot\System32\Config\SAM>
ROOT KEY at offset: 0x001020 * Subkey indexing type is: 666c <lf>
Page at 0x6000 is not 'hbin', assuming file contains garbage at end
File size 262144 [40000] bytes, containing 5 pages (+ 1 headerpage)
Used for data: 222/17400 blocks/bytes, unused: 14/2920 blocks/bytes.

* SAM policy limits:
Failed logins before lockout is: 0
Minimum password length        : 0
Password history count         : 0
| RID -|---------- Username ------------| Admin? |- Lock? --|
| 01f4 | Administrator                  | ADMIN  | dis/lock |
| 01f5 | Guest                          |        | dis/lock |
| 03e9 | myself                         | ADMIN  | dis/lock |
And now let’s modify only one user in the list
$ chntpw -u 'myself' SAM
chntpw version 0.99.6 080526 (sixtyfour), (c) Petter N Hagen
Hive <SAM> name (from header): <\SystemRoot\System32\Config\SAM>
ROOT KEY at offset: 0x001020 * Subkey indexing type is: 666c <lf>
Page at 0x6000 is not 'hbin', assuming file contains garbage at end
File size 262144 [40000] bytes, containing 5 pages (+ 1 headerpage)
Used for data: 222/17400 blocks/bytes, unused: 14/2920 blocks/bytes.

* SAM policy limits:
Failed logins before lockout is: 0
Minimum password length        : 0
Password history count         : 0
| RID -|---------- Username ------------| Admin? |- Lock? --|
| 01f4 | Administrator                  | ADMIN  | dis/lock |
| 01f5 | Guest                          |        | dis/lock |
| 03e9 | myself                         | ADMIN  | dis/lock |

---------------------> SYSKEY CHECK <-----------------------
SYSTEM   SecureBoot            : -1 -> Not Set (not installed, good!)
SAM      Account\F             : 0 -> off
SECURITY PolSecretEncryptionKey: -1 -> Not Set (OK if this is NT4)
Syskey not installed!

RID     : 1001 [03e9]
Username: myself
fullname:
comment :
homedir :

User is member of 1 groups:
00000220 = Administrators (which has 2 members)

Account bits: 0x0214 =
[ ] Disabled        | [ ] Homedir req.    | [X] Passwd not req. |
[ ] Temp. duplicate | [X] Normal account  | [ ] NMS account     |
[ ] Domain trust ac | [ ] Wks trust act.  | [ ] Srv trust act   |
[X] Pwd don't expir | [ ] Auto lockout    | [ ] (unknown 0x08)  |
[ ] (unknown 0x10)  | [ ] (unknown 0x20)  | [ ] (unknown 0x40)  |

Failed login count: 2, while max tries is: 0
Total  login count: 1

- - - - User Edit Menu:
 1 - Clear (blank) user password
 2 - Edit (set new) user password (careful with this on XP or Vista)
 3 - Promote user (make user an administrator)
 4 - Unlock and enable user account [probably locked now]
 q - Quit editing user, back to user select
Select: [q] > 1

Hives that have changed:
 #  Name
 0  <SAM>
Write hive files? (y/n) [n] : y
 0  <SAM> - OK
In this case it clears the password (the choice of “1″). In fact, it appears like the password was already cleared when I captured this log, but it did no good.
As mentioned above, the password was still required after this, so the operation failed. I also failed to change the password for this user.
На данной странице будет описан сброс пароля Windows с использованием консольной утилиты chntpw, которая включена в состав ALT Rescue.
- Просмотрите список дисков/разделов
# fdisk -l
/dev/sda1 *
/dev/sda2
Если список слишком большой, воспользуйтесь командой more:
# fdisk -l | more
- Смонтируйте раздел/диск с Windows
# mount /dev/sda2 /mnt
- Проверьте, тот ли диск вы примонтировали, по его содержимому
# ls -l /mnt
Если вы ошиблись, отмонтируйте диск
# umount /mnt
и повторите шаг 2
-
Перейдите в следующий каталог:
# cd /mnt/Windows/System32/config/
! В Linux в имени файлов регистр имеет значение, соблюдайте его.
- Чтобы просмотреть список учетных записей Windows введите следующую команду:
# chntpw -l SAM
Отобразится, приблизительно, следующее:
| RID -|---------- Username -------------| Admin?|- Lock? --|
| 01f4 | Администратор                   | ADMIN | dis/lock |     //учетная запись встроенного администратора
| 03ea | Петр                            |       |dis/Lock  |     //созданный пользователь
| 01f5 | Гость                           |       | *BLANK*  |     //учетная запись гостя
| 03eb | root                            | ADMIN | dis/lock |     //созданный пользователь с правами администратора
-
Чтобы приступить к редактированию учетной записи, введите команду
# chntpw -u 0xRID SAM
В нашем примере
# chntpw -u 0x03eb SAM
-
Появится следующее окно:
| RID -|---------- Username -------------| Admin?|- Lock? --|
| 01f4 | Администратор                   | ADMIN | dis/lock |
| 03ea | Петр                            |       |dis/Lock  |
| 01f5 | Гость                           |       | *BLANK*  |
| 03eb | root                            | ADMIN | dis/lock |

- - - - User Edit Menu:
1 - Clear (blank) user password
2 - Edit (set new) user password (careful with this on XP or Vista)
3 - Promote user (make user an administrator)
4 - Unlock and enable user account [probably locked now]
q - Quit editing user, back to user select
Select:
! В разных версиях программы пункты могут идти в разном порядке.
- Учетная запись скорее всего будет заблокирована, введите номер пункта «Unlock and enable user account [probably locked now]», чтобы разблокировать учетную запись и согласитесь с записью изменений введя y.
-
Чтобы сбросить пароль снова введите
# chntpw -u 0x03eb SAM
и на этот раз введите номер пункта «Clear (blank) user password», чтобы произвести сброс пароля.
-
Проверьте результат сброса командой
# chntpw -l SAM
| RID -|---------- Username -------------| Admin?|- Lock? --|
| 01f4 | Администратор                   | ADMIN | dis/lock |
| 03ea | Петр                            |       |dis/Lock  |
| 01f5 | Гость                           |       | *BLANK*  |
| 03eb | root                            | ADMIN |  *BLANK* | //пароль пустой
- После перезагрузки в Windows у вас данная учетная запись будет без пароля.
Источник: форум ALT Linux
Помощь по ALT Linux Rescue
Lost your Windows login? The chntpw utility can save the day.
If you (or someone you know) ever forget your Windows password, you’ll be glad to know about chntpw, a neat Linux utility that you can use to reset a Windows password. For this how-to, I created a Windows virtual machine and set the password to pass123 on my user account, Archit-PC. I also created a Live USB with Fedora 27 using the Fedora Media Writer application.
Here are the steps, along with screenshots, to guide you through the quick and super easy process of resetting your Windows password with chntpw.
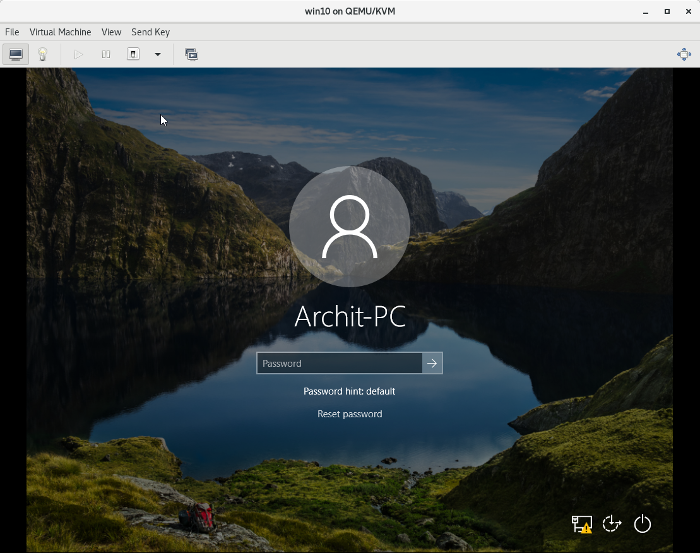
1. Attach the Live USB to your PC and restart from the login screen, as shown below:
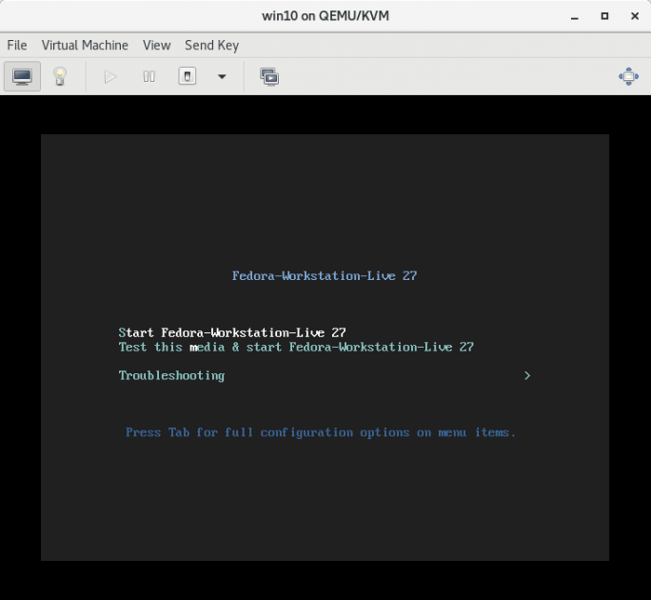
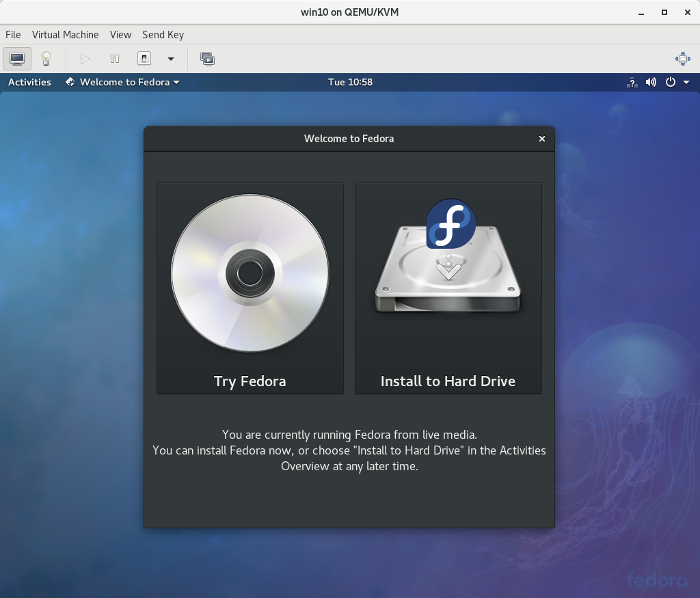
2. Boot from the Live USB and click on Try Fedora:
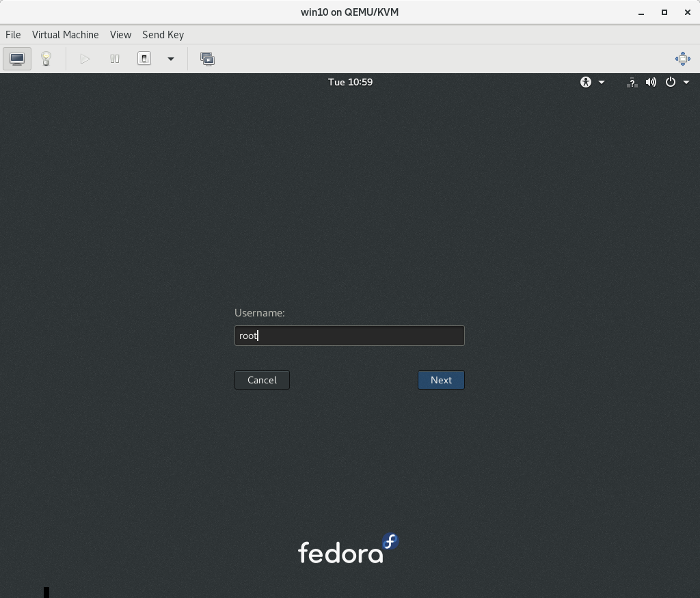
3. Log out from live-user and log into root. This step is not necessary, but I prefer to use the root user to bypass any permission issues:
4. Install the chntpw utility with the following command (you’ll need a live internet connection for this):
sudo dnf install -y chntpw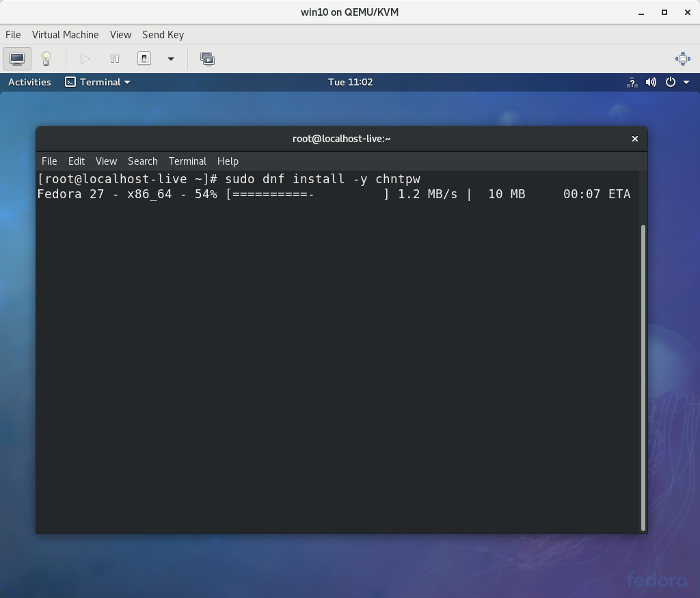
5. Check which partition should be mounted by sfdisk -l …:
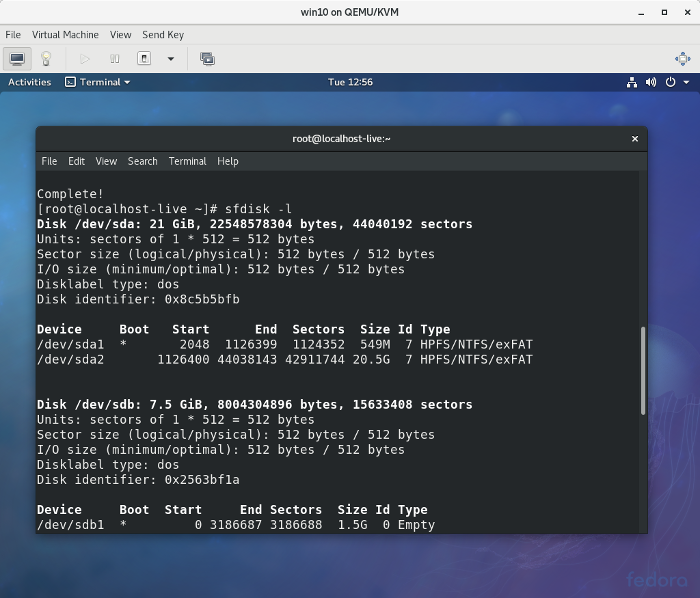
and mount that partition (e.g., /dev/sda2) with the following command:
sudo mount /dev/sda2 /mnt/Microsoft/
Change the current directory to the config directory:
cd /mnt/Microsoft/Windows/System32/config/Also, check the user records in the Security Account Manager (SAM) database:

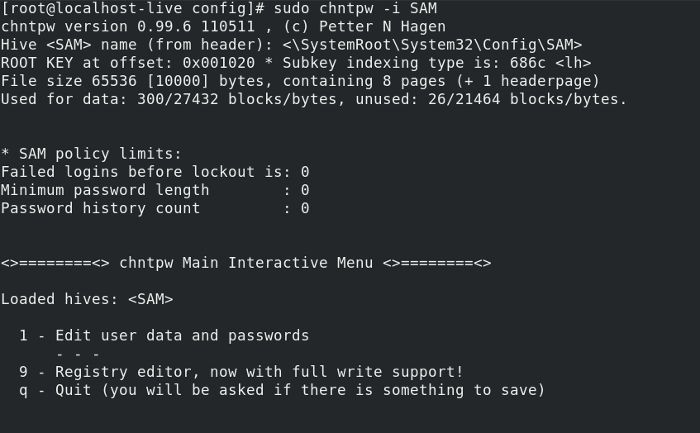
6. Edit the SAM database with the command:
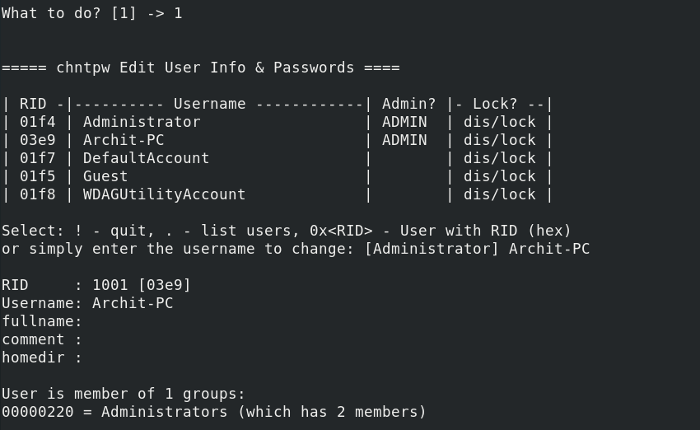
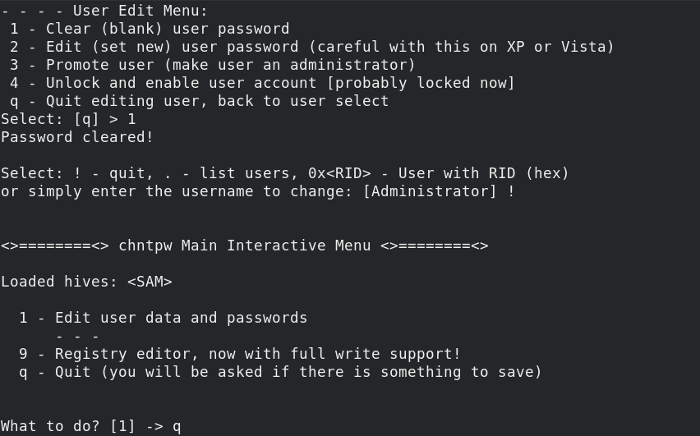
sudo chntpw -i SAMThen type 1 (for Edit user data and passwords):
And type your user account name (i.e., Archit-PC in this example) for the username:
7. Type 1 to clear the user password or 2 to set a new password for the Archit-PC user, then quit and save the changes:

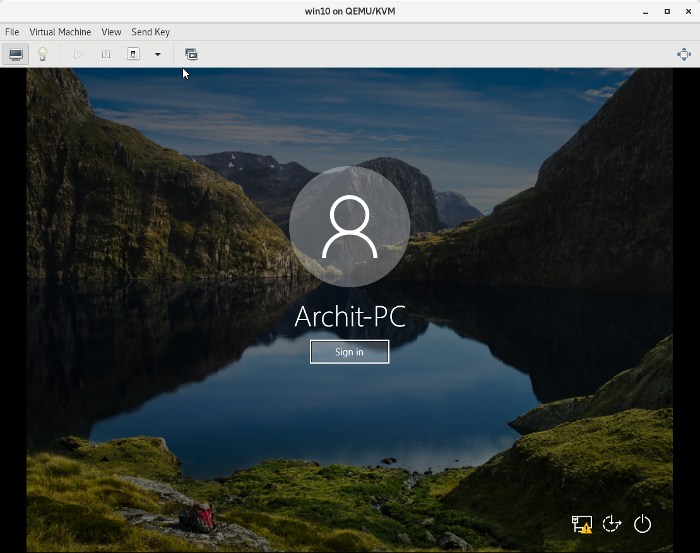
8. Reboot to Windows. If you selected 1 above, you’ll see there’s no password required to log in. Just click Sign in and you will be logged in:
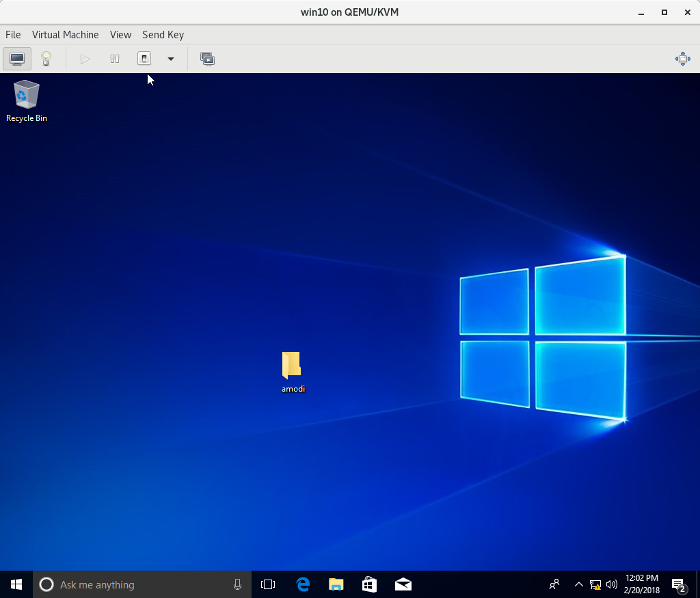
That’s all there is to it! I hope this will be helpful if you ever need to reset a Windows password.
Related Content
This work is licensed under a Creative Commons Attribution-Share Alike 4.0 International License.