
Microsoft объявила о масштабном обновлении, которое обещает прорыв в области создания музыки. В последней тестовой сборке Windows 11 Build 27788 (Canary) появилась публичная предварительная версия Windows MIDI Services, которая полностью поддерживает протокол MIDI 2.0. Это самое значительное обновление MIDI с момента его появления в 1983 году.
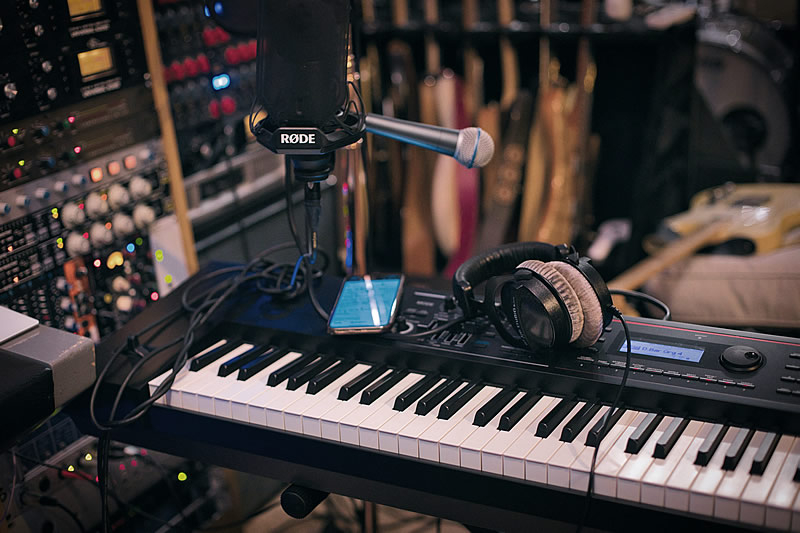
Источник изображения: Caught In Joy / Unsplash
Интерфейс MIDI (Musical Instrument Digital Interface) играет огромную роль в современной музыкальной индустрии и представляет собой протокол передачи, редактирования и хранения музыкальной информации для соединения электронных музыкальных инструментов с ПК и другими устройствами. Новая версия MIDI 2.0, впервые анонсированная в 2019 году, улучшает скорость, точность и возможности управления музыкальными инструментами и другими устройствами. Ранее протокол был доступен на устройствах Mac, а теперь станет доступен и в операционной системе Windows, сообщает The Verge.
В компании заявляют, что обновление Windows MIDI Services направлено на то, чтобы обеспечить «наилучший опыт для музыкантов» и создать «прочную основу для дальнейших улучшений». По словам представителей Microsoft, новая версия MIDI будет поддерживать не только MIDI 2.0, но и MIDI 1.0 на устройствах с Windows на платформе Arm.
В этой тестовой сборке также было представлено несколько других функций. Например, появилась возможность одним кликом продолжать работу с файлами OneDrive на разных устройствах, включая ПК, iOS и Android. Кроме того, в Microsoft Store теперь можно устанавливать отдельные игровые компоненты, например, для таких игр, как Call of Duty и Halo.
Текущая версия Windows 11 Build 27788 (Canary) пока находится на стадии тестирования и доступна участникам программы Windows Insider, однако обновления MIDI 2.0 и другие изменения в ближайшее время станут частью стабильной версии Windows 11. Подробные технические детали, касающиеся MIDI 2.0 можно найти в блоге Microsoft (пока только на английском языке).
Если вы заметили ошибку — выделите ее мышью и нажмите CTRL+ENTER.
Всем привет!
Конечно жалко о закрытии ветки»Выбор ОС для аудио».Жалко о решении Димы(БАМФа) уйти из ветки.Ну а с другой стороны,он никому и ничего не должен был доказывать.Просто человек поделился своими изысканиями в области Аудио.
Я,например перед его сборкой плотно сидел на Ubuntu Studio 16.04.1
Инструкция установки написана на английском языке,а для незнающих английский или знающих только в пределах школьной программы 70-х годов,тяжело разобраться в техничесских терминах.
Поэтому я написал установку на русском(для юзеров,типа меня).Выложу здесь,может кому то и пригодится.
Ubuntu Studio 16.04.1 Release
- Берём чистую флешку на 4Ggb(установочную) и накатываем с помощью rufus-2.11,от сюда LTS version http://ubuntustudio….[/size][/color] для архитектуры 32 или 64 бит.Почему именно rufus-2.11?Пробовал с помощью unetbootin-windows-625,но очень долго грузила(часов
 и так до конца и не догрузила.
 - Установочную флешку уже с распакованной LTS version ставим на загружаемый комп,включаем и усилленно мусируем кнопку F12(выбор девайса).В меню выбираем загрузочную флешку и жмём «Enter».
- На мониторе видим белое поле с выбором языков.Можно оставить английский,но я выбираю русский(что бы не заморачиваться с переводом),и жмём «Enter».
- Вставляем вторую флешку(целевую) на 32Ggb под систему ли же грузим на харддиск.Нажимаем на значок(установить Ubuntu Studio).
В откывшейся менюшке выбираем русский язык.
Жмём продолжить,отмечаем галкой пункт»Загрузить обновления во время установки…»,жмём продолжить.
В вкладке»installation options»везде ставим галки — продолжить.
В вкладке»Тип установки» я отмечаю первый раздел и жму»Установить сейчас».
На карте отмечаем самый близкий к нам город.
Раскладка клавиатуры-английская(Великобритания) — продолжить.
Дальше открывается вкладка с персональными данными.
Вот здесь я долго путался,не зная,как правильно заполнить.
А.- пишем как нас звать в компьютере
Б.- имя компьютера в сети
В.- как и в А.
Г.- задаём пароль и повторяем его(с ним мы будем делать все изменения в системе).
Отмечаем пункт»Входить в систему автоматически»-продолжить.
Пошла установка системы.
Когда установка закончена,перезагружаем компьютер и вынимаем установочную флешку.
Первый этап завершон.
 и так до конца и не догрузила.
В первую очередь я загружаю Google Chrom,что бы иметь доступ к инету(вы можете загрузить Ваш любимый браузер).Когда Вы загрузили появляется вкладка аутенфикации,вот здесь мы и вводим тот пароль.что писали изначально(пункт Г).
Снимок экрана_2017-04-28_07-52-27.png1360×768 38.1 KB
Снимок экрана_2017-04-28_07-56-03.png1360×768 185 KB
Снимок экрана_2017-04-28_08-06-28.png1360×768 146 KB
Всё готово.Теперь могу работать с инета
В поисковике вводим http://kxstudio.linu…[/color] и заходим в реппозитории.
Открываем окно терминала и вводим
Install needed tools
Без имени-1.jpg1920×1080 462 KBsudo apt-get install software-properties-common wget
Enable KXStudio repo (press ‘Enter’ once asked)
sudo add-apt-repository ppa:kxstudio-debian/kxstudio
Update software sources
sudo apt-get update
Install kxstudio-repos
sudo apt-get install kxstudio-repos
Update software sources again
Потом это
Без имени-2.jpg1920×1080 467 KB
С версии Ubuntu 15.10 нет пакетов GCC5 и мы устанавливаем
Install required dependencies if needed
sudo apt-get install libglibmm-2.4-1v5
Download package file
wget https://launchpad.ne…studio1_all.deb
Install it
sudo dpkg -i kxstudio-repos-gcc5_9.4.1~kxstudio1_all.deb
Снимок экрана_2017-04-28_08-50-37.png1360×768 381 KB
Перезагружаемся.
Меняю в настройках стола внешний вид(не обязательно.а ради эстетического удовольствия).
Снимок экрана_2017-04-28_09-17-52.png1360×768 387 KB
Загружаем из реппо Синаптик
sudo apt-get install synaptic
И перезагрузка.
Открываем меню,в поисковике набираем»synaptic» и в синаптике в поисковике набираем»kxstudio».
Снимок экрана_2017-04-28_09-41-06.png1360×768 196 KB
Снимок экрана_2017-04-28_09-41-51.png1360×768 162 KB
Всё установилось.
Теперь в Синаптике выделяем строку «kxstudio-repos» и жмём»обновить». Получаем пакет kxstudio.Ставим галки напротив тех,что нам нужны и жмём»применить».
Снимок экрана_2017-04-28_10-19-38.png1360×768 140 KB
Снимок экрана_2017-04-28_10-36-04.png1360×768 140 KB
Затем снова входим на сайт KXStudio : Repositories и жмём на ссылку»Applications in the repositories»
Снимок экрана_2017-04-28_09-53-59.png1360×768 122 KB
Открывается»KXStudio : Repositories : Applications» находим «Cadence (JACK Toolbox)» и жмём на нижнюю ссылку» /cadence «.Открывается «KXStudio : Applications : Cadence».Находим Linux 32bit или Linux 64bit и жмём Загружается Cadence.Файл распаковываем.
Теперь идём в Синаптик и набираем «Cadence»
Снимок экрана_2017-04-28_10-41-43.png1360×768 182 KB
Обновляем и открываем в меню софта
[/size]
Снимок экрана_2017-04-28_11-11-54.png1360×768 133 KB
Снимок экрана_2017-04-28_11-14-50.png1360×768 134 KB
Теперь устанавливаем проигрыватель.Мне больше по душе звучание плеера Audacious,хотя в плане управления по сети,лучше Клементина. Итак ставим Audacious.
Инсталировал Audacious,:
sudo apt-get install audacious
Если через терминал не устанавливается,заходим в наш,уже любимый,Синаптик и в поисковике набираем»audacious»
Ставим галки напротив пунктов,что касается audacious,жмём обновить и
Снимок экрана_2017-04-28_11-29-05.png1360×768 198 KB
Снимок экрана_2017-04-28_11-30-07.png1360×768 201 KB
Снимок экрана_2017-04-28_11-32-46.png1360×768 203 KB
Снимок экрана_2017-04-28_11-42-54.png1360×768 129 KB
…Оп ля получаем плеер Audacious.
Перезагружаемся и сохраняем все изменения.
Настраиваем плеер
Снимок экрана_2017-04-28_20-16-46.png1360×768 142 KB
,пока вот так.
Наверное нужно всё это было вставить в спойлер,но как не знаю.
Изменено пользователем pupsik2005
-
reziduchamp
Platinum Record- Joined:
- Mar 15, 2016
- Messages:
- 577
- Likes Received:
- 211
Hey all
I’m about to format to Windows 10.
Do some of the latest plugins need this 21H2 version or later?
Is there an optimised version for DAW only, offline? I thought I’d seen something like this on the sister site recently?
I have AMD Ryzen 7 3700X and a Radeon RX570. Is there anything that needs optimising and do any plugins use the Adrenalin Software? In the past I’ve installed it, saved the ‘driver only’ and removed Adrenalin, then just installed the driver. I’m wondering if that has caused issues?
I mostly run Ableton 10 but I’ll probably install Cubase as well if that makes any difference?
Last edited by a moderator: Jun 26, 2022
-
BEAT16
Audiosexual- Joined:
- May 24, 2012
- Messages:
- 9,081
- Likes Received:
- 7,062
Use the following links to optimize your computer for music production:
0.) Don’t let audio glitches ruin your performances! www.cantabilesoftware.com/glitchfree/
1.) The Ultimate Guide to Optimize your Windows PC for the Stage
https://gigperformer.com/docs/ultimate-guide-to-optimize-windows-for-stage/index.html
2.) LatencyMon 7.20
The LatencyMon software analyzes and identifies which device, which driver or which service is causing audio dropouts or malfunctions. Real-time audio suitability checker for Windows 10/8.1/8/7/2016/2012/2008 (x86 and x64)
Scroll Down to: System Monitoring Tools www.resplendence.com/downloads
3.) Windows Tuning Tips for Audio Processing
https://support.native-instruments….1729-Windows-Tuning-Tips-for-Audio-Processing
4.) PreSonus — Optimizing Your Computer for Audio — Windows 10
https://support.presonus.com/hc/en-…Optimizing-Your-Computer-for-Audio-Windows-10
5.) Ableton — Optimizing Windows for Audio
https://help.ableton.com/hc/en-us/articles/209071469-Optimizing-Windows-for-Audio
6.) FL Studio — Optimizing FL Studio performance
www.image-line.com/fl-studio-learning/fl-studio-online-manual/html/app_opt.htm
7.) Steinberg — Windows: How to set-up and optimize a Digital Audio Workstation
https://helpcenter.steinberg.de/hc/…t-up-and-optimize-a-Digital-Audio-Workstation
8.) Focusrite — Optimising your PC for Audio on Windows 10
https://support.focusrite.com/hc/en-gb/articles/207355205-Optimising-your-PC-for-Audio-on-Windows-10 -
clone
Audiosexual- Joined:
- Feb 5, 2021
- Messages:
- 8,423
- Likes Received:
- 3,674
It might not matter that much anymore, but on past experience; I would recommend installing your OS, then UAD drivers, then Cubase. And then plugins, applications, etc/.
-
reziduchamp
Platinum Record- Joined:
- Mar 15, 2016
- Messages:
- 577
- Likes Received:
- 211
Thanks for the help…
I’m booting off USB and Rufus says it can ‘boot in UEFI mode only’. I’m not sure why I set it up like this. Might be related to my USB keyboard, MIDI keyboard or Mouse or something legacy. I’m trying to wrap my head around this CSM thing…
But will this choice affect my DAW or any plugins if I choose the wrong one?
-
You probably have to create boot key in UEFI mode and possibly disable UEFI secure boot or create your signed boot key (from UEFI boot screen).
Try also Ventoy, it specifically asks for boot mode (choose UEFI).Last edited: Jun 26, 2022
- Like x 1
- List
-
HikaruSniper
Kapellmeister- Joined:
- Nov 20, 2021
- Messages:
- 70
- Likes Received:
- 40
Need offline? Just turn windows update off and install TinyWall (best firewall imo) that won’t let ANYTHING connect to the internet unless you allow it.
-
reziduchamp
Platinum Record- Joined:
- Mar 15, 2016
- Messages:
- 577
- Likes Received:
- 211
Cheers for the help. Think I’m mostly back up and running with a few hitches. Thanks for all the suggestions. I have to go through these now and get it optimised and those mother fuckin Windows alerts destroyed… I’ve forgotten how much torture a clean install is.
-
VroundS
Kapellmeister- Joined:
- Dec 8, 2015
- Messages:
- 191
- Likes Received:
- 69
Latest stable?
It’s not LInux brah.- Love it! x 1
- List
-
vuldegger
Platinum Record- Joined:
- Mar 15, 2021
- Messages:
- 418
- Likes Received:
- 185
version 21h2 os build 19044.1806
- Like x 1
- List
-
Windows 10 LTSC 2021 is the most stable and latest Windows version. It contains no bloatware apps and advertisements, and only stability and security updates. The problem is LTSC version is a corporate product, so one need to sign a corporate contract with at least 5 licenses. Which is why we have to download pirated copy of it via torrent websites.
Last edited by a moderator: Jul 6, 2022
-
VroundS
Kapellmeister- Joined:
- Dec 8, 2015
- Messages:
- 191
- Likes Received:
- 69
There is no such as thing as Windows stable distro.
- Agree x 3
- List
-
PifPafPif
Rock Star- Joined:
- Jan 19, 2022
- Messages:
- 544
- Likes Received:
- 394
Common ppl … i’m a computer tech and can tell you OSX and Linux are NOT always stable.
A lot of Ubuntu releases are pure crap.
OSX crash in certain situations.Personal story ; the first time i seen a mixing eng on Mac, he started an Altiverb instance and computer crashed with restart needed
The first time i tried to install an Ubuntu LTSC, it didn’t even started.
Linux Mint : no problem so farYES Windows s*cks. But don’t use it as an excuse for other OS
PS : As a side note, i tried the last OSX releases.
It was such a pain to install and run some plugins i returned to WindowsAnswer to OP : I run «Win 10 Entreprise LTSC 1809» with no problem
Better than the last OSX «nightmare installs» versions i dropped -
bluerover
Audiosexual- Joined:
- May 3, 2013
- Messages:
- 1,376
- Likes Received:
- 1,212
Windows 10 LTSC 2021 — imo, the absolute best option atm for an online/offline Windows 10 Audio Production system.
- Like x 3
- List
-
which build are you using?
-
bluerover
Audiosexual- Joined:
- May 3, 2013
- Messages:
- 1,376
- Likes Received:
- 1,212
Windows 10 X64 Enterprise LTSC 2021 en-US MAY 2022 Version 21H2 Build 19044.1706
I’m using the latest {Gen2} release. **TeamOS has some really great ‘unmodified’ and modified releases on their site too.
LTSC 2021 addresses the FLS slot limit problem upping the slots from 128 to over 4000.
Some example FLS requirements for some randomly selected plugins (for shitz n’ giggles purposes) :
UAD2 :
BX20 — 4
ATR102 — 4
DBX160 — 2
SSL E Legacy — 4
API 2500 — 4
EMT 140/250 — 4
Fairchild 670 MKII — 4
LA-2A Grey — 4
———————————————-
Slate VMR — 2
———————————————-
Korg ARP Odyssey — 3
Steinberg Padshop — 1
Waves Codex — 2
Steinberg Dark Planet — 3
Spectrasonics trilian — 1
FXpansion BFD3 — 2
———————————————
Arturia :
1973 Pre — 8
TridA — 8
V76 — 8Analogue Lab3 — 45
ARP 2600 v3 — 6
Buchla — 6
CMI — 8
DX7 — 6
Synclavier — 7
Modular V3 — 7- Like x 4
- List
-
Just more stable or less stable. LOL
For as long as I can run u-he and TAL plugins I’m good with any OS. Linux taught me that less is more and you really don’t miss much. [when you have some hardware fx maybe?]
edit: @bluerover Seems like Arturia takes another resource consuming prize. Thanks for posting that.
- Like x 1
- List
-
Just how many times..??
Last edited by a moderator: Jul 6, 2022
-
latest up-to-date Windows 10 is your best bet, to get most from your hardware and software,
sure disable/postpone further Updates and limit network connections with some firewall -
vuldegger
Platinum Record- Joined:
- Mar 15, 2021
- Messages:
- 418
- Likes Received:
- 185
-
Heavily stripped? I never heard of this Atlas OS before, do tell us more.
Здравствуйте, уважаемые форумчане!
Предлагаю вашему вниманию две сборки, предназначенных для превращения компьютера в «музыкальную станцию».
Сборки сформировались в процессе дискуссии на форуме сайта doctorhead.ru
Предлагаю вам оценить полученный результат и высказать свои мнения.
Надеюсь, данное программное обеспечение окажется полезным для местных ценителей качественного звука.
Обе сборки устанавливается на любую USB-флэшку,
объёмом 4Гб и выше
.
С этой-же флэшки грузится в оперативную память компьютера и ОЧЧЧЕНЬ быстро работает!
Начнём с Linux: сборка основана на BunsenLabs Hydrogen (в свою очередь, это микро-сборка на основе Debian Linux).
Сборка 32-битная, nonPAE (использует только 3Гб ОЗУ) — т.е. должна работать на самых древних компьютерах.
Из сборки удалена звуковая подсистема PulseAudio, как лишняя «прослойка» между плеерами и системой вывода звука ALSA.
1. Скачиваем архив
BunsenLabs_Hydrogen_4gb_(4audio.v2.no_pulseaudio).7z
с образом и утилитой записи на флэшку.
Размер архива: 1,38 ГБ (1 490 056 791 байт).
2. Подключаем USB-флэшку и утилитой USB Image Tool.exe заливаем на неё образ линукса (кнопка «Restore»).
Запись образа на флэшку нужно производить в режиме «Device Mode» , а в настройках поставить галлочку на «Truncate oversize images in device mode».
Скриншот с настройками — прилагается в архиве, в папке _docum_.
3. Загружаем компьютер с полученной флэшки.
Правой кнопкой мыши или сочетанием клавиш [Super]+[Space](в простонародье [Win]+[пробел]) вызываем меню оконного менеджера Openbox.
4. Запускаем плеер DeaDBeeF — он настроен на вывод звука через ALSA.
Плеер бит-перфектный и обладает наиболее эмоциональным звуком.
В настройках плеера вместо «Аудио устройство по умолчанию» выбираете конкретную аудио-карту и ОБЯЗАТЕЛЬНО c пометкой внизу названия «Direct hardware device without any conversions», и запускаете тестовую композицию.
Если всё заиграло — радуемся и слушаем.
Если в плеере бегунок ползёт по указателю трека, а звука нет, то смотрим все-ли «нолики» стоят на нужных нам аудио-выходах в «Меню» -> «ALSA Mixer», и установлена-ли максимальная громкость; или пробуем поменять девайс в настройках плеера.
5. Проверяем, определилась-ли Ваша звуковая карта ядром linux-а: в «Меню» -> «ALSA SoundCards» -> появится список аудиокарт.
Обычно, card 0 — соответствует параметру hw:0,0 в настройках MPD-сервера и плеера gmusicbrowser.
В трее, справа-вверху кликните мышкой по значку динамика — при загрузке часто громкость стоит на минимуме (столбик регулятора весь светло-серого цвета).
Для более подробных регулировок аудио-входов в меню есть пункт «ALSA Mixer».
6. В системе установлен gmusicbrowser — аудио-плеер, выводящий звук через набор библиотек GStreamer.
Говорят, что тоже бит-перфектный и обладает наиболее натуральным звуком. Послушайте-сравните…
Настройка звуковой карты: «Главное» -> «Настройки» -> «Аудио» -> «gstreamer 1.0» -> «расширенные настройки» -> alsa -> hw:0,0 (или измените, если Ваша карта установилась в системе как hw:1,0… hw:2,0 )
7. В системе установлен Music Daemon Player (MPD) и клиент-оболочка для него Ario.
ВНИМАНИЕ!!! Ракета — педальная. Загрузка сетевых функций и/или локального MPD-демона производится вручную.
MPD работает
как локальный сервис
— автоматически запускается при запуске Ario, и выгружается из памяти — при остановке Ario.
Сетевой доступ к MPD
запускается пунктом «MPD net.service START» в «Меню».
При этом запускается ТРИ системные службы:
1. AVAHI — для динамического предоставления DNS-имён, в первую очередь — нашего MPD-плеера;
2. LIGHTTPD — «лёгкий» web-сервер — для закачки обложек альбомов в программы-клиенты;
3. MPD — сам плеер.
Для выгрузки этих служб из памяти предназначен ярлык «MPD net.service STOP».
Выбор звуковой карты в Ario: вверху горизонтального меню «Редактировать» -> «Параметры» -> «Сервер» -> внизу пункт «Аудио выходы» -> ставим крыжик напротив нужной Вам карты, например «ALSA card 0 (hw:0,0)».
Остальные крыжики — убираем.
Если оставить крыжики на всех картах — звук будет выводиться СРАЗУ НА ВСЕ аудиокарты.
Если у Вас пять и более аудиокарт — добавить их в Ario/MPD Вы сможете, отредактировав файл /etc/mpd.conf
Папка с музыкальными файлами для MPD задана в /media/meloman/
Из неё формируется база MPD.
В папку /media/meloman/music/ записаны локальные файлы для тестирования.
В файле mpd.conf
я отключил автоматическое обновление базы
, ибо по-умолчанию mpd делает его при каждом запуске.
И, если у Вас большая фонотека, то это будет сильно раздражать.
Поэтому, если Вы добавили в папку с музыкой новые файлы, то обновите базу вручную, отправив команду из клиента, будь то Ario или ncmpcpp.
Локальные HDD или подключённые USB-носители можно добавить в папку /media/meloman/ при помощи встроенного файлового менеджера Thunar.
Или, после этого, обновите базу вручную, отправив команду из клиента, будь то MPoD, GMPC, Ario или ncmpcpp.
Треки с подключённых дисков можно добавить в плейлист при помощи вкладки «Файловая система».
После того, как Вы смонтировали дополнительные диски и запустили сетевые службы MPD, можно выйти из графической оболочки в консоль, при этом из памяти выгружается около 15 процессов.
Продолжайте управление MPD плеером удалённо с планшета или смартфона программами-клиентами.
клиенты для коммуникаторов:
— для Android в Google Play есть MPDroid и DroidMPD. Какой из них выбрать — дело вкуса; интерфейс второго показался несколько аляповатым.
— для iPhone/iPod пользуется популярностью MPoD, для iPad есть специализированная версия — MPaD.
— клиент для Windows — GMPC.
Скачиваете, устанавливаете, настраиваете соединение — клиент должен автоматически найти работающий MPD как «blh4audio», в меню клиента запускаете обновление базы музыкальных файлов, пользуетесь…
***
Вы можете одновременно запустить три плеера (DeaDBeeF, Ario и gmusicbrowser) и, наконец-то сравнить их звучание в одинаковых условиях.
Для удобства работы с файлами, дополнительно установлена утилита Double Commander — бесплатный кросс-платформенный аналог Total Commander-а.
P.S. Если (вдруг) кто-то хочет использовать MPD в сетевом режиме и не желает загружать графический интерфейс, то достаточно в файле /home/meloman/.profile запретить последнюю строчку скрипта, поставив # в начале строки и сохранив изменения.
При следующем включении компьютера графический интерфейс не будет загружаться.
P.P.S. По-умолчанию логин/пароль в данной сборке: meloman / meloman
Principal Software Engineer
Windows 10 tweaks, optimizations, and build tips for pro audio workstations / DAWs – Part 1 of 3
Permalink for the start of this guide: https://aka.ms/Win10AudioTweakGuide . Please use this link when sharing.
This is a long guide. It started out as a simple list of recommended tweaks, but weeks later, it evolved into this multi-part series. I hope you find it useful, despite its book-sized text. 🙂
This is Part 1 of 3. Once available, you will find the other posts here:
- Part 1: Introduction and PC picking/building
- Part 2: What to tweak proactively, and what to consider doing
- Part 3: What not to do when tweaking your digital audio workstation
There are many Windows tweak guides out on the net. Some are good, some are quite bad, some are simply outdated, and some suggest things that may ultimately make for a worse-performing workstation. I’ve avoided releasing a guide like this, because many folks follow tweak guides blindly, and end up with unstable workstations. Part of the reason for this is that very few tweaks will reliably increase performance across all types of PCs, DAWs, and audio interfaces.
But I felt it’s time to release the things I personally find valuable for a Windows music workstation, in the form of an unofficial and potentially unsupported tweak guide. This is part 1, which deals with decisions made before tweaking even starts. This is important, because so much of the train is set in motion here, at the beginning, when you pick your PC or components.
This tweak/tip guide will be full of caveats. Why? Because tweak guides should be full of caveats, of course. There are always implications and side effects to any choices you make when customizing a system.
My general approach for audio is to start with the things I know will be important to do, and then test my performance. If it’s within the range I want, I’m good. But I test with my ears, not by using tools. I recommend folks not get hung up with test results from DPC latency checkers or others unless there’s an actual audible audio glitch.
It’s important to note again that this is an unofficial guide. The tweaks and tips here are not necessarily supported by or recommended by Microsoft, the Windows team, or the companies involved in building the hardware and software you are using. I’ve put this out based on my own experience and research. As with any list of “tweaks”, use these at your own risk and expense.
That said, I’ve tried to provide enough information here for you to make informed decisions, rather than blindly following a list of changes. For that reason, the guide here is both longer, and requires more of your active decision making vs. a straight list of tweaks.
Also, some of these tweaks and suggestions will have different implications when on a desktop vs a gaming laptop vs a “thin and light” laptop or tablet. I note those when that’s the case. Personally, I use a desktop PC for my music creation because that affords me the best performance and expansion options all with the best possible thermal management.
I also keep my PC on the other side of a physical wall (cables pass through the wall, which is actually a decoupled double-wall) so I don’t have to consider any tradeoffs with cooling vs noise. That said, it’s still pretty quiet due to the large fans. Not everyone can do this, but if you can, it’s really a great setup with the best of all worlds.
I’m making the assumption here that the PC you are tweaking is being used for primarily or exclusively DAW use. My own PC is the one I use for everything (video editing and rendering, gaming, software development, 3d CAD/CAM, music creation, general PC use), so I’ve personally made different choices in some cases. That said, my audio latency and performance are quite good, despite having made minimal tweaks.
Folks often ask about specs for my own PC, so here are my PC specs at the time of this writing. Most of my PC is a few years old now. I tend to update components every 3-5 years, on a rolling basis. I don’t regularly reinstall Windows or do any maintenance.
| Component | What I use |
|---|---|
| Processor | Intel i9 9900K – 8 cores, 16 threads |
| Memory | 64GB XMP 3200 DDR4 RAM |
| Motherboard | Gigabyte Z390 Aorus Ultra |
| Video | nVidia 2080 RTX Super (for video rendering, 3d design, and gaming). Driving one 4k 40″ screen and one smaller touch screen |
| OS and apps drive | Intel PCIe 1.2TB NVMe drive in a PCIe slot. (I’ve had this drive across a few PC upgrades, but it is very fast and reliable. I intend to upgrade it once I move to a PCIe 4.0 system in the future) |
| Data drive | old spinning rust 3TB drive. I intend to replace this soon as it’s starting to get on in years. |
| Audio interface | MOTU PCIe 424 with 4x 24 i/o rack units (96 inputs, 96 outputs) running at 96k/24 bit (these drivers haven’t been updated in a very long time, so they may stop working at some point in the future). I run with a 256 sample buffer which gives me around 5ms round trip. I can go lower (and have, as a test), but settled on this to allow me the best mix of performance and flexibility with some rather hungry plugins. |
| MIDI interfaces | 5x MOTU MIDI 128, 2x iConnectivity mio XL, many USB->device direct connections |
| Backup | Both OneDrive and external USB drives |
That setup was the right choice for my build at the time, and as of this writing, I am still using it. I’m not making any statement about it being the best system, lowest latency, or most suitable for you. I use a mix of hardware and software synthesizers, and primarily software effects (although I do have some hardware effects). As mentioned above, I also do non-DAW work on this PC (video editing, 3d modeling, software development, writing this blog post, graphics work, games, and more).
Here’s a photo of the basement wall behind me (approximately a third of my setup, and most of my modular gear — keyboards and other synths are on other side of the room)
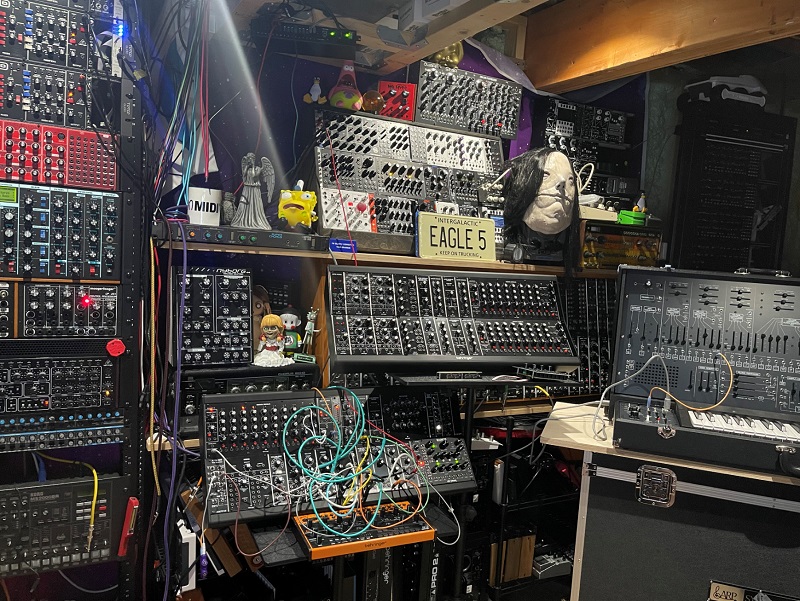
Almost all of that is attached to the PC either directly (USB), or through a USB MIDI interface (MOTU and iConnectivity). All of it is connected to my PC audio inputs.
Please note that I can neither recommend a system for you, nor comment on suitability of individual components you’ve picked. I cannot otherwise help you choose software/parts/components/PCs/etc. There are lots of helpful folks on forums who can help you there, and who can give you up-to-date advice.
Some (many) of the DAW software companies have their own tweak lists. They are a best attempt at covering the ecosystem of devices that run their products. I don’t recommend following any of them blindly, especially since some of them are really Windows Vista/7 information re-labeled as Windows 10, but do take a look at any additional information provided by your DAW or interface developer. They tend to know what works best with their own software, but aren’t always on top of keeping up with the latest releases of Windows or hardware.
I also work with a number of good DAW PC OEMs (companies that build DAW PCs). They tend to do even more for their systems. If you buy a custom DAW PC from a DAW OEM, and they do something different from what I indicate here, I would trust them to know what is the most stable thing for their system. They know the subset of hardware they target, and they know what they need to be able to support over time. They also know which subset of software they support, and how to get the most from it.
I want to point out one thing many folks don’t realize, and the proliferation of tweak guides (including this one) doesn’t help: you can get perfectly fine audio performance from most quality PCs without doing any of this. You don’t have to tweak the PC in most cases. Of course, the PC ecosystem is huge with many different PCs, DAWs, and devices out there, so your mileage may vary. But don’t go into a PC purchase assuming that, to be usable for any audio, you’ll have to do a ton of customizations.
Ok. Enough with the disclaimers. Before getting into the tweaks, let’s start with some general guidance.
Agree, disagree, or otherwise have an opinion on anything here? Please drop me a note in the comments.
Acceptable audio latency
Unless you are trying to get audio latency down to the absolute minimum you can, because that’s your hobby (much like overclocking PCs, or performance tuning cars), it’s usually not worth doing the additional hard work and stability troubleshooting to knock off another ms or so from your round-trip latency; the additional tweaks have diminishing returns and increased risk of instability in many cases. The majority of your performance is going to come from picking a good audio interface with good ASIO drivers.
I’m not talking about folks building custom systems for orchestral arrangement with 500+ tracks. Those folks will have their own information to go by, and rather unique needs which may push them further than most folks need to go (including restricting to known hardware that may be several generations old). But rather I’m targeting the vast majority of musicians out there who want to ensure they get the most reasonable and stable performance from their PC.
Remember, sound travels approximately one foot per millisecond. So the typical stage monitor, for a guitar player, is around 5-12 milliseconds of latency away from them (if not using in-ear). For those of us with studio monitors, they are usually 2-5ms away. Headphones have less latency, but only if wired. Wireless and Bluetooth protocols add their own latency in communications to the headphones.
Tip: Unless you prefer tweaking over making music, don’t get hung up on the last millisecond or three.
How to pick a PC
If you haven’t already picked the PC you plan to use for audio production, you have some decisions to make. The decisions you make here will completely influence your options when it comes to actual tweaking.
Consider a desktop instead of a laptop
If this is a dedicated DAW PC, and you don’t currently gig or otherwise take your performance on the road, consider a desktop rather than a laptop. Desktops have more expansion options, and most importantly, much better thermal management which include larger (quieter) fans. I know many musicians who hate the loud fan on their laptops once they kick into heavy production. Larger fans can spin more slowly while moving the same amount of air as the much smaller fans in a laptop. Slower typically means quieter. High-quality name-brand fans here also make a difference in airflow and bearing noise.
Additionally, laptops and tablets are very prone to throttling the CPU to reduce heat. The last thing you need while recording is the CPU to slow down. This happens a lot with any consumer laptop that is optimized for size and weight rather than heat dissipation. Note that you can mitigate this a bit with dedicated active cooling pads for your laptop should you need to, but those little fans still tend to be quite loud.
My son had a gaming laptop (he now has a desktop). Whenever he spun up a more intense game, the fan went into full jet engine mode. The CPU didn’t throttle, but that’s because this was a fat laptop, with more cooling. But boy was it loud. I’d never use it for DAW work. I ended up building him a gaming PC for his birthday, spurred on by the failure of one of the fans in the laptop (I’ve replaced those fans, but it’s really a backup/friend PC now.)
And note that this isn’t just a Windows PC thing, it happens across the board with laptops of all sorts. But in the PC world, we have a decent choice to build or buy a desktop as an alternative. I have friends who use actively-cooled laptops that run other operating systems, and they are no different when it comes to noise levels or heat.
Desktops also tend to give you more options for USB connections, as well as the ability to use wired networking rather than wireless. These are both extremely important for systems that will use many external devices.
There are many professional musicians who have completely different gigging vs home studio rigs. They often have desktops in the studio, and laptops for gigs/road. If you can swing this type of setup, you get the best of both worlds. You can use tools like OneDrive to automatically synchronize your data files between them.
Finally, you can upgrade a desktop PC over time vs having to throw it away and replace it. For my own build, I’ve used the same case across a number of builds. I’ve also brought memory (which was over-specc’d), drives, and the audio interface over from past builds. I’ve replaced the motherboard and CPU cooling for each build, and the video card in-between builds. Not only does this reduce overall cost, but it’s generally better on the environment to reuse rather than throw away or even recycle. Also, because I own a retail license to Windows 10 Pro (rather than an OEM version), I’ve been able to move that from build to build over the years.
Tip: If you don’t need to take this PC on the road, or otherwise need it to be portable, a desktop is almost always the better choice. You could always get a separate laptop for road use if you require one in the future. Because the laptop would not be a desktop replacement, it doesn’t necessarily have to have the same high specs you’d require if it were your main studio PC.
Build or Buy
Building your own PC is a hobby in itself. It’s easy enough to build a working PC to handle gaming, web, and more, but not always simple to build an optimally performing PC for audio. In general, you will not save money when building your own PC. Instead, you get to pick exactly what you install into it, rather than choose a pre-configured system, that was not designed with audio in mind.
You can also buy a new audio-focused DAW PC, built by companies that specialize in this. This gives you someone to turn to if something doesn’t work, and also gets you up and running much faster. In the case of PCs built by custom DAW OEMs, you are also guaranteed to have a musician-quality PC ready to run. There are many PC DAW builders out there, but here are two shows I’ve done with current and former DAW Builders:
Computer Music Week
DAWbench Radio Show
Tip: If building a PC is not part of your hobby or interests, strongly consider a custom/dedicated DAW PC builder.
Ok. Let’s get into some decisions around building your own PC.
Custom PC Build tips
Let’s say you’re going to build your own PC. Remember, you’re not likely to save money here, but rather you get to make every decision that goes into the build.
What should you consider?
Start with good components
By “good” I don’t necessarily mean “top of the line”. Plenty of folks make great music on i5 and similar processors, integrated graphics, and 8-16GB memory. In fact, sometimes those i5s do better than i7s in thin laptops due to less thermal throttling. Instead, I mean to purchase quality, name-brand components that have a good reputation in the community. That includes everything from the power supply to the case fans to the memory.
When it comes to memory, I recommend new builders use the memory compatibility list the motherboard manufacturer releases. Most memory will just work, but the compatibility list will remove all doubt and help ensure you are able to get memory that performs to spec in your setup. How much memory you need will depend upon your use, but I personally recommend 32GB if you can, especially if you have integrated graphics and you work with sample libraries. Most everything will work well enough on 16GB, of course. 8GB can be stretching it and will be limiting, but folks still use it with the limitations in mind. I have 64GB in my PC not because I use that much with a DAW, but because some of the other work I do on this PC really benefits from the additional memory.
Is it worth getting memory that is faster than the minimum requirement for your CPU and motherboard? In many cases, the answer is “yes”. There’s a price/performance trade-off, but if you go a couple steps higher, and the memory has an XMP setting (a profile for describing the memory’s preferred settings) that you can enable with your motherboard, it’s worth doing. Audio, video, and graphics work all tend to be memory-intensive, so it’s usually worth boosting just a little there when you can. Keep in mind that rated speed is not the only consideration, as various latency values also play a part. You can go nuts researching this on overclocking and gaming forums.
Tip: Budget components often have budget performance over time.
Minimize what you put in the box
Do you really need a discrete graphics card? Is your DAW PC the right location for a video capture card? The more things you add to your PC, the more work you’ll have troubleshooting any potential additional latency or instability. I’m not saying to completely avoid these things (in fact, I have both a video capture card and a discrete video card in my build), but just to be aware that you will potentially add issues with these devices. What issues you run into highly depends upon the quality of the devices and drivers, how your motherboard is set up, and how much experience you have building PCs.
That said, sometimes, a discrete graphics card will actually help your performance. But this was in specific cases reported on forums, with specific graphics-hungry plugins.
Tip: Keep it simple. The more you put in, the more complex any troubleshooting will be.
Know how your motherboard works
If possible, before purchasing your motherboard, or certainly afterwards, read the manual. The manual typically includes information such as which PCIe slots share resources with each other, or with specific M.2 slots or Thunderbolt ports. In many motherboards, you’ll also find that certain SATA ports share resources with PCIe slots or other on-board devices. This information, factored into your build decisions, can make the difference between a great DAW PC and an unusable one. Knowing this in advance will help prevent issues where you may, for example, max out the M.2 slots with drives, only to find that there are no PCIe lanes left for that audio interface after you added that video card.
Another thing you’ll learn from the manual is which USB ports are CPU/chipset vs. being run from an on-board hub. This seldom makes a real performance difference, but it can help you in prioritizing connections and partitioning the tree of USB devices to maximize bandwidth and minimize interruptions. For example, I would try not to put a USB Audio interface on the same branch of the tree as mouse, touch, webcam, and keyboard. I would also try to minimize the devices (like on-board hubs) in between the CPU and the audio interface.
Knowing this information will help you plan your build in a way that minimizes potential conflicts and maximizes performance where it’s needed.
Tip: Read the motherboard manual. 🙂
Start with a current set of firmware
Your laptop, desktop, or motherboard manufacturer will almost certainly have BIOS updates available. Read the notes and check online forums for problems. If they look reasonable, update to the latest before you even install the OS. Staying with an old BIOS will often mean you lose compatibility with later processors and memory. Many motherboards in the past have required BIOS updates to work with Thunderbolt 3 as well.
When looking for BIOS problems, keep in mind that people on the internet generally don’t start threads to tell you that the BIOS update works as expected. Instead, like anything else you look up, you’ll typically find problem reports disproportionately represented in discussions. What you’re looking for are audio-specific reports, or trends of obvious big problems. A single problem report is not likely to be a trend. Similarly, a report about dropped FPS in a game is not likely to be relevant to music creation.
The same goes for updates to your audio interface firmware.
Tip: Try to update your BIOS firmware before you install Windows
Understand the difference between Windows 10 editions
I’m often asked which edition of Windows 10 I recommend for musicians. In general, I recommend Pro, because it has more knobs you can turn to control aspects of the system, especially anything that uses Group Policy, or has to do with updates. But outside of that, most folks with a basic DAW can do fine with the Home edition, as long as they understand the limitations.
So, when in doubt, get the Pro edition. But if your PC came with Home edition installed, you don’t necessarily have to upgrade to Pro.
Note that some PCs come with what is known as “S Mode” (formerly Windows 10 S). This is fine for the majority of consumers out there, but not for musicians at the time of this writing. You can switch the PC out of S mode, so you can install the DAW software and other tools you need to produce music.
Tip: Windows 10 Home is fine, but Windows 10 Pro will give you more options for control over the PC. You can upgrade at any time, but it’s easiest to start with the one you want to keep.
Talk to others
There’s a huge community of PC builders out there. Ideally, you want to participate in a segment which specializes in DAW PCs. You can find forums and threads in places like Gearslutz, KVR, and more. If you just do a web search, you’ll get an unbalanced view because most people post their problems, not their successes.
I can’t help you with PC or component recommendations, but I do recommend checking out the various music forum DAW Build PC threads. Technology changes every year, so these tend to be quite active.
Tip: There’s a great community of audio PC builders. Tap into it.
Don’t rely on latency-reporting apps to decide if your PC is usable for audio
I sometimes get reports from folks who have perfectly usable systems, and are making music with them, but tried out a latency monitoring application and saw poor results. These types of apps are really only useful once you’ve already run across glitching or other issues. Instead of relying on these reports, trust your ears. Only if you hear a problem should you turn to these apps to get some indication of what may be the cause.
Tip: Use your senses, not a benchmarking app.
Bonus: Consider installing Power Toys
Musicians often want to remap keys and have greater control over managing windows on their desktop. The open source Microsoft PowerToys makes those, and more, very easy to do. You can download and install them for free. You can even contribute your ideas (or code!) to help make the product even better.
Microsoft PowerToys Documentation Microsoft PowerToys Github Repo
PowerToys is delivered out of the box because it makes it easier for us to iterate out of cycle with Windows, and also makes community contributions possible.
Tip: The PowerToys Fancy Zones is especially nice for window management.
Bonus 2: Consider Microsoft Edge (Chromium)
Oh, and one of the first things many people do, usually by old habit when setting up a new PC, is install Google Chrome. Chrome is a good browser, but keep in mind that the current version of Microsoft Edge is based on the open source Chromium project (Microsoft is one of the biggest contributors to that project) so is compatible with all the same sites and markup that Chrome is. It also supports Web Audio and Web MIDI, and I’ve had zero issues using it on sites that recommend Chrome. You can (if you want) sync favorites and more between Windows, macOS, iOS, and Android. It even has some pretty nice privacy tweaks, and easy switching between home and work profiles.
I beg forgiveness for the marketing-like blurb, but please do check it out.
This video is almost a year old at this point, but is still useful. Also, for once, it seems like I can actually recommend that you read the comments. 🙂
Tip: The new Microsoft Edge Browser, based on Chromium, is not the same as the old one. Check it out.
What’s coming
In the remaining two parts of this series, I’ll talk about what we would normally think of as tweaks, which ones to apply, which ones to question, and which ones to stay away from. I’ll also recommend steps to take when things don’t go as planned.
If you have your own PC building tips (specific to DAWs), or disagree with any advice here, please do mention it in the comments below.
The DAW PC tweak series
This is Part 1 of 3. Once available, you will find the other posts here:
- Part 1: Introduction and PC picking/building
- Part 2: What to tweak proactively, and what to consider doing
- Part 3: What not to do when tweaking your digital audio workstation
Permalink for the start of this guide: https://aka.ms/Win10AudioTweakGuide . Please use this link when sharing.
Author
Principal Software Engineer
Pete is a Principal Software Engineer in the Windows Developer Platform team Windows at Microsoft. He focuses on client-side dev on Windows, apps and technology for musicians, music app developers, and music hardware developers, and the Windows developer community. Pete is also the current chair of the Executive Board of the MIDI Association.
He first got into programming and electronic music by working with sprites and the SID chip using BASIC on the Commodore 64 in 6th and 7th grade, and …
More about author