
Дата последнего обновления : 21-08-2023
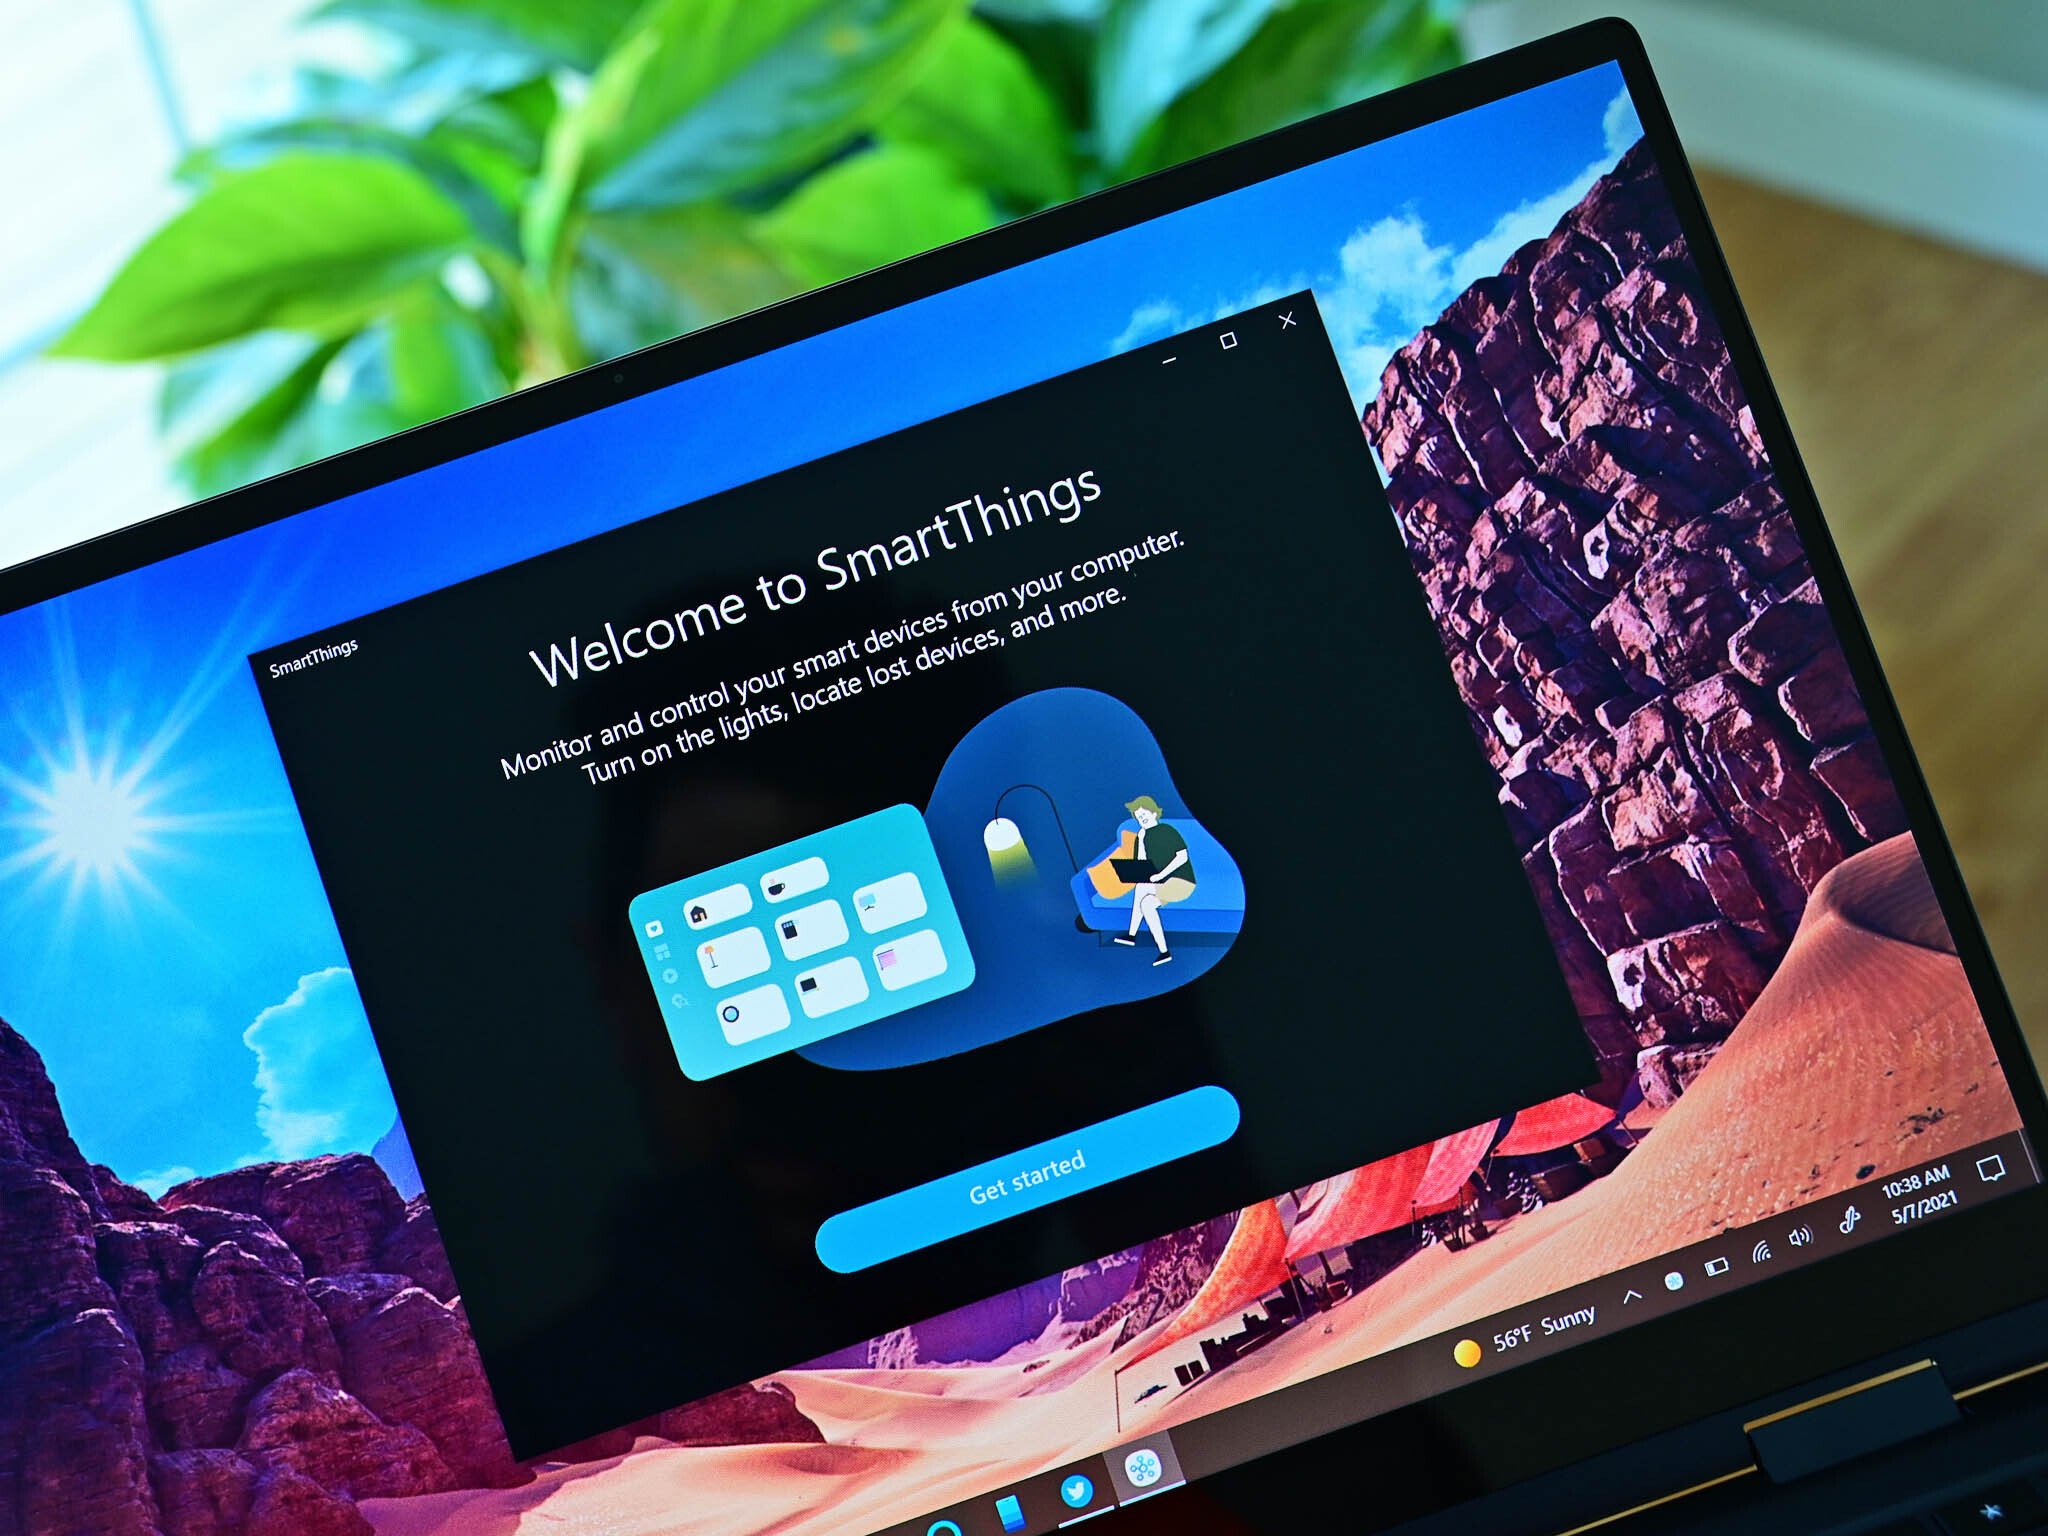
У SmartThings появилась версия для Windows 10 и 11. Теперь можно включать и выключать устройства, активировать сцены, редактировать комнаты, просматривать SmartThings Find и многое другое в приложении на компьютере.
Функция поддерживается на серии Galaxy Book, выпущенных с мая 2021 года (Galaxy Book Pro 360, Galaxy Book Pro, Galaxy Book Go, Galaxy Book)
Начало работы с SmartThings для Windows
Загрузите новую версию SmartThings из магазина Microsoft, если у вас ее еще нет. При первом открытии приложение предложит войти в аккаунт Samsung и попросит предоставить разрешения. Войдите в тот аккаунт Samsung, к которому были привязаны ваши устройства в мобильной версии SmartThings. Тогда эти устройства появятся в приложении на компьютере.
В приложении SmartThings для Windows можно:
- Включать и выключать устройства.
- Запускать Сцены.
- Редактировать существующие Комнаты и добавлять новые.
- Просматривать SmartThings Find.
В версии для Windows есть и некоторые ограничения:
- Нельзя подключать новые устройства и создавать Сцены.
- Нельзя редактировать подключенные устройства и Сцены.
- Нет доступа к разделу Автоматизация.
- Нет доступа к другим Smart-приложениям и сервисам, кроме SmartThings Find.
- Нет доступа к детальной информации об устройствах, что может ограничивать контроль над ними.
Навигация по приложению SmartThings для Windows
Навигация по SmartThings для Windows несильно отличается от навигации по мобильной версии приложения.
На панели управления слева можно перейти к различным функциям приложения: подключенным устройствам, сценариям, избранному, меню настроек. Просто нажмите на нужную категорию для перехода. Вы также можете скрыть панель управления: для этого нажмите на Меню (три горизонтальные линии) в верхнем левом углу.
Чтобы выбрать другое Место, нажмите на стрелку рядом с текущим Местом (например, Мой Дом), а затем выберите нужное.

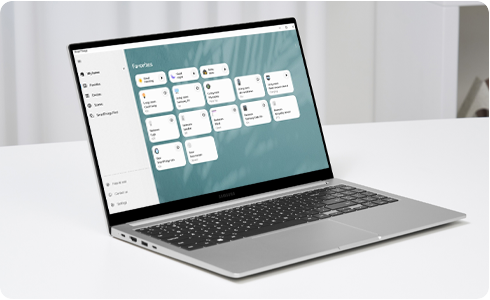
Добавление в избранное Сцен и устройств
Раздел Избранное позволяет быстро просматривать часто используемые устройства и Сцены и управлять ими.
1
Выберите нужное Место, а затем нажмите на пункт Избранное на панели управления.
2
Если вы в первый раз добавляете что-либо в избранное, внизу страницы нажмите Настроить избранное.
3
Выберите устройства и сцены, которые хотите добавить, и нажмите Готово.
5
Чтобы впоследствии пополнить список избранного, зайдите в раздел Избранное, откройте Больше опций (три вертикальные точки) и нажмите Редактирование избранного.

6
Нажмите на знак + и выберите устройства или сцены, которые хотите добавить в Избранное. Затем нажмите Готово.
7
Приложение вернет вас на страницу Редактирование избранного. При желании вы можете перемещать элементы в списке, чтобы изменить их порядок. Чтобы подтвердить изменения, нажмите Сохранить.
8
Для управления подключенными устройствами или сценами перейдите в раздел Избранное. Чтобы включить или выключить устройство, нажмите на значок питания рядом с ним. Чтобы активировать сцену, нажмите на значок воспроизведения рядом с ней.
Если вы захотите удалить что-то из Избранного, вернитесь на страницу Избранное, откройте Больше опций (три вертикальные точки), а затем — Редактировать избранное. Нажмите на значок удаления (-) рядом с устройством, которое вы хотите убрать из списка. Нажмите Сохранить для подтверждения.
Управление устройствами и запуск Сцен
Обратите внимание: при использовании версии приложения для Windows управление устройствами будет ограничено.
В приложении SmartThings для Windows нельзя добавлять новые устройства и Сцены, но можно включать и выключать уже добавленные. Кроме того, вы можете активировать существующие Сцены.
В панели управления выберите Место и нажмите Устройства. Нажмите на кнопку включения напротив устройства, чтобы включить или выключить его. Если на вашем компьютере сенсорный экран, то переместить устройство в комнату можно просто удерживая на нем нажатие.

Чтобы активировать Сцену, на панели управления перейдите в Сценарии и нажмите на значок воспроизведения напротив нужной сцены. Она активируется, если задействованные в ней устройства включены.
Добавление и редактирование Комнат
В приложении SmartThings для Windows можно добавлять новые комнаты, а также переименовывать их, удалять и изменять порядок.
Как добавить Комнату
Выберите Место, в которое хотите добавить Комнату. Нажмите знак + (Добавить) в правом верхнем углу (на вкладке Устройство), а затем Добавить комнату. Введите название и нажмите Готово. Новая Комната появится в выбранном Месте. Далее вы сможете добавлять устройства в эту Комнату.

Как переименовать Комнату
Откройте Больше опций (три вертикальные точки) напротив нужной Комнаты (не напротив пункта Устройства). Выберите Переименовать и введите новое название. Еще раз нажмите Переименовать, чтобы подтвердить изменения.

Как изменить порядок Комнат
Откройте Больше опций (три вертикальные точки) в правом верхнем углу напротив пункта Устройства. Нажмите Изменить порядок комнат. Удерживайте значок со стрелками напротив названия Комнаты, чтобы переместить ее на нужную позицию.

Как удалить Комнату
Откройте Больше опций (три вертикальные точки) напротив нужной Комнаты (не напротив пункта Устройства). Нажмите Удалить, затем выберите, в какую Комнату переместить устройства из удаляемой Комнаты. Еще раз нажмите Удалить, чтобы подтвердить действие.

Дополнительные опции и настройки
На панели управления есть дополнительные опции. Панель сворачивается и разворачивается при нажатии на Меню (три вертикальные линии) в левом верхнем углу.
Доступные опции:
- Использование: читайте полезные руководства по использованию приложения.
- Свяжитесь с нами: находите ответы на частые вопросы или оставьте запрос для службы поддержки.
- Настройки: настройте уведомления, просматривайте личные данные и информацию о приложении.
- Уведомление: узнавайте новости о приложении.
Благодарим за отзыв!
Play on PC with BlueStacks or from our cloud
Run SmartThings on PC or Mac
SmartThings is a lifestyle app developed by Samsung Electronics Co., Ltd. BlueStacks app player is the best platform to use this Android app on your PC or Mac for your everyday needs.
Experience the ultimate control over your Samsung Smart TVs, appliances, and an extensive range of SmartThings-compatible devices with unparalleled ease and convenience.
SmartThings empowers you to swiftly connect and manage your smart home devices, offering a unified platform for seamless control.
Compatible with hundreds of leading smart home brands, SmartThings consolidates all your gadgets into one comprehensive interface, granting you full command over your Samsung Smart TV, as well as an array of smart home appliances.
With SmartThings, the process of connecting, monitoring, and controlling multiple smart devices becomes effortlessly efficient.
Harness the power of voice assistants such as Alexa, Bixby, and Google Assistant to effortlessly control your smart devices, adding an extra layer of convenience to your everyday life.
Unlock a host of key features that elevate your smart home experience. Monitor and control your home regardless of your location, ensuring peace of mind and complete control at your fingertips.
Seamlessly connect your smart devices from different brands and orchestrate them to work in harmony by creating customized “scenes.” Build routines based on time, weather conditions, and device status, ensuring your home operates smoothly in the background.
How to Download and Run SmartThings on PC or Mac
-
Download and install BlueStacks on your PC or Mac
-
Complete Google sign-in to access the Play Store, or do it later
-
Look for SmartThings in the search bar at the top right corner
-
Click to install SmartThings from the search results
-
Complete Google sign-in (if you skipped step 2) to install SmartThings
-
Click the SmartThings icon on the home screen to start playing

Watch Video
Do you want to enjoy the convenience of a larger screen without buying a separate device? Then, look no further than BlueStacks!
BlueStacks is a free Android emulator software that allows you to run Android applications on your computer or laptop. With BlueStacks, you can access thousands of Android apps and games without a mobile device.
One of the most significant advantages of BlueStacks is its compatibility with both Windows and Mac operating systems. So whether using a PC or a Mac, you can enjoy your favorite mobile apps and games on a larger screen with BlueStacks.
BlueStacks’ advanced Keymapping feature is perfect for gamers with more precision and speed. This feature allows you to assign controls to your mouse, keyboard, or gamepad for more accurate gameplay. So whether you’re playing action-packed or strategy games, you can customize controls to suit your preferences and play like a pro.
With BlueStacks, you can also easily record input sequences and execute them with a single button click using the Macro functionality. This feature makes it easier to perform repetitive tasks or complex maneuvers in games, helping you to level up faster and play more efficiently.
BlueStacks’ Multiple Instances feature is another game-changer. It lets you run multiple apps or games simultaneously on a single machine, allowing you to get more done in less time. This is particularly useful for multitasking and productivity apps.
BlueStacks 5, the latest software version, is faster and lighter than ever. Its sleek and modern interface is designed to provide a seamless mobile experience on a larger screen. In addition, key features like Advanced Keymapping and the Instance Manager are more intuitive and user-friendly than ever before.
In conclusion, BlueStacks is the ultimate solution for anyone who wants to enjoy Android applications on their computer or laptop. Whether you’re a gamer, a social media enthusiast, or a productivity-focused user, BlueStacks offers a range of features and updates that make your mobile experience on a larger screen even better.
BlueStacks requires a PC or Mac with at least 4GB of RAM. Now supports simultaneous 32- and 64-bit apps.
Operating System
Microsoft Windows 7 or above, macOS 11 (Big Sur) or above
Processor
Intel, AMD or Apple Silicon Processor
RAM
at least 4GB
HDD
10GB Free Disk Space
Note:
* You must be an Administrator on your PC. Up to date graphics drivers from Microsoft or the chipset vendor.
SmartThings — FAQs
-
How to Run SmartThings on Windows PC & Mac?
Run SmartThings on your PC or Mac by following these simple steps.
- Click on ‘Download SmartThings on PC’ to download BlueStacks
- Install it and log-in to Google Play Store
- Launch and run the app.
-
Why is BlueStacks the fastest and safest platform to play games on PC?
BlueStacks respects your privacy and is always safe and secure to use. It does not carry any malware, spyware, or any sort of additional software that could harm your PC.
It is engineered to optimize speed and performance for a seamless gaming experience.
-
What are SmartThings PC requirements?
Minimum requirement to run SmartThings on your PC
- OS: Microsoft Windows 7 and above:
- Processor: Intel or AMD Processor:
- RAM: Your PC must have at least 2GB of RAM. (Note that having 2GB or more disk space is not a substitute for RAM):
- HDD: 5GB Free Disk Space.
- You must be an Administrator on your PC.
-
Home
-
News
- The Samsung SmartThings App Is Now Available For Windows 10
By Sarah |
Last Updated
The SmartThings app is finally available for Windows 10 PCs. You may download and use it to manage your Samsung and 3rd party devices in easy steps. SmartThings makes it easy for anyone to build a smart home. If you don’t know what this app is and how to use it on your Windows 10 computer, please read this page carefully.
Samsung’s SmartThings is a wonderful ecosystem for connected & smart home devices; it offers a more convenient and simpler way to manage your devices: Ring, Phillips Hue, products from Amazon, and so on. The good news is that the Samsung SmartThings app is finally available for Windows 10. As for how to download, setup, and use SmartThings Windows 10, the following content will give you an answer.
Tip: A lot of useful software to help you manage your computer disk, system, and data are provided for you on the home page. Please click to have a look and choose the tools you need; download them to a safe place and then install them properly by referring to the on-screen instructions. Below is a reliable data recovery tool available for Windows 10/8/7.
MiniTool Power Data Recovery TrialClick to Download100%Clean & Safe
How to recover deleted files in Windows 10/8/7?
What Is SmartThings
Samsung described SmartThings as one simple home system to help users build a smart home. The easy-to-use SmartThings app is released to replace the old Samsung connect app so that people can control their Samsung and third-party devices (that are compatible with the app) in a better way. You are able to make your home/office a connected space by using the SmartThings app. In this way, your life will be safer, simpler, and more interesting.

What Can SmartThings Do for You
The SmartThings app Samsung can help you do a lot of things remotely to control your automated devices:
- Have fun easily using Sonos speakers.
- Check the front door using Ring doorbell.
- Set the perfect mood using Lutron Dimmer.
- Set up your home monitoring using the Aeotec.
- Track your miles using the Samsung Galaxy Watch.
- Open your door using phone and August Smart Lock.
- Adjust the temperature automatically in a room.
- Set scheduled cycles for Samsung washers and dryers.
- Babysit anywhere in your room by using Arlo camera.
- Cast videos from a phone to a Samsung TV with ease.
- Play meals of the family using the Samsung Family Hub.
- Add more magic to your storytime using the Philips Hue.
- Cool down your house using the ecobee Smart Thermostat.
- Connect multiple devices together and control them automatically.
- Control and check the status of your devices registered via a Wi-Fi AP.
- …
Get Your SmartThings App for Windows 10
The most amazing thing of all in Samsung SmartThings is – it helps to create scenes with different lines of products or program automation so that devices from different brands can work together. Now, the Samsung SmartThings app is finally available for Windows 10; you can download it and get it work on your Windows 10 device now!
Could Not Communicate With Your Google Home: 7 Useful Solutions.
How to Download SmartThings to Windows 10 PC
- First, you should open a web browser on your PC running Windows 10.
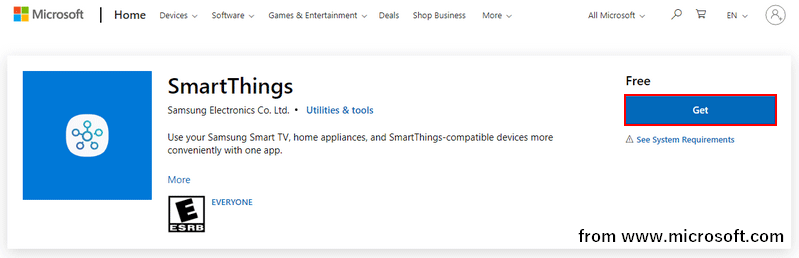
- Search for Microsoft Store using the search engine or type www.microsoft.com directly into the address bar & press Enter.
- Click on the search icon in the upper right corner. The message “Search Microsoft.com” will appear when you hover the mouse over the icon.
- Type smartthings into the textbox. Then, press Enter or select SmartThings App from the search results.
- Click on the Get button in the upper right corner. Then, click Open Microsoft Store in the confirmation dialog box.
- Click Get again in the Microsoft Store window. Then, wait for the downloading process to finish.
- Finally, you should install the SmartThings app properly on your PC.
Windows 10 ISO Free Download & Troubleshooting Guide.
How to Add & Manage Devices in SmartThings
Though SmartThings arrives on Windows 10, it doesn’t allow you to add or manage devices on a PC. So you still need to set up SmartThings on your phone and use it to add & manage your devices.
- Open SmartThings app on your phone.
- Press Menu (represented by three horizontal lines).
- Navigate to the Location drop-down menu to choose a desired location for the device.
- Click on the add icon (plus sign) and then select Device.
- Press Scan nearby if the device is using Bluetooth.
- Select the correct device from the detected devices list.
- Follow the on-screen instructions to connect your device to SmartThings.
You can press By device type or By brand to add a device manually if your device is not detected successfully.
About The Author
Position: Columnist
Sarah has been working as an editor at MiniTool since she graduated from university. Sarah aims at helping users with their computer problems such as disk errors and data loss. She feels a sense of accomplishment to see that users get their issues fixed relying on her articles. Besides, she likes to make friends and listen to music after work.
(Image credit: Daniel Rubino / Windows Central)
What you need to know
- Samsung’s SmartThings app is now available on Windows 10.
- The app allows you to control the large library of SmartThing-compatible devices.
- SmartThings works with Alexa, Google Assistant, Phillips Hue, Ring, and several other staples in the smart home industry.
Samsung’s SmartThings is one of the largest ecosystems for connected and smart home devices. It works with thousands of smart devices, including products from Amazon, Phillips Hue, Ring, and Sonos. Now, people can control their automated devices from Windows 10 using the new SmartThings app. Aggiornamenti Lumia recently shared a link to the SmartThings app in the Microsoft Store.
Samsung announced that SmartThings would be preinstalled on its Galaxy Book Pro and Galaxy Book Pro 360, but it doesn’t appear to be exclusive to these laptops. The app listing states that the SmartThings app has been optimized for the Galaxy Book, but it appears to work on any Windows 10 device. I was able to download it without any issues on a Huawei MateBook X Pro.
While many smart home and connected devices have their own hub, Samsung SmartThings can bring home automation to another level. You can use it to create scenes with different lines of products or program automation to make devices from different brands work together. You can also use SmartThings to find lost Galaxy devices.
Samsung’s Quick Share app also appeared in the Microsoft Store recently, but it is exclusive to Galaxy Books released from May 2021 onward. I wasn’t able to install Quick Share on an unsupported device.
Interestingly, this is a return of SmartThings to the Windows ecosystem as Samsung had an app for Windows Phone back in 2014, but it was later deprecated. SmartThings also worked with Cortana back in the day too.
Samsung’s SmartThings allows you to control thousands of connected devices from your Windows 10 PC. SmartThings works with devices from major brands, including Samsung, Ring, Sonos, Yale, and Phillips Hue.
All the latest news, reviews, and guides for Windows and Xbox diehards.
Sean Endicott is a tech journalist at Windows Central, specializing in Windows, Microsoft software, AI, and PCs. He’s covered major launches, from Windows 10 and 11 to the rise of AI tools like ChatGPT. Sean’s journey began with the Lumia 930, leading to strong ties with app developers. Outside writing, he coaches American football, utilizing Microsoft services to manage his team. He studied broadcast journalism at Nottingham Trent University and is active on X @SeanEndicott_ and Threads @sean_endicott_.
SmartThings is the smart home platform owned and developed by Samsung. It was originally designed to tie together thousands of different smart home products (much like Alexa and Google Home/Assistant today), but it’s now the home of Samsung’s own Internet-connected devices too. The company finally released a web dashboard for SmartThings last month, and now Samsung is resurrecting the Windows app.
Samsung offered a Windows application for managing SmartThings in the past, but it was deprecated in 2019. Since then, options have been limited for controlling SmartThings devices on a PC — installing the Android app in an emulator or connecting SmartThings to Alexa (which has a Windows app) were some of the easier methods. The new web dashboard works well with any desktop web browser, but it’s not finished yet and can’t access some devices.
Samsung has now published a new listing for the SmartThings Windows app on the Microsoft Store (spotted by @ALumia_Italia). The app was mainly developed for the Galaxy Book Pro, but it can also be installed on other PCs. Samsung says the app can control devices, create and edit groups, and start Scenes (customizable automations that change multiple devices at once). There’s also a map for SmartThings Find, so you can locate nearby Galaxy SmartTags or other devices detected by Samsung phones/tablets.
However, it appears you can’t add new devices or accounts to SmartThings through the desktop app, so you’ll still need the Android or iOS apps for that. Samsung also notes there «may be restrictions on use or on some features when used from certain models or products made by other manufacturers.»
You can download the app from the Microsoft Store through the link below.
https://apps.microsoft.com/store/detail/9n3zbh5v7hx6