
By default, when you open a windows/Linux system’s file manager, you will see network shares that are automatically advertised across your local network. Remote users are only allowed to connect to the network and access the shared files when they are directly connected to the machine.
Samba is an extremely powerful tool that allows one to create file and printer sharing to SMB/CIFS clients in both Windows and Unix systems. When it comes to file sharing, Windows 11 and Ubuntu work seamlessly since they both use the SMB protocol. Samba share was developed by Andrew Tridgell and runs on many Unix-Operating systems such as Linux, Solaris, BSD variants and AIX.
Samba share, is so significant in that:
- It allows Windows systems to share files and printers on the Unix host and allows Unix users to access the resources shared by Windows systems.
- It is so reliable it runs on a Unix host resulting in few problems and low maintenance costs. It also offers good performance under heavy loads.
- It offers secured data transfer
- Message signing-with didgital signing users who receive the data packets are assured of the origin point authenticity.
- SMB encryption.
- Allows concurrent operations.(simultaneous access to the files)
- Multichanel technology.
This guide demonstrates how to install and Configure Samba Share on Windows 11. For Samba share set up, you will need the following:
- Windows 11 installation.
- A Linux machine
Step 1: Enable Network Discovery in Windows 11
The network needs to be advertised for other devices to view and access it. This is made possible In Windows 11 by Enabling Network discovery.
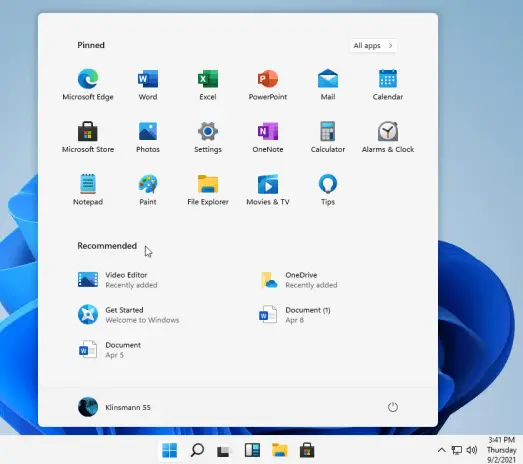
On your Windows 11 start menu, launch settings as below:
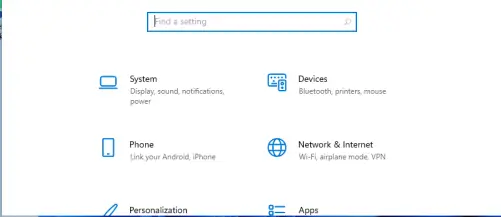
On the settings tab, click on Network & internet then select Ethernet:
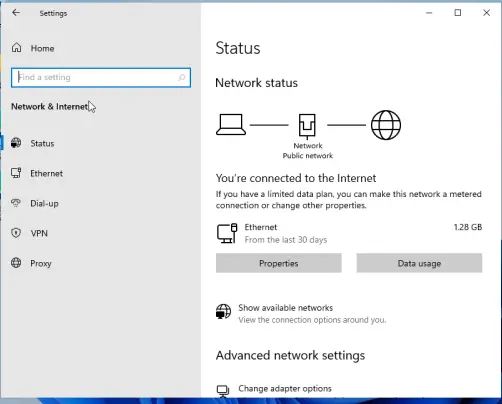
In the Ethernet settings tab, select Ethernet properties:
Here, select private under the network profile as shown:
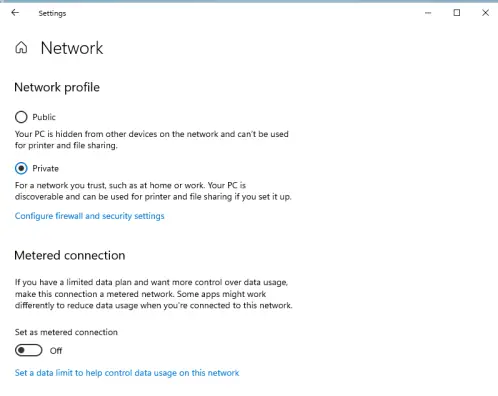
If you are connected with Wi-Fi, you will need to enable Private in the Profile settings. This profile should be selected if you need file-sharing or you are using apps that communicate over the network. With this done, exit and the network should now be discoverable.
Step 2: Turn on Public Folder Sharing in Windows 11
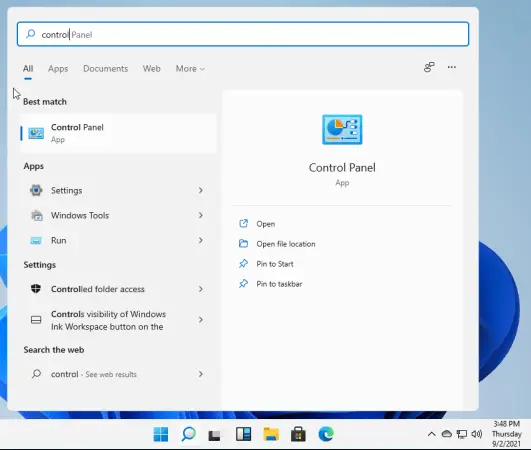
On the Windows 11 start menu, launch the Control Panel:
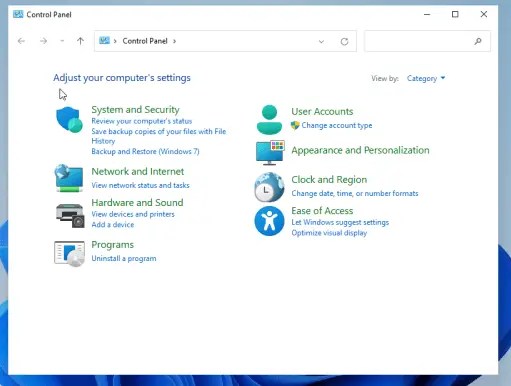
While in the Control Panel, select Network and Internet as shown:
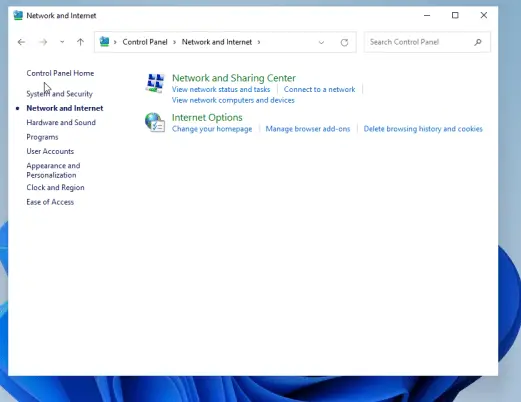
On the next page select Network and Sharing Center:
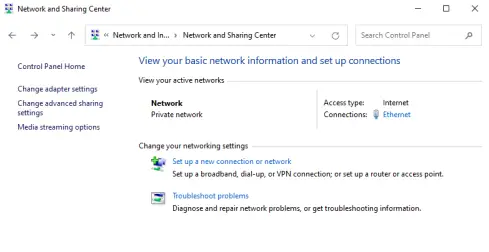
Go to the Change advanced sharing settings option on the right-hand side panel:
While here, select the Private(current profile) and make the below settings:
Turn on file and printer sharing:
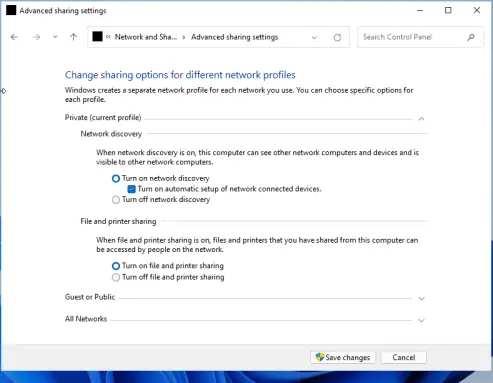
Save the changes made and exit.
While in the Advanced settings tab, Click the all networks option, and scroll down. Here there are several options such as Public folder sharing, Media streaming, File sharing connections, and Password protected sharing. By default, Windows turns on file and printer sharing, but in some cases, it is not enabled.
With password-protected sharing turned on, anyone connecting to your shared network will have to authenticate with the set password to be allowed to access your network.
While here, you can also allow Public folder sharing as shown.

With your desired changes made, save and exit.
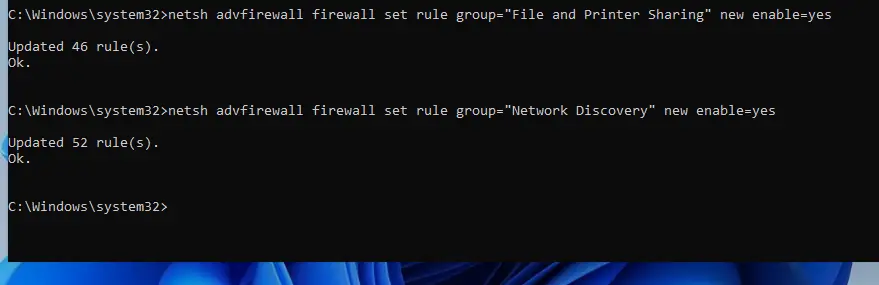
Alternatively, all the above settings can easily be done using the below commands. Run Command prompt as Administrator and issue the below commands.
netsh advfirewall firewall set rule group="File and Printer Sharing" new enable=Yes
netsh advfirewall firewall set rule group="Network Discovery" new enable=Yes
Sample Output:
Step 3: Access Windows 11 shares from Linux
In this guide, I will be using Ubuntu to access the Windows 11 shared files. Now I will have to make a few configurations on my Ubuntu system to be able to connect to the Windows network.
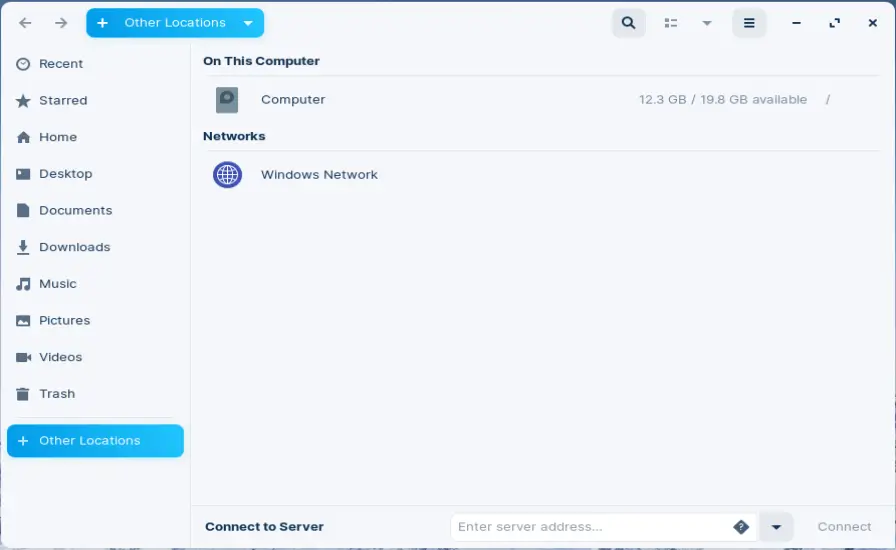
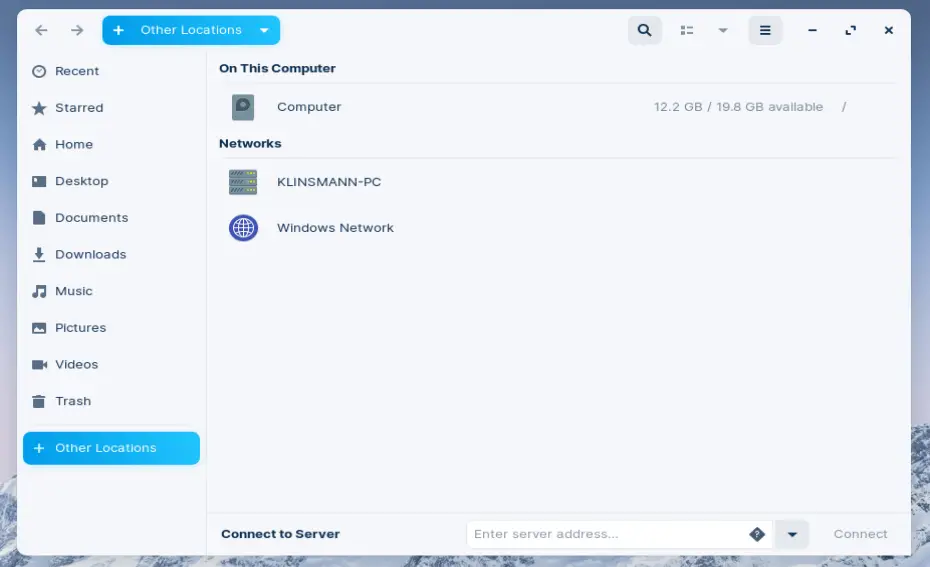
Before we install Samba your Ubuntu File Manager appears as below after clicking on Other Locations:
Install Samba file-sharing system on Ubuntu using the below command:
sudo apt update && sudo apt install sambaAdd users to Samba and create a password:
sudo pdbedit -a -u $(whoami)Sample Output:
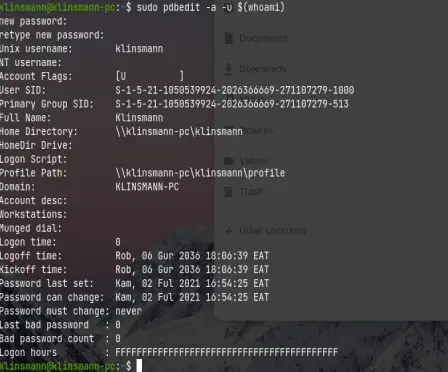
You have successfully set a Samba password which you will use to log in to samba share.
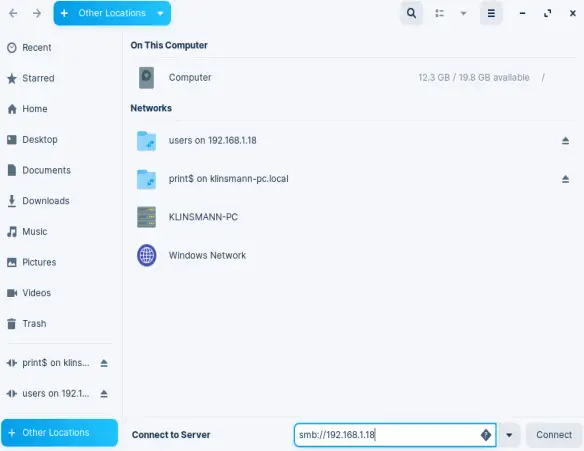
Now launch the Ubuntu File Manager, click on other locations as shown.
Now the Windows system is visible. Launch file sharing by adding the connection as shown. Enter the address of the server with the below syntax.
smb://servername/Share_nameFor example, I will use this syntax to access my Windows System.
smb://192.168.1.18See below screenshot:
In case you are prompted to enter a password for login, use the Samba login password:
You will successfully be connected to the Network and you can access files from the windows system.
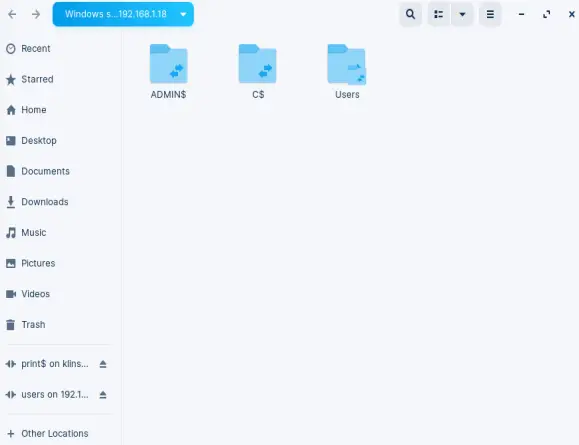
Now you are set to access the files on your Windows system. Click on Users> Default, you should be able to see these files.

Access Ubuntu Files from Windows 11
Now we want to access the Ubuntu files from Windows 11. This is done in the following steps.
First, we need to find the workgroup name in Windows 11. Launch the command prompt and issue the command below.
net config workstationSample Output:
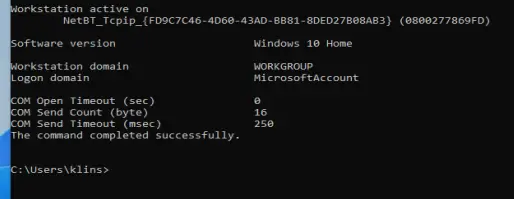
On my system, the workgroup name is WORKGROUP. This is the default workgroup name for Windows systems.
The next step is to configure Samba on Ubuntu. Since we already have samba installed we will make configuration settings as below.
Edit the Samba default configuration:
sudo cp /etc/samba/smb.conf /etc/samba/smb.conf.bak
sudo vi /etc/samba/smb.conf
Edit your file as below replacing appropriately.
[global]
........
# Configure correct UTP
 unix charset = UTF-8
# Change this to the workgroup/NT-domain name your Samba server will be part of
  workgroup = WORKGROUP
  server min protocol = NT1
  ntlm auth = yes
  netbios name = UbuntuVM
  security = user
  #interfaces = 127.0.0.0/8 eth0
  bind interfaces only = yes

# add at the end
[Public]
   comment = Ubuntu File Share
   path = /srv/samba/share
   browsable = yes
   writable = yes
   guest ok = yes
   read only = no
   create mode = 0777
   directory mode = 0777
   force user = nobody
In the configuration file, we have set to share /srv/samba/share directory. So we need to create it. This is used for experiment purposes, but you can share an existing directory.
sudo mkdir -p /srv/samba/share
sudo chown nobody:nogroup /srv/samba/share
sudo chmod -R 0777 /srv/samba/share
sudo chgrp sambashare /srv/samba/share
Now restart the Samba service.
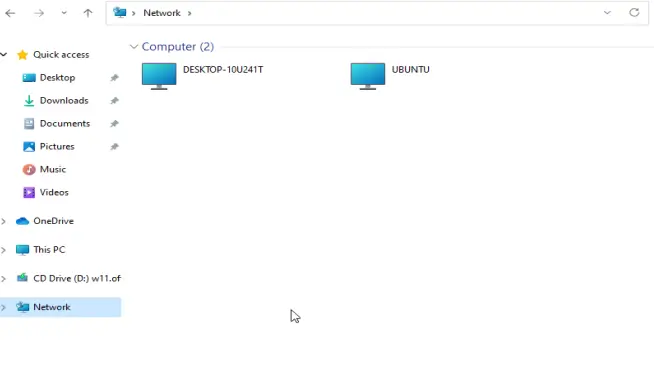
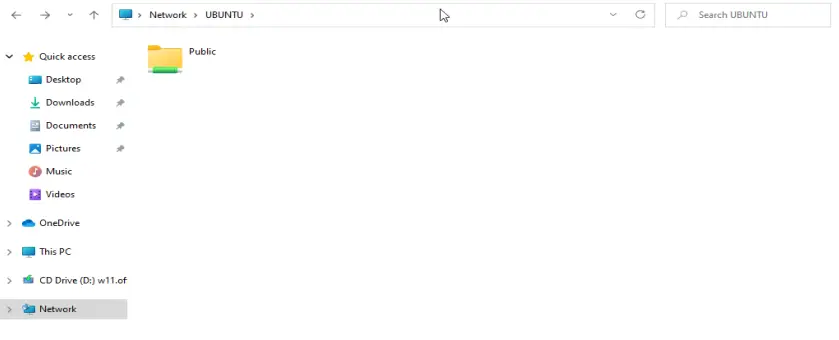
sudo systemctl restart smbd.service nmbd.serviceOn the Windows system, open the file manager and click on Network. You will see the Ubuntu system added as below. Open it and view the contents of your shared folder:
This Public folder contains contents of your shared path. For this guide, our shared path is /srv/samba/share :
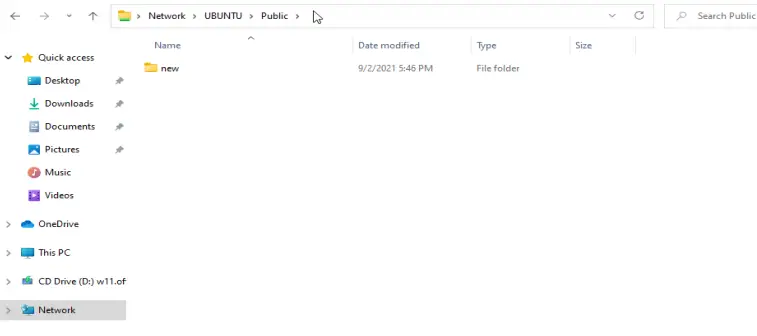
Suppose I add a new directory in the path /srv/samba/share using the command:
sudo mkdir /srv/samba/share/newOn Windows, the shared file will appear inside the Public folder as below:
Alternatively, you can create a file on this Windows tab that will appear on our Ubuntu system.
That is it! We have successfully gone through how to install and configure Samba Share on Windows 11. I hope you found this guide helpful.
See more on this page:
- How To Install MySQL 8.2 on Windows 11 / Windows 10
- Fix Windows Error “running scripts is disabled on this system”
- Fix Windows BSOD Issue caused by CrowdStrike Update
- Running Windows Server 2022 on OpenStack (Complete Steps)
If you work with different operating systems, it’s handy to be able to share files between them. This article explains how to set up file access between Linux (Fedora 33) and Windows 10 using Samba and mount.cifs.
Samba is the Linux implementation of the SMB/CIFS protocol, allowing direct access to shared folders and printers over a network. Mount.cifs is part of the Samba suite and allows you to mount the CIFS filesystem under Linux.
Caution: These instructions are for sharing files within your private local network or in a virtualized host-only network between a Linux host machine and a virtualized Windows guest. Don’t consider this article a guideline for your corporate network, as it doesn’t implement the necessary cybersecurity considerations.
Access Linux from Windows
This section explains how to access a user’s Linux home directory from Windows File Explorer.
1. Install and configure Samba
Start on your Linux system by installing Samba:
dnf install sambaSamba is a system daemon, and its configuration file is located in /etc/samba/smb.conf. Its default configuration should work. If not, this minimal configuration should do the job:
[global]
        workgroup = SAMBA
        server string = %h server (Samba %v)
        invalid users = root
        security = user
[homes]
        comment = Home Directories
        browseable = no
        valid users = %S
        writable = yes
You can find a detailed description of the parameters in the smb.conf section of the project’s website.
2. Modify LinuxSE
If your Linux distribution is protected by SELinux (as Fedora is), you have to enable Samba to be able to access the user’s home directory:
setsebool -P samba_enable_home_dirs onCheck that the value is set by typing:
getsebool samba_enable_home_dirsYour output should look like this:
3. Enable your user
Samba uses a set of users and passwords that have permission to connect. Add your Linux user to the set by typing:
smbpasswd -a <your-user>You will be prompted for a password. This is a completely new password; it is not the current password for your account. Enter the password you want to use to log in to Samba.
To get a list of allowed user types:
pdbedit -L -vRemove a user by typing:
smbpasswd -x <user-name>4. Start Samba
Because Samba is a system daemon, you can start it on Fedora with:
systemctl start smbThis starts Samba for the current session. If you want Samba to start automatically on system startup, enter:
systemctl enable smbOn some systems, the Samba daemon is registered as smbd.
4. Configure the firewall
By default, Samba is blocked by your firewall. Allow Samba to access the network permanently by configuring the firewall.
You can do it on the command line with:
firewall-cmd --add-service=samba --permanentOr you do it graphically with the firewall-config tool:

5. Access Samba from Windows
In Windows, open File Explorer. On the address line, type in two backslashes followed by your Linux machine’s address (IP address or hostname):

You will be prompted for your login information. Type in the username and password combination from step 3. You should now be able to access your home directory on your Linux machine:

Access Windows from Linux
The following steps explain how to access a shared Windows folder from Linux. To implement them, you need Administrator rights on your Windows user account.
1. Enable file sharing
Open the Network and Sharing Center either by clicking on the
Windows Button > Settings > Network & Internet
or by right-clicking the little monitor icon on the bottom-right of your taskbar:
In the window that opens, find the connection you want to use and note its profile. I used Ethernet 3, which is tagged as a Public network.
Caution: Consider changing your local machine’s connection profile to Private if your PC is frequently connected to public networks.
Remember your network profile and click on Change advanced sharing settings:

Select the profile that corresponds to your connection and turn on network discovery and file and printer sharing:

2. Define a shared folder
Open the context menu by right-clicking on the folder you want to share, navigate to Give access to, and select Specific people… :

Check whether your current username is on the list. Click on Share to tag this folder as shared:

You can display a list of all shared folders by entering \\localhost in File Explorer’s address line:


Image by:
<p class=»rtecenter»><sup>(Stephan Avenwedde, <a href=»https://opensource.com/%3Ca%20href%3D»https://creativecommons.org/licenses/by-sa/4.0/» rel=»ugc»>https://creativecommons.org/licenses/by-sa/4.0/» target=»_blank»>CC BY-SA 4.0</a>)</sup></p>
3. Mount the shared folder under Linux
Go back to your Linux system, open a command shell, and create a new folder where you want to mount the Windows share:
mkdir ~/WindowsShareMounting Windows shares is done with mount.cifs, which should be installed by default. To mount your shared folder temporarily, use:
sudo mount.cifs //<address-of-windows-pc>/MySharedFolder ~/WindowsShare/ -o user=<Windows-user>,uid=$UIDIn this command:
<address-of-windows-pc>is the Windows PC’s address info (IP or hostname)<Windows-user>is the user that is allowed to access the shared folder (from step 2)
You will be prompted for your Windows password. Enter it, and you will be able to access the shared folder on Windows with your normal Linux user.
To unmount the shared folder:
sudo umount ~/WindowsShare/You can also mount a Windows shared folder on system startup. Follow these steps to configure your system accordingly.
Summary
This shows how to establish temporary shared folder access that must be renewed after each boot. It is relatively easy to modify this configuration for permanent access. I often switch back and forth between different systems, so I consider it incredibly practical to set up direct file access.
This work is licensed under a Creative Commons Attribution-Share Alike 4.0 International License.
In my previous article, Interoperability: Getting started with Samba, I covered installing and configuring Samba shares on a Linux server. The real power of Samba comes when Windows clients can communicate with Linux file servers. In this article, I will cover how you can access Samba shares from both Linux and Windows clients.
Install the Samba client packages
To access Samba share from Linux clients we need to install a few Samba client packages.
On the client machine, install the samba-common and samba-client packages.
# yum install samba-client samba-common -yCheck for available shares
Let’s check if we can access our shares from the server. We can use either the hostname or ip address of the server. If you use the hostname, make sure DNS is working.
# smbclient -U user -L 192.168.1.122

Enter SAMBA\user's password:

        Sharename       Type      Comment
        ---------       ----      -------
        print$          Disk      Printer Drivers
        myshare         Disk      my share
        IPC$            IPC       IPC Service (Samba 4.9.1)
        user      Disk      Home Directories

Reconnecting with SMB1 for workgroup listing.

        Server               Comment
        ---------            -------

        Workgroup            Master
        ---------            -------
        SAMBA                SAMBA-SERVER
Create a directory that we can use as our mount point. I’m going to create a directory under /mnt, but you can use any directory you would like to. You may need to configure SELinux on that directory.
# mkdir /mnt/myshareNow, mount the share.
# mount -t cifs -o username=user //192.168.1.122/myshare /mnt/share

Password for user@//192.168.1.122/myshare:  ********
Now that we’ve mounted our share, we can check the mounts with the following command:
# df -hPersistent mount
Let’s make that directory mount persistently so it can withstand a reboot. Using the text editor of your choice, edit the /etc/fstab file. You can do this in multiple ways, but I’m going to demonstrate two ways to mount the Samba share at boot in /etc/fstab.
# vim /etc/fstabThe first option provides a username and password for the Samba user in the fstab.
//192.168.1.122/myshare /mnt/share cifs username=user,password=password,_netdev 0 0The other option is to create a credential file. You can call this file anything, but I would like to call it cred. I would like to place credentials files in the home directory of the user. In our demonstration it will be /home/user/.cred.
//192.168.1.122/myshare /mnt/share cifs credentials=/home/user/.cred,_netdev 0 0The _netdev option is important since we are mounting a network device. Clients may hang during the boot process if the system encounters any difficulties with the network.
Now create that .cred file inside the user’s home directory.
# vim /home/user/.credNext, add the Samba user’s username and password.
username=user
password=password
Finally, mount all filesystems.
# mount -aAccess a share from a Windows client
I will be using Windows 10 as my client machine with a workgroup called SAMBA. We need to create a local user account on the Windows machine that matches the username and password of the Samba user account we created in my previous article. Although account creation is not necessary, this will make things simpler when accessing the share.
Like I mentioned above, this step is optional and you can skip it completely. Although there are multiple approaches to adding a new local user on a Windows machine, for the simplicity of this article I will be using PowerShell. Launch PowerShell as an administrator and issue following commands:
PS > $password = Read-Host -AsSecureString
PS > New-LocalUser -Name “user” -Password $password
Now that we have created a new local user account matching the Samba user account, we can log in to Windows with our newly created user account.
Access a share from Windows Explorer
To access the Samba share from Windows Explorer, start typing the IP address to our share in the search area. I am using the hostname of the Samba server. In my case, it is centos. You can also access the share by using the IP address of the Samba server.
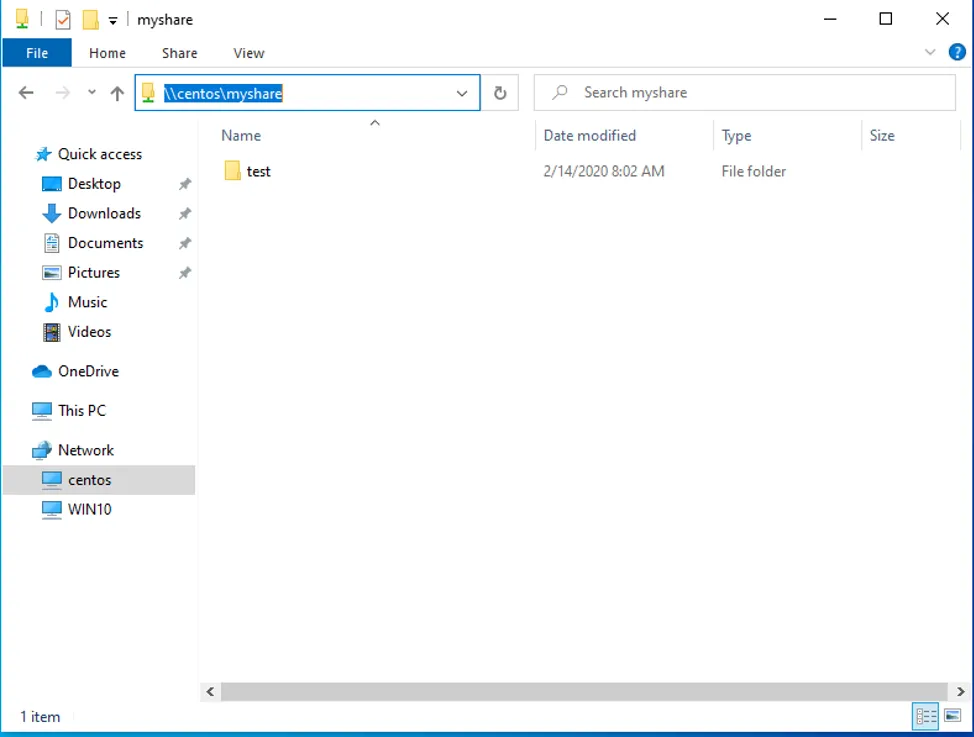
You might be prompted to enter the username and password to access the share if you skipped the local user creation process. If you get prompted for credentials, enter the Samba username and password we created in the previous article.
You will need to enter the Samba share path every time you want to access the share. There is a better way to access the share by mapping a drive to Samba share in Windows.
Mapping a drive to a Samba share
To map a drive to the Samba share, open PowerShell and issue following command:
PS > NET USE M: \\centos\myshare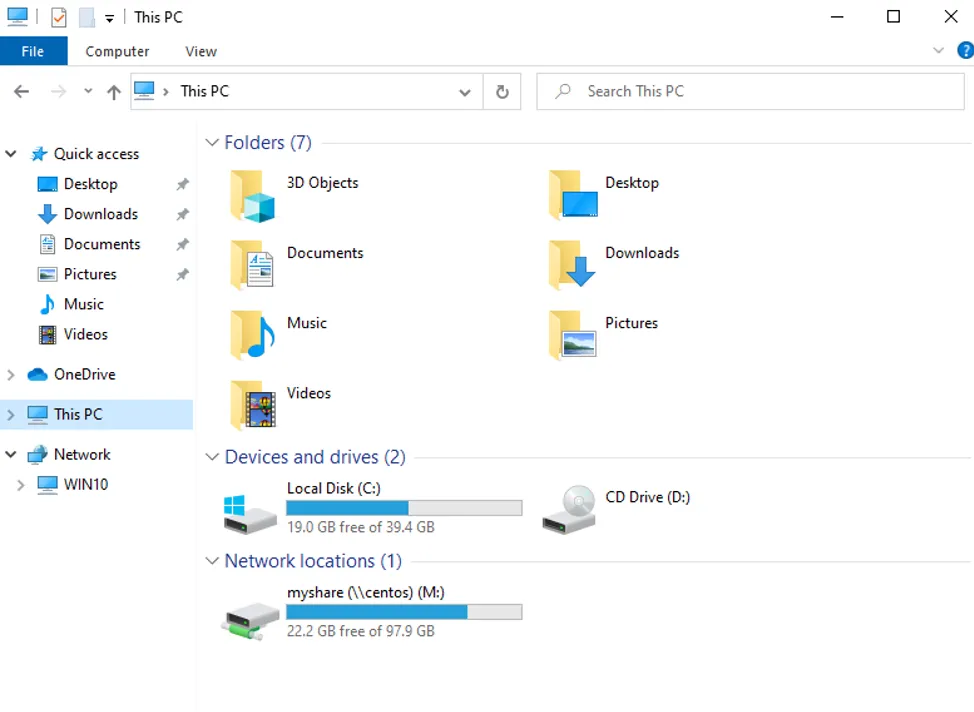
Wrap up
Accessing a Samba share on Linux and Windows is easy. With this basic setup, you will be able to access file shares from client machines in your network. With somewhat more configuration, you can deploy Samba shares in a domain environment. Samba can do more than file share. If you would like to learn more about Samba, read this article about Windows and Linux interoperability. This is a basic set up, but you can do so much more with Samba.
[ Want to test your sysadmin skills? Take a skills assessment today. ]
A samba guide to share files between Windows 10 and Linux
Introduction
Using samba is way easier than you might think. However, it won’t work out of the box if you want to share files between
newer versions of Windows 10 and Linux.
The guide is written for Arch Linux, but you probably can install these packages on your distro too.
Setting up Samba
First, you need to install samba. sudo pacman -S samba. After that, you need to write a config file in
etc/samba/smb.conf, you can either use example one from Arch Wiki, or copy this one.
#============================ Global definition ================================
[global]
# Workgroup name. Default for Windows is WORKGROUP.
workgroup = WORKGROUP

# An additional name of the PC, that will be displayed when browsing shares, and also will
# be accessible through \\NETBIOS-NAME
# This is SHOULD NOT be the same as your hostname, as it will be in conflict. If you
# Want to use the same NETBIOS name as your hostname, just leave it commented.
# netbios name = NETBIOS-NAME

# A type of verification. User = ask for username and password.
security = user

# Makes sure, you can browse shares.
browseable = yes

# When wrong username is entered, it will automatically log you as guest user.
map to guest = bad user

# This just has to be here.
name resolve order = bcast lmhosts host wins


#============================ Share Definitions ==============================
# Shares that will be made here will be displayed when entered \\NETBIOS-NAME
# share name is defined in []

[PublicArchShare]
    path = /home/cisu/.smbpubshare
    browseable = yes
    writable = yes
    guest ok = yes
    # if you want to use folder inside user's home folder, you need to add
    # this, otherwise you will see "permission denied" error.
    force user = cisu
    write list = cisu
After that, you will need to create user for samba. Either you can use one that already exists, or make a new one.
To make user available to samba, you need to type smbpasswd user and provide a new password.
NOTE: Samba password is different to your system password, and should be different!
Now enable smb.service and nmb.service. If you use systemd, you should type:
NOTE: It’s not always necessary to enable
nmb, but because this guide
sudo systemctl enable --now smb.service
sudo systemctl enable --now nmb.service
NOTE:
Remember: You need to restart the service in order to apply changes made in smb.service.
Now you should be able to access your share by entering \\NETBIOS-NAME in Windows Explorer path par.
Making sure your PC will be visible in Windows share
By default, newer builds of Windows 10 can’t discover samba shares. In order to fix that install wsdd:
https://github.com/christgau/wsdd.
If you use arch, you can use your favorite AUR helper to install it from aur: yay -S wsdd
After that sudo systemctl enable --now wsdd.service, and your share should be visible in «Network» in Windows File
Explorer.
Discovering Windows shares in Thunar
And now we will do it the other way around. Accessing files from Windows 10 in Linux.
Install gvfs, gvfs-smb and sshfs.
Using thunar, you should already
be able to access Network Share by typing in path smb://WINDOWS-PC-NAME/share-name. It should ask you for username and
password and let you in.
In order to browse Windows Shares in Thunar, just like you did the other way around you need to do one more thing:
- On your Windows machine press
win+rand type in:optionalfeatures. - Find SMB1.0/CIFS File Sharing Support and tick it.
- Restart your PC.
After that, your PC should be visible in Thunar Network:

As a tech enthusiast, I’m always looking for ways to make my life a bit easier when it comes to data storage and sharing. I recently came across the Samba share, and it seemed like the perfect solution for my needs.
Samba share is a free and open-source software protocol for accessing and sharing files, printers, and other data across a local area network. It’s compatible with Windows, Linux, and Mac systems, making it an ideal choice for home networks.
I decided to try it out on my Linux Mint system, and the installation and setup were surprisingly easy. I was able to set up a Samba share in a matter of minutes. I also found out that I could even turn my old PC into a Network Attached Storage (NAS) with Samba and Nginx.
In this tutorial, I will show you how to install and set up Samba Share on Linux Mint and how can you access the storage from a Windows machine.
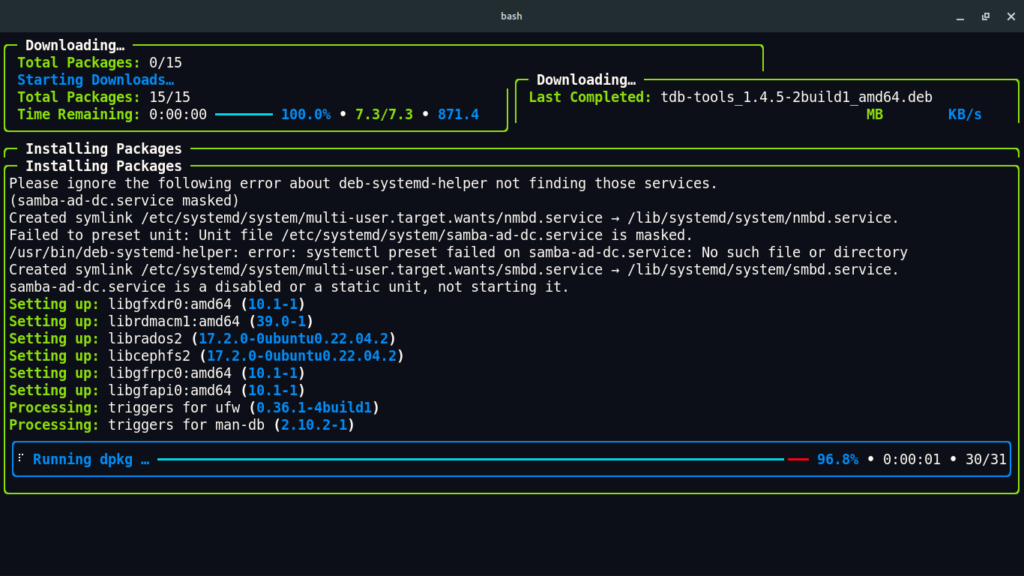
Installing Samba Share
If you look at the Sharing properties of the directory which you want to share, then you will find that Linux Mint does not have Samba installed by default. It also asks us to enable and set up a firewall for security reasons. So let’s first install Samba on our PC. Just open a Terminal window and type the following commands:
sudo apt update && sudo apt install samba
Once installed, you can check if the service is running or not, you can type the following command in the Terminal to check:
sudo systemctl status smbd
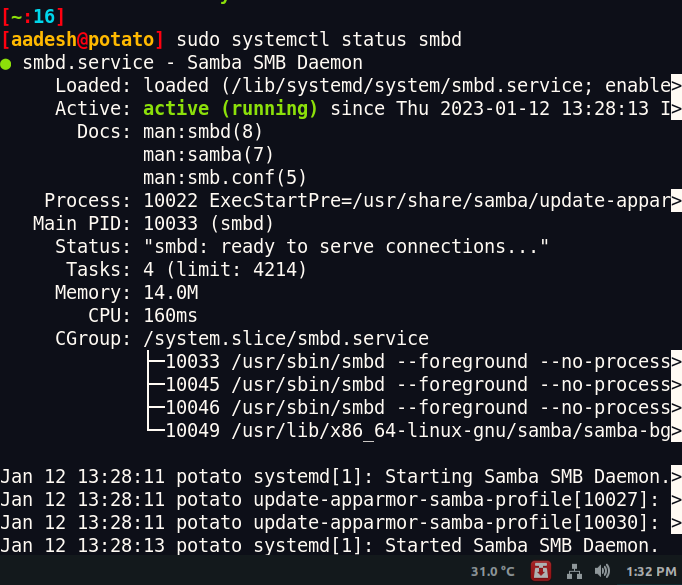
If it is disabled, then you can type the following command to enable and start the service:
sudo systemctl enable smbd.service
sudo systemctl start smbd.service
Finally, allow Samba to the firewall rules and then create a user. Yes, you must create a separate user for Samba, your current one will not be able to work with this tool. Just open a Terminal and then type the following command:
# Allow a Firewall port
sudo ufw allow samba

# Create a new user
sudo usermod -aG sambashare $USER

# Add a Password
sudo smbpasswd -a aadesh
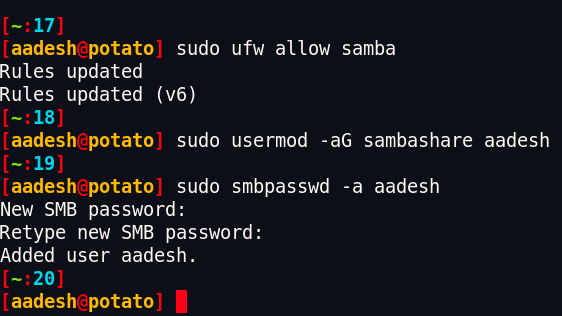
Type and then retype a new password and press enter. Finally, select your desired directory and then change its properties by right-clicking and opening its properties. Click on ‘Share this folder’ and then click on ‘Modify Share’. You can optionally allow any user to create and delete the files inside this directory.

Optionally, You can now create a static IP for your PC so that your IP address does not change every time you restart your PC.
Once finished, you can note down the IP address of your PC. Now, open your Windows PC and then open ‘This PC’ or ‘My Computer’. Make sure that you are on the same network on which your Linux PC is connected.
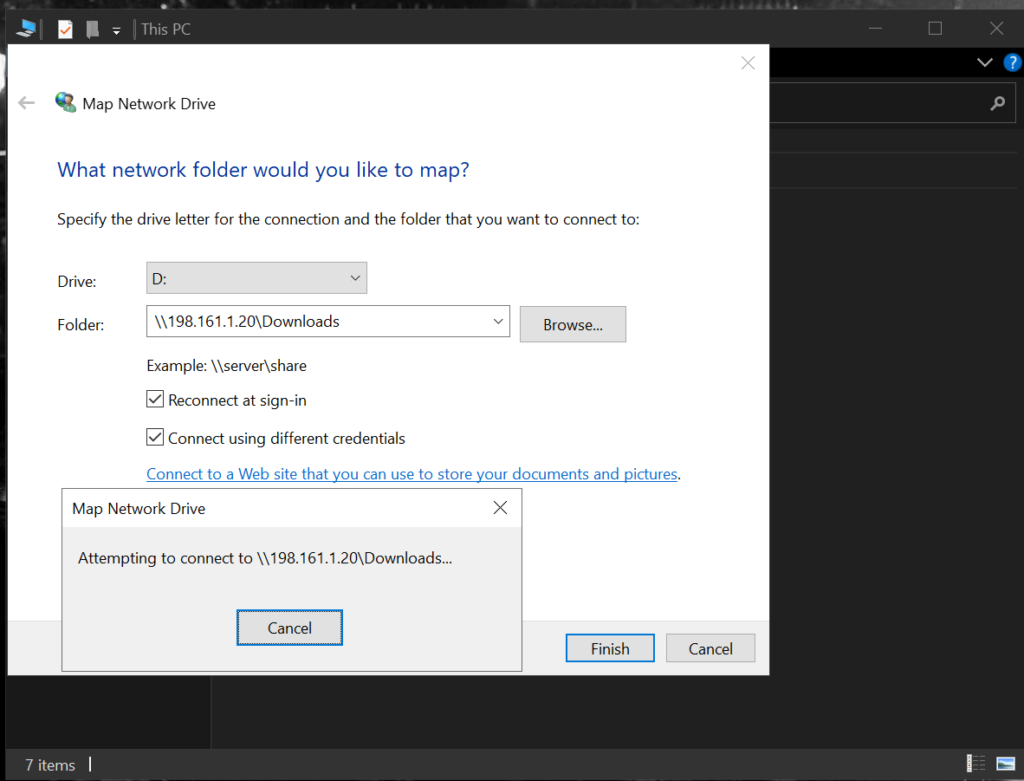
Now, go to ‘Computer’ and then click on ‘Map a Network Storage’ or ‘Add a network drive’.
From here, you have to type the IP address of your machine like this:
//YOUR.IP.ADDRESS.HERE/FOLDER-NAME
# example:
//192.168.1.1/Downloads
If asked for a password, enter the username and password we just set up in SMB Share.
Summary
The amount of Flexibility a Linux operating system gives you is quite amazing. You can easily set up a seedbox or a file server using this method on your old PC if you want to, apart from the file-sharing part. And if you want to set up several Virtual Machines for different purposes on a single PC, then all your stuff will be separated, and you can easily troubleshoot when any error arises. We hope you learned the right way to work with Samba share on Linux.
References
Official Samba documentation