
Fix Windows Time Service not working: If you’re facing issues with your clock then it’s possible that Windows Time service might not be working correctly which is why you’re facing this issue but don’t worry as today we are going to discuss how to fix this issue. The main cause seems to be Windows time service which doesn’t start automatically which is causing the delay in date and time. This issue can be fixed by enabling Time Synchronization in Task Scheduler but this fix may or may not work for everyone as every user have different system configuration.

Users have also reported that while manually synchronizing time they face the error message “An error occurred while windows was synchronizing with time.windows.com” but don’t worry as we have got this covered. So without wasting any time let’s see how to Fix Windows Time Service not working with the help of below-listed troubleshooting guide.
Table of Contents
Make sure to create a restore point just in case something goes wrong.
Method 1: Start Windows Time service
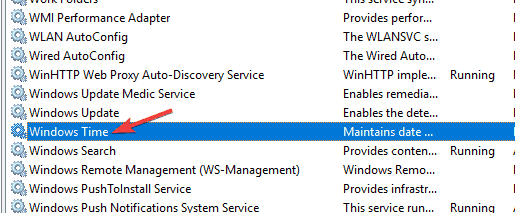
1.Press Windows Key + R then type services.msc and hit Enter.
2.Find Windows Time Service in the list then right-click and select Properties.

3.Make sure the Startup type is set to Automatic (Delayed Start) and the service is running, if not then click on start.

4.Click Apply followed by OK.
Method 2: Run SFC and DISM
1.Press Windows Key + X then click on Command Prompt(Admin).
2.Now type the following in the cmd and hit enter:
Sfc /scannow
sfc /scannow /offbootdir=c:\ /offwindir=c:\windows (If above fails then try this one)

3.Wait for the above process to finish and once done restart your PC.
4.Again open cmd and type the following command and hit enter after each one:
a) Dism /Online /Cleanup-Image /CheckHealth
b) Dism /Online /Cleanup-Image /ScanHealth
c) Dism /Online /Cleanup-Image /RestoreHealth

5.Let the DISM command run and wait for it to finish.
6. If the above command doesn’t work then try on the below:
Dism /Image:C:\offline /Cleanup-Image /RestoreHealth /Source:c:\test\mount\windows
Dism /Online /Cleanup-Image /RestoreHealth /Source:c:\test\mount\windows /LimitAccess
Note: Replace the C:\RepairSource\Windows with the location of your repair source (Windows Installation or Recovery Disc).
7.Reboot your PC to save changes and see if you’re able to Fix Windows Time Service not working issue.
Method 3: Use a different synchronization server
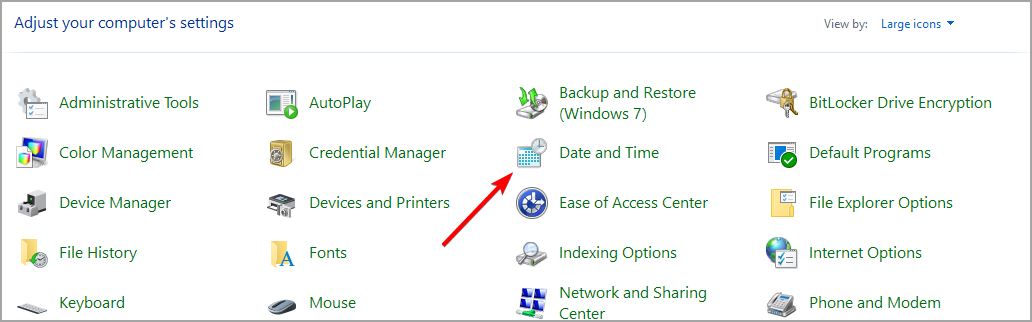
1.Press Windows Key + Q to bring up Windows Search then type control and click on Control Panel.
2.Now type date in the Control Panel search and click on Date and Time.
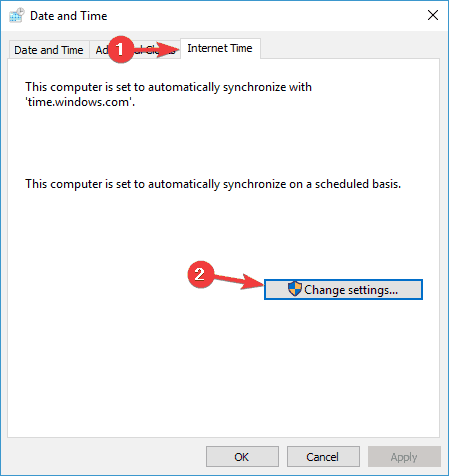
3. On the next window switch to Internet Time tab and click on “Change settings“.

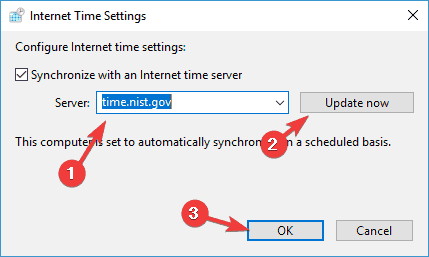
4.Make sure to checkmark “Synchronize with an Internet time server” then from the server dropdown select time.nist.gov.

5.Click Update now button then click OK and see if you’re able to Fix Windows Time Service not working issue.
Method 4: Unregister and then again Register Time Service
1.Press Windows Key + X then select Command Prompt (Admin).
2.Type the following command into cmd and hit Enter after each one:
net stop w32time
w32tm /unregister
w32tm /register
net start w32time
w32tm /resync

3.Wait for the above commands to finish then again follow the method 3.
4.Restart your PC and see if you’re able Fix Windows Time Service not working issue.
Method 5: Temporarily Disable Firewall
1.Type control in Windows Search then click on Control Panel from the search result.
2.Next, click on System and Security and then click on Windows Firewall.

3.Now from the left window pane click on Turn Windows Firewall on or off.
4.Select Turn off Windows Firewall and restart your PC.
If the above method doesn’t work make sure to follow the exact same steps to turn on your Firewall again.
Method 6: Enable Time Synchronization in Task Scheduler
1.Press Windows Key + X then select Control Panel.
2.Click System and Security and then click Administrative Tools.

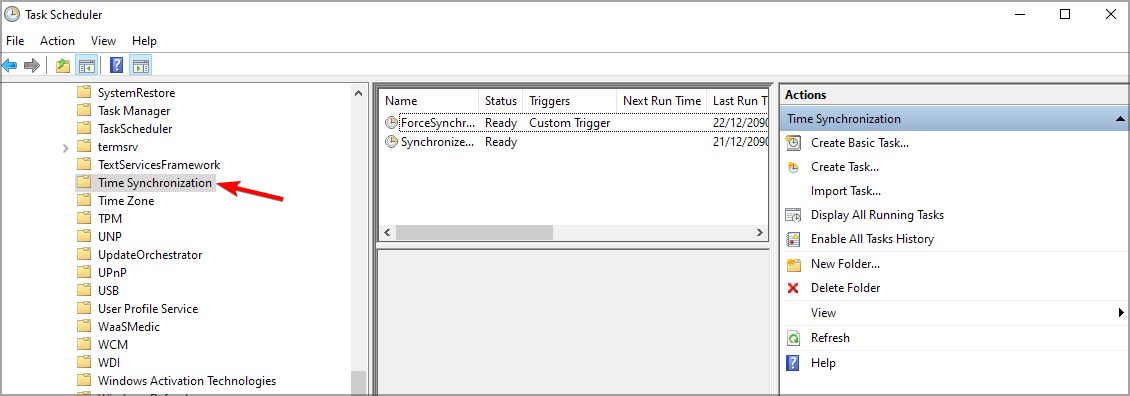
3.Double click on Task Scheduler and navigate to the following path:
Task Scheduler Library / Microsoft / Windows / Time Synchronization
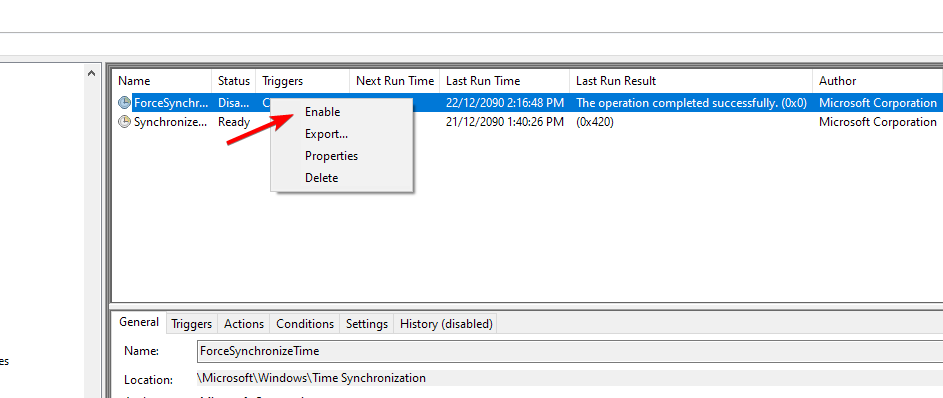
4.Under Time Synchronization, right-click on Synchronize Time and select Enable.
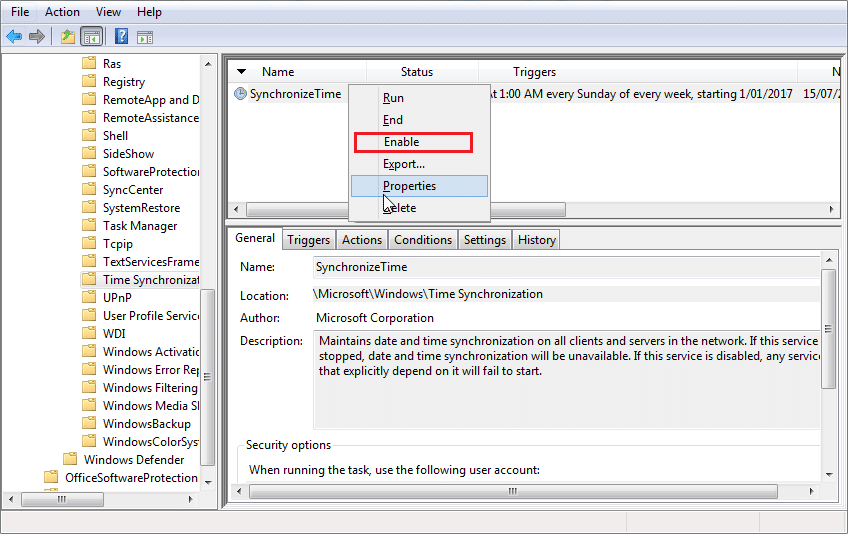
5.Reboot your PC to save changes.
Method 7: Change the default update interval
1.Press Windows Key + R then type regedit and hit Enter to open Registry Editor.
2.Navigate to the following registry key:
HKEY_LOCAL_MACHINE\SYSTEM\CurrentControlSet\Services\W32Time\TimeProviders\NtpClient
3.Select NtpClient then in the right window pane double-click on SpecialPollInterval key.

4.Select Decimal from the Base section then in the value data field type 604800 and click OK.

5.Reboot your PC to save your changes and see if you’re able to Fix Windows Time Service not working issue.
Method 8: Add more Time servers
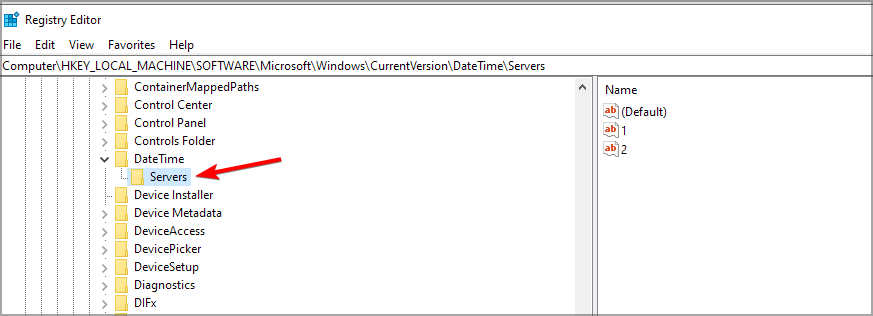
1.Press Windows Key + R then type regedit and hit Enter to open Registry Editor.
2.Navigate to the following registry key:
HKEY_LOCAL_MACHINE\SOFTWARE\Microsoft\Windows\CurrentVersion\DateTime\Servers
3.Right-click on Servers then select New > String value than name this string as 3.

Note: Check if you already have 3 keys then you need to name this key as 4. Similarly, if you have already have 4 keys then you need to start from 5.
4.Double-click this newly created key then type tick.usno.navy.mil in the value data field and click OK.

5.Now you could add more servers by following the above steps, just use the following in value data field:
time-a.nist.gov
time-b.nist.gov
clock.isc.org
pool.ntp.org
6.Reboot your PC to save changes then again follow the method 2 to change to these time servers.
Recommended:
- Fix Windows 10 Stuck at Preparing Security Options
- Fix If playback doesn’t begin shortly try restarting your device
- How to Schedule Windows 10 Automatic Shutdown
- Fix CD or DVD Drive Not Reading Discs in Windows 10
That’s it you have successfully Fix Windows Time Service not working in Windows 10 but if you still have any questions regarding this post then feel free to ask them in the comment’s section.
Update: The Windows time sync service is not working reliably. It was working fine on my system for a few months but stopped syncing time properly eventually even though it is still being started automatically. Feel free to give it a try nonetheless but know that this seems to be another one of Windows’ great unreliable mysteries…
Unlike most other operating systems, Windows 10 doesn’t sync the time with an internet service at startup by default. This can become an issue, if your mainboard’s built-in clock provides a wrong time or uses a different time zone.
If the mainboard’s battery responsible for storing time dies, it can become an even more annoying problem, because Windows will always start with an ever-growing time skew, which can eventually result in web browsing become a problem due to Windows considering websites’ SSL certificates not yet valid — effectively rendering browsing the majority of web pages impossible!
This can be worked around by starting Windows’ time sync service automatically at startup. Below you’ll find instructions on doing this with the graphical Services console and PowerShell.
Services console
- Press
Windows Key+rat the same time to open the Run dialogue - Type
services.mscand hit Run — the Services window opens - In the list, scroll to Windows Time (in german: Windows-Zeitgeber) and right-click on it, click Properties in the context menu
- In the Properties window change Startup type to Automatic, click Start and click OK to save

PowerShell
- Start PowerShell as admin
- Run the following command:
Set-Service -Name W32Time -Status running -StartupType automatic
If PowerShell complains about not finding a service with the specified name, you can run the following command to get a list of all available services — Microsoft might have changed the time service’s name.
Readers help support Windows Report. We may get a commission if you buy through our links.
Read our disclosure page to find out how can you help Windows Report sustain the editorial team. Read more
The Windows Time Service (W32Time) is a Microsoft service that synchronizes computer clock. The tool is implemented in the W32Time.dll file.
The Windows Time Service recently broke down, sending the wrong times to computers worldwide. Fortunately, Microsoft quickly fixed this problem, and your computer should now display the correct time.
Should the Windows Time Service break down again, we’ve covered you. In this article, we’ll list a series of workarounds that you can use to set the correct time on your computer.
Why is Windows Time Service missing?
- Damaged installation – Sometimes, your installation can get damaged. To fix it, you need to repair corrupted system files.
- Service settings – In case the service isn’t correctly configured, you can get this and many similar errors. Restarting it usually fixes the problem.
- Improperly configured tasks – If the tasks aren’t scheduled properly, you need to manually schedule tasks related to date and time.
- Time server issues – In some instances, there might be issues with the time server. Change the server and check if that helps.
What are other Windows Time Service issues?
Windows Time service can sometimes lead to certain issues if it’s not running properly. Speaking of this service, here are some similar issues that users reported:
- Windows 10 time service not starting, access denied, not working, not found, not showing
- There are various issues that can occur with Windows Time service on Windows 10, but you should be able to fix most of them by using one of our solutions.
- Windows Time service keeps stopping
- According to users, sometimes this service keeps stopping on your PC.
- To fix this problem, be sure to run both SFC and DISM scans and check if that solves the issue.
- Windows Time service missing, not installed
- If this service is missing or if it’s not installed, be sure to reregister the service and check if that solves the problem.
- Windows Time service not starting error 1792, 1290, 1079
- There are various errors that can prevent this service from running, and if you encounter any of these issues, be sure to try some of our solutions.
- Windows Time service could not be started
- This is another common problem with Windows Time service.
- If this issue occurs, you might have to change the Startup type of Windows Time service.
- Windows Time not syncing
- This is another common problem caused by Windows Time service.
- However, you can fix it by checking your scheduled tasks.
How do I fix the Windows Time service if it’s missing?
Before we start fixing this issue, be sure to try the following:
- Check motherboard battery – A faulty one often causes time and date issues. Consider replacement before trying other steps.
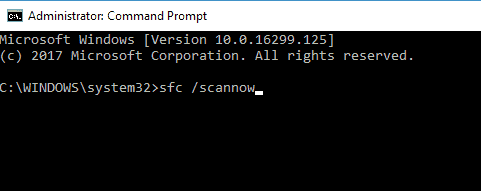
1. Perform SFC and DISM scans
- Press Windows key + X to open Win + X menu.
- Now choose Command Prompt (Admin) or Powershell (Admin) from the menu.
- When Command Prompt opens, type the following and press Enter:
sfc /scannow

- SFC scan will now start. This scan can take up to 15 minutes, so don’t interfere with it or interrupt it.
If Windows Time service isn’t running, the problem might be your file corruption. Sometimes, your system files can get corrupted, leading to this and many other errors.
To fix the problem, you need to perform an SFC scan. Once the SFC scan is finished, check for the problem.
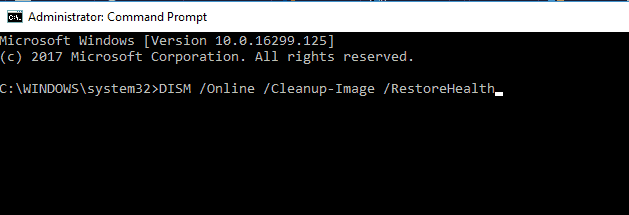
If the issue is still present, your next step would be to run a DISM scan. To do that, start Command Prompt as administrator and run the following command: DISM /Online /Cleanup-Image /RestoreHealth
Once the DISM scan is finished, check if the problem persists. If the issue is still present, repeat the SFC scan and check if that solves the issue. If this process seems too complicated or time-consuming, we recommend reliable repair software.
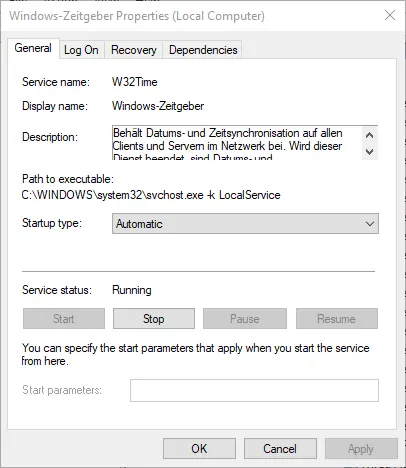
2. Set the Windows Time Service to automatic
- Press Windows key + R and type services.msc. Next, press Enter.
- Scroll down to Windows Time and double-click it.

- Change the Startup type to Automatic. Lastly, click on Apply and OK.

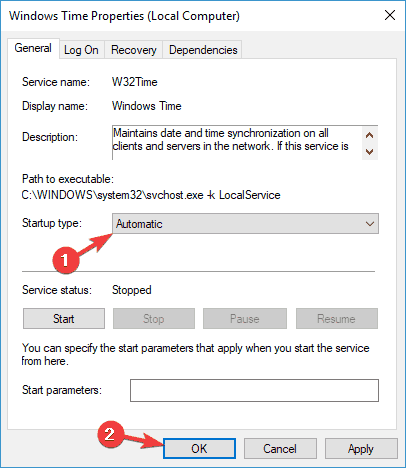
After you change the Startup type, the service should automatically start with Windows, and your problem should be resolved. If you have issues with Windows Time service, you need to ensure that the Startup type of the service is set to Automatic.
- May 2025 Patch Tuesday finally brings Recall & other AI features to Copilot+ PCs
- Microsoft releases Windows 10 (KB5058379/ KB5058392 / KB5058383/ KB5058387) May 2025 Patch Tuesday
- Microsoft extends Microsoft 365 apps support on Windows 10 to 2028
3. Make sure that the Local System account starts the Windows Time service
- Open the Services window.
- Scroll down to Windows Time and double-click it.

- Select the Log Ontab and check the Local System account. Lastly, click Apply and OK.

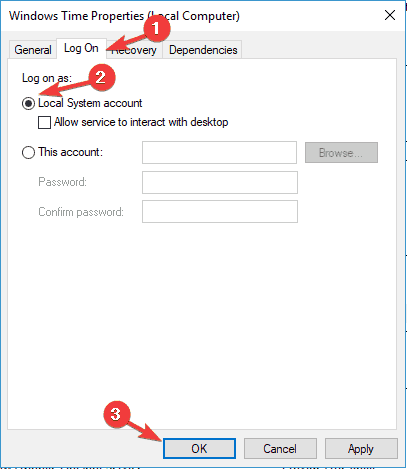
According to users, sometimes issues Windows Time service can occur if it’s not being started properly. After making these changes, the problem should be resolved completely.
4. Register the W32Time file again
- Press Windows key + X and choose PowerShell (Admin).

- Run the following commands:
net stop w32time
w32tm /unregister
w32tm /register - Close PowerShell.

Sometimes this issue can occur if there’s a problem with the W32Time service. To fix the issue, you must stop the services and unregister it.
5. Check the Windows Time Service in the Task Scheduler
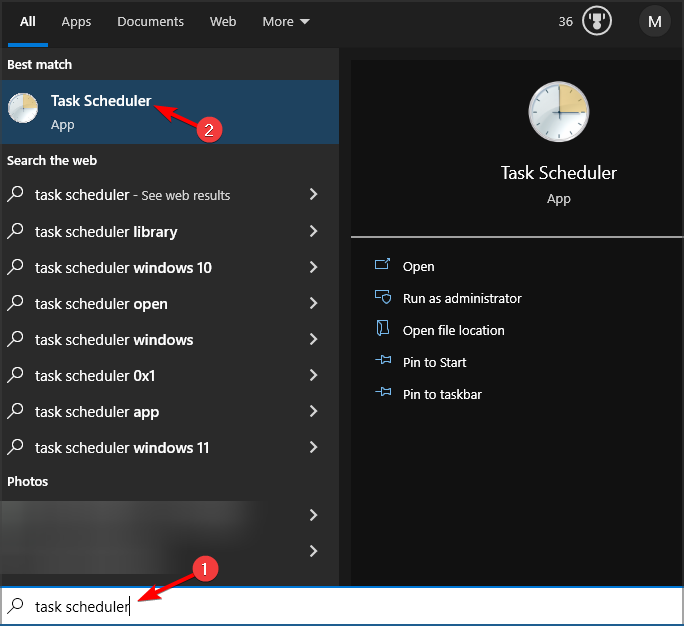
- Go to the Search menu, type task scheduler and select Task Scheduler.

- Expand the Task Scheduler Library tree. Next, go to Microsoft and select Windows. Lastly, choose Time Synchronization.

- Left-click each task and make sure it is enabled. To enable a task, right-click it and select Enable.

- Still in the center pane, check the settings from the Triggers tab and set the service to run automatically at startup.
For Windows Time Service to work properly, specific scheduled tasks must be running. If there’s an issue with one of these tasks, you might encounter some problems.
6. Use a different time server
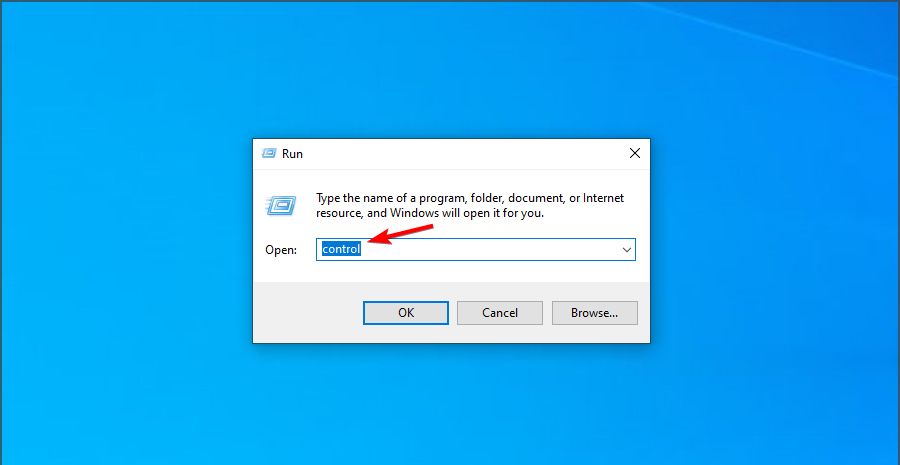
- Press Windows key + R and enter control. Click OK.

- Go to Date and Time.

- Go to Internet Time and click the Change settings button.

- Select time.nist.gov as the Server and click the Update now button. Also, try using pool.ntp.org as the server, some users reported that this fixed the issue.

In some cases, problems with Windows Time service can occur if there’s an issue with the time server. Check out our in-depth comparison of time.windows.com vs time.nist.gov for good measure. After changing the time server, check if the issue is still there.
You can also add more servers to the list. Here’s how to do this:
- Press Windows key + R and enter regedit. Press Enter.
- Once the Registry Editor opens, navigate to the following path:
Computer\HKEY_LOCAL_MACHINE\SOFTWARE\Microsoft\Windows\CurrentVersion\DateTime\Servers
- To add a new time server, right-click the empty space and choose New and then String Value.

- Enter the appropriate number and double-click it. In the Value data field enter the server’s address.
Here are some server examples:
- time-a.nist.gov
- time-b.nist.gov
- 128.105.37.11
- europe.pool.ntp.org
- clock.isc.org
- north-america.pool.ntp.org
- time.windows.com
- time.nist.gov
- After you add servers to the registry, simply go to Time and Date settings and choose any of the servers that you added.

7. Force Windows to sync the time
- Start PowerShell as adminsitartor. Use Windows key + X and select PowerShell (Admin).
- Now run the following commands:
net stop w32time
w32tm /unregister
w32tm /register
net start w32time
w32tm /resync

According to users, sometimes you might be able to solve this problem simply by forcing Windows to start the service and sync the time. After that, restart your PC and check if the problem is resolved.
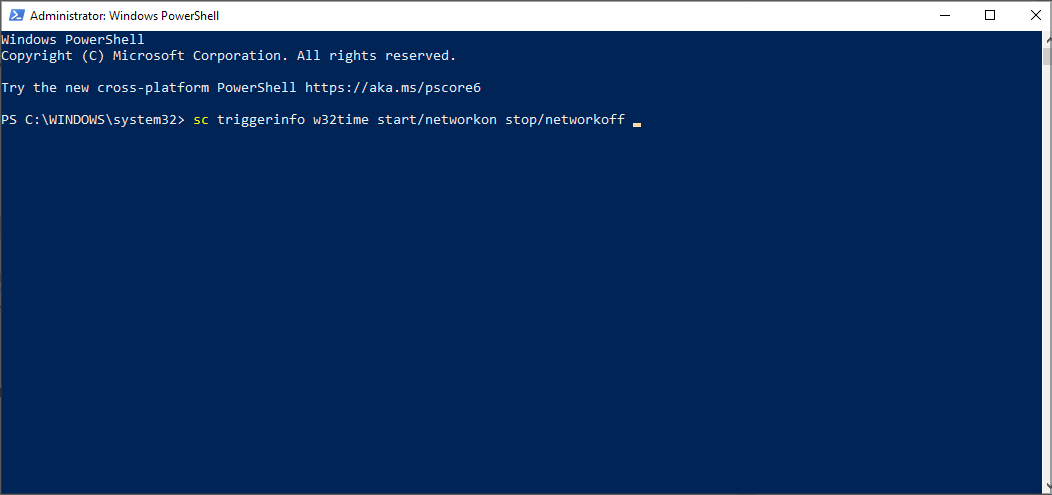
8. Use the sc triggerinfo command
- Start Powershell as administrator.
- Now run the following command:
sc triggerinfo w32time start/networkon stop/networkoff
According to users, sometimes Windows Time service isn’t triggered properly, and if that’s the case, the service won’t start at all. However, you can fix the problem simply by running a single command in Command Prompt.
After executing the command, the Windows Time service should be fixed and start automatically with your PC.
There you go. We hope one of these solutions helps you synchronize your Windows 10 clock. If the problem is still there, our Windows clock is falling behind guide should be able to help.
If you’ve encountered other workarounds to fix various Windows Time Service bugs, please list the troubleshooting steps in the comment section below.
Madalina Dinita
Networking & Security Specialist
Madalina has been a Windows fan ever since she got her hands on her first Windows XP computer.
She is interested in all things technology, especially emerging technologies — AI and DNA computing in particular.
Prior to joining the WindowsReport team, she worked in the corporate world for a number of years.
I’ve blogged about checking Windows Time Settings and how sometimes Windows Time Stops Even When Set to Start Automatically. But what if you just need a basic setup for a domain controller or for a computer that is not joined to a domain?
Here are the commands I use (from an administrative command prompt) for a computer based in the United States. This is only for setting up a domain controller or a non-domain computer. Do not use these commands for domain members!
w32tm /dumpreg /subkey:Parameters
w32tm /dumpreg /subkey:TimeProviders\NtpClient
w32tm /config /manualpeerlist:"0.us.pool.ntp.org,0x1 1.us.pool.ntp.org,0x1 2.us.pool.ntp.org,0x1 3.us.pool.ntp.org,0x1" /syncfromflags:MANUAL
net stop w32time && net start w32time
w32tm /dumpreg /subkey:Parameters
w32tm /dumpreg /subkey:TimeProviders\NtpClient
time /t
What the Commands Do
1. Display several time service registry values.
2. Set the time source to a /manualpeerlist consisting of the four U.S. pool servers from the ntp.org Pool Project. (See that site for servers in other parts of the world.) The peer list appears in the NtpServer registry value (see screen shot).
Also set /syncfromflags:MANUAL which tells it to use use the peers from the manual peer list. This sets Type to NTP (see screen shot).
3. Restart the time service.
4. Display the time service registry values again.
5. Display the current time. Make sure this is correct!
Sample output of steps 2 through 4:

SpecialPollInterval
The last line in the screen shot shows the SpecialPollInterval.
Note the 0x1 after each server entry in the manual peer list. This SpecialInterval tells Windows Time to check the time every SpecialPollInterval seconds. If your SpecialPollInterval is already 3600 (1 hour) as shown above, that should be fine for a physical server. If your server is virtualized and thus subject to more clock skew, you may want to reduce that, e.g. to 900 (15 minutes). There is no command to do that; you must edit this registry value:
HKLM\SYSTEM\CurrentControlSet\Services\W32Time\TimeProviders\NtpClient\SpecialPollInterval
The meanings of the registry values are documented on TechNet (Server 2003/2008/2008R2).
Update August 23, 2018 and May 4, 2023
The TechNet registry values documentation has been updated for Server 2012 through 2022. Under SpecialPollInterval, I stumbled across this new tidbit:
New for build 1703, SpecialPollInterval is contained by the MinPollInterval and MaxPollInterval Config registry values.
Strange wording. I guess it means that SpecialPollInterval should or must be between MinPollInterval and MaxPollInterval. I’m still on the main 1607 release of Server 2016, so this is probably not enforced yet, but better check it now.
To see the Min and Max: w32tm /dumpreg /subkey:Config
This arcticle (formerly KB3205089) explains things better. On two example computers in my office:
Server settings (new Server 2022):
MinPollInterval = 0x6 (== 2^6 seconds == 64 seconds or 1 minute)
MaxPollInterval = 0xA ( == 2^10 seconds == 1024 seconds or 17 minutes)
Workstation settings (older Windows 10):
MinPollInterval = 10 = 0xA (== 2^10 seconds == 1024 seconds or 17 minutes)
MaxPollInterval = 0xF ( == 2^15 seconds == 32768 seconds or 9.1 hours)
So my SpecialPollInterval of 900 (15 minutes) is already in between those numbers.
The interesting thing in that article is Workaround 2: If you leave the flag set to 0x8, it should automatically adjust the interval as needed between from “MinPollInterval all the way up to MaxPollInterval if the client machine keeps fairly accurate time.” So on the new Server 2022 above, time will sync every 1-17 minutes. The NtpServer is set to time.windows.com,0x8. I used to always change that to pool.ntp.org, I think because time.windows.com was unreliable. Hopefully they’ve fixed that; I’m going to leave the default and see.
AnnounceFlag
Regarding this key:
HKEY_LOCAL_MACHINE\SYSTEM\CurrentControlSet\Services\W32Time\Config\AnnounceFlags
another nugget, buried in the depths of KB816042:
- If an authoritative time server that is configured to use an AnnounceFlag value of 0x5 does not synchronize with an upstream time server, a client server may not correctly synchronize with the authoritative time server when the time synchronization between the authoritative time server and the upstream time server resumes. Therefore, if you have a poor network connection or other concerns that may cause time synchronization failure of the authoritative server to an upstream server, set the AnnounceFlag value to 0xA instead of to 0x5.
- If an authoritative time server that is configured to use an AnnounceFlag value of 0x5 and to synchronize with an upstream time server at a fixed interval that is specified in SpecialPollInterval, a client server may not correctly synchronize with the authoritative time server after the authoritative time server restarts. Therefore, if you configure your authoritative time server to synchronize with an upstream NTP server at a fixed interval that is specified in SpecialPollInterval, set the AnnounceFlag value to 0xA instead of 0x5.
Basically, if things aren’t always peachy, set AnnounceFlags to 10 (0xA) instead of 5. I actually had 10 already (not sure how that was set) but after using the Fix it from that KB article, it changed to 5. Since my server seems to be struggling to get remote time servers to answer, I’m setting it back to 10.
Debugging
I’ve been trying to figure out why a virtual domain controller often shows “Local CMOS Clock” as when I run w32tm /query /source. Haven’t cracked it yet but a few tidbits I’ve learned:
You can turn on Windows Time Service debug logging.
When the time source ends in 0x1, Windows Time sends “NTP version 3, symmetric active” packets (as described in WireShark with display filter “ntp”). The packets coming back are “NTP version 3, symmetric passive”. If they come back.
When the time source ends in 0x8, Windows Time sends “NTP version 3, client” packets and (hopefully) receives “NTP version 3, server” back.
If you run w32tm /monitor /computers:<time server IP>, Windows Time sends and receives “NTP version 1” packets, which always seem to work.
This post suggests changing from 0x1 to 0x8 if you’re having trouble with symmetric packets, but that didn’t fix my issue.
To watch NTP packets on the WAN side of a UniFi USG router, SSH in and use this command:
sudo tcpdump port 123 -i eth0 -n
To watch NTP packets on the LAN side coming and going to a specific internal IP address:
sudo tcpdump host 192.168.1.55 and port 123 -i eth1 -n
There’s a helpful tcpdump tutorial with examples here.
Maintains date and time synchronization on all clients and servers in the network. If this service is stopped, date and time synchronization will be unavailable. If this service is disabled, any services that explicitly depend on it will fail to start.
This service also exists in Windows 11, 8, Vista and XP.
Startup Type
| Windows 10 version | Home | Pro | Education | Enterprise |
|---|---|---|---|---|
| 1507 | Manual | Manual | Manual | Manual |
| 1511 | Manual | Manual | Manual | Manual |
| 1607 | Manual | Manual | Manual | Manual |
| 1703 | Manual | Manual | Manual | Manual |
| 1709 | Manual | Manual | Manual | Manual |
| 1803 | Manual | Manual | Manual | Manual |
| 1809 | Manual | Manual | Manual | Manual |
| 1903 | Manual | Manual | Manual | Manual |
| 1909 | Manual | Manual | Manual | Manual |
| 2004 | Manual | Manual | Manual | Manual |
| 20H2 | Manual | Manual | Manual | Manual |
| 21H1 | Manual | Manual | Manual | Manual |
| 21H2 | Manual | Manual | Manual | Manual |
| 22H2 | Manual | Manual | Manual | Manual |
Default Properties
| Display name: | Windows Time |
| Service name: | W32Time |
| Type: | share |
| Path: | %WinDir%\system32\svchost.exe -k LocalService |
| File: | %WinDir%\system32\w32time.dll |
| Error control: | normal |
| Object: | NT AUTHORITY\LocalService |
| Privileges: |
|
Default Behavior
The Windows Time service is running as NT AUTHORITY\LocalService in a shared process of svchost.exe. Other services might run in the same process. If Windows Time fails to start, the error is logged. Windows 10 startup proceeds, but a message box is displayed informing you that the W32Time service has failed to start.
Restore Default Startup Type of Windows Time
Automated Restore
1. Select your Windows 10 edition and release, and then click on the Download button below.
2. Save the RestoreWindowsTimeWindows10.bat file to any folder on your hard drive.
3. Right-click the downloaded batch file and select Run as administrator.
4. Restart the computer to save changes.
Note. Make sure that the w32time.dll file exists in the %WinDir%\system32 folder. If this file is missing you can try to restore it from your Windows 10 installation media.
Yea, though I walk through the valley of the shadow of death, I will fear no evil: for thou art with me; thy rod and thy staff they comfort me.