
Supported Platforms
What versions of Windows does PostgreSQL run on?
PostgreSQL is supported on Windows XP and above, at least as of version 9.0. It will run on 32 and 64 bit systems.
Versions of the server are not tested on new operating system versions that are released after a newer major version of the server was released. For example, Windows 7 was released after PostgreSQL 8.4, so PostgreSQL 8.3 will not be supported on it. Similarly, when the upcoming RHEL 6 is released, only PostgreSQL 9.0.x will be supported on it. We aim to support new versions of Windows in the PostgreSQL major version following their release at the latest.
For information about platforms supported by the One-click installer, please see the installer download page, off the main download page for windows.
For information on non-Windows platforms see the main FAQ and the main download page.
What Windows platforms are NOT supported?
The PostgreSQL installers are not tested or supported on:
- Windows XP Embedded
- Windows 2000
- Windows NT 4
- Windows NT 3.5.x
- Windows 95/98/ME/3.x
- Windows CE
- Windows Mobile
These platforms are not supported. Please do not ask the mailing list for help with any of these platforms.
Please read the troubleshooting notes on installation on embedded versions of windows for some more information about embedded windows.
I heard that NT4 and Windows 2000 are supported. Is that true?
Although not officially supported, PostgreSQL may run on Windows NT4 and Windows 2000
with a few minor issues including:
- The installer may not work correctly, thus you will need to install PostgreSQL manually from the binary .zip release, or compile it yourself.
- PostgreSQL uses a feature in the NTFS filesystem called ‘reparse points’ to implement tablespaces. Reparse points are not available in NT4, hence tablespaces cannot be used on NT4.
- There is no ‘runas.exe’ included in Windows NT4 as standard, making it difficult to start PostgreSQL from an administrative account.
It should also be noted that very little testing has been done on NT4.
- No testing is done on Windows NT 4 or Windows 2000, so newer versions may not work on these platforms.
Please do not ask for help with these obsolete platforms on the mailing list. Some of the professional support companies may be able to assist you, though.
What about Windows 95/98/ME?
PostgreSQL requires functionality that is not available on these
platforms and will not run on them. If you need to run PostgreSQL
on these platforms, you can look at the
Cygwin
port, which has basic support for 9x platforms.
Is there a 64-bit build of PostgreSQL for Windows?
Yes. A 64bit Windows port was released for PostgreSQL 9.0.
32-bit builds of previous versions of PostgreSQL generally run fine on 64-bit Windows. Though they cannot practically use more than about 1GB of shared_buffers directly, they can still benefit from more than 4GB of memory because the Windows kernel will use that memory to cache disk reads.
What about 64-bit ODBC drivers?
At time of writing there was 64-bit support in the psqlODBC source code, but no official binary releases of 64-bit ODBC drivers. Check the psqlODBC website for details.
Installation
What do I need to install PostgreSQL on Windows?
See the PostgreSQL for Windows download page for various ways to download and install PostgreSQL on Windows.
The easiest way to install PostgreSQL on Windows is with the
One Click installer package maintained by EnterpriseDB, which you can get from the page linked to above. This will install PostgreSQL along with
pgAdmin (a graphical administration and management program), a selection of ‘contrib’ modules to provide additional specialised functionality, and a choice of procedural languages. A program called StackBuilder will be installed to help you download and install any additional components, like ODBC or JDBC drivers, that you may need.
What do I need to compile PostgreSQL from source code?
See the documentation
for instructions on how to compile PostgreSQL for windows, including details about supported compilers and tools.
Why do I need a non-administrator account to run PostgreSQL under?
When a hacker gains entry to a computer using a software bug in a
package, she gains the permissions of the user account under which the
service is run. Whilst we do not know of any such bugs in PostgreSQL,
we enforce the use of a non-administrative service account to minimise
the possible damage that a hacker could do should they find and utilise
a bug in PostgreSQL to hack the system.
This has long been common practice in the Unix world, and is starting to
become standard practice in the Windows world as well as Microsoft and
other vendors work to improve the security of their systems.
Note, that with the release of PostgreSQL 8.2, it is possible to run under
a administrative account. PostgreSQL 8.2 and above are able to irrevocably
give up administrative rights at startup, thus ensuring the rest of the
system remains secure in the extremely unlikely event that PostgreSQL
becomes compromised.
Can I install PostgreSQL on a FAT partition?
Use of PostgreSQL on FAT32 file systems is not supported or tested, because
FAT32 is a terrible file system on which to run any database.
PostgreSQL’s number one priority is the integrity of your data. FAT and
FAT32 filesystems simply do not offer the reliability or crash-safety required.
In addition, the lack of security features offered by FAT make it
impossible to secure the raw data files from unauthorised modification.
Finally, PostgreSQL utilises a feature called ‘reparse points’ to
implement tablespaces. This feature is not available on FAT partitions.
The NTFS file system is a journalled filesystem offering much better
reliability and crash recovery. In addition, it has a comprehensive
access control system and offers the reparse point functionality used
by PostgreSQL.
For this reason, the PostgreSQL installer package will not initialise
a database cluster on anything but an NTFS partition. The server and
utilities may be installed on any partition type.
It is recognised however, that in rare cases FAT partitions may be the only choice.
In such cases, you can simply install PostgreSQL as normal, but without initialising the
database cluster. When the installation has finished, manually run
the ‘initdb.exe’ program on the FAT partition. Security and
reliability will be compromised however, and any attempts to create
tablespaces will fail. Do not use PostgreSQL on FAT32 in production.
The most common reason people ask this is when they have a USB key or external hard drive and they want to put a PostgreSQL database on it. Don’t do it. You can format USB keys and external hard drives with NTFS, and you should do so if you want to run a database on them. FAT is not crash-safe, and removing a hard drive without using «Safely remove…» in Windows counts as a crash as far as the hard drive is concerned. Corruption is extremely likely. It is very important to reformat a removable drive with NTFS if it is to be used with PostgreSQL to store any data you care about.
What filesystem permissions does PostgreSQL require?
The PostgreSQL service account needs read permissions on
all directories leading up to the service directory. It needs write permissions only
on the data directory. Specifically, it should not be granted anything other than read
permissions on the directories containing binary files. (All directories below the installation
directory are set by the installer, so unless you change something, there should be no problem with this).
PostgreSQL also needs read permissions on system DLL files like kernel32.dll and user32.dll
(among others), which is normally granted by default, and on the CMD.EXE binary, which may in some
scenarios be locked down and need opening.
If you are running PostgreSQL on a multi-user system, you should remove the permissions from all
non-administrative users from the PostgreSQL directories. No user ever needs permissions on the
PostgreSQL files — all communication is done through the libpq connection. Direct access to data files
can lead to information disclosure or system instability!
Why can’t I select Unicode as an encoding?
Starting with PostgreSQL 8.1, the UTF-8 unicode encoding is fully supported on Windows. The Unicode ODBC driver supports UTF-16, and the JDBC driver also has full unicode support.
The PostgreSQL server does not support the 2-byte UTF-16 or 4-byte UTF-32 Unicode encodings for internal data storage or on-the-wire communication. Beause UTF-16 is the default encoding on Windows, and what people on Windows usually mean when they say «Unicode», you might expect this to be a problem, but in practice it’s fine, as the ODBC and JDBC drivers take care of this. Programs using libpq directly need to be aware of this, but not much else does.
I installed in a non-english language, but all messages show up in english!
The language choice made during the installation only selects which language is used by the installer. To
change the language of the messages of the installed product, make sure you have installed the National language
support feature. Then edit your postgresql.conf file and change the value of the lc_messages parameter
to the language you want.
Common installation errors
PostgreSQL and/or the installer crashes at startup, fails to start or hangs on start
By far most common reasons for installation and runtime problems with PostgreSQL on Windows are Windows Scripting Host issues, antivirus software problems and 3rd-party (non-Microsoft) software firewalls. People also sometimes have trouble with the postgres service account password.
The following articles cover these issues. Please read them and follow their instructions before asking for help with installer problems.
Antivirus software
If you have any antivirus software installed, you must exclude the data directories that are to be used by PostgreSQL and must exclude postgresql.exe process. If that still does not help, it may be required to completely uninstall the antivirus software from the machine.
Antivirus software can interfere with PostgreSQL’s operation, because PostgreSQL requires file access commands in Windows to behave exactly as documented by Microsoft, and many antivirus programs contain errors or accidental behavior changes that cause these commands to misbehave subtly. Most programs do not care because they access files in fairly simple ways. Because PostgreSQL is continuously reading from and writing to the same set of files from multiple processes, it tends to trigger programming and design mistakes in antivirus software, particularly problems related to concurrency. Such problems can cause random and unpredictable errors, or even data corruption.
Antivirus software is also likely to dramatically slow down PostgreSQL’s operation. For that reason, you should at least exclude postgres.exe and the data directories so the scanner ignores them.
What Anti-Virus software is compatible?
The systems used to build the Windows installers all run either Sophos AV or AVG Free Edition, and
those systems pass a full set of PostgreSQL regression tests running those programs.
Microsoft Security Essentials is also known to work.
Specific issues have been reported with the nod32 antivirus
product. If you are using this product, add «postmaster.exe» to the list
of excluded processes (available under advanced options). This has been
reported to fix the problem.
Specific issues have also been reported with McAfee and Panda anti-virus
software and NetLimiter network monitoring software. While some people do have
PostgreSQL working with these software packages, there is no specific or even
recommend solutions that have not worked in some cases, so the issues would appear
to be installation specific, sometimes even requiring uninstallation.
Software firewalls
If you have any 3rd-party firewall software installed on your machine, try either disabling it or uninstalling it. There’s really no need for 3rd party firewalls on Windows XP and above, as the built-in firewall provided by Microsoft does an excellent job already. Some badly-written 3rd party firewalls do not uninstall correctly, so after uninstallation you might have to tell Windows to repair its network settings.
If you had a 3rd-party firewall and have now uninstalled it, make sure to turn Windows Firewall back on, as many products turn it off during installation and fail to turn it back on during uninstallation.
The installer exits with a runtime installation error?
The installer may exit with an error like: An error occured executing the Microsoft VC++ runtime installer. This can only happen on Windows.
There are two main reasons why this may occur:
1) The Windows Scripting Host is unable to execute VBscripts. This can occur if the scripting host is disabled (which is unusual), or if the installation is broken. A sign of this problem is a message like CScript Error: Can’t find script engine «VBScript» for script «C:\…. It can often be resolved by re-registering the VBscript interpreter — click Start -> Run and enter the following and click OK:
regsvr32 %systemroot%\system32\vbscript.dll
If that fails, on older versions of Windows you can try updating the scripting host.
Also, make sure that the registry value in HKEY_CLASSES_ROOT\.vbs\(Default) is VBSFile. [1]
2) The installer is unable to properly read and write files to the system TEMP directory. This can occur if the TEMP or TMP environment variables are set to non-standard values, and can be recognised by errors in the logfile indicating that scripts could not be executed or found. To resolve this issue, ensure the TEMP and TMP variables are set to their correct values.
Trouble with passwords for the postgres user
Dave Page wrote a blog post explaining what the different passwords are used for, and how to overcome common problems such as resetting them.
PATH environment variable
There is also an issue if you have installed cygwin, and the cygwin\bin directory is present
in the system PATH variable. There are DLL files in the cygwin directory related to interpreted languages (TCL,
perl, python) that contain bugs that can cause the installer or the installed version of PostgreSQL to either hang
or crash. Remove the cygwin\bin directory from your path before running the installer!
Problems have also been observed when the PATH environment variable contains directories containing versions of libssl and/or libintl.
I’m getting permissions errors when installing/running initdb
Make sure the PostgreSQL service account has permissions on the directories leading up to the one
you have installed into. The installer will set permissions on the install directory but not on
parent directories of it.
You may also see related errors show up as «The database Cluster initialisation failed» during the One Click installer.
Check your install-postgresql log
but it is usually related to permission errors. The following thread may help,
http://forums.enterprisedb.com/posts/list/2044.page#7503
Or alternatively, you can fix up the directory permissions and then manually restart the initcluster.vbs script like this for v9,
cscript //NoLogo "<install_path>/installer/server/initcluster.vbs" "postgres" "postgres" "<password>" "<install_path>" "<data_path>" 5432 "DEFAULT"
Check the %COMSPEC% environment variable
Some Windows installations seem to land up with an incorrect %COMSPEC% environment variable that prevents the execution of initdb.
In a command prompt, run:
echo %COMSPEC%
You should get something like:
C:\Windows\system32\cmd.exe
(Where C:\Windows is your Windows install location).
If you see something else, check the System control panel, and in the Environment section check for COMSPEC. If its value there is wrong:
- Make a system restore point; and
- Back up your computer; then
- Change it in the system environment settings, so it points to the correct location of cmd.exe
You can test to make sure it’s right by:
- Opening a new cmd.exe prompt (not re-using one that was already open); and
- Running
"%COMSPEC%" /C "echo test ok"
It should print «test ok».
The installer claims the specified account is an administrator, but it isn’t!
Most likely, the specified account is an administrator or power user,
even though you aren’t aware of it. The check used by the installer
specifically checks for membership in the Administrators or
Power Users group. Work your way backwards using Local Users and Groups —
open the Administrators group, see who’s a member. Then check any
groups (domain or local) that are a member of the Administrators group,
and any groups members of that group etc. PostgreSQL checks any level
of nested groups.
I’m getting an error message that says PostgreSQL cannot be installed from a Terminal Services session
This is unfortunately so. The PostgreSQL backend won’t run from a TS session, and in order to do initdb the installer
has to start a standalone backend. Therefore, installation has to be performed from the console. Note that if you are
using Windows Server 2003, you can get remote access to the actual console and not just an administrative session.
To do this, start the Remote Desktop Connection by executing mstsc /console, and then connect as usual.
This will lock the local console of the server and give you control over that session. In this scenario,
PostgreSQL should install just fine.
I get the error «the user has not been granted the requested logon type at this computer» or similar
Make sure the specified PostgreSQL account has the «Log on as a service»
and «Log on locally» rights. The «Log on locally» is only required for
the install part, and can be removed once the installation is completed
if security policies require it. (Rights are granted and revoked using
the «Local Security Policy» MMC snapin. «Log on locally» is default,
and «Log on as a service» will normally be granted automatically by
the installer).
If you still have this problem, enable auditing (also using
the «Local Security Policy» snapin) and let us know what other rights
were required in your setup.
Note that if your computer is a member of a domain, the settings of
the security policies may be controlled at the domain level using
Group Policy.
How do I delete the service account — it’s not listed under users!
Windows sometimes hide some accounts from the GUI tools, so they cannot be removed from there. This includes
the auto-created service account for PostgreSQL (that may be left over from a previous installation). To delete this
account, use the NET command on the commandline:
NET USER <username> /DELETE
Where <username> is the windows login name of the user, for example postgres.
Common runtime issues
I’m getting «dynamic load error» when installing a procedural language
Most commonly this means that the actual language DLL for the procedural language is missing. The PostgreSQL
DLLs only contains the language bindings, and require the language distribution DLLs to be present
in the system PATH. For a list of the current required DLLs for the different procedural languages,
please see the installation instructions.
To find out exactly which DLL files are missing, you can use the depends tool from Microsoft.
It is available in the Windows Support Tools, that are on the Windows CD as a separate install. Just run
depends plpython.dll (for PL/python) to show which imports are missing.
I’m seeing a lot of postgres.exe processes even though I only started the server once
This is normal. PostgreSQL uses a multi-process architecture. In an empty system you will see anything from two to
five processes. Once clients start to connect, the number of processes will increase.
How do I set an environment variable?
PostgreSQL uses environment variables for several settings. To change an environment variable in most
Windows versions, go into Properties for My Computer, then into Advanced. Note that there are two sets of
environment variables — one for the system which applies to all users and one for the current user. If you
want an environment variable to affect the PostgreSQL service, you must change the system variable. After
changing a system variable, you must restart the service.
I cannot run with more than about 125 connections at once, despite having capable hardware
When running as a service, you may experience failures with more than approximately 125 simultaneous connections.
This can happen because some of the libraries that PostgreSQL is dependent on are dependent on user32.dll which allocates
memory from an area known as the Desktop Heap. The desktop heap is assigned to each logon session, with non-interactive
sessions typically being assigned 512KB. Each postgres process that runs typically consumes approximately 3.2KB of desktop
heap, which coupled with other overhead can exhaust the allocated heap at somewhere around 125 connections. This doesn’t
happen when running from the command line (or more precisely, happens with much higher numbers of connections) because the
interactive logon session is typically allocated 3MB of Desktop Heap.
You can increase the non-interactive Desktop Heap by modifying the third SharedSection value in the registry as described
in this Microsoft Knowledgebase article. Note that this should be done
with great care as specifying a value that is excessively high may prevent your system from booting.
Windows version-specific issues
Can I install a 32-bit PostgreSQL on 64-bit Windows?
Recent 32-bit versions of PostgreSQL (8.3 and newer) can be installed and used on 64-bit Windows XP and above,
though they retain the 32-bit limits on maximum process address space (and thus shared memory).
You can connect to the 32-bit postgresql server from 64-bit programs on the computer the server is running on
or other computers if a 64-bit libpq or psqlODBC driver is installed where the program is running.
Because 32-bit versions of the PostgreSQL server only install a 32-bit libpq and pgsqlODBC, only 32-bit programs
on the computer the server was installed on can use the database unless a 64-bit ODBC driver or libpq
is installed as an add-on.
Where is the PostgreSQL ODBC driver? I’m running 32-bit PostgreSQL on 64-bit Windows
You need to use the 32-bit ODBC administrator to set up data sources for 32-bit
applications using 32-bit drivers.
Unless you’ve also installed a 64-bit version of
psqlODBC, a 32-bit install of PostgreSQL will
only have a 32-bit ODBC driver. The 32-bit ODBC driver may only be used by 32-bit programs,
and will not show up in the 64-bit ODBC administrator.
This gets confusing because on 64-bit windows c:\windows\system32\odbcad32 is the 64-bit
ODBC driver administrator, despite the name. This is a historical artifact of Windows development.
Apparently many apps and installers depend on odbcad32.exe having that name and path,
so Microsoft landed up being stuck with it despite the now-stupid name, which made sense back
in the 16- to 32-bit transition but makes none now. It’s the same reason the
«system32» directory is still called that on 64-bit Windows. PostgreSQL can’t do anything about this.
See: http://support.microsoft.com/kb/942976
You’ll see in that article that the 32-bit ODBC administrator on 64-bit Windows is:
%systemdrive%\Windows\SysWoW64\odbcad32.exe
You can launch this from «Start->Run» using the path above. You will see the PostgreSQL ODBC drivers in the
32-bit ODBC administrator.
You ‘can not’ use a 32-bit ODBC driver in a 64-bit application. That means that you’ll still only be
able to use the PostgreSQL ODBC driver with 32-bit applications unless you install a 64-bit ODBC driver
as well.
Can I use a 64-bit ODBC program with a 32-bit PostgreSQL server?
Only if you have a 64-bit [2] driver installed. See the installation section.
Установка PostgreSQL по шагам
1. Загружаем дистрибутив
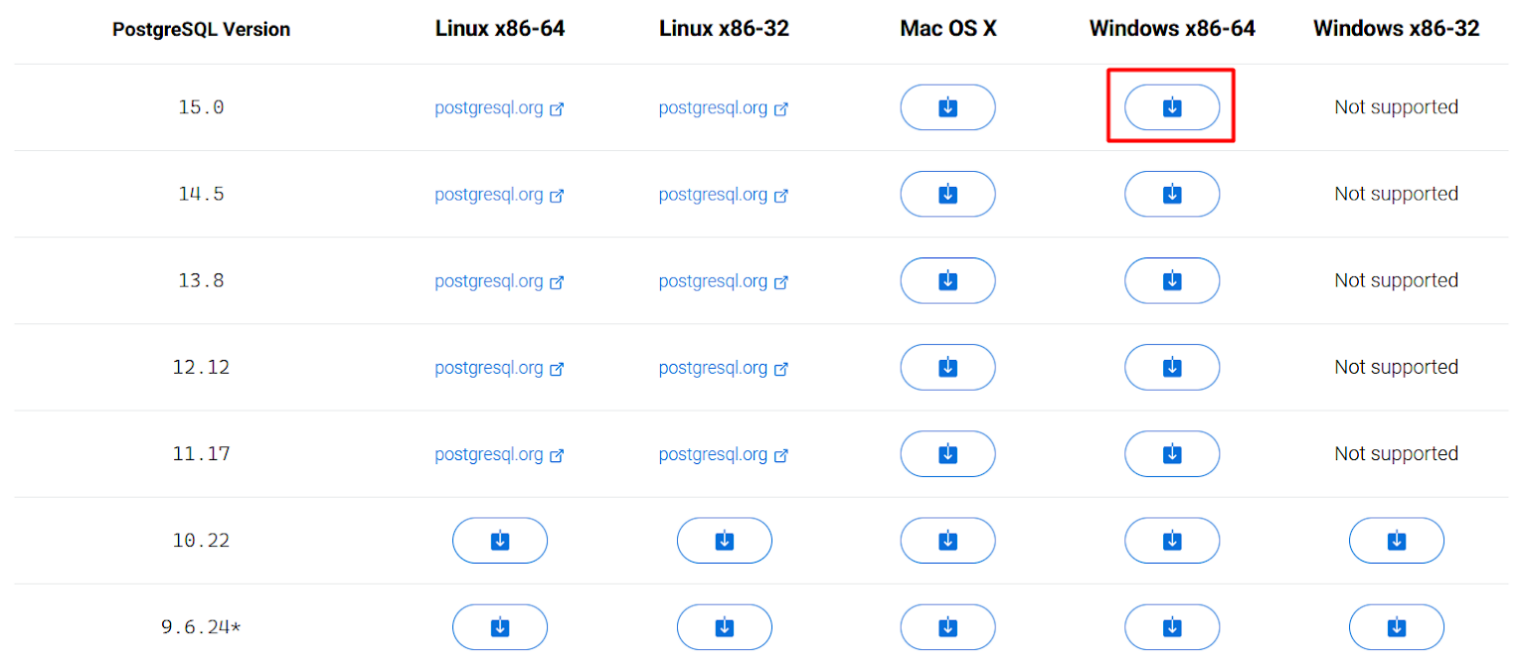
Мы советуем скачивать актуальные версии на официальном сайте СУБД. Чтобы найти установщик PostgreSQL 15 для Windows нажимаем Download → Windows → Download the installer.
На сайте выбираем интересующую нас версию PostgreSQL и платформу Windows x86-64. Начинается загрузка установочного файла на компьютер.
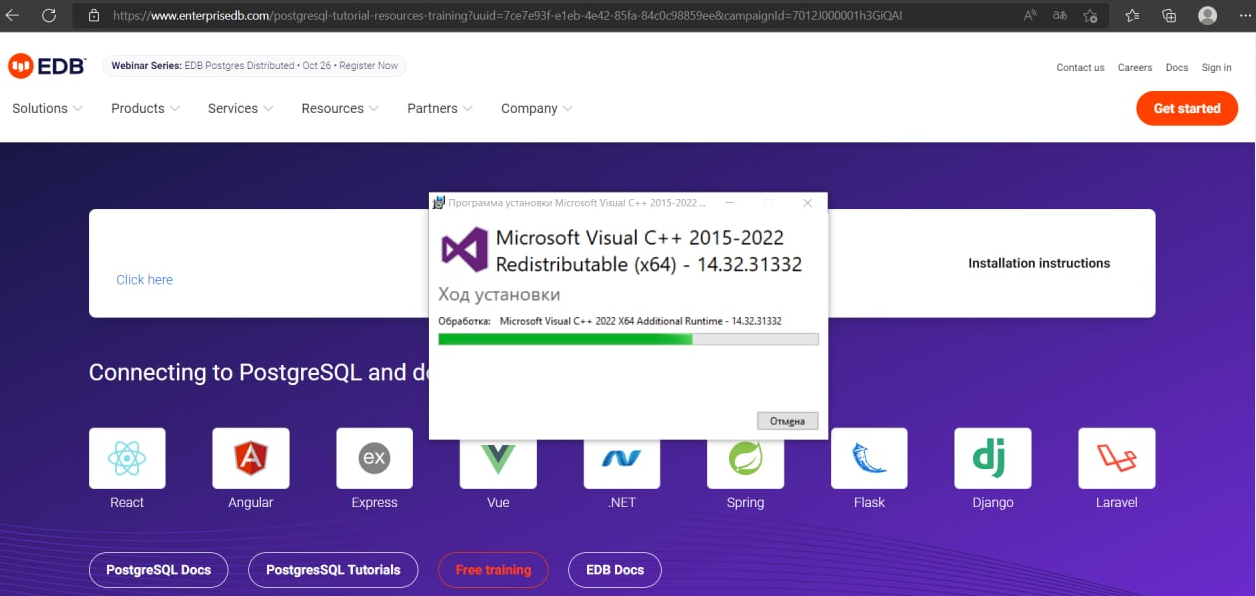
2. Запускаем установочный файл
В ходе установки проводится проверка на наличие необходимых компонентов, например, Microsoft Visual C++. Если каких-то компонентов не хватает, они устанавливаются автоматически.
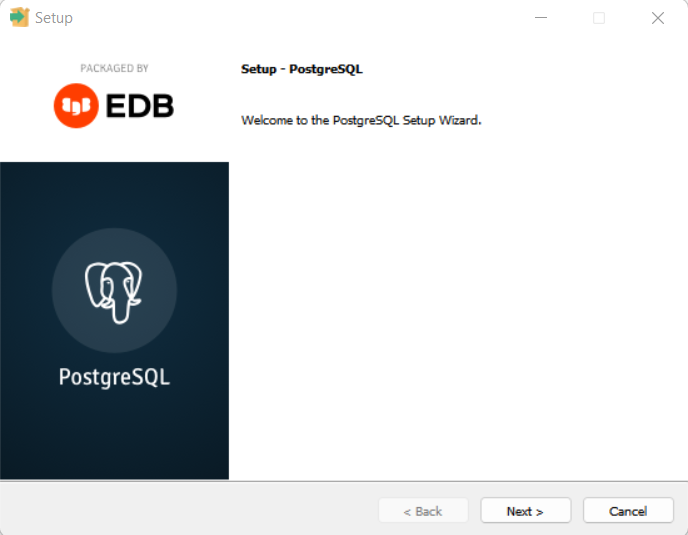
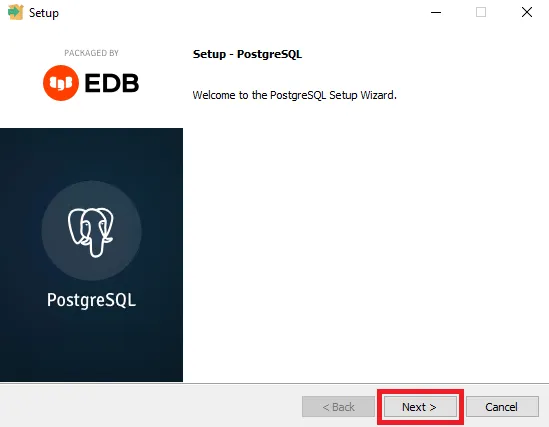
В открывшемся приветственном окне нажимаем Next.
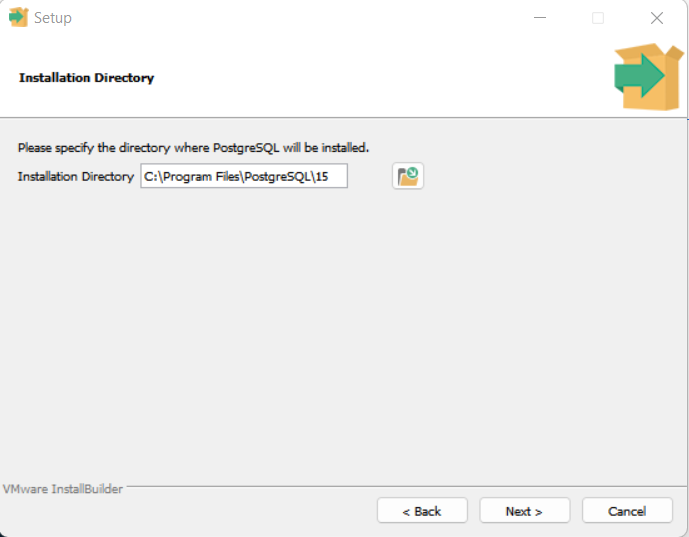
3. Указываем каталог для установки
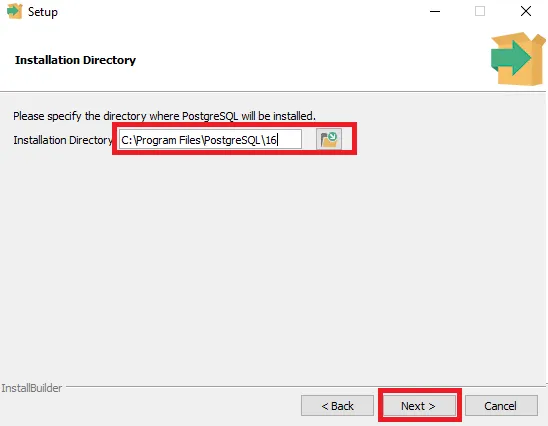
Выбираем путь, куда нужно установить PostgreSQL 15. По умолчанию предлагается C:\Program Files\PostgreSQL\15, его можно оставить.
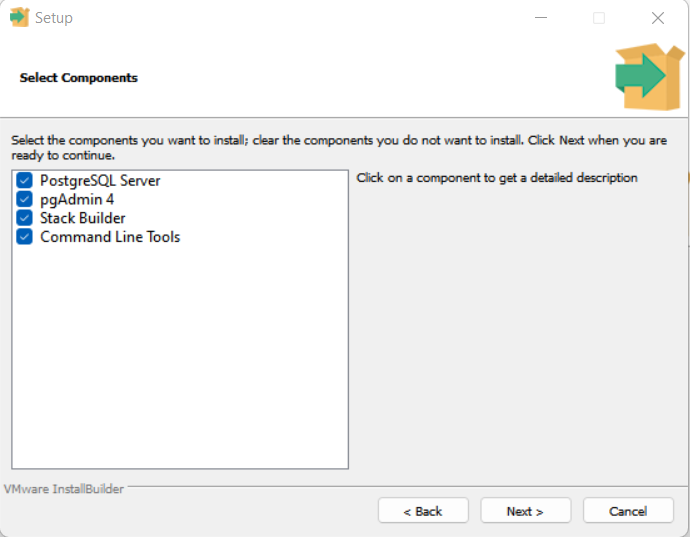
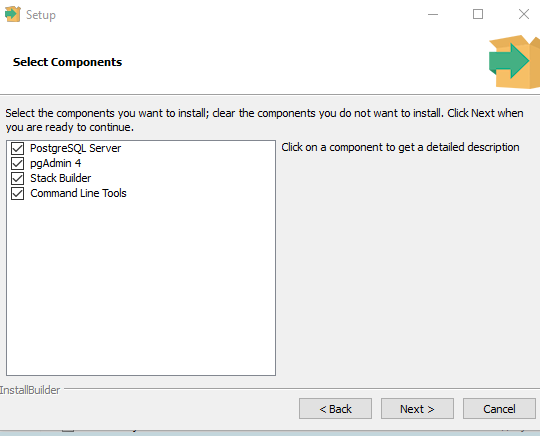
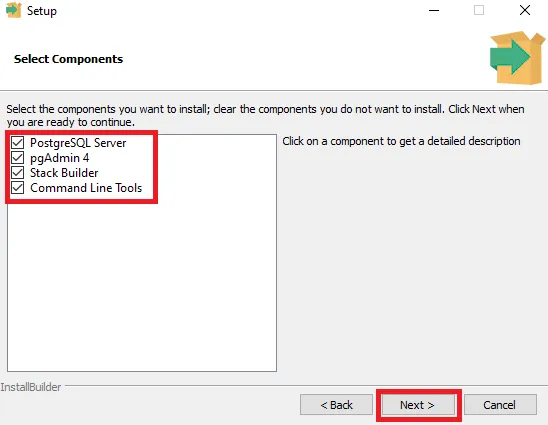
4. Выбираем дополнительные компоненты
Вместе с СУБД можно установить следующие компоненты:
- PostgreSQL Server — это сам сервер баз данных PostgreSQL;
- pgAdmin 4 — приложение с графическим интерфейсом для администрирования СУБД;
- Stack Builder — утилита, которая поможет установить дополнительные библиотеки и инструменты в PostgreSQL;
- Command Line Tools — инструменты для работы с СУБД через командную строку.
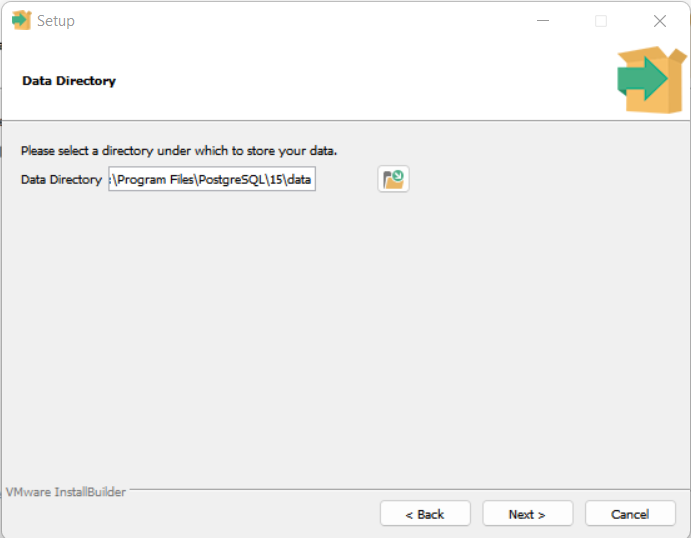
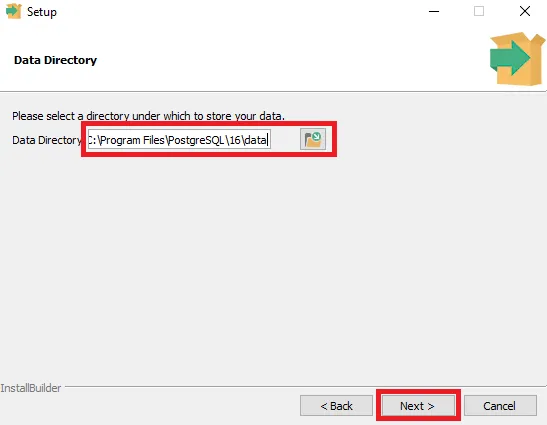
5. Указываем каталог для файлов баз данных
Можно оставить путь по умолчанию C:\Program Files\PostgreSQL\15\data или выбрать свой. Здесь будет храниться вся информация, поэтому перед выбором каталога важно проверить, что на диске достаточно свободного места.
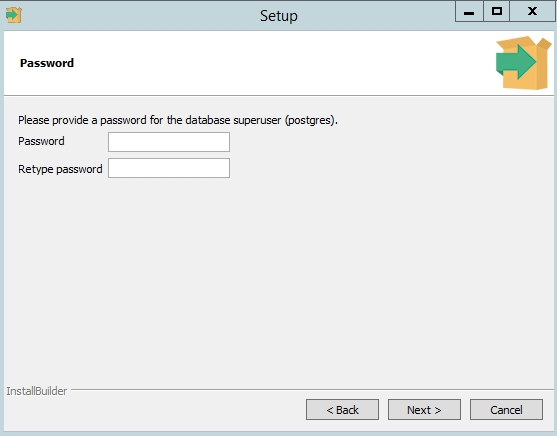
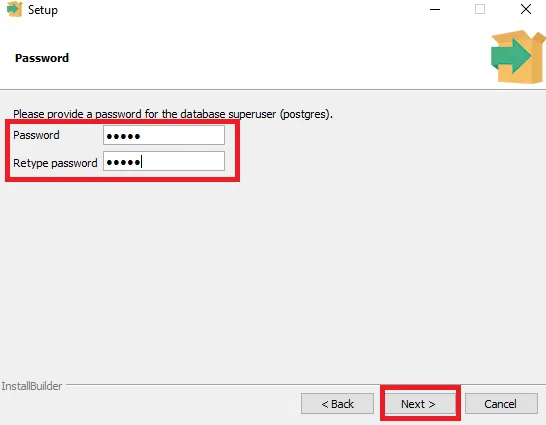
6. Устанавливаем пароль для системного пользователя
Рекомендуем выбирать пароль из 12 и более символов, со строчными и прописными буквами, цифрами и символами. Логин postgres устанавливается по умолчанию.

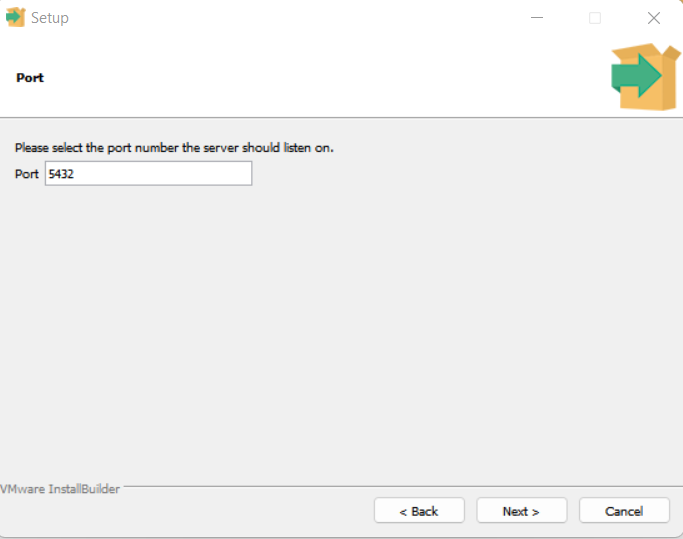
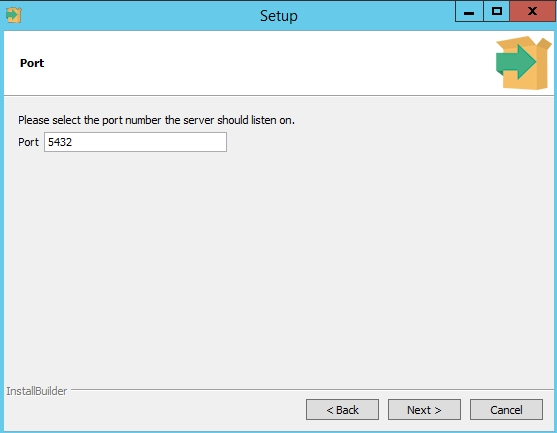
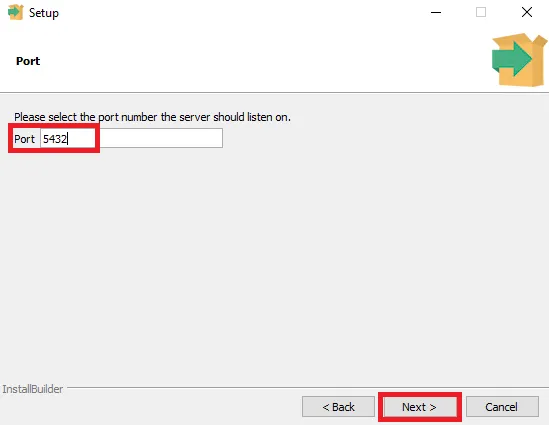
7. Выбираем порт и кодировку
Можно оставить порт по умолчанию 5432 или указать свой. Далее нажать Next.
В появившемся списке локалей выбираем подходящую для себя локализацию или оставляем значение по умолчанию [Default locale]. Нажимаем Next.
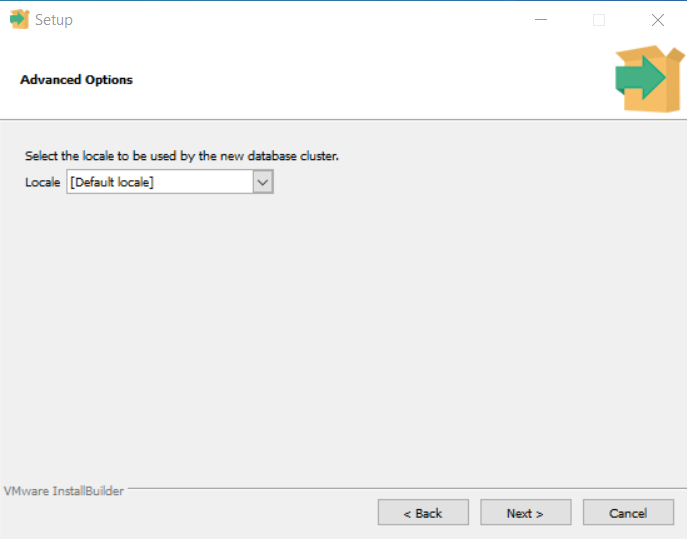
В будущем для новых баз данных на сервере можно будет указать конкретную кодировку.
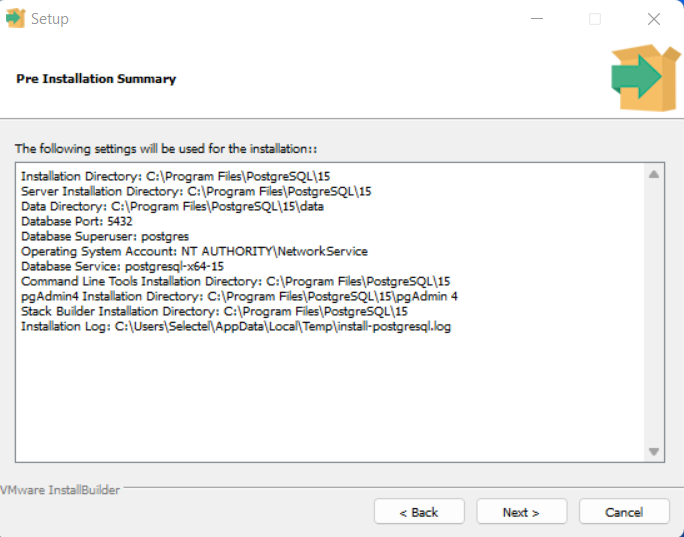
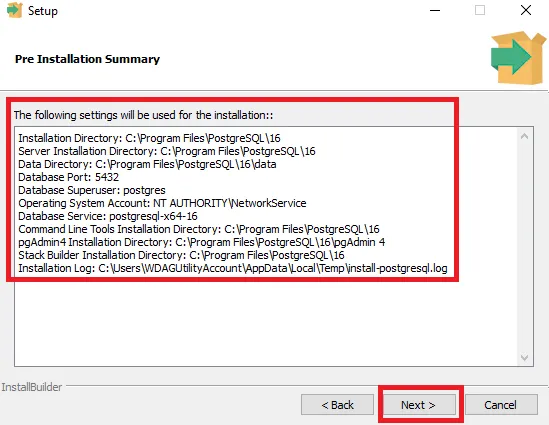
8. Проверяем параметры и завершаем установку
В финальном окне выводится сводная информация об установке PostgreSQL 15: дополнительные компоненты, выбранные порт и каталог, логин. Если параметры указаны верно, нажимаем Next или возвращаемся для корректировок с помощью кнопки Back.
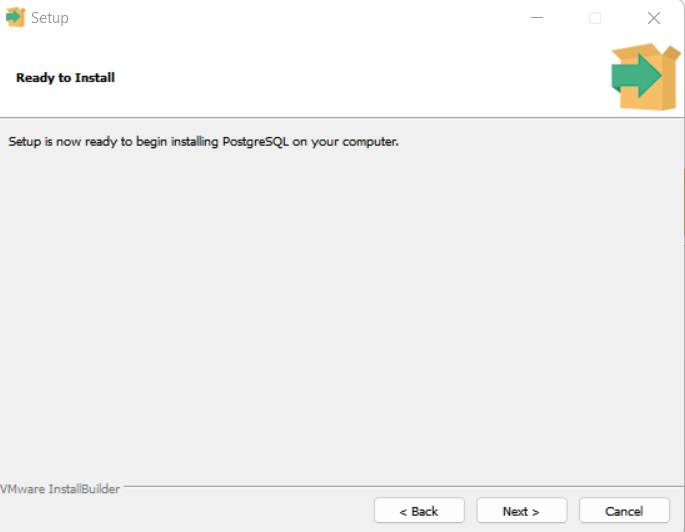
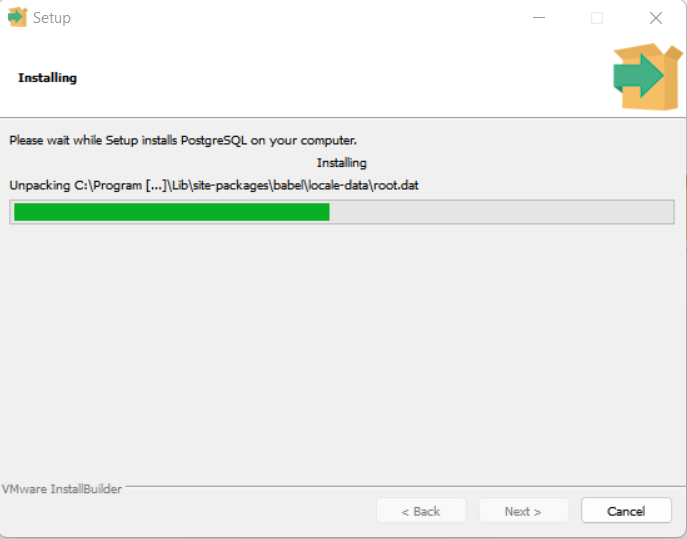
Все готово. Нажмите Next и дождитесь, когда необходимые компоненты установятся. Обычно процесс занимает не более 5 минут.
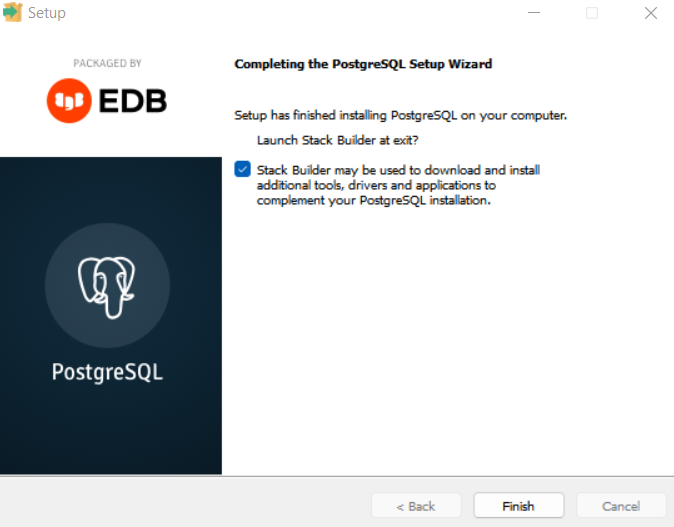
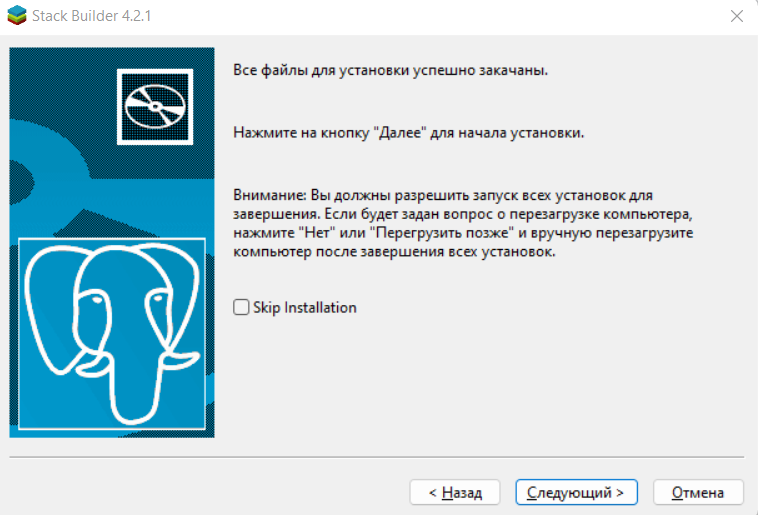
Одновременно с завершением процесса установки можно запустить компонент Stack Builder. Если запуск не требуется, снимаем флажок и нажимаем Finish.
Установка приложений с помощью Stack Builder
Запустить Stack Builder после окончания установки PostgreSQL можно с помощью команды:
C:\"Program Files"\PostgreSQL\15\bin\stackbuilder.exe
При этом путь будет зависеть от того, какие диск и каталог были выбраны во время установки СУБД.
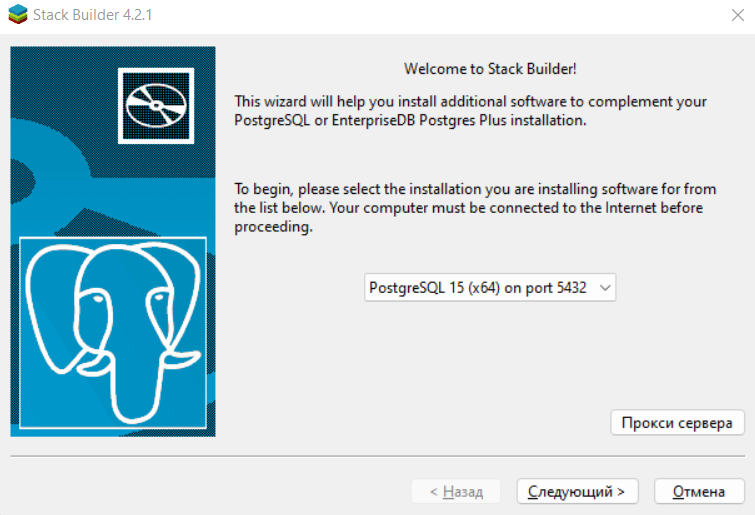
В начальном окне Stack Builder выбираем СУБД, для которой будем устанавливать дополнения. Для дальнейшей загрузки необходимо подключение к Интернету.
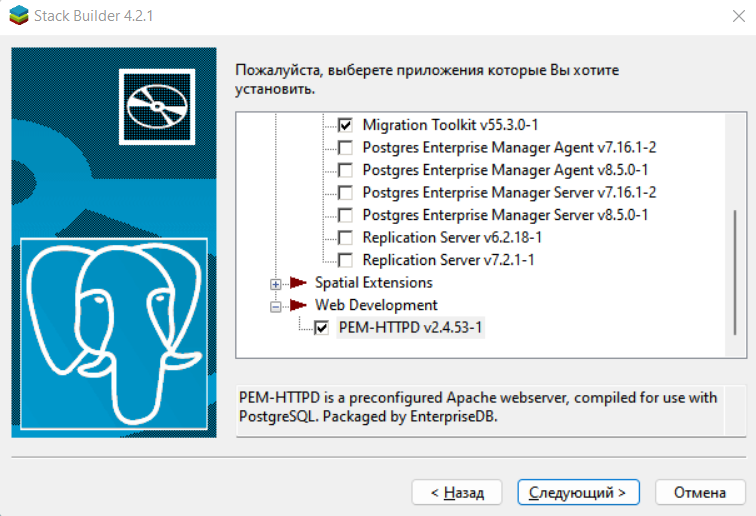
Далее выбираем дополнительные приложения, которые нужны для работы с базой данных. При клике на любой из компонентов внизу окна появляется его краткое описание. Мы выбрали Migration Toolkit и PEM-HTTPD.
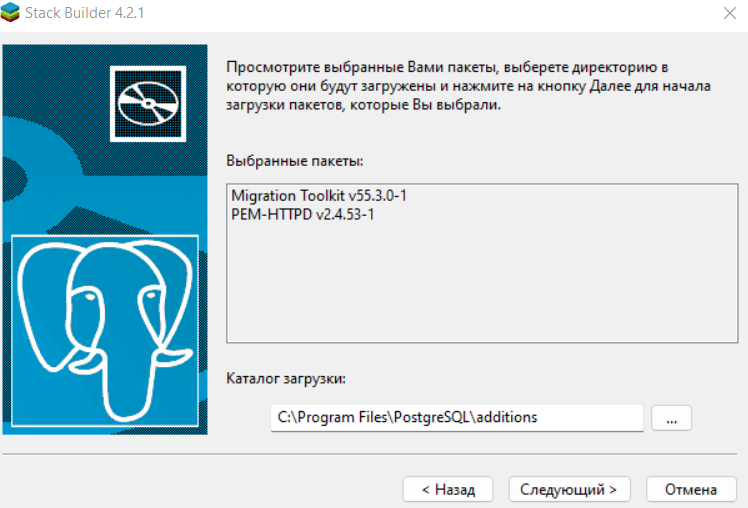
Следующим шагом указываем путь на локальной машине, куда нужно загрузить пакеты выбранных дополнений.
Дожидаемся загрузки файлов.
После этого скачанные приложения устанавливаются по очереди. Перезагружать компьютер следует только после того, как все дополнения из набора будут установлены.
Если устройство все-таки было перезапущено раньше, чем завершилась установка всех приложений, можно запустить инсталляцию с помощью .exe файла. Он находится в папке, которая была выбрана на предыдущем шаге. В нашем примере это папка C:\Program Files\PostgreSQL\additions.
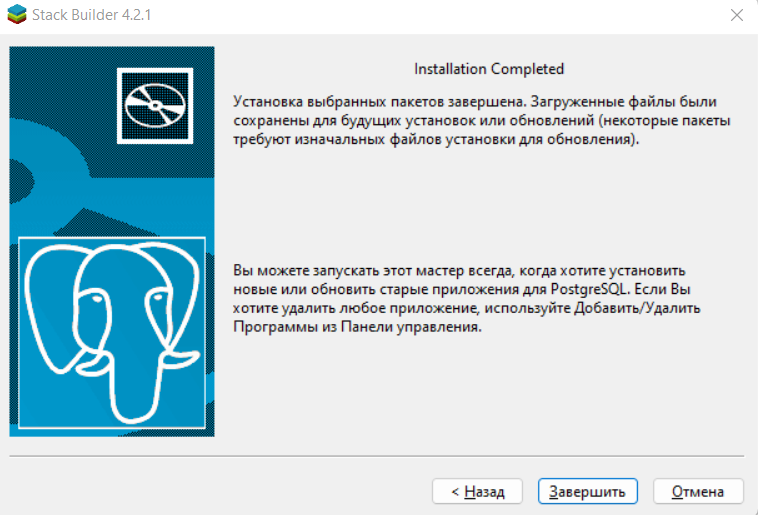
После установки всех выбранных приложений Stack Builder сообщает об успешном завершении.
Запуск pgAdmin 4
pgAdmin 4 — это утилита с простым визуальным интерфейсом, которая помогает работать с PostgreSQL. Ее можно установить отдельно от СУБД, скачав дистрибутив на официальном сайте.
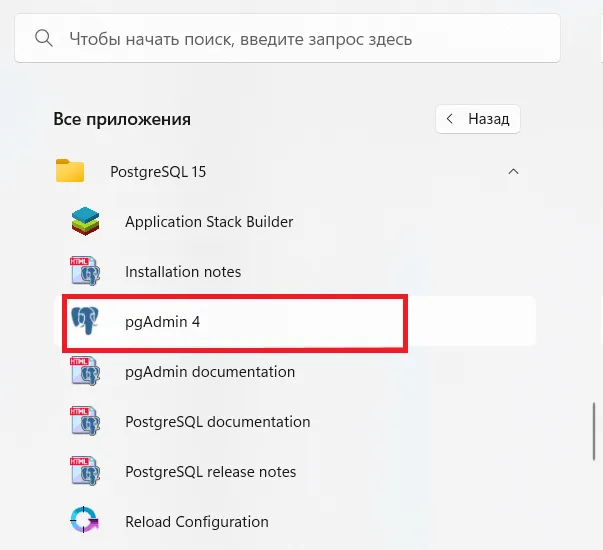
Запустить pgAdmin 4 на устройстве можно через поиск в панели Пуск.

Еще один способ запустить утилиту — ввести в командной строке:
C:\Users\Selectel>C:\"Program Files"\PostgreSQL\15\"pgAdmin 4"\bin\pgAdmin4
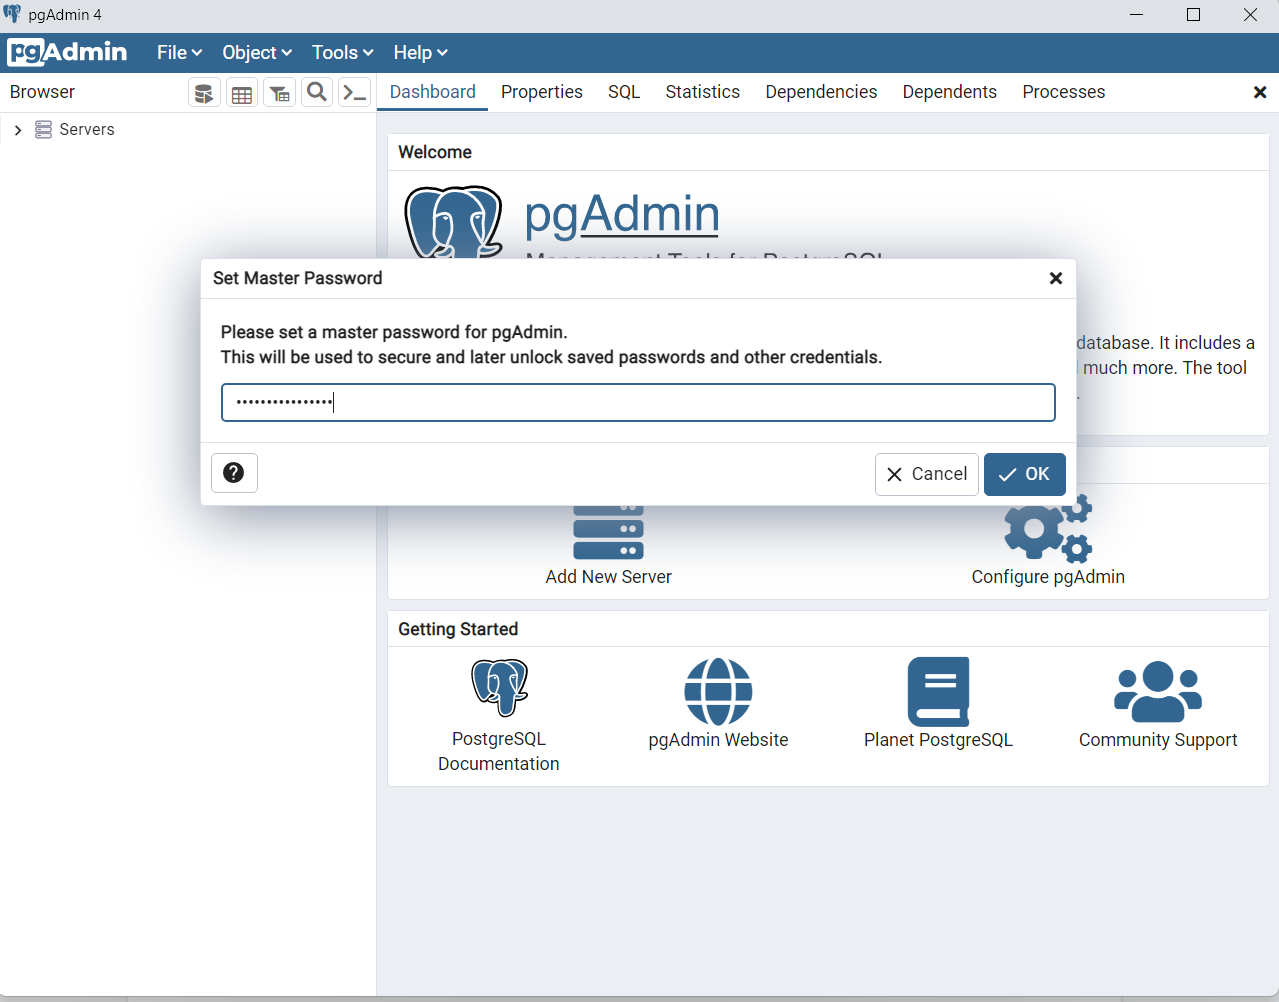
Сразу при запуске необходимо придумать мастер пароль. Он нужен для защиты сервера и последующей разблокировки сохраненных паролей.
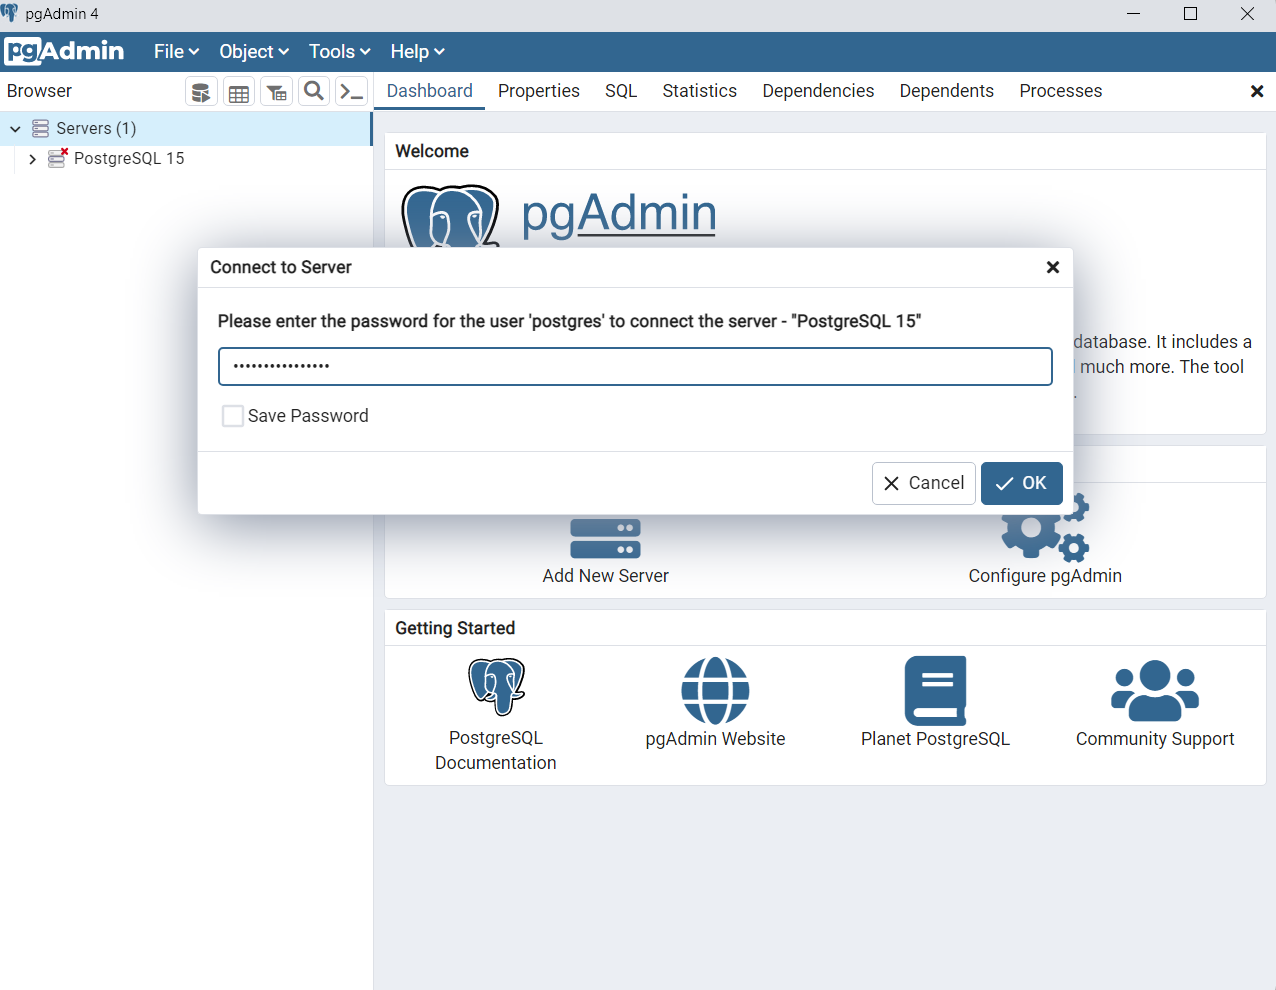
Чтобы подключиться к серверу СУБД кликните на Servers в левой панели и в раскрывшемся списке выберите PostgreSQL 15. Нажмите на него правой кнопки мыши и выберите Connect Server.

Для подключения нужно ввести пароль пользователя postgres — его мы задавали на этапе установки PostgreSQL 15.
После аутентификации мы подключаемся к своему серверу PostgreSQL 15 и видим все объекты, которые на нем расположены.
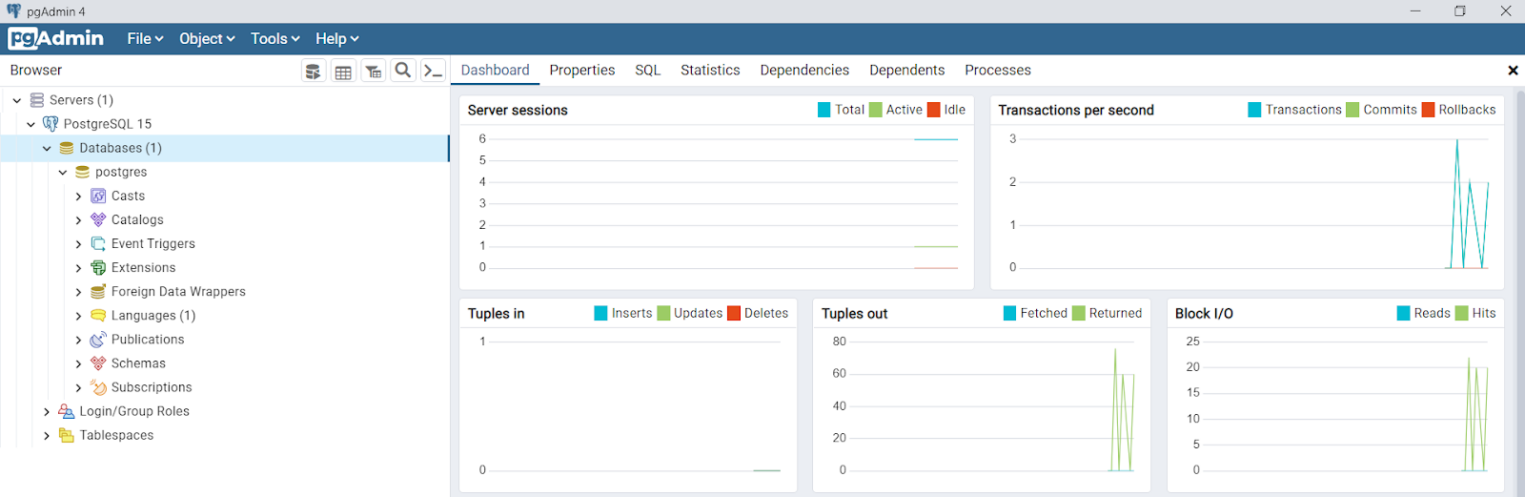
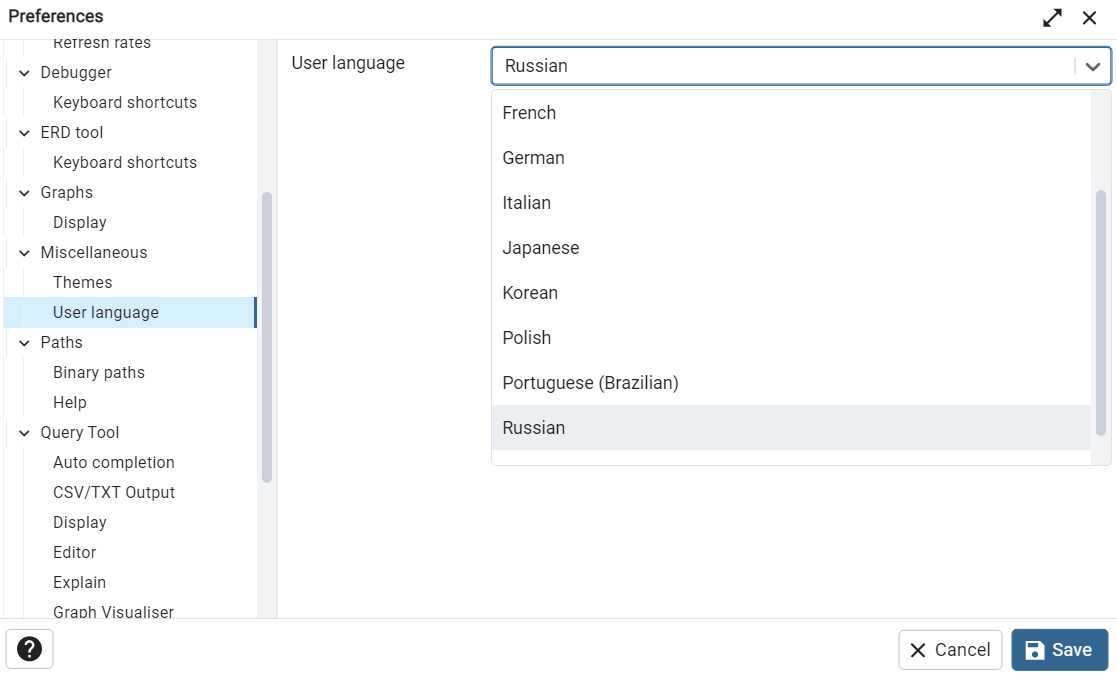
Чтобы изменить язык в pgAdmin 4 нажмите в левом верхнем углу File → Preferences. Далее в открывшемся окне в разделе Miscellaneous выберите пункт User language и в выпадающем списке с доступными языками найдите Russian. Язык изменится после перезагрузки страницы.
Сетевой доступ к PostgreSQL
Чтобы сервер PostgreSQL был доступен другим устройствам по сети, необходимо добавить правила в файрволе Windows. Проще всего сделать это с помощью PowerShell или командной строки. При этом команды необходимо выполнять от имени администратора. Еще можно использовать графический интерфейс. Ниже рассмотрим каждый из способов.
PowerShell
New-NetFirewallRule -Name 'POSTGRESQL-PORT' -DisplayName 'Selectel Port PostgreSQL2' -Direction Inbound -Enabled True -Protocol TCP -LocalPort 5432
Командная строка
netsh advfirewall firewall add rule name="Selectel Port PostgreSQL" dir=in action=allow protocol=TCP localport=5432
Графический интерфейс
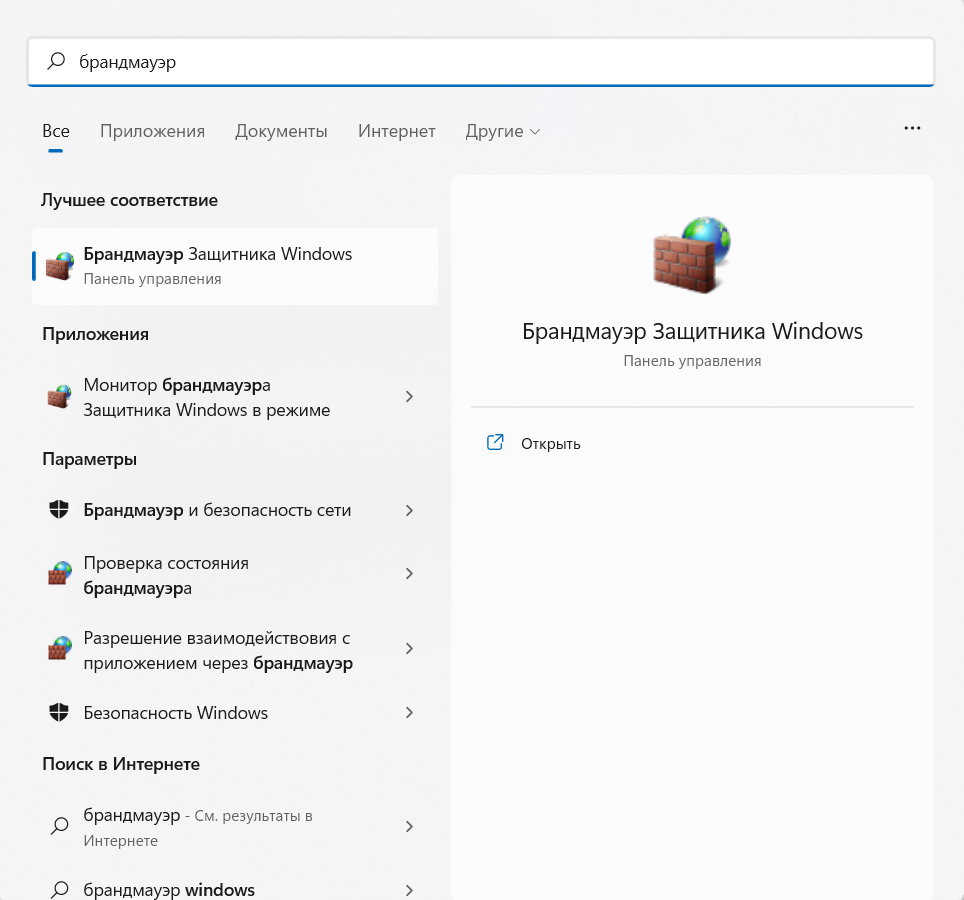
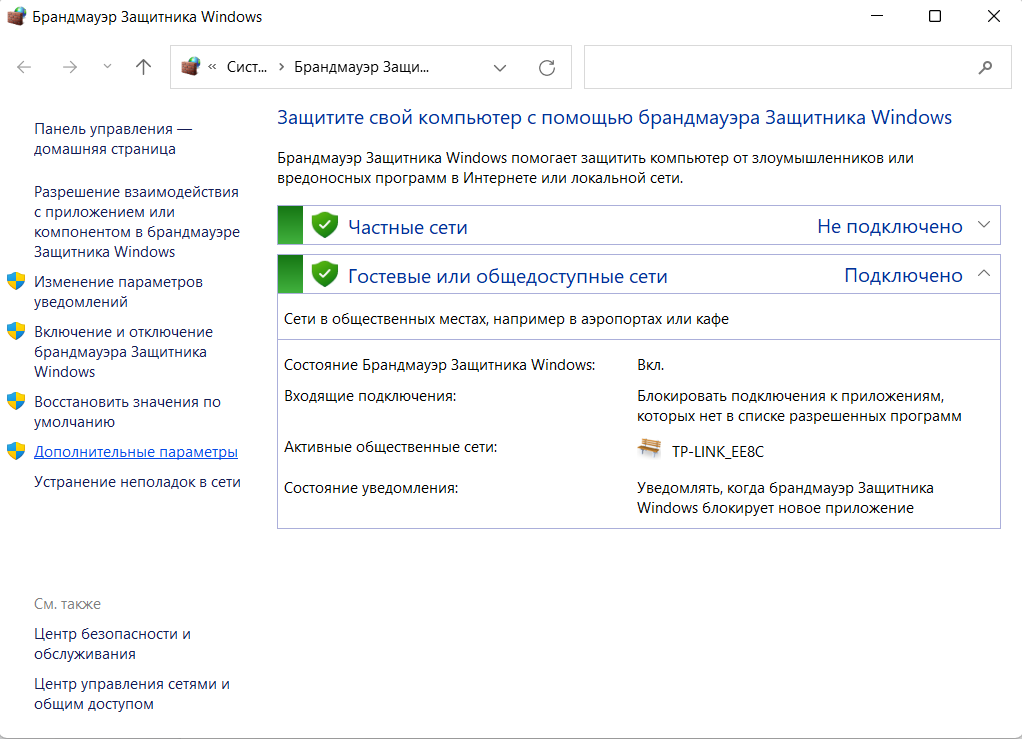
В меню Пуск ищем брандмауэр и выбираем Брандмауэр Защитника Windows.
В левом меню кликаем на Дополнительные параметры.
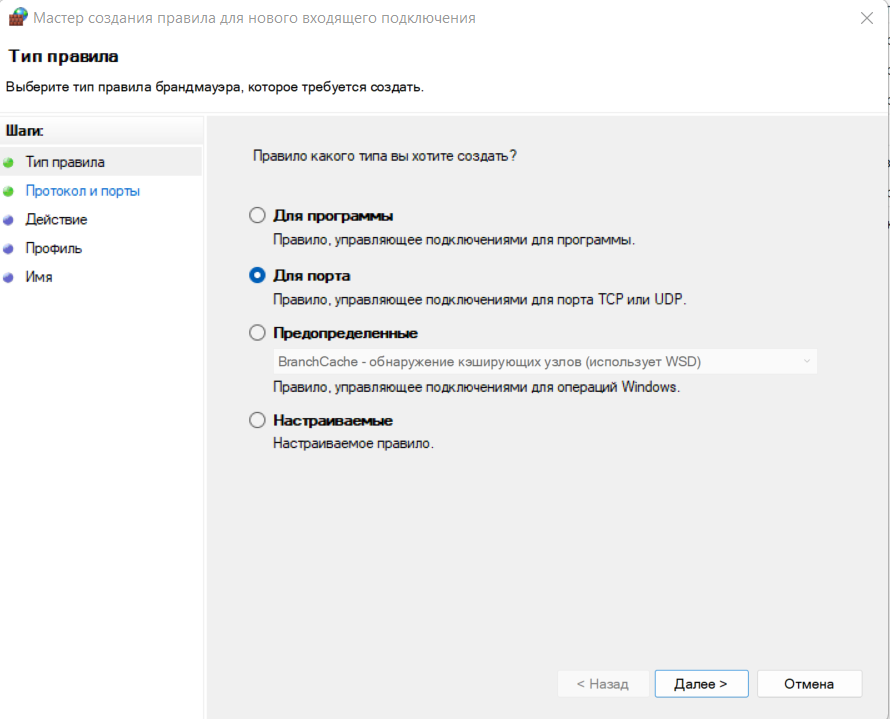
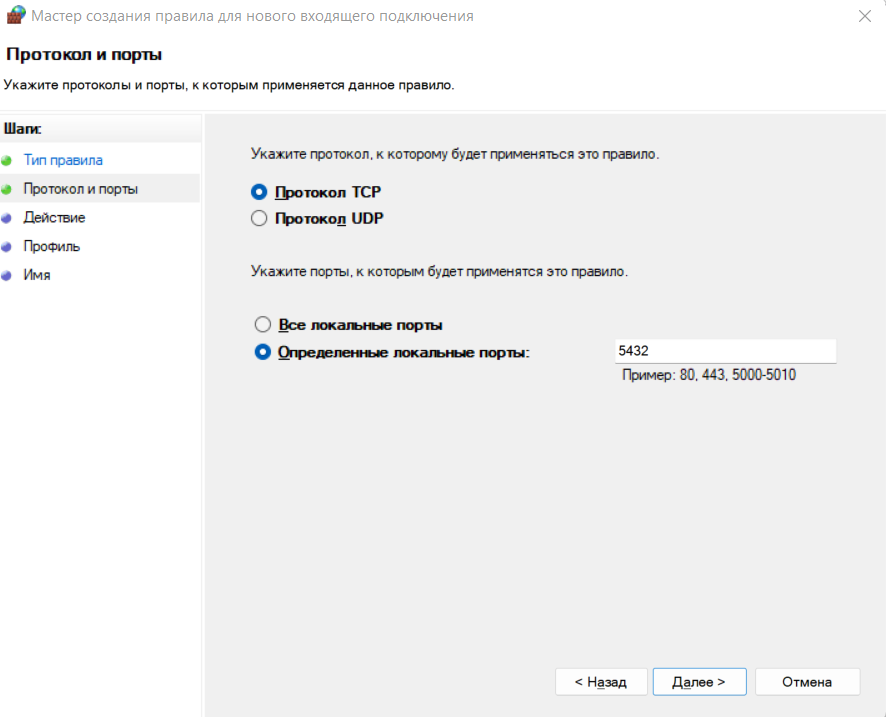
Заходим в Правила для входящих подключений и в правой части окна выбираем Создать правило.

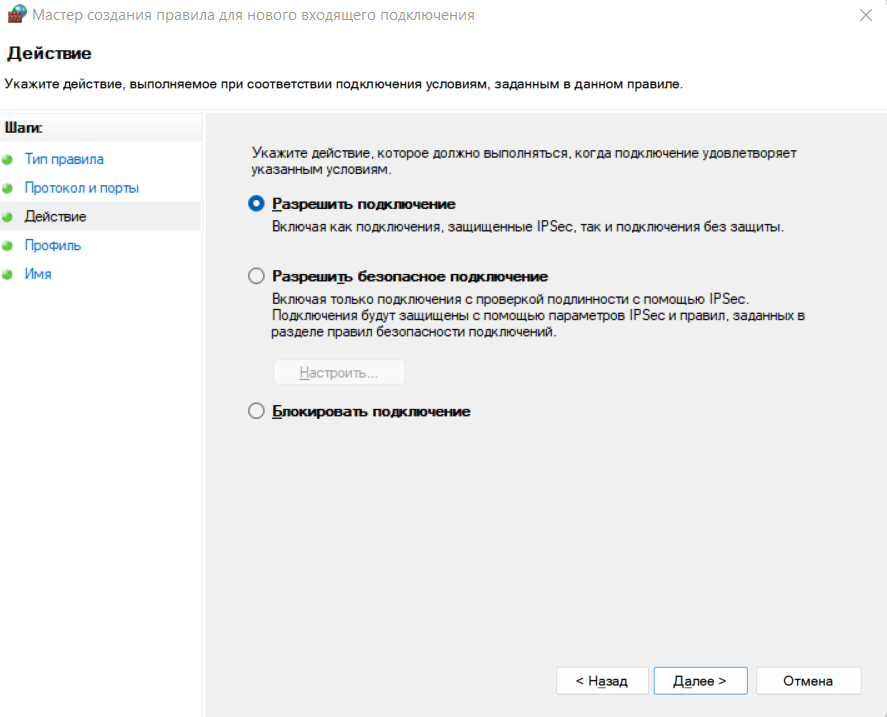
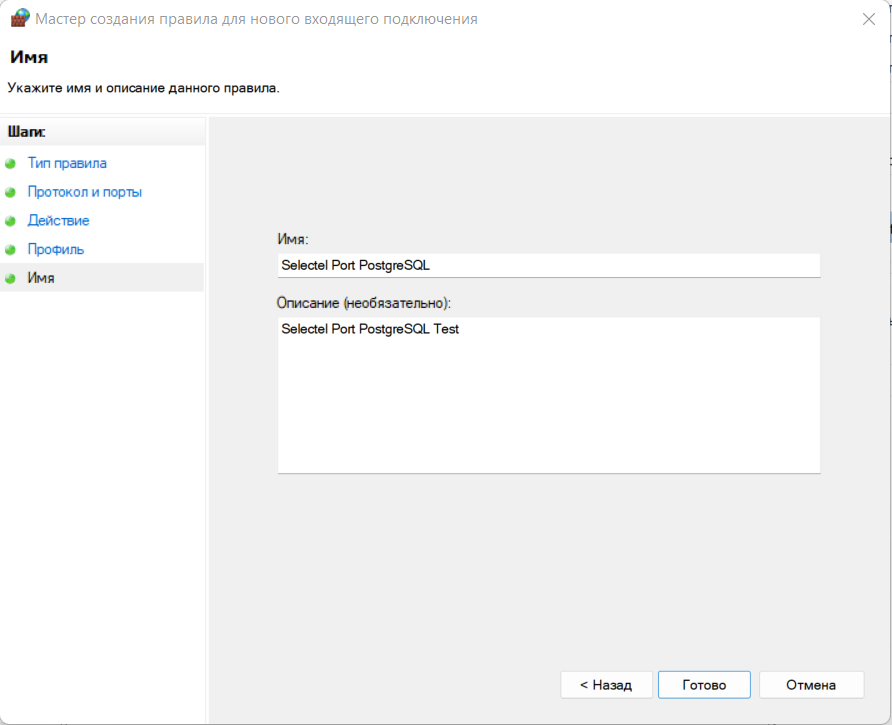
Устанавливаем настройки так, как показано на скринах ниже:
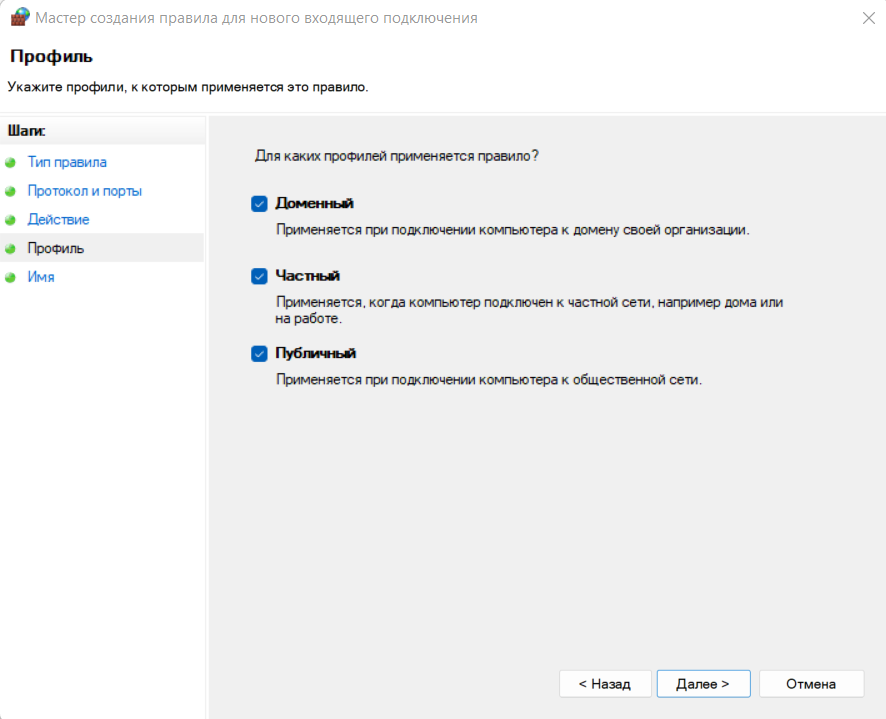
На шаге Профиль вы сами решаете, для каких профилей использовать новое правило. Мы оставим все профили включенными.
Задаем имя для нового правила и его описание.
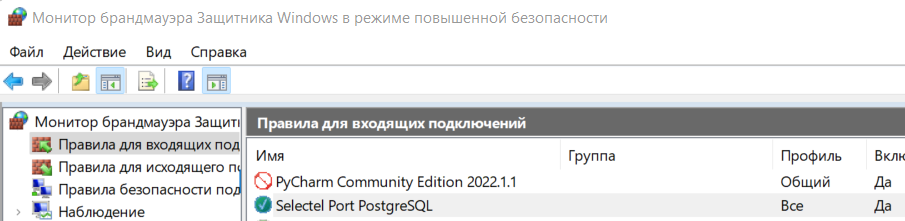
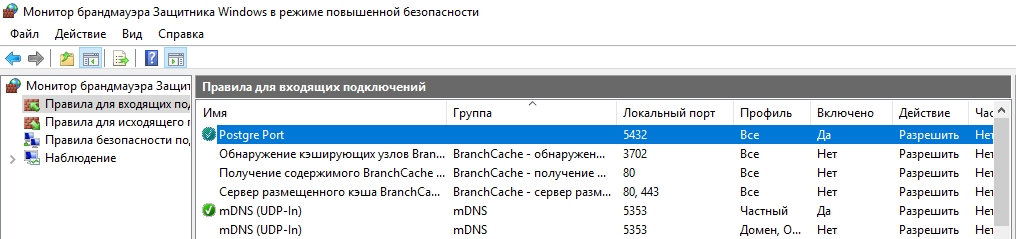
После того, как мы добавили правило в файрволе Windows любым из описанных способов, оно появится в брандмауэре.
Смена порта для подключения к СУБД
Чтобы изменить порт подключения к PostgreSQL находим файл postgresql.conf. Путь к нему — C:\Program Files\PostgreSQL\15\data.
В этом файле ищем строку с указанием port=5432 и меняем номер порта на нужный. Для поиска нужной строки поможет Ctrl+F.
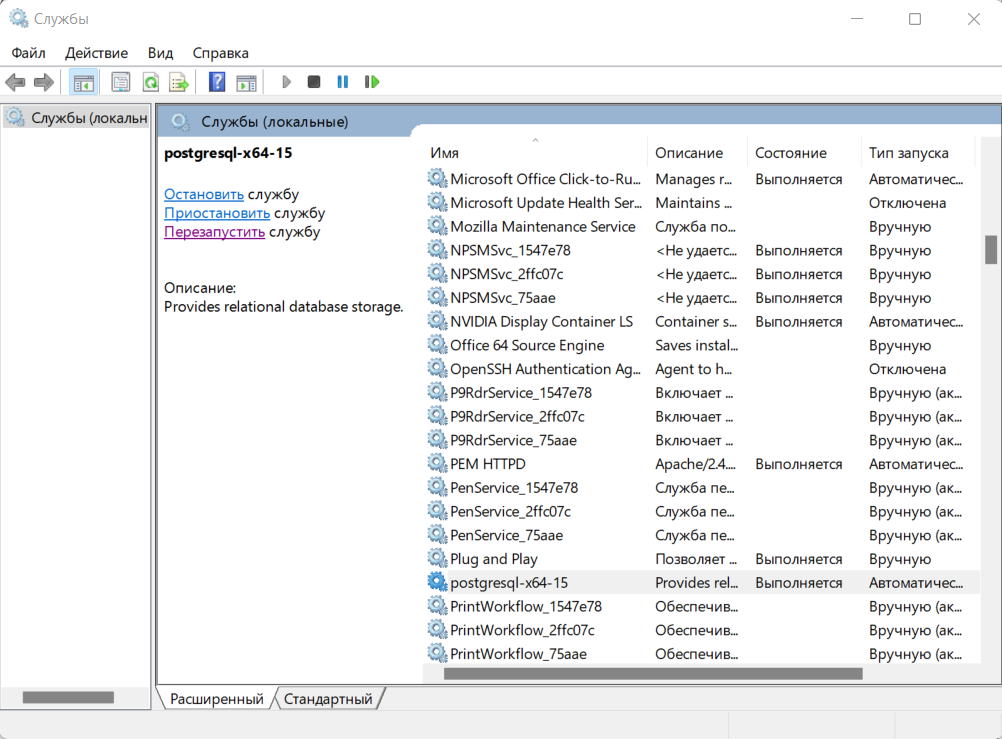
После этого перезапускаем службу postgresql-x64-15 используя встроенное в Windows приложение Службы. Его можно найти в меню Пуск или с помощью команды Win+R на клавиатуре и далее services.msc.
Еще postgresql-x64-15 можно перезапустить с помощью PowerShell. Для этого в консоли PowerShell нужно ввести команду:
Restart-Service-Name postgresql-x64-15
Проверка открытого порта
Проверить открыт ли указанный порт для входящего трафика можно с помощью пробного подключения по протоколу Telnet. Дальше рассмотрим по шагам, как включить этот протокол на Windows 11 и 10.
Telnet на Windows 11
- Через меню Пуск находим и открываем приложение Параметры.
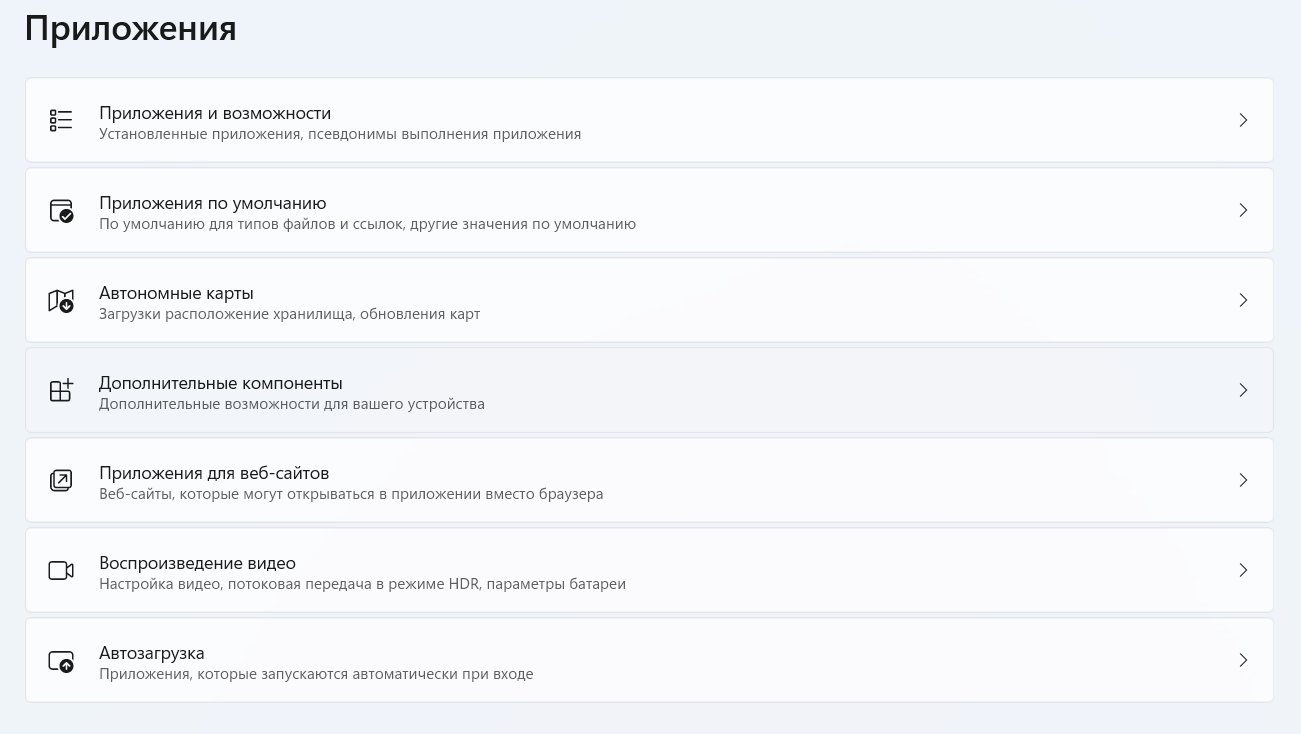
- В открывшемся окне слева выбираем Приложения.
3. В окне Приложения открываем пункт Дополнительные компоненты.
4. В поисковой строке вводим Другие компоненты и открываем указанный параметр.
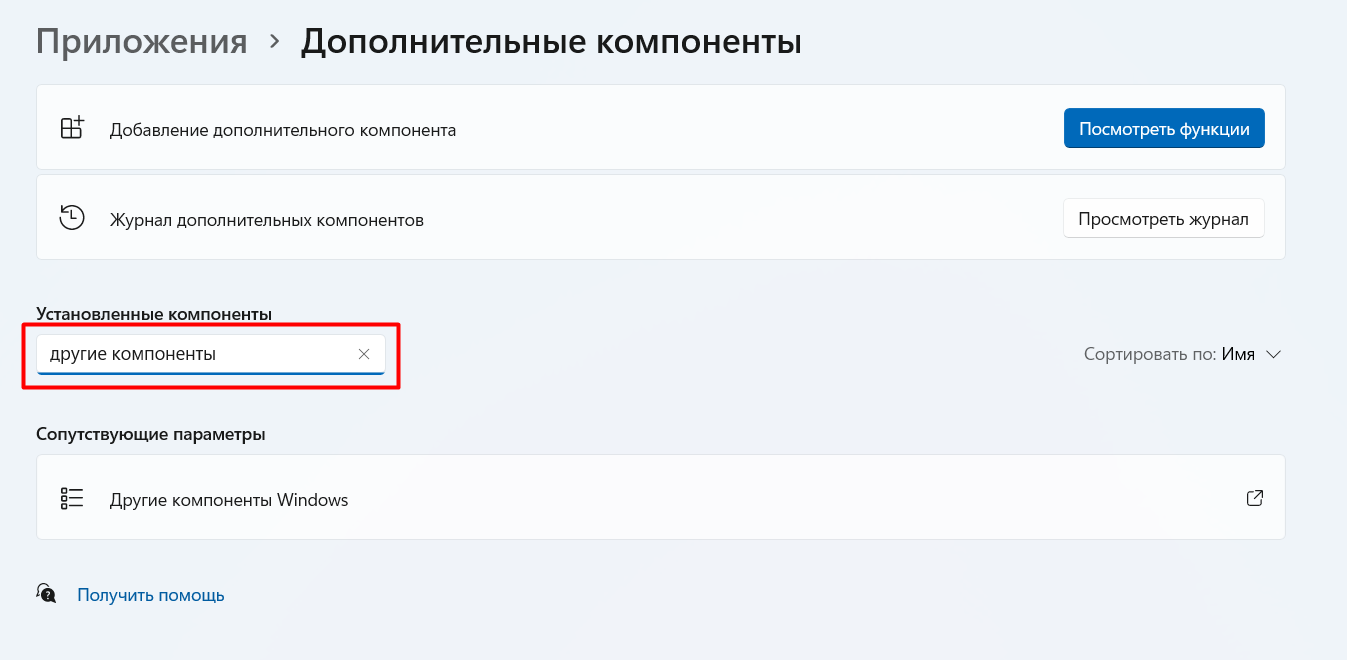
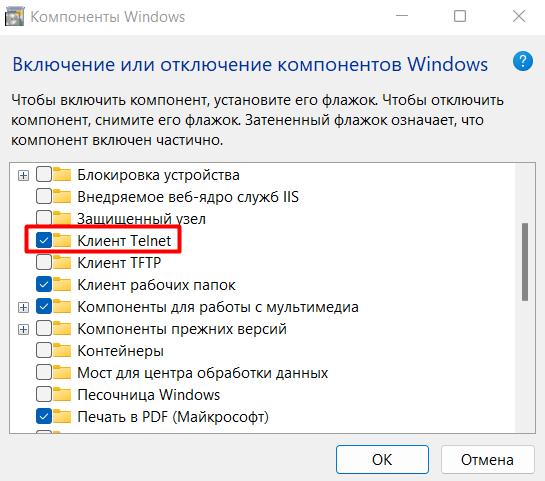
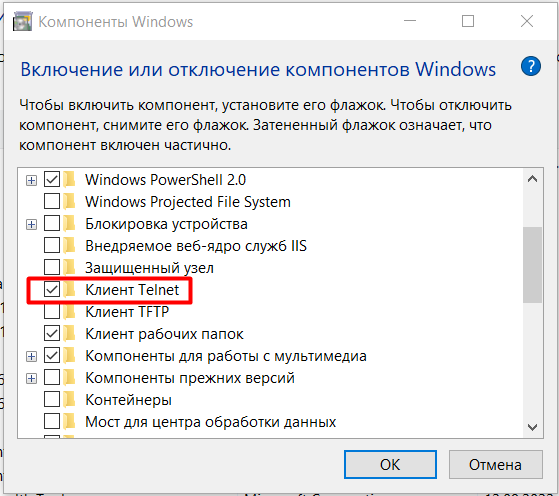
5. В открывшемся окне находим Клиент Telnet и включаем этот компонент, нажав кнопку ОК.
Telnet на Windows 10
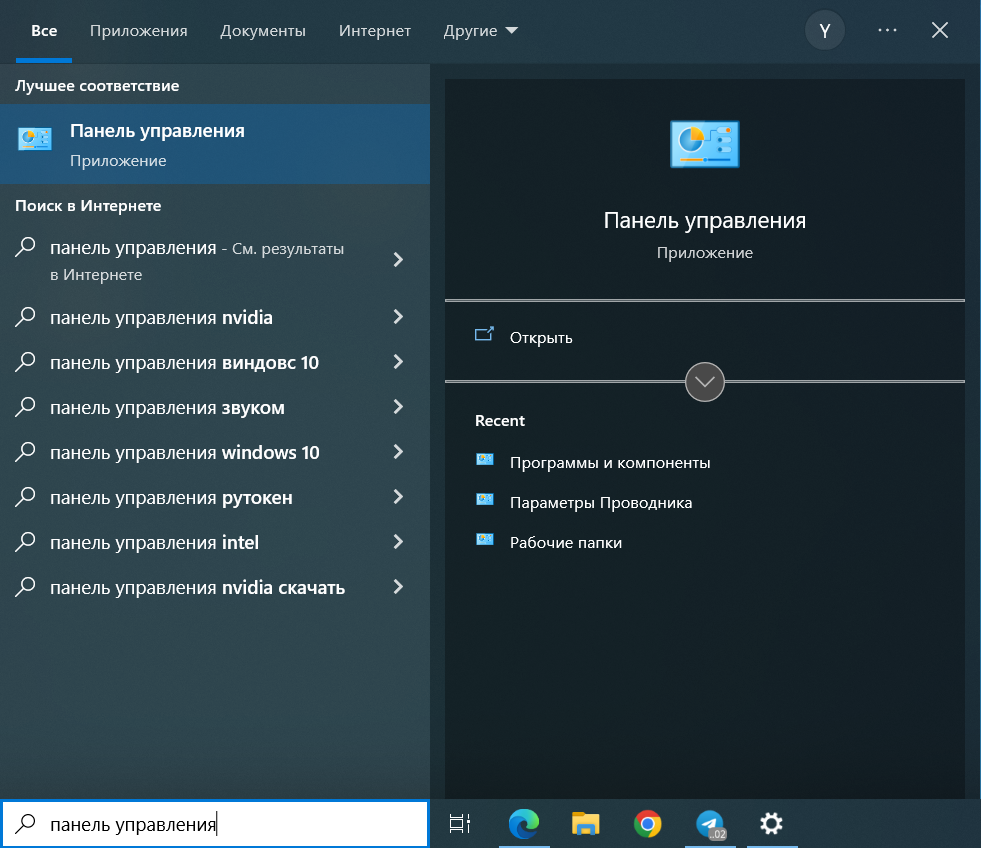
- Через меню Пуск находим и открываем приложение Панель управления.
2. В открывшемся окне находим Программы и компоненты.
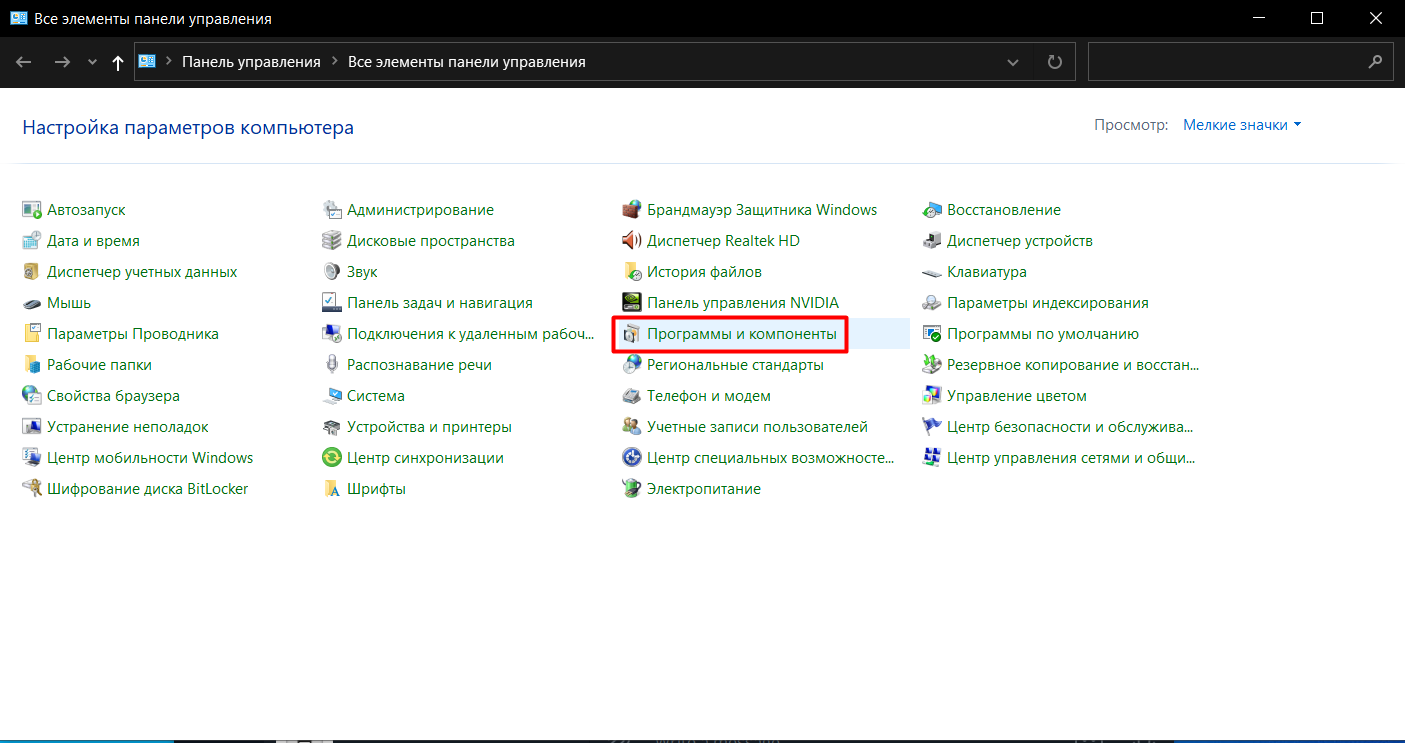
3. Кликаем слева на Включение или отключение компонентов Windows.

4. В открывшемся окне находим Клиент Telnet и включаем этот компонент, нажав кнопку ОК.
Теперь протокол Telnet включен и можно проверить открыт ли порт, который прослушивает PostgreSQL. Для этого в командной строке введем:
telnet <IP-address> <Port>
Где IP-address это IP-адрес сервера или его имя, а Port — номер порта, по которому будет производится подключение. Например,
C:\Users\Selectel>telnet 10.0.10.55 5432
Если подключение произошло успешно и порт открыт, будет отображаться пустая командная строка, а имя окна изменится на Telnet <IP-address>.
Если порт закрыт и подключение произвести не удалось, мы увидим сообщение о сбое.
Управление PostgreSQL через командную строку
Чтобы управлять СУБД с помощью командной строки, необходимо открыть ее от имени администратора.
Далее перейти в каталог \bin, так как все основные инструменты PostgreSQL лежат именно в этой папке:
C:\Users\Selectel>cd C:\Program Files\PostgreSQL\15\bin
С помощью параметра -V можно проверить версию СУБД, которая была установлена:
C:\Program Files\PostgreSQL\15\bin>psql -V
Для корректного отображения русских символов в Windows 10 и 11 советуем сменить кодировку на Windows-1251:
C:\Program Files\PostgreSQL\15\bin>chcp 1251
Чтобы создать новую базу данных есть команда:
C:\Program Files\PostgreSQL\15\bin>createdb -U postgres SelectelDatabase
Где:
createdb — сама команда создания новой базы данных;
-U — параметр для указания имени пользователя;
postgres — имя пользователя;
SelecterDatabase — название новой базы данных.
Теперь проверим была ли создана новая база данных. Введем команду с параметром -l, который выводит список доступных баз данных:
C:\Program Files\PostgreSQL\15\bin>psql -U postgres -l
Получаем список:

Чтобы создать нового пользователя воспользуемся командой:
C:\Program Files\PostgreSQL\15\bin>createuser -U postgres TRex
Где:
postgres — пользователь с правами создавать других пользователей;
TRex — имя нового пользователя.
После этого необходимо ввести пароль пользователя postgres, который инициирует команду.
Чтобы сразу изменить пароль для новой роли, можно использовать команду:
postgres=# ALTER ROLE “TRex” WITH PASSWORD 'password';
В команде вместо ‘password’ указать новый пароль.
При вводе SQL запросов важно не забывать ставить ; в конце запроса. Enter без ; в конце строки просто сделает переход на новую строку. Поэтому, если вы забыли ввести ; и нажали Enter, не нужно снова печатать всю строку. Достаточно ввести ; и запрос отправится на сервер.
Чтобы изменить права для новой роли, используется команда ALTER ROLE. Параметр CREATEDB дает право на создание базы данных:
postgres=# ALTER ROLE "TRex" CREATEDB;
Для просмотра ролей и их описания используется команда:
postgres=# \du
Теперь пользователь TRex имеет права на создание базы данных:

Для выхода из postgres можно использовать команду \q или exit.
С помощью командной строки можно также создавать таблицы и заполнять их данными. Для этого сначала подключимся к базе данных SelectelDatabase:
C:\Program Files\PostgreSQL\15\bin>psql -U "postgres" "SelectelDatabase"
Создадим таблицу с цветами Colors, где первое поле idcolor будет автоматически заполняться порядковым номером, а второе поле namecolor содержит наименование цвета:
SelectelDatabase=# CREATE TABLE Colors
SelectelDatabase-# (idcolor serial PRIMARY KEY,
SelectelDatabase(# namecolor varchar(255) NOT NULL);
Теперь добавим в созданную таблицу данные:
Ввод:
SelectelDatabase=# INSERT INTO Colors (namecolor) VALUES ('black');
Вывод:
INSERT 0 1

Ввод:
SelectelDatabase=# INSERT INTO Colors (namecolor) VALUES ('red');
Вывод:
INSERT 0 1

Ввод:
SelectelDatabase=# INSERT INTO Colors (namecolor) VALUES ('white');
Вывод:
INSERT 0 1

Ввод:
SelectelDatabase=# INSERT INTO Colors (namecolor) VALUES ('blue');
Вывод:
INSERT 0 1
Выведем на экран содержимое таблицы Colors и увидим, что данные успешно записались:
SelectelDatabase=# SELECT * FROM Colors;
Таблица:
С помощью команды \dt можно посмотреть весь список существующих таблиц в базе данных:
SelectelDatabase=# \dt
Все таблицы:
Команда \d позволяет вывести информацию о конкретной таблице. Так, указав таблицу Colors, мы видим параметры с которыми создана данная таблица:
SelectelDatabase=# \d 'Colors'
Параметры таблицы:

Таблицу можно удалить с помощью функции DROP:
SelectelDatabase=# DROP TABLE Colors;
Query Tool — это редактор SQL запросов в pgAdmin 4 с удобным графическим интерфейсом. На русском редактор называется Запросник.
Открыть запросник можно, нажав на одну из указанных на скриншоте кнопок:
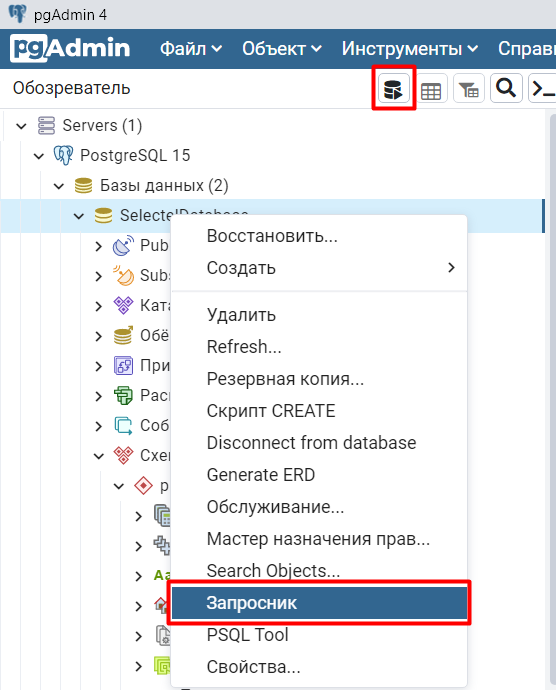
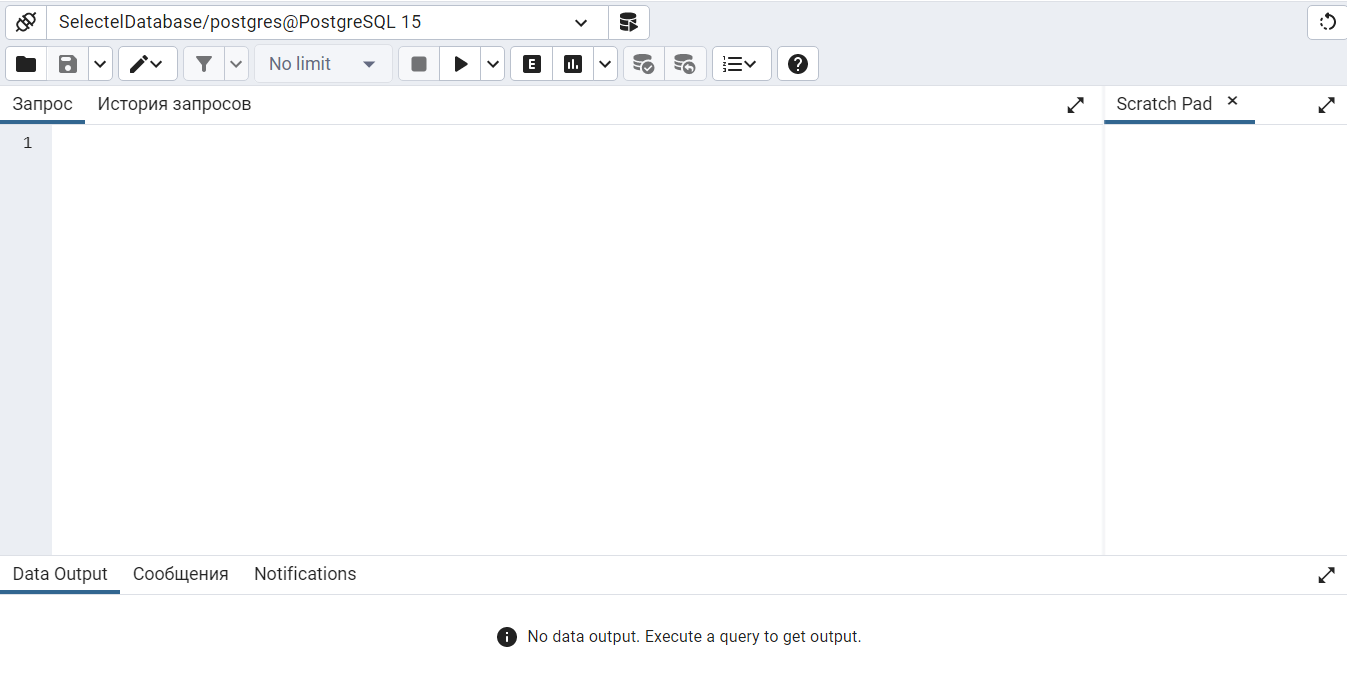
Появляется пустое стартовое окно запросника.
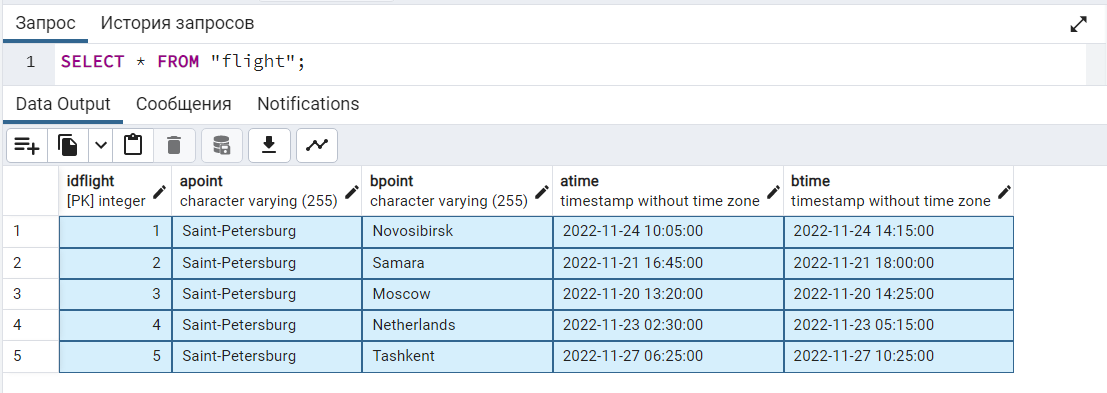
Покажем как работает запросник на примере. Для этого создадим таблицу из пяти полей, где будут указаны рейсы самолетов. Первое поле задается автоматически порядковым номером, второе — точка вылета, третье — точка прилета, четвертое — дата и время отправления, пятое — дата и время прибытия самолета.
Вводим запрос:
CREATE TABLE "flight"
    (
   	 idflight SERIAL PRIMARY KEY,
   	 Apoint VARCHAR(255) NOT NULL,
   	 Bpoint VARCHAR(255) NOT NULL,
   	 Atime timestamp NOT NULL,
   	 Btime timestamp NOT NULL
    );
INSERT INTO "flight" (Apoint, Bpoint, Atime, Btime) VALUES
    ('Saint-Petersburg', 'Novosibirsk', '2022-11-24 10:05:00', '2022-11-24 14:15:00'),
    ('Saint-Petersburg', 'Samara', '2022-11-21 16:45:00', '2022-11-21 18:00:00'),
    ('Saint-Petersburg', 'Moscow', '2022-11-20 13:20:00', '2022-11-20 14:25:00'),
    ('Saint-Petersburg', 'Netherlands', '2022-11-23 02:30:00', '2022-11-23 05:15:00'),
    ('Saint-Petersburg', 'Tashkent', '2022-11-27 06:25:00', '2022-11-27 10:25:00');
Чтобы отобразить введенную информацию выполним команду:
SELECT * FROM "flight";
Получаем вот такую таблицу с рейсами:
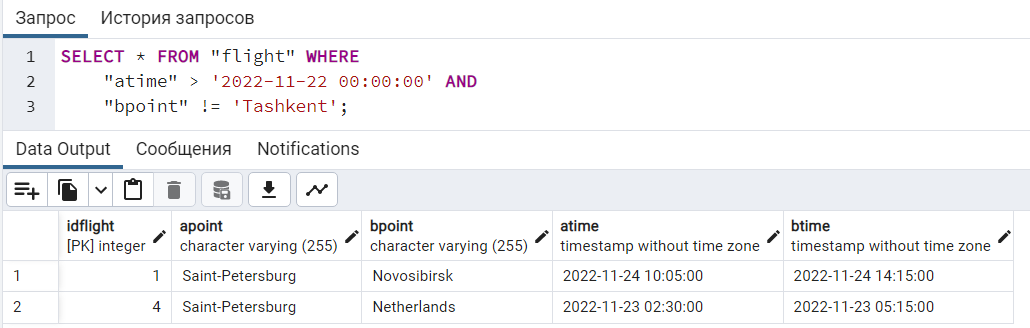
С использованием SQL запроса можно отсортировать данные в таблице по определенным условиям. Например укажем, что дата вылета должна быть после полуночи 22 ноября 2022 года и точкой прилета не должен быть Ташкент.
SELECT * FROM "flight" WHERE
    "atime" > '2022-11-22 00:00:00' AND
    "bpoint" != 'Tashkent';
Выполнив запрос, получим два рейса, которые подходят под заданные условия:
Заключение
В этой инструкции мы рассмотрели, как установить PostgreSQL на устройство с десктопной версией ОС Windows 10 и 11, а также:
- установили дополнительные приложения с помощью утилиты Stack Builder;
- создали правила файрвола для доступа к PostgreSQL по сети;
- поработали с СУБД через командную строку Windows;
- установили и русифицировали pgAdmin 4;
- рассмотрели работу запросника Query Tool.
-
Basic
PG_CTLInitialization Commands in Windows -
Use
SERVICES.MSCtoSTART/STOPa PostgreSQL Session in Windows
Today, we will be learning how to start a PostgreSQL server on Windows. In the previous article about downloading and installing PostgreSQL on Windows, we already learned how to start a session, create a USER, issue queries, and work with different database objects.
Our topic now focuses on trying to run a PostgreSQL server session to which other users in a local system can connect.
Basic PG_CTL Initialization Commands in Windows
PG_CTL is a utility used to start and control a PostgreSQL server. PG_CTL is a manual setup for initializing a PostgreSQL session as it provides a controlled exit, encapsulates different tasks, and can be used for various operations related to our database.
To start a server on Windows, go to your command prompt inside the PostgreSQL installation for the BIN folder.
pg_ctl start -D "[\data folder directory]";
This will start your PostgreSQL server. To do this on a different port on your computer on which you want other users to listen, use a query as follows.
pg_ctl -o "-F -p [post_number]" start
Enter your PORT NUMBER in the port_number defined without the brackets. This will help start your server and allow other users to connect to it on different systems.
However, if your PostgreSQL server stopped due to a reason or a slight malfunction, you are better off using any of the following commands to make it work.
pg_ctl restart -D "[\data folder];
pg_ctl start company; --may or may not work / may produce errors
...
Many times, there will be no need to do any of this. Starting PGADMIN, for example, tends to already create a PostgreSQL session on a pre-defined port in your PC, allowing other users to discover it easily.
There may be no need to write any of the commands given above to make your PostgreSQL server boot up.
Specify Paths While Issuing PG_CTL START/RESTART in Windows
Sometimes, calling a simple PG_CTL START/RESTART isn’t the way to go. You may need to specify the DATA folder path within your PostgreSQL installation and then issue the boot commands.
Calling the queries given above, you will get an OUTPUT.
Output:
pg_ctl: another server might be running; trying to start server anyway
waiting for server to start....2022-04-28 19:28:38.766 PKT [3228] LOG:  redirecting log output to logging collector process
2022-04-28 19:28:38.766 PKT [3228] HINT:  Future log output will appear in directory "log".
 stopped waiting
pg_ctl: could not start server
Examine the log output.
The output given above happens when a PostgreSQL server is already running. Because we already had PGADMIN booted up and running in the background, calling the query above would be unable to initialize a server on the port already being used.
However, doing something below would run separate servers on the same PC.
pg_ctl -o "-F -p 5656" start -D "C:\Program Files\PostgreSQL\14\data"
Output:
waiting for server to start....2022-04-28 19:34:04.588 PKT [11784] LOG:  redirecting log output to logging collector process
2022-04-28 19:34:04.588 PKT [11784] HINT:  Future log output will appear in directory "log".
 done
server started
Similarly, you could also issue the same commands for RESTART.
pg_ctl restart -D "C:\Program Files\PostgreSQL\14\data"

or

pg_ctl -o "-F -p 5656" restart -D "C:\Program Files\PostgreSQL\14\data"
Output:
waiting for server to shut down.... done
server stopped
waiting for server to start....2022-04-28 19:35:46.007 PKT [884] LOG:  redirecting log output to logging collector process
2022-04-28 19:35:46.007 PKT [884] HINT:  Future log output will appear in directory "log".
 done
server started
You can see in the output how the server is first shut down because it is already running, then it is restarted and logged for any changes during its session.
Use SERVICES.MSC to START/STOP a PostgreSQL Session in Windows
We already know that a PostgreSQL server is instantiated on your PC when you launch it, either from PSQL or PGADMIN. We can do a few things in SERVICES.MSC For STOPPED or PAUSED services, the Windows Services Manager.
-
Press Windows+R and type in
SERVICES.MSC. -
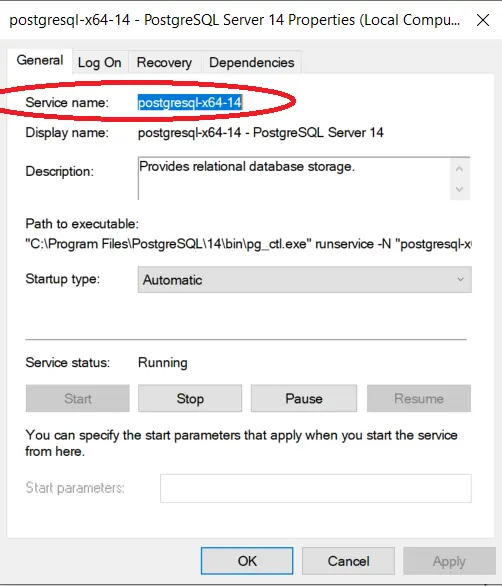
Once the Windows Services Manager has opened, search for the PostgreSQL server service in the list. It may be named as follows:
postgresql-x64-14 - PostgreSQL Server 14.
-
Right-click on this to either
START,STOP,PAUSE,RESUME, orRESTARTyour server. You can even change the startup time toAUTOMATICfor it to start by itself the next time.

The Services Manager also tends to tell us the cause of the failure of a specific service. To view the executable path, you can open the General tab and view it as follows.

Initiate the PostgreSQL Server From the COMMAND PROMPT Using NET START
We can use the NET START command to start a service from the command prompt. The syntax is as follows.
You may need to find the SERVICE_NAME for your PostgreSQL session. It is also mentioned in the General tab.
Now you can issue a command as follows.
net start postgresql-x64-14;
This will boot up our server and display output as follows.
Output:
The postgresql-x64-14 - PostgreSQL Server 14 service is starting.
The postgresql-x64-14 - PostgreSQL Server 14 service was started successfully.
However, remember that COMMAND PROMPT needs to be started as an ADMINISTRATOR and not a normal user.
Right-click on the CMD.EXE executable file and click Run as Administrator. Else you will get an error as follows.
Output:
System error 5 has occurred.

Access is denied.
So today, we learned how to start a PostgreSQL server on Windows in different ways. We hope you read through this article carefully and can use it per your needs.
Enjoying our tutorials? Subscribe to DelftStack on YouTube to support us in creating more high-quality video guides. Subscribe
PostgreSQL — это бесплатная объектно-реляционная СУБД с мощным функционалом, который позволяет конкурировать с платными базами данных, такими как Microsoft SQL, Oracle. PostgreSQL поддерживает пользовательские данные, функции, операции, домены и индексы. В данной статье мы рассмотрим установку и краткий обзор по управлению базой данных PostgreSQL. Мы установим СУБД PostgreSQL в Windows 10, создадим новую базу, добавим в неё таблицы и настроим доступа для пользователей. Также мы рассмотрим основы управления PostgreSQL с помощью SQL shell и визуальной системы управления PgAdmin. Надеюсь эта статья станет хорошей отправной точкой для обучения работы с PostgreSQL и использованию ее в разработке и тестовых проектах.
Содержание:
- Установка PostgreSQL 11 в Windows 10
- Доступ к PostgreSQL по сети, правила файерволла
- Утилиты управления PostgreSQL через командную строку
- PgAdmin: Визуальный редактор для PostgresSQL
- Query Tool: использование SQL запросов в PostgreSQL
Установка PostgreSQL 11 в Windows 10
Для установки PostgreSQL перейдите на сайт https://www.postgresql.org и скачайте последнюю версию дистрибутива для Windows, на сегодняшний день это версия PostgreSQL 11 (в 11 версии PostgreSQL поддерживаются только 64-х битные редакции Windows). После загрузки запустите инсталлятор.

В процессе установки установите галочки на пунктах:
- PostgreSQL Server – сам сервер СУБД
- PgAdmin 4 – визуальный редактор SQL
- Stack Builder – дополнительные инструменты для разработки (возможно вам они понадобятся в будущем)
- Command Line Tools – инструменты командной строки
Установите пароль для пользователя postgres (он создается по умолчанию и имеет права суперпользователя).
По умолчание СУБД слушает на порту 5432, который нужно будет добавить в исключения в правилах фаерволла.
Нажимаете Далее, Далее, на этом установка PostgreSQL завершена.
Доступ к PostgreSQL по сети, правила файерволла
Чтобы разрешить сетевой доступ к вашему экземпляру PostgreSQL с других компьютеров, вам нужно создать правила в файерволе. Вы можете создать правило через командную строку или PowerShell.
Запустите командную строку от имени администратора. Введите команду:
netsh advfirewall firewall add rule name="Postgre Port" dir=in action=allow protocol=TCP localport=5432
- Где rule name – имя правила
- Localport – разрешенный порт
Либо вы можете создать правило, разрешающее TCP/IP доступ к экземпляру PostgreSQL на порту 5432 с помощью PowerShell:
New-NetFirewallRule -Name 'POSTGRESQL-In-TCP' -DisplayName 'PostgreSQL (TCP-In)' -Direction Inbound -Enabled True -Protocol TCP -LocalPort 5432
После применения команды в брандмауэре Windows появится новое разрешающее правило для порта Postgres.
Совет. Для изменения порта в установленной PostgreSQL отредактируйте файл postgresql.conf по пути C:\Program Files\PostgreSQL\11\data.
Измените значение в пункте
port = 5432
. Перезапустите службу сервера postgresql-x64-11 после изменений. Можно перезапустить службу с помощью PowerShell:
Restart-Service -Name postgresql-x64-11

Более подробно о настройке параметров в конфигурационном файле postgresql.conf с помощью тюнеров смотрите в статье.
Утилиты управления PostgreSQL через командную строку
Рассмотрим управление и основные операции, которые можно выполнять с PostgreSQL через командную строку с помощью нескольких утилит. Основные инструменты управления PostgreSQL находятся в папке bin, потому все команды будем выполнять из данного каталога.
- Запустите командную строку.
Совет. Перед запуском СУБД, смените кодировку для нормального отображения в русской Windows 10. В командной строке выполните:
chcp 1251 - Перейдите в каталог bin выполнив команду:
CD C:\Program Files\PostgreSQL\11\bin

Основные команды PostgreSQL:

PgAdmin: Визуальный редактор для PostgresSQL
Редактор PgAdmin служит для упрощения управления базой данных PostgresSQL в понятном визуальном режиме.
По умолчанию все созданные базы хранятся в каталоге base по пути C:\Program Files\PostgreSQL\11\data\base.
Для каждой БД существует подкаталог внутри PGDATA/base, названный по OID базы данных в pg_database. Этот подкаталог по умолчанию является местом хранения файлов базы данных; в частности, там хранятся её системные каталоги. Каждая таблица и индекс хранятся в отдельном файле.
Для резервного копирования и восстановления лучше использовать инструмент Backup в панели инструментов Tools. Для автоматизации бэкапа PostgreSQL из командной строки используйте утилиту pg_dump.exe.
Query Tool: использование SQL запросов в PostgreSQL
Для написания SQL запросов в удобном графическом редакторе используется встроенный в pgAdmin инструмент Query Tool. Например, вы хотите создать новую таблицу в базе данных через инструмент Query Tool.
- Выберите базу данных, в панели Tools откройте Query Tool
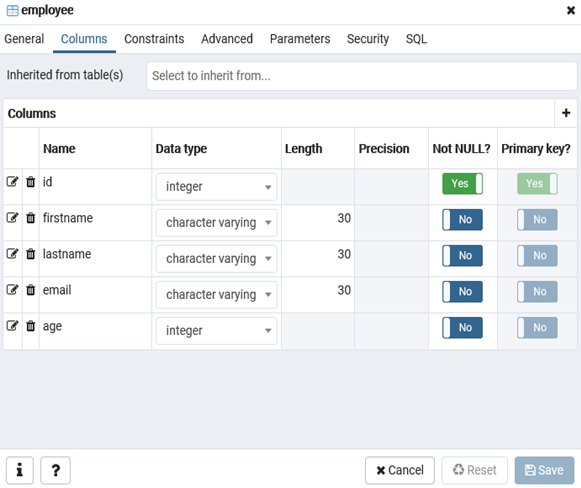
- Создадим таблицу сотрудников:
CREATE TABLE employee
(
Id SERIAL PRIMARY KEY,
FirstName CHARACTER VARYING(30),
LastName CHARACTER VARYING(30),
Email CHARACTER VARYING(30),
Age INTEGER
);
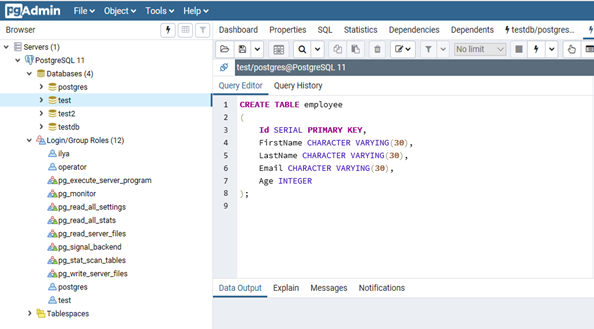
Id — номер сотрудника, которому присвоен ключ SERIAL. Данная строка будет хранить числовое значение 1, 2, 3 и т.д., которое для каждой новой строки будет автоматически увеличиваться на единицу. В следующих строках записаны имя, фамилия сотрудника и его электронный адрес, которые имеют тип CHARACTER VARYING(30), то есть представляют строку длиной не более 30 символов. В строке — Age записан возраст, имеет тип INTEGER, т.к. хранит числа.
После того, как написали код SQL запроса в Query Tool, нажмите клавишу F5 и в базе будет создана новая таблица employee.
Для заполнения полей в свойствах таблицы выберите таблицу employee в разделе Schemas -> Tables. Откройте меню Object инструмент View/Edit Data.
Здесь вы можете заполнить данные в таблице.
После заполнения данных выполним инструментом Query простой запрос на выборку:
select Age from employee;
Установка PostgreSQL на Windows: подробная инструкция из 9 шагов. Разбираем процесс установки и начальной настройки СУБД PostgreSQL, а также рассказываем, как пользоваться приложением pgAdmin и подключаться к серверу PostgreSQL удалённо.
PostgreSQL — это передовая open-source система управления базами данных корпоративного класса, известная высокой стабильностью, производительностью, расширенным функционалом и отказоустойчивостью. СУБД PostgreSQL поддерживает как реляционные запросы SQL, так и нереляционные JSON и по своим качествам ничем не уступает коммерческим аналогам (Oracle, SQL Server). При этом PostgreSQL распространяется по свободной лицензии и имеет открытый исходный код — в том числе и это уже более 30 лет привлекает к ней пользователей.
Прежде всего убедитесь, что выполнены следующие предварительные условия:
- версия Windows совместима с версией PostgreSQL, которую вы планируете установить (обратите внимание, что на 32-битные версии Windows установить PostgreSQL не получится);
- конфигурация системы соответствует необходимым аппаратным требованиям, таким как объём оперативной памяти и дискового пространства;
- для установки нового программного обеспечения на ПК или виртуальную машину с Windows вам необходимы права администратора.
Шаг 1. Загрузите инсталлятор
Посетите страницу загрузки СУБД PostgreSQL для Windows на сайте проекта. Щёлкните по ссылке «Скачать инсталлятор», которая перенаправит вас на веб-сайт EnterpriseDB, где можно загрузить установщики версий для Windows. Обратите внимание, что enterprisedb.com использует Amazon CloudFront для доставки контента, поэтому доступ из некоторых регионов может быть заблокирован — в этом случае используйте альтернативные способы загрузки.
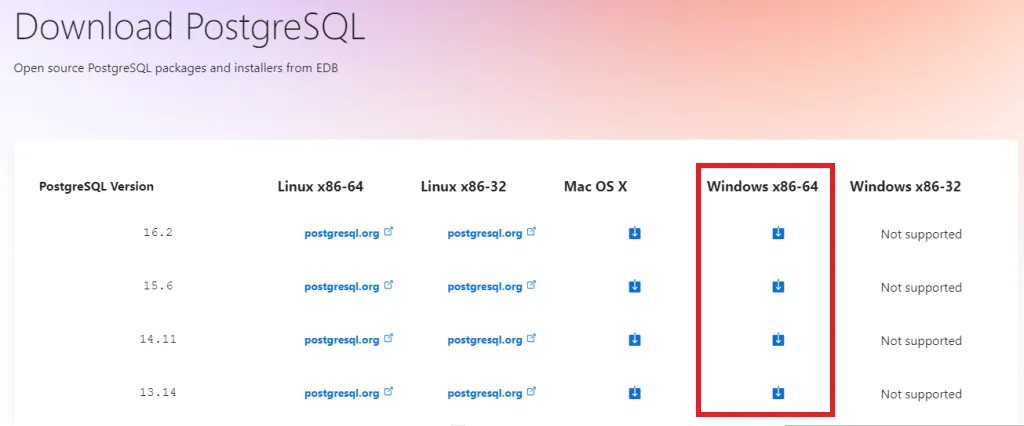
Выберите нужную версию и загрузите исполняемый файл установщика.
Шаг 2. Запустите установщик
Перейдите в папку, куда был загружен установщик. Дважды щёлкните исполняемый файл, чтобы начать процесс установки PostgreSQL. Если от службы контроля учётных записей появится запрос на подтверждение действия, нажмите «Да», чтобы разрешить установщику внести изменения в систему. Нажмите «Далее» (Next) на экране приветствия.
Укажите каталог, в который будет установлен PostgreSQL. Вы можете оставить путь, заданный по умолчанию, прописать его вручную или выбрать местоположение из дерева каталогов.
Шаг 3. Процесс установки
Отметьте галочкой следующие компоненты в мастере установки:
- PostgreSQL Server: компонент, обязательный для работы самой базы данных.
- pgAdmin 4: графический пользовательский интерфейс (GUI). Рекомендуется для более простого администрирования баз данных.
- StackBuilder: менеджер пакетов, добавляющий расширения и драйвера.
- Command Line Tools: поддержка командной строки.
Шаг 4. Каталог для хранения данных
Укажите каталог, где будут находиться файлы вашей базы данных. При сохранении настроек по умолчанию он будет расположен в каталоге установки PostgreSQL. Также вы можете выбрать любую другую директорию. Нажмите «Далее».
Шаг 5. Задайте пароль
Задайте надёжный пароль для учётной записи суперпользователя. Суперпользователь создаётся автоматически и получает имя «postgres».
Шаг 6. Конфигурация порта
Укажите номер порта, который будет прослушивать сервер PostgreSQL. Порт по умолчанию — 5432. Оставьте его без изменений, если нет особых причин использовать другой порт. Нажмите «Далее».
Шаг 7. Проверьте настройки
Этот экран предоставляет сводку выбранных параметров установки. Внимательно проверьте их и внесите изменения, если необходимо. Нажмите «Далее» для подтверждения.
Шаг 8. Запустите установку
Установщик начнёт копирование файлов и настройку PostgreSQL, это может занять несколько минут. Если вы выбрали StackBuilder, то может появиться запрос на его запуск после установки. Вы можете запустить его для установки дополнений или отложить это действие.
Шаг 9. Установка завершена
После завершения установки нажмите «Готово», чтобы выйти из мастера.
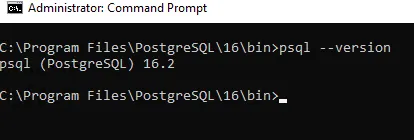
Проверьте, как прошла установка. Откройте окно командной строки. Перейдите в каталог PostgreSQL C:\Program Files\PostgreSQL\16\bin (число обозначает ветку PostgreSQL). Введите следующую команду и нажмите «Enter»:
psql --versionДолжна отобразиться информация об установленной версии:
Использование pgAdmin
Откройте приложение pgAdmin (ярлык находится в меню «Пуск», также найти его можно через строку поиска Windows).
Создайте подключение к серверу. Кликните по Servers в левой области окна →
Create → Server. Укажите следующие данные:
- Имя: на ваше усмотрение.
- Имя хоста: «localhost» для локальных установок, IP-адрес для удалённых.
- Порт: порт, который вы настроили во время установки (по умолчанию — 5432).
- Служебная база данных.
- Имя пользователя: введите «Postgres» в качестве учётной записи суперпользователя.
- Пароль: введите пароль, который вы задали во время установки.
Кроме того убедитесь, что порт PostgreSQL разрешён в брандмауэре (если требуется удалённый доступ).
После успешного подключения вы можете работать с базами данных PostgreSQL, создавать новых пользователей и управлять ими с помощью интерфейса pgAdmin.
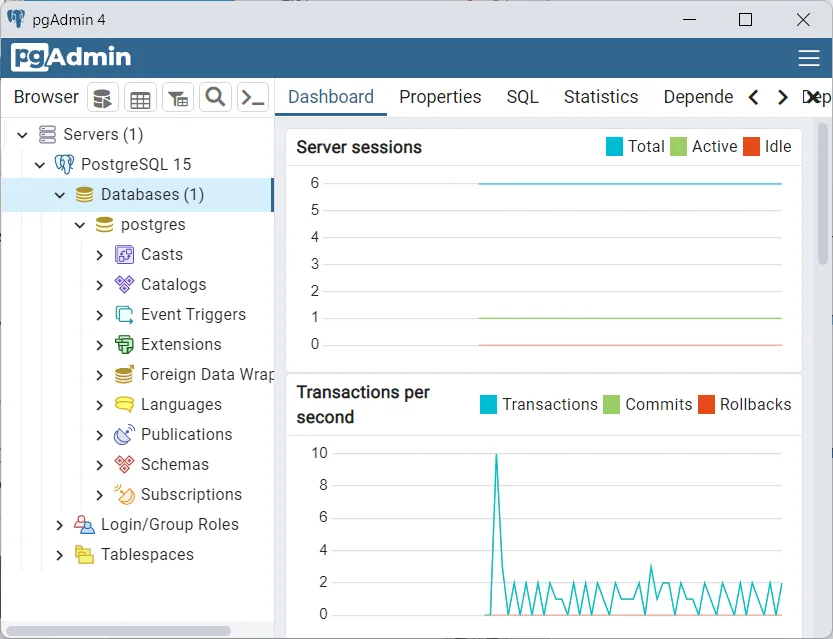
В левой области окна pgAdmin в меню перечислены все доступные серверы. На скриншоте это единственный только что установленный PostgreSQL, но вы можете добавить в приложение и другие серверы.
В списке Databases будут перечислены все базы данных. Пока здесь также только одна — «postgres», созданная по умолчанию. Если кликнуть по названию БД, то откроется список с настройками.
Ниже находится пункт Login/Group Roles, предназначенный для управления ролями и группами.
Последний пункт Tablespaces — управление местом хранения таблиц.
Чтобы создать новую базу данных, кликните по Databases правой кнопкой мыши и в выпадающем списке выберите Create, затем Database. Укажите название, владельца (выберите из списка) и нажмите Save — БД появится в меню, после чего её можно редактировать. Все новые БД создаются по образцу «template1», измените параметры «template1», чтобы настроить шаблон.
Читайте в блоге:
- Что такое Active Directory в Windows
- Установка Windows Server: комплексный подход к сетевой инфраструктуре и защите данных
- Настройка DFS на Windows Server