
The Command Prompt is a powerful tool that you can use for various purposes, including troubleshooting and fixing problems with Windows. Starting it is easy if Windows is working correctly, but what do you do when Windows refuses to load? How do you «boot» to Command Prompt (cmd.exe) «from BIOS» to fix the issues that you’re having? Moreover, how do you open CMD in Windows Setup? Read this tutorial, and you’ll learn three different ways to open CMD while installing Windows, right after the UEFI/BIOS POST process or when Windows doesn’t boot:
1. How to open CMD during Windows Setup using the Shift + F10 keyboard shortcut
In our opinion, this is the best method of opening Command Prompt at boot, and that’s why we’re showing it first. You can do it immediately after UEFI/BIOS POST, and it works no matter what Windows version you have installed on your PC. It even works if you don’t have Windows or any other operating system installed on your computer. Here’s what you need to do:
First, use a Windows installation USB memory stick or DVD to boot your computer or device. It doesn’t matter whether the installation media is for Windows 11 or Windows 10: either one works the same.

Boot your PC using some Windows installation media (USB, DVD, etc.)
Then, to open CMD in Windows Setup, simultaneously press the Shift + F10 keys on your keyboard when the installation wizard shows up. This keyboard shortcut opens Command Prompt before boot.
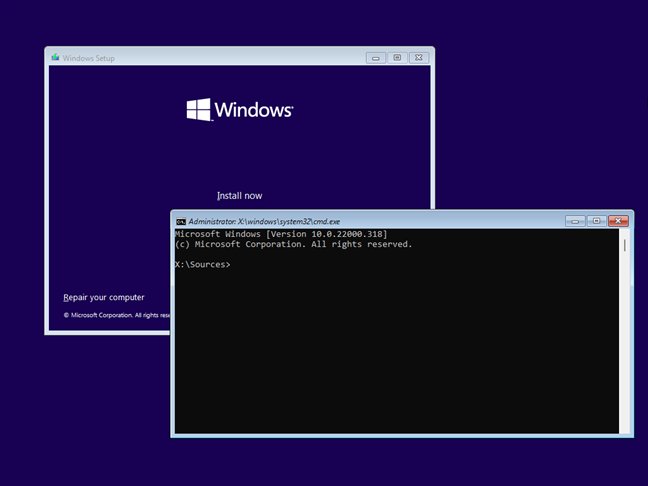
Press Shift + F10 on the keyboard to open Command Prompt on boot
NOTE: If you don’t already have a Windows setup DVD or USB stick at hand, read these tutorials to learn how to create your own Windows setup drive: How to download Windows and Office ISO files (all versions) and How to use the Windows USB/DVD Download Tool.
2. How to boot to Command Prompt from a Windows installation USB memory stick or DVD
This method to open Command Prompt «from BIOS» is similar to the previous one, except it uses more clicks than keys. 🙂
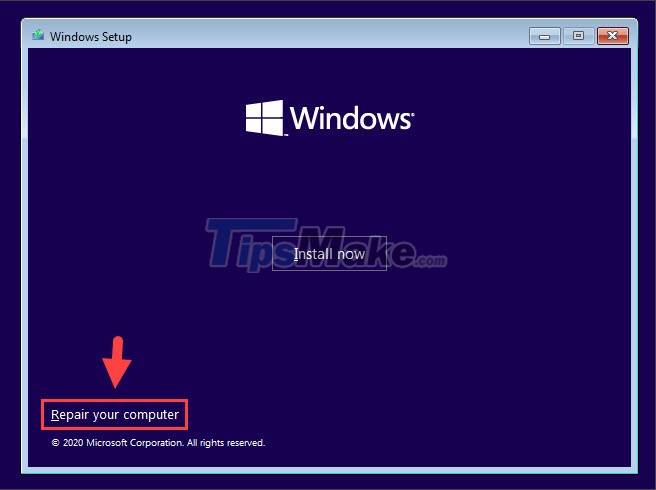
Start your computer and, from the UEFI/BIOS boot menu, choose the drive where you have the Windows 11 or Windows 10 setup files as the boot device. Wait for the Windows Setup to load, select the language and keyboard if you’re prompted, and then press Next. Don’t click/tap on Install now. Instead, click or tap «Repair your computer» on the bottom-left corner of the wizard or press R on your keyboard.
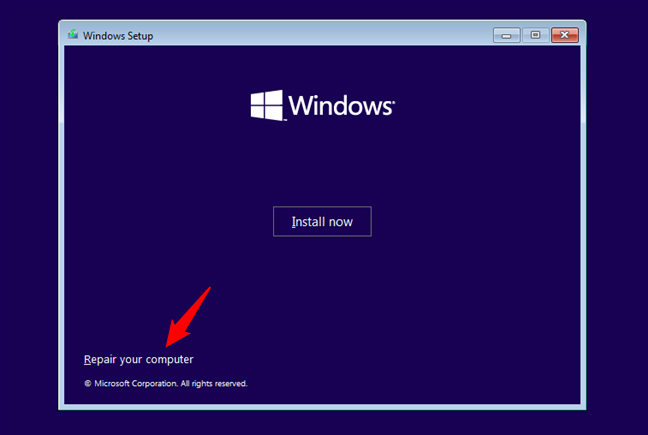
Choosing Repair your computer
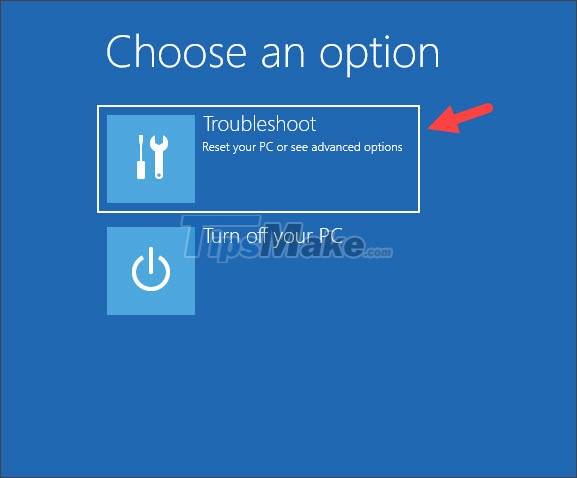
You are asked to choose an option on how to continue. Choose Troubleshoot.
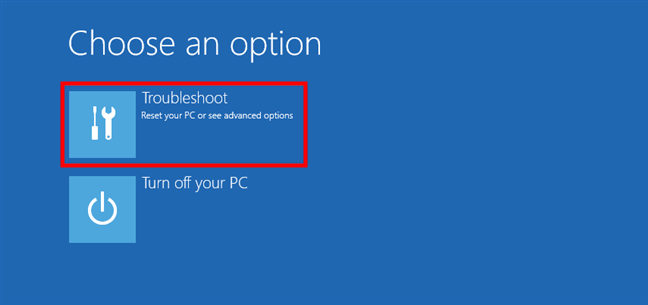
The Troubleshoot option
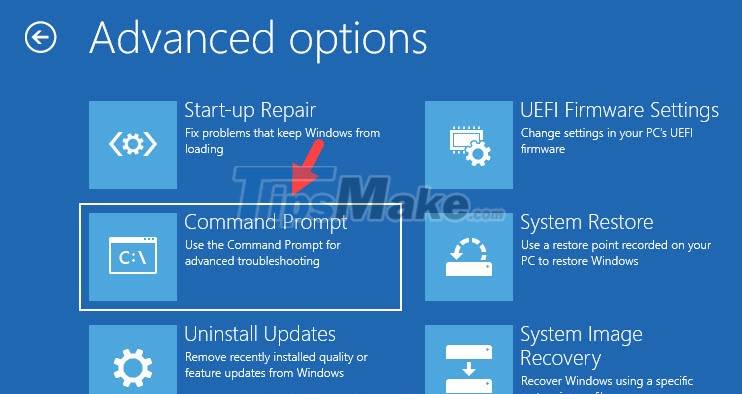
You are shown several advanced options, but only the Command Prompt option interests us: click or tap on it to get to CMD at boot.

Open Command Prompt before booting Windows
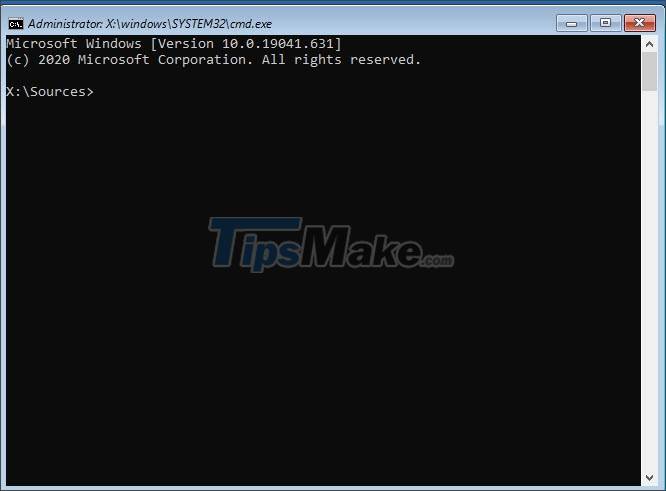
The Command Prompt (cmd.exe) is loaded, and you can use it to repair your non-working Windows system or do anything else you wish.
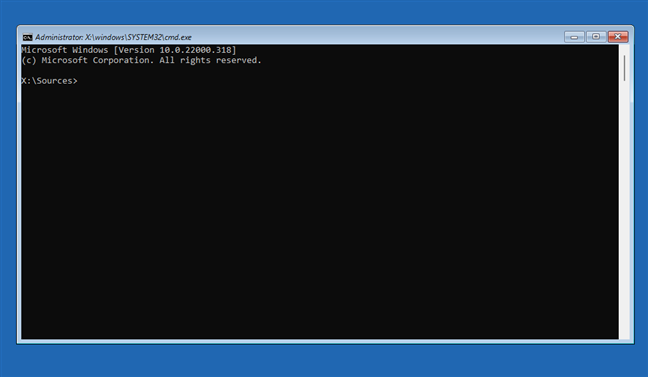
CMD open before startup
We now know how to open CMD while installing Windows in two different ways. Next, let’s see how to get to Command Prompt “from BIOS” using a Windows repair drive.
3. How to boot to Command Prompt in Windows when your PC doesn’t boot, using a USB repair drive
If you have a Windows 11 or Windows 10 recovery drive, you can use it to start the Command Prompt at boot. Insert the drive, then start your computer and use the UEFI/BIOS boot menu to select the removable repair drive as the boot device. When the recovery drive loads, it first asks you to choose the keyboard layout. Select the one you prefer using.
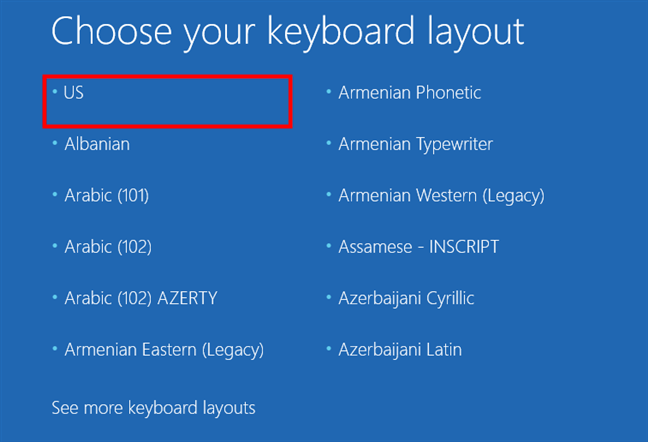
Choosing a keyboard layout
Then, you can choose one of several options. Select Troubleshoot.
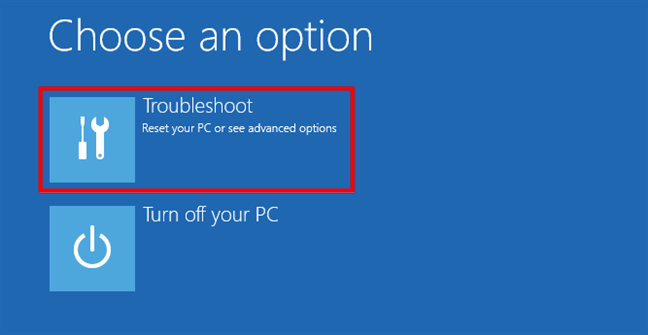
Choose the Troubleshoot option
Now, to boot to Command Prompt, in the list of Advanced options, click or tap on Command Prompt.
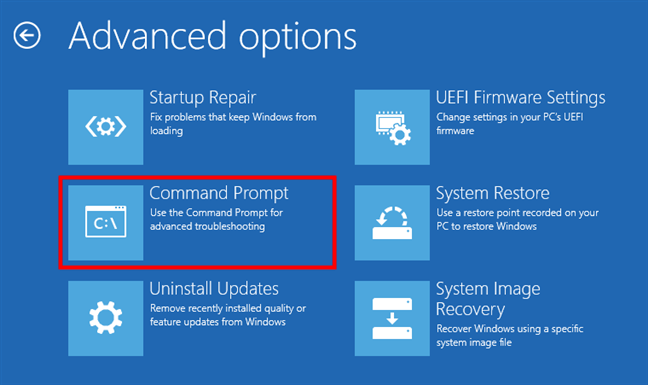
Launch Command Prompt before boot
The Command Prompt is immediately loaded, and you can start using it for whatever you need.
I’ve managed to boot to Command Prompt at Windows startup. What’s next?
After you’ve managed to get to the Command Prompt “from BIOS,” you can use simple commands and more advanced tools such as diskpart or bootrec to repair your system’s partitions, boot records, write a new boot sector (if needed), or rebuild the Boot Configuration Data.
If these are the things you must do to get your PC up and running again, these tutorials might interest you: How to use diskpart, chkdsk, defrag, and other disk-related commands and How to use the Command Prompt to fix issues with your PC’s boot records.
Why did you want to boot to Command Prompt?
Hopefully, this guide was helpful to you when you’ve encountered issues with your Windows computers and devices. Also, if you know other ways to start the Command Prompt when Windows refuses to load correctly, don’t hesitate to share them using the comments below.
To open Command Prompt (cmd) during Windows Setup, press `Shift + F10` on your keyboard when the setup screen appears.
# This command will not require any specific syntax; just press the keys.
Shift + F10
Understanding Windows Setup
What is Windows Setup?
Windows Setup is the process by which the operating system is installed or reinstalled on a computer. This can occur after a new purchase, when upgrading to a newer version of Windows, or during troubleshooting when a corrupted installation needs repair. During this process, users may encounter opportunities to interact with various features of the operating system, including the Command Prompt (CMD).
Why Use CMD in Windows Setup?
Command Prompt is a powerful tool that provides users with direct access to system commands. It can be incredibly useful during Windows setup for several reasons:
- Advanced Options: CMD allows users to navigate through advanced features that may not be available through the graphical user interface (GUI).
- Diagnostic Commands: Basic network testing or disk diagnostics can be run to address and troubleshoot issues directly.
- Customization and Troubleshooting: Users can manually configure settings, repair system files, and create user accounts without needing additional software.
Open Cmd Windows 10: Your Quick Start Guide
Accessing CMD During Windows Setup
Step-by-Step Guide to Open CMD
Booting from Installation Media
To open CMD during Windows setup, you’ll first need to boot from the Windows installation media. This requires either a bootable USB drive or a DVD containing the Windows installer. If you don’t have this media, you can create one using the Microsoft Media Creation Tool.
- Insert the bootable USB or DVD into your computer.
- Restart your computer.
- Access the boot menu by pressing the designated key (often F2, F10, F12, ESC, or DEL—varies by manufacturer).
- Select the bootable media from the list.
Navigating to the Repair Options
Upon booting the installation media, you’ll see the Windows Setup screen. Follow these steps to reach the CMD interface:
- First, select the “Repair your computer” option instead of proceeding directly to installation.
- Next, choose “Troubleshoot.”
- From the Troubleshoot menu, click on “Advanced options.”
Accessing Command Prompt
Once you are in the Advanced options menu:
- Click on “Command Prompt.”
This will launch the Command Prompt window where you can start entering commands to perform various tasks related to setup and troubleshooting.
Example Actions After Opening CMD
Running Basic Commands
One immediate action you can take is to check the disk partitions available on your system. This can be particularly useful for ensuring you are working with the correct drives during troubleshooting.
To view the partitions, enter the following command:
diskpart
list partition
This command starts the DiskPart tool and lists all available partitions, allowing you to identify which drive you may need to work with.
Running System File Checker
Another useful command is the System File Checker (SFC), which scans and repairs corrupted system files. To initiate this check, use:
sfc /scannow
This command checks the integrity of system files and attempts to repair any corrupted files found, which can be invaluable if you are facing issues during or after installation.
Open Cmd Window Here: A Quick How-To Guide
Common CMD Commands Useful in Setup
Network Commands
Ping Command
Testing your network connection can help diagnose connectivity issues. Use the following command:
ping google.com
This command sends packets to Google’s server to check if your computer can reach it. A successful response indicates a functioning network connection.
Disk Management Commands
Format Command
If you need to prepare a disk for use, formatting might be necessary. To format a drive correctly, enter the command:
format X: /fs:NTFS
Replace `X:` with the letter corresponding to the drive you wish to format. The `/fs:NTFS` option designates the file system as NTFS, which is preferred for Windows systems.
User Management Commands
Net User Command
If you need to create a new user account for troubleshooting or other purposes, the following command is useful:
net user UserName Password /add
Replace `UserName` and `Password` with the desired username and password. This command facilitates the quick creation of user accounts without navigating through the GUI.
Mastering Cmd in Windows XP: A Quick Guide
Troubleshooting Common Issues Using CMD
Repairing Boot Issues
Boot issues can be frustrating but can often be resolved using boot repair commands. The `bootrec` commands are particularly effective for repairing the Master Boot Record (MBR).
To enter these commands, simply type the following:
bootrec /fixmbr
bootrec /fixboot
- `bootrec /fixmbr`: This command repairs the MBR to correct issues preventing booting.
- `bootrec /fixboot`: This command writes a new boot sector onto the system partition.
Using these commands can often resolve startup problems and enable a smoother boot process.
Resetting Windows Passwords
If you find yourself locked out of your Windows account, CMD can also help with this. To reset a password directly, once you are in the Command Prompt, type:
net user UserName NewPassword
Replace `UserName` with the account name and `NewPassword` with the intended new password. This is particularly useful in scenarios where the password has been forgotten, allowing you to regain access quickly.
Master Cmd Windows Updates: A Quick Guide
Conclusion
The ability to open CMD in Windows setup empowers users with powerful tools for troubleshooting and customization. Utilizing Command Prompt effectively during setup can enhance your experience and resolve many potential issues without additional software.
To further your knowledge and command skills, consider continuing your practice with CMD and exploring additional resources. Subscribe for ongoing tips and tutorials to ensure you make the most of your Windows experience.

Open Windows Settings from Cmd: Your Quick Guide
Frequently Asked Questions
Can I use CMD without installation media?
Yes, you can access CMD on a running Windows system by typing cmd in the Start Menu search bar. Additionally, if your system fails to boot, the recovery environment may still allow access to CMD without installation media.
Is there any risk in using CMD during setup?
Yes, while CMD provides powerful capabilities, incorrect commands can lead to data loss or system instability. Always ensure that you are entering commands only when you are confident of their effects.
Where to find more resources on CMD?
For additional CMD resources, explore online forums, official Microsoft documentation, or websites dedicated to Windows troubleshooting and command tutorials.
Opening Command Prompt while you install Windows will help you use commands in CMD such as checking drive health, converting standard MBR — GPT and many other benefits,
In the following article, let’s learn about how to open Command Prompt during Windows installation.
1. On the Windows 10 installation interface
Step 1: On the installation screen, click Repair your computer.
Step 2: Click Troubleshoot.
Step 3: You choose Command Prompt.
After that, the Command Prompt window will appear as success.
2. On the Windows 8/8.1 installation interface
Step 1: Click Repair your computer.

Step 2: Click Troubleshoot.

Step 3: Click on Advanced options.

Step 4: You choose Command Prompt.

After that, the Command Prompt window will appear and you can perform CMD commands on it.

3. On the Windows 7 installation interface
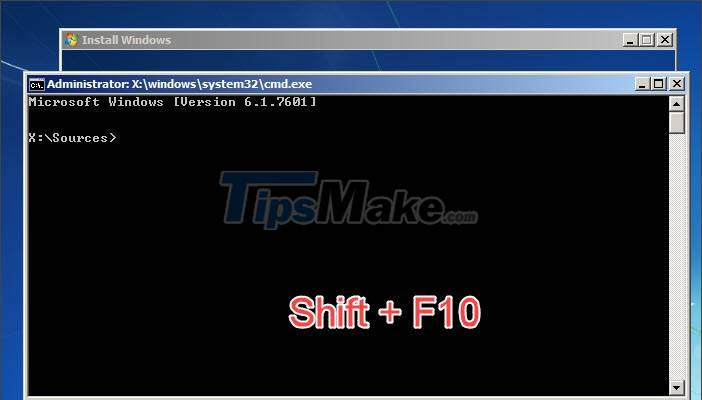
On the Windows 7 installation interface, you do not need to click Repair your computer, but use a keyboard shortcut to open the Command Prompt.
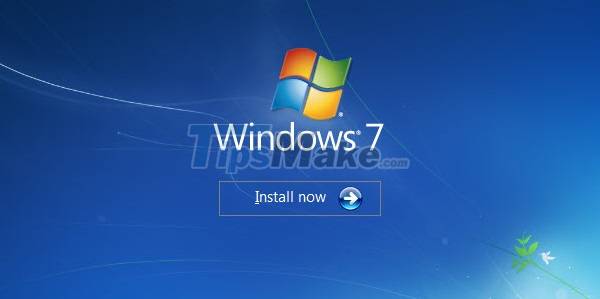
Press the keyboard shortcut Shift + F10 and the Command Prompt window will appear on the screen.
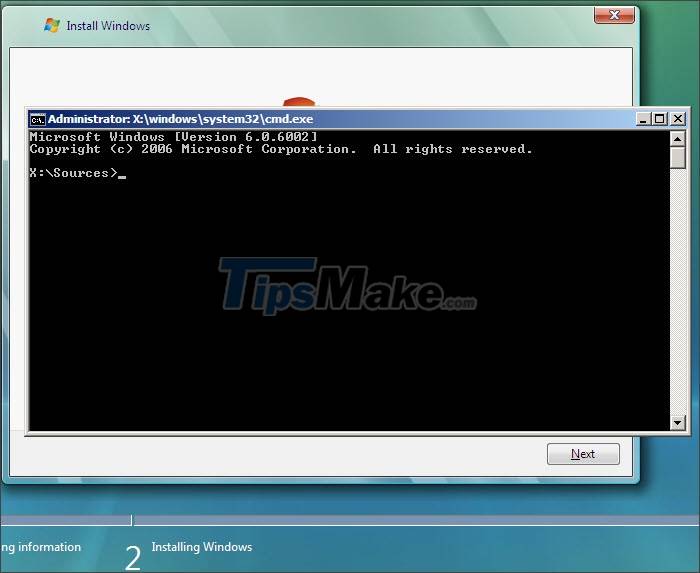
4. On the Windows Vista installation interface
Similar to Windows 7, you can open Command Prompt on Windows Vista with the keyboard shortcut Shift + F10.
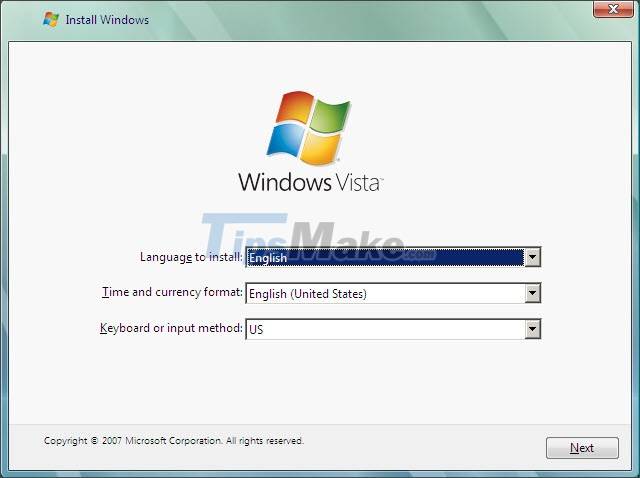
After executing the Shift + F10 command, the Command Prompt window will appear on the screen.
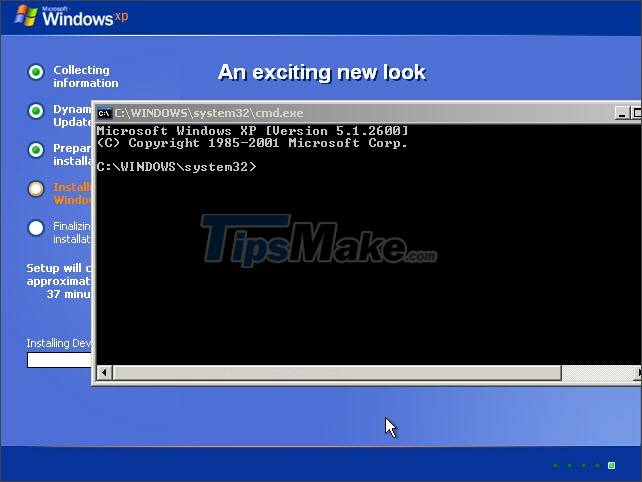
5. On the Windows XP installation interface
For Windows XP, you will be able to open the Command Prompt while installing to the Installing Windows step. In the meantime, press Shift + F10.
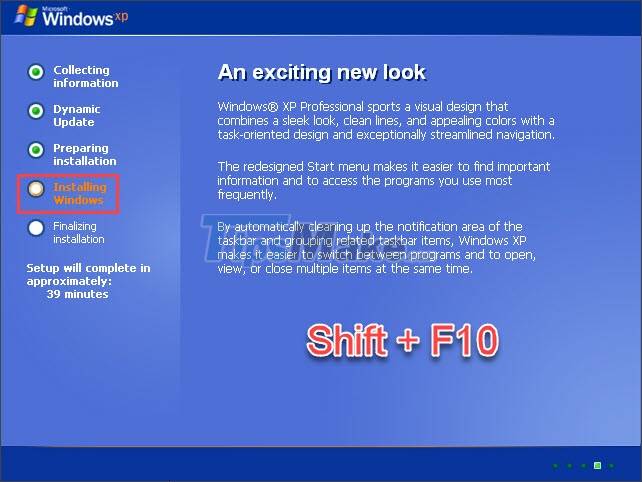
After pressing the Shift + F10 combination, the Command Prompt window will display on our screen.
Through sharing in this article, you can quickly and easily open the Command Prompt dialog box and perform CMD commands during Windows installation. Good luck!
5 stars4 stars3 stars2 stars1 star3.9 ★ | 132 Vote
Installing Windows using CMD. (UEFI and BIOS Supported)
Guide created by Andrew Lee
Note that this guide does not go into detail, it’s just providing the commands to install Windows.
Be cautions when doing this when dualbooting, please backup any existing data or you will lose them all.
Open CMD
First open CMD by pressing the following keys after booting into setup: Shift + F10
Creating Partition
MBR
diskpart
list disk
select disk (number for main disk)
clean # Clearing the partitions
convert mbr
-----------------------
(Creating recovery is optional)
create part primary size 500
format quick label Recovery
assign letter R
set id 27
-----------------------
create part primary
format quick label Windows (or label of your choice)
assign letter C (or E)
active
exit
UEFI
diskpart
list disk
select disk (number for main disk)
clean # Clearing the partitions
convert gpt
create part efi size 512
format fs fat32 quick
assign letter w
create part msr size 16
-----------------------
(Creating recovery is optional)
create part primary size 500
format quick label Recovery
assign letter R
set id de94bba4-06d1-4d40-a16a-bfd50179d6ac
gpt attributes 0x8000000000000001
-----------------------
create part primary
format quick label Windows (or label of your choice)
assign letter C (or E)
exit
Go to install.wim directory
[letter of installation disk]:
cd sources
List SKUs
Listing SKUs like Home, Pro, Education, Ultimate, etc.
dism /get-wiminfo /wimfile:[Location to install.wim]
Deploying WIM file
Copies the content from the install.wim file to the main disk.
dism /apply-image /imagefile:[Location to install.wim] /index:[SKU Number] /applydir:(Drive letter to main disk)
e.g dism /apply-image /imagefile:d:\sources\install.wim /index:6 (Win10 Pro) /applydir:C:\
Creating recovery folders and copying Windows RE to the recovery partition (Optional)
md R:\Recovery
xcopy /h C:\Windows\System32\Recovery\Winre.wim R:\Recovery
C:\Windows\System32\Reagentc /Setreimage /Path R:\Recovery /Target C:\Windows
Creating boot files
MBR only
bootsect /nt60 C: (or E:) /force /mbr
MBR + UEFI
bcdboot (Drive letter to main disk):\Windows
Add argument if it’s UEFI (if needed)
/s [drive letter to UEFI]:
Bypassing the OOBE entirely (Optional)
reg load HKLM\SOFT C:\Windows\System32\config\SOFTWARE
reg load HKLM\SYS C:\Windows\System32\config\SYSTEM
reg add HKLM\SOFT\Microsoft\Windows\CurrentVersion\Policies\System /v VerboseStatus /t REG_DWORD /d 1 /f
reg add HKLM\SOFT\Microsoft\Windows\CurrentVersion\Policies\System /v EnableCursorSuppression /t REG_DWORD /d 0 /f
reg add HKLM\SYS\Setup /v CmdLine /t REG_SZ /d cmd.exe /f
Reboot
wpeutil reboot
Bypassing the OOBE entirely (P2)
Run Windows Deployment Loader then enable recovery
oobe\windeploy
Reagentc /enable (if you made a recovery parition)
Reagentc /Info /Target C:\Windows
Add user (When the boot status says «Getting Ready»)
net user /add (username) (password)
net localgroup users /add (username) # in case Windows didn't add the users group
net localgroup administrators /add (username)
Clear OOBE status
reg add HKLM\SYSTEM\Setup /v OOBEInProgress /t REG_DWORD /d 0 /f
reg add HKLM\SYSTEM\Setup /v SetupType /t REG_DWORD /d 0 /f
reg add HKLM\SYSTEM\Setup /v SystemSetupInProgress /t REG_DWORD /d 0 /f
exit
Disabling VerboseStatus and Enabling CursorSuppression (Optional)
When entering the desktop open CMD as admin and run the following.
reg add HKLM\SOFT\Microsoft\Windows\CurrentVersion\Policies\System /v VerboseStatus /t REG_DWORD /d 0 /f
reg add HKLM\SOFT\Microsoft\Windows\CurrentVersion\Policies\System /v EnableCursorSuppression /t REG_DWORD /d 1 /f
Credits
If there’s anything that needs to be added, feel free to tell me in the comments below!
- Caesar (TheDarkBomber#0229): For helping fixing some things in the script that I forgot or needed to add.
If you’re looking to install Command Prompt in Windows 10, you’re in luck because it’s actually pre-installed on your system. This task is more about accessing and making the most out of this powerful tool rather than installing it from scratch. Essentially, you just need to know where to find it and how to open it. You can use simple methods like searching via the Start Menu or using the Run dialog box. Once you’ve got that down, you’re all set to dive deeper into the world of command line utilities.
In this section, we’ll walk you through the basic steps to access and open Command Prompt on your Windows 10 computer. This will ensure you can start using it immediately.
Step 1: Access the Start Menu
Open the Start Menu by clicking the Windows icon on the bottom-left corner of your screen or by pressing the Windows key on your keyboard.
The Start Menu is your gateway to all the apps and features on your computer. Once opened, it provides a search bar, which is the quickest way to find Command Prompt.
Step 2: Type “Command Prompt”
In the search bar that appears, type “Command Prompt.”
Typing this will help you locate the Command Prompt application quickly. It should show up at the top of the results list, making it easy to find and open.
Step 3: Select “Run as Administrator”
Right-click on the Command Prompt application and select “Run as Administrator” to open it with full privileges.
Running Command Prompt as an administrator gives you access to more commands, especially those that require elevated permissions to execute.
Step 4: Confirm the Action
If prompted, click “Yes” on the User Account Control dialog box to confirm.
This step is crucial for security reasons, ensuring that only authorized users can execute commands that may affect the system significantly.
Step 5: Begin Using Command Prompt
Once Command Prompt opens, you’re ready to start typing your commands.
Command Prompt is a text-based interface that allows you to execute batch scripts, troubleshoot system issues, and much more—all through simple text commands.
After completing these steps, you’ll have access to the Command Prompt, a powerful tool that lets you execute text-based commands directly on your computer. This utility is essential for advanced troubleshooting and executing batch scripts, giving you deeper control over your Windows environment.
Tips for Using Command Prompt in Windows 10
-
Keep a list of frequently used commands handy to save time.
-
Use the “help” command to display a list of available commands and their functions.
-
Remember, you can copy and paste into Command Prompt using right-click options.
-
Customize the Command Prompt appearance with properties to suit your preferences.
-
Always double-check commands before executing to avoid unintended changes.
Frequently Asked Questions
Is Command Prompt already installed on Windows 10?
Yes, Command Prompt is pre-installed on Windows 10 and does not require separate installation.
How do I open Command Prompt as an Administrator?
Right-click on Command Prompt from the search results and select “Run as Administrator.”
Can I customize the appearance of Command Prompt?
Yes, you can change font size, color, and window size through the properties menu.
What are some basic commands to start with?
Some basic commands include “dir” to list directory contents and “cd” to change directories.
Is there a way to learn more commands?
Absolutely, typing “help” in Command Prompt will provide a list of available commands and their descriptions.
Summary
- Access the Start Menu.
- Type “Command Prompt.”
- Select “Run as Administrator.”
- Confirm the action.
- Begin using Command Prompt.
Conclusion
Accessing Command Prompt in Windows 10 can seem daunting, especially if you’re new to the world of command lines and scripts. However, once you get the hang of it, you’ll find it’s like having your own personal wizard at your fingertips, ready to perform magical tricks on your computer. From troubleshooting pesky issues to automating repetitive tasks, Command Prompt is your go-to tool for gaining deeper control of your system.
Now that you know how to access it, why not explore more? There’s a treasure trove of commands waiting to be discovered. Dive into guides, join forums, and experiment with different commands to see what each does. The more you explore, the more you’ll harness the full potential of your Windows 10 machine.
Remember, the key to mastering Command Prompt is practice. So go on, open it up, and start typing away. Who knows? You might just become the next command line guru in your circle.
Matt Jacobs has been working as an IT consultant for small businesses since receiving his Master’s degree in 2003. While he still does some consulting work, his primary focus now is on creating technology support content for SupportYourTech.com.
His work can be found on many websites and focuses on topics such as Microsoft Office, Apple devices, Android devices, Photoshop, and more.