
You can use Rufus to create a bootable USB flash drive to install Windows 11 22H2 (2022 Update), and in this guide, you will learn how. The tool is similar to the Media Creation Tool, but the difference is that you have the option to provide an existing ISO or download the installation files directly from the Microsoft servers.
The advance of using Rufus is that you can create a USB installation media faster for the current and older versions of Windows, including versions 22H2, 21H2, 10, and 8.1. Also, it’s the best tool to create a USB bootable media that bypasses the requirements and allows you to install Windows 11 on unsupported hardware.
In this guide, you will learn the steps to use Rufus to download the ISO file and create a bootable media to install Windows 11 22H2 on supported or unsupported hardware.
- Create Windows 11 22H2 bootable USB from Rufus
- Create Windows 11 22H2 bootable USB for unsupported hardware with Rufus
To create a Windows 11 22H2 USB bootable media, connect a USB flash drive with 8GB of space, and then use these steps:
-
Open Rufus website.
-
Under the “Download” section, click the link to download the latest version.
-
Double-click the executable to launch the tool.
-
Click the Settings button (third button from the left) at the bottom of the page.

-
Under the “Settings” section, use the “Check for updates” drop-down menu and select the Daily option.
-
Click the Close button.
-
Click the Close button again.
-
Open Rufus again.
-
(Optional) Under the “Device” section, use the drop-down menu and select the USB flash drive to create the installation media.
-
Under the “Boot selection” section, use the drop-down menu and select the Disk or ISO image option.
-
Click the down-arrow button (on the right side) and select the Download option.
-
Click the Download button.
-
Select the Windows 11 option.
-
Click the Continue button.
-
Under the “Release” section, select the 22H2 v1 (Build 22621.xxx – 2022.09) option.
-
Click the Continue button.
-
Select the Windows 11 Home/Pro/Edu option.
-
Click the Continue button.
-
Select the language for the Windows 11 2022 Update installation.
-
Click the Continue button.
-
Select the x64 architecture.
-
Click the Download button.
-
Select the location to save the Windows 11 22H2 ISO file automatically.
-
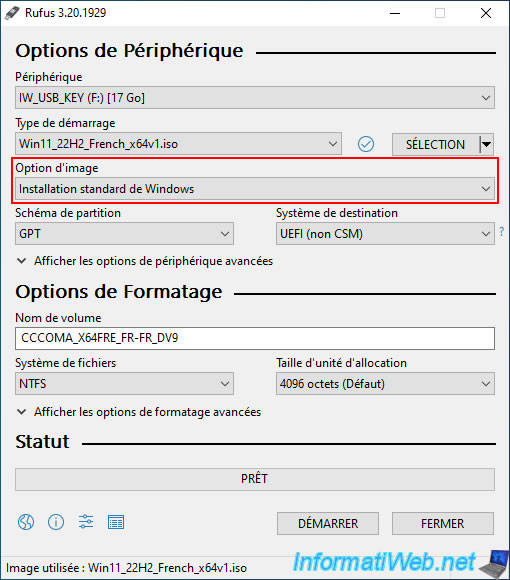
Under the “Image option” setting, select the “Standard Windows 11 Installation” option.

-
(Optional) Continue with the default settings after the download.
-
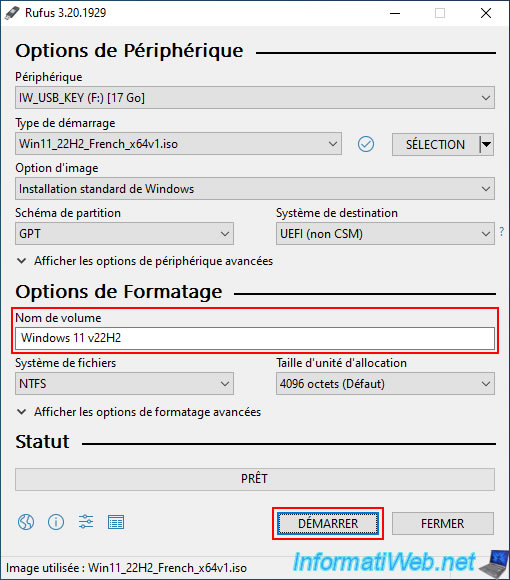
(Optional) Under the “Volume label” setting, specify a name for the drive. For example, Windows 11 22H2 Setup.
-
Click the Start button.
-
Clear the “Remove requirement for 4GB+ RAM, Secure Boot and TPM 2.0” option.

-
(Optional) Check the “Set a local account using the same name as this user’s” option if you want an installation with a local account instead of a Microsoft account (not recommended).
-
Click the OK button.


Once you complete the steps, you can use the bootable USB flash drive to install Windows 11 using a clean or in-place upgrade installation.
Create Windows 11 22H2 bootable USB for unsupported hardware from Rufus
You can also use Rufus to create a bootable USB to bypass the TPM 2.0, Secure Boot, and memory requirements to install the Windows 11 2022 Update on unsupported hardware.
For the purpose of this guide, I’m using the option to provide an existing ISO file. However, you can also use the “Download” option to get the Windows 11 22H2 files within the application, as shown in the previous steps.
To create a Windows 11 22H2 bootable USB for unsupported hardware, use these steps:
-
Open Rufus website.
-
Under the “Download” section, click the link to download the latest version.
-
Double-click the rufus.3.xx.exe file to launch the tool.
-
Under the “Device” section, use the drop-down menu and select the flash drive to create the Windows 11 22H2 bootable USB media.
-
Under the “Boot selection” section, use the drop-down menu and select the Disk or ISO image option.
-
Click the Select button.
-
Select the Windows 11 22H2 ISO file.

-
Click the Open button.
-
Under the “Image option” section, select the “Standard Windows 11 Installation” option.
-
Under the “Partition scheme” section, select the GPT option.
-
Under the “Target system” section, select the UEFI (non-CSM) option.
-
Under the “Volume label” section, specify a descriptive name for the Windows 11 22H2 bootable USB flash drive – For example, Windows 11 22H2 Setup.
-
Use the default settings for the File system and Cluster size options.
-
Check the Quick format option.
-
Check the “Create extended label and icon files” option.
-
Click the Start button.
-
Check the “Remove requirement for 4GB+ RAM, Secure Boot and TPM 2.0” option to bypass the Windows 11 hardware requirements.
-
Click the OK button.


Once you complete the steps, Rufus will create a bootable USB media that will bypass the security and memory requirements to install version 22H2 on a computer with unsupported hardware.
Why You Can Trust Pureinfotech
The author combines expert insights with user-centric guidance, rigorously researching and testing to ensure you receive trustworthy, easy-to-follow tech guides. Review the publishing process.
-
Home
-
News
- How to Bypass Restrictions on Windows11 22H2 via Rufus to Install
By Vera | Follow |
Last Updated
How to use Rufus to create a bootable USB drive to bypass restrictions on Windows 11 22H2 to install this system on your unsupported PC? See this guide from MiniTool to know more information on the topic – Windows 11 22H2 bypass requirements including TPM, RAM, Secure Boot, and Microsoft account.
Windows 11 22H2 Requires Higher Demands
If you are a Windows user, you may have a general idea of Windows 11. Compared to Windows 10, its system requirements are higher. To install this operating system (its first release 21H2) on your PC, the machine should have enabled TPM 2.0 & Secure Boot, at least 4GB RAM, 64GB storage capacity, 1 GHz or faster with two or more cores on a compatible 64-bit processor or system on a chip (SoC), etc.
In Windows 11 22H2, Microsoft increases the restrictions – an internet connection and a Microsoft account are required to set up the installation. Although these system requirements make Windows 11 installation more complicated, you can use Rufus 3.19 or higher to bypass restrictions on Windows 11 22H2 so that you can easily install the system on unsupported hardware.
Well then, how to install Windows 11 on unsupported hardware by creating a bootable USB drive to bypass Windows 11 22H2 requirements? Move to the next part to find details.
How to Install Windows 11 22H2 on Unsupported PC via Rufus for Requirements Bypass
Download Windows 11 ISO
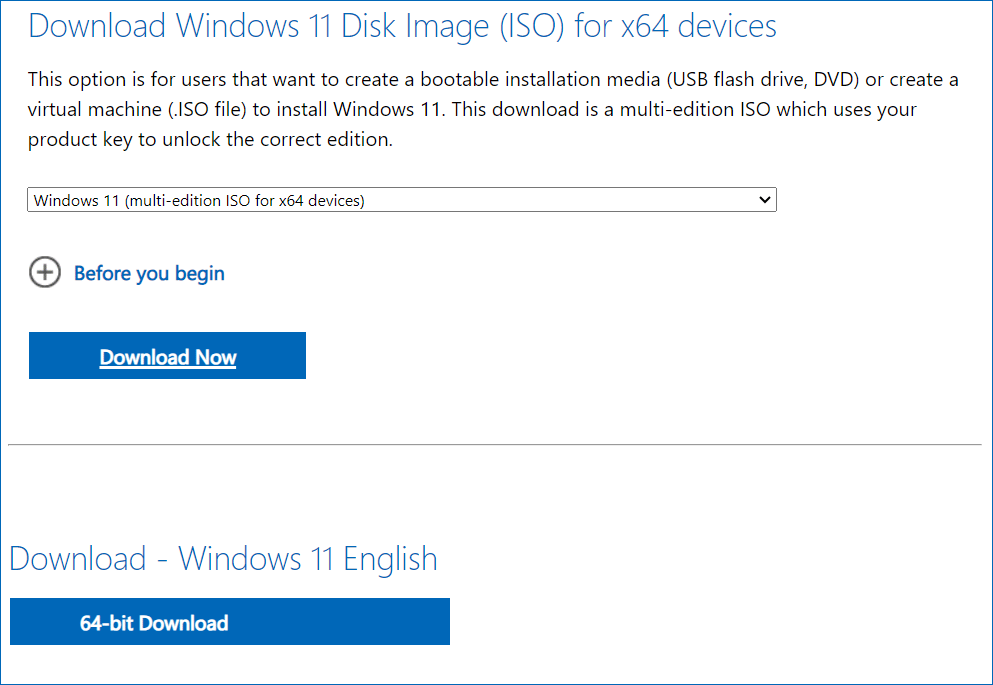
Currently, the latest release is Windows 11 2022 Update, version 22H2 and you can get an ISO from Microsoft’s website. Just go to https://www.microsoft.com/en-us/software-download/windows11, scroll down to the Download Windows 11 Disk Image (ISO) for x64 devices section, choose Windows 11, click Download Now, specify a language and click 64-bit Download to get a full edition ISO of Windows 11 22H2.
Tips:
In addition, you can download Windows 11 22H2 ISO using Rufus and see details from this post — Rufus Windows 11 Download & How to Use Rufus for a Bootable USB.
Windows 11 22H2 Bypass Requirements
To bypass restrictions on Windows 11 22H2, you can run Rufus for this thing. See how to create a Windows 11 USB installer without checking internet connection requirements, Microsoft account, TPM, RAM, etc.
Step 1: Go to https://rufus.ie/downloads/ and download its latest version. Rufus 3.19 or later allows you to bypass Windows 11 22H2 requirements.
Step 2: Double-click on the executable file to open Rufus and connect your USB drive to your computer.
Step 3: Click SELECT to choose the ISO file of Windows 11 22H2 you have downloaded.
Step 4: Set Image option to Standard Windows installation, choose GPT as the partition scheme, and select UEFI (non CSM) under Target system.
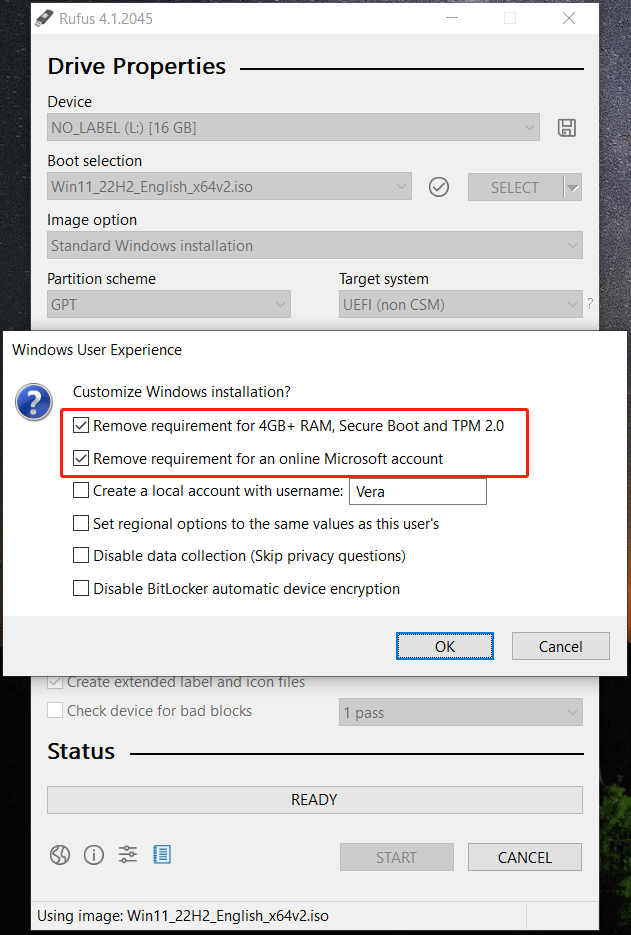
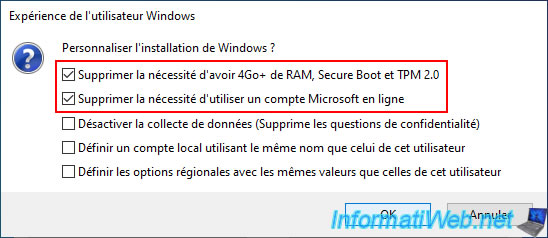
Step 5: After finishing the settings configuration, click the START button. Then, you will get a popup to allow you to customize Windows installation. Here, you can bypass restrictions on Windows 11 22H2 like an online Microsoft account, RAM, Secure Boot, and TPM. Just check these options:
- Remove requirement for 4GB+ RAM, Secure Boot and TPM 2.0
- Remove requirement for an online Microsoft account
In addition, you can check other options based on your needs.
Step 6: Click OK > OK to start creating a bootable USB drive.
Rufus Windows 11 Bypass for Installation
Tips:
Before the installation, you had better create a backup for your PC since this installation method (clean install) can erase your data on the C drive. To avoid data loss, you should run a piece of PC backup software like MiniTool ShadowMaker for file backup. This tool can help back up your files automatically and only back up the changed data. Just get it to have a try and this post may help you a lot — How to Backup Files on Windows 10? Try These Top 4 Ways.
MiniTool ShadowMaker TrialClick to Download100%Clean & Safe
Now, you can use the bootable USB drive created by Rufus to bypass restrictions on Windows 11 22H2 to start installing this operating system on your unsupported PC. Just boot it to the BIOS menu, change the USB drive as the first boot order, and run the PC. Then, configure something and click the Install now button to start the installation.
To know details on the installation, refer to our previous post – How to Install Windows 11 from USB? Follow the Steps Here.
Tips:
If you want to bypass the internet connection requirement in Windows 11 22H2, you can follow these ways in the guide — Windows 11 Setup Without Internet – Here Is a Full Guide.
Verdict
Want to install Windows 11 22H2 on an unsupported PC? Download an ISO and use Rufus to bypass restrictions on Windows 11 22H2 to create a bootable USB drive for the installation. Follow the given steps and they can help you a lot.
About The Author
Position: Columnist
Vera is an editor of the MiniTool Team since 2016 who has more than 7 years’ writing experiences in the field of technical articles. Her articles mainly focus on disk & partition management, PC data recovery, video conversion, as well as PC backup & restore, helping users to solve some errors and issues when using their computers. In her spare times, she likes shopping, playing games and reading some articles.
Since Windows 11, Microsoft has implemented several restrictions in its installer: TPM module required, 4GB minimum RAM, …
Since version 22H2 of Windows 11, a new restriction has appeared: the need to use a Microsoft account when installing Windows 11.
Nevertheless, you will see that Rufus will easily allow you to disable all of its restrictions.
Which will allow you to install Windows 11 on any computer with officially supported or unsupported hardware, as well as with a local account instead of a Microsoft account (including on the new 22H2 version of Windows 11).
- Create Windows 11 v22H2 Bootable USB key with Rufus
- Install Windows 11 v22H2 with a local account from your bootable USB key
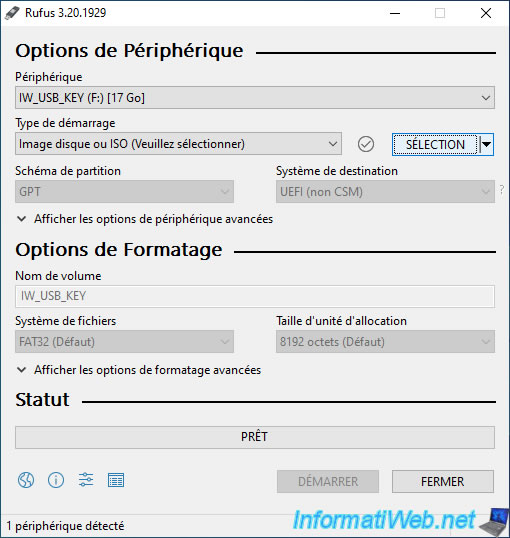
To get started, download and launch the «Rufus» program.
Next, select your USB key from the «Device» list and click «Select».
Warning : the USB key you will use will be completely erased before creating your Windows 11 bootable USB key.
Remember to save its content elsewhere before continuing with this tutorial.
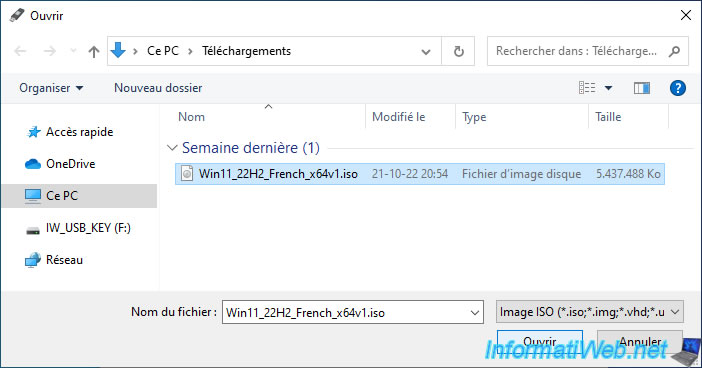
Select the Windows 11 ISO file and click Open.
Note: in this tutorial, we will use the iso of the latest version available at the moment.
Namely, the 22H2 version.
Note that the option «Extended Windows 11 Installation (no TPM / no Secure Boot)» which was visible in the old version of Rufus has changed its place.
With this new version of Rufus, you must therefore leave the «Standard Windows installation» option and the deactivation of the various restrictions of Windows 11 will be offered only when you click on the «Start» button.
Change the volume label (the name under which your USB key will appear in File Explorer) if desired.
Then, click on the button: Start.
If you selected the Windows 11 v22H2 ISO, a «Windows User Experience» window will appear with 5 options:
- Remove requirement for 4GB+ of RAM, Secure Boot and TPM 2.0: allows you to install Windows 11 on a computer whose hardware is not officially supported.
This is possible, because checking for the presence of a TPM 2.0 module, at least 4 GB of random access memory (RAM) and the activation of Secure Boot (which requires a motherboard with UEFI firmware) will be disabled. - Remove requirement for an online Microsoft account: Allows you to install Windows 11 (regardless of its edition) using a local account IF Internet is not available.
In other words, when the installer asks you to connect to a Microsoft account, all you have to do is unplug the network cable from your computer and click on the «back» icon for the installer to offer you to use an account. local as was the case with the previous version (21H2) of Windows 11.
Note that the «Local account» option that appeared by default with the professional edition of Windows 11 no longer exists.
You will therefore have to activate this option to use a local account, even on this edition of Windows 11. - Disable data collection (Skip privacy questions): allows you to disable Windows 11 data collection without having to answer privacy questions during the Windows 11 setup steps.
- Set a local account using the same name as this user’s: allows you to create an account on your future installation of Windows 11 whose name will be the same as the user with which you are currently logged in on your computer.
- Set regional options using the same values as this user’s: allows you to use the same regional options (country, language, …) as your current installation for your future Windows 11 installation.
By default, the first 2 options will be checked. This allows disabling hardware verification (RAM, Secure Boot, and TPM 2.0), as well as installing Windows 11 using a local account, if desired.
Click OK.
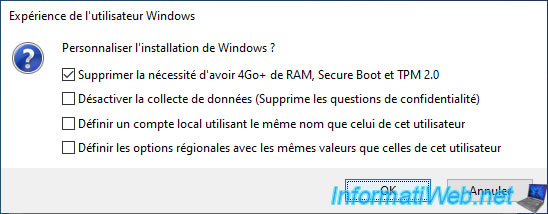
If you have selected the Windows 11 v21H2 ISO, you will see that the option «Remove requirement for an online Microsoft account» will not appear as this relates to the restriction that appeared with the 22H2 version of Windows 11 .
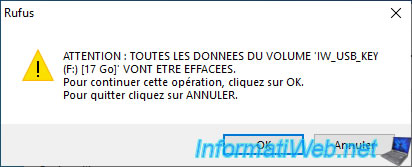
As stated by Rufus, all data present on your USB key will be erased.
Click OK.
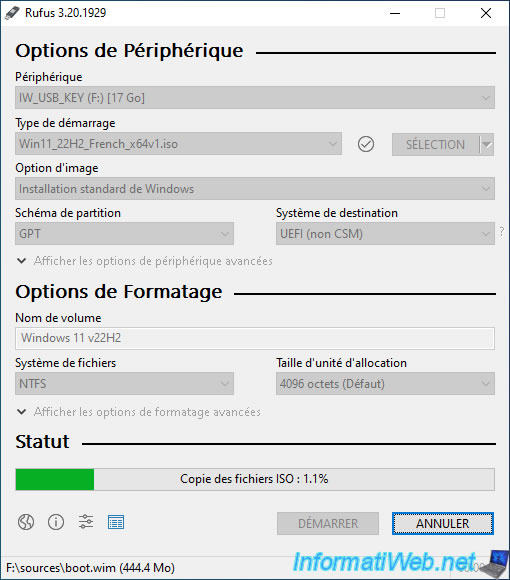
Wait while the contents of the ISO file are copied to your USB key.
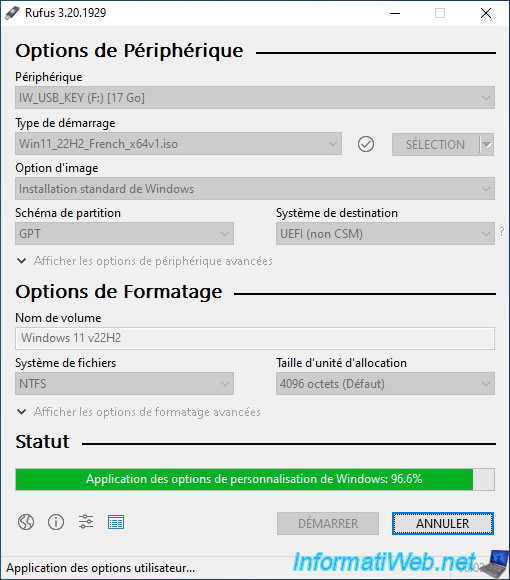
Then, the Windows customization options selected earlier will be applied to your USB key.
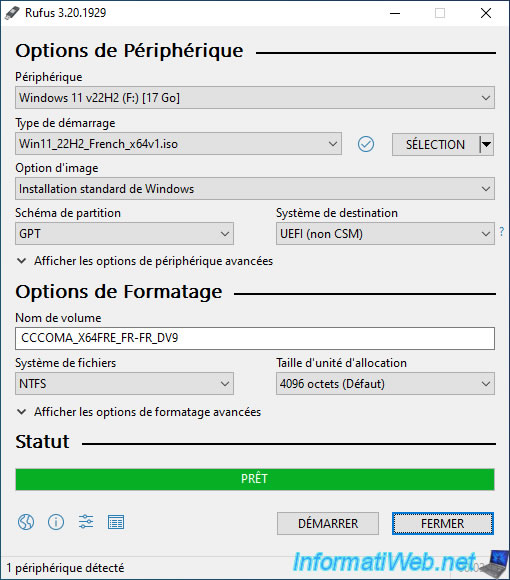
Once your Windows 11 bootable USB key is created, the «Ready» status will appear.
Click Close.
Your bootable USB key will have a blue icon as it does by default with the Windows 11 installation DVD.
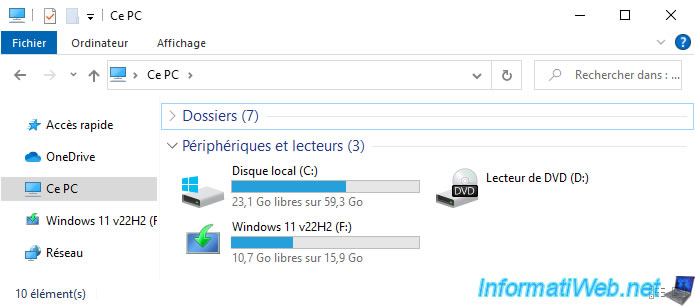
Its content will look like this.
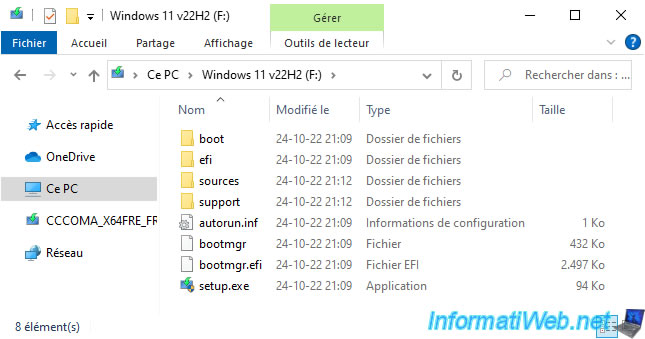
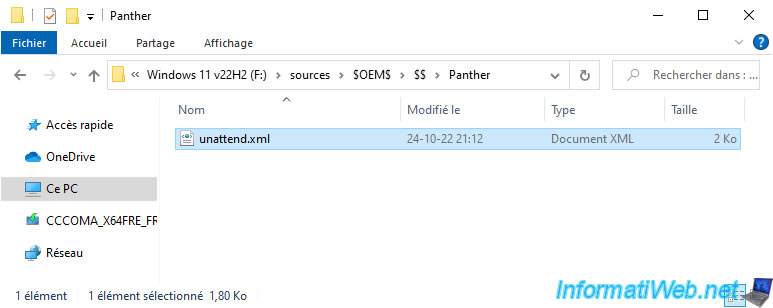
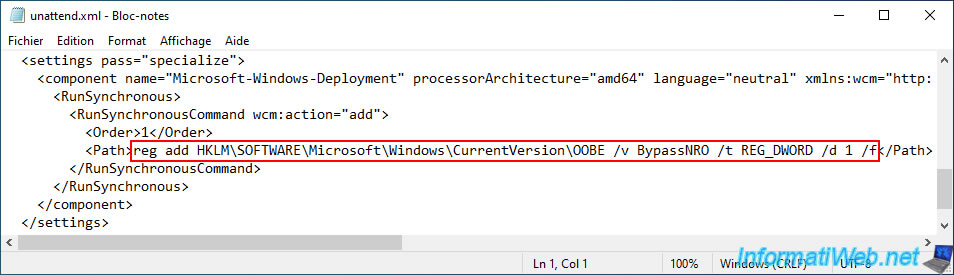
In the «sources\$OEM$\$$\Panther» folder of your Windows 11 bootable USB drive, you will find an «unattend.xml» file which contains the previously selected Windows customizations.
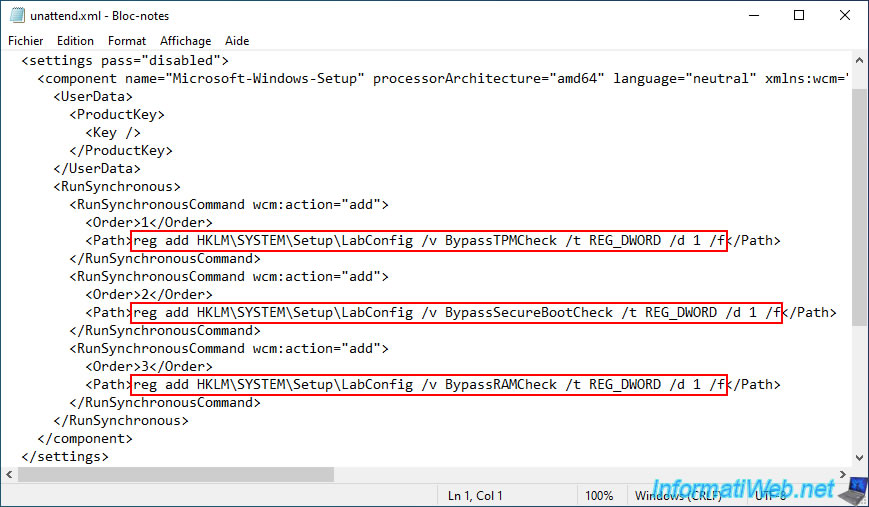
If you open this «unattend.xml» file with notepad, you will see that it has commands to add 3 DWORD values in the Windows PE environment registry of Windows 11 used during installation from Windows 11:
- BypassTPMCheck = 1
- BypassSecureBootCheck = 1
- BypassRAMCheck = 1
Note: this block concerns the 1st step of the installation of Windows 11.
Below, you will find a second block which concerns this time the OOBE environment (Out-of-box experience).
In other words, the configuration steps proposed after the installation of Windows 11 (after the 1st restart).
The given command allows to add a DWORD value named «BypassNRO» whose value is again «1» and which allows to use a local account during the configuration steps of Windows 11 IF Internet is not available.
2. Install Windows 11 v22H2 with a local account from your bootable USB key
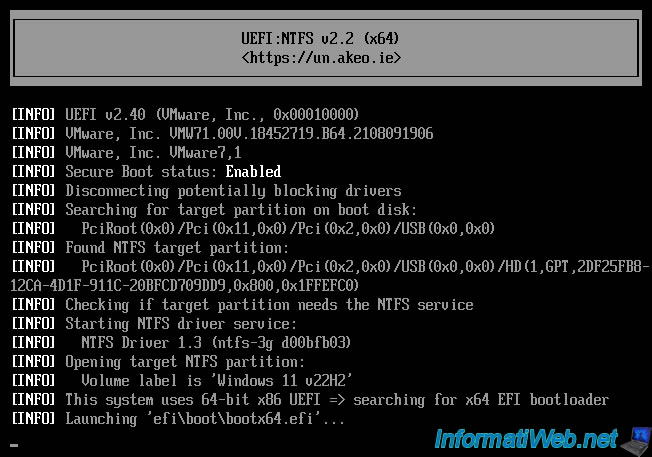
Configure your computer’s BIOS boot order to boot from your bootable USB key to install Windows 11.
If your BIOS is configured correctly, you will see a «UEFI:NTFS» screen briefly appear when your computer boots.
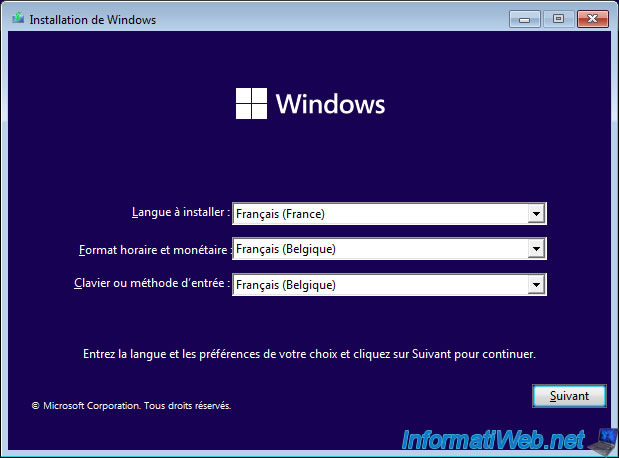
Then, the Windows 11 loading logo will appear.
Choose your country and language in the «Windows Setup» program that appears, then click Next.
Then, click on: Install now.
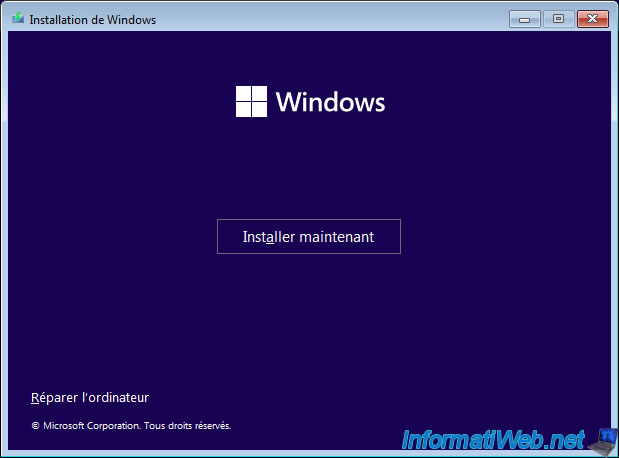
As expected, you will be able to install Windows 11 without any problem, without the error «This PC can’t run Windows 11» occurring.
Note: to see all the steps for a standard installation of Windows 11, refer to our tutorial: Windows 11 — Formatting and reinstalling.
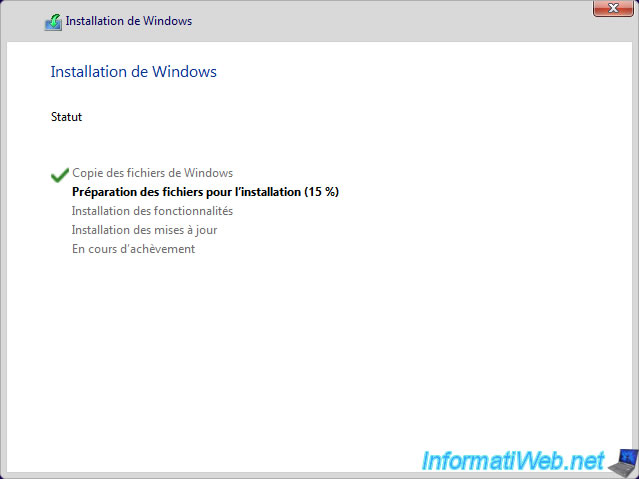
Once the 1st step of the installation is complete, your computer will restart and eventually arrive at the Windows 11 setup steps.
Select your country, your keyboard language, …

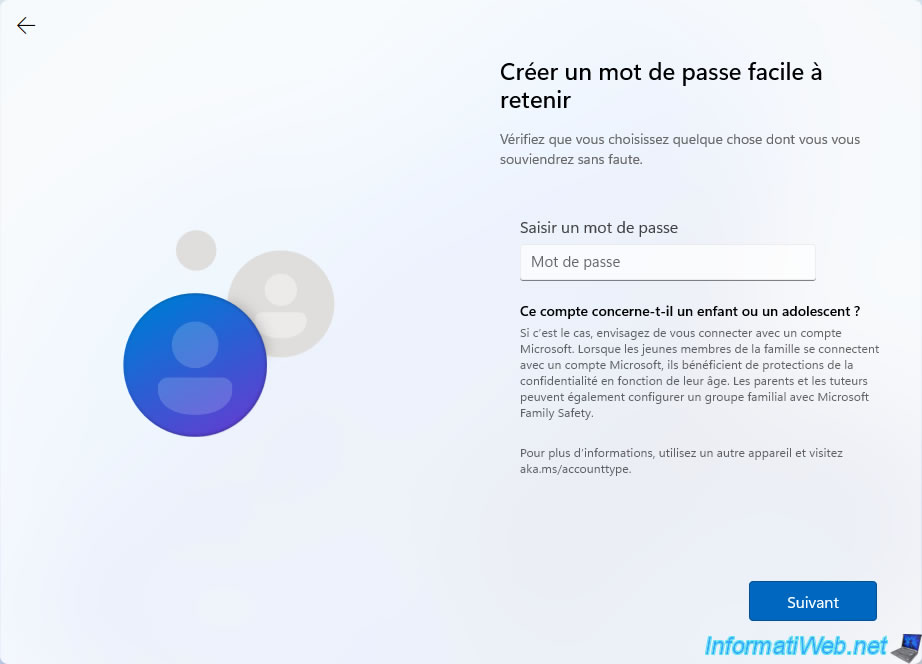
Since version 22H2 of Windows 11, a «Sign in with a Microsoft account» step will appear if you are connected to the Internet.
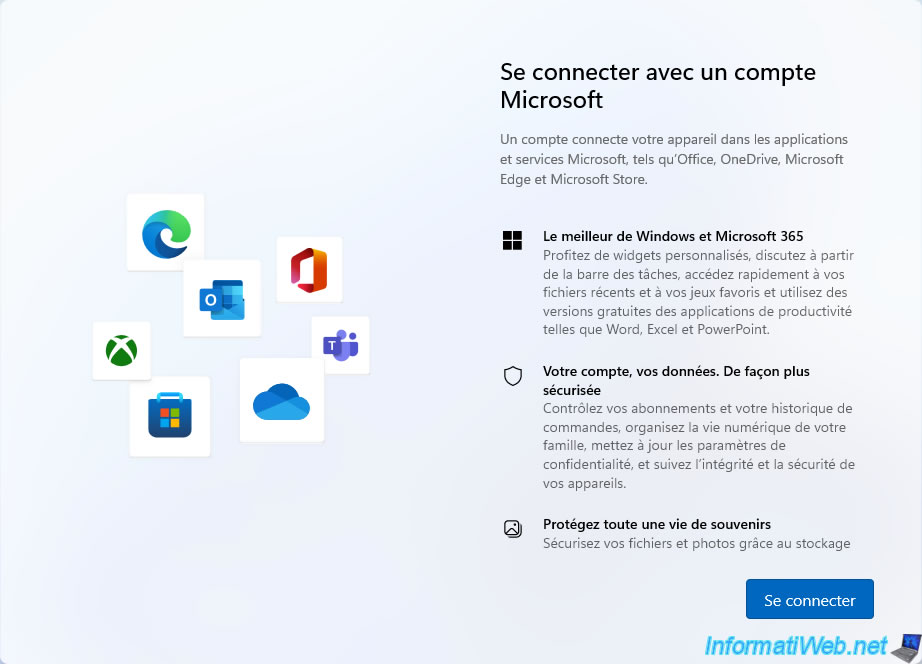
If you are connected to the Internet, Windows 11 will ask you to add your Microsoft account.
Even if you selected the «Remove requirement for an online Microsoft account» option when creating your Windows 11 bootable USB key.
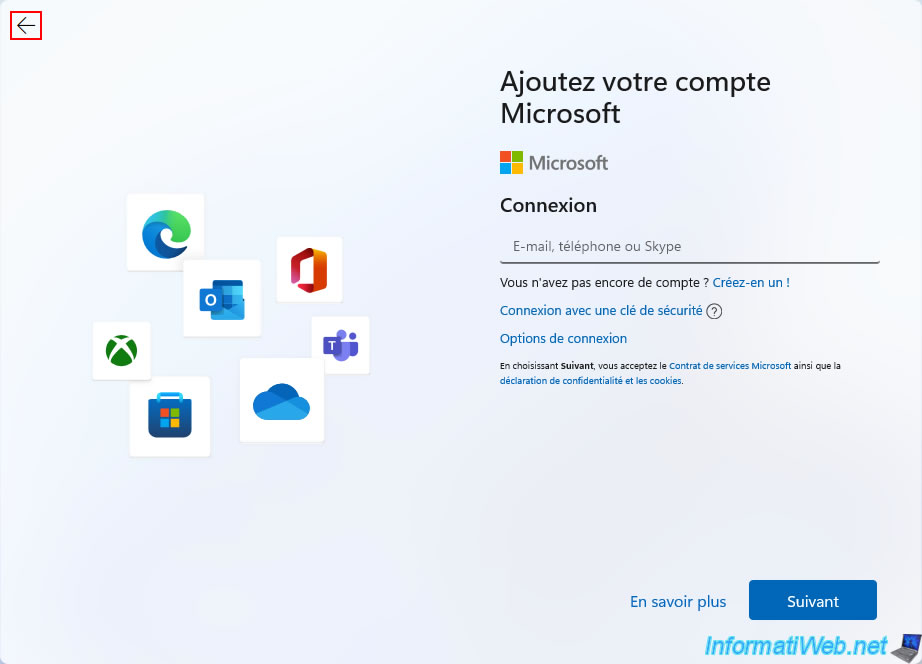
To use a local account, you must unplug the network cable from your computer (so that the Internet is no longer available), then click on the «<-» arrow located at the top left.
Now, Windows 11 asks you to provide a name for the local account to create on your computer.
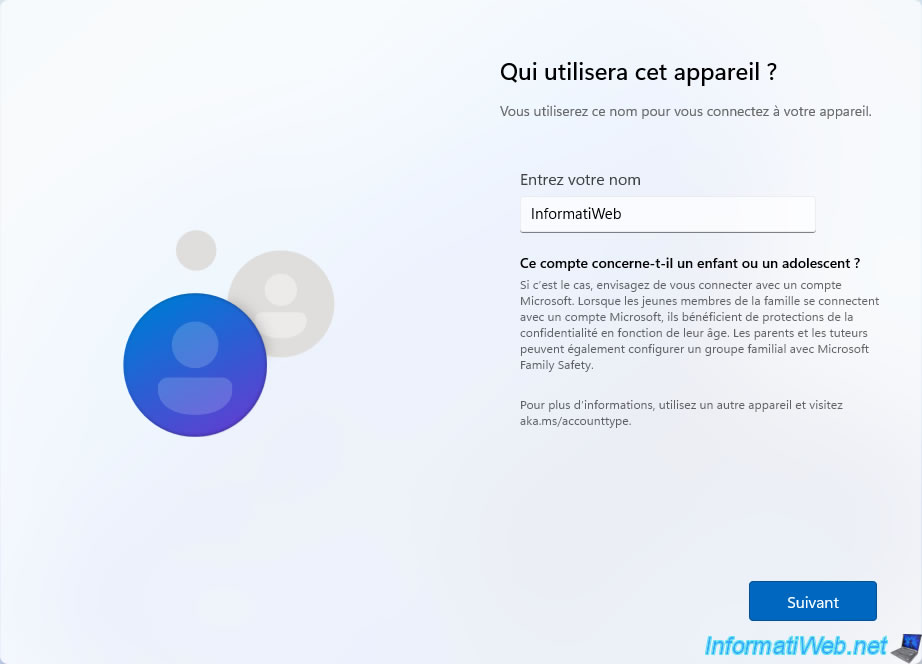
If desired, set a password for this local account.
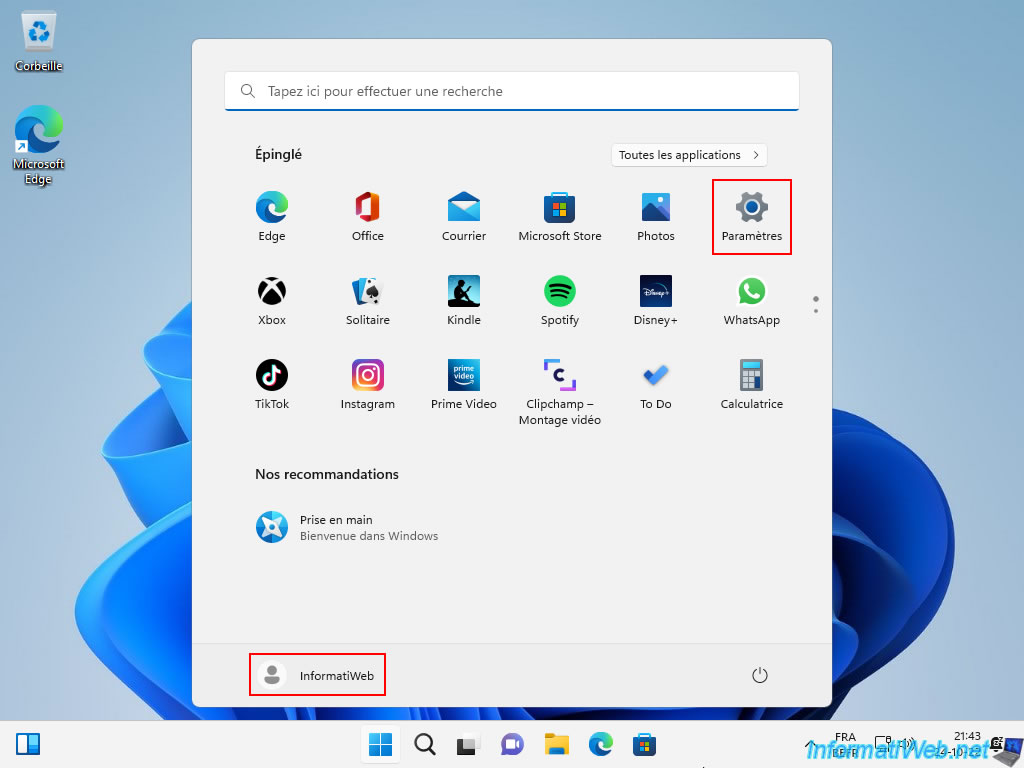
Once Windows 11 is installed, reconnect your computer’s network cable and open the start menu.
As you can see, you are logged in with a local account.
Click on: Settings.
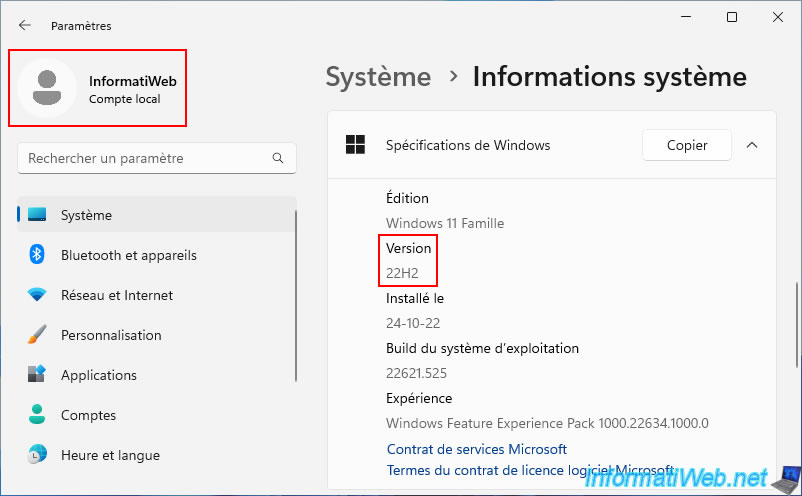
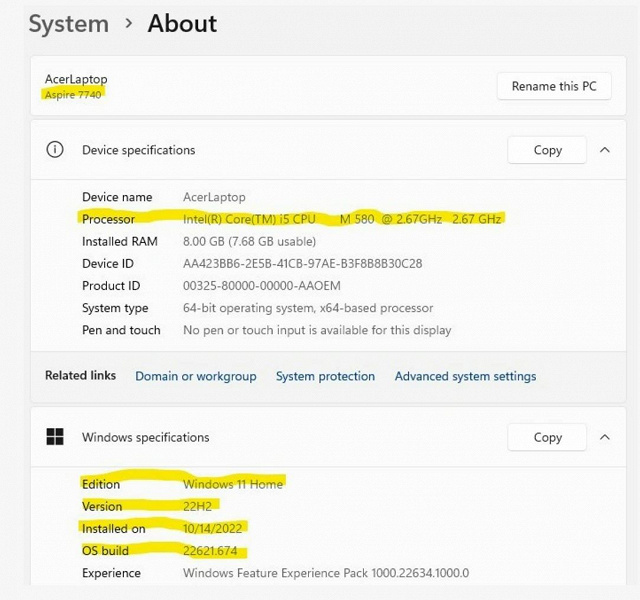
In the «Settings» window that appears, go to: System -> System Information.
As you can see, Windows 11 v22H2 was successfully installed using a local account.
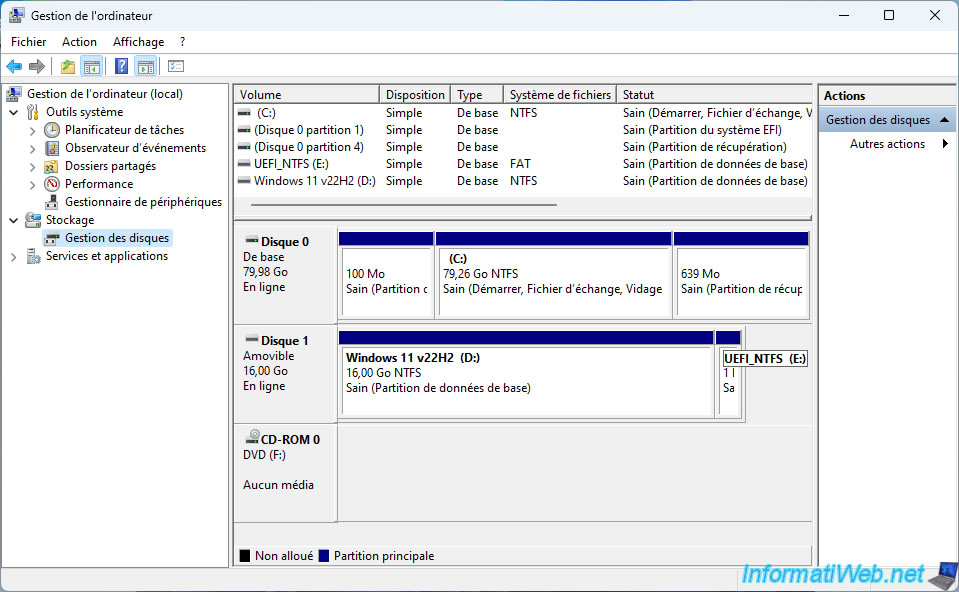
If you open the file explorer, you will see in particular a «UEFI_NTFS» partition appear.

This partition is not part of your Windows 11 installation.
Indeed, this small «UEFI_NTFS» partition of 1 MB is on your bootable USB key and was automatically created on your USB key by Rufus.
Once the USB key is unplugged, this partition will disappear from the file explorer.
· Hot!

Earlier this year in May, Microsoft made internet connectivity and Microsoft Account (MSA) mandatory for installing Windows 11 22H2 Insider builds. Thankfully, the OOBE\BYPASSNRO workaround, which we discovered earlier, still worked, and later, one of our forum members found a simple bypass trick to install Windows 11 22H2 via a local account.
Now Rufus has joined in too and with its latest pre-release version 3.19 Beta, a new option for bypassing the mandatory requirement for a Microsoft account (MSA) on Windows 11 22H2 has been added. This comes as a part of the new selection dialog for Windows 11 setup customization in Rufus.
Alongside the bypass for MSA, the new dialog also gets the option for the TPM and Secure Boot bypass which were added with a previous Rufus 3.18 Beta version.
Here is the changelog for the new Rufus 3.19 Beta which describes these new features:
Add a new selection dialog for Windows 11 setup customization:
- Secure Boot and TPM bypass have now been moved to this dialog
- Also allows to bypass the mandatory requirement for a Microsoft account with Windows 11 22H2
(NB: Network MUST be temporarily disabled or unplugged for the local account creation to be proposed)
Rufus 3.19 Beta also has several other changes and improvements. You can find all of them here.
Update: The final version of Rufus 3.19 utility is available for download. The changelog remains mostly the same as Rufus 3.19 beta which means the Windows 11 22H2 MSA bypass is still present. However, the new release does add a feature for multi-extent file support when using Joliet specification (based on Unicode). The changelog says:
Fix support for multiextent files when Joliet is in use
You can find the download link for Rufus 3.19 final version in this article here.
Пользователь установил Windows 11 22H2 на ноутбук со стареньким двухъядерным процессором Intel Core i5-580M
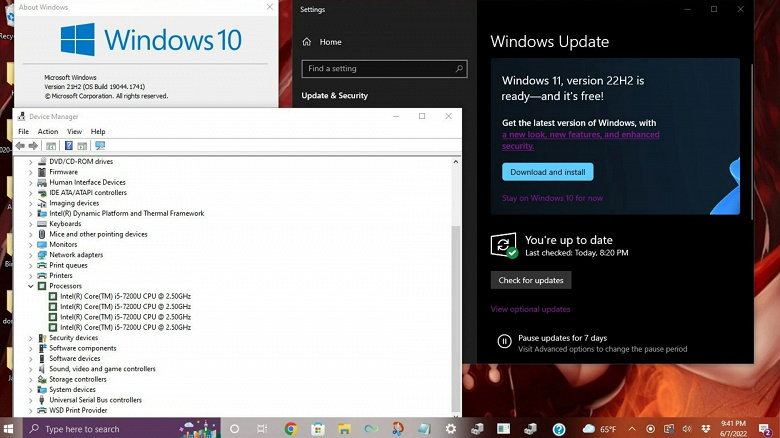
Один из пользователей крупнейшего американского форума Reddit поделился своей историей установки Windows 11 22H2 на очень старенький ноутбук – 12-летний Acer Aspire 7740, оснащенный двухъядерным процессором Core i5-580M. Система не имеет TPM, процессор уж тем более официально не поддерживается, но это не является проблемой, если воспользоваться «правильным» ПО: в данном случае пользователь использовал Rufus 3.20, приложение позволяет обойти все аппаратные ограничения для установки самой свежей версии Windows 11.

История с требованиями к ПК для установки Windows 11 известна если не всем, то многим: Microsoft ограничивает установку ОС на компьютерах без поддержки TPM (хотя бы в виде программной эмуляции), с небольшим объемом ОЗУ, на «старых» процессорах. Однако использование Rufus – один из самых простых способов обойти все эти ограничения.
Интересно, что еще в июне текущего года у пользователей появилась возможность установить бета-версию Windows 11 22H2 на «неподдерживаемые» ПК под управлением Windows 10. Но Microsoft довольно быстро разобралась с этой «ошибкой». Тем не менее, используя Rufus, сейчас можно установить уже вполне себе финальную версию Windows 11 22H2 на совсем старые компьютеры.
16 октября 2022 в 10:45
| Теги: Microsoft, Windows
| Источник: ITHome