
-
Home
-
News
- How to Fix Rtwlanu.sys BSOD on Windows 10? Try These Methods
By Sonya |
Last Updated
Blue Screen of Death could be triggered by a variety of different causes, and this post is mainly talking about how to fix BSOD caused by rtwlanu.sys on Windows 10. If you want to fix BSOD caused by other reasons, then you should go to the MiniTool website.
You may meet Blue Screen of Death caused by netwtw06.sys and ntfs.sys, but this post focuses on BSOD caused by rtwlanu.sys. The rtwlanu.sys BSOD error often occurs when you try to put your computer on Sleep or Hibernation.
Then why does this error appear? This error appears when your network WLAN driver is corrupted, WLAN driver is not permitted to wale the machine, or your system file is corrupted.
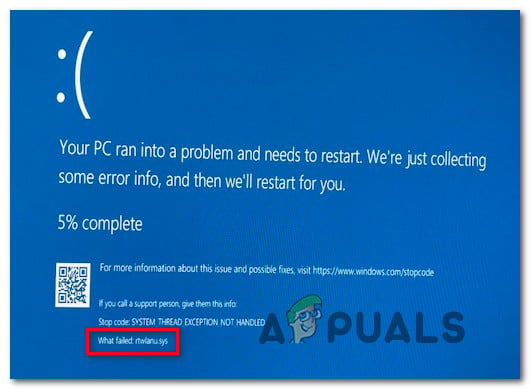
Besides, the rtwlanu.sys BSOD error is always accompanied by Driver IRQL Not Less or Equal, System Thread Exception Not Handled, and Driver Unloaded Without Canceling Pending Operation.
So how to fix rtwlanu.sys Windows 10 BSOD? The following part will give you detailed instructions.
Method 1: Reinstall the Corrupted Network Driver
As we have mentioned before, you could meet the rtwlanu.sys BSOD error if your network driver is corrupted. Therefore, you can try to reinstall the corrupted network driver to fix the error. Here is what you need to do:
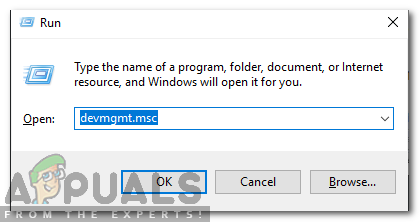
Step 1: Press the Win + R keys at the same time to open the Run box. Then, type devmgmt.msc and press Enter to open Device Manager.
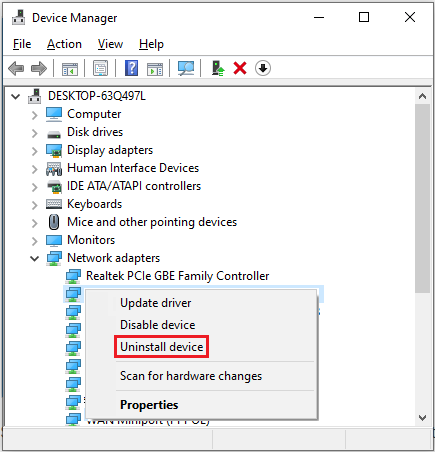
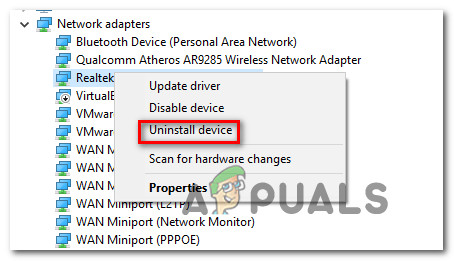
Step 2: Expand your Network adapters and then right-click the wireless driver that you are currently using to choose Uninstall device.
Step 3: Click OK to confirm your changes, then reboot your computer. At the next system startup, Windows should have reinstalled the wireless network driver and the BSOD error should be fixed.
Method 2: Change the LAN Settings
You can also try to change the LAN settings to get rid of the BSOD error caused by rtwlanu.sys. Here is what you need to do:
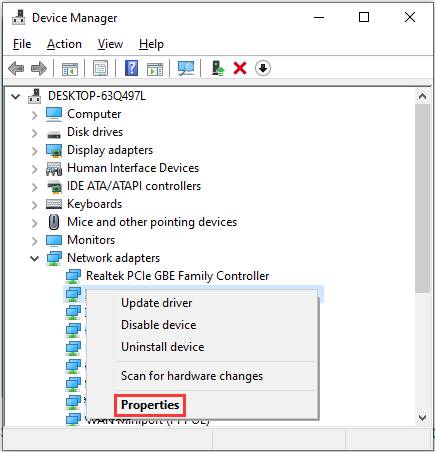
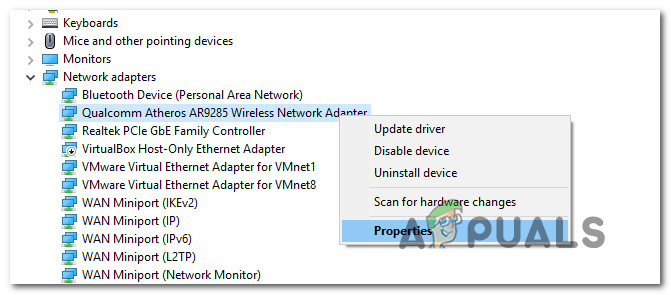
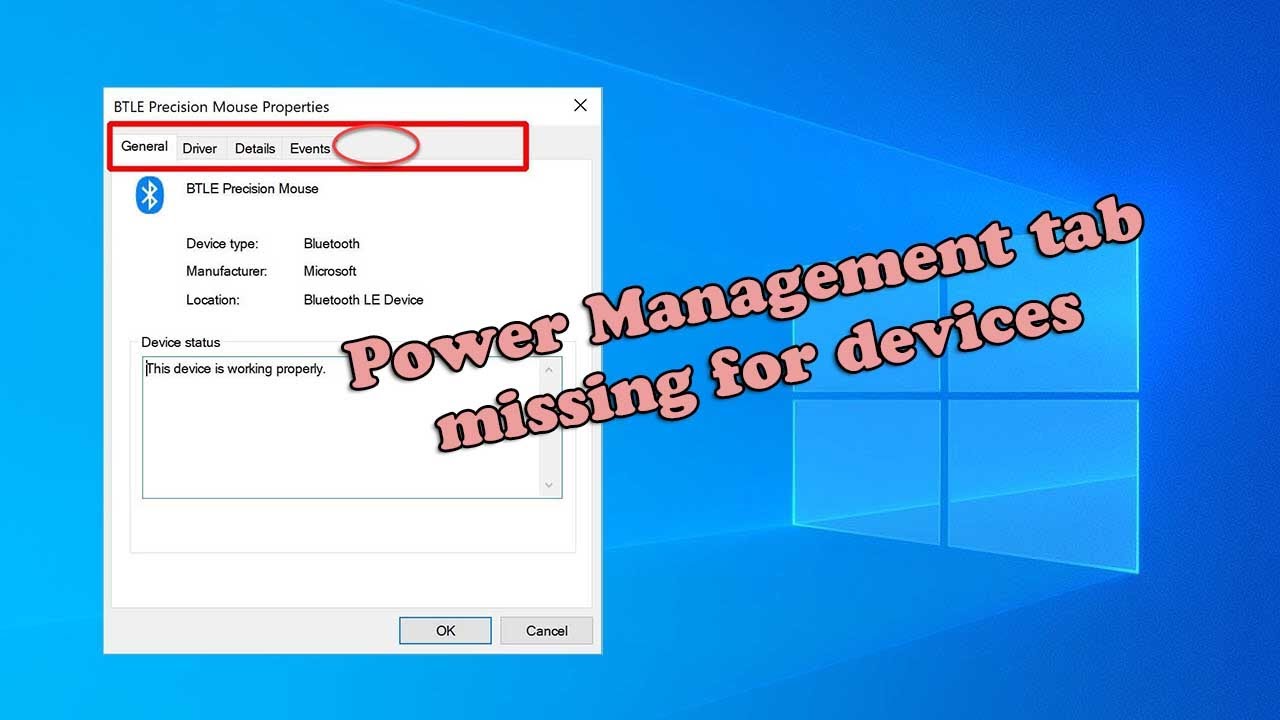
Step 1: Open Device Manager, expand your Network adapters and then right-click your wireless driver that you are currently using to choose Properties.
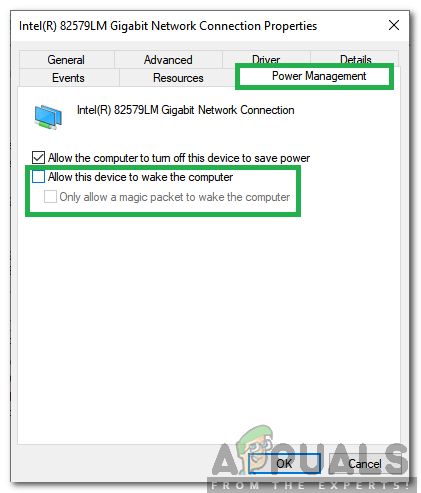
Step 2: A new window pops out, go to the Power Management tab and then check the box net to Allow this device to wake the computer. Click OK to save your changes.
Step 3: Restart your computer to check if the error is fixed.
Method 3: Perform System Restore
If you haven’t solved the problem after trying the two methods above and you have created a restore point in advance, then you can try to perform System Restore to deal with the problem. Using System Restore can make your computer go back to the previous normal state.
Here is a simple guide:
Step 1: Open the Run box, type rstrui in the box and press Enter to open the System Restore window.
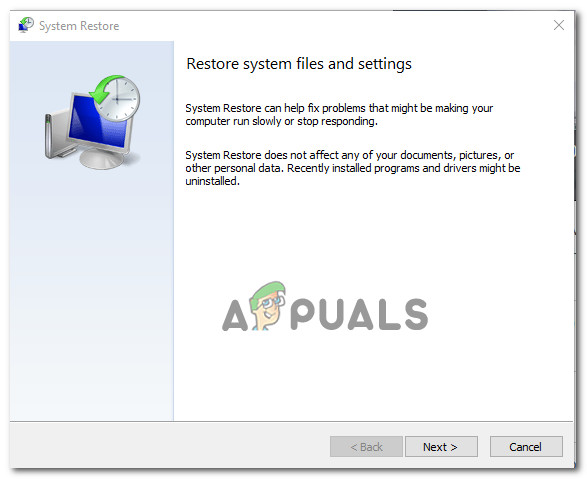
Step 2: In the pop-out window, click Next. Then choose s system restore point from the list and click Next.
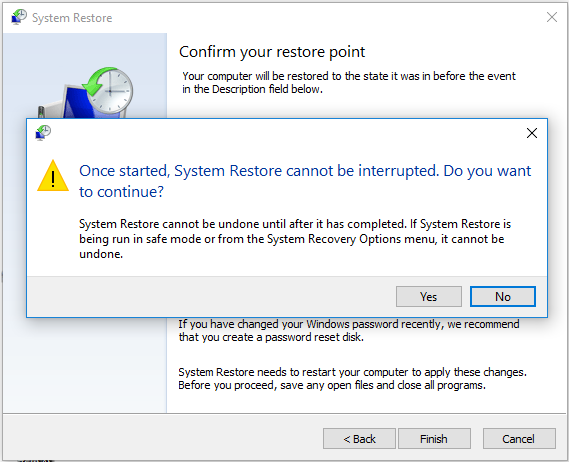
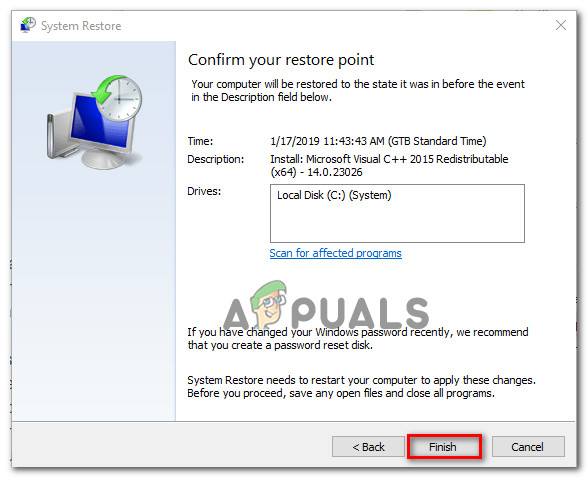
Step 3: Confirm your restore point and then click Finish. Read the message saying that “Once started, System Restore cannot be interrupted. Do you want to continue?”, then click Yes.
Step 4: Restart your computer and then check if the error is fixed.
Note: If you haven’t created a system restore and the BSOD caused by rtwlanu.sys still appears, then you should perform a clean installation of Windows, read this post – How to Install Windows 10 on a New Hard Drive (with Pictures) to get detailed instructions.
Bottom Line
How to fix Blue Screen of Death caused by rtwlanu.sys? This post introduced 3 efficient methods to you with detailed instructions. So if you meet the error, try the methods mentioned in this post.
About The Author
Position: Columnist
Author Sonya has been engaged in editing for a long time and likes to share useful methods to get rid of the common problems of Windows computers, such as Windows Update error. And she aims to help more people to protect their data. What’s more, she offers some useful ways to convert audio and video file formats. By the way, she likes to travel, watch movies and listen to music.
Several Windows users have been struggling to resolve an issue that is causing constant BSOD that point towards the rtwlanu.sys as the file causing the issue. Most users that are encountering this issue are reporting that the crash typically happens when they try to put their machine on Sleep or Hibernation. Aside from the failed object rtwlanu.sys, the Blue Screen also points towards several different Stop codes including “Driver IRQL Not Less or Equal”, “System Thread Exception Not Handled” and “Driver Unloaded Without Canceling Pending Operation”.
The issue is mostly reported to occur on Windows 10, but there are reported cases of the problem happening on Windows 7 and Windows 8.
What’s causing the BSOD triggered by rtwlanu.sys?
We investigated this particular issue by looking at various user reports and analyzing various repair strategies that other users in a similar scenario have successfully implemented to stop the BSODs from occurring.
As it turns out, several different culprits might trigger this behavior. Here’s a list with potential culprits that might be responsible for this BSOD critical crash:
- Corrupted Network WLAN driver – One of the most common scenarios that will spawn this type of BSOD is a corrupted network Driver. Realtek drivers are often reported to cause this behavior on Windows 10. If this scenario is applicable, you should be able to resolve the issue by uninstalling the corrupted network driver using Device Manager and replace it with a dedicated driver or with a generic Windows driver.
- WLAN driver is not permitted to wake the machine – If you’re getting BSODs while trying to put/wake your computer from Sleep or Hibernation, chances are this behavior is occurring because WLAN is not configured to wake the computer. This behavior can be fixed by accessing the Power management settings and permitting the device to wake the computer up.
- System file corruption – Corrupted operating system files can also be responsible for a critical crash of this kind. In this case, you can resolve the issue either by using a System Restore point or by refreshing all Windows components with a clean install or repair install.
If you’re currently struggling to resolve this error message, this article will provide you with several potential repair strategies. Down below, you’ll find a series of troubleshooting strategies that other users in a similar scenario have successfully applied to resolve the issue. Each of the potential fixes mentioned below is confirmed to be effective by at least one affected user.
To remain as efficient as possible, we advise you to follow the methods below in the same order as we arranged them in (by difficulty and efficiently). Eventually, you should stumble upon a fix that should fix the BSOD (or at least help you identify the cause) regardless of the culprit that’s causing the problem.
Method 1: Uninstall the corrupted Network driver
As it turns out, this issue is most commonly linked to a corrupted Network driver. There’s one particular driver (Realtek RTL8723AU Wireless LAN 802.11n USB 2.0 Network Adapter) that is often pinpointed as the culprit by many users that we’re struggling to resolve this type of BSOD.
If this scenario is applicable (You’re using Realtek drivers for your wireless connection), there’s a high chance that you will be able to resolve the issue by uninstalling the driver responsible for the crash and install the dedicated one according to your motherboard manufacturer or let Windows install a generic one.
Here’s a quick guide on uninstalling the driver responsible for the crash to resolve the rtwlanu.sys BSOD:
- Press Windows key + R to open up a Run dialog box. Then, type “devmgmt.msc” and press Enter to open up Device Manager.

Typing “devmgmt.msc” in the run prompt. - Once you’re inside Device Manager, scroll down to Network adapters and expand the drop-down menu. Next, right-click on the Realtek Wireless driver and choose Uninstall Device from the newly appeared context menu.

Uninstalling the Realtek network driver - Click Ok at the confirmation prompt, then restart your computer.
- At the next system startup, Windows should have already installed the generic driver for Wireless, so you should no longer be encountering the issue. But if you want, you can also download the dedicated WLAN driver according to your motherboard manufacturer.

Downloading the dedicated WLAN driver - Repeat the action that was previously causing the BSOD and see if the issue has been resolved.

If you’re still facing BSOD crashes pointing towards the rtwlanu.sys file, move down to the next method below.
Method 2: Changing the LAN Settings
Other users that were also struggling to resolve this issue have managed to stop the BSOD crashes from occurring by changing the default LAN behavior to allow the Network adapter to wake the computer up at any given moment.
This fix is especially useful in situations where you’re encountering the problem when you put your computer on Sleep or Hibernate and has been confirmed by dozens of users.
Here’s a quick guide on changing the default LAN behavior for the Network adapter to allow the device to wake the computer up:
- Press Windows key + R to open up a Run dialog box. Then, type “devmgmt.msc” and press Enter to open up the Device Manager utility.
Typing “devmgmt.msc” in the run prompt. - Once you’re inside Device Manager, scroll down through the list of installed devices and expand the drop-down menu associated with Network Adapters. Then, right-click on your network adapter and choose Properties from the newly appeared context menu.

Accessing the Properties screen of the Network Adapter - Inside the Properties screen, select the Power Management tab and then check the box associated with “Allow this device to wake the computer”.

Clicking on the power management tab and unchecking the “Allow this device to wake up the computer” option - After the change is enforced, restart your computer and see if the problem has been addressed.
If you’re still seeing BSOD crashes pointing towards the rtwlanu.sys file when putting your computer to Sleep or Hibernation, move down to the next method below.
Method 3: Perform a System Restore (if applicable)
Given the circumstances, it’s very likely that the issue is being caused by an underlying system file corruption that can’t be resolved conventionally. In these cases, a damage-limiting fix is to use System Restore.
This utility is designed to deal with critical errors by restoring the entire Windows installation to a healthy state in which the problem didn’t occur. But to be able to use this fix, your operating system needs to have previously created a snapshot that can be used to restore the Windows installation to a previous point in time. But if you haven’t modified the default behavior, your WIndows should be configured to save System restore snapshots regularly (after every installed Windows update).
But before you go ahead and try out this fix, keep in mind that this procedure will essentially revert any changes made since the snapshot was created. This means that any app installations, games and user preferences enforced after the snapshot was created will be lost.
If you decide to go forward with the system restore procedure, follow the instructions below:
- Open a Run dialog box by pressing Windows key + R. Next, type “rstrui” inside the newly created text box and press Enter to open up the System Restore window.

Opening the System Restore wizard via Run box - Once you manage to open the System Restore window, click Next to advance to the next screen.

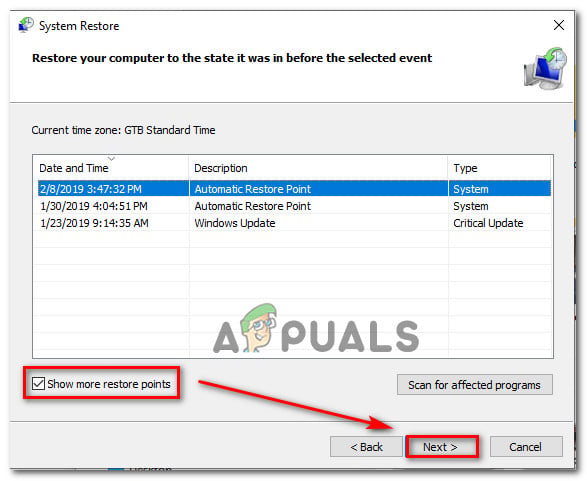
Using System Restore - At the next screen, start by checking the box associated with Show more restore points. After you do this, choose a Restore Point that is older than the apparition of the rtwlanu.sys BSOD and click Next.

Restoring your system to a previous point in time - Now that everything is set up, click on Finish to initiate the restoring process. This will restart your computer and mount the older machine state at the next system startup.

Starting the System Restore process - Once the next startup sequence is complete, see if you’re still encountering the BDSOD pointing towards the rtwlanu.sys file.

If you’re still encountering the same kind of critical crash, move down to the next method below.
Method 4: Perform a repair install or clean install
If none of the methods above have fixed the issue for you, chances are you’re dealing with a severe corruption issue that cannot be resolved conventionally. If this scenario applies to your current situation, the only chance of resolving the issue is to make sure that you reset all Windows components to remove any instance of corrupted system files.
If you want to go for the radical solution, a clean install does the job well, but it will remove any personal data including documents, media, games and other applications.
A more focused and less destructive approach is to refresh all your Windows components without affecting your data – this can be achieved by going for a repair install (in place repair). On top of allowing you to keep all your data, you can even keep some user preferences.
If you decide to go for a repair install, follow this article (here) for step-by-step instructions on performing this procedure.
Kevin Arrows
Kevin Arrows is a highly experienced and knowledgeable technology specialist with over a decade of industry experience. He holds a Microsoft Certified Technology Specialist (MCTS) certification and has a deep passion for staying up-to-date on the latest tech developments. Kevin has written extensively on a wide range of tech-related topics, showcasing his expertise and knowledge in areas such as software development, cybersecurity, and cloud computing. His contributions to the tech field have been widely recognized and respected by his peers, and he is highly regarded for his ability to explain complex technical concepts in a clear and concise manner.
- Rtwlanu.sys errors are random and can occur when using Wi-Fi heavily, such as when streaming on YouTube or downloading a file.
- This error seems to mostly affect Windows 10; however, there are times when PCs running Windows 7 or Windows 8 experience the same error.
- The error can occur if your network driver is corrupt or if the WLAN is not configured to wake up your computer.
Unraveling the Mysteries: Tackling the rtwlanu.sys BSOD Error
Understanding the rtwlanu.sys BSOD error
If you’re experiencing the rtwlanu.sys BSOD error on your Windows 10 computer, there are a few steps you can take to fix it. First, make sure you have the latest drivers for your WLAN adapter installed. You can download them from the Realtek Semiconductor Corporation website.
If that doesn’t solve the issue, try updating your Windows OS to the latest version. Sometimes, Windows updates can address and fix these types of errors.
If the problem persists, you can try running a system file checker scan to check for any corrupt system files. Open a command prompt as an administrator and type “sfc /scannow“. This will scan and repair any corrupted files it finds.
If none of these solutions work, you may need to seek further assistance from a professional or contact Microsoft support.
Methods to fix the rtwlanu.sys BSOD error
- Open Device Manager by pressing Windows Key + X and selecting Device Manager from the menu.
- Expand the Network adapters category.
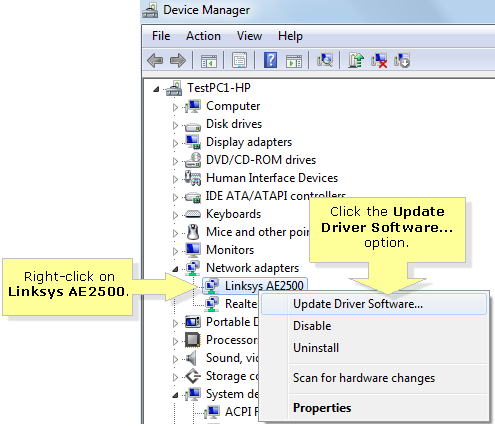
- Right-click on your wireless adapter and select Update driver.
- Choose the option to Search automatically for updated driver software.

- Wait for the process to complete and then restart your computer.
Method 2: Roll Back the Wireless Adapter Driver
- Open Device Manager by pressing Windows Key + X and selecting Device Manager from the menu.
- Expand the Network adapters category.
- Right-click on your wireless adapter and select Properties.
- Go to the Driver tab and click on Roll Back Driver.
- Follow the on-screen instructions to complete the rollback process.
- Restart your computer.
Method 3: Disable Power Saving for the Wireless Adapter
- Open Device Manager by pressing Windows Key + X and selecting Device Manager from the menu.
- Expand the Network adapters category.
- Right-click on your wireless adapter and select Properties.
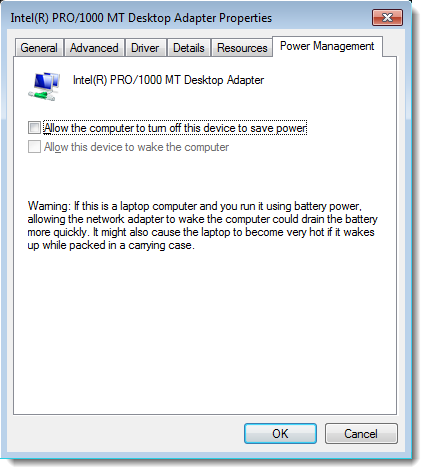
- Go to the Power Management tab.
- Uncheck the option that says Allow the computer to turn off this device to save power.
- Click OK and restart your computer.
Method 4: Run a System File Checker Scan
- Open Command Prompt as an administrator.
- Type sfc /scannow and press Enter.
- Wait for the scan to complete.
- If any corrupted system files are found, the tool will attempt to repair them automatically.
- Restart your computer.
Method 5: Perform a Clean Boot
- Press Windows Key + R to open the Run dialog box.
- Type msconfig and press Enter.
- In the System Configuration window, go to the Services tab.
- Check the box that says Hide all Microsoft services.
- Click on Disable all.
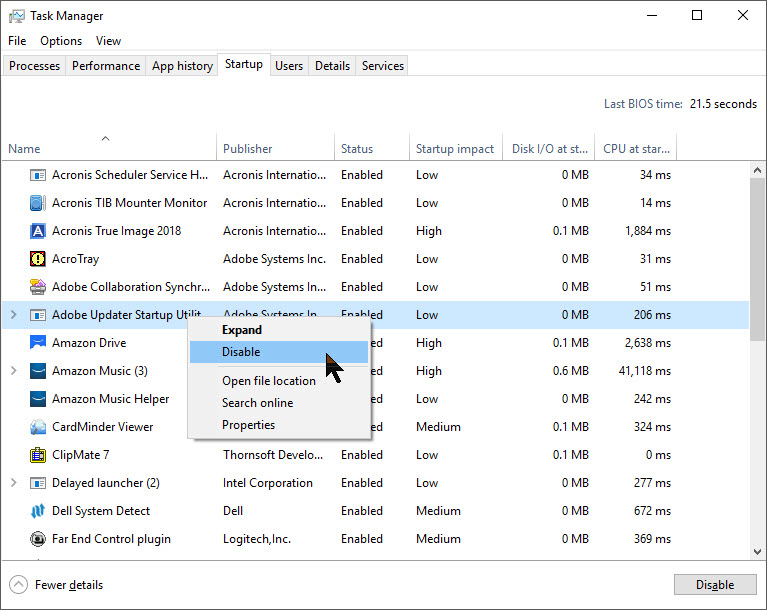
- Go to the Startup tab and click on Open Task Manager.
- In the Task Manager, disable all the startup programs.
- Close the Task Manager and go back to the System Configuration window.
- Click OK and restart your computer.
Scanning for malware and updating network drivers
To fix the rtwlanu.sys BSOD error, it’s important to scan for malware and update network drivers on your Windows device. Malware can often cause system errors and crashes, while outdated or corrupt network drivers can lead to connectivity issues. Follow these steps to resolve the problem:
1. Scan for malware: Use a trusted antivirus program to perform a full system scan. Remove any detected threats to ensure they are not causing the BSOD error.
2. Update network drivers: Visit the website of your network adapter’s manufacturer, such as Realtek Semiconductor Corporation, and download the latest drivers for your specific device model and Windows version.
3. Install the updated drivers: Once downloaded, double-click the driver file and follow the on-screen instructions to install it. Restart your PC after the installation is complete.
By scanning for malware and updating your network drivers, you can effectively address the rtwlanu.sys BSOD error and prevent future issues with your WLAN connectivity.
Configuring LAN settings and running system restore
1. Press the Windows key + R to open the Run dialog box.
2. Type “ncpa.cpl” and hit Enter to open the Network Connections window.
3. Right-click on your LAN connection and select “Properties.”
4. In the Properties window, scroll down and double-click on “Internet Protocol Version 4 (TCP/IPv4).”
5. Select “Use the following IP address” and enter the necessary details provided by your network administrator.
6. Click “OK” to save the changes.
To run a system restore, follow these steps:
1. Press the Windows key + R to open the Run dialog box.
2. Type “rstrui” and hit Enter to open the System Restore window.
3. Click “Next” and choose a restore point before the BSOD error occurred.
4. Follow the on-screen instructions to complete the system restore process.
These steps should help resolve the rtwlanu.sys BSOD error. If the issue persists, consider updating your device drivers or seeking further assistance.
Cleaning up and optimizing your PC for better performance
| Cleaning up and optimizing your PC for better performance | |
|---|---|
| Step | Action |
| 1 | Remove unnecessary startup programs |
| 2 | Uninstall unused applications |
| 3 | Delete temporary files and folders |
| 4 | Run a disk cleanup |
| 5 | Defragment your hard drive |
| 6 | Update device drivers |
| 7 | Scan for malware and viruses |
| 8 | Adjust visual effects for better performance |
| 9 | Disable unnecessary Windows services |
| 10 | Upgrade your hardware if necessary |
Mark Ginter
Mark Ginter is a tech blogger with a passion for all things gadgets and gizmos. A self-proclaimed «geek», Mark has been blogging about technology for over 15 years. His blog, techquack.com, covers a wide range of topics including new product releases, industry news, and tips and tricks for getting the most out of your devices. If you’re looking for someone who can keep you up-to-date with all the latest tech news and developments, then be sure to follow him over at Microsoft.
You are here because you are struggling with a BSOD related to the rtwlanu.sys file. The error seems to mostly be affecting Windows 10; however, there have been cases of PCs running Windows 7 or Windows 8 encountering the same error. Most people report that rtwlanu.sys BSOD errors are random and may happen when the Wi-Fi is under high load, for instance, while streaming on YouTube or downloading a file. In today’s post, you will learn how to fix “rtwlanu.sys is missing or corrupt” on Windows 10.
What Is Rtwlanu.sys?
Rtwlanu.sys can be described as Realtek WLAN USB NDIS Driver. It’s a system file used as a driver for wireless WLAN adapters. The file, developed by Realtek Semiconductor Corporation, enables communication between the Windows OS and WLAN Wireless USB 2.0 Adapter.
Rtwlanu.sys was first released in 2012 for the Windows 8 OS. In 2015, a newer version was released for the Windows 10 operating system.
Is Rtwlanu.sys Safe?
SYS files, also known as Windows system files, are developed to be used in DOS and Windows operating systems. Such files contain hardware configurations and device drivers for the system, and they are required by the system to perform its functions accordingly.
If you’re wondering if the rtwlanu.sys file is safe, then the answer is “YES”. According to investigations carried out by our technical team, no antivirus program detected the rtwlanu.sys file as malware. Normally, the file is located in C:/Windows/system32/drivers.
Possible Causes of the Rtwlanu.sys Error on Windows 10
Like we mentioned earlier, rtwlanu.sys is needed by the Windows OS to perform its functions as required. But what if rtwlanu.sys could not be found, causing the blue screen of death error? In most cases, rtwlanu.sys BSOD errors occur after the installation of new hardware or software. The new installation could have caused conflicts in the registry or system files.
Other possible reasons include:
- A corrupted system file – system file corruption is known to cause system crashes and BSOD errors. If you suspect this to be the case, you may have to restore your system to a state before the error first occurred or perform a clean install.
- WLAN is not configured to wake the computer – if the BSOD errors happen when trying to wake your PC or put it to sleep or hibernation, then configuring WLAN to wake your device can resolve the issue.
- A corrupted or incompatible Network WLAN driver – if your network driver is corrupted, then it’s highly likely to be the cause of the BSOD errors. Many users have reported running into issues related to Realtek drivers. If that’s the case, then installing the latest drivers should eliminate the BSOD errors.
- sys has been deleted by mistake – system files are important, and if they are mistakenly deleted by someone, a virus or other software, then it could explain why you’re getting rtwlanu.sys BSOD errors.
- Software-related issues – Microsoft encourages Windows users to always install the latest Windows updates to keep the machine running smoothly. However, this may not always be the case. Some updates may cause software or hardware conflicts, interfering with the normal operation of the system. Likewise, if you performed a failed Windows update, you risk running into BSOD errors.
How to Fix the Rtwlanu.sys BSOD on a Windows PC
Before you start making hardware or software changes to your Windows 10 device, we recommend trying the following simple troubleshooting steps:
Scan Your PC for Malware
A malware infection can cause all kinds of damage to your PC, including software and system file corruption. The only way to ensure that your system is protected is to install a powerful anti-malware tool that will effectively detect and contain any form of malware attack. Regularly scanning your computer keeps your sensitive data and online activity safe.
Is your computer running slow or suffering system glitches? If so, it may need maintenance. Try running a dedicated PC optimization tool to check the health of your PC and apply the necessary fixes.
Therefore, scan your PC first to check if malware is responsible for deleting or corrupting system files or software, causing rtwlanu.sys BSOD errors. If the malware scan doesn’t raise any red flags, try the next troubleshooting step.
Connect Your Network Adapter to a Different PC
Have you tried using your network adapter on a different PC? This way, you can tell whether the problem is specific to your PC or adapter. If the adapter works fine on other PCs, then your computer is to blame for the errors. In such a case, try one or all of the solutions provided below until you find the one that works for you.
Fix 1: Reinstall Your Network Driver
If you’re using Realtek drivers, your network driver may be corrupted. In that case, you need to uninstall the corrupted network driver and install a new driver. You can reinstall the Realtek driver manually, automatically or using Device Manager.
Option 1: Manually
Here, you need to check your PC to determine the driver version and model. You will then go to the official site of your motherboard manufacturer and search for Realtek WLAN Driver for Windows 10 (or your Windows version) and download the latest drivers specifically dedicated to your system. Next, open the location where you saved the downloaded file and install it.
This is a complicated process, and you’re likely to waste a lot of time trying to search for the correct drivers. Plus, if you mistakenly install the wrong drivers, then you risk running into more system issues.
Option 2: Using Device Manager
Device Manager makes it easier to update device drivers on your PC. Use the guide below to uninstall the corrupted Realtek driver and install a cleaner version:
- Press the Windows Key and type “Device Manager” (no quotes).
- Press “Enter” to launch “Device Manager”.
- Navigate to “Network adapters”, and expand it.
- Right-click “Realtek Wireless driver” and select “Uninstall device”.
- Click “OK” to confirm your action.
- Restart your PC. Windows will restart and automatically install the generic driver for Realtek Wireless.
Option 3: Automatically
The last option involves using a trusted driver updater to automatically update your network driver. Auslogics Driver Updater is an intelligent tool that scans your system to determine the type of drivers installed, those that need updating, and those drivers that are damaged or missing. The program then downloads the latest driver versions directly from the official manufacturers’ websites and then automatically installs them on your computer.
Auslogics Driver Updater gives you a detailed report on the drivers installed on your PC and shows you when the drivers were installed and the available updates. You can opt to update your device drivers one by one or all of them at once by clicking the “Update all” button. Additionally, the tool backs up your drivers to make it easier to revert the changes if you run into issues after installing the new driver versions. You can even schedule the program to run automatic maintenance so that you never miss out on updates whenever they are released.
After installing the updates, repeat the action that triggered the rtwlanu.sys BSOD error and check if it has been resolved. If not, move to the next solution below.
Fix 2: Run the SFC Scan
If the error is due to system file corruption, Windows has a built-in utility that checks for and repairs corrupted system files. The System File Checker tool can be used across all Windows versions. To run the SFC scan, here are the steps to follow:
- Hit the Win + X keyboard shortcut, and select “Command Prompt (Admin)”.
- Click “Yes” in the permission box to open the “Command Prompt” window.
- Type in scf /scannow, and then press “Enter”. This operation activates the System File Checker tool to scan system files and check if there are any rtwlanu.sys-related issues.
- Follow the on-screen prompts, where applicable, to complete the process. The scan might take a while, so wait patiently and don’t interrupt the process.
If this fix fails, move to the next solution below.
Fix 3: Configure LAN Settings
This fix applies if you experience the rtwlanu.sys BSOD error when trying to put your PC to Sleep or Hibernate mode. If you haven’t configured LAN to wake the computer or put it to Sleep or Hibernate mode, then you can adjust the settings to check if it resolves the problem.
To configure LAN settings, follow these steps:
- Open the “Run” dialog box by pressing the Win +R shortcut, type in msc, and then press “Enter”.
- Once “Device Manager” opens, navigate to “Network adapters” and expand it.
- Right-click your network adapter and open “Properties”.
- Go to the “Power Management” tab, and check the box next to “Allow this device to wake the computer”.
- Click “OK” and reboot your PC.
Check if the BSOD error associated with rtwlanu.sys has been resolved. If the error is still giving you problems, move on to the next fix.
Fix 4: Update Windows
You probably have done this already, but you must ensure that all pending Windows updates have been installed. Microsoft releases Windows updates periodically, and by ensuring that your device is up to date, you avoid running into issues like the BSOD error associated with rtwlanu.sys.
To run Windows Update, follow these steps:
- Press the Windows Key or click “Start”, and type in Update.
- Select “Check for updates” from the results.
- Click the “Check for updates” button and let Windows search for and install all pending updates. If updates are available, Windows will automatically install them on your device.
- Restart your computer after the update is complete.
Check if the error has been resolved. If not, proceed to the next solution below.
Fix 5: Run System Restore
Normally, when faced with a critical error like a Blue Screen of Death and unable to find a solution, it’s advisable to restore your system to a state when everything was working fine. System Restore is a Windows tool that allows users to revert changes made to the system on specific dates.
However, to perform a system restore, your operating system needs to have created a restore point before the BSOD error first occurred. Luckily, Windows is configured to automatically save backup images or restore points regularly, especially after every Windows update that gets installed successfully. Remember, performing a system restore clears any changes made since the restore point was created. In other words, all apps, games, and software installed after the snapshot was created will be erased.
So, if you have installed important apps or games, you can note them down so that you can reinstall them once you finish restoring your system to a previous state.
To run System Restore, follow these steps:
- Use the Win + R keyboard shortcut to launch the “Run” dialog box.
- Type in rsturi and click “OK”.
- Once the “System Restore” window opens, click “Next”.
- On the next window, you’ll be required to select a restore point. It’s important to try to recall the exact date when you first encountered the error. This way, it will be easier to select a date and time registered before the event happened. Click “Show more restore points” for more options.
- Once you’ve selected a restore point, click “Next”.
- Click “Finish” to trigger Windows to commence the system restoration process. Wait patiently until the process completes successfully.
At the next Windows startup, check if you’ll still run into the rtwlanu.sys BSOD error. If the problem persists even after performing a system restore, you might have to install Windows afresh.
Clean Up and Optimize Your PC
Some of the common PC errors, including certain BSOD errors, can be avoided if you run regular PC maintenance. Junk files are a PC’s worst nightmare. They take up disk space and negatively affect your PC’s speed and performance. Additionally, corrupt keys and invalid entries in the Windows Registry can cause stability issues, and your system might crash constantly.
To improve your system’s speed and restore stability, you need an effective optimization tool like Auslogics BoostSpeed. The program is loaded with several advanced modules that ensure your PC is running as fast as when you first bought it. Among other functions, Auslogics BoostSpeed can help protect your privacy, defragment your HDD, clean up junk files, improve internet speeds, clean the registry, and optimize startup items.
It’s the tool that has it all in terms of tweaks and optimization features. Running the program regularly is guaranteed to keep your PC at peak levels. This way, you can enjoy faster browsing, play games without issues, and get rid of BSOD errors caused by rtwlanu.sys.
We hope you find the solutions above on how to fix the rtwlanu.sys BSOD on a Windows PC useful. Please let us know the fix that worked for you by commenting below.
It is only natural to panic when your computer suddenly crashes and you see a Blue Screen of Death (BSOD) error. What will you do when you encounter the rtwlane.sys BSOD error? Well, you must first remain calm. It is worth noting that this problem is not uncommon. As such, it is easy to find solutions that will help you get rid of the rtwlane.sys BSOD error.
Typically, this issue is accompanied by the error code ‘DRIVER_IRQL_NOT_LESS_OR_EQUAL’. The system file has something to do with the Realtek PCIE Wireless LAN PCI-E NIC driver. In this article, we will teach you how to fix the rtwlane.sys error in Windows 10. In most cases, all you need to do is update the Realtek Wireless LAN card driver on your PC.
Solution 1: Using Device Manager to Update your Realtek PCIE Wireless LAN PCI-E NIC Driver
One of the options for updating your Realtek PCIE Wireless LAN PCI-E NIC is using the Device Manager on your computer. To do that, simply follow the instructions below:
- Right-click the Windows icon on your taskbar.
- Select Device Manager from the options.
- Look for Network Adapters, then double-click it.
- Right-click the Realtek PCIE Wireless LAN PCI-E NIC driver, then choose Update Driver.
- Click the ‘Search automatically for updated driver software’ option.
Your system will automatically detect if your driver needs an update. However, it is possible for Windows to tell you that you have the best drivers already installed. If this is the case, then you have to manually search for the latest drivers on the manufacturer’s website. Since this process is tedious, time-consuming and complicated, we do not recommend doing it.
What we advise is using a reliable program like Auslogics Driver Updater. Once you activate this tool, it will automatically detect your system and look for the latest, manufacturer-recommended drivers for it. The best part is, Auslogics Driver Updater will take care of all problematic drivers on your computer. So, once the process is done, you can expect your PC to perform more efficiently.
Solution 2: Checking your Hardware
It is possible for the rtwlane.sys BSOD error to appear due to faulty hardware. As such, we recommend checking whether your hardware is working properly. Some users reported that they had been able to get rid of the rtwlane.sys BSOD error after replacing their sound card. Apparently, a faulty sound card had been causing the issue.
Fix this issue quickly
You can try using a safe and totally free tool developed by the Auslogics team of experts.
A few simple steps to troubleshoot the issue:
Download the tiny Auslogics TroubleShooter tool.
Run the application (no installation is needed).
The app will check for the issue mentioned in the article. When the scan is done, check that this is the issue you were looking to solve and click ‘Apply now’ to apply the recommended fix.
You can use the app to troubleshoot other malfunctions for free by simply typing in a brief description of the issue your PC is experiencing. Or you can scan your PC for performance issues using the My Scanner tab.
Solution 3: Resetting Windows 10
If you’ve tried our solutions above and the error still persists, your last resort is to reset your operating system. This is the appropriate solution if the source of the problem is your software. Before you proceed, you must remember that this solution will delete all the files in your system drive. So, we recommend creating a backup first.
If you’re not yet ready to reset your system, you can try using a trusted antivirus to scan your system for corrupted or infected files. There are many security programs out there, but one of the most effective ones is Auslogics Anti-Malware. This tool can detect threats and attacks you’d never suspect existed. Moreover, it can also spot security issues that your main antivirus might miss. On the other hand, if you prefer resetting your OS, you can do so by following the instructions below:
- Click the Windows icon on your taskbar, then click the Power button.
- Hold the
Shift Keywhile clicking Restart from the menu. - Follow this path: Troubleshoot ->Reset this PC ->Remove Everything.
- If prompted, insert the Windows 10 installation media.
- Choose your Windows version, then select the ‘Only the drive where Windows is installed’ option.
- Select Just Remove Files.
- Once you’re ready to start the process, click Reset.
- Follow the on-screen instructions to complete the process.
Can you suggest other solutions for this error?
Share your ideas in the comments below!