
В этой статье посмотрим, как с помощью встроенных средств на базе сервера с Windows Server 2012 R2 организовать простой межсетевой маршрутизатор. И хотя на практике маршрутизаторы на базе компьютеров используются довольно редко (аппаратные маршрутизаторы, как правило, имеют более высокую производительность, надежность и несколько дешевле выделенного компьютера), в тестовых или виртуальных средах, когда нужно срочно настроить маршрутизацию между несколькими подсетями, маршрутизатор на базе Windows Server вполне себе приемлемое решение.
Итак, в роли маршрутизатора будет выступать сервер с ОС Windows Server 2012 R2. Сервер имеет 2 сетевых интерфейса: физических или виртуальных, если сервер запущен на гипервизоре. Каждому интерфейсу сервера назначен выделенный IP адрес из различных подсетей. Для удобства, мы переименовали названия сетевых интерфейсов в Панели управления сетями и общим доступом:
Сетевая карта 1 (сетевая карта подключена во внутреннюю LAN сеть):
Имя: LAN
IP: 10.0.1.1
Сетевая карта 2 (сетевая карта во внешней сети ):
Имя: Internet
IP: 192.168.1.20
Наша задача – организовать маршрутизацию пакетов из локальной подсети 10.0.1.0 во внешнюю подсеть 192.168.1.0 (как правило, такая сеть имеет выход в интернет) через NAT. Такую схему можно реализовать в случае необходимости организации доступа клиентов из внутренней сети в интернет.

Маршрутизация в Windows Server 2012 R2 реализуется на базе роли Remote Access (RRAS). Данная служба появилась еще в Windows Server 2003 и до текущей в версии Windows Server ее интерфейс и процесс настройки практически не изменился.
В первую очередь нужно установить роль Remote Access. Для этого откроем консоль Server Manager, выбираем Manage -> Add Roles and Features, находим и отмечаем роль Remote Access, в ее составе выбираем службу Routing, и, соглашаясь со всеми предложенными по умолчанию компонентами, запускаем ее установку (Install).

После окончания установки открываем консоль Routing and Remote Access (rrasmgmt.msc), щелкаем по имени сервера (с красной стрелкой) и выбираем Configure and Enable Routing and Remote Access.

В открывшемся окне выбираем пункт Network Address Translation (NAT).
")
На следующей шаге (NAT Internet Connection) нужно выбрать сетевой интерфейс, подключённый ко внешней сети / Интернету (в нашем примере это интерфейс Internet с ip 192.168.1.20). Этот интерфейс будет «публичным интерфейсом» нашего NAT роутера.

Далее будет предложено указать должен ли NAT роутер обеспечить клиентов внутренней сети сервисами DHCP и DNS. Как правило, этот функционал во внутренней сети уже имеется, поэтому в нем мы не нуждаемся.

На этом базовая настройка маршрутизации на Windows Server 2012 R2 завершена. Сервер уже должен выполнять маршрутизацию пакетов между двумя подключенными сетями и выполнять трансляцию сетевых адресов (NAT).
Чтобы в этом убедиться, в консоли RRAS откройте свойства сервера. На вкладке General показано, что IPv4 маршрутизация включена (т.е. пакеты IPv4 будут пересылаться с одной сетевой карты на другую).
Проверить работу маршрутизации можно, указав на клиентском компьютере во внутренней сети (к которой подключен интерфейс сервера LAN) в качестве шлюза IP-адрес сервера (10.0.1.1), и выполнить ping или трассировку маршрута к ресурсу, расположенному во внешней сети или интернете. Эти попытки должны быть успешными.

Примечание. Windows Server 2012 R2 поддерживает статическую маршрутизацию, протокол динамической маршрутизации RIPv2 и BGPv4. Поддержка OSPF была прекращена еще в Windows Server 2008.
В нашем случае на сервере осуществялется статическая маршрутизация. Если нужно добавить новый маршрут, щелкните ПКМ по Static Routes, выберите пункт меню New static route и создайте новое статическое правило маршрутизации.
Примечание. Статический маршрут также можно добавить из командной строки с помощью команд Route или netsh.
Помните пост о временном переключении WIFI в режим точки доступа? Конечно же нет, давно было. Вот он: habrahabr.ru/blogs/linux/122876.
Сегодня речь пойдёт не о точке доступа, а о режиме работы компьютера, в котором он выступает в качестве маршрутизатора. Это может пригодится в том случае, когда есть всего одна точка выхода в интернет, а компьютеров нужно подключить несколько. Или, например, интернет раздаётся по WIFI, есть один ноутбук с WIFI, а второе устройство имеет только Ethernet-интерфейс.
Имеем
— Ноутбук с Ubuntu 11.10 и беспроводным сетевым адаптером
— Беспроводной интернет
— Комьютер с Ethernet-интерфейсом
Задача
— Получить с компьютера доступ в интернет
Решение
До недавнего времени для решения поставленной задачи я копировал скрипты из топика про точку доступа и правил их. Но частая необходимость в таком доступе превратилась новый небольшой скрипт.
Первый скрипт установит необходимые пакеты, а именно dnsmasq, которвый выступает в качестве dns/dhcp-сервера.
install.sh
#!/bin/bash

# Install dns/dhcp server
apt-get install dnsmasq
# Stop installed service
service dnsmasq stop
# Disable autostart on boot
update-rc.d dnsmasq disable
И второй скрипт, который перводит ноутбук в режим роутера и обратно.
start.sh
#!/bin/bash

INT=eth0
EXT=wlan0
INT_IP=192.168.2.2
INT_RANGE=192.168.2.10,192.168.2.50

# Start
ifconfig $INT $INT_IP
sysctl net.ipv4.ip_forward=1
iptables -t nat -A POSTROUTING -o $EXT -j MASQUERADE
dnsmasq -d -zi $INT -F $INT_RANGE -C /dev/null -l /tmp/dnsmasq.leases

# Stop
iptables -D POSTROUTING -t nat -o $EXT -j MASQUERADE
sysctl net.ipv4.ip_forward=0
Протестировано в Ubuntu 11.10, но может быть использовано в любом дистрибутиве, в котором доступен для установки dnsmasq.
Приятных экспериментов!
UPDATE:
Хабравчане не одобряют, переехало на Help Linux.
Если эта публикация вас вдохновила и вы хотите поддержать автора — не стесняйтесь нажать на кнопку
Many of us are unaware that our laptops, like our smartphones, can broadcast Wi-Fi. We are not likely to concern ourselves with the feature when we are at home and using our Wi-Fi routers. However, it can come in handy when trying to get our devices online when we are on the go.
This article will look at creating a virtual router in Windows 10 and Windows 11. You will learn how to use your laptop to generate a Wi-Fi hotspot and share your internet connection with other devices.
Why Create a Virtual Wireless Router?
Turning your laptop into a virtual router is helpful in several scenarios. They include:
- Extending the range of your internet signal
- Staying in a hotel room or at an airport
- Locations that only have a wired Ethernet connection
Can My Windows Computer Be Turned Into a Virtual Router?
Before initiating the process, it’s important to make sure that your device can broadcast Wi-Fi signals. It’s easy to verify this. Simply follow the steps below:
- Press the Win+S shortcut keys.

- Type in “cmd” in the search bar.
- Scroll to “Command Prompt” and click on that.
- Type netsh wlan show drivers into Command Prompt.

- Click “Enter.” Your network drivers will be displayed.

- Ensure that “Yes” follows “Hosted network supported.”


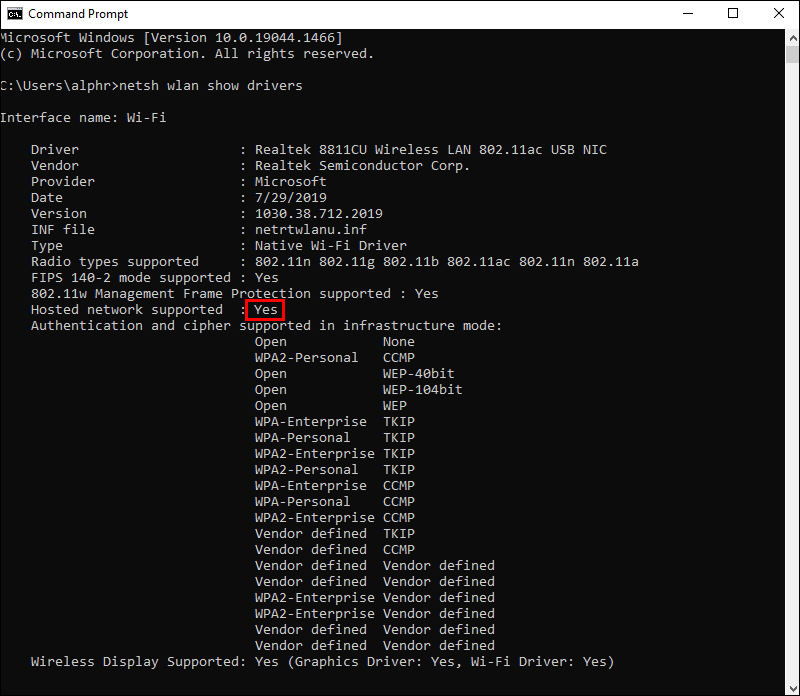
This means that you’re good to go and can broadcast a Wi-Fi signal in Windows 10. If the statement is followed by “No,” however, you will unfortunately not be able to create a virtual router using your device.
Microsoft Windows has a virtual Wi-Fi tool to create and manage a virtual wireless network. You, therefore, will not need to buy additional software to activate the Wi-Fi hotspot feature.
However, you may find it easier to use software to set up your virtual router in Windows 10. Here, we will show you two methods you can use to turn your laptop into a Wi-Fi hotspot.
Setting Up Virtual Router Using Software
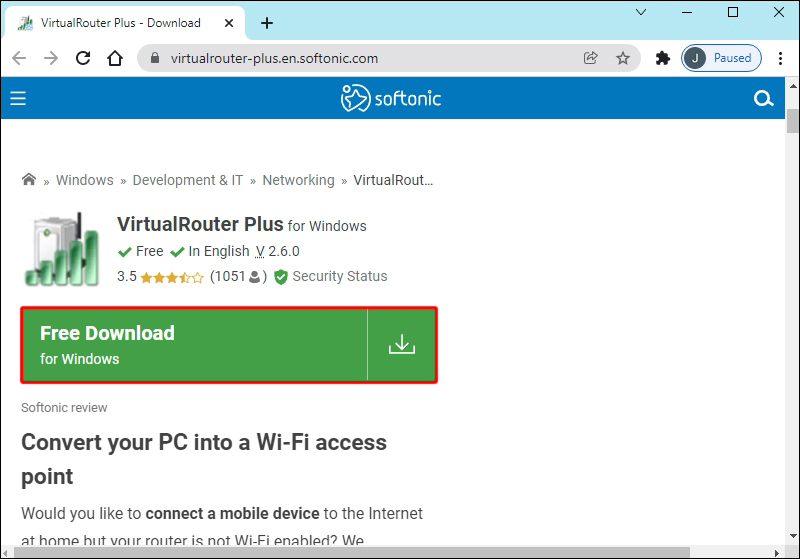
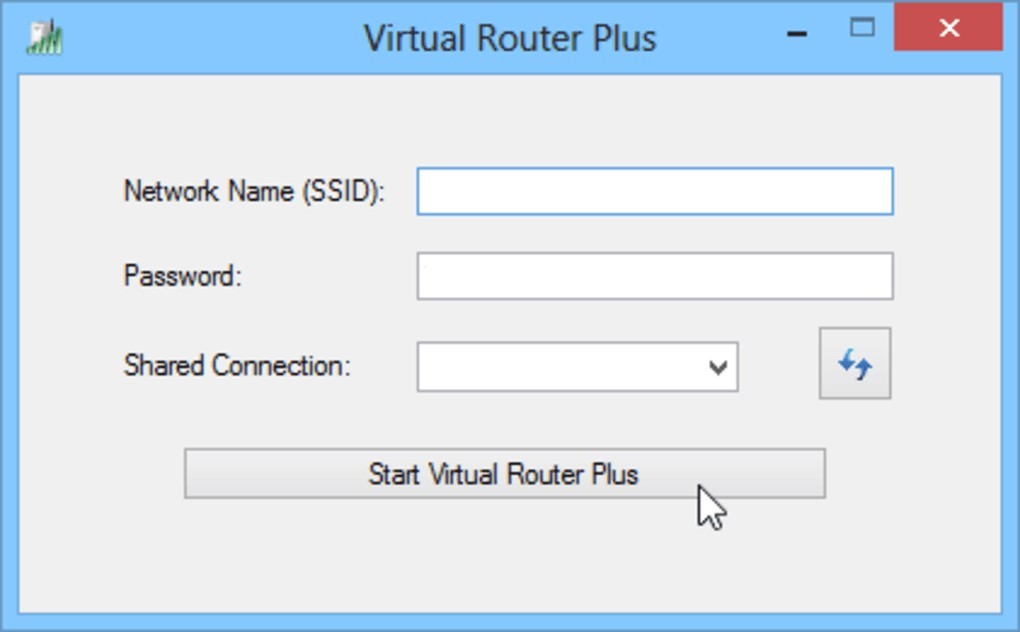
One of the easiest ways to create a hotspot on Windows 10 is using third-party software. Programs like Virtual Router Plus can be downloaded onto your computer and utilized to automate the process.
Follow the steps below to set up your virtual router using software:
- Download your preferred virtual router software.

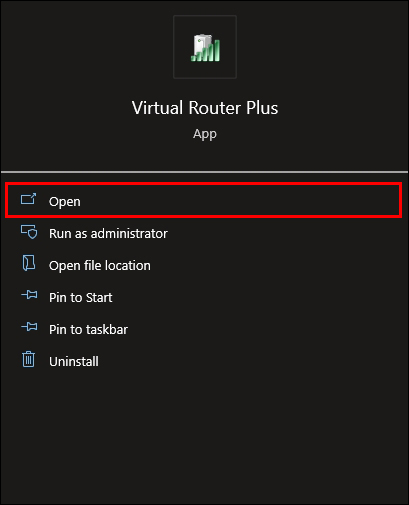
- Install and open the program.

- Most programs will give you a menu where all you need to do is input the name of the network and the password.

- Launch the program.


Your network should now be visible to other devices.
Setting Up Virtual Router Using the Command Prompt
If you would like to manually create a virtual router for Windows 10, you can do this using the Command Prompt. Follow the below steps:
- Type in “cmd” in the Windows search bar.
- Open Command Prompt as “admin” by right-clicking on it.
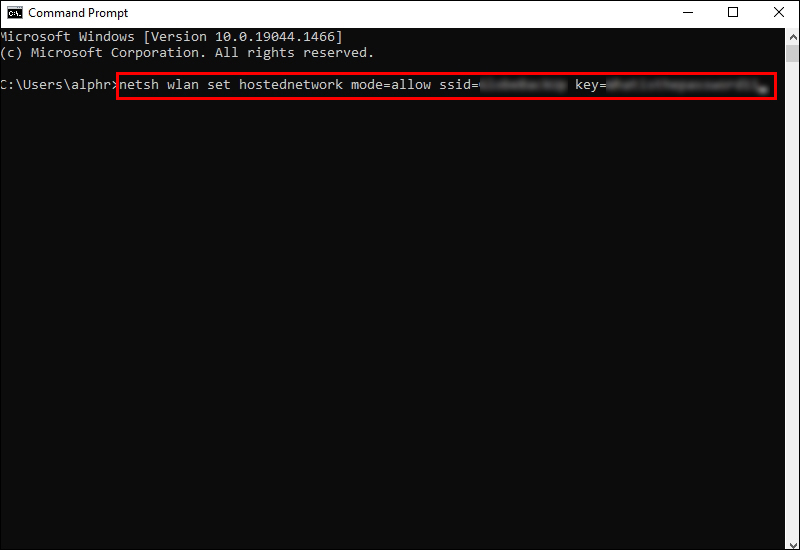
- To input the settings of your virtual router, type out the command below:
netsh wlan set hostednetwork mode=allow ssid=XXXXX key=YYYYY
In place of XXXXX, type in the name of your network.
In place of YYYYY, type in your password.
- Press “Enter.”
- You can now launch your virtual router using the command below:
netsh wlan start hostednetwork
- You can disable the virtual router using the command below:
netsh wlan stop hostednetwork


You have now successfully set up your virtual router on Windows 10.
Troubleshooting
If you encounter problems starting the network, your drivers might require an update.
To update your drivers, follow the guidelines below:
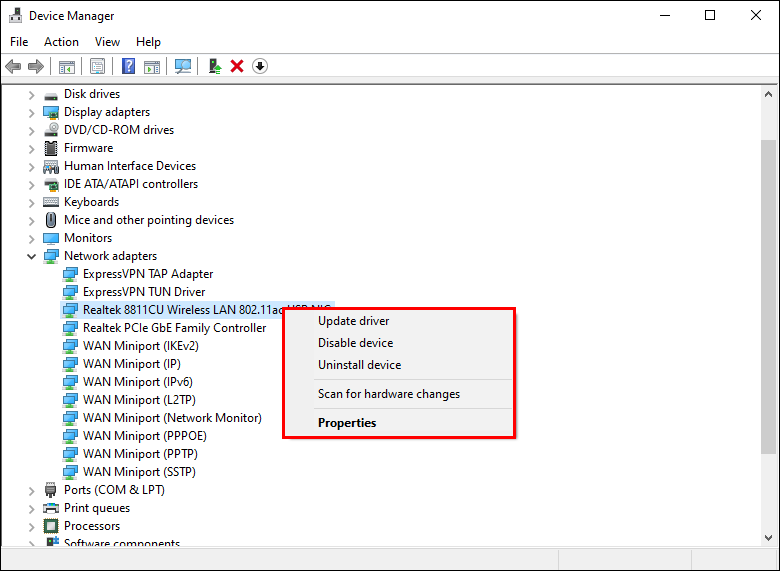
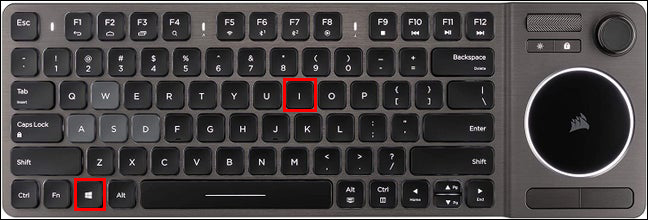
- Press Win+X and select “Device Manager.”

- Click the arrow pointing to “Network Adapters.” It will display a list of the network adapters available.
- Find your primary network adapter and right-click on it.

- Select “Update Driver Software” to check if any updates are available.

- Update the software if that is required.


How to Setup a Virtual Router in Windows 11
You can use two different methods to turn your Windows 11 device into a virtual router.
The first is through “Settings.”
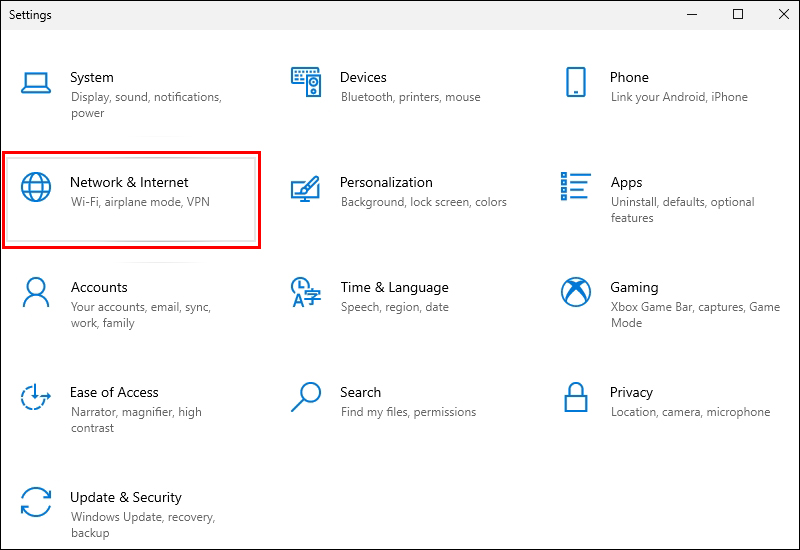
- Press Win+I to open “Settings.”

- Click on “Network & Internet.”
- Toggle to turn on the “Mobile Hotspot” option on the right pane.
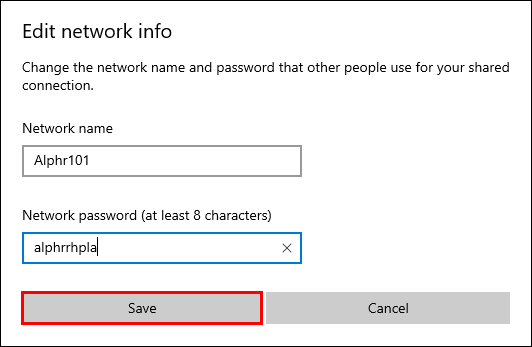
- Within the “Mobile Hotspot” category, click “Edit” to configure the network name and password.
- Input the name and password of your choice and then click on “Save.”


You have now successfully set up a virtual router in Windows 11.
If you would prefer to use a third-party app to set up your virtual router, then these are the steps to follow:
- Download and install your third-party app.
- Go to your control panel and navigate to “Network & Internet” and then “Network & Sharing Center.”
- Click on “Change Adapter Settings.”
- Right-click on the network you are connected to and then click on “Properties.”
- Click on the “Sharing” tab and select “Allow other network users to connect using this computer’s internet connection.”
- Click on the “Apply” button. Your computer’s network can now be shared.
- On your Windows 11 computer, open the third-party app.

- Select the network for which you enabled sharing.
- Launch the app.


Your device should now be able to work as a virtual router in Windows 11.
Setting Up VPN Connection on a Virtual Router in Windows
Some devices don’t have the built-in software required to set up Virtual Private Network (VPN) connections. These include gaming devices, TV players, etc. You can, however, use a virtual router to connect them to VPN networks. If this is why you want to create a virtual router in Windows, follow the guidelines below to connect your devices.
- Download and install your VPN software. Make sure that it’s not connected.

- Go to “Settings” and select “Mobile Hotspot.”
- Click on “Share my internet.”
- Select a suitable name and password for your network.

- Scroll to “Related Settings” and click on the “Change Adapter” option.
- Make a note of the “Wi-Fi” and “Local Area Connections” that have the green bars indicating they are connected.

- Right-click on the option that says “XXXX TAP Adapter.” The XXXX will be the name of your preferred VPN software.
- Click on the “Sharing” tab and go to “Allow other users to connect.”
- From the dropdown menu, select the “Local Area Connection” noted down earlier.
- Click on “OK.”
- Now, you can open your VPN program and connect to your desired server. Your virtual router will now work only when the VPN is connected and turned on.

- On your device, you can now connect to the virtual router.


Creating a Virtual Router in Windows
Turning your laptop or PC into a virtual router can come in very handy, especially when you are in a pinch. Learning how to set up a virtual router in Windows means you no longer have to worry about finding a wireless router when looking to extend the range of your internet signal. You can also easily connect one or more devices to one internet source while traveling.
Have you encountered problems connecting to the internet while on the road? Let us know in the comments section below.
Маршрутизатор – это устройство, выполняющее задачи локальной сети. Можно даже использовать домашний компьютер в качестве маршрутизатора и также подключать другие устройства в сеть.
Содержание
- Конфигурация ПК
- Подключение через дополнительную сетевую карту
- Раздача Wi-Fi
- Хот-спот
- CMD
- Программы
- Заключение
- Задать вопрос автору статьи
Конфигурация ПК
Чтобы компьютер обеспечил доступ к интернету для других устройств ему нужен Wi-Fi адаптер или дополнительная сетевая карта. Первый можно настроить на раздачу интернета для мобильных устройств, второй – для подключения еще одного компьютера, ноутбука, NAS-хранилища и даже роутера (если того требует схема нахождения в локальной сети).
Главный Ethernet-кабель провайдера от модема должен быть подключен в LAN-порт сетевой карты или материнской платы. На компьютере должна быть установлена операционная система. Можно установить любую, но в качестве примера используется Windows 10.
Подключение через дополнительную сетевую карту
Чтобы компьютер как роутер работал, требования следующие:
- ПК подключен к интернету через кабель провайдера в LAN-порт материнской платы.
- Вторая сетевая карта определяется в диспетчере устройств и для нее установлен драйвер.
Соединение происходит по схеме:
- Подключите второй компьютер с помощью патч-корда к первому.
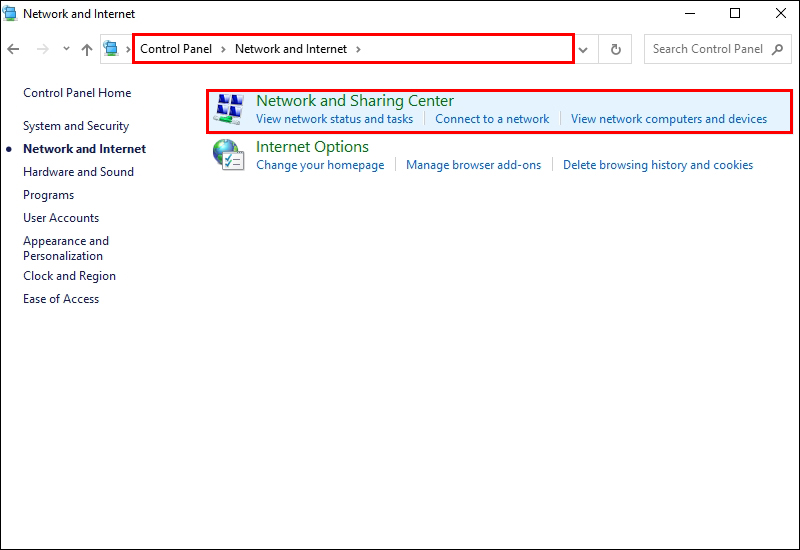
- Вызовите комбинацией + R строку ввода быстрых команд и перейдите в раздел параметров общего доступа по команде %windir%\system32\control.exe /name Microsoft.NetworkAndSharingCenter /page Advanced.
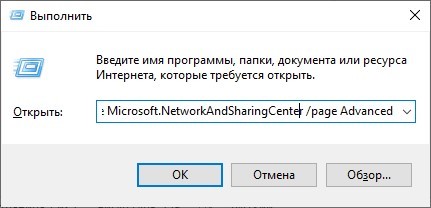
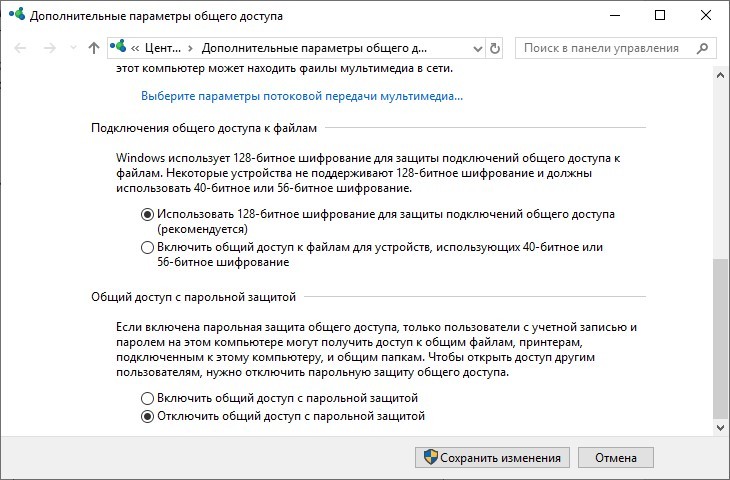
- Включите общий доступ во всех сетях. Но пункт «Общий доступ с парольной защитой» выключите и примените изменения.
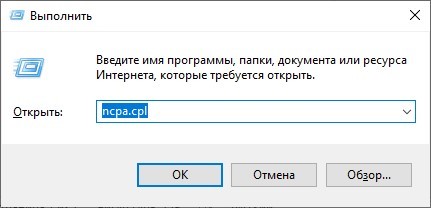
- Зайдите в раздел адаптеров командой ncpa.cplчерез строку «Выполнить».
- Нажмите ПКМ по второму адаптеру и выберите «Свойства».
- Перейдите в раздел «Доступ».
- Выставите птичку напротив «Разрешать другим пользователям сети использовать интернет-подключение…».
- Жмите «ОК» и перезапустите адаптер.
- Проверяйте интернет-соединение на втором подключенном устройстве.
Раздача Wi-Fi
Если к компьютеру подключен Wi-Fi модуль, то можно создать точку доступа и раздавать беспроводную сеть в радиусе действия адаптера. Способов существует много: от одного нажатия мышки до установки дополнительного софта или прописывания специальных команд.
Хот-спот
О том, как раздать Wi-Fi с ноутбука на «десятке», очень подробно написал Бородач тут.
В Windows 10 роутер из компьютера делается так:
- На панели «Пуск» откройте «Центр уведомлений», что находится справа снизу в углу.
- Нажмите на функцию «Мобильный хот-спот».
- Готово, точка доступа создана и к Wi-Fi от компьютера может подключиться любое устройство.
- Нажмите ПКМ по иконке и перейдите к «Параметрам».
- Снизу надписи сетевой пароль нажмите «Изменить»
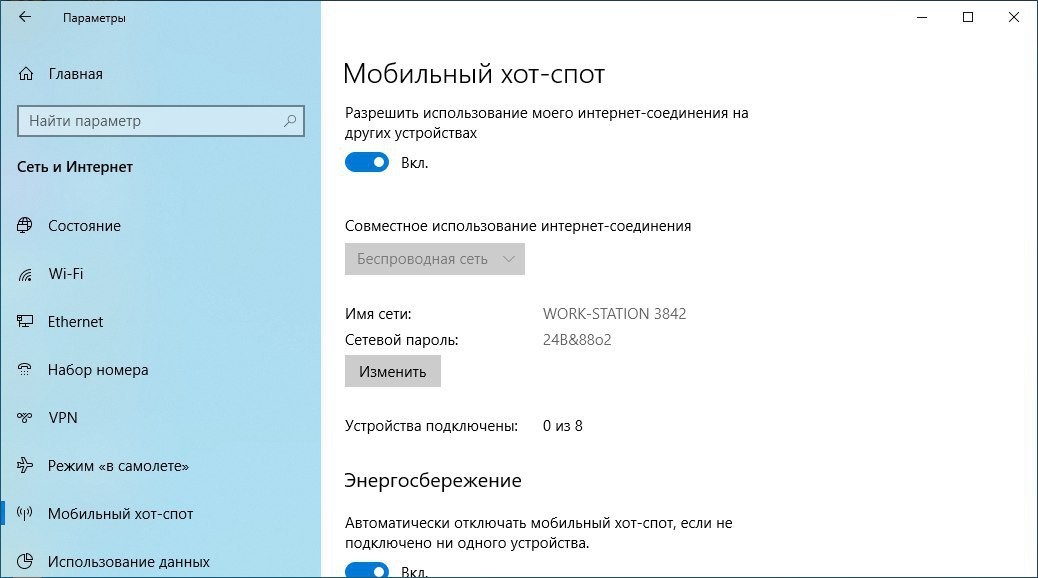
- Смените имя пользователя и пароль по желанию.
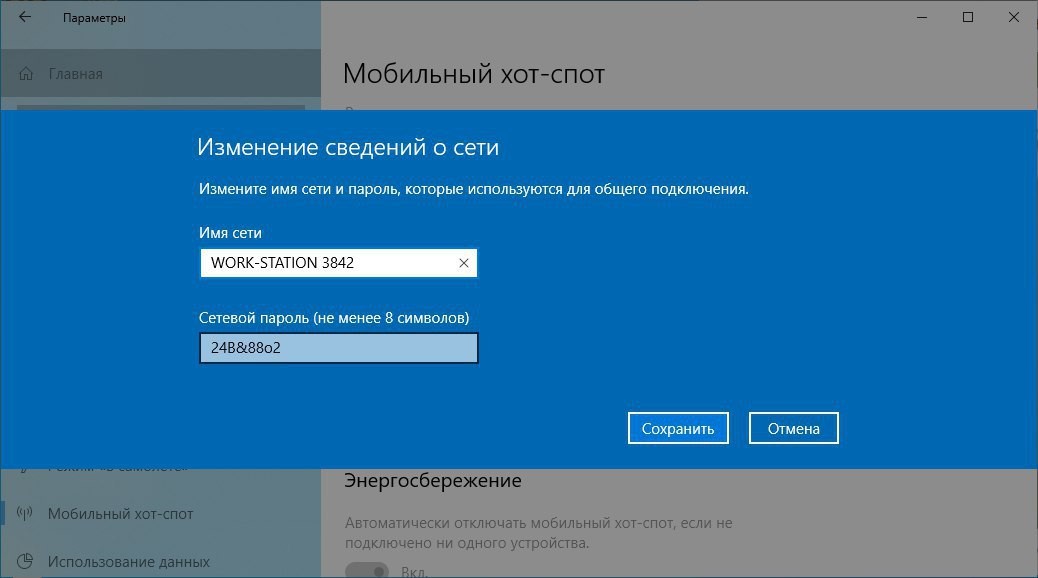
- Жмите «Сохранить» и пользуйтесь.
CMD
Сделать роутер из компьютера с Windows 7, 8, 10 можно альтернативным способом – через текстовый интерфейс:
- Через cmd введите команду netsh wlan set hostednetwork mode=allow ssid=Moy_hot_spot key = Moy_parol keyUsage=persistent.
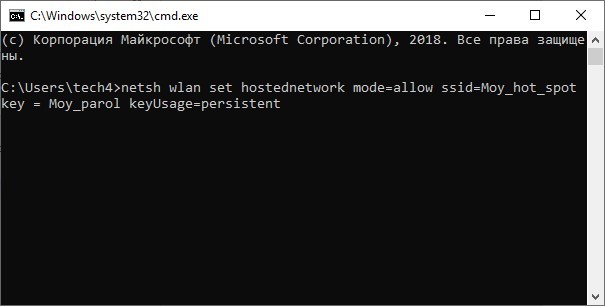
- Имя и ключ (параметры после знака равно) впишите свои собственные (можно писать только на латинице).
- Точка создана. Чтобы она стала активной, ее нужно запустить командой: netsh wlan start hostednetwork.
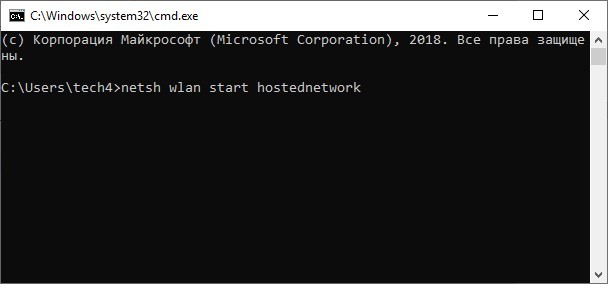
- Готово. Wi-Fi раздается и к нему можно подключиться.
- Теперь нужно пустить по нему интернет.
- Нажмите Win+R и запустите окно с сетевыми адаптерами командой ncpa.cpl.
- Клацните ПКМ по беспроводному сетевому адаптеру и вызовите «Свойства».
- Перейдите в раздел «Доступ».
- Активируйте функцию доступа в интернет другим устройствам.
- Жмите «ОК» и проверьте доступ к глобальной сети с другого устройства.
О способах раздачи интернета на Windows 7 – следующее видео:
Данный способ плох тем, что созданная точка доступа находится в памяти системы до первой перезагрузки. То есть создавать хот-споты нужно будет снова и снова. Некоторые для этих целей делают специальный bat-файл или просто записывают команды в текстовый документ и выполняют каждый раз. Чтобы этого избежать можно отдать задачу на аутсорсинг программному обеспечению.
О том, как создать bat-файл, мы писали тут.
Программы
На самом деле существует много аналогов. Их отличает только визуальная составляющая, а концепция у всех едина – создание точки доступа для раздачи Wi-Fi с компьютера.
Виртуальный Wi-Fi поддерживают такие программы:
- Connectify – простая и понятная утилита на русском языке. Есть реклама.
- Switch Virtual Router – простой интерфейс, русский язык, есть дополнительные функции.
- Virtual Router Plus – максимально заточенный под Windows интерфейс с основными функциями. Систему не нагружает, рекламу не содержит, сетевые настройки не сбивает.
- MaryFi – русскоязычный интерфейс с дополнительными статусами, выведенными в основное поле.
Заключение
Если в вашем распоряжении есть компьютер с дополнительной сетевой картой или подключенным Wi-Fi адаптером, можно отчасти заменить им роутер. Замена будет ощущаться неполноценной из-за единственного LAN-порта, по которому подключается второе устройство. Хотя никто не запрещает использовать более 1 дополнительной сетевой карты. С хот-спотом все проще, настройка и включение в Windows 10 занимает считанные секунды.
Virtual Router
The original, open source Wifi Hotspot for Windows 7, Windows 8.x and Windows Server 2012 and newer!
FYI, this project is no longer being updated. However, the software will still work as-is. If you find it helpful, please use it.
What is Virtual Router?
Virtual Router is a free, open source software based router for PCs running Windows 8, Windows 7 or Windows Server 2008 R2. Using Virtual Router, users can wirelessly share any internet connection (Wifi, LAN, Cable Modem, Dial-up, Cellular, etc.) with any Wifi device (Laptop, Smart Phone, iPod Touch, iPhone, Android Phone, Zune, Netbook, wireless printer, etc.) These devices connect to Virtual Router just like any other access point, and the connection is completely secured using WPA2 (the most secure wireless encryption.)
This application has had OVER 10 MILLION DOWNLOADS over the years. I am humbled and appreciative of being able to help so many people by adding a feature to Windows that Microsoft should have added themselves. Thanks you!
Download / Install
Click below to download the installer for Virtual Router v1.0 so you can get started using it today!
Important: To install Virtual Router, you will also need to have .NET Framework 3.5 installed on your Windows computer.

For previous releases, you can find those located within the Release folder inside this repository.
Where can Virtual Router be used?
Anywhere you are!
Including:
- Home
- Office
- School
- Airport
- Bus Station
- The Park
- Grandmas House
- The In-Laws
- Absolutely Anywhere!
No Advertising, No Hassle
Unlike similar applications, Virtual Router is not only completely Free, but will not annoy you with any advertisements. Also, since Virtual Router is not ad-supported, it does not track your web traffic the way other ad-supported applications do/can.
Frequently Asked Questions (FAQ)
Is Virtual Router Free to use?
Yes, Virtual Router is completely Free. If you’ve paid for it, then I suggest you demand a refund.
Will I incur extra charges from my ISP using Virtual Router?
The bandwidth the extra devices you have connected to a Virtual Router shared Internet connection will of course count towards your internet service bandwidth. Using Virtual Router functions identically to using a router to share your internet connection. If you have questions regarding how much bandwidth you have allocated and/or what overage charges you may be subject to, then you should contact your Internet Service Provider.
Which Wifi Devices are Supported?
The device support is dependent on you having a driver installed that is Certified for Windows 7 or Windows 8. As far as we know, part of the requirement for a wireless driver to be «Certified for Windows 7» or «Certified for Windows 8» must support the Virtual Wifi and Wireless Hosted Network features of Windows 7.
Unfortunately, in regards to using Virtual Router, any driver that is «Certified for Windows Vista» will work with your Wifi device in Windows 7 or 8, however it will not support the Virtual Wifi and Wireless Hosted Network features.
Virtual Router will not start after installation
There are some cases that Virtual Router is unable to start immediately after installation. First you should make sure that you have the latest device drivers installed from the manufacturer of your Wifi device, then if that still doesn’t work you should try restarting/rebooting you machine if you haven’t already done so.
Error: «group or resource is not in the correct state to perform the requested operation»
Here’s a Hotfix available from Microsoft for a common cause of this problem on Windows 7 and Windows Server 2008 R2: http://support.microsoft.com/kb/2496820
If the hotfix doesn’t work, or you aren’t using Windows 7 or 2008 R2, then you could try some of the suggestions at the following link: http://superuser.com/questions/373861/how-can-i-start-hostednetwork-on-windows-7
How do I know if my computer/hardware supports Virtual Router?
First, you need to have a Wifi device and driver that both support the Windows Virtual Wifi and Wireless Hosted Network features. Drivers that are Certified for Windows 7 or Windows 8 will work.
Can I use Virtual Router with Windows Vista or Windows XP?
Unfortunately, Virtual Router will not work on Windows Vista or Windows XP, or any older version of Windows. Virtual Router is only compatible with Windows 7 and Windows 8 since the Virtual Wifi and Wireless Hosted Network features are new in Windows 7 and Windows Server 2008 R2.
What About Windows 7 Starter Edition?
Unfortunately, Microsoft has disabled the Virtual Wifi features in Windows 7 Starter Edition so Virtual Router will not work. This is the only edition of Windows 7 that the software will not work with.
Is the connection encrypted? How secure it this?
The wireless connection is encrypted with WPA2 encryption. Encryption is also required, with no method of disabling it. The security of you «Virtual Router» is dependent on the strength of you Password / Passphrase.
How To Change Device (Connected Peer) Icon
You can open the Device «Properties» dialog one of two ways:
- Double Click the Device / Connected Peer
- Right Click the Device / Connected Peer and Select «Properties…»
- Then click on the «Change Icon…» Button, and Select the Icon you want and click «Save».
Source Code
The source code for Virtual Router is located within the Source folder inside this repository.
This project was originally hosted on Microsoft’s CodePlex open source project hosting site, but that site is no longer in existence, so I moved the project hosting over here to GitHub.
Disclaimer
This software is provided «as-is» without any warranty express or implied.
Project History
This software was originally created in 2009 using Virtual Wifi features that were newly introduced in the Windows 7 operating system. There were a couple improvements and releases made to the software with the most recent release in 2013. This software works well for what it does, and what it was intended for. However, at this time the project is no longer being updated. Please use this software for what it does and what value it offers you. Just because there aren’t new updates doesn’t negate the benefits from working software that still solves a need people have. If you need to share your laptop or desktops Internet connection with your smartphone, tablet, or other device then this software will likely help you.
Plus, it doesn’t advertise or spy on you like other similar solution. It’s extremely humbling to see this software be so helpful to over 10 MILLION users over the years. And, people still use this software today, over 10 years after the first release! Thank you, and you are more than welcome!!
Feel free to use Virtual Router as-is. The latest released version still works just fine. However, this project will no longer be updated. I’m Chris Pietschmann, the creator of Virtual Router, and I truly thank the over 10 MILLION users for using Virtual Router over the years! Feel free to keep using Virtual Router where it provides value.