
Remote Desktop is a great feature that provides you the ability to access, interact, and administer a computer remotely. However, in certain situations, you may come across some issues in the remote PC and might need to Restart RDP Service.
There are three different ways through which you can restart the TermService (service name) in Windows 10. So explore the below section to find out the methods and see which one seems easier for you.
Restart RDP Service
Here is How to Restart RDP Service in Windows 10 –
1] Through Services Snap-in
The easiest way to manage services, including restarting them is through Services administrative tool only. So, follow the given sequence of steps to carry out the –
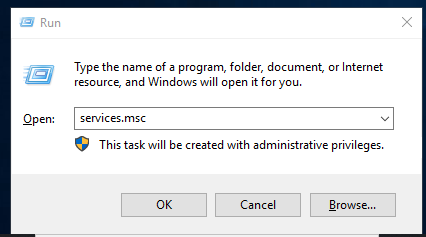
- Press key combination of “Win logo + R”.
- Type in services.msc and click OK.
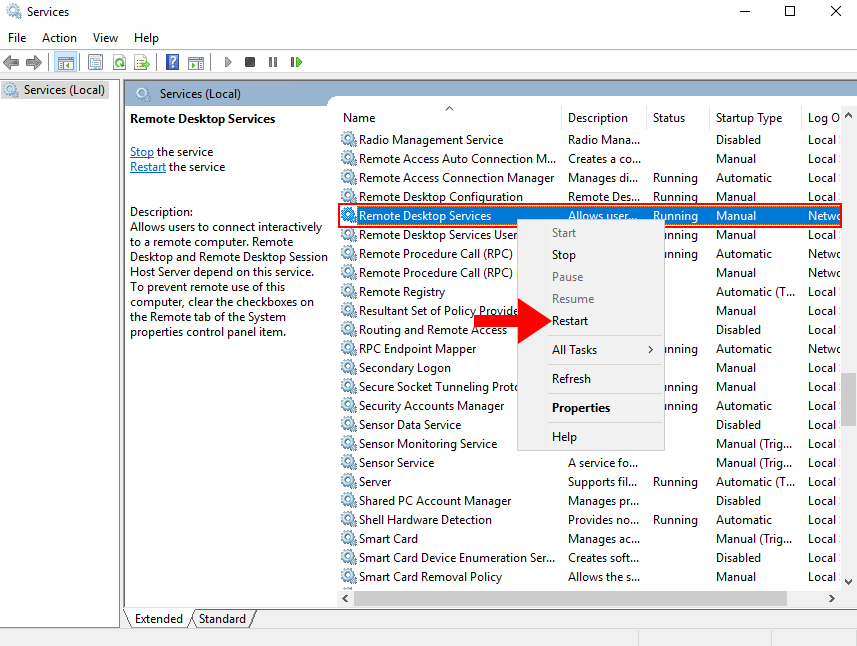
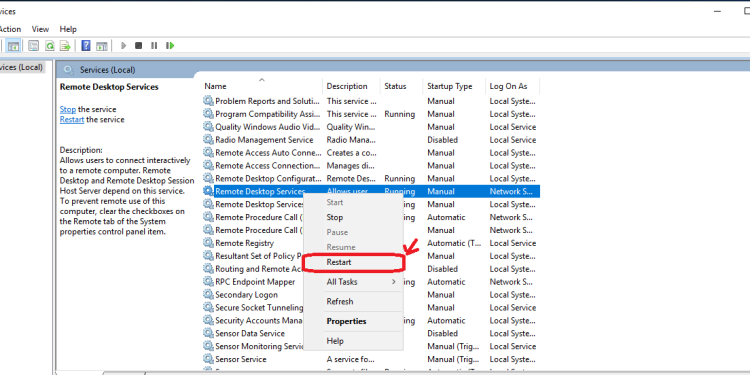
- Scroll down and locate Remote Desktop Services.
- Right-click on the service and from the list of options, choose Restart.
- As an alternative, you can also use the toolbar to restart RDP Service. To do so, simply select the service and click Restart Service icon on the toolbar (see screenshot).
2] Using Task Manager
Another simple way to Restart RDP Service is via Task Manager, the system monitor program in Windows 10. Go through the steps below to accomplish the task –
- Press Start, type Task Manager and then hit enter.
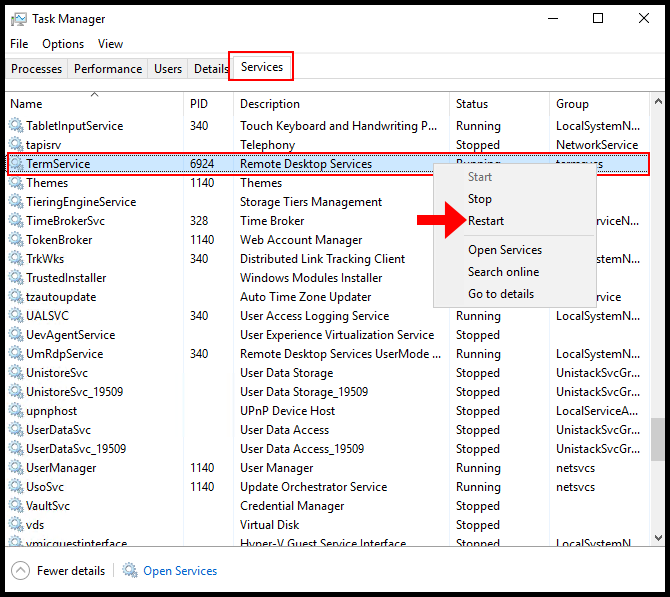
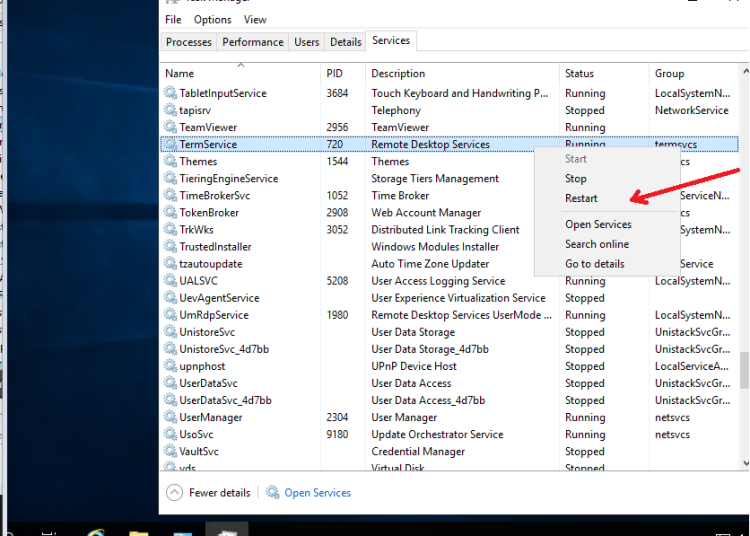
- Click on the Services tab
- Find and right-click on the name TermService and choose Restart.
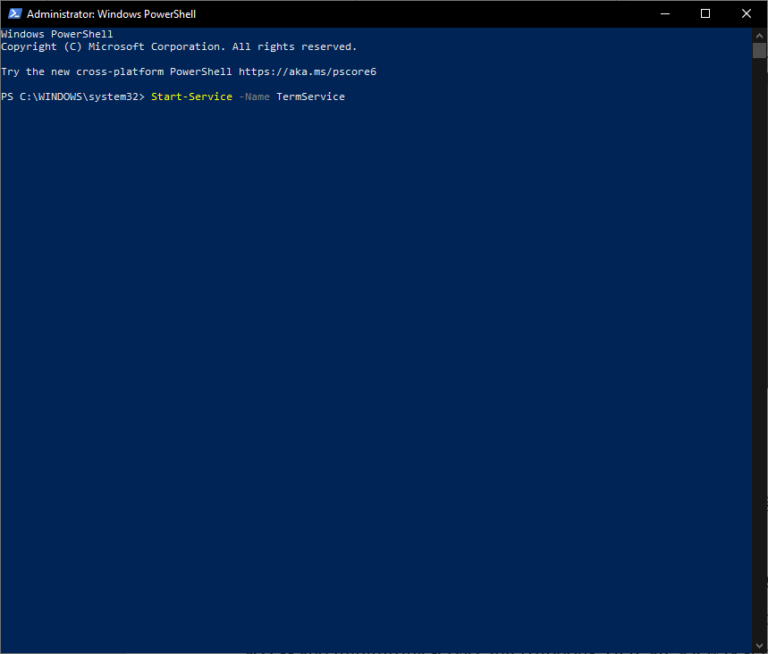
3] Via Elevated PowerShell
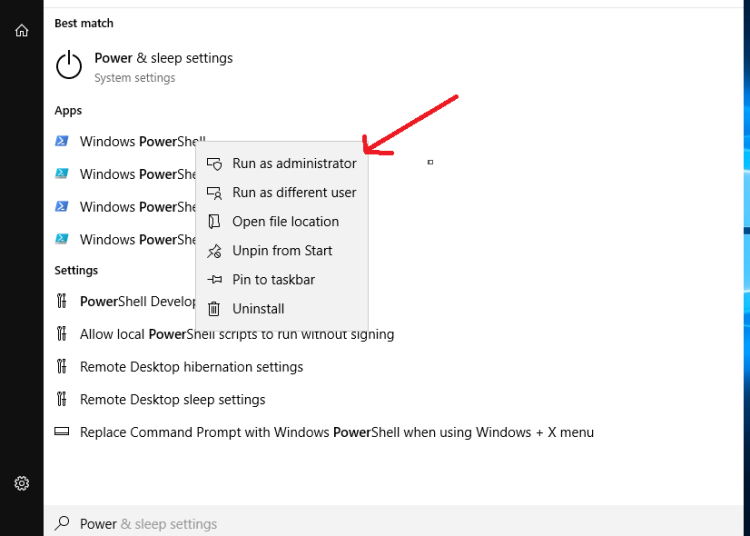
- Perform a right-click on the Start icon and select “Windows PowerShell (Admin)” from Win+X menu.
- Click Yes when UAC dialog prompts up.
- Type the command in the following format and hit Enter –
Restart-Service -Force -Name "TermService"
OR
Restart-Service -Force -DisplayName "Remote Desktop Services"
More alike posts –
1] How to Connect to PC Using RDP / Remote Desktop Preview on Windows 10
2] How to Disable, Enable Remote Desktop From Windows 10 Settings App
3] Windows 10 – How to Establish Remote Desktop Connection
Methods:
1] Through Services Snap-in
2] Using Task Manager
3] Via Elevated PowerShell
That’s all!!
Learn How to restart Remote Desktop service without rebooting Windows Server for a more efficient solution to Windows service issues. Our guide is ideal for new Windows users who believe a simple reboot fixes all problems.
Method 1 – Using Services.msc
In this section, we will be going over how to restart the Remote Desktop service via Services on Windows Server.
1. To start, log into your Windows Server and use the Windows search function to search and open Services.
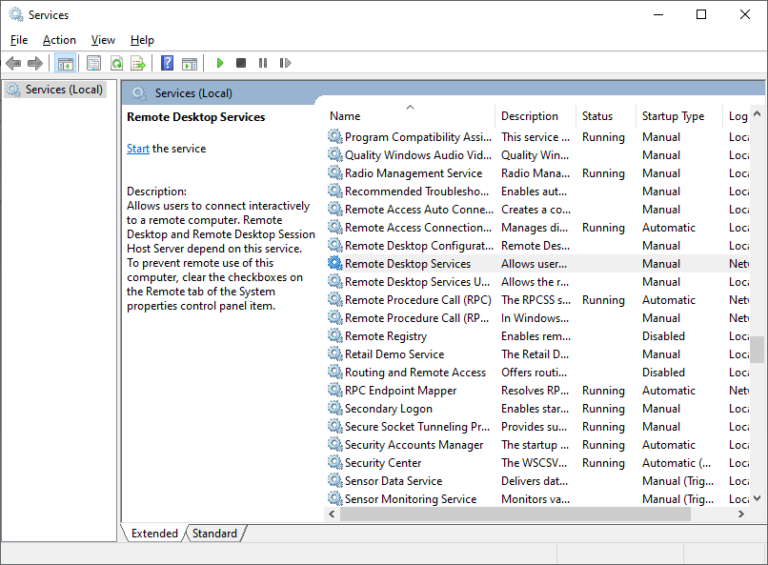
2. Then on the Services window, locate Remote Desktop Services then right-click it, and click Restart.
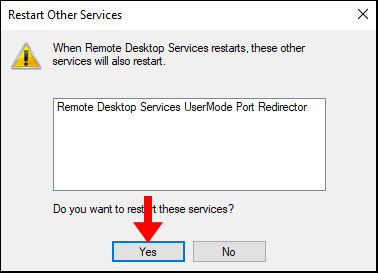
3. Lastly, you will see a pop-up prompting confirmation to restart Remote Desktop Services, click Yes to continue with the restart. We have successfully restarted Remote Desktop Service via Services.msc without rebooting the Windows Server.
You will be disconnected during the restart, and after 30 seconds you will be able to reconnect to the server.
Method 2 – Using Powershell
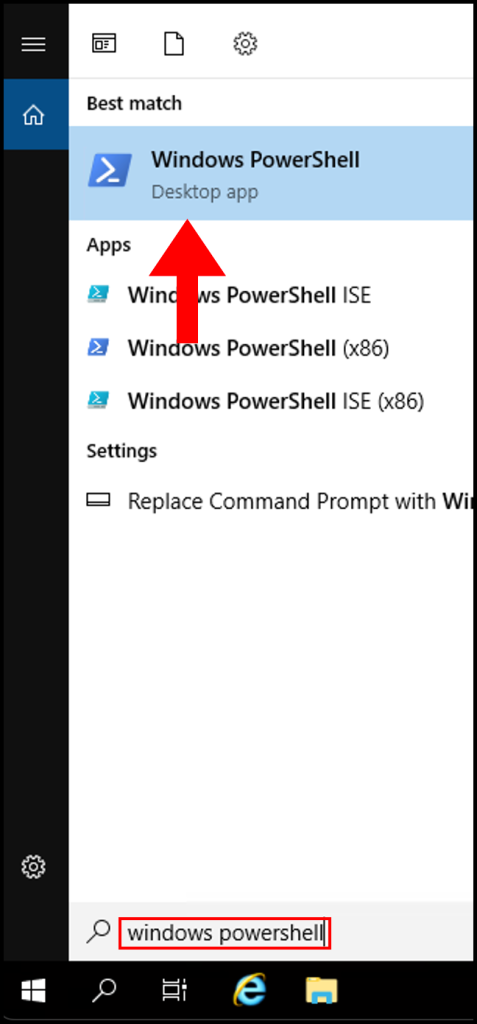
1. To start, log into your Windows Server and use the Windows search function to search and open Windows PowerShell.
2. Once the PowerShell window is open, run the following command:
Restart-Service -Force -DisplayName "Remote Desktop Services"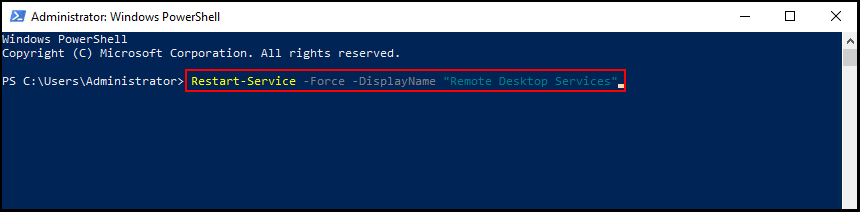
You will be disconnected during the restart, and after 30 seconds you will be able to reconnect to the server.
We have successfully restarted Remote Desktop Service via PowerShell without rebooting the Windows Server.
Method 3 – Using Task Manager
1. To start, log into your Windows Server and use the Windows search function to search and open Task Manager.
2. Expand the Task Manager by clicking on More Details.
3. Next, navigate to the Services tab and right-click TermService, then click Restart. We have successfully restarted Remote Desktop Service via Task Manager without rebooting the Windows Server.
Estimated reading: 2 minutes
1216 views
Remote Desktop is a great feature that allows you to access and administer a computer remotely. However, in certain circumstances, if you have incurred any changes related to the RDP service on the Windows server, then you need to reboot the Windows.
Rebooting Windows is the most common tactic to fix the problem, but you can restart the RDP service if you want to save time.
There are three different ways to restart your remote desktop service.
Option – 1: Restart via Services Console
You can restart the RDP service from the Windows services console. It is an easy method to restart the service. Here, we have mentioned the steps for the same.
- Log in to your Windows VPS. Go to “Run” and type services.msc
2. Search for Remote Desktop Services. Right-click on the Remote Desktop Services click on Restart, and it will restart your service.
Option – 2: Using Task Manager
If you don’t have access to the Services console on the Windows server, you can restart it via Task Manager.
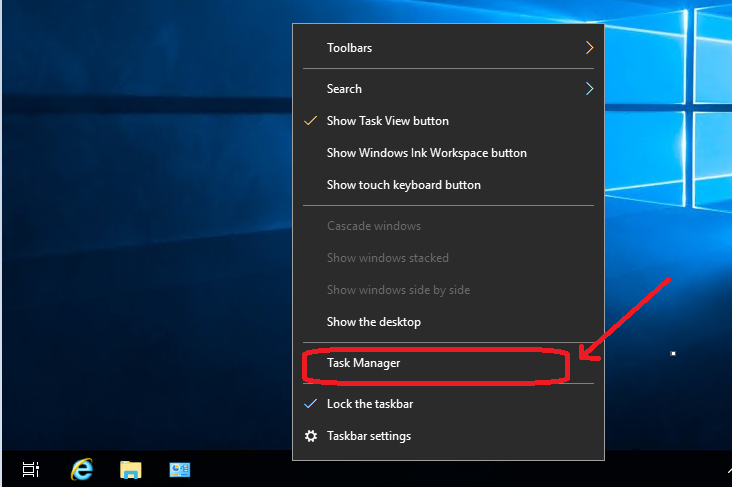
1 . Right-click on your VPS taskbar and click on Task Manager.
2. Please search for the term service and right-click on it. Here, you will see an option to restart the service.
Option – 3: Using PowerShell
We can also restart the RDP Service using the PowerShell command. Here, we have mentioned the steps to restart the RDP service via Powershell.
1. Click on the start button and search for Powershell.
2. Run any of the below commands
Restart-Service -Force -Name "TermService"
OR
Restart-Service -Force -DisplayName "Remote Desktop Services"
Good luck!
Windows 11 is the latest operating system from Microsoft, boasting a sleek design and improved performance. One key feature of Windows 11 is Remote Desktop Protocol (RDP), which allows users to remotely access their computers from anywhere in the world. However, like any software, RDP can sometimes encounter issues that require troubleshooting. One common solution to RDP problems is to restart the RDP service. In this article, we will discuss how to restart the RDP service in Windows 11, as well as some common issues that may require a restart.
What is Remote Desktop Protocol (RDP)?
Before we dive into how to restart the RDP service in Windows 11, let’s first understand what RDP is and how it works. Remote Desktop Protocol (RDP) is a proprietary protocol developed by Microsoft that allows users to connect to and control a remote computer over a network connection. By using RDP, users can access their desktops, applications, and files from anywhere with an internet connection.
RDP works by transmitting data between the local and remote computers in an encrypted format, ensuring that sensitive information remains secure during the remote connection. This makes RDP an essential tool for remote workers, IT professionals, and anyone who needs to access their computer from a distance.
Common RDP Issues in Windows 11
While RDP is a powerful tool for remote access, it can sometimes encounter issues that prevent users from connecting to their computers. Some common RDP issues in Windows 11 include:
-
Connection errors: Users may encounter connection errors when trying to connect to their remote computer, such as «The remote computer could not be found» or «The connection was terminated unexpectedly.» These errors can be caused by network issues, firewall settings, or other factors.
-
Slow performance: RDP connections may experience slow performance, lag, or screen freezing, making it difficult to work remotely. This can be caused by network congestion, low bandwidth, or hardware limitations.
-
Authentication problems: Users may encounter authentication problems when trying to log in to their remote computer, such as «The username or password is incorrect» or «Access is denied.» These issues can be caused by incorrect login credentials, account permissions, or security settings.
-
Black screen: Users may see a black screen when connecting to their remote computer, preventing them from accessing their desktop or applications. This can be caused by graphics driver issues, display settings, or RDP configuration problems.
Restarting the RDP Service in Windows 11
If you encounter any of the above issues with RDP in Windows 11, one common troubleshooting step is to restart the RDP service. Restarting the RDP service can help resolve connectivity issues, performance problems, and authentication errors, allowing you to reconnect to your remote computer successfully. Here’s how to restart the RDP service in Windows 11:
-
Open the Services app: Press the Windows key + R on your keyboard to open the Run dialog box. Type «services.msc» and press Enter to open the Services app.
-
Locate the Remote Desktop Services: In the Services app, scroll down the list of services and locate «Remote Desktop Services.» This is the service that controls RDP connectivity on your computer.
-
Stop the Remote Desktop Services: Right-click on the «Remote Desktop Services» entry and select «Stop» from the context menu. This will stop the RDP service on your computer.
-
Start the Remote Desktop Services: After stopping the RDP service, right-click on the «Remote Desktop Services» entry again and select «Start» from the context menu. This will restart the RDP service on your computer.
-
Check RDP connectivity: Once you have restarted the RDP service, try connecting to your remote computer again to see if the issue has been resolved. If you can successfully connect, the RDP service restart was successful.
Common Issues and Solutions
While restarting the RDP service can help resolve many common RDP issues in Windows 11, some problems may require additional troubleshooting steps. Here are some common RDP issues and their solutions:
-
Network connectivity problems: If you are unable to connect to your remote computer, check your network connection and firewall settings. Make sure that RDP is allowed through your firewall and that your network connection is stable.
-
Performance issues: If you are experiencing slow performance or screen freezing during an RDP session, try reducing the display settings on your remote computer. Lowering the resolution, color depth, or refresh rate can improve performance.
-
Authentication errors: If you are unable to log in to your remote computer due to authentication problems, double-check your username and password for accuracy. You may also need to check your account permissions and security settings.
-
Black screen: If you see a black screen when connecting to your remote computer, try updating your graphics drivers and adjusting your display settings. You may also need to configure RDP settings to display the remote desktop properly.
Conclusion
Remote Desktop Protocol (RDP) is a powerful tool for remote access in Windows 11, allowing users to connect to their computers from anywhere with an internet connection. However, RDP can sometimes encounter issues that require troubleshooting, such as connection errors, slow performance, authentication problems, and black screens. Restarting the RDP service is a common solution to these problems, helping to restore connectivity, performance, and functionality.
In this article, we discussed how to restart the RDP service in Windows 11 and common RDP issues that may require a restart. By following the steps outlined in this article, you can troubleshoot RDP problems and successfully reconnect to your remote computer. Remember to check your network settings, firewall configurations, and display options when troubleshooting RDP issues in Windows 11.
Remote Desktop Services in a Windows Server allow users to remotely connect to the server. For this reason, you might already be using RDS for remote troubleshooting, system management, and even remote working. However, like any service, RDS may sometimes require a reboot to continue working properly.
In this article, we‘ll explore how you can do a Remote Desktop Services restart without rebooting Windows Server.
- Part 1: When to Restart Remote Desktop Services
- Part 2: How to Restart Remote Desktop Services on Windows Without Rebooting Windows Server
- Part 3: Best Practices for Managing Remote Desktop Services
- Part 4: Best Remote Desktop Software You Should Know
Part 1. When to Restart Remote Desktop Services
But when is a Remote Desktop Services restart necessary? The reality is that there are several instances when restarting Remote Desktop Services is necessary. The most common ones include:
- Service Interruptions: Sometimes, Remote Desktop Services might stop functioning correctly due to a crash or a network issue. When this happens, rebooting the service can resolve the issue and let you continue your work.
- Configuration Changes: In many cases, making changes to the RDS configuration, requires restarting the service for the new settings to take effect.
- Troubleshooting: When you encounter performance issues try restarting Remote Desktop Services to quickly troubleshoot them. This is usually enough to eliminate the issue or help you identify it.
- Resource Overuse: As you use RDS, it might consume more resources during remote sessions, such as CPU or memory. In this case, you can restart the service to free up your resources.
- Updates: Some system or security updates might require restarting RDS to complete the installation. This is a crucial step to ensure that your server remains secure and up-to-date.
Part 2. How to Restart Remote Desktop Services on Windows Without Rebooting Windows Server
Now that you are aware of the scenarios that require a Remote Desktop Services restart, it’s time to go through the methods for doing it. In this part, we are going to show you three different methods for completing a Remote Desktop Services restart without rebooting Windows Server.
Method 1. Using Services Manager
The first and probably simplest way to restart Remote Desktop Services is through the Services Manager.
Here are the steps for completing the restart:
- Step 1.Press Win + R, type services.msc, and click OK to launch the Services Manager.
- Step 2.Scroll down the list of services to find the one with the name TermService.
- Step 3.Right-click on TermService and select the Restart option.
Method 2. Using Command Prompt
The next method utilizes the Command Prompt. Knowing the right commands to use makes the Remote Desktop Services restart a quite quick and straightforward process. Here is how to do that:
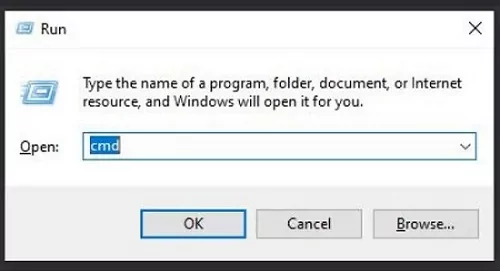
- Step 1.Press Win + R, type cmd, and click OK to open the Command Prompt.
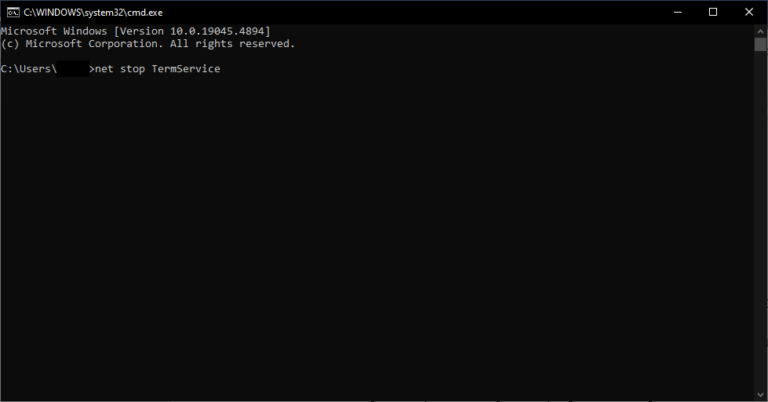
- Step 2.Type the command net stop TermService to stop RDS on your device.
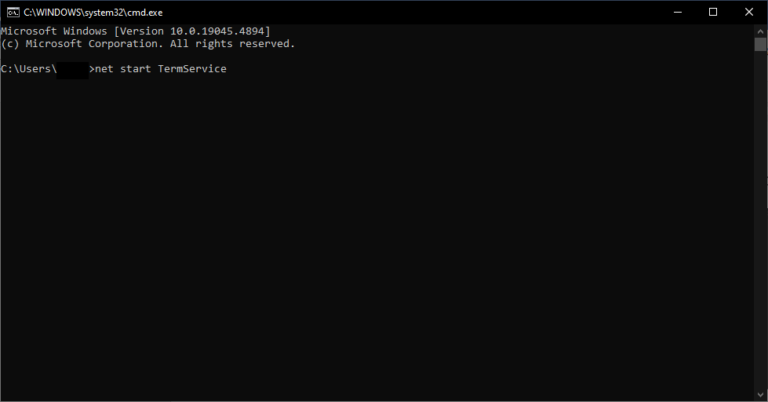
- Step 3.Then, type the command net start TermService to restart the service.
Method 3. Using PowerShell
The final method uses PowerShell to restart RDS. The process is also quite straightforward if you know the steps that you need to take. Here is what you need to do:
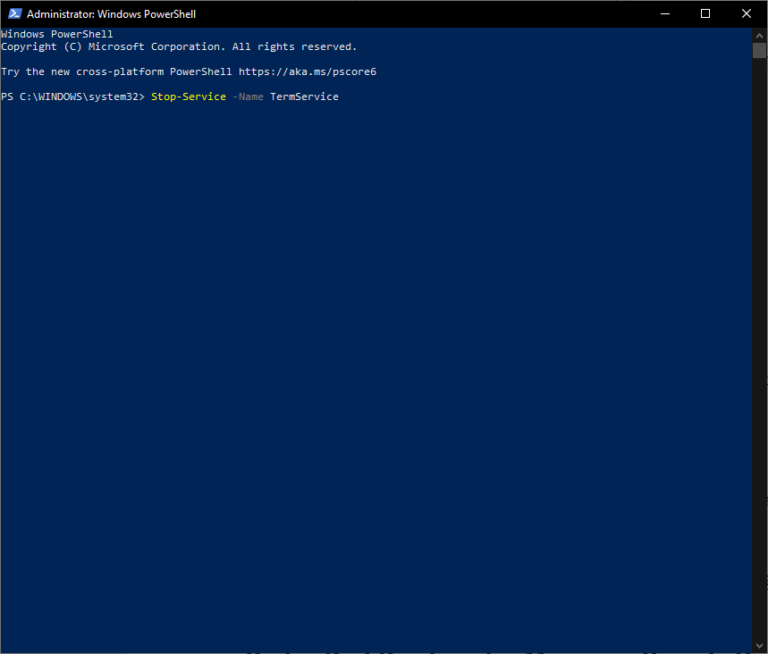
- Step 1.Press Win + X and click the Windows PowerShell (Admin) option to launch PowerShell with administrator rights.
- Step 2.Type the command Stop-Service -Name TermService to stop Remote Desktop Services.
- Step 3.Type the command Start-Service -Name TermService to restart Remote Desktop Services without rebooting the Windows Server.
Part 3. Best Practices for Managing Remote Desktop Services
Even though restarting RDS is one way to keep the services working properly, you still need to be aware of how to manage them effectively. These best practices ensure that you will have a seamless remote access experience without any interruptions. Here are a few tips that will help you in practice:
- Monitor RDS Performance: It is very important to regularly check the performance of RDS. This process will ensure that the services don’t consume too many resources. The good thing is that there are many tools that you can use to keep an eye on this, such as Task Manager, Resource Monitor, or some other third-party monitoring software.
- Schedule Regular Restarts: If you make it a habit to perform a regular restart of RDS based on a schedule, you will ensure that the services always function properly. For instance, you can schedule the restart on non-peak hours, when it will not hinder your workflow.
- Regularly Update Your System: The latest system and security updates keep your server safe and up-to-date. For this reason, you need to regularly check for updates.
- Use Session Limits: Set session time limits to automatically log off idle users. This simple practice prevents resource overuse and contributes to a smooth-running environment.
Part 4. Best Remote Desktop Software You Should Know
If you‘re looking for a reliable remote management solution that guarantees uninterrupted work at all times, then you should try AirDroid Remote Support. This robust tool provides a user-friendly environment, ideal for both professionals and individuals. Paired with a rich list of features, it is the perfect choice for companies of all sizes. Among its key features, these are the ones that make it stand out:
- Real-Time Screen Sharing: The app supports real-time screen sharing, which enhances remote troubleshooting.
- Always-On Unattended Remote Access: Set up your devices for unattended remote access in a few, simple steps. This will reduce downtime and make your workflow more efficient.
- Scalability: AirDroid is perfect for growing businesses as it can support numerous users and devices.
- Cross-Platform Support: AirDroid is a versatile option, as it supports Windows, macOS, Android, and iOS devices.
Steps to Use AirDroid Remote Support
- Step 1.Go to the AirDroid Remote Support official website and click the Download option to find the installers.
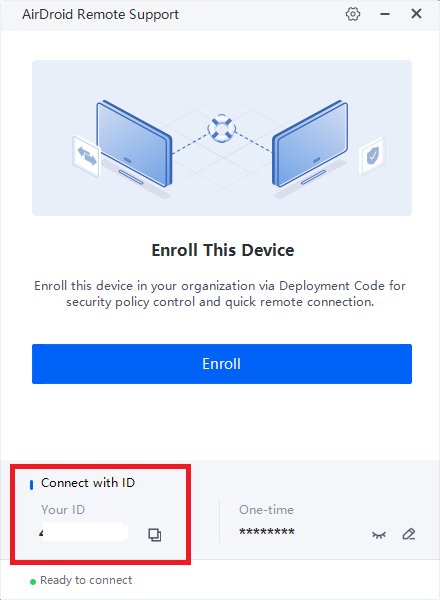
- Step 2.On the remote device, launch AirDroid Remote Support and note the 9-digit ID code under the Connect with ID section.
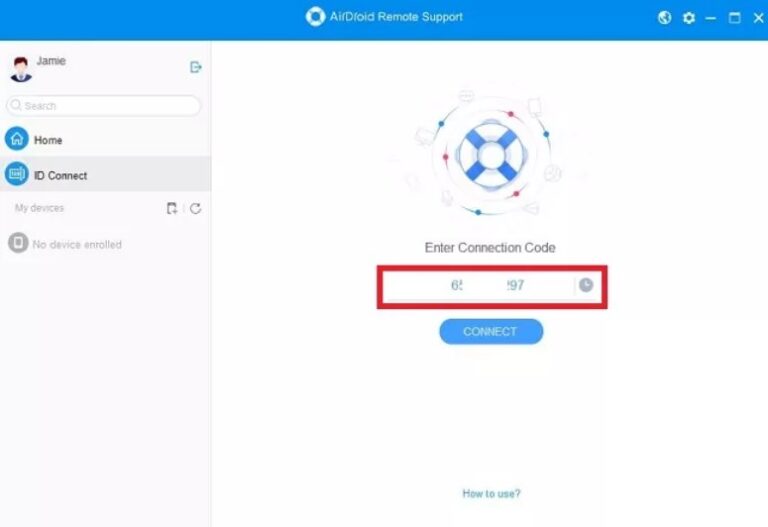
- Step 3.In the local device, launch AirDroid Business and go to the ID Connect section. Type the 9-digit ID and click the Connect button. Once you do that, wait for the other user to accept the connection from the remote device.
In Conclusion
When you need to do a Remote Desktop Services restart, use one of the methods we have explained here. With these, you can restart RDS without rebooting Windows Server. But if you are looking for a new tool that offers you a reliable environment for remote connections, then we recommend AirDroid Remote Support. With this tool, you can improve the overall performance and security of your remote experience. Try out AirDroid Remote Support to find out what this outstanding app has to offer!