
If you installed multiple Windows versions on the same PC, your dual-boot (or multi-boot) configuration may stop working.
The most cause for a dual-boot or multi-boot configuration error (to stop working) is when you reinstall the older Windows version before the newer Windows version.
For example, Windows Vista and Windows 7 were already installed as dual-boot and then Windows Vista was reinstalled again. At the second installation, Windows Vista overwrites the MBR and the new MBR isn’t recognized by Windows 7.
In this article, you can find various solutions to repair your dual-boot configuration.
What is dual-boot/multi-boot
Dual-booting or multi-booting means installing multiple Windows versions (or other operating systems) on the same computer and being able to choose which operating system you’d like to boot into.
It’s very common to see this kind of configuration on Windows computers:
- Windows XP with Windows Vista
- Windows Vista with Windows 7
- Windows 8 with Windows 7
For more information on how to setup a dual-boot system, go to our guides from EasyBCD.
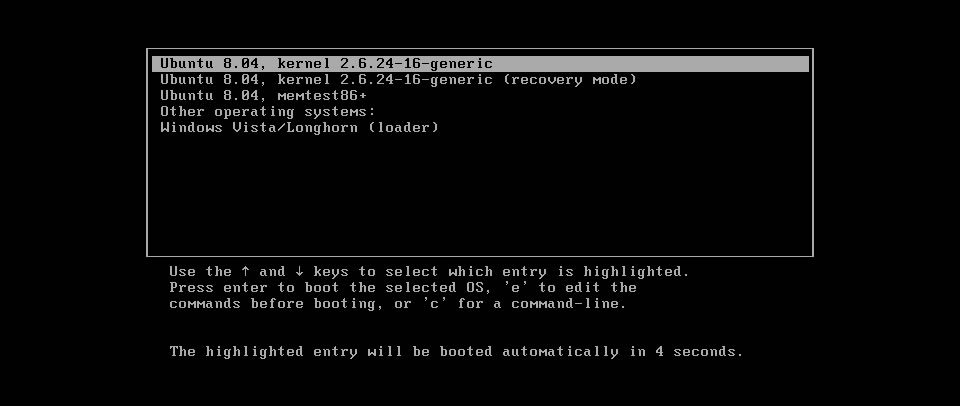
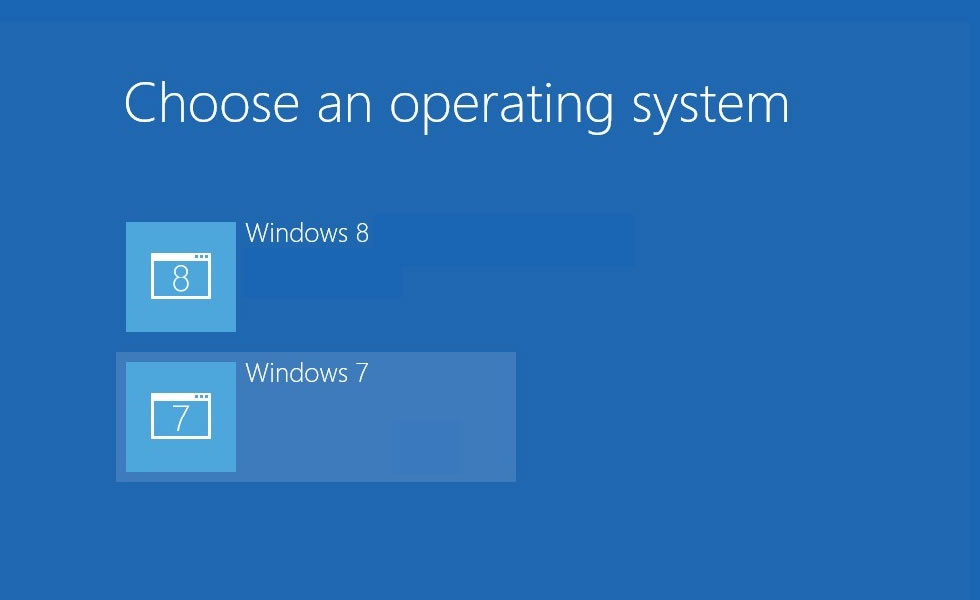
If you’re dual-booting Windows 8 with Windows 7, the boot options menu will look like this:
Fix dual-boot configuration with Easy Recovery Essentials
Easy Recovery Essentials can correct the errors of your computer’s boot configuration.
Easy Recovery Essentials can fix many errors such as this automatically using its built-in Automated Repair option. EasyRE is currently available for Windows XP, Vista, 7, 8, Windows 10, and Windows 11 and can be downloaded and created on any PC.
- Download Easy Recovery Essentials. Make sure to note your Windows version (XP, Vista, 7, 8, 10, or Windows 11) before you download EasyRE. This guide can help you identify what version of Windows you have installed.
- Burn the image. Follow these instructions on how to burn the bootable ISO image very carefully, as making a bootable CD can be tricky! Alternatively, these instructions explain how to create a bootable EasyRE recovery USB stick/drive.
- Boot up your PC from the Easy Recovery Essentials CD or USB you created.
- Once EasyRE is running, choose the “Automated Repair” option and click Continue.

Choose “Automated Repair” in Easy Recovery Essentials
- After EasyRE scans your computer’s drives, identify and select the drive letter for your Windows installation from the list, and then click on the Automated Repair button to begin.
Choose the drive associated with the Windows installation you’re trying to repair.
- Easy Recovery Essentials will start analyzing the selected drive for problems. EasyRE will test for and attempt to automatically correct errors with the disk, partition, bootsector, filesystem, bootloader, and registry. No intervention is required, as EasyRE’s repair is fully automated:
Easy Recovery Essentials searches for errors and makes corrections to the selected Windows installation.
- Once the process is complete, EasyRE will report its findings. Click on the Restart button to reboot your PC and test the changes.
- The “dual-boot errors” error should now be fixed as your PC begins to load:


You can download Easy Recovery Essentials from here.
Other solutions to repair dual-boot configurations
Repair Windows XP on a dual-boot system
Windows Setup CD/DVD Required!
Some of the solutions below require the use of the Microsoft Windows setup CD or DVD. If your PC did not come with a Windows installation disc or if you no longer have your Windows setup media, you can use Easy Recovery Essentials for Windows instead. EasyRE will automatically find and fix many problems, and can also be used to solve this problem with the directions below.
If you have installed Windows XP along another Windows system (e.g. Windows Vista) on the same computer, follow these instructions to repair the Windows XP and fix the dual-boot configuration.
If you don’t have the original installation disc, go to Fix dual-boot configuration with Easy Recovery Essentials.
- Insert the Windows XP installation disc and start the computer
- At the Press any key to boot from CD screen, press any key to boot from the CD
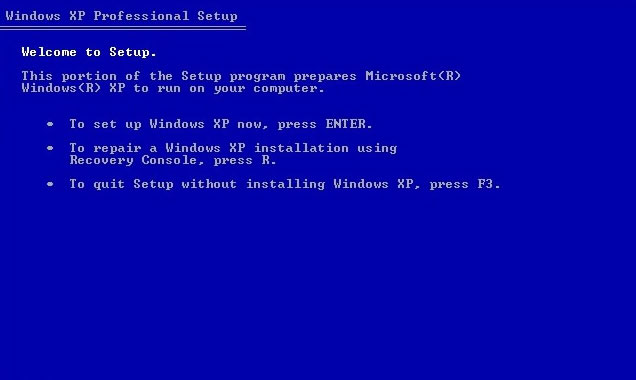
- Press Enter to setup Windows. You will not re-install Windows XP, but repair the installation.Clicking R at this step will load Recovery Console, not the repair installation utility. Do not click R!

Windows XP Press R for Recovery Console
- Press the F8 key to accept the license agreement
- Select your Windows XP installation from the disc and press R.
- If the repair option isn’t available or the Windows XP installation isn’t found, exit the setup. If you continue from this step you may overwrite your Windows XP system and delete all personal files!
Repair Windows Vista on a dual-boot system
To repair Windows Vista’s bootloader and fix the dual-boot configuration, you can use the bootrec utility that’s available on the original Windows Vista installation disc (CD or DVD).
If you don’t have the original installation disc, go to Fix dual-boot configuration with Easy Recovery Essentials.
Fix #1: Run bootrec
Windows Setup CD/DVD Required!
Some of the solutions below require the use of the Microsoft Windows setup CD or DVD. If your PC did not come with a Windows installation disc or if you no longer have your Windows setup media, you can use Easy Recovery Essentials for Windows instead. EasyRE will automatically find and fix many problems, and can also be used to solve this problem with the directions below.
- Insert the installation disc in the tray and boot from it
- At the Welcome screen, click on Repair your computer
Windows Vista Repair Your Computer Menu
- Choose your operating system and click Next
- At the System Recovery Options screen, click Command Prompt
Windows Vista System Recovery Options
- Type:
bootrec /FixMbr
- Press Enter
- Type:
bootrec /FixBoot
- Press Enter
- Type:
bootrec /RebuildBcd
- Press Enter
- Remove the CD/DVD from the tray
- Type:
exit
- Press Enter
- Restart your computer
Fix #2: Run diskpart, then bootrec
Windows Setup CD/DVD Required!
Some of the solutions below require the use of the Microsoft Windows setup CD or DVD. If your PC did not come with a Windows installation disc or if you no longer have your Windows setup media, you can use Easy Recovery Essentials for Windows instead. EasyRE will automatically find and fix many problems, and can also be used to solve this problem with the directions below.
If Fix #1 above doesn’t work, you may need to set the partition which was Windows Vista installed as active first and then run bootrec.
To do so, run diskpart:
- Insert the Windows installation disc and boot from it
- Go to Command Prompt from System Recovery Options (same steps as Fix #1)
- Type:
diskpart
- Press Enter
- Type:
list disk
This command will list all disks available on your computer.
- Press Enter
- Type:
select disk 0
Replace
0with the disk where your Windows Vista is installed on. If you have only 1 hard drive, it’s0. - Press Enter
- Type:
list part
This command will list the partition available on the select disk.
- Press Enter
- Type:
select partition 0
Replace
0with the partition where Windows Vista is installed. - Press Enter
- Type:
active
- Press Enter
- Type:
exit
- Press Enter
- diskpart is now closed. Run the bootrec commands, one by one, and press Enter after each:
bootrec /fixmbr
bootrec /rebuildbcd
bootrec /fixboot
Repair Windows 7 on a dual-boot system
In order to have Windows 7 back in your dual-boot options menu, use the bootsect utility to restore Windows 7’s MBR.
If you don’t have the original installation disc, go to Fix dual-boot configuration with Easy Recovery Essentials.
- Boot from the original Windows 7 installation DVD
- At the System Recovery Options screen, click Command Prompt
- Type:
diskpart
- Press Enter
- Type:
select disk 0
Replace
0with the disk available on the hard disk, where Windows 7 is installed on. To have the full list of disks from your computer, typelist disk. - Press Enter
- Type:
list volume
- Press Enter
- Look for the drive’s letter of your optical drive (where the Windows 7 installation DVD is now running). This usually has “CD-ROM” mentioned in the Type column.
- Type:
exit
- Press Enter
- Type:
D:
Where
D:is the optical’s drive letter. - Press Enter
- Type:
cd boot
- Press Enter
- Type:
dir
- Press Enter
- Type:
bootsect /nt60 SYS /mbr
- Press Enter
- Type:
exit
- Press Enter
- Restart your computer
Repair Windows 8 or 8.1 on a dual-boot system
Using the bootrec utility you can repair Windows 8 or Windows 8.1 on a dual-boot system and boot into your Windows.
If you don’t have the original installation disc or original USB, go to Fix dual-boot configuration with Easy Recovery Essentials.
Fix #1: Use bcdboot
Windows Setup CD/DVD Required!
Some of the solutions below require the use of the Microsoft Windows setup CD or DVD. If your PC did not come with a Windows installation disc or if you no longer have your Windows setup media, you can use Easy Recovery Essentials for Windows instead. EasyRE will automatically find and fix many problems, and can also be used to solve this problem with the directions below.
Using bcdboot, attempt to fix your computer and have the boot menu back:
- Insert the Windows 8 DVD or Windows 8.1 USB and restart your computer to boot from the media
- Go to Command Prompt (click Troubleshoot > Command Prompt)
- Type:
bcdboot C:\windows
Where
C:\is the drive’s letter where Windows 8 or Windows 8.1 is installed on. - Press Enter
- Remove the DVD or USB
- Type:
exit
- Press Enter
- Restart your computer
Fix #2: Use diskpart, then bootrec
- Insert the Windows 8 DVD or Windows 8.1 USB
- Restart your computer and boot from the media
- Click Repair your computer at the Welcome screen

Windows 8 Repair Your Computer Menu
- Go to Troubleshoot > Command Prompt
- Type:
diskpart
- Press Enter
- Type:
sel disk 0
- Press Enter
- Type:
list vol
- Press Enter
- Determine which volume has FAT32 mentioned at the Fs column. This would be the UEFI/EFI partition with Windows 8/8.1
- Type:
sel vol 2
Where
2is the volume with the FAT32 format. - Press Enter
- Type:
assign letter x:
Where
x:is the partition’s letter. The letter must be unique. - Press Enter
- Type:
exit
- Press Enter
- Type:
cd /d x:\EFI\Microsoft\Boot\
Where
x:is the letter you used. - Press Enter
- Type:
bootrec /FixBoot
- Press Enter
- Type:
ren BCD BCD.backup
This would create backup of the BCD.
- Press Enter
- Type:
bcdboot c:\Windows /l en-us /s x: /f ALL
Where
c:\is the drive’s letter where Windows 8 is installed on. - Press Enter
- Remove the DVD or USB
- Type:
exit
- Press Enter
- Restart your computer

Repair Windows 10 on a dual-boot system
Using the bootrec utility you can repair Windows 10 on a dual-boot system and boot into your Windows.
If you don’t have the original installation disc or original USB, go to Fix dual-boot configuration with Easy Recovery Essentials.
Fix #1: Use bcdboot
Windows Setup CD/DVD Required!
Some of the solutions below require the use of the Microsoft Windows setup CD or DVD. If your PC did not come with a Windows installation disc or if you no longer have your Windows setup media, you can use Easy Recovery Essentials for Windows instead. EasyRE will automatically find and fix many problems, and can also be used to solve this problem with the directions below.
Using bcdboot, attempt to fix your computer and have the boot menu back:
- Insert the Windows 10 media and restart your computer to boot from the media
- Go to Command Prompt (click Troubleshoot > Command Prompt)
- Type:
bcdboot C:\windows
Where
C:\is the drive’s letter where Windows 10 is installed on. - Press Enter
- Remove the DVD or USB
- Type:
exit
- Press Enter
- Restart your computer
Fix #2: Use diskpart, then bootrec
- Insert the Windows 10 media
- Restart your computer and boot from the media
- Click Repair your computer at the Welcome screen

- Go to Troubleshoot > Command Prompt
- Type:
diskpart
- Press Enter
- Type:
sel disk 0
- Press Enter
- Type:
list vol
- Press Enter
- Determine which volume has FAT32 mentioned at the Fs column. This would be the UEFI/EFI partition with Windows 10
- Type:
sel vol 2
Where
2is the volume with the FAT32 format. - Press Enter
- Type:
assign letter x:
Where
x:is the partition’s letter. The letter must be unique. - Press Enter
- Type:
exit
- Press Enter
- Type:
cd /d x:\EFI\Microsoft\Boot\
Where
x:is the letter you used. - Press Enter
- Type:
bootrec /FixBoot
- Press Enter
- Type:
ren BCD BCD.backup
This would create backup of the BCD.
- Press Enter
- Type:
bcdboot c:\Windows /l en-us /s x: /f ALL
Where
c:\is the drive’s letter where Windows 10 is installed on. - Press Enter
- Remove the DVD or USB
- Type:
exit
- Press Enter
- Restart your computer

More Information
Linked Entries
- bootrec
- diskpart
Support Links
- Easy Recovery Essentials for Windows – our repair and recovery disk.
It’s an easy-to-use and automated diagnostics disk. It’s available for Windows 8, Windows 7 and Windows Vista. It’s also available for Windows XP and Windows Server.
Read more at Windows Recovery Disks.
- The NeoSmart Support Forums, member-to-member technical support and troubleshooting.
- Get a discounted price on replacement setup and installation discs: Windows XP, Windows Vista, Windows 7, Windows 8, Windows 10.
Applicable Systems
This Windows-related knowledgebase article applies to the following operating systems:
- Windows XP (all editions)
- Windows Vista (all editions)
- Windows 7 (all editions)
- Windows 8 (all editions)
- Windows 8.1 (all editions)
- Windows 10 (all editions)
Propose an edit
The source of most of the unbootable situations on Windows is caused by a misconfiguration or even corrupted Boot Configuration Data files, otherwise known as BCD. BCD contains boot configuration parameters on how to start your Windows operating system. We also discuss Visual BCD Editor in this post.
In earlier versions of Windows, it was stored in the Boot ini file. On EFI-based operating system, you’ll find the entry in the EFI firmware boot manager, which is located at \EFI\Microsoft\Boot\Bootmgfw.efi.
One of the main reasons Microsoft upgraded from Boot ini to BCD was to improve the working and introduce new features like Startup Repair Tool, Multi-User Install shortcuts, etc.
Most of the System Administrators use the command line utility called BCDEdit,exe, which helps the user to modify, create, edit delete entries from Boot Configuration Data. Some of the operations we can perform using BCDEdit are:
- Add entries to an existing BCD
- Delete entries from a BCD
- Display all the active settings
- Change the default time-out value
There are a lot more you can do with BCDEdit. However, the problem with this command is that it’s not very user-friendly for an average user who is trying to fix something. A small mistake can make your operating system unbootable. So if you want to repair your BCD, there are a lot of applications that help you make this process easier. For example, most of the Disk Management software will have some commands built into it – like MBR repair, etc.

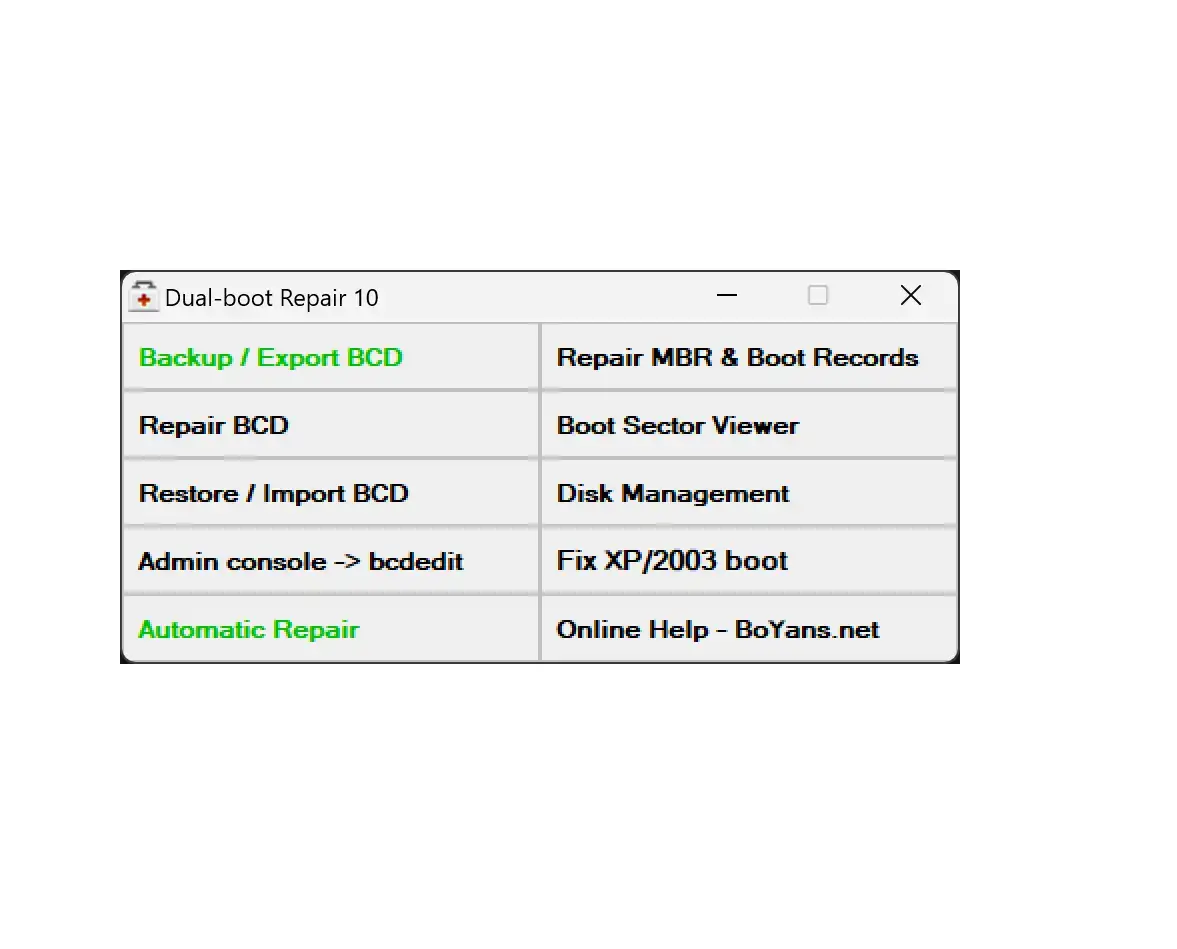
Today, I’ll discuss a portable utility called Dual Boot Repair Tool. Some really useful commands in this tool will help you fix and repair MBR, PBR, BCD, and the disk structure. I’ll go over the options to explain what it does.
1] Repair BCD: It does exactly as the name suggests. The utility will check the BCD for incorrect parameters or any sort of error, and it will correct it. Before you proceed, you need to select the drive you have the BCD, the path of your Windows folder, language, and firmware (BIOS-MBR or EFI firmware). Remember, always select the updated installed OS. For example, if you have Windows 11 and Windows 10, you need to choose Windows 11.
1] Backup / Export BCD : This option will help you back up your BCD, It’s best that you back up your BCD before making any minor changes
3] Restore / Import BCD : If something goes wrong, you can use this option to restore your BCD if you have done a backup before
4] Repair MBR & Boot Records: Just like the name suggests, it can repair your Master Boot Record. Use this option when you need to resolve MBR corruption issues or when you have to remove non-standard code from the MBR. Also, I believe, it writes a new boot sector to the system partition mostly, if the boot sector was replaced with a non-standard boot sector or if it was damaged at some point. It also fixed those old NDLTR missing issues.
The rest of the options are pretty much self-explanatory. Remember, if you are unsure about any of these options, please use the Automatic Repair option, which is much safer compared to the other commands.
Dual Boot Repair Tool is a nifty little tool that will be a good addition to your USB collection. You can download the tool from boyans.net.
Visual BCD Editor for Windows computer
Visual BCD Editor is an advanced GUI for the BCDEdit utility in the Windows operating system. In fact, it looks to be the first GUI utility to implement the full editing of the BCD store.

The Visual BCD Editor utility allows you to create a new Windows 11/10/VHD Loader with the help of a few clicks and keystrokes.
You can create a boot sector (Linux, Ubuntu, Mac OS X) loader in one click plus the extraction of MBR or PBR with DD utility for Windows.
The latest version now comes with the automatic creation of missing Windows 11/10/8/7/VHD loader entries.
The user can create and change the value of more than 120 properties of BCD objects by simple edits. Other similar utilities do not give access to not more than 30 properties. It is available for download it from boyans.net.
The Visual BCD Editor tool also includes Dual-boot Repair, discussed above – a one-click repair facility.
TIP: Also check out another similar tool EasyBCD.
Also read: The boot configuration data store could not be opened.
В этой статье мы разберемся, как восстановить загрузчик Windows 10 или 11 на современном компьютере, на котором используется UEFI интерфейс вместо классического BIOS и таблица разделов диска GPT (вместо MBR). Повреждение загрузчика Windows может быть вызвано установкой второй ОС (Dual Boot — конфигурация), повреждением файловой систему, некорректным восстановлении Windows после сбоя, удалением скрытых разделов, вирусом-вымогателем и рядом других причин.
Данная статья содержит подробную пошаговую процедуру восстановления поврежденного или удаленного загрузчика ОС в Windows 11/10/8.1 и Windows Server 2022/2019/2016/2012R2 на компьютерах, которые работают в нативном (не legacy) режиме UEFI. Инструкцию можно использовать как для восстановления бинарных файлов загрузчика Windows, так и конфигурационного файла загрузчика EFI\Microsoft\Boot\BCD (в случаях, когда Windows не загружается из-за отсутствия или повреждения файла конфигурацией загрузка BCD.
Содержание:
- Не загружается Windows: Boot configuration data is missing EFI\Microsoft\Boot\BCD
- Автоматическое восстановление загрузчика Windows
- Ручное восстановление загрузчика Windows с помощью BCDBoot
Не загружается Windows: Boot configuration data is missing EFI\Microsoft\Boot\BCD
UEFI компьютер с Windows, установленной в наивном режиме, не сможет загрузиться при повреждении EFI загрузчика Windows. При попытке загрузиться с диска с повреждённым или отсутствующим EFI загрузчиком появится BSOD (синий экран смерти) с ошибкой:

The boot configuration data for your PC is missing or contains errors.
File :\EFI\Microsoft\Boot\BCD
Error code: 0xc000000f
или
Error code: 0xc000014c
В русской версии Windows ошибка может быть такая:
Ваш компьютер нуждается в ремонте Данные конфигурации загрузки для вашего ПК отсутствуют или содержат ошибки Файл:\EFI\Microsoft\Boot\BCD

Код ошибки: 0xc000000f
Эта ошибка говорит о повреждении или даже полном удалении конфигурации загрузчика Windows — Boot Configuration Data (BCD). Если вы попытаетесь восстановить загрузчик на UEFI компьютере с помощью утилиты
bcdedit
, вы получите такую ошибку:
The boot configuration data store could not be found.
The requested system device cannot be found.
Дело в том, что если Windows 10/11 установлена в нативном режиме UEFI на GPT диск, то EFI загрузчик Windows (Windows Boot Manager) хранит программу управления загрузкой и конфигурацию BCD на отдельном скрытом разделе EFI (размером 100 мб с файловой системой FAT32). Утилита bcdedit не видит этот EFI раздел, и соответственно не может управлять конфигурацией загрузчика на нем.
Если при загрузке Windows появляется только черный экран с надписью “Operating System not found”, скорее всего у вас полностью удален загрузчик Windows. Следуйте инструкции по ссылке.
Автоматическое восстановление загрузчика Windows
Процедура автоматического восстановления загрузчика, зашитая в среду восстановления Windows (WinRe), как правило, в таких случаях бессильна. Но попробовать все-же стоит:
- Загрузитесь с диска загрузочного диска, диска восстановления или установочной флешки с Windows 10 или 11;
- На экране установки нажмите кнопку Восстановление системы;
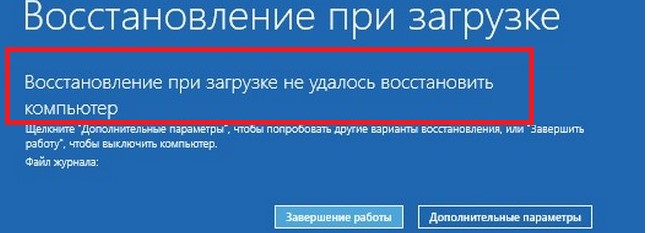
- Затем выберите пункт Поиск и устранение неисправностей -> Восстановление при загрузке и выберите ОС, загрузчик которой нужно попытаться восстановить;
- Но скорее всего результат будет отрицательный: Восстановление при загрузке не удалось восстановить компьютер

Ручное восстановление загрузчика Windows с помощью BCDBoot
Перейдем к процедуре ручного восстановления EFI загрузчика Windows на UEFI компьютере.
Для восстановления конфигурации загрузчика (BCD), вам нужно загрузить компьютер с оригинального установочного диска с Windows (диска восстановления или специально подготовленной установочной USB флешки с Windows ). После загрузки в среде восстановления нужно открыть окно командной строки: выберите Восстановление системы -> Диагностика -> Командная строка (System Restore -> Troubleshoot -> Command Prompt).
Командную строку также можно запустить, если у вас под рукой есть только установочный диск с Windows. Для этого достаточно на самом первом этапе установки Windows (при выборе языка и раскладки клавиатуры) нажать комбинацию клавиш Shift+F10 (или Shift+Fn+F10 на некоторых моделях ноутбуков).

В открывшейся командной строке выполните запустите утилиту управления дисками, набрав команду:
diskpart
Выведите список дисков в системе:
list disk
На этом этапе очень важно определить тип таблицы разделов на диске, на котором установлена Windows: MBR или GPT. Дело в том, что EFI загрузчик используется только на дисках с GPT разметкой.
Если у диска в столбце Gpt указана звездочка (
*
), тогда на диске используется таблица разделов GPT, если нет – MBR.
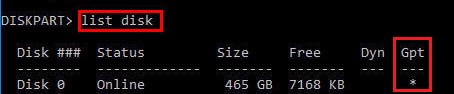
Если с помощью diskpart вы определили, что на вашем диске используется GPT разметка, следуйте дальнейшим шагам инструкции по восстановлению загрузчика.
Если у вас разметка MBR, тогда данная инструкция не применима к вашему компьютеру. Скорее всего у вас компьютер с BIOS, или в настройках UEFI включен режим совместимости Legacy/Compatibility Support Module/CSM.
На MBR дисках загрузчик хранится на отдельном разделе System Reserved, а не на EFI разделе (ни в коем случае не конвертируйте таблицу разделов MBR в GPT, пока не исправите загрузчик!!) Используйте другую инструкцию по восстановлению BCD загрузчика на MBR (Master Boot Record) диске.
Выберите диск, на котором установлена ваша Windows (если жесткий диск в системе один, его индекс должен быть равен 0):
sel disk 0
Выведите список томов и разделов в системе:
list partition
list volume
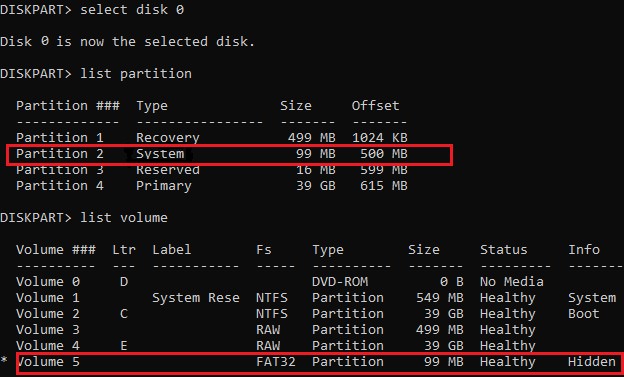
В нашем примере видно, что загрузочный раздел EFI имеет индекс Partition2 (он же Volume 5 с меткой Hidden). Проще всего определить EFI размер по файловой системе FAT32, размеру 100 Мб (это стандартный минимальный размер для Windows компьютеров, в редких случая размер раздела может быть). Чаще всего для него используется метка — System EFI или ESP/ EFI System Partion).
В нашем примере основной раздел, на который установлена Windows, имеет индекс volume 2, отформатирован в файловая система NTFS и ему назначена буква C:.
В вашем случае назначенная буква диске может отличаться. Это зависит, как вы загрузили свой компьютер в среде WinPE. Проще всего определить его по размеру. Если вы не уверены, нужно проверить что на этом диске есть каталог Windows. Выйдите из утилиты diskpart (команда exit) и выполните команду:
dir C:\
Убедитесь, что на этом диске есть каталоги
Windows
,
Program Files
,
Users
и прочие.
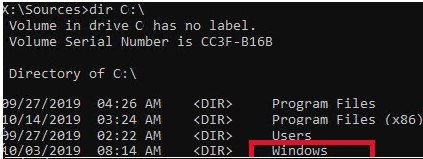
Если этих каталогов нет, значит вашему диску с Windows назначена другая буква диска. Проверьте содержимоет дисков с другими буквами.
Запомните букву диска, назначенную разделу с Windows, чуть ниже мы будем использовать ее в качестве одного из аргументов команды bcdboot.
В таблице также обязательно должен быть раздел MSR (Microsoft System Reserved) размером 16 мб в Windows 10/11 (или 128 Мб в Windows 8.1).
Назначьте скрытому EFI разделу произвольную букву диска (например, M:):
select volume 5
assign letter M:
Должна появится строка, свидетельствующая об успешном назначении буквы диска разделу EFI:
DiskPart successfully assigned the drive letter or mount point.
Завершите работу с diskpart:
exit
Перейдите в каталог с загрузчиком на скрытом разделе:
cd /d m:\efi\microsoft\boot\
В данном случае M: это буква диска, присвоенная разделу EFI чуть выше. Если каталог \EFI\Microsoft\Boot\ отсутствует
The system cannot find the path specified
), попробуйте следующие команды:
cd /d M:\Boot\
или
cd /d M:\ESD\Windows\EFI\Microsoft\Boot\
На этом этапе многие рекомендуют выполнить следующие команды, которые должны перезаписать загрузочную запись раздела, найти установленные Windows и добавить их в BCD:
bootrec /fixboot
bootrec /scanos
bootrec /rebuildbcd
или даже:
bootrec /FixMbr
(восстановление MBR записи для GPT диска выглядит странным)
Все эти команды применимы только для дисков с MBR. Если ваш компьютер загружается в UEFI режиме, то на нем обязательно используется таблица разделов GPT (как раз наш случай). Поэтому при запуске команд
bootrec
вы увидите ошибку:
access is denied
Для исправления загрузочных записей на EFI разделе нужно использовать утилиту
BCDBoot
, а не bootrec.
Утилита BCDBoot позволяет восстановить файлы загрузчика на EFI разделе, скопировав их системного каталога на разделе с Windows. Конфигурация загрузчика BCD пересоздается с помощью шаблона %WINDIR%\System32\Config\BCD-Template.
С помощью команды
attrib
снимите атрибуты скрытый, read-only и системный с файла BCD:
attrib BCD -s -h -r
Удалите текущий файл с конфигурацией BCD, переименовав его (так вы сохраните старую конфигурацию в качестве резервной копии):
ren BCD BCD.bak
С помощью утилиты bcdboot.exe нужно скопировать из системного каталога критические файлы среды загрузки UEFI в загрузочный EFI раздел и пересоздать конфигурацию загрузчика в хранилище BCD:
bcdboot C:\Windows /l en-us /s M: /f ALL
где,
- C:\Windows – путь к корневому системному каталогу Windows на диске (это ваш диск, на который была установлена ваша Windows, мы узнали его ранее с помощью команды diskpart);
- /f ALL – означает, что необходимо скопировать файлы среды загрузки Windows, включая файлы для компьютеров с UEFI и BIOS (теоретическая возможность загружаться на EFI и BIOS системах). Чтобы скопировать только EFI загрузчик, используйте команду /f UEFI;
- /l en-us — определяет языковой стандарт, который используется при инициализации хранилища BCD. По умолчанию используется en-US — английский язык (США);
- /s M: — скопировать файлы EFI загрузчика на указанный раздел;
- /с – эта новая опция BCDBoot в Windows 10, которая позволяет перезатереть имеющиеся загрузочные записи при создании нового хранилища (в том числе debugsettings). Используйте этот параметр, чтобы игнорировать старые настройки и создать полностью чистую конфигурацию BCD загрузчика;
- /v – используется для включения режима вывода подробной информации BCDBoot..
Теперь, если выполнить команду bcdedit, вы увидите следующую картину:
В секции диспетчера загрузки Windows (Windows Boot Manager) должна появится запись, указывающая на полный путь к файлу управления загрузкой UEFI. В этом примере он находится на разделе 2 (
partition=\Device\HarddiskVolume2
), путь
\EFI\MICROSOFT\BOOT\BOOTMGFW.EFI
.
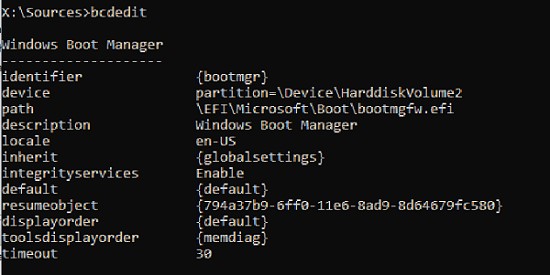
Windows Boot Manager
--------------------
identifier              {bootmgr}
device                  partition=\Device\HarddiskVolume2
path                    \EFI\Microsoft\Boot\bootmgfw.efi
description             Windows Boot Manager
locale                  en-US
inherit                 {globalsettings}
bootshutdowndisabled    Yes
default                 {CURRENT}
resumeobject            {xxxxxxxx-xxxx-xxxx-xxxx-xxxxxxxxxxxx}
displayorder            {default}
toolsdisplayorder       {memdiag}
timeout                 30
Windows Boot Loader
-------------------
identifier              {current}
device                  partition=C:
path                    \Windows\system32\winload.efi
description             Windows Server 10
locale                  en-US
inherit                 {bootloadersettings}
recoverysequence       {xxxxxxxx-xxxx-xxxx-xxxx-xxxxxxxxxxxx}
recoveryenabled         Yes
isolatedcontext         Yes
allowedinmemorysettings 0x15000075
osdevice                partition=C:
systemroot              \Windows
resumeobject            {xxxxxxxx-xxxx-xxxx-xxxx-xxxxxxxxxxxx}
В секции Windows Boot Manager должен быть указан путь к EFI разделу (
=\Device\HarddiskVolume2
), путь к файлу управления загрузкой (bootmgfw.efi). В секции Windows Boot Loader указан раздел Windows и путь к EFI загрузчику Windows (
\Windows\system32\winload.efi
). При включении компьютер передаст управление диспетчеру загрузки EFI, который запустит загрузчик Windows.
Возможные ошибки:
Перезагрузите компьютер, отключите загрузочный диск. Если вы все сделали правильно, в выборе устройств загрузки должен появиться пункт Windows Boot Manager в котором можно выбрать загрузку нужной операционной системы. Ваш EFI загрузчик и конфигурация BCD успешно восстановлены!
В некоторых случаях после восстановления BCD загрузчика, при загрузке Windows появляется ошибка
BAD SYSTEM CONFIG INFO
. Чтобы исправить ошибку:
Убедитесь, что вы не вносили недавно изменения в настройки UEFI
Загрузитесь с установочной/загрузочной флешки и измените конфигурацию загрузчика командами:
-
bcdedit /deletevalue {default} numproc -
bcdedit /deletevalue {default} truncatememory
Dual-booting is a popular choice for many users who want to have multiple operating systems installed on their computers. Whether you’re transitioning from an older version of Windows or experimenting with different software environments, dual-booting allows you to run multiple operating systems side by side. However, managing a dual-boot setup can sometimes lead to boot-related issues. That’s where Dual-boot Repair comes to the rescue. In this article, we’ll explore the user-friendly Dual-boot Repair tool and learn how it simplifies the process of fixing boot problems in Windows.
What is Dual-boot Repair?
Dual-boot Repair is a handy utility designed specifically for Windows 11, 10, 8, 7, and Vista systems. Developed by BoYans.net, this tool aims to automatically repair and restore the boot environment of your dual-boot or multi-boot system. Whether you’re experiencing boot failures, missing boot options, or other boot-related problems, Dual-boot Repair provides a straightforward solution.
How to Repair Your Dual-Boot System?
Follow these easy steps to repair your Dual-boot system:-
Step 1. Download Dual-boot Repair, run the installer, and follow the on-screen instructions to install the tool on your computer. There are separate versions available for Windows 10, 8, 7, and Vista.
Step 2. After installation, launch the Dual-boot Repair tool from your desktop or the Start menu.
Step 3. Dual-boot Repair offers an automatic repair option, which is the simplest way to fix boot-related issues. Click on the “Automatic Repair” button within the tool’s interface. The tool will analyze your system, repair any damaged boot components, and recreate the necessary boot environment.
Step 4. After the repair process is complete, restart your computer. You should now be able to boot into your dual-boot system without any issues. The repaired boot environment will provide the necessary boot menu options to choose between your installed operating systems.
Advanced Options for Further Customization
If you want to dive deeper into customizing your boot environment, Dual-boot Repair provides additional advanced options. These options allow you to fine-tune your dual-boot system to your liking. Here are a few notable options:-
- Repair BCD: This option uses the bcdboot.exe utility to fix the Boot Configuration Data (BCD) file. It is useful when you need to manually repair or create a loader entry for a specific operating system.
- Import and Export BCD: These options leverage the bcdedit.exe utility and enable you to import or export BCD settings. This can be handy when you want to back up or transfer your boot configuration.
- Repair Boot Records: This option utilizes the bootsect.exe utility to repair the Master Boot Record (MBR) and Partition Boot Record (PBR). It helps resolve issues related to the boot records of your drives.
- Disk Management: Dual-boot Repair provides a shortcut to the native Windows Disk Management tool. You can use this option to manage your partitions, create new ones, shrink or extend existing partitions, and more.
- Admin console -> bcdedit: This option opens a command prompt with administrative rights, executing the bcdedit command to list the existing BCD entries. It allows you to view and manage your boot configuration using the command-line interface.
Download Dual-boot Repair
You can download Dual-boot Repair from its official website.
Conclusion
Dual-boot Repair is a user-friendly tool that simplifies the process of repairing boot-related issues in dual-boot or multi-boot systems running Windows 10, 8, 7, or Vista. With its automatic repair feature and advanced options for customization, it offers a comprehensive solution for resolving boot failures, restoring missing boot options, and managing the boot environment. If you’re facing boot-related problems in your dual-boot setup, Dual-boot Repair is a reliable tool to have in your troubleshooting toolkit.
repair
dualboot
windows
linux
boot
recovery
Free, open source software for repairing dual-boot configurations on Windows and Linux computers
What is Dual-boot Repair?
Dual-boot Repair is a free, open source software application designed to repair and maintain dual-boot systems running both Windows and Linux operating systems. It provides an easy-to-use graphical interface for diagnosing and automatically fixing many common issues that can prevent dual-boot systems from properly booting into each operating system.
Some of the key features and capabilities of Dual-boot Repair include:
- Automatically detecting Windows and Linux installations on a dual-boot system
- Fixing Master Boot Record (MBR) and bootloader issues that may prevent booting
- Repairing EFI boot permissions and entries
- Rebuilding initramfs images to ensure hardware drivers are available
- Updating GRUB and other bootloaders with correct OS configuration
- Providing detailed boot diagnostics and logs for advanced troubleshooting
- Easy-to-use wizard-style interface requiring no command line usage
- Completely free and open source software
Overall, Dual-boot Repair makes it much easier for dual-boot users to maintain these complex configurations and prevent or recover from issues that may occur overtime or when changing hardware or software. With its automatic detection and repair capabilities, it simplifies the process of keeping a dual-boot system working properly.
Dual-boot Repair Features
Features
- Automatically detects and repairs many common dual-boot issues
- Fixes bootloader configurations like GRUB
- Repairs partition issues
- Restores Master Boot Records (MBRs)
- Rebuilds boot menus
- Safeguards boot partitions
- Adds missing operating systems to boot menu
- Removes invalid or non-existent OS entries from boot menu
Pros
Free and open source
Easy to use with an intuitive interface
Automates many complex repair tasks
Supports repairing Windows/Linux dual-boot issues
Actively maintained and updated
Cons
Limited to repairing dual-boot issues only
May not fix every complex scenario
Requires some technical knowledge to understand repairs
Not compatible with macOS or other operating systems besides Windows/Linux
Official Links
The Best Dual-boot Repair Alternatives
Top
Os & Utilities
and
Dual Boot Tools
and other similar apps like Dual-boot Repair
Hiren’s BootCD
Hiren’s BootCD is a bootable CD/USB containing various diagnostic tools and utilities that allow you to perform tests and maintenance tasks on a computer. It contains many common software programs for diagnosing hardware issues, recovering data, resetting passwords, partitioning drives, cloning disks, and more.Some of the key features and tools…

Hiren’s BootCD PE
Hiren’s BootCD PE is a bootable CD (or USB drive) that contains a range of diagnostic, repair, partition management, data recovery, and system testing tools that can be used to fix various issues with computers. It boots into a lightweight Mini Windows environment rather than loading the installed operating system.This…
Trinity Rescue Kit
Trinity Rescue Kit (TRK) is a free Linux distribution that functions as a system recovery toolkit. It is designed specifically for repairing and recovering Linux systems that are otherwise unbootable or failing to start properly.Key features and tools included in TRK:Reset forgotten passwords on Linux systemsCloning tools to duplicate hard…

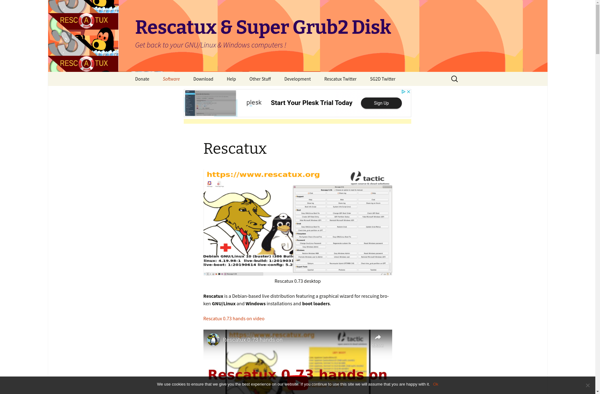
Rescatux
Rescatux is a bootable rescue CD or USB drive designed to fix common issues with Linux, Windows and Mac operating systems. It can be a useful tool to have on hand for troubleshooting computer problems.Some key features of Rescatux include:Fixing GRUB bootloader issues — If the GRUB bootloader gets corrupted…
USB/DVD DLC Boot 2019
USB/DVD DLC Boot 2019 is a lightweight bootable USB/DVD creator software for Windows. It allows you to easily install and boot multiple operating systems such as Linux distributions or Windows installations from a USB flash drive or DVD.Some key features include:Intuitive interface to select an ISO file and target USB…
SystemRescue
SystemRescue (also known as SystemRescueCd) is a Linux distribution that is specifically designed for system recovery and repair. It runs as a bootable live system from a CD or USB drive without needing to install anything on the hard drive.Some of the key features of SystemRescue include:An intuitive graphical user…
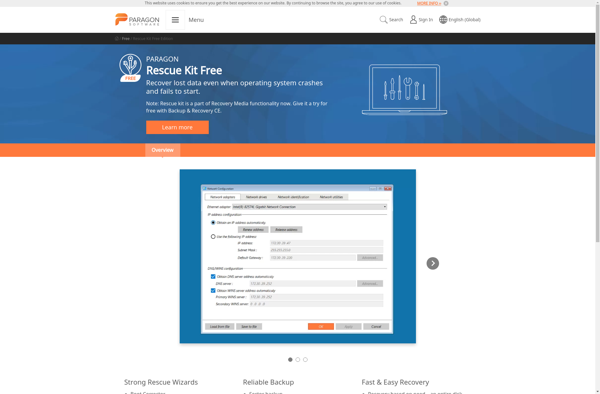
Paragon Rescue Kit
Paragon Rescue Kit is a comprehensive data recovery and system restore software suite contained on a bootable USB or CD. It provides a wide range of tools to help diagnose and repair corrupted or failing hard drives and systems.Key features include:Bootable environment independent of the main OS, allowing access to…
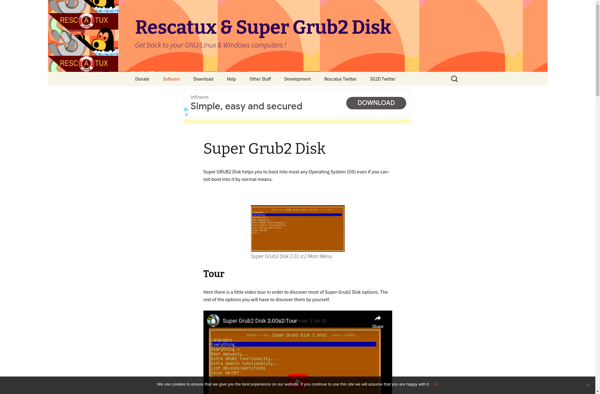
Super GRUB2 Disk
Super GRUB2 Disk is a bootable CD/DVD or USB drive that is designed to help repair and restore corrupted bootloaders and boot sectors on Linux and other operating systems. It contains multiple versions of the GRUB bootloader as well as a variety of diagnostics tools to identify and fix common…
ALT Linux
ALT Linux is a Linux distribution that is based on the source code of Red Hat Enterprise Linux and SUSE Linux Enterprise Server. It was created in Russia in 2001 with the goal of providing a free and open source Linux distribution for use in schools, government institutions and businesses…
Finnix
Finnix is a Debian-based Linux distribution designed to be run as a live operating system from removable media like a CD/DVD or USB drive. It focuses on system administration tasks such as testing, diagnosing, and recovering Linux systems.Key features of Finnix include:Lightweight — under 150MB image size, runs well on…
Anvi Rescue Disk
Anvi Rescue Disk is a bootable CD or USB thumb drive that provides a variety of free system recovery and diagnostic tools for fixing common computer problems. It boots into a minimal Linux environment without needing to load the operating system already installed on the computer.Some of the key features…
Avira AntiVir Rescue System
The Avira AntiVir Rescue System is a free bootable antivirus scanner designed to remove virues and malware from a Windows computer. It can be used to clean an infected system that will not boot properly or cannot run antivirus software.It works by booting your computer from a CD or USB…

PC Win Boot
PC Win Boot is a comprehensive bootable USB toolkit for diagnosing and repairing Windows computer issues. It provides an easy-to-use graphical user interface that allows you to:Reset forgotten Windows passwords — Easily reset local or domain admin passwords if you have forgotten your login credentials.Backup and restore Windows — Create…