
More people are working remotely day after day as the current global pandemic is on the rise again. For that, they need to access their computers and devices in their offices from the comfort of their home.
Rather than using third-party tools and applications to remotely access their machines, such as TeamViewer or Chrome Remote Desktop, you can access your computers directly using the Microsoft Remote Desktop application.
Microsoft Remote Desktop is an excellent, free-to-use application best suited for Windows 10 users through which they can connect to other devices remotely. The app can be downloaded and installed through the Microsoft Store. However, the application is only a pawn in the entire process. Making a successful connection between devices over the internet requires further configurations, which are discussed in this article.

Let us show you how you can access a Windows 10 PC using Remote Desktop.
Table of Contents
The process we are about to discuss needs to be performed in the same order. Here are the highlights of the process:
- Target PC:
- Prevent your PC from entering sleep mode
- Enable/allow remote connection
- Set static IP address
- Target router:
- Determine your public IP address
- Configure DDNS (in case of dynamic public IP address)
- Configure port forwarding
- Source PC:
- Install & configure Microsoft Remote Desktop
Continue reading the step-by-step guide to perform all of these tasks.
Prevent your PC from entering sleep mode
When a computer enters sleep mode, it is no longer responsive to network calls. Meaning, if a computer is in sleep mode and you are trying to access it remotely, it will be an unsuccessful attempt. Therefore, it needs to be configured such it does not enter sleep mode. Here are 4 ways you can prevent it from happening.
Enable/allow remote connection on Windows 10 PC
The Windows 10 firewall blocks any remote connections by default. It needs to be enabled and allowed through the firewall for a successful Remote Desktop Protocol (RDP) connection. There are 2 ways to enable remote desktop connection in Windows 10.
Enable remote desktop connection through Control Panel
Open the Control Panel, click System and Security, and then click Allow remote access under System.

In the System Properties window, select the radio button next to “Allow remote connections to this computer” and then make sure the checkbox under it is checked. Click Apply and Ok.

Enable remote desktop connection through Settings app
The same can be achieved using the Settings application in Windows 10. Open the Remote Desktop setting in the Settings app (Run -> ms-settings:remotedesktop) and toggle the slider under Enable Remote Desktop.

Remote Desktop connection is now successfully enabled on your PC. Let us now proceed with the other configuration steps.
Set static IP address
By default, most routers are set to Dynamic Host Configuration Protocol (DHCP). This protocol automatically allots vacant IP addresses to all connected devices to avoid any IP conflict. However, in a further step down the article, we will require to forward a port onto the IP address of this target PC. For that, we need the IP address of this machine to be static, i.e. not continuously changing.
Therefore, we must set a static IP address for this right now. Before we do that, let us see what the current IP address of the machine is so that we allocate the same static IP address to avoid an IP address conflict with any of the other devices on the network.
Check your current local IP address
To identify the current allotted IP address, open Command Prompt and type in ipconfig /all. This command will display all the IP configurations of all network ports on the PC, including virtual ones.
You need to look for the “IPv4 address” under the network adapter that is connected to the router, it may be wired or wireless. In our case, we are using Wi-Fi to connect to the router:

In the image above, the IP of our target PC is 192.168.100.245. We will be assigning the same IP address manually to make it static.
Configure static IP address
To configure a static IP address on a Windows 10 machine, type in ncpa.cpl in Run to open the Network Connections window. From there, right-click the network adapter connected to the router and click Properties from the context menu.

On the Properties window, click Internet Protocol Versions 4 (TCP/IPv4) and then click Properties.

In the next Properties window, select the “Use the following IP address” radio button and then fill in the fields below from the information obtained from the Command Prompt earlier which includes the IP address, subnet mask, default gateway, and DNS server(s). Once done, click OK on all open windows to close them.
Note: You can set the DNS server(s) to Google’s addresses which are 8.8.8.8 and 8.8.4.4.

You have now successfully set up a static IP address on your computer. Make sure that you are still connected to the internet to ensure that all configurations are done correctly.
As an alternative, if you are more comfortable with the command line, you can also set a static IP address and DNS server using the command line in Windows 10.
Determine public IP address
The next part of the process is determining your network’s public IP address. This IP address is provided by your Internet Service Provider (ISP). You can check your public IP address via command line, or simply type in “What’s my IP address” on Google’s website to find out.

Your public IP address will then be highlighted, as shown in the image above.
Usually, this IP is static. But often ISPs tend to provide dynamic public IP addresses which change from time to time. If that is the case, you need to contact your ISP and ask for a static IP address, which may cause a little extra as these IP addresses are primarily reserved for businesses.
Alternatively, you can also configure the Dynamic Domain Name System (DDNS) on your router to assign your router a name it will track regardless of the change in the public IP address. Note that this only requires to be done if your public IP address keeps changing.
Configure DDNS on router
Dynamic DNS keeps track of your changing public IP address and works like a regular Domain Name Server. The name you set for the domain will keep still while the public IP address keeps changing.
Note: Not all routers have this option. Please check whether the setting is supported on your router via the manufacturer’s website.
First, you need to access the router’s configuration interface via a web browser. Enter the IP address of the router’s interface which can usually be found on the back of the router.
Note: Commercial routers, such as Juniper, Cisco, etc., have a command-line interface that needs to be accessed using the SSH protocol with apps like Putty.

Now log into the interface using the credentials which are usually available on the back of the router, if not changed by a net-admin. After logging in, look for “DDNS configuration” which is usually under Network Application, but each router can have its own different layout.
Configure the DDNS settings according to your requirements and set a name for the domain, as in the example below:

Now that DDNS has been configured, you can proceed to the next step.
Configure port forwarding on router
Network ports are used by Windows services and applications to send and receive data over the network. When accessing a PC over the internet with Remote Desktop, the router needs to understand which port to forward the incoming traffic on, as one router may have many internally connected devices.
To configure port forwarding, access the router’s interface again and log in. Look for “Port forwarding” or “port mapping” settings within the router. These are usually found under Forward Rules. Enter the following configuration:
- Enable port mapping: Check
- Type: Application
- Mapping Name: Enter any name for the rule
- Internal host: IP address of target PC (Static IP that we set earlier)
- Protocol: TCP
- Internal port: 3389
- External port: 3389

Save all settings and you have now successfully configured port forwarding on your router.
Install & Configure Microsoft Remote Desktop on source PC
We can now begin the setup phase on the source PC from where you will be remotely accessing the other computer. We shall start with installing Microsoft Remote Desktop.
Open the Microsoft Remote Desktop page in the Microsoft Store and click Get.

The Microsoft Store will then open and the app will begin downloading and installing. Once installed, click Launch. When the application launches, click Add in the top-right corner, and then click PCs.

On the next screen, under PC name enter the public IP address or the DDNS (if configured). Then, click on the + sign in front of User Account.

In the Add an account window, enter the login details for the remote PC. If there is a Microsoft account associated, enter your Microsoft account’s credentials. If you have a local account, enter the local account’s credentials. Click Save when done.

Now configure any additional settings (optional) and click Save at the end. You may now connect to a remote PC using the Remote Desktop application from the comfort of your home, or anywhere else with a PC and a stable internet connection.
Closing words
The process may seem lengthy, but it is doable. This needs to be a one-time configuration so you can access your remote PC from anywhere in the world with a stable internet connection, without having to purchase any third-party software.
Microsoft Remote Desktop is a simple yet excellent tool to help you manage various remote devices that you can connect to simultaneously and be productive.
What is RDP Web Access?
RDP Web Access is a feature of Microsoft Remote Desktop Services that allows users to access remote desktops and applications via a web browser. This technology provides a convenient and platform-independent method for remote access, leveraging the capabilities of
HTML5
to deliver a seamless user experience.
Prerequisites for RDP Web Access
Supported Windows Server Versions
RDP Web access is supported on Windows Server devices. Ensure that your PC or server is updated with the latest service packs and security updates to guarantee compatibility and security. Windows Home editions are not supported as the Remote Desktop Protocol is absent on those devices.
Required Roles and Features
To deploy RDP Web Access, the following Remote Desktop Services roles must be installed and configured:
·
RD Gateway:
Acts as a secure gateway for RDP connections from external networks.
·
RD Connection Broker:
Manages user sessions, load balancing, and reconnections.
·
RD Web Access:
Provides the web portal for accessing remote desktops and applications.
Setting Up RDP Web Access
Step-by-Step Installation Guide
1. Install Required Roles:
· Open Server Manager and add the Remote Desktop Services roles (RD Gateway, RD Connection Broker, RD Web Access).
2. Configure SSL Certificates:
· Obtain SSL certificates from a trusted Certificate Authority (CA).
· Install and configure these certificates on the RD Gateway and RD Web Access roles to secure connections.
3. Set Up Remote Desktop Licensing:
· Configure the Remote Desktop License Server and ensure it is properly reporting and managing licenses.
· Choose between per-user and per-device licensing based on your organization’s needs.
4. Configure Network Settings:
· Ensure adequate bandwidth and low latency for optimal performance.
· Configure firewalls to allow traffic on HTTPS (port 443) and RDP (port 3389).
Accessing the RDP Web Client
Once setup is complete, provide users with the URL to access the RDP Web Client through their preferred web browser. Ensure the browser is updated to the latest version for the best performance.
Advanced Configuration and Troubleshooting
Load Balancing and Session Persistence
Implement load balancing to ensure smooth operation during peak times and configure session persistence settings to enhance the user experience in a multi-server environment. Use the RD Connection Broker to distribute the load and maintain session continuity.
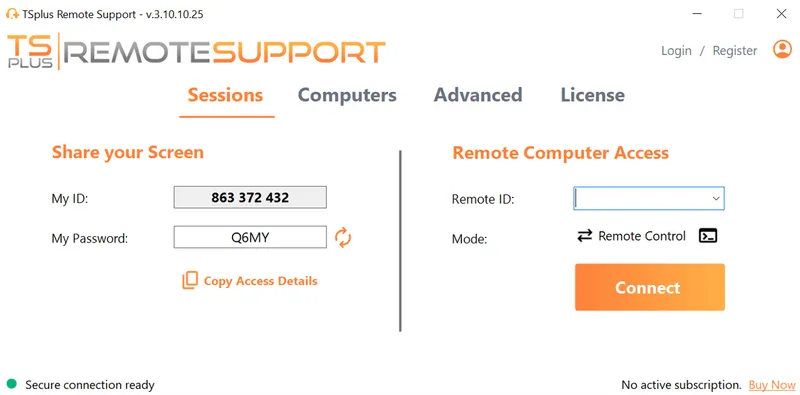
TSplus Remote Support Free Trial
Cost-effective Attended and Unattended Remote Assistance from/to macOS and Windows PCs.
Troubleshooting Common Issues
·
Connectivity Problems:
Verify network settings and SSL configurations.
·
Certificate Errors:
Ensure that SSL certificates are valid and correctly installed.
·
Performance Issues:
Check bandwidth and latency and optimise network settings accordingly.
Security Best Practices for RDP Web Access
Multi-Factor Authentication
Implement two factor authentication (2FA) or multi-factor authentication (MFA) to add an extra layer of security. 2FA or MFA reduce the risk of unauthorised access even if credentials are compromised.
Regular Updates and Patch Management
Keep your RDP Web Access environment secure by regularly applying updates and patches to all software components. This minimises vulnerabilities and protects against new threats.
Monitoring and Logging
Monitor remote access sessions and maintain logs to detect and respond to suspicious activities. Use tools like TSplus Advanced Security for enhanced monitoring and threat detection.
Secure Configuration
· Use strong passwords and enforce password policies.
·
Limit access to necessary users and roles
.
· Regularly review and update security settings.
Enhancing Remote Access with TSplus
For organizations seeking advanced features and a user-friendly setup, TSplus offers a powerful alternative to traditional RDS setups with Remote Access. Indeed, the software enables a variety of remote connectivity possibilities, from RDP to web only, from full desktop to application only, publishing legacy applications at the drop of a hat. Teamed with robust security measures from TSplus Advanced Security, comprehensive support tools from Remote Support and intuitive management tools with Server Monitoring, TSplus enhances remote desktop and application access capabilities.
Client Side with TSplus
Microsoft Windows versions 7 onwards are fully supported. If you are connecting from MacOS, you can use any Mac RDP client or the TSplus HTML5 client. Similarly, you can use Rdesktop or the TSplus HTML5 client to connect from Linux.
Installation and Configuration of TSplus Remote Access
For a brief setup guide,
Our quick start guide is perfect.
Should you need further information, all TSplus software is well documented and fully described online and you can access it from different parts of the quick-start guide page.
To Conclude on RDP Web Access with TSplus
By following this guide, you can effectively deploy, secure and manage RDP Web Access, providing reliable seamless remote access for your organizations. Visit
TSplus.net
To explore how our software can transform your remote access strategy. Try TSplus for free for 15 days.
Last Updated :
15 Apr, 2025
The Remote Desktop feature in Windows 10 allows you to access and control another computer remotely from anywhere. Whether you need to manage files, troubleshoot issues, or connect to your work machine, knowing how to set up a Remote Desktop in Windows 10 is essential. This guide will walk you through the process of enabling Remote Desktop in Windows 10, configure the settings, and show you how to use Remote Desktop in Windows 10 to connect to another device seamlessly.
Table of Content
- What is a Remote Desktop?
- How to Set Up Remote Desktop in Windows 10?
- STEP 1: Using Settings App
- STEP 2: Using Control Panel
- STEP 3: Using CMD
- How to Use Remote Desktop in Windows 10?
What is a Remote Desktop?
A remote desktop is a software or operating system feature that enables a user to access and control a computer from a different location. Remote desktop users can access their desktop, open and edit files, and run applications just like they were sitting at their desktop computer.
How to Set Up Remote Desktop in Windows 10?
To connect to a computer with Remote Desktop you need to enable it on the computer. There are three ways to enable Remote Desktop on the host computer in Windows 10:
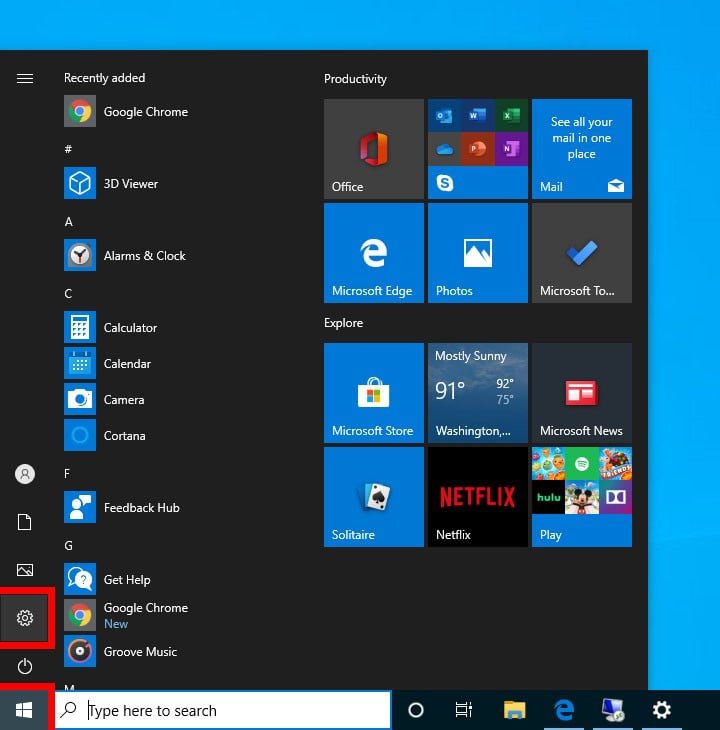
Step 1: Using Settings App
1. Open the Settings app by pressing the Windows key + I.
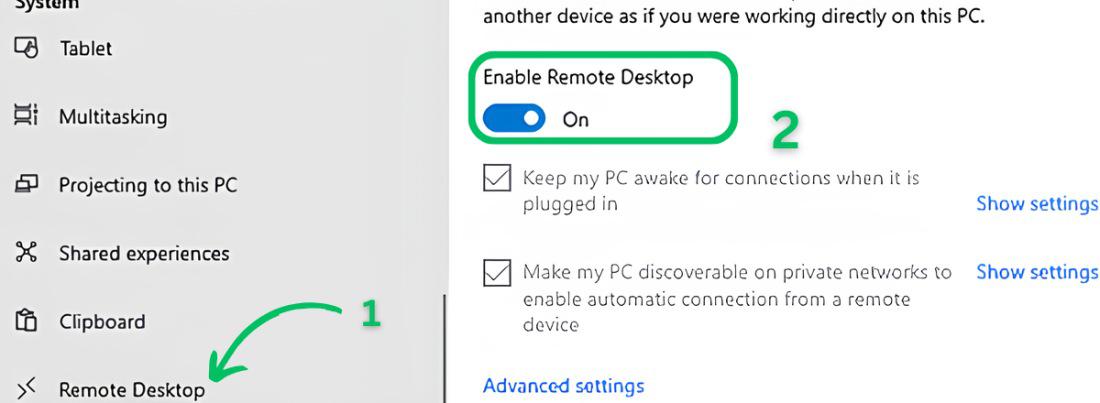
2. Navigate to System > Remote Desktop.
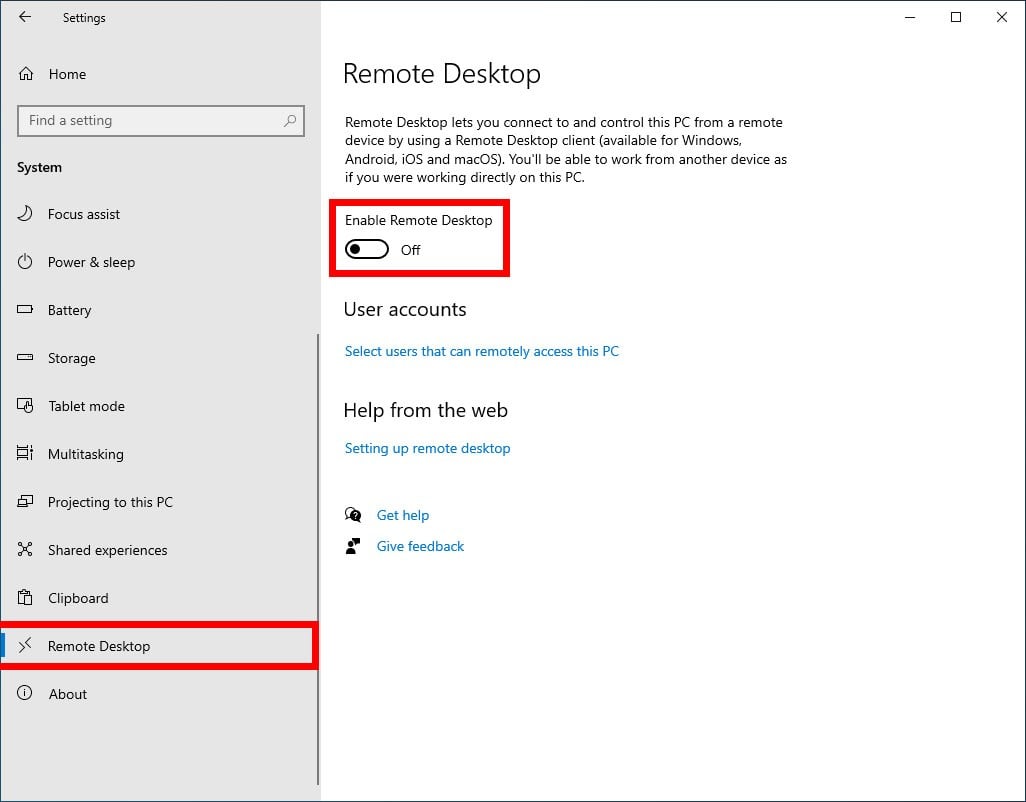
3. Toggle on «Remote Desktop.«
Step 2: Using Control Panel
1. Press Win + R then on the run dialog type «Control Panel«
2. Then, Navigate to «System and Security»
3. Under the System click on «Allow remote access«
4. Navigate to the «Remote» tab.
5. In the «Remote Desktop» section, check the «Allow remote connections to this computer» option.
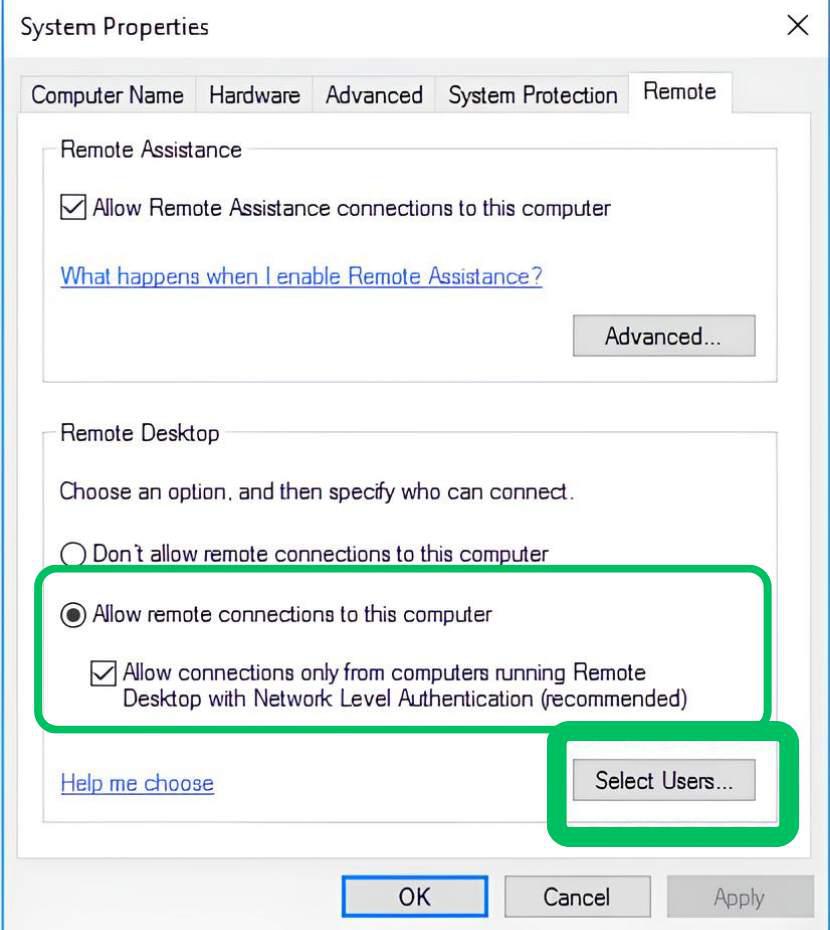
6. Select User for a specific user like administrator or normal
7. Click the Apply button. Then, click on the OK button.
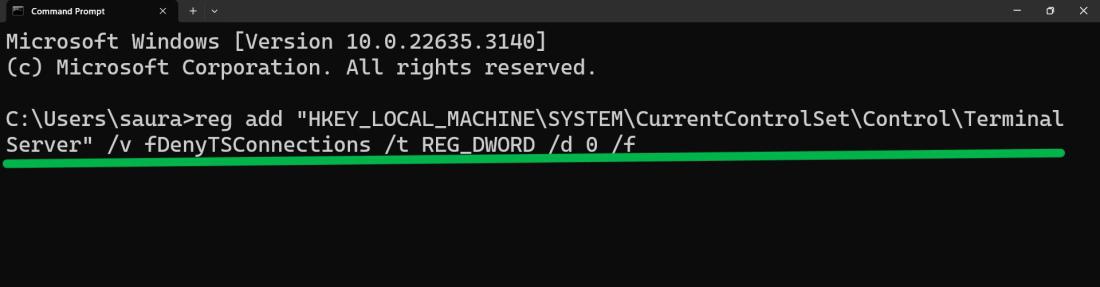
Step 3: Using CMD
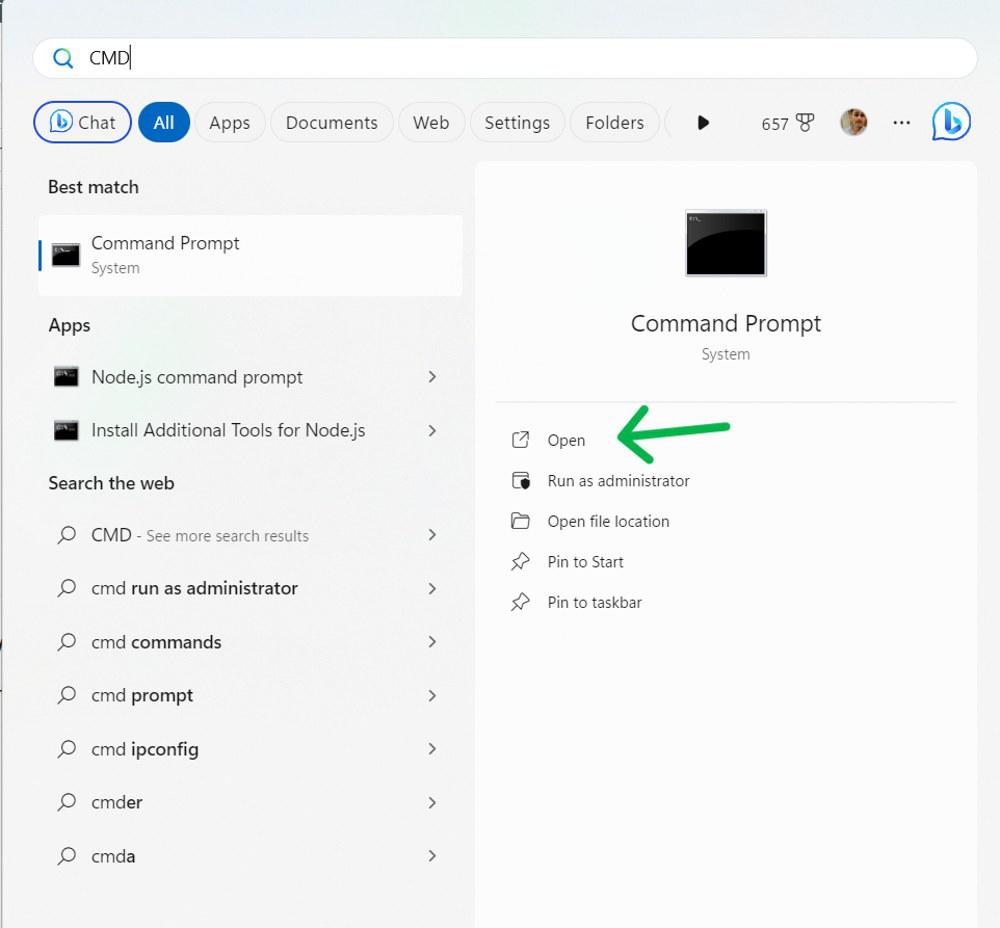
1. Press WIn + S then on the search bar type «CMD» and click on «Run as administrator«
2. Type the following command and hit the enter button
reg add "HKEY_LOCAL_MACHINE\SYSTEM\CurrentControlSet\Control\Terminal Server" /v fDenyTSConnections /t REG_DWORD /d 0 /f
How to Use Remote Desktop in Windows 10?
To open Remote Desktop, open the free app from Microsoft Store, Google Play, and the Mac App Store, and add the desired PC name. Select the remote PC and wait for the connection to complete.
Follow these steps to use Remote Desktop in Windows 10 from your phone:
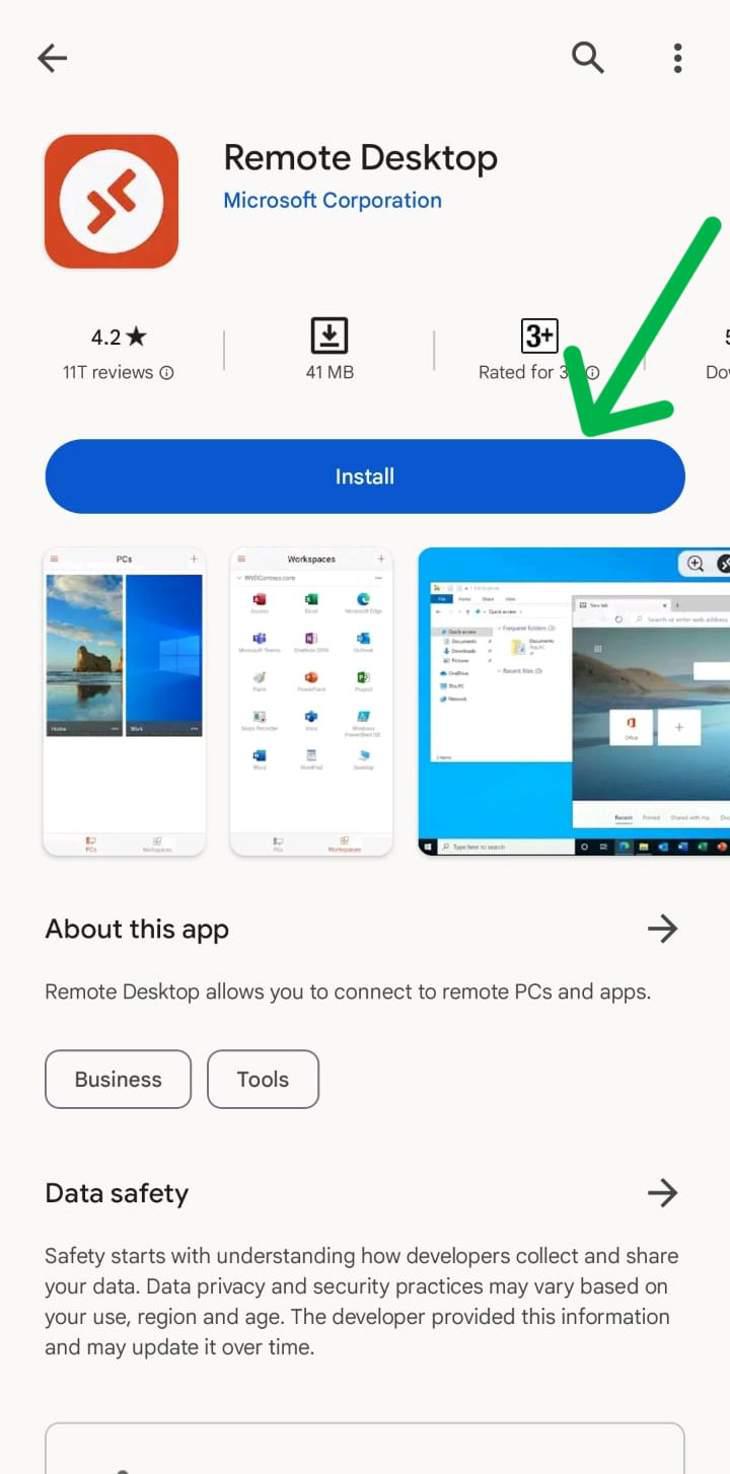
Step 1: Open Play Store or App store then on the search bar type «Microsoft Remote Desktop» and click on the «Install» button
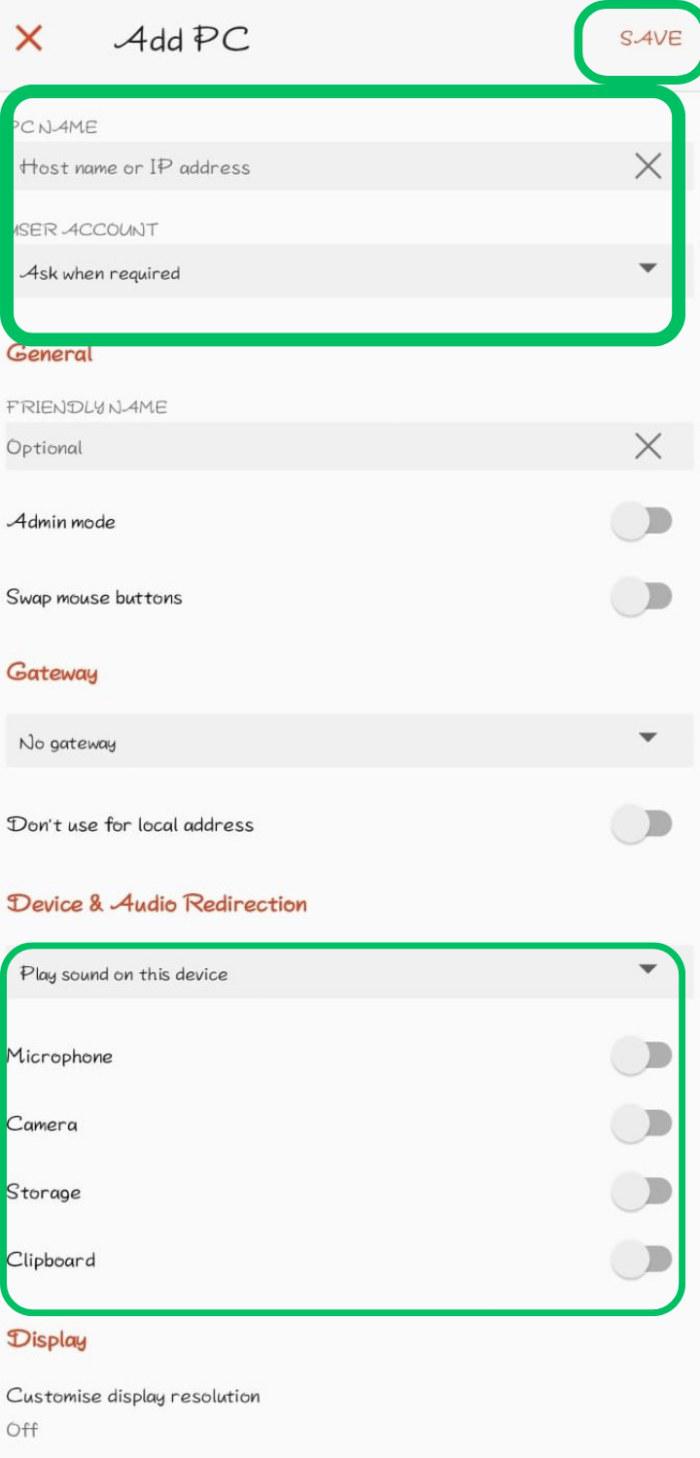
Step 2: After installing click on the «Plus icon» on the top then select «Add PC»

Step 3: Then, In input type your PC name, and user account, and toggle the feature which you want to use like microphone, camera, admin mode, etc.
Conclusion
Setting up and using Remote Desktop in Windows 10 makes it easy to access your computer from virtually anywhere. By following the steps to enable Remote Desktop and configure the connection, you can easily work remotely or assist others. The Windows 10 Remote Desktop feature provides a secure and efficient way to stay connected to your files and applications, no matter where you are.
Also Read
- How to Set Up Remote Desktop Access to Ubuntu From Windows?
- How to Get ‘This PC’ Icon On Desktop in Windows 11?
- How to Change the Desktop Background in Windows 11?
- Remote Web Access overview. When you are away from your office, you can open a web browser and access Remote Web Access from anywhere that has Internet access.
- Turn on Remote Web Access. You can turn on Remote Web Access by running the Set up Anywhere Access Wizard from the server Dashboard.
- Change your region. You must be a network administrator to change the region setting in Windows Server Essentials. …
- Manage Remote Web Access permissions. When you add a user account in Windows Server Essentials, the new user is allowed by default to use Remote Web Access.
- Secure Remote Web Access. Windows Server Essentials uses a security certificate to help secure the information that is exchanged between the software and a web browser.
- Manage Remote Web Access and VPN users. You can use VPN to connect to Windows Server Essentials and access all your resources that are stored on the server.
Access a computer remotely
- On your computer, open Chrome.
- In the address bar at the top, enter remotedesktop.google.com/access , and press Enter.
- Click Access to select which computer you want.
- Enter the PIN required to access another computer.
- Select the arrow to connect.
How to setup remote access?
Once installed, you can now connect to remote endpoints by following the steps below:
- The software needs to be downloaded on both the local and remote computers.
- Open the software on both the local and remote computers.
- Write down the ITarian ID number and password of the remote computer.
- Click “Start Connection.”
- Enter the ID number and password of the remote computer.
- Click “Connect.”
More items…
How do I enable remote access in Windows 10?
Windows 10 Fall Creator Update (1709) or later
- On the device you want to connect to, select Start and then click the Settings icon on the left.
- Select the System group followed by the Remote Desktop item.
- Use the slider to enable Remote Desktop.
- It is also recommended to keep the PC awake and discoverable to facilitate connections. …
More items…
How do I setup my computer for remote access?
To enable remote connections on Windows 10, use these steps:
- Open Control Panel.
- Click on System and Security.
- Under the “System” section, click the Allow remote access option …
- Click the Remote tab.
- Under the “Remote Desktop” section, check the Allow remote connections to this computer option.
How to properly secure remote access?
- Windows or Mac login when connecting remotely
- Request permission to connect to the user’s computer
- Automatically blank the remote screen when connected
- Automatically lock remote computer when disconnected
- Lock the remote computer’s keyboard and mouse while in session
- Lock the streamer settings using Splashtop admin credentials
What is a remote access website?
Remote Web Access is a feature of Windows Servers Essentials that enables you to access file/folders and computers on your network via a web browser from anywhere with Internet connectivity. Remote Web Access helps you stay connected to your Windows Server Essentials network when you are away.
What is Remote Desktop web client?
The Remote Desktop web client lets users access your organization’s Remote Desktop infrastructure through a compatible web browser. They’ll be able to interact with remote apps or desktops like they would with a local PC no matter where they are.
How can I remotely access another computer over the Internet for free?
10 Best Free Remote Desktop Tools You Should KnowTeamViewer. Available in premium and free versions, TeamViewer is quite an impressive online collaboration tool used for virtual meetings and sharing presentations. … Splashtop. … Chrome Remote Desktop. … Microsoft Remote Desktop. … TightVNC. … Mikogo. … LogMeIn. … pcAnywhere.More items…
Can Remote Desktop run from URL?
An rdp:// link launching mstsc.exe is possible following this solution. There is also the Microsoft remote desktop web access solution. Regarding the chrome remote desktop, it’s accessible through the url chrome://apps within chrome.
What is the best way to Remote Desktop?
How to use Remote DesktopSet up the PC you want to connect to so it allows remote connections: Make sure you have Windows 11 Pro. … Use Remote Desktop to connect to the PC you set up: On your local Windows PC: In the search box on the taskbar, type Remote Desktop Connection, and then select Remote Desktop Connection.
How do I run a web client?
Running the WebClient servicePress WinKey + R or type into the search dialog: services.msc.Press Enter. The Services window opens.Right-click the WebClient service.Click on Properties. … If the service is stopped, click on Start.Change the Startup type to Automatic.Click OK to confirm the changes.
How can I remote into another computer using IP address?
Remote Desktop to Your Server From a Local Windows ComputerClick the Start button.Click Run…Type “mstsc” and press the Enter key.Next to Computer: type in the IP address of your server.Click Connect.If all goes well, you will see the Windows login prompt.
Is there a free remote desktop?
Microsoft Remote Desktop Microsoft produces a remote desktop connection system that is free to use and grants access to computers running the Windows Professional, Windows Enterprise, or Windows Server operating systems. You can access a remote machine from a mobile device as long as it runs Windows Mobile.
Is Google Chrome Remote Desktop free?
Pros. Chrome Remote Desktop is free to download and use. You’ll use your Google account, which is also free, to access the application. It’s easy to set up.
How do I connect to an RDP URL?
Start>All Programs>Accessories>Remote Desktop Connection Once the program loads, you can enter the path to your Remote Desktop PC into the Computer field and hit the Connect button.
What is an application used on Internet to connect to a remote computer?
Like Chrome Remote Desktop, Microsoft Remote Desktop is a simple and effective tool for achieving remote connections. This platform can help users remotely access Windows PCs from other Windows computers, mobile devices, and Macs.
What IP address do I use for Remote Desktop?
0:135:41How to Use Windows Remote Desktop Connection (RDC)YouTubeStart of suggested clipEnd of suggested clipArea by going to your Start button all programs accessories. And here in Windows 7 it’s calledMoreArea by going to your Start button all programs accessories. And here in Windows 7 it’s called remote desktop connection. And as you can see here do you have an IP address in here that’s the way I
How do I access Remote Desktop access?
How to connect RD Web Access on the Client systemType the URL of the RD Web Access Web site into a Web browser. … Enter the user name and password to log in to the RD Web Access Web site.Use the RemoteApp programs or Remote Desktop Option to connect the RD Web Access.
How do I setup Remote Desktop access?
How to setup the RD Web Access on the Host systemMake sure that on the Host system the Remote Desktop Services are installed. … Add the Remote Desktop Users on the System > Remote Settings > Remote tab > Select User > Add.Check if the RemoteApp programs are visible in the RD Web Access on the RemoteApp Manager.More items…
Turn on and Configure Remote Web Access
The following topics will help you turn on and configure Remote Web Access: 1. Remote Web Access overview 2. Turn on Remote Web Access 3. Change yo…
Customize Remote Web Access
You can customize your Remote Web Access site by adding a personal logo or background image. You can also add links on the Home page so that this i…
Troubleshoot Remote Web Access
1. Troubleshoot Remote Web Access connectivity 2. Troubleshoot your firewall 3. Troubleshoot Anywhere Access
What You’ll Need to Set Up The Web Client
Before getting started, keep the following things in mind: 1. Make sure your Remote Desktop deployment has an RD Gateway, an RD Connection Broker,…
How to Publish The Remote Desktop Web Client
To install the web client for the first time, follow these steps: 1. On the RD Connection Broker server, obtain the certificate used for Remote Des…
How to Update The Remote Desktop Web Client
When a new version of the Remote Desktop web client is available, follow these steps to update the deployment with the new client: 1. Open an eleva…
How to Uninstall The Remote Desktop Web Client
To remove all traces of the web client, follow these steps: 1. On the RD Web Access server, open an elevated PowerShell prompt. 2. Unpublish the Te…
How to add a computer to Chrome Remote Desktop?
To add your computer in Chrome Remote Desktop, so you will be able to access from anywhere using the below steps: i) Click Get Started under My Computer. Then add your computer by clicking Enable Remote Connections. Chrome will start downloading Chrome Remote Desktop Host Installer and after download install it. ii)Then you will be asked to set up the PIN. The PIN will be required to access your computer from another location. Once you set up the PIN then you are ready to access your computer from a remote location.
What is the best remote desktop app?
Chrome Remote Desktop is one of the best remote access application available for free. It is very easy to set up, use and provide a secure connection to your remote server.
What is Chrome RDP?
Chrome RDP – Easiest Way. Chrome RDP is a Microsoft’s Remote Desktop APP available as an extension on chrome browser only. In Chrome RDP, both standard RDP and SSL encryption are supported. Simply enter the address of the remote machine and connect. Let’s see, how to set up and access through Chrome RDP:
What is remote web access?
In Remote Web Access, you can: Access shared files and folders on the server. Access your server and computers on the network. This means that you can access the desktop of a networked computer as if you were sitting in front of it at your office. Remote Web Access is not turned on by default.
How to manage remote access?
To manage Remote Web Access permissions for a user account. Log on to the Dashboard, and then click Users. Click the user account that you want to manage, and then click View the account properties in the Tasks pane. In the Properties dialog box, click the Anywhere Access tab.
How does Windows Server Essentials configure router?
During this step, Windows Server Essentials attempts to automatically configure your router by using UPnP commands. To do this, your router must support UPnP standards, and the UPnP setting must be enabled on your router.
What does the setup wizard do?
When you run the Set up Anywhere Access Wizard, the wizard attempts to set up your router and Internet connectivity. After Remote Web Access is turned on, you can set up a domain name for your server and customize Remote Web Access. You can also set up the router again if you change your router.
How to change region on Windows Server Essentials?
On a computer that is connected to Windows Server Essentials, open the Dashboard. Click Settings. On the General tab, click the drop-down list in the Country/Region location of server section. From the drop-down list, select the new region, and then click Apply to accept the new region setting.
What is a domain name?
A domain name uniquely identifies your server on the Internet. Domain names consist of at least two parts: a top level domain name (TLD) and a second level domain name. For example, in contoso.com, com is the TLD and contoso is the second level domain name.
How to grant access to desktop remotely?
On the navigation bar, click USERS. In the list of user accounts, select the user account that you want to grant permissions to access the desktop remotely. In the <User Account> Tasks pane, click Properties. In <User Account> Properties, click the Anywhere Access tab.
How to update the Remote Desktop web client
When a new version of the Remote Desktop web client is available, follow these steps to update the deployment with the new client:
How to install the Remote Desktop web client without an internet connection
Follow these steps to deploy the web client to an RD Web Access server that doesn’t have an internet connection.
Connecting to RD Broker without RD Gateway in Windows Server 2019
This section describes how to enable a web client connection to an RD Broker without an RD Gateway in Windows Server 2019.
How to pre-configure settings for Remote Desktop web client users
This section will tell you how to use PowerShell to configure settings for your Remote Desktop web client deployment. These PowerShell cmdlets control a user’s ability to change settings based on your organization’s security concerns or intended workflow. The following settings are all located in the Settings side panel of the web client.
Troubleshooting
If a user reports any of the following issues when opening the web client for the first time, the following sections will tell you what to do to fix them.
Get help with the web client
If you’ve encountered an issue that can’t be solved by the information in this article, you can report it on Tech Community. You can also request or vote for new features at our suggestion box.
How to remotely connect to a computer?
The easy way to remotely connect with your home or work computer, or share your screen with others. Securely access your computer whenever you’re away, using your phone, tablet, or another computer. Share your screen to collaborate in real-time, or connect with another computer to give or receive remote support. Access my computer. Share my screen.
What is Chrome Remote Desktop?
Whether you need to access your work computer from home, view a file from your home computer while traveling, or share your screen with friends or colleagues, Chrome Remote Desktop connects you to your devices using the latest web technologies.
What is the easiest program to use for remote access?
AeroAdmin is probably the easiest program to use for free remote access. There are hardly any settings, and everything is quick and to the point, which is perfect for spontaneous support.
How does remote utility work?
It works by pairing two remote computers together with an Internet ID. Control a total of 10 computers with Remote Utilities.
What is ShowMyPC?
Always displays a banner ad. ShowMyPC is a portable and free remote access program that’s similar to some of these other programs but uses a password to make a connection instead of an IP address.
How to connect to remote desk on another computer?
On another computer, run AnyDesk and then enter the host’s Remote Desk ID or alias in the Remote Desk section of the program. Press Connect, and wait for the host to press Accept .
What is the other program in a host?
The other program, called Viewer, is installed for the client to connect to the host. Once the host computer has produced an ID, the client should enter it from the Connect by ID option in the Connection menu to establish a remote connection to the other computer.
How to open file transfer in remote mode?
During a remote connection, you can send the Ctrl+Alt+Del shortcut, choose which display to view, switch to full screen mode, and open the file transfer or chat utility. If you want more control you can open the settings to enable continuous access, a custom password, a proxy, etc.
How to share screen on a PC?
Type into the text box the 6-digit code that the client’s computer generated, and then select Share screen. Once the client has done their part, you need to confirm that they can have access to your computer before the connection can be established.
What is remote desktop?
The Remote Desktop web client lets you use a compatible web browser to access your organization’s remote resources (apps and desktops) published to you by your admin. You’ll be able to interact with the remote apps and desktops like you would with a local PC no matter where you are, without having to switch to a different desktop PC. Once your admin sets up your remote resources, all you need are your domain, user name, password, the URL your admin sent you, and a supported web browser, and you’re good to go.
How to download files from remote desktop?
To download files from the remote session to your local computer: Connect to the remote session. Open the file explorer in your remote session. Copy the files you want to download to Remote Desktop Virtual Drive > Downloads. Your files will be downloaded to your local default downloads folder.
How to enable IME input in a remote session?
To enable IME input using the web client: Before you connect to the remote session, go to the web client Settings panel. Toggle the Enable Input Method Editor setting to On. In the drop-down menu, select the keyboard you want to use in the remote session. Connect to the remote session.
How to print from a web client?
Follow these steps to print from the web client: Start the printing process as you would normally for the app you want to print from. When prompted to choose a printer, select Remote Desktop Virtual Printer. After choosing your preferences, select Print. Your browser will generate a PDF file of your print job.
How to sign in to a client?
To sign in to the client, go to the URL your admin sent you. At the sign in page, enter your domain and user name in the format DOMAINusername, enter your password, and then select Sign in.
How to use an app on desktop?
To start using an app or desktop, select the item you want to use, enter the same user name and password you used to sign in to the web client if prompted, and then select Submit. You might also be shown a consent dialog to access local resources, like clipboard and printer.
Can you copy and paste from remote desktop?
Copy and paste from the Remote Desktop web client. The web client currently supports copying and pasting text only. Files can’t be copied or pasted to and from the web client. Additionally, you can only use Ctrl+C and Ctrl+V to copy and paste text.
Getscreen.me: One of the Best Remote Access Services Without Installation
A new service that may well compete with Teamviewer. Judging by the reviews on Trustpilot, about 70% of their new customers are starting to use it after disappointment in Teamviewer or Anydesk. And they stay in.
Chrome Remote Desktop: Only for Google Fans
Chrome Remote Desktop is a free remote desktop program from Google. It works as an extension for the Chrome web browser. It was one of the first services that began to implement remote access through the browser, so you will not find many modern features here. You can just get access to your computer or share your screen.
Zoho Assist: an Effective Remote Support Tool
Another cloud service for customer support. Zoho Assist has two types of plans with corresponding rates. You can choose remote customer support or an auto-access plan for your computer. The price of paid rates starts from $10 per month. The more computers and technicians you connect, the more expensive use you’ll get.
How to sign out of Outlook on the web?
To sign out of Outlook on the web: Select your account picture at the top of the screen. If you don’t see your picture at the top of screen, check to see if ad blocking is turned on. Sometimes this prevents the picture from showing. Select Sign out.
How to sign in to Microsoft 365?
Go to the Microsoft 365 sign-in page or to Outlook.com. Enter the email address and password for your account. Select Sign in. Note: To sign in to Microsoft 365 using another account, select Use another account the next time you sign in.
VPN download
Via Christi associates who connect to the Via Christi network using VPN should download the latest AnyConnect VPN client, version 3.1.05152 (Supports: Windows XP, Vista, Windows 7, Windows 8). The client is available below for download.
With remote application access, Via Christi employees can use the following applications from home or anywhere:
Popular Posts:
Setting up a remote desktop allows you to access your computer wherever you are and control it as if you were directly in front of the keyboard. By using the built-in Remote Desktop Connection app in Windows 10, you can troubleshoot issues, access files, and so much more. Here’s how to set up a remote desktop in Windows 10 and how to remotely access another computer over the internet.
How to Set Up Remote Desktop Windows 10
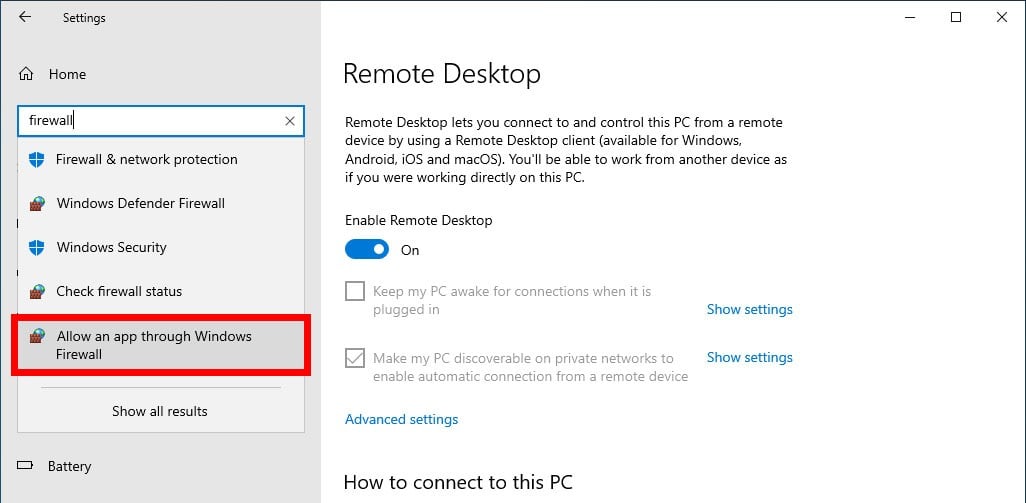
To set up a remote desktop in Windows 10, go to Settings > System > Remote Desktop. Then turn on the slider for Enable Remote Desktop. Next, search Settings for Allow an app through Windows firewall and enable the Remote Desktop app for Private and Public.
Note: You can only run the Remote Desktop Connection app if you are using Windows 10 Professional or Enterprise. If you are using Windows 10 Home edition, check out our guide on how to use Quick Assist to remotely control a computer.
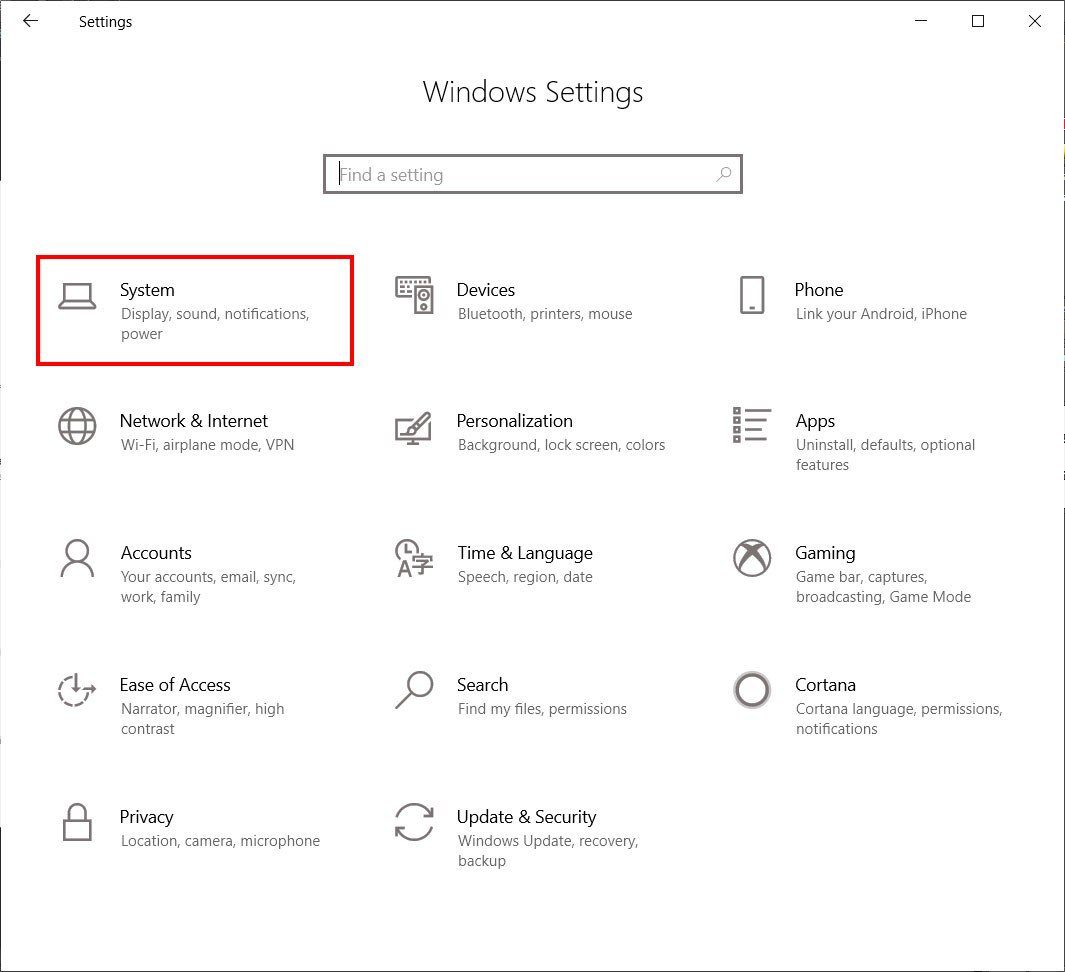
- Click the Windows Start button. This is the button with the Windows logo in the bottom-left corner of your screen. Do this from the host computer (or the computer you will be trying to access remotely).
- Then click Settings. This is the gear-shaped icon just above the power button.

- Next, click System.
- Then click Remote Desktop in the left sidebar. You can find this by scrolling down. It is the icon that looks like greater than and less than signs pointing at each other.
- Next, click the slider next to Enable Remote Desktop. This will cause a new window to pop up.
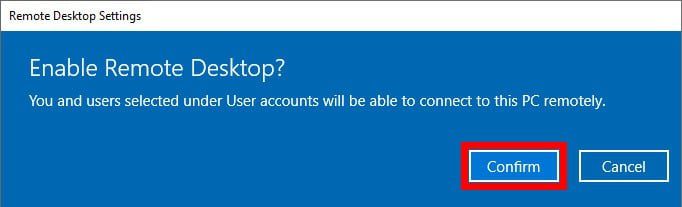
- Then click Confirm. A pop-up box appears asking you if you would like to enable remote desktop. It also reminds you that doing so will allow you and other users in your User accounts to connect to the PC remotely. Then you will need to change your firewall settings in order to access another computer over the internet.
- Next, type firewall into the search bar of the Settings window. You can do this by clicking the search box that says Find a setting at the top of the left sidebar. Once you type firewall, you will see search results populated under the search bar.
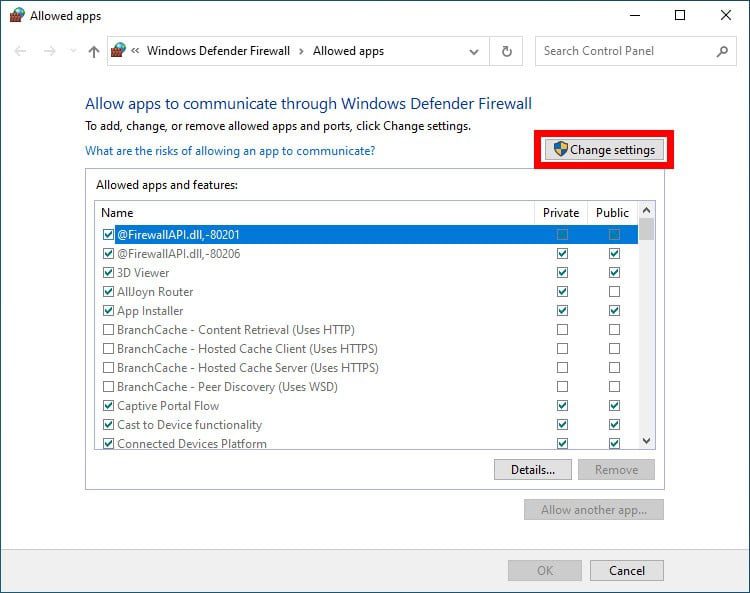
- Then choose Allow an app through Windows firewall. If you don’t see this option, click Show All, and then select it from the list.
- Then click Change settings. Initially, the apps and the checkboxes beside them will be grey or disabled. Once you click Change settings, they will turn black and become enabled.
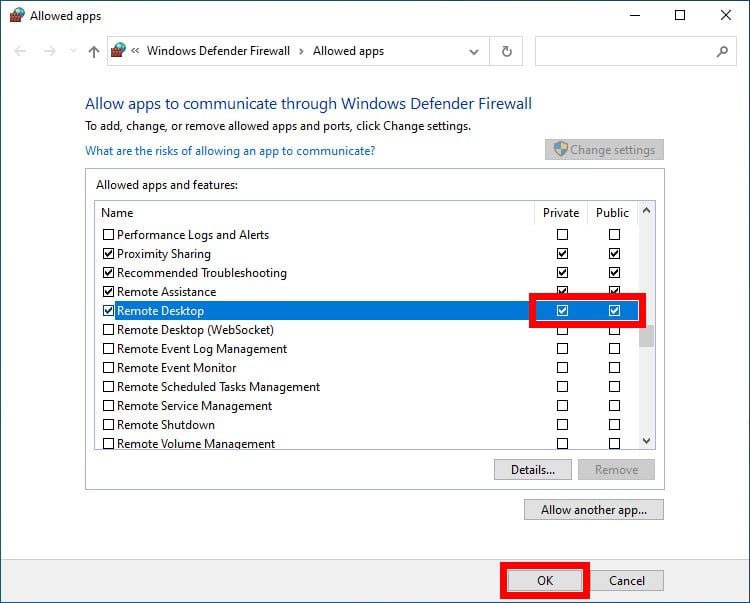
- Tick the Private and Public checkboxes to the right of Remote Desktop. Make sure both that the boxes under the Private and Public columns are checked.
- Finally, click OK.
Once you enable your remote desktop and allow the app to communicate through your firewall, you can access that computer over the internet. Here’s how:
How to Remotely Access Another Computer Over the Internet
There are two ways you can remotely access another computer over the internet – depending on whether you’re on the same network or not. If you are accessing another computer within the same network, you just need to know the PC name. If otherwise, you need to know your public IP and set up port forwarding.
How to Remotely Access Another Computer Over the Internet Within Your Network
To remotely access another computer within your network over the internet, open the Remote Desktop Connection app and enter that computer’s name, and your username and password.
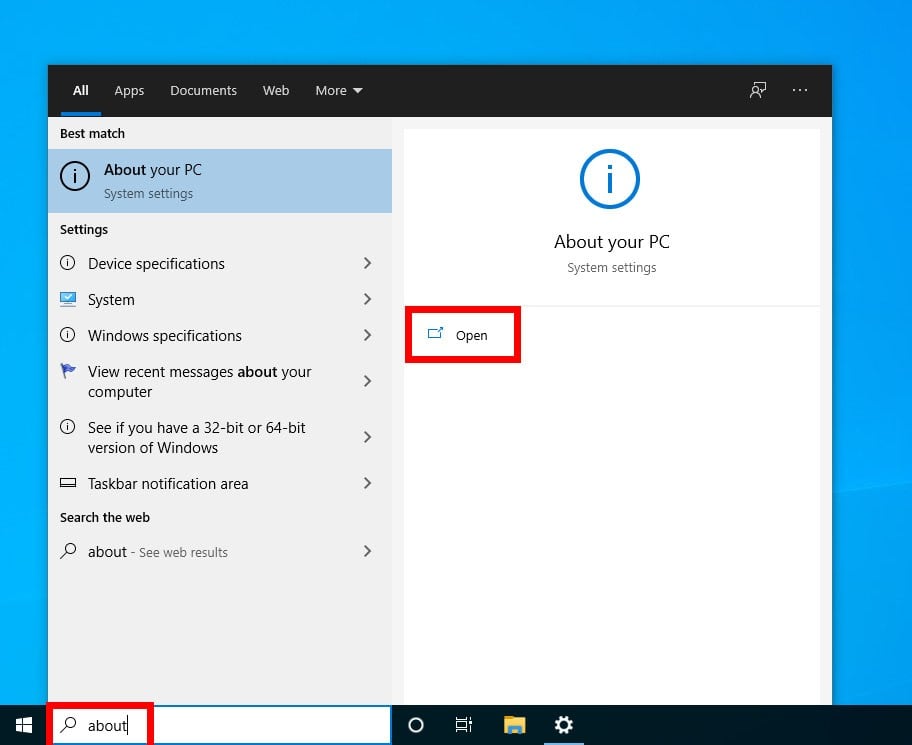
- Click the magnifying glass icon in the bottom-left corner of your screen. Do this from the computer you want to access over the internet.
- Then type About into the search bar and click Open.
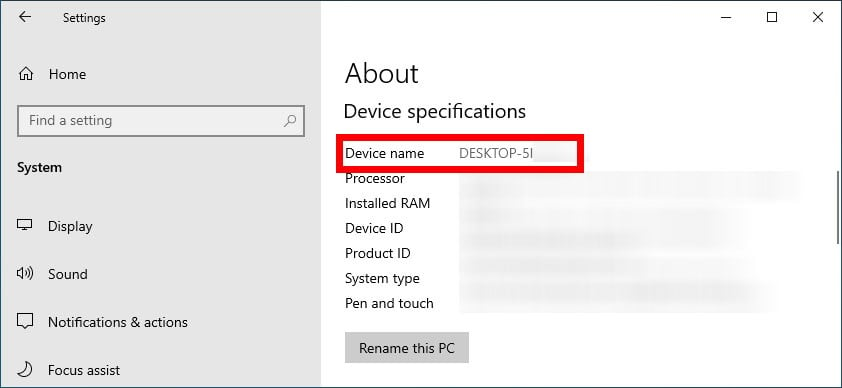
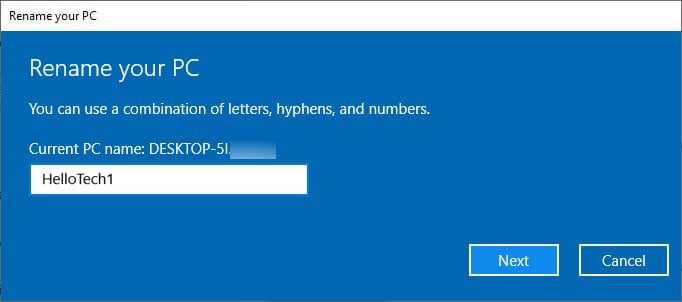
- Next, copy your computer’s name. You can find this next to Device name. You can either write this name down, or copy and paste it into a text document, an email, or any other method that you want.
Note: If this name is too complicated, you can click the Rename this PC button below. This lets you choose your own name for your PC.
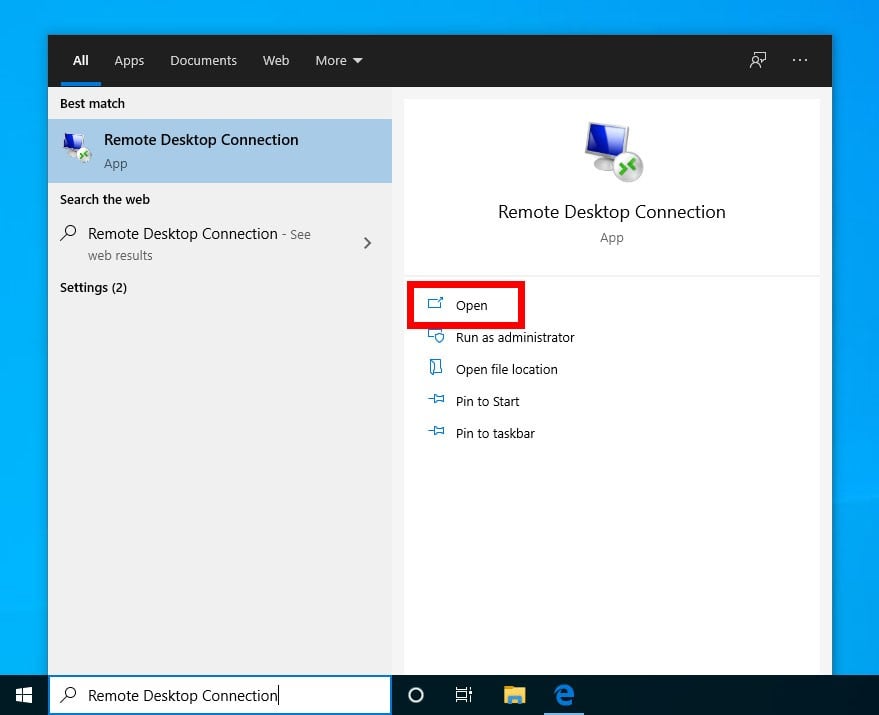
- Then open the Windows search bar and type remote desktop connection. This is the magnifying glass icon in the bottom-left corner of your screen.Do this from the client computer or the computer that you will use to establish the remote connection.
- Next, click Open.
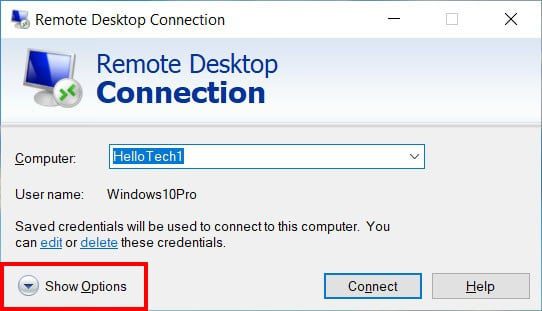
- Then click Show Options. You can see this in the bottom-left corner of the window.
- Next, enter the computer’s name. This is the name that you copied down in the previous steps.
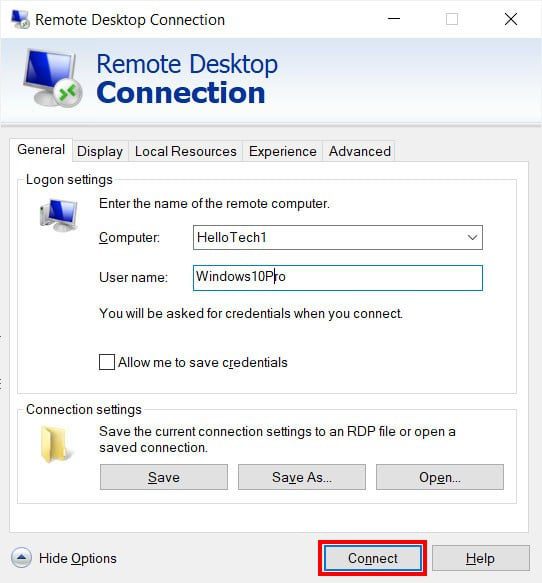
- Also, enter the username. If this information is filled in already, make sure it is correct. You can find your username by going to Settings > Accounts. Then you will see your username under your profile image.
- Then click Connect.
Note: You can also change additional settings by clicking the Display, Local Resources, Experience, and Advanced tabs.
- Next, enter your computer’s password and click OK. This is the password that you use to sign in to the computer when you are on the lock screen.
Note: You might encounter a prompt asking you if you want to connect even if the identity of the remote computer cannot be identified. Just click on Yes.
- Finally, wait for the remote connection to be configured. After the step above, you will see a green progress bar. Wait for it to complete. Briefly, you will see a black window which turns to blue. Once the remote connection is successfully established, you will see a view of the computer you’re trying to access.
How to Remotely Access Another Computer Outside Your Network
- Open a web browser. Do this from the host computer or the computer you will be trying to access remotely.
- Then type what is my IP into the address bar.
- Next, copy the public IP address listed. Your public IP address will be a series of numbers separated by periods.
Note: Do not share your public IP address with anyone you don’t trust. They can use this information to hack your computer and steal your personal information, such as bank details.
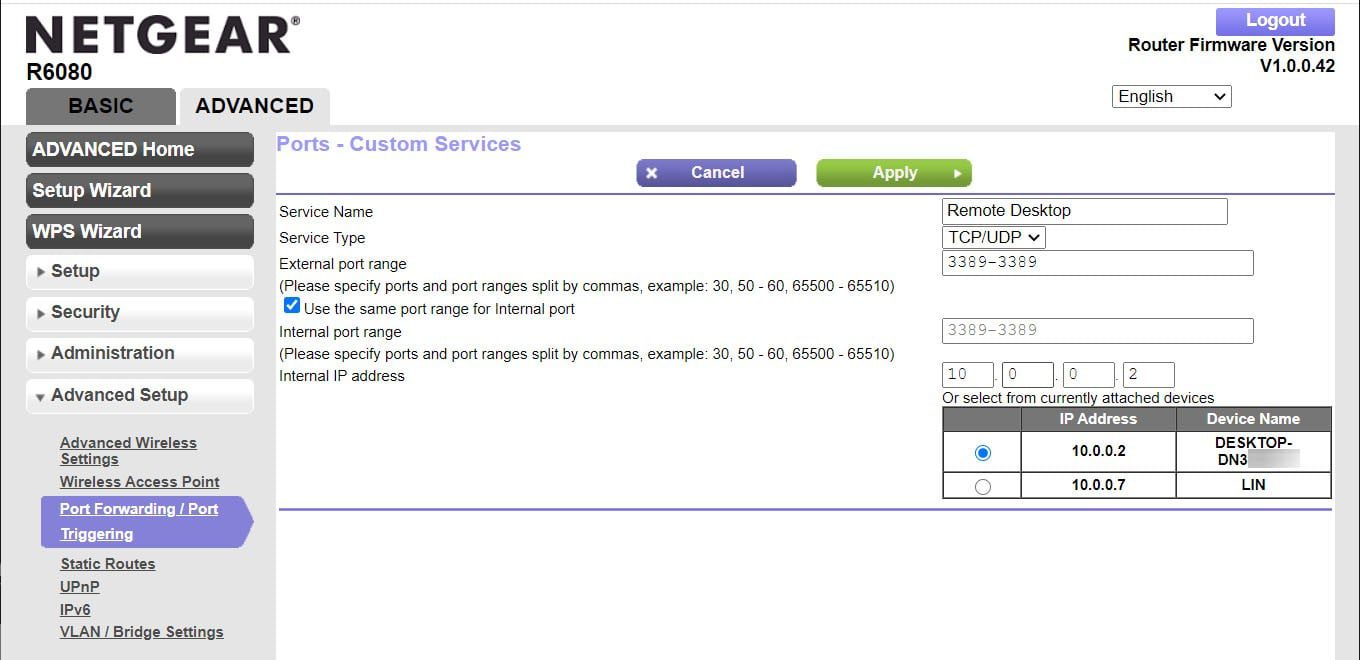
- Then open TCP port 3389 on your router. If you don’t know how to do this, check out our step-by-step guide on how to port forward.
Note: You should also set a static IP address for the computer you are trying to access. If you want to know how to set a static IP address for your Windows 10 PC, check out our step-by-step guide here.
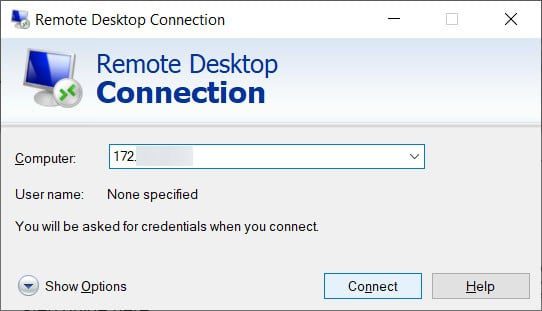
- Next, open the Remote Desktop Connection app. Do this from the client computer (or the one you will use to remotely control the host computer).
- Enter your public IP address in the Computer field. This will be the public IP address you copied down earlier.
- Then click Connect.
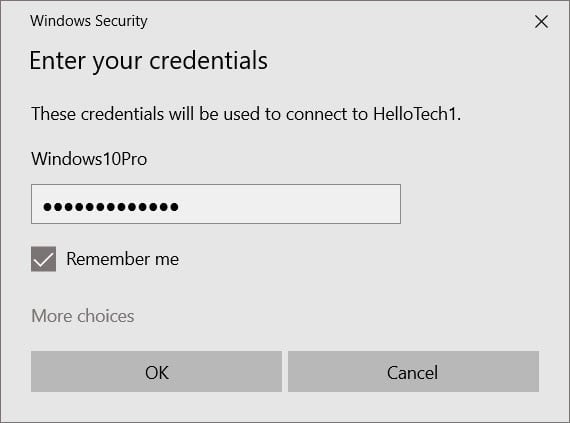
- Enter your credentials. On the Windows Security page, type in the username and password of your remote server.
- Click OK.
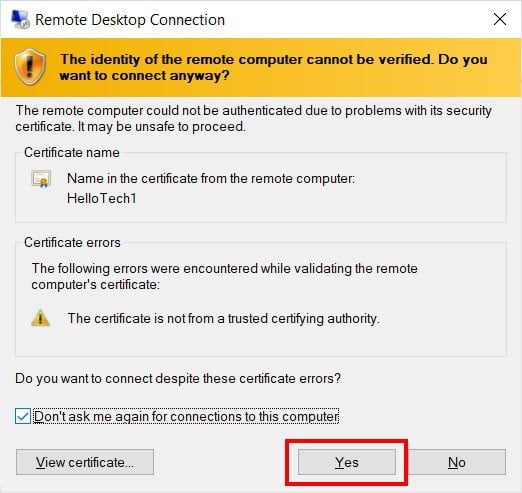
Note: You might encounter a prompt asking you if you want to connect even if the identity of the remote computer cannot be identified. Just click on Yes.
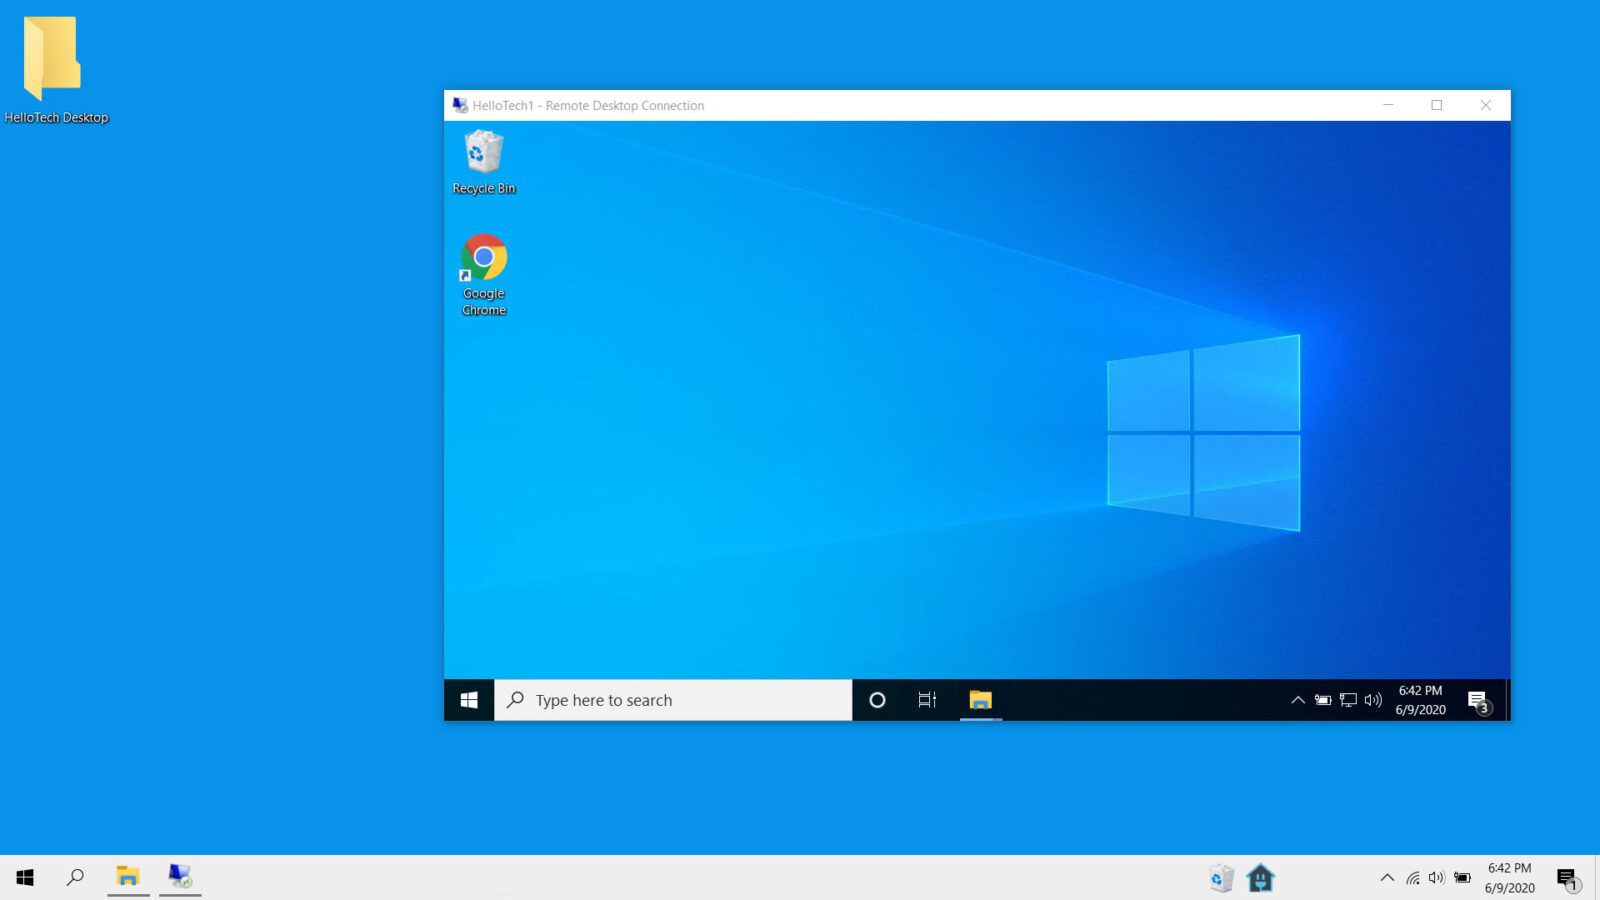
- Finally, wait for the remote connection to be configured. After the step above, you will see a green progress bar. Wait for it to complete. Briefly, you will see a black window which turns to blue. Once the remote connection is successfully established, you will see a view of the computer you’re trying to access.
If you’re looking for a less complicated way of accessing your computer remotely, check out our article on how to remotely control a Windows 10 or Mac computer.