
The ServiceStack/redis-windows project contains the binary releases of MS Open Tech redis port of windows as well as a vagrant configuration for redis letting you run the native version of Redis in a Virtual Box VM.
Whilst it’s recommended to use Redis on Linux in production, it is often useful for developers on Windows platforms to have their own local version of redis running to develop with.
The 3 most popular ways of running redis on windows is to use the binary releases of Microsoft’s native port of redis, but as this is an unofficial port it always lags behind the latest official development of redis on Linux/OSX.
Thanks to Vagrant you can choose to run the latest linux version inside a Virtual Box Linux VM where you’ll be able to run the official native version of redis.
Or from Windows 10 you can install Bash on Ubuntu on Windows which will let you run the official version of Redis on Ubuntu on Windows  This is our preferred approach as it lets you run native Ubuntu binaries on Windows more efficiently than a VM of Linux.
Option 1) Install Redis on Ubuntu on Windows
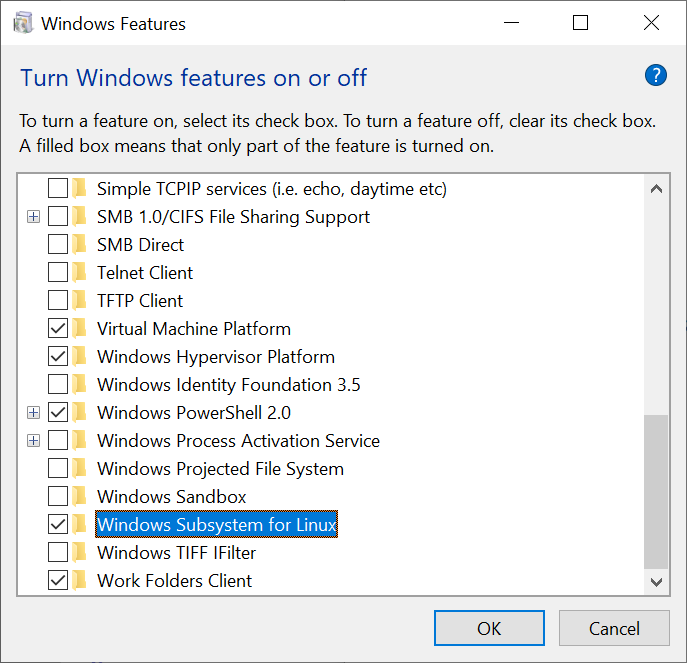
Install Windows Subsystem for Linux (WSL)
From Command Line:
From GUI:
- From Start, search for Turn Windows features on or off (type
turn) - Select Windows Subsystem for Linux
Once installed you can run bash on Ubuntu by typing bash from a Windows Command Prompt, then you can install recent stable versions of Redis from the official packages.redis.io APT repository with:
curl -fsSL https://packages.redis.io/gpg | sudo gpg --dearmor -o /usr/share/keyrings/redis-archive-keyring.gpg

echo "deb [signed-by=/usr/share/keyrings/redis-archive-keyring.gpg] https://packages.redis.io/deb $(lsb_release -cs) main" | sudo tee /etc/apt/sources.list.d/redis.list

sudo apt-get update
sudo apt-get install redis
After install, start the Redis server with:
sudo service redis-server start
Then test that it’s running with:
$ redis-cli
$ 127.0.0.1:6379> SET foo bar
OK
$ 127.0.0.1:6379> GET foo
"bar"
Install latest from source
To install the latest version of Redis we first need to install some prerequisites:
$ sudo apt-get update
$ sudo apt-get install make
$ sudo apt-get install gcc
Then follow the official installation guide
to download, build and install the latest stable version. NOTE: Installing
the binaries using make install will not work. You need to copy them manually
to /usr/bin (just like described in the guide, except that they use
/usr/local/bin — which is the problem).
You’ll then be able to launch redis with:
redis-server —daemonize yes
Which will run redis in the background freeing your shell so you can play with it using the redis client:
$ redis-cli
$ 127.0.0.1:6379> SET foo bar
OK
$ 127.0.0.1:6379> GET foo
"bar"
Which you can connect to from within bash or from your Windows desktop using the redis-cli native Windows binary from MSOpenTech.
Option 2) Running the latest version of Redis with Vagrant
-
Install Vagrant on Windows
-
Download the vagrant-redis.zip vagrant configuration
-
Extract
vagrant-redis.zipin any folder, e.g. inc:\vagrant-redis -
Launch the Virtual Box VM with
vagrant up
$ cd c:\vagrant-redis
$ vagrant up
This will launch a new Ubuntu VM instance inside Virtual Box that will automatically install and start the latest stable version of redis.
Option 3) Running Microsoft’s native port of Redis
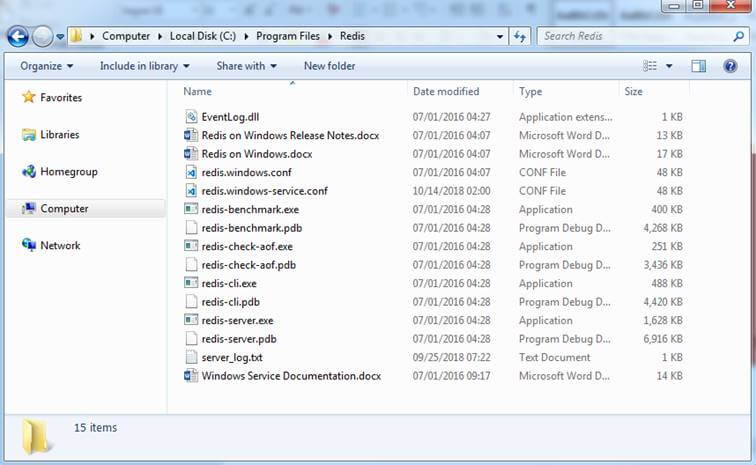
These 64-bit binary releases are created by building the Microsoft’s native port of redis which have also been published on NuGet, but as it’s more convenient we provide a zip of the 64-bit binaries here.
MS Open Announcements
- MSOpenTech Redis on Windows 3.0 Release Notes
- MSOpenTech Redis on Windows 2.8 Release Notes
- MSOpenTech’s Redis on Windows
- Updates Released for Redis on Windows (2.8.4)
Current Version: 3.0.503 (June 28, 2016)
- Download the redis-latest.zip native 64bit Windows port of redis
-
Extract
redis64-latest.zipin any folder, e.g. inc:\redis -
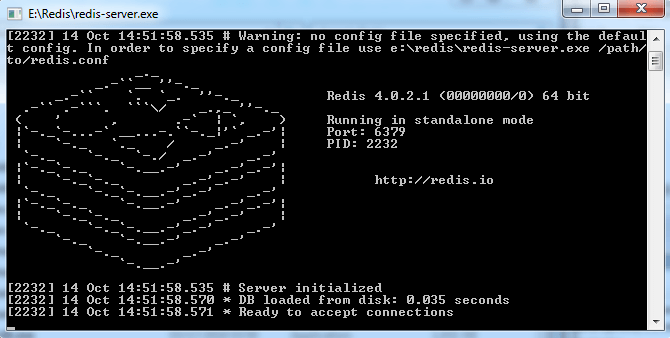
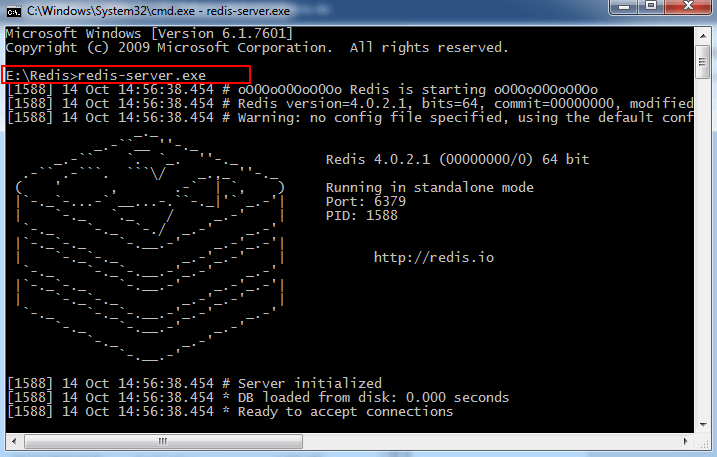
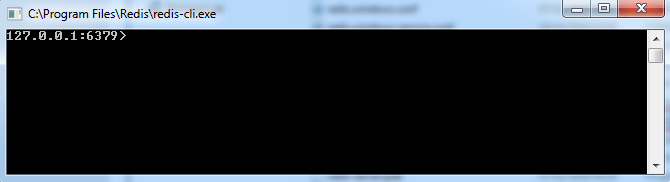
Run the
redis-server.exeusing the local configuration
$ cd c:\redis
$ redis-server.exe redis.windows.conf
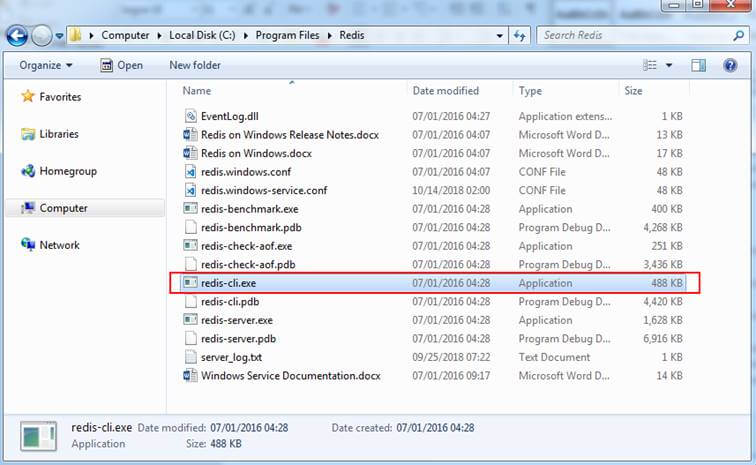
- Run
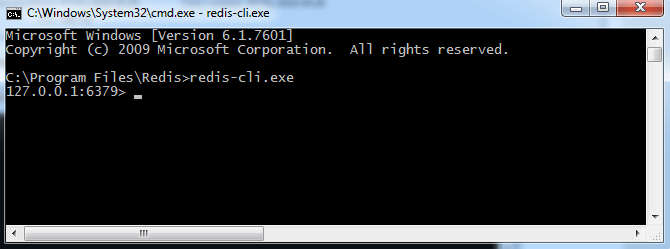
redis-cli.exeto connect to your redis instance
$ cd c:\redis
$ redis-cli.exe
- Start playing with redis

redis 127.0.0.1:6379> SET foo bar
OK
redis 127.0.0.1:6379> KEYS *
1) "foo"
redis 127.0.0.1:6379> GET foo
"bar"
redis 127.0.0.1:6379>
The MSOpenTech of Redis adds some useful extensions for better integration with Windows:
Running Redis as a Service
If you installed Redis using the MSI package, then Redis was already installed as a Windows service. Nothing further to do.
If you would like to change its settings, you can update the redis.windows-service.conf file and then restart the Redis
service (Run -> services.msc -> Redis -> Restart).
During installation of the MSI you can either use the installer’s user interface to update the port that Redis listens to and the firewall exception or run it silently without a UI. The following examples show how to install from the command line:
default install (port 6379 and firewall exception ON):
msiexec /i Redis-Windows-x64.msi
set port and turn OFF firewall exception:
msiexec /i Redis-Windows-x64.msi PORT=1234 ADD_FIREWALL_RULE=»»
set port and turn ON firewall exception:
msiexec /i Redis-Windows-x64.msi PORT=1234 ADD_FIREWALL_RULE =1
install with no user interface:
msiexec /quiet /i Redis-Windows-x64.msi
If you did not install Redis using the MSI package, then you still run Redis as a Windows service by following these instructions:
In order to better integrate with the Windows Services model, new command line arguments have been introduced to Redis.
These service arguments require an elevated user context in order to connect to the service control manager.
If these commands are invoked from a non-elevated context, Redis will attempt to create an elevated context in which to execute these commands.
This will cause a User Account Control dialog to be displayed by Windows and may require Administrative user credentials in order to proceed.
Installing the Service
--service-install
This must be the first argument on the redis-server command line. Arguments after this are passed in the order they occur to Redis when the service is launched.
The service will be configured as Autostart and will be launched as «NT AUTHORITY\NetworkService». Upon successful installation, a success message will be displayed and Redis will exit.
This command does not start the service.
For instance:
redis-server —service-install redis.windows.conf —loglevel verbose
Uninstalling the Service
--service-uninstall
This will remove the Redis service configuration information from the registry. Upon successful uninstallation, a success message will be displayed and Redis will exit.
This does command not to stop the service.
For instance:
redis-server —service-uninstall
Starting the Service
--service-start
This will start the Redis service. Upon successful startup, a success message will be displayed and Redis service will be started.
For instance:
redis-server —service-start
Stopping the Service
--service-stop
This will stop the Redis service. Upon successful termination, a success message will be displayed and Redis will exit.
For instance:
redis-server —service-stop
Naming the Service
--service-name name
This optional argument may be used with any of the preceding commands to set the name of the installed service. This argument should follow the service-install, service-start, service-stop or service-uninstall commands, and precede any arguments to be passed to Redis via the service-install command.
The following would install and start three separate instances of Redis as a service:
$ redis-server --service-install –service-name redisService1 –port 10001
$ redis-server --service-start –service-name redisService1
$ redis-server --service-install –service-name redisService2 –port 10002
$ redis-server --service-start –service-name redisService2
$ redis-server --service-install –service-name redisService3 –port 10003
$ redis-server --service-start –service-name redisService3
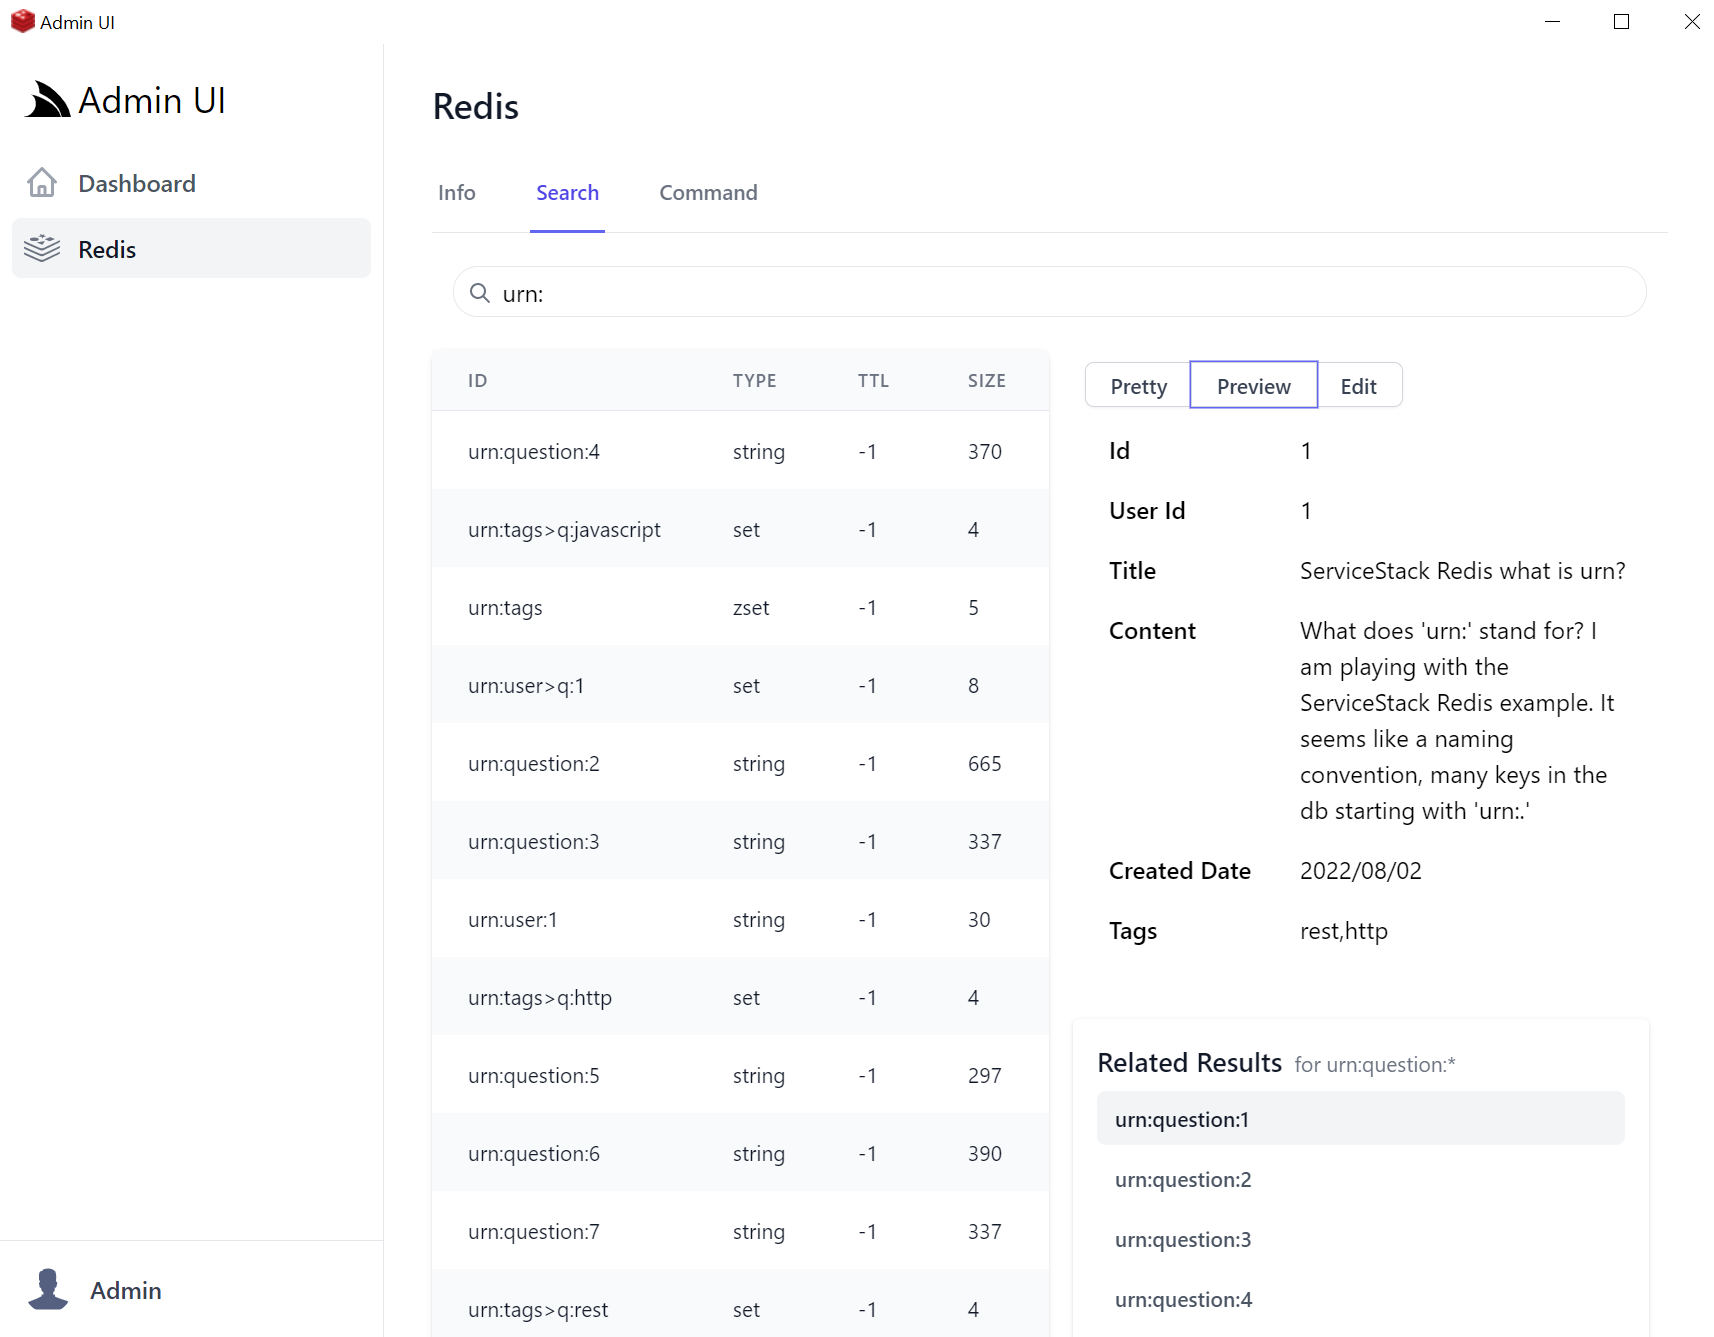
Redis Admin Desktop App
Redis Admin UI is a vuedesktop.com App that lets you manage your App’s configured Redis Server with a user-friendly UX for managing core Redis data types, simple search functionality to quickly find Redis values, quick navigation between related values, 1st class support for JSON values and a flexible CLI interface and command history to inspect all previously run redis commands for easy edits & reruns.
Video feature tour
Install
Launch as a stand-alone Desktop App by Installing .NET SDK and the
Windows Desktop App tool:
powershell iwr gist.cafe/install.ps1 -useb | iex
After install, open the Redis Admin Desktop from your browser at:
app://redis
Or from the command-line with:
Run headless on macOS, Linux and Windows
Non Windows OS can install the cross-platform x dotnet tool:
Then launch from Command Line with:
Where you can view it with your preferred browser at http://localhost:5000
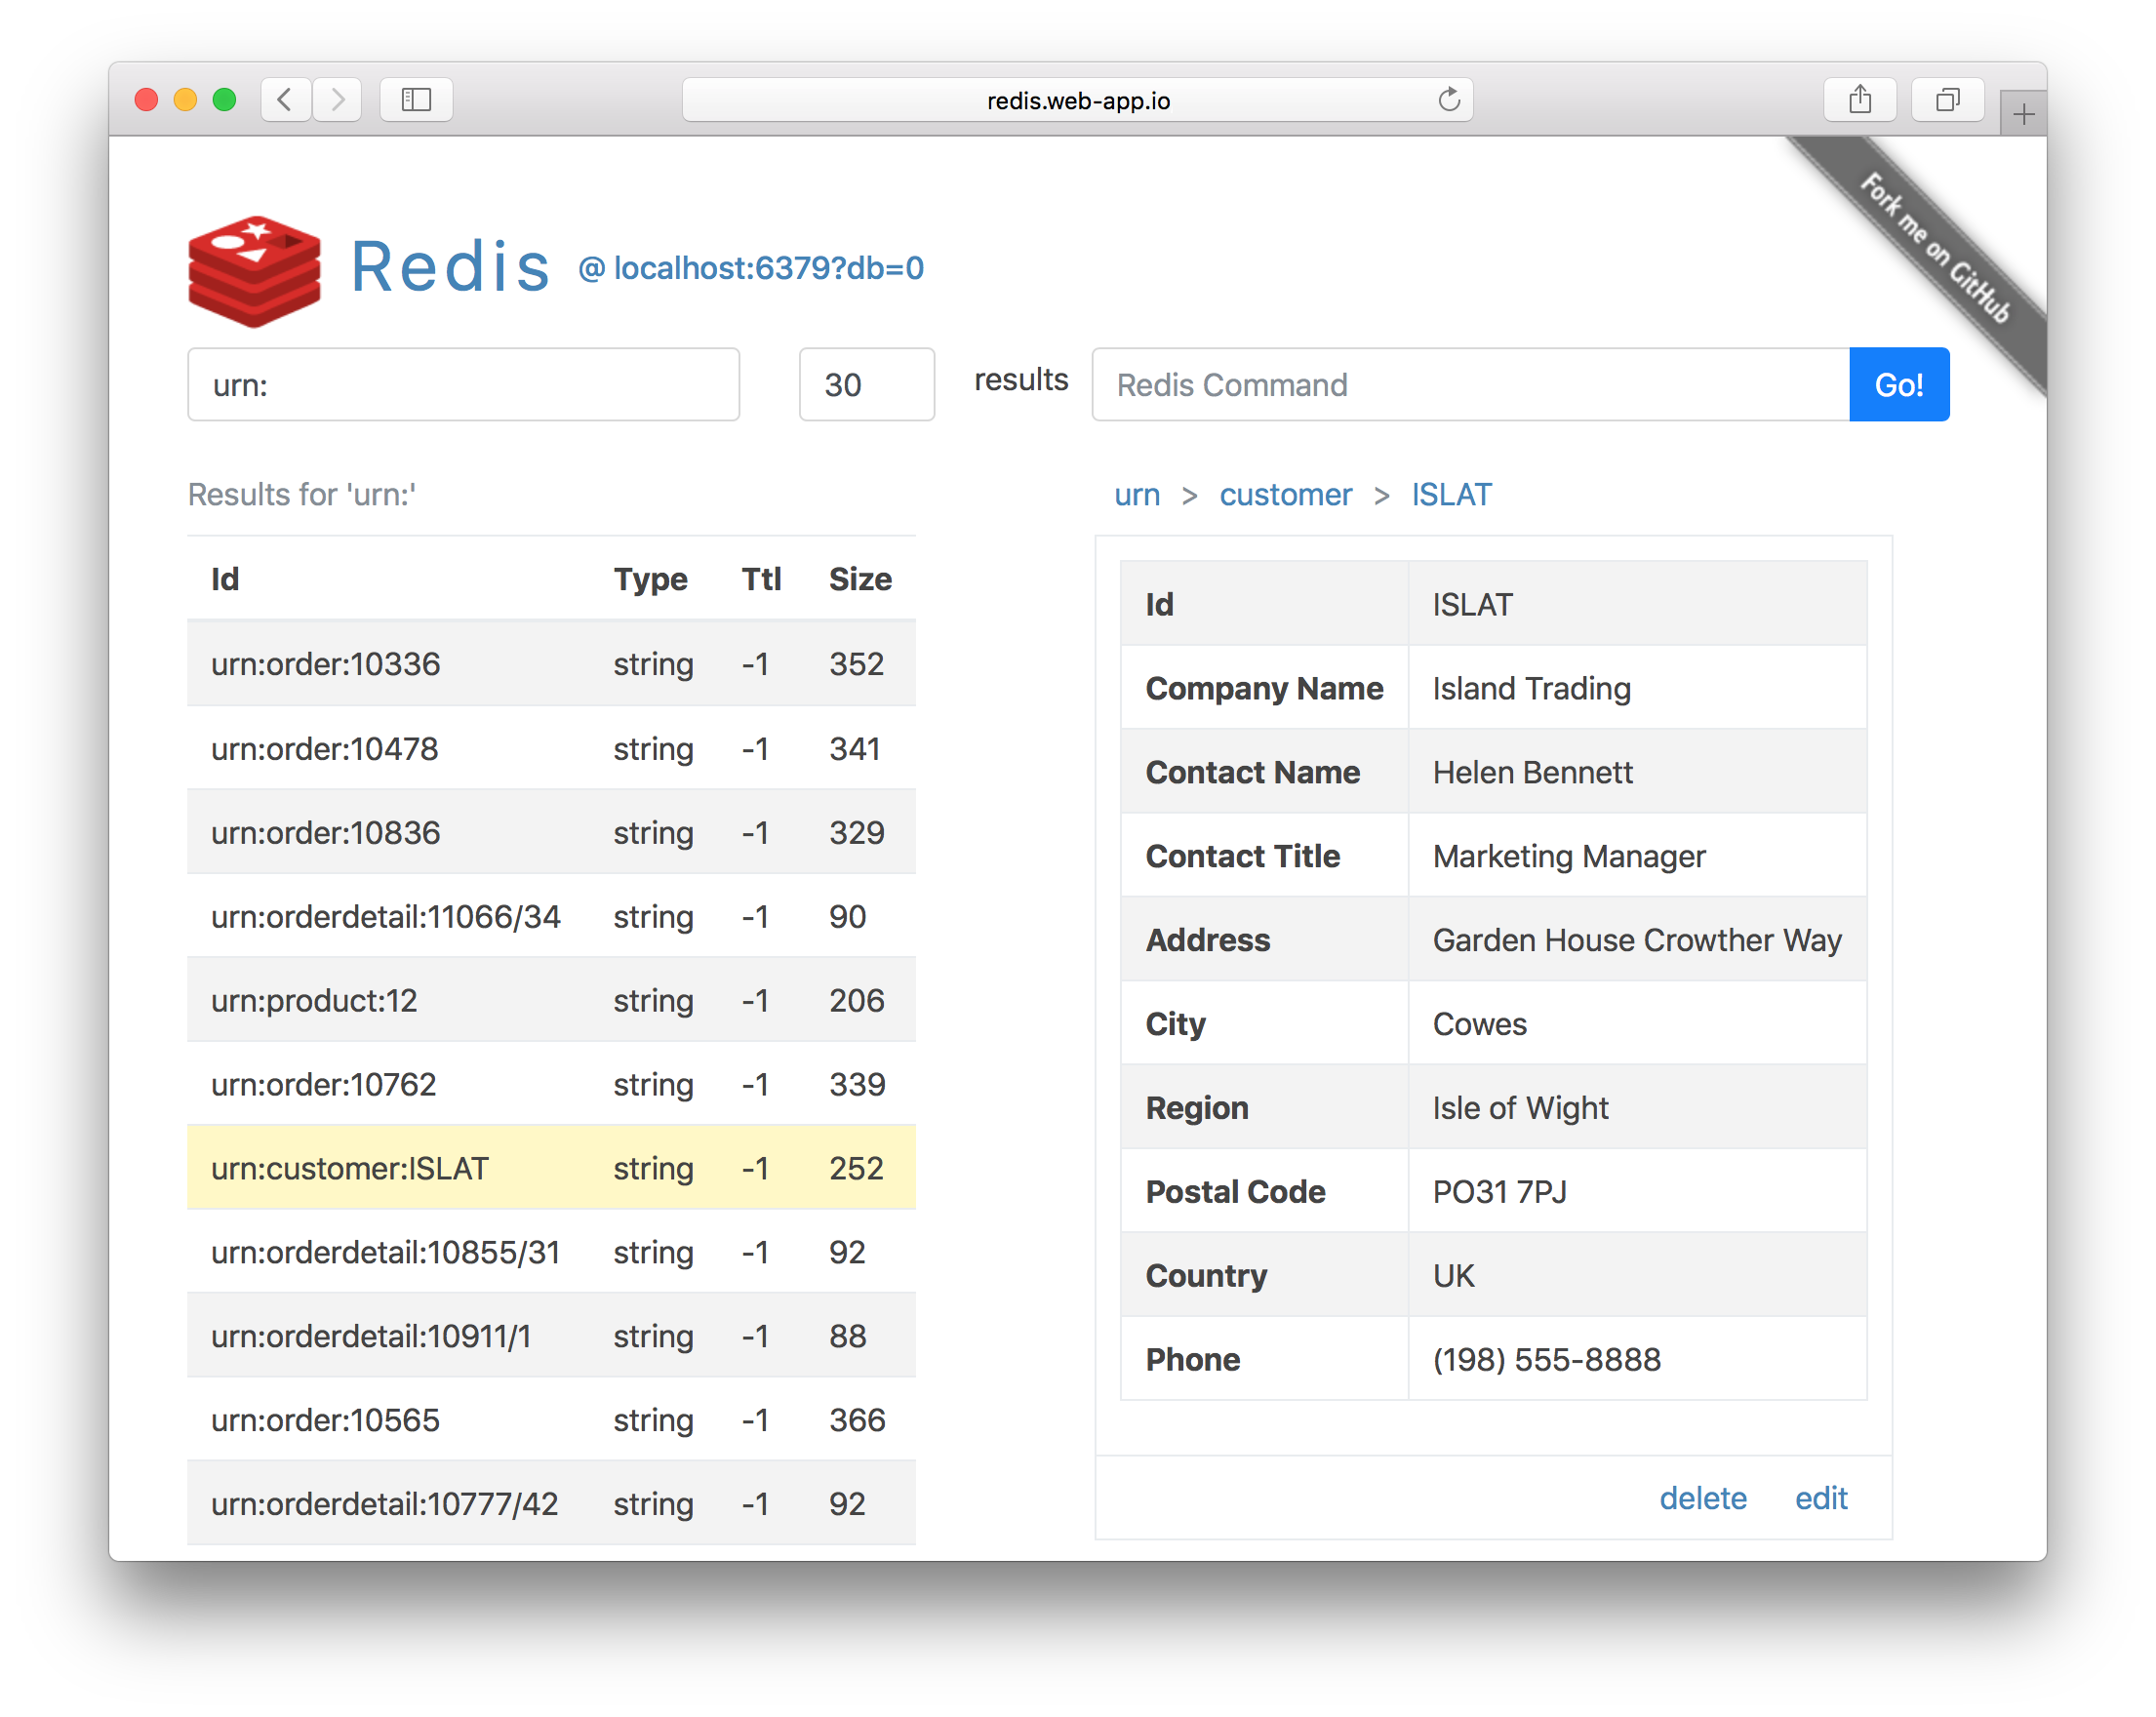
Redis Vue
Redis Vue is a simple, lightweight, versatile Redis Admin UI developed using Vue and ServiceStack Sharp Apps. It supports Redis’s core Strings, Lists, Sets, Sorted Sets and Hash data structures and custom Redis commands with its entire functionality contained in a single /index.html using the dynamic #Script language, making it easy to customize and further enhance.
After app install, open the Redis Vue Desktop App from your browser at:
app://redis-vue
Or from the command-line with:
Run headless on macOS, Linux and Windows
Non Windows OS can install the cross-platform x dotnet tool then launch from Command Line with:
Where you can view it with your preferred browser at http://localhost:5000
Configure Redis Sentinel Servers
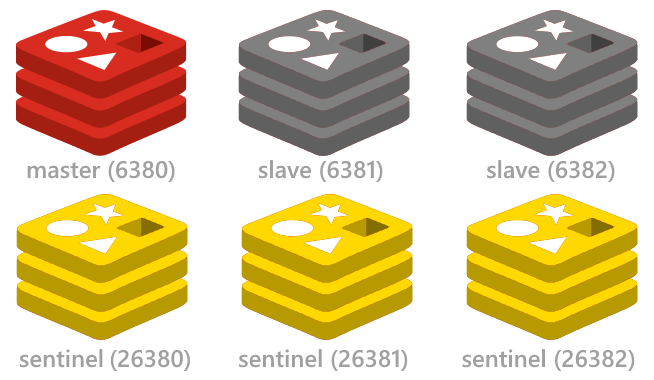
See the
redis config project for a quick way to setup up
the minimal
highly available Redis Sentinel configuration
including start/stop scripts for instantly running multiple redis instances on a single (or multiple)
Windows, OSX or Linux servers.
Introduction
In this article, we are going to learn how to download and install the Windows flavor of Redis Cache and will learn the process of getting started with Redis Client and Redis Server.
Who this article is for
This article is for .NET developers and beginners who are working with ASP.NET.
What is Redis?
Redis is an open source (BSD licensed), NoSQL, and in-memory datastore which works on a key-value pair.
In-memory means it stores the data inside RAM. If you are thinking it’s similar to other NoSQL databases, like MongoDB, CouchDB etc, let me tell you that it is quite different because it stores the data in random access memory which serves the data faster as compared to the other NoSQL technologies.
What does «BSD licensed» mean?
BSD licenses are a family of permissive free software licenses, imposing minimal restrictions on the use and distribution of the covered software. This is in contrast to the copyleft licenses which have share-alike requirements.
Referred from — https://en.wikipedia.org/wiki/BSD_licenses
Operating System support
Redis is supported by all common operating systems.
- Linux
- Mac
- Windows (For Windows, the beta version of Redis has been released)
Downloading
The current version of Redis available for download is 3.2.100.
You can download Redis for Windows from here.

After downloading, let’s install Redis on our Windows machine.
There are 2 ways you can install Redis.
- Redis-x64-3.0.504.msi (Microsoft Installer)
- Redis-x64-3.0.504.zip (zip files)
If you use Microsoft installer (.msi), then Redis will be installed as a service on Windows. On the other hand, if you use the zip file, it will be a standalone application (without being registered as a service).
Installing Redis on Windows Using the MSI file
Execute the downloaded MSI file on your system. The installer window will open. Click Next.
On the next screen, set the Destination Folder for your Redis application. Let’s leave it with the default value.

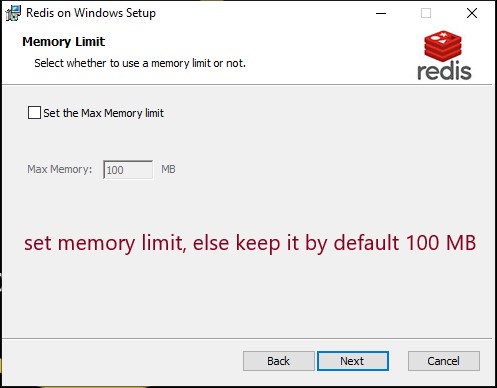
After setting the destination folder, we need to set the port number for Redis to run. By default, it is “6379”. Here also, we are not going to change anything.
Next, set the Max Memory Limit.
The default memory limit is 100 MB. If you want to set more than that, then click on the checkbox and enter your value.
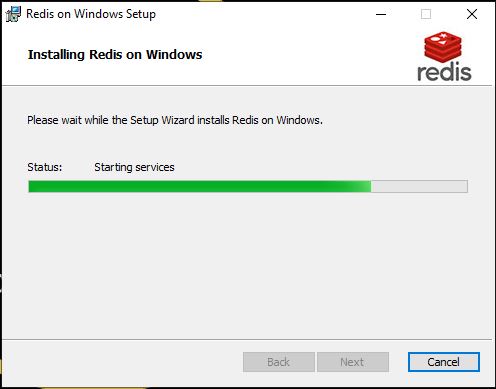
After clicking on the Next button, it will show the «Install» button. Just click on it to install the product.
After successfully installing Redis on Windows, now, let’s see its folder structure.
Running Redis Server
After installing, the Redis application is installed as a service on Windows. The current state of service is running.

Now, we have checked that the server is running, let’s open the folder location where Redis files are stored.
Running Redis Server as Standalone from the zip file
If you have downloaded the zip version of Redis, then you can directly click on “redis-server.exe” to start the Redis Server.
And in the same way, you can run through Windows command prompt by just calling the path where you have stored the Redis files.
Running the Redis command-line interface (CLI)
To use the built-in Redis Client, we are going to open the folder location where we have installed Redis on Windows and from there, open “redis-cli.exe” to run the command line to Redis Server.
If you double-click on “redis-cli.exe”, it will execute the CLI.
In another way, if you want to open “redis-cli.exe” from Windows CMD, enter the location path and then call “redis-cli.exe”.
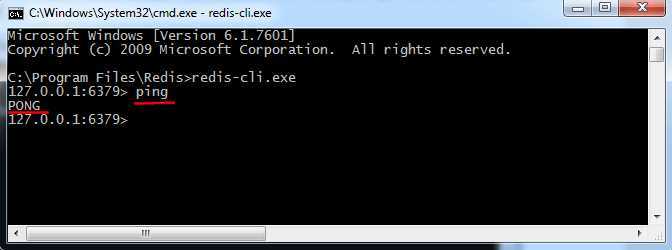
Now, let us execute the first command to test if we are connected to the Server.
First Command
We enter the first command as ping with the pings server. That Server sends a response as “PONG”.
Conclusion
In this part of the article, we have learned how to set up Redis on Windows, how to start the Server, and how to execute commands using Redis CLI.
Installing Redis on Windows 10 can be a bit tricky since Redis is primarily designed for Unix-based systems. However, with a few straightforward steps, you can have Redis up and running on your PC. In this guide, I’ll walk you through the process so you can easily install Redis on your Windows 10 machine.
In this section, we will cover the step-by-step process to install Redis on Windows 10. By the end of these steps, you’ll have a working Redis installation on your computer.
Step 1: Download the Redis MSI Installer
First, we need to download the Redis MSI installer from the official Microsoft archive.
Go to the Microsoft archive and find the latest Redis MSI installer for Windows. Download it and save it to your computer.
Step 2: Run the Redis Installer
Now, we need to run the installer to start the installation process.
Double-click the downloaded MSI file to begin the installation. Follow the prompts to install Redis on your system. Ensure to accept the default settings unless you have specific requirements.
Step 3: Add Redis to the PATH Environment Variable
Adding Redis to the PATH will make it easier to run Redis from the command line.
Open your Control Panel, navigate to System and Security > System > Advanced system settings, and click on Environment Variables. Find the PATH variable and add the directory where Redis was installed.
Step 4: Install Redis as a Windows Service
Installing Redis as a service allows it to start automatically with your computer.
Open a command prompt as an administrator and run the command redis-server --service-install. This will install Redis as a Windows service. You can start or stop it using the net start redis and net stop redis commands.
Step 5: Start Redis
Finally, we need to start the Redis server to ensure it’s working correctly.
In the command prompt, type redis-server and press Enter. You should see Redis start up and display some initialization messages. This means Redis is running successfully.
After completing these steps, you will have Redis running on your Windows 10 machine. You can now start using Redis for your projects or experiments.
Tips for Installing Redis on Windows 10
- Verify the downloaded MSI file’s integrity to ensure it isn’t corrupt.
- Make sure to restart your computer after adding Redis to the PATH environment variable.
- Use Redis CLI to test if Redis is running correctly by typing
redis-cli ping. You should get a response of «PONG». - Keep your Redis installation updated to benefit from the latest features and security updates.
- Check the Redis logs located in the installation directory if you encounter any issues.
Frequently Asked Questions
What is Redis?
Redis is an in-memory data structure store, used as a database, cache, and message broker.
Why do I need to add Redis to the PATH environment variable?
Adding Redis to the PATH allows you to run Redis commands from any command prompt window without needing to navigate to the installation directory.
How do I check if Redis is working?
You can run redis-cli ping in the command prompt. If Redis is working, you should see «PONG».
Can I uninstall Redis easily?
Yes, you can uninstall Redis from the Control Panel. Simply go to Programs and Features, find Redis, and uninstall it.
Is Redis free to use?
Yes, Redis is open-source and free to use.
Summary
- Download the Redis MSI installer.
- Run the Redis installer.
- Add Redis to the PATH environment variable.
- Install Redis as a Windows service.
- Start Redis.
Conclusion
Installing Redis on Windows 10 might seem daunting, but following these simple steps can make it a breeze. By downloading the Redis MSI installer, running it, adding Redis to your PATH, setting it up as a service, and starting the server, you’ll have Redis ready to use in no time. Remember, Redis is a powerful tool and can significantly enhance your applications with its speedy data storage capabilities.
If you’re new to Redis, take some time to explore its features and capabilities. There are plenty of resources online, including the official Redis documentation, that can help you get the most out of your Redis installation. Now that you’ve installed Redis on Windows 10, you can begin leveraging its powerful features to optimize your projects. Happy coding!
Kermit Matthews is a freelance writer based in Philadelphia, Pennsylvania with more than a decade of experience writing technology guides. He has a Bachelor’s and Master’s degree in Computer Science and has spent much of his professional career in IT management.
He specializes in writing content about iPhones, Android devices, Microsoft Office, and many other popular applications and devices.
Read his full bio here.
Are you looking to supercharge your data storage but need to figure out how? Look no further than Remote Dictionary Server (Redis)! With its lightning speed, ease of use, and scalability, Redis on your Windows machine is an ideal choice for anyone looking to get the most out of their data.
In this tutorial, you will learn how to install Redis on Windows so you can leverage Redis’s capabilities for caching, data storage, and message queueing.
Read on and conquer any data challenge that comes your way with Redis!
Prerequisites
This tutorial comprises a series of practical and insightful demonstrations. To make the most out of this tutorial, ensure you have the following in place:
- A machine running Windows – This tutorial uses Windows 10 64-bit.
- Windows Subsystem for Linux (WSL) installed on your machine.
Installing Redis on Windows via WSL
People often call Redis (an open-source, in-memory data structure) a data structure server. Why? The cool thing about Redis is that it lets you store and play around with all sorts of data structures like strings, lists, sets, hashes, and more.
Redis stores data in memory, culminating in swift read and write operations. This behavior makes Redis suitable for scenarios where low latency and high throughput are crucial.
Before you can harness Redis’ speed and efficiency, you must install it on your machine via WSL or the installer package.
💡 WSL seamlessly integrates Linux tools and software into your Windows environment, allowing you to work with Redis and other Linux-based applications without needing a separate virtual machine.
But in this example, you will install Redis via WSL as follows:
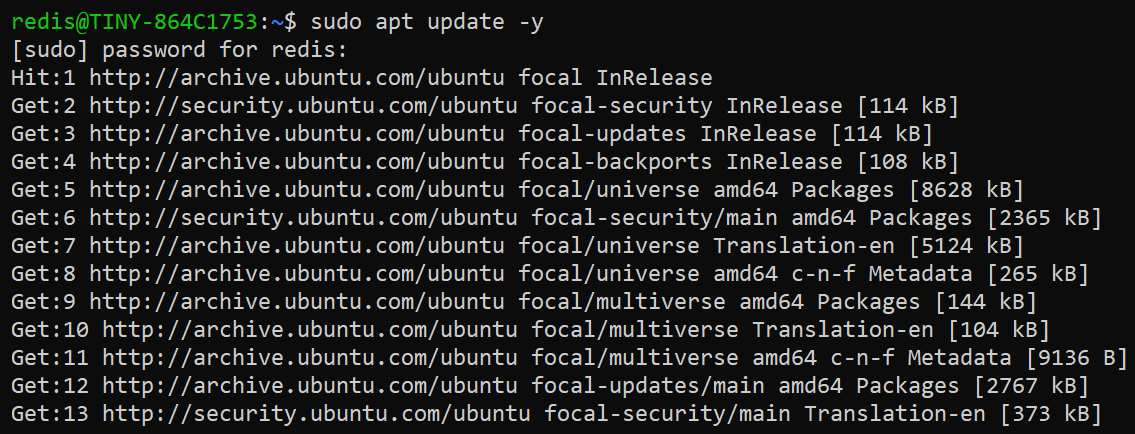
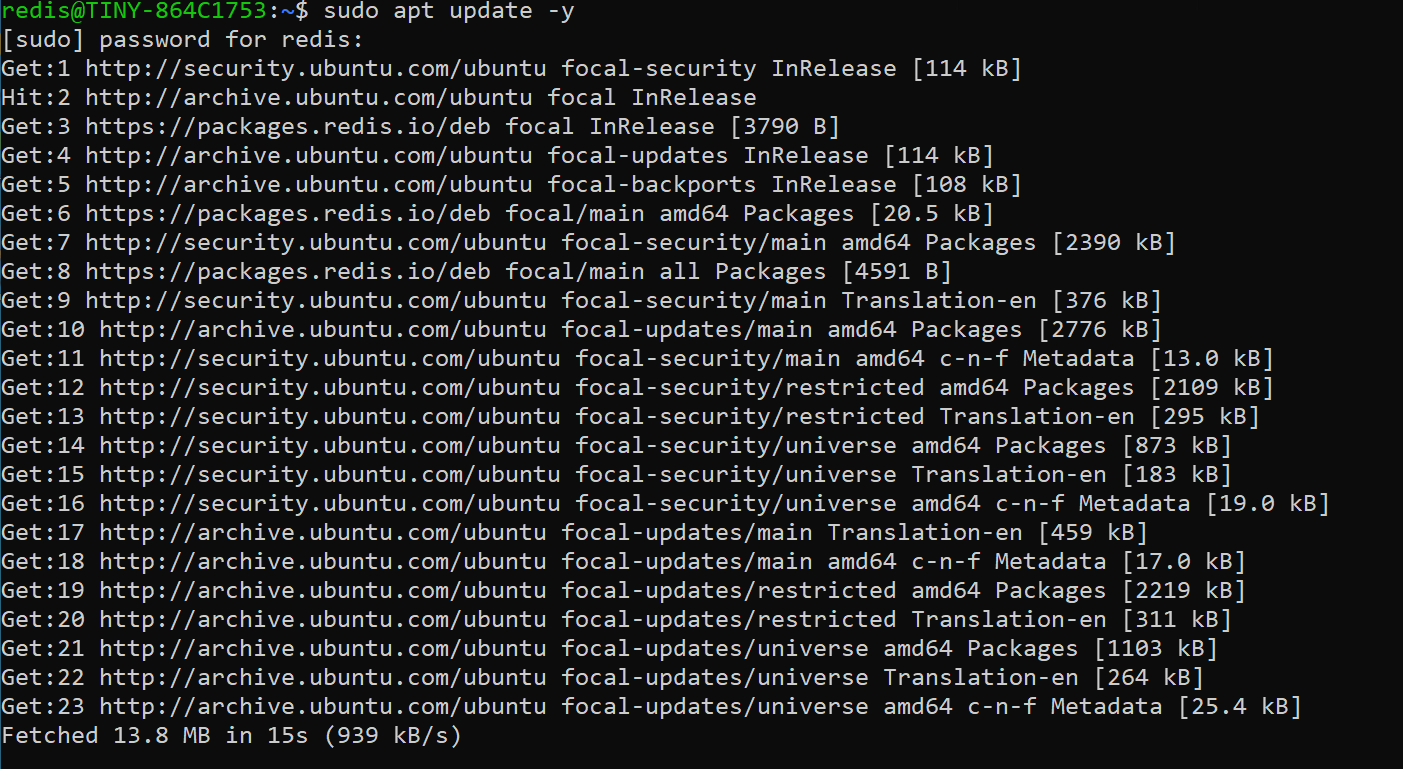
1. Open your Ubuntu terminal on WSL, and run the following apt update command to update the package information in Ubuntu’s repository.
2. Once updated, run the below curl command, which does not produce output but downloads the GNU Privacy Guard (GPG) key and saves it as a binary file on your system.
This GPG key will later be used by apt to verify the authenticity of packages provided by the Redis repository. Doing so ensures you are installing software from a trusted source.
sudo curl -fsSL https://packages.redis.io/gpg | sudo gpg --dearmor -o /usr/share/keyrings/redis-archive-keyring.gpg3. Next, execute the echo command below to create a repository configuration for Redis and save it in a file named redis.list within the sources.list.d directory.
This repository configuration is where the apt package manager locates and installs Redis packages.
sudo echo "deb [signed-by=/usr/share/keyrings/redis-archive-keyring.gpg] https://packages.redis.io/deb $(lsb_release -cs) main" | sudo tee /etc/apt/sources.list.d/redis.list
4. Rerun the below command to refresh the local package lists with all configured repositories.
5. After the update, run the following apt-cache command to display the installation candidate versions of the Redis package available from the configured repositories.
sudo apt-cache policy redis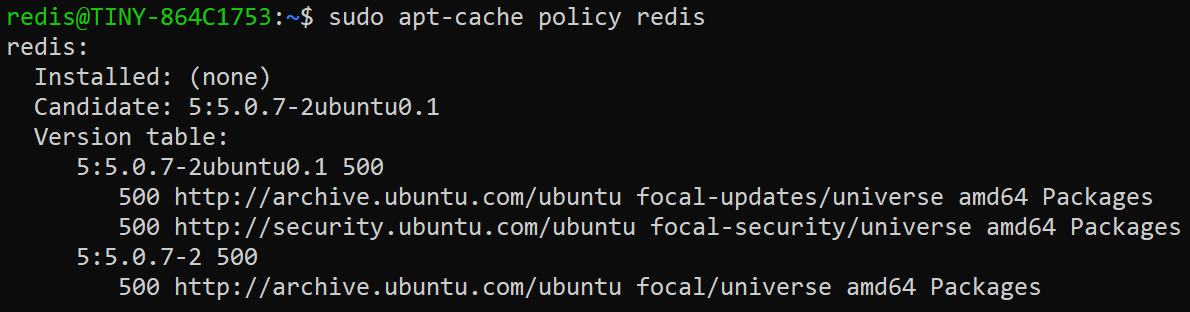
6. Finally, run the below command to install redis.
sudo apt install redis -y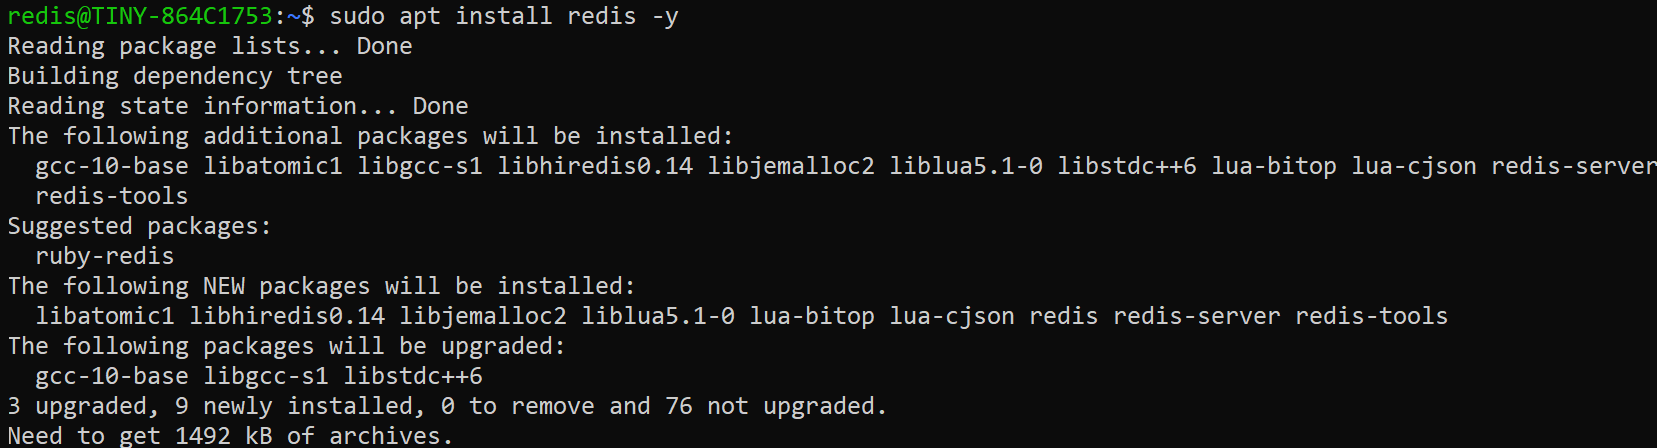
7. Lastly, execute the below command to start the redis service.

Installing Redis on Windows via The Installer Package
Are you not in the mood for jumping to WSL and having to memorize commands to install Redis on your Windows machine? No worries, as Redis offers an installer package! This installer package lets you install Redis with a graphical interface, simplifying the installation process.
The installer package simplifies the installation process by providing an executable installer that handles all the necessary configurations and dependencies. An installer package like this is beneficial for users who are unfamiliar with Linux systems.
To install Redis on your Windows machine via the installer package:
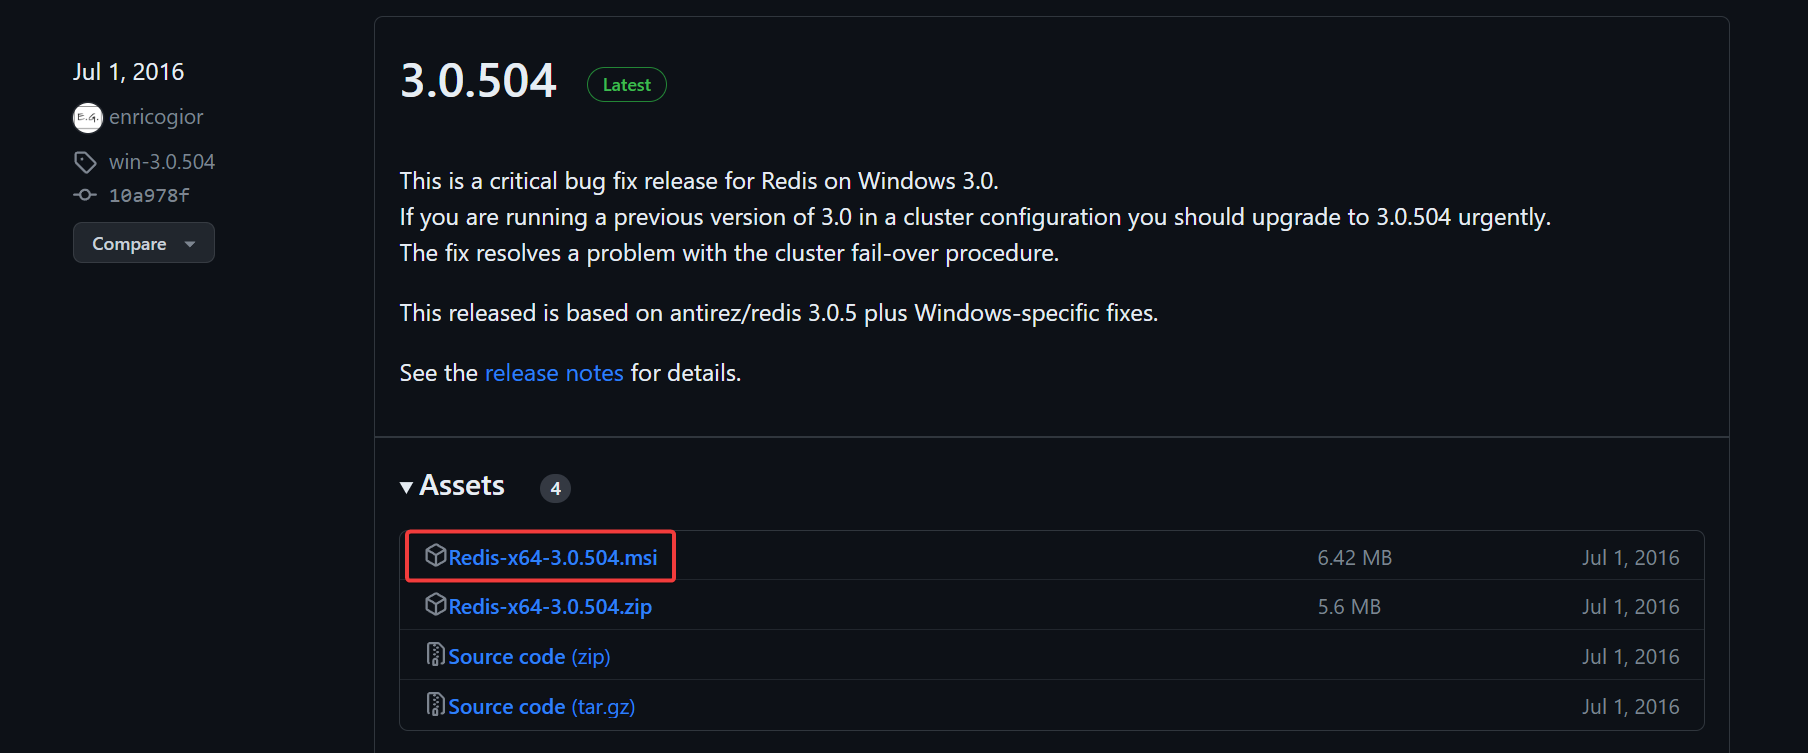
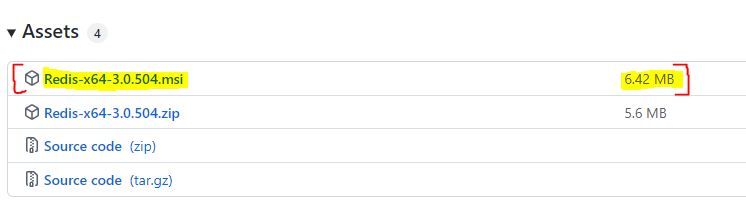
1. Open your favorite web browser and navigate to the official GitHub Redis release page.
2. Next, click the latest MSI version under the Asset section to download the executable file named Redis-x64-3.0.504.msi.
This version is a port of the original Redis. A port is a version of an application adapted to work with a different operating system or platform.
In this case, the port of Redis has been adapted and modified to work with Windows.
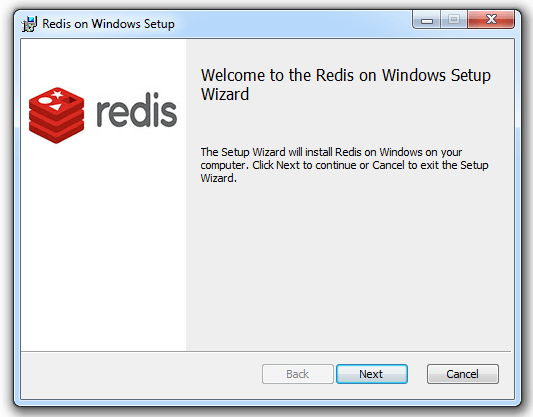
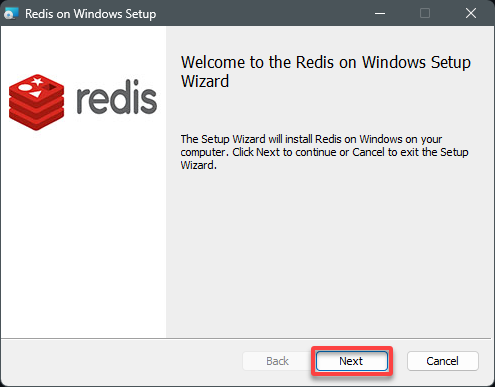
3. Once downloaded, double-click the executable, which brings up the Redis on Windows Setup wizard (step four).
4. Now, click Next on the welcome page to continue.
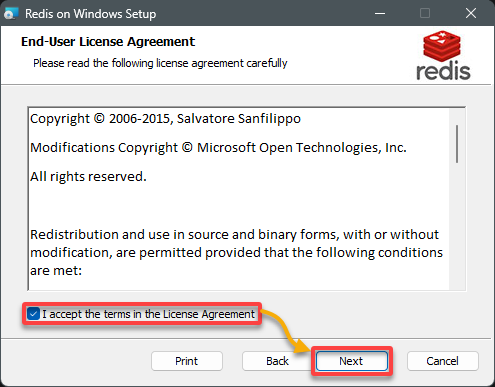
5. Tick the checkbox at the bottom to accept the license agreement and click Next.
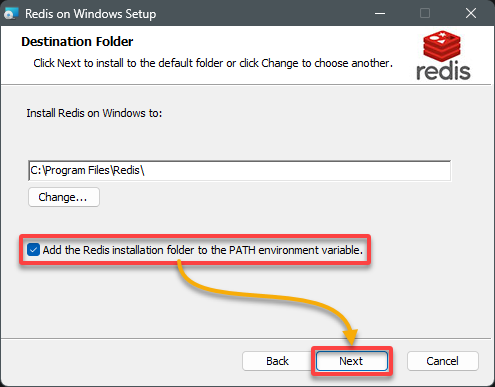
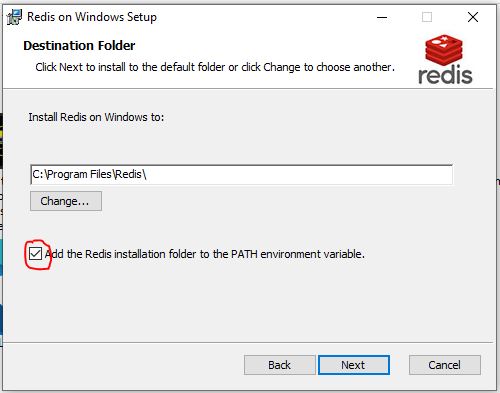
6. Leave the default installation folder as is, but tick Add the installation folder to the PATH environment variable, and click Next.
This feature allows you to run Redis commands from any directory in the command prompt (CMD) or PowerShell, regardless of the current working directory.
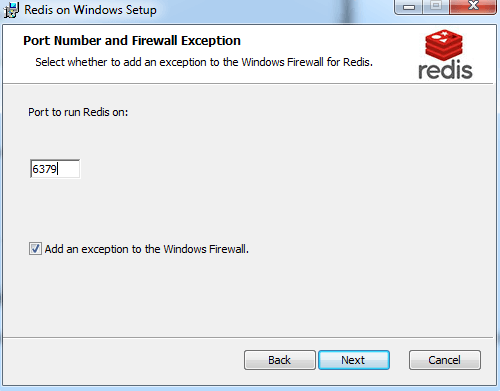
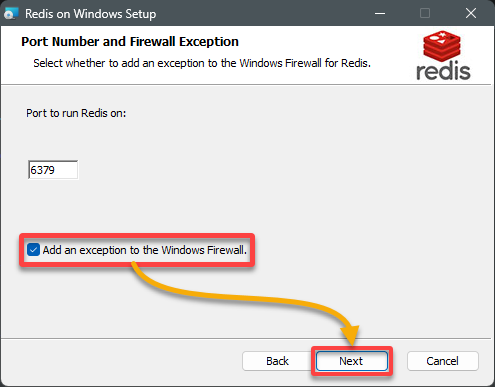
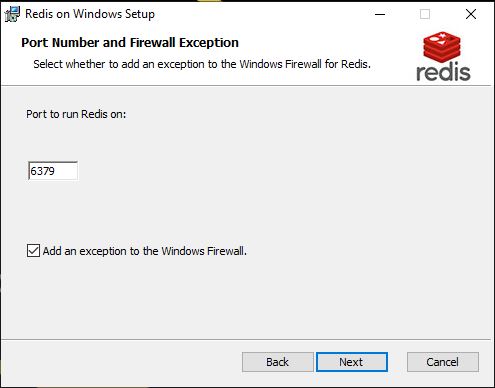
7. Keep the default port number (6379), tick the Add an exception to the Windows Firewall checkbox, and click Next.
This configuration adds an exception to the Windows firewall so that the Redis server can accept incoming connections through port 6379.
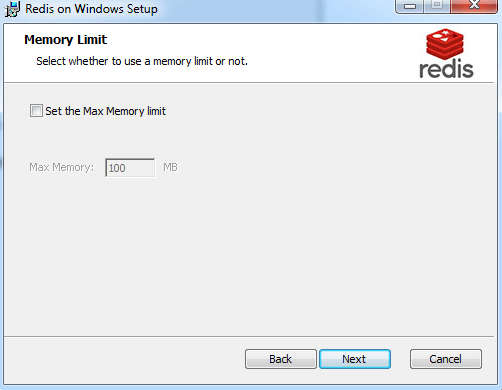
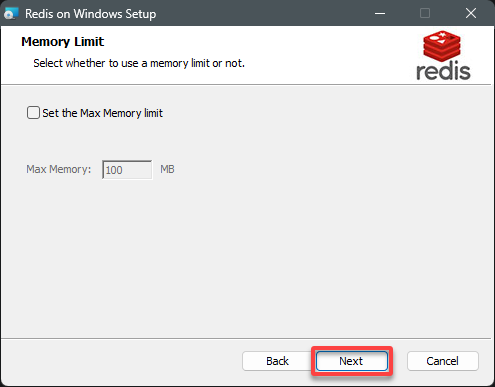
8. On the next screen, keep the setting as is since you do not need to set the memory limit at this stage, and click Next
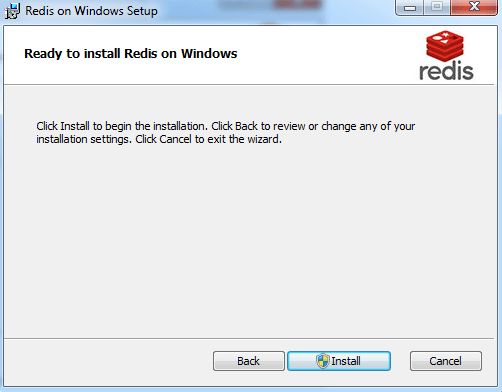
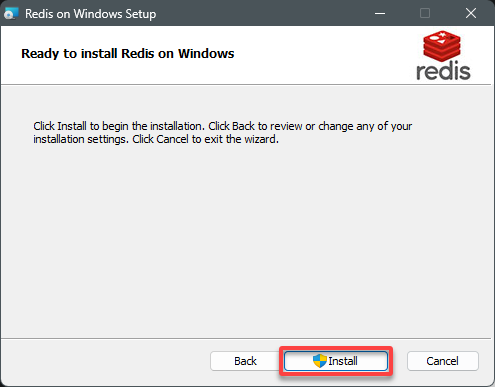
9. Click Install to begin the installation process.
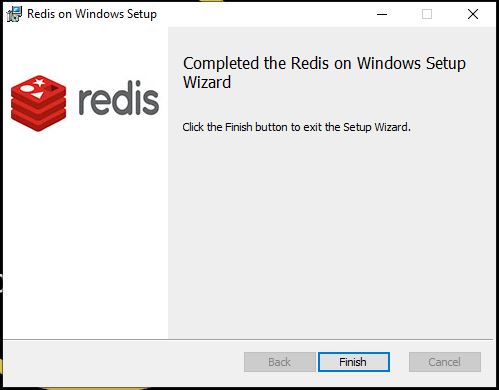
10. Ultimately, click Finish once the installation completes to close the wizard.

Testing Your Redis Installation
With Redis successfully installed on your Windows machine, the action is to test if the installation works. While there are many ways to test the installation, the quickest way is to send a ping command and hope to get a PONG response.
To test your Redis installation, follow the steps below:
1. Execute either of the below commands (on your terminal or PowerShell as administrator) depending on which method you used to install Redis.
These commands launch the Redis Command Line Interface (CLI), which provides an interactive way to communicate with your Redis server.
# If you installed Redis via WSL
redis-cli
# If you installed Redis via the package manager
redis-cli.exe
If successful, your prompt changes to something like the ones below.


2. In the Redis CLI prompt, run the ping command to initiate the communication with your Redis server.
If your Redis server is live and reachable, it responds to the ping command with a PONG response, as shown below.
3. Next, execute the following command to set keys in your Redis server.
Setting keys in your Redis server lets you harness its capabilities for efficient data storage, retrieval, caching, and various data processing tasks
set test "Redis is working!"Once keys are set, you will see a response that says OK, like the one below.

4. Now, run the below get command to retrieve the value associated with the key (test) you set in step three.
Assuming things go smoothly, the key’s associated value is printed in the response.
5. Finally, run the below command to exit the Redis CLI prompt.
Congratulations! You can now use Redis’s powerful features and benefits within your Windows environment.
Conclusion
Throughout this tutorial, you have learned to install and test your Redis installation on Windows. Embracing new technologies can be daunting, but you have taken a significant step toward harnessing the power of Redis for your projects.
You now have a gateway to lightning-fast data management at your fingertips! With its unmatched speed, scalability, and efficiency, Redis is your go-to solution for maximizing data utilization.
But why not further explore Redis’s advanced capabilities? Perhaps learn how to manage a dynamic Redis list or a Redis sorted set? Start integrating Redis into your future projects and elevate your software to new heights!

Hi Guys, Welcome to Proto Coders Point. This Article is on how to download and install redis on windows, I found out redis windows installer a .msi file by which, in just one click “install redis”.
Video Guide
What is Redis
Redis stands for “Remote Directory Server”, It’s an open source & fastest in-memory data storage CLI + Server, basically we can store data in redis in key-value pair, and is used by many developers to manage database, cache message broker & streaming engine.
When should we use Redis
Most of the time redis is used as an caching layer, As it’s an in-memory DB, That means, It keep the given data in-memory & is much faster if compared with MYSQL or NOSQL (Mongodb) query executions.
Redis can’t be used to store large data then 1/3 of RAM size, So it’s better not to use it to store huge data collections.
Can data Stored in Redis get lost
Yes, Data stored in Redis can get deleted but only when server instance is rebooted or terminated and in local PC if you shutdown you system.
Learn more about Redis on Official site
Below are the steps to install redis.
Step 1: Download redis .msi installer file
Offically, Redis not provide any direct installer file to install it on windows operating system but Microsoft has build a installer version of redis by which windows users can easily install redis on windows with just one click.
From above download link download .msi file.
Step 2: Install redis using .msi installer
Start the installer by click on Redis-x64-3.0.504.msi
Step 3: Start using Redis using CMD
On Windows, When you start your system, redis-server.exe will automatically get started and will be running in background.
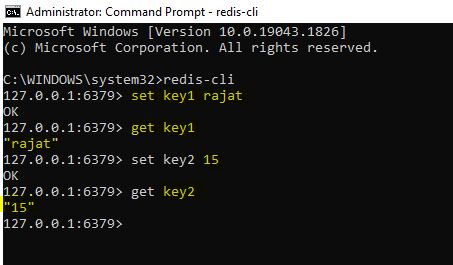
To get connected to redis server and store some data in it, you can make use of redis-cli.
Just open CMD prompt and type “redis-cli”.
Hope, This easiest method to install redis on win10 successfully worked for you.
How to Install Redis on Ubuntu
To Install latest stable version on Redis all you need to do is run below provided commands into Ubuntu/Linux Terminal one by one.
sudo apt install lsb-release
curl -fsSL https://packages.redis.io/gpg | sudo gpg --dearmor -o /usr/share/keyrings/redis-archive-keyring.gpg
echo "deb [signed-by=/usr/share/keyrings/redis-archive-keyring.gpg] https://packages.redis.io/deb $(lsb_release -cs) main" | sudo tee /etc/apt/sources.list.d/redis.list
sudo apt-get update
sudo apt-get install redis
OR
If above Steps don’t work, Then you can Install Redis into Ubuntu system using Snapcraft
Install Redis via snap:
sudo snap install redis