
Windows 8.1/8 Recovery Disk Create Rescue Media, when booting a computer running Windows 8 or 8.1, it’s common for the machine to spontaneously crash with error 0xC1902150 or 0xC1900210 respectively shown on screen during a blue output on incompatible hardware.
Instantly look at the recovery media to enable your computer to boot and be restored back to normal. You can use different installation data like CD/DVD or USB and make a recovery disk in attention of the system failure.
If you’ve got multiple operating systems loading up when you turn on your computer, Windows 8.1/8 Recovery Disk Create Rescue Media this of course can make things difficult.
Not being able to login to one system means you have to switch over to another one instead – and thus basically turning off your computer isn’t a feasible option. This is some serious whirlpooling going on.
The only thing more important than having a backup of your computer is having a way to recover it if something bad happens.
This usually means making and verifying bootable disks which every Windows operating system has in its arsenal.
Mac starter software is perfect for people who have just started using a Mac. Windows 8.1/8 Recovery Disk Create Rescue Media There optional tools enable users to quickly diagnose minor problems and efficiently fix them.
What is the Importance of Rescue-Disk Options?
In earlier versions of Microsoft’s Windows operating system, you needed a floppy disk to create a rescue disk.
But remember the days when USB disks were used to install operating systems? You will not believe how hard it was back then.
Third party tools – both paid and unpaid – are available for operating systems like Windows that provide a wide range of useful functions for a price, ranging from graphics quality to text messaging.
A much safer option is to use the Windows Installation media because it contains more advanced recovery tools and the necessary options.
But with laptops on the rise for technology usage, there is a special partition dedicated to handling in case of failure.
By using an emergency rescue disk, we’d be able to recover files from a partition that you otherwise wouldn’t be able to access.
This is important because if you don’t have it, you won’t be able to boot into the PC.
How to Create a Recovery Disk in Windows 8 or 8.1?
Windows 8.1/8 Recovery Disk Create Rescue Media, windows 8 and 8.1 both come with Recovery Media Creator built-in .
Before we create a recovery disk, let’s take a moment to realize the importance of backing up important data.
The experts at PC Geeks recommend saving a copy of important files onto an external hard drive (device) which can be easily accessed without working directly from the computer itself.
The backup is created and saved in case anything were to happen to your computer such as a virus, hardware issues or even plain human error.
There is also a term called system repair disc which was earlier used in Windows XP and like versions of the operating system.
Windows 8.1/8 Recovery Disk Create Rescue Media, but this system repair disc is not the same as a factory recovery or restore disc.
The important thing is that system repair disc cannot be used to install a Windows 8 operating system. It can only be used for the installation of the Windows 7 and Vista systems.
A system repair disc can also be created on a 32-bit Windows 8 OS, and it can be used to repair a 32-bit Windows 8 system. Similarly, the same can be done for 64-bit systems.
How to Create a Recovery Disc (“System Repair Disc”) using CD or DVD in Windows 8 or 8.1?
Now you have two options. You can either use CD or DVD as the media for creating a rescue disc or an USB disk.
- If you want the CD or DVD option, you need to remove all the USB disks connected to your computer.
- As you can see above, CD or DVD choice is a legacy option. You can “Create a system repair disc with a CD or DVD instead“ .The rest of the process is simple. When you click Next button, you are asked to click on the “Create disc” button. There is also a message on the screen.
A system repair disc can be used to boot your computer. It also contains system recovery tools that are needed when Windows encounters serious errors or if you wanted to restore it back to the version that was backed up by a system image.
The contents of your CD or DVD are now successfully on it. You will simply want to label yours appropriately so that you remember what’s on it.
How to Create Recovery USB Flash Drive in Windows 8 or 8.1?
The only difference between the “system repair disc” and this option is that you are using USB drive or thumb drive as your media.
You will be asked to select your USB media where you want to create the startup disk onto, so choose wisely when choosing that thumb-drive.
Always opt for a USB 3.0 soon if possible, instead of reaching forwards backwards into the past with an old USB 2.0 stick.
In addition, Windows 8.1/8 Recovery Disk Create Rescue Media having the ability to make sweeping changes can be quite effective.
Also important to mention is that the Recovery Drive also comes pre-configured, unlike the Recovery Obtainable from the Microsoft website which needs to be manually configured for your specific computer after downloading.
As earlier, if your computer DOES NOT has a OEM recovery partition then this option will be disabled or greyed out. In that case you should avoid using it.
Warning:
If you copied contents of the recovery partition on your hard disk to the recovery drive, at the end of recovery disc creation, you can delete this partition from your computer.
Windows 8.1/8 Recovery Disk Create Rescue Media, without this partition (which occupies about 10 GB space normally), you will be able to get more memory space on a normal computer.
BUT DO NOT DELETE THE RECOVERY PARTITION.
The system recovery partition is a part of the hard drive that provides users with a means of restoring their computers to factory settings in the event that problems become too much for them.
- The only difference from the earlier scenario is that you will get a list of USB drives or thumb drives listed to which you can make a recovery disc.

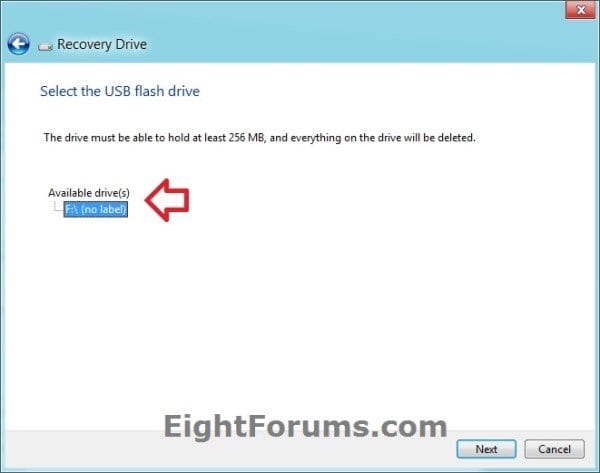
Note:
- There is a message that “The drive must be able to hold at least 256 MB, and everything on the drive will be deleted“. So in case you stored any important files on this drive, its best to back them up to another drive. Also this drive will get formatted which should be kept in mind.
How to Restore you Windows 8 or 8.1 PC?
Windows 8.1/8 Recovery Disk Create Rescue Media, you must enter the CD, DVD, or USB flash drive to start the computer because it is necessary for your machine to boot.
Then several options will come up.
Now, depending on whether you would like to refresh your PC, reset Windows 8.1, or do a system image recovery, you can select that option.
Hello, My name is Shari & I am a writer for the ‘Outlook AppIns’ blog. I’m a CSIT graduate & I’ve been working in the IT industry for 3 years.
Здравствуйте, скажите как создать флешку восстановления Windows 8.1? Видел эту информацию у Вас на сайте в какой-то статье, но не могу найти. Мне нужно срочно восстановить загрузку Windows 8.1 и диск восстановления от простой восьмёрки не подходит к операционной системе Windows 8.1. Говорят нужно создавать флешку. Вообще неплохо было бы Вам коротенькую инструкцию написать, у Вас больше всего статей о Windows 8, 8.1.
Как создать флешку восстановления Windows 8.1
Очень неприятной для любого пользователя выглядит ситуация когда Windows 8.1 перестанет загружаться, в таком случае Вы можете загрузиться с флешки восстановления и войти в меню Выбор действия Windows 8.1, и уже там выбрать инструмент для восстановления Вашей операционной системы, например: простое восстановление с помощью контрольной точки, восстановление Windows 8 без удаления пользовательских файлов (Refresh Your PC), восстановление с помощью ранее созданного образа и так далее.
{banner_google1}
Сам процесс создания флешки восстановления очень простой. Подсоединяем флешку в USB-порт нашего компьютера или ноутбука
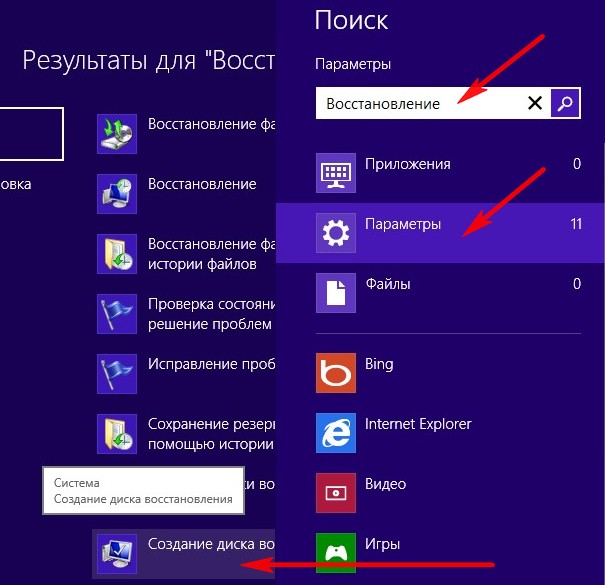
Уводим мышь в правый горячий угол рабочего стола и нажимаем Поиск.
Набираем в поле поиска слово Восстановление. Жмём на Параметры и Создание диска восстановления.
Да.

Далее.

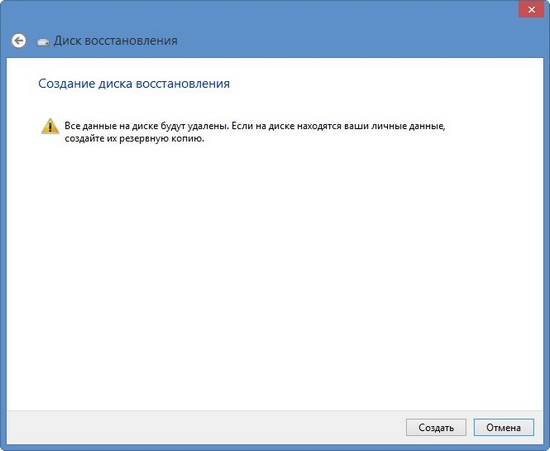
Далее (осторожно, вся информация будет удалена с флешки).

Создать.

Готово. Вот и всё, флешка восстановления Windows 8 создана.

tutorial
Both Windows 8 and Windows 8.1 offer a new tool for creating recovery drives on all kinds of devices, from USB flash drives, to external hard disks to partitions on your computer’s internal hard disk. This is a big step forward from the manual and error prone procedure you had to go through in Windows 7. In this tutorial I will show how to use the new Recovery Media Creator to create a recovery drive on a USB memory stick.
How to Start the Recovery Media Creator in Windows 8 & Windows 8.1
Before you start, plug in the USB memory stick or the external hard drive on which you want to create a recovery drive. After Windows detects it correctly, go to the Start screen and type recovery.
In Windows 8, filter by Settings and click or tap the «Create a recovery drive» search result.
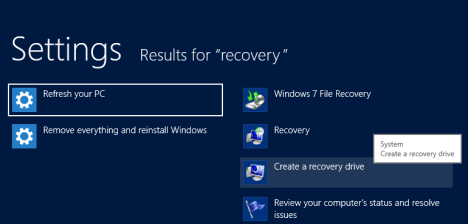
In Windows 8.1 there is no need to filter the results. Type recovery and click or tap the «Create a recovery drive» search result.
A UAC (User Account Control) prompt is shown, asking whether you allow the Recovery Media Creator to make changes to your computer.
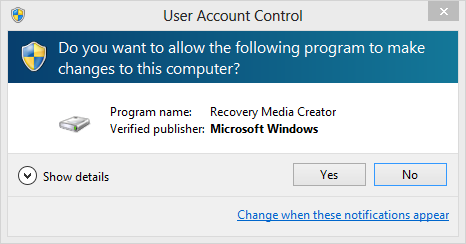
Click or tap Yes and the Recovery Media Creator is started.
How to Use the Recovery Media Creator to Create a Recovery Drive
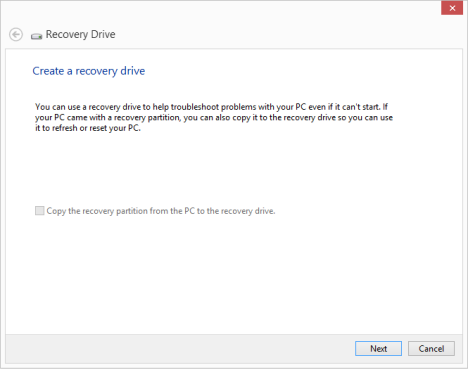
First, you are shown information about the Recovery Media Creator and what it does. Also, there’s an option that says «Copy the recovery partition from the PC to the recovery drive».
If you have a computer that was sold with Windows 8 or Windows 8.1 preinstalled, it may have a special recovery partition, with custom recovery tools created by its manufacturer. If that is the case for your PC, you will be able to check this option and have that partition copied to the recovery drive you are about to create. If you don’t want to copy this partition and you want to create a drive only with the recovery tools available for Windows 8 and Windows 8.1, do not check this option.
Then, click or tap Next.
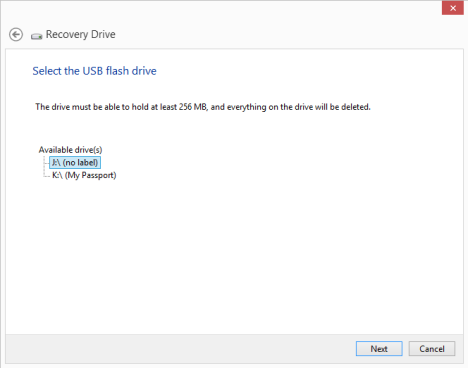
You are asked to select the USB flash drive where you want to store the recovery tools. It must have at least 256MB in size. Be careful — all the data existing on it will be wiped out!
Select the drive you want to use and click or tap Next.
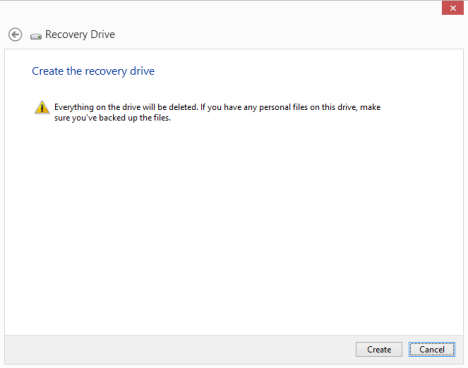
You are warned that everything on the selected drive will be deleted. This is your last opportunity to back up the data found on it. When ready to go ahead, click or tap Create.
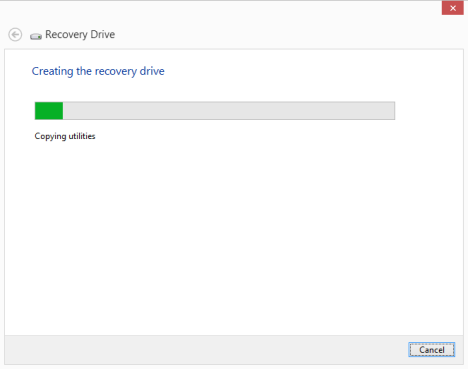
The selected drive is formatted and all the system recovery utilities are copied on it. The process will take a minute or two, depending on the drive you selected.
When the recovery drive is created, you are informed. Click or tap Finish.
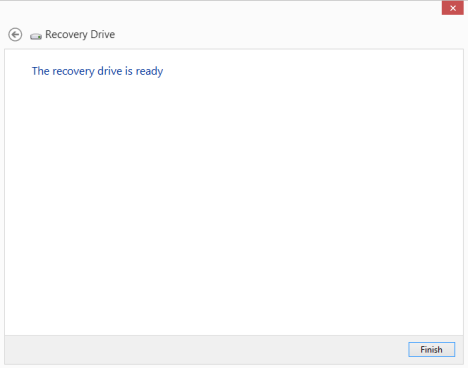
Recovery Media Creator is closed and you can use the USB flash drive to repair malfunctioning Windows installations on your computer or other computers.
Conclusion
As you can see from this tutorial, the Recovery Media Creator is a great tool, that’s fast and easy to use. My only complaint is that it is hidden in Windows 8 and Windows 8.1. Unless you know of its existence and you search for it, there is not visible shortcut in the All Apps list, nor in the Control Panel.
Subscribe:
RSS Feed
Google News
YouTube
В одной из статей я писал, как создать пользовательский образ восстановления в Windows 8, с помощью которого в экстренной ситуации можно было бы вернуть компьютер к исходному состоянию, вместе с установленными программами и настройками.
Сегодня же речь пойдет о том, как сделать загрузочную флешку, специально предназначенную для восстановления Windows 8. Кроме этого, на этой же флешке может быть и образ системы, который имеется на компьютере или ноутбуке по умолчанию (он присутствует практически на всех ноутбуках с предустановленной операционной системой Windows 8). См. также: Лучшие программы для создания загрузочной флешки, Загрузочная флешка Windows 8
Запуск утилиты для создания диска восстановления Windows 8
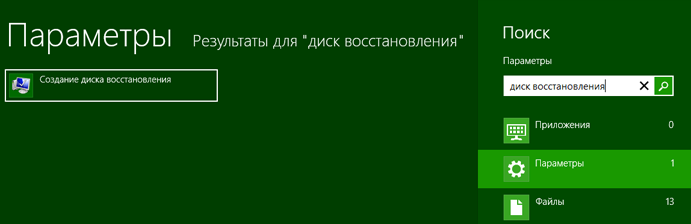
Для начала, подключите к компьютеру подопытную USB флешку, а затем начните набирать на начальном экране Windows 8 (не куда-либо, а просто набирать на клавиатуре в русской раскладке) фразу «Диск восстановления». Откроется поиск, выберите пункт «Параметры» и вы увидите иконку для запуска мастера создания такого диска.

Окно мастера создания диска восстановления Windows 8 будет выглядеть как показано выше. При наличии раздела восстановления, также будет активным пункт «Скопировать раздел восстановления с компьютера на диск восстановления». Вообще, это отличный пункт и я бы рекомендовал делать такую флешку, включая данный раздел, сразу после покупки нового компьютера или ноутбука. Но, к сожалению, вопросами восстановления системы обычно начинают интересоваться некоторое время спустя…

Нажмите «Далее» и подождите, пока система выполнит подготовку и анализ подключенных дисков. После этого, вы увидите список накопителей, на которые можно записать информацию для восстановления — среди них будет и подключенная флешка (Важно: вся информация с USB накопителя будет удалена в процессе). В моем случае, как вы можете видеть, раздела восстановления на ноутбуке нет (хотя, на самом деле, есть, но там Windows 7) и общий объем информации, который будет записан на флешку не превышает 256 МБ. Тем не менее, несмотря на небольшой объем, находящиеся на ней утилиты смогут помочь во многих случаях, когда Windows 8 не запускается по той или иной причине, например — был заблокирован баннером в загрузочной области MBR жесткого диска. Выберите накопитель и нажмите кнопку «Далее».

Ознакомившись с предупреждением об удалении всех данных, нажмите «Создать». И подождите некоторое время. По завершении, вы увидите сообщения о том, что диск восстановления готов.
Что находится на этой загрузочной флешке и как ее использовать?
Для использования созданного диска восстановления, когда это будет необходимо, нужно поставить загрузку с флешки в БИОС, загрузиться с нее, после чего Вы увидите экран выбора раскладки клавиатуры.
После выбора языка, вы можете воспользоваться самыми разными средствами и инструментами для восстановления системы Windows 8. Сюда включены и автоматическое восстановление запуска и восстановления из образа операционной системы, а также такой инструмент, как командная строка, с помощью которого можно сделать, поверьте, очень много всего.


Кстати, во всех тех ситуациях, где для решения проблемы с операционной системой Вам рекомендуют воспользоваться пунктом «Восстановление» с диска дистрибутива Windows, созданный нами диск также прекрасно подойдет.
Подводя итог, диск восстановления Windows — неплохая вещь, которую можно всегда иметь на относительно свободном USB носителе (никто не мешает записывать туда другие данные, помимо имеющихся файлов), которая, при некоторых обстоятельствах и наличии определенных умений, может здорово выручить.
Applies ToWindows 11 Windows 10
Support for Windows 10 will end in October 2025
After October 14, 2025, Microsoft will no longer provide free software updates from Windows Update, technical assistance, or security fixes for Windows 10. Your PC will still work, but we recommend moving to Windows 11.
Learn more
The Recovery Drive utility in Windows is a valuable tool designed to back up essential system files needed to restore a PC to its original state. This utility creates a USB recovery media that can help you restore your Windows device to its factory settings, even if you replace the hard drive or completely wipe the drive. The recovery media includes built-in Windows files, any updates installed at the time of media creation, and any customizations from the PC manufacturer, ensuring a reliable backup solution for bare metal recovery scenarios.
Creating a recovery media is a proactive measure to ensure that you can quickly and efficiently restore your system in case of major issues such as hardware failure. This media can be used for bare metal recovery on the device it was created for, ensuring a smooth and efficient restoration process.
It’s recommended to recreate the recovery media annually to include the latest Windows updates and improvements. Additionally, it’s important to note that the recovery media doesn’t include your personal files. Therefore, you should use a different backup method, such as Windows Backup or File History, to back up your personal data separately.
Create a recovery drive
Warning: Use an empty USB drive because this process will erase any data that’s already stored on the drive.
-
To open Recovery Drive you can use one of the following methods:
-
From Start, search for Recovery Drive and select it
-
Use the command recoverydrive.exe
-
-
When the tool opens, make sure Back up system files to the recovery drive is selected and then select Next
-
Connect a USB drive to your PC, select it, and then select Next
-
Select Create. Many files need to be copied to the recovery media, so this might take a while
Reinstall Windows with a recovery drive
Follow these steps to reinstall Windows using the recovery media:
-
Start your device from the USB drive that was created with Recovery Drive. The process to boot from a USB drive may vary by manufacturer, so refer to your device’s manual if needed
-
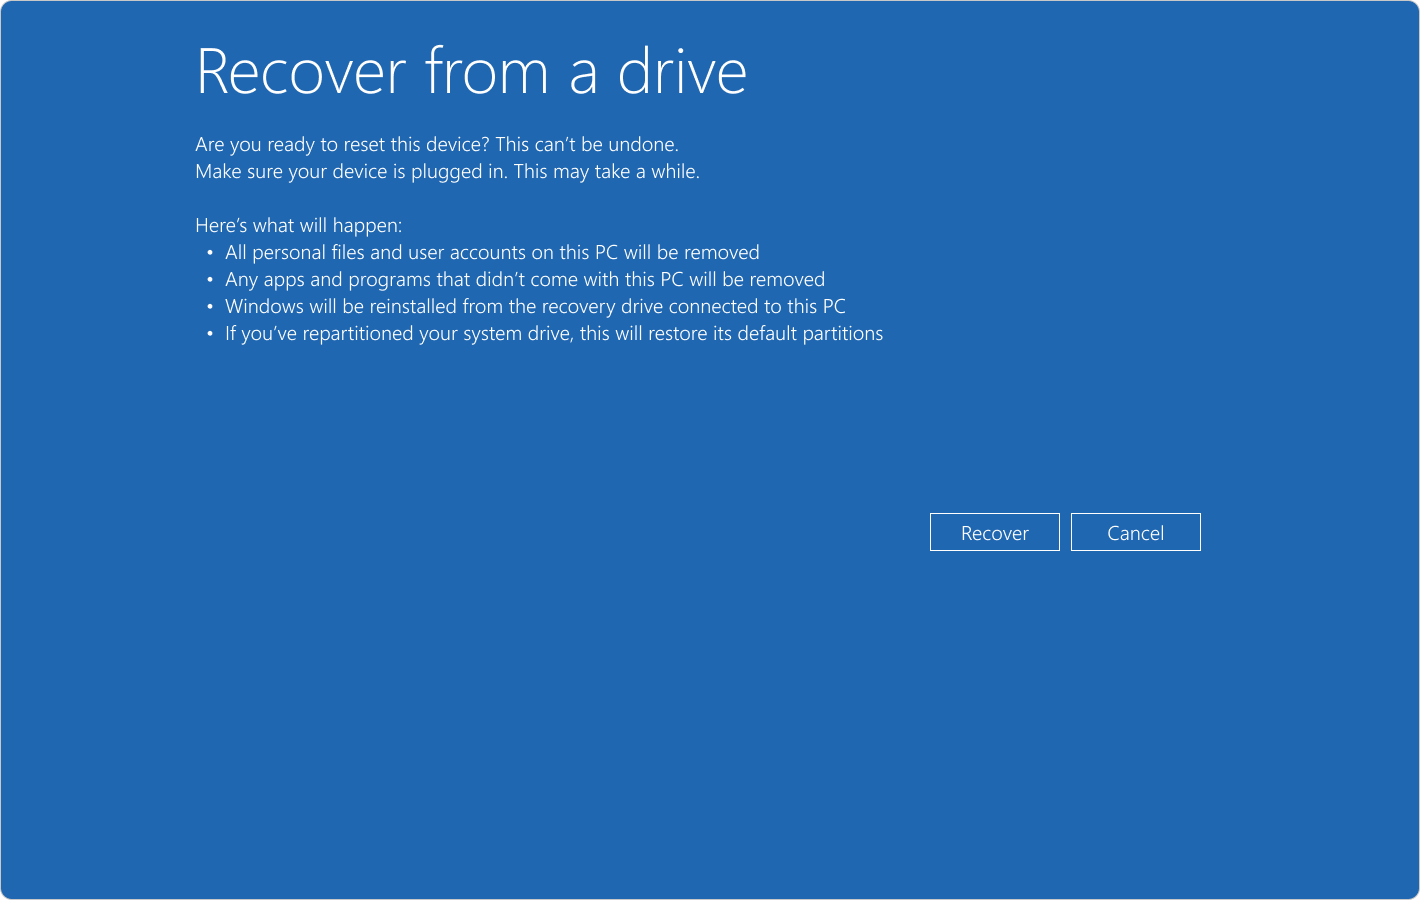
Once Windows Recovery Environment (Windows RE) loads, select Recover from a drive
-
Choose either Just remove my files of Fully clean the drive, depending on your preference
-
Select Recover to confirm and start the recovery process

Need more help?
Want more options?
Explore subscription benefits, browse training courses, learn how to secure your device, and more.