It is helpful to employ a Windows 10 screen recorder with audio to capture business conferences, online lectures, or streaming videos. This helps record video on Windows 10 or 11 computers while persevering the original sound. Let’s discover four free diverse methods of how to screen record on Windows 10 with audio in this guide.
Quick Answer: How to Screen Record on Windows with Audio
To screen record Windows 10 with audio, there are various choices, including a built-in Windows 10 screen recorder, third-party screen recording software, an online screen capture tool, or an open-source screen and audio recording program. So, how do you make the best choice? Here is a quick overview.
1️⃣Xbox Game Bar: This tool is pre-installed in your Windows 10 or 11 computers, letting you screen record computer with audio for free. However, the Game Bar only allows you to capture the screen activity on full screen; you are not allowed to record the audio only, pause and resume during the session, or switch from different windows.
2️⃣EaseUS RecExperts: This lightweight Windows screen recorder lets you record the screen, audio, and webcam separately or simultaneously from a laptop or desktop. It can capture computer screens fully or partially. No time limit, watermark, or lag.
3️⃣EaseUS Online Screen Recorder: This easy-to-use online tool lets you screen record Windows 10 with audio without downloading software or installing add-ons. It is free-to-use and supports Chrome, Edge, Firefox, Safari, and Opera.
4️⃣OBS Studio: This free, open-source recording program lets you capture a specific window or screen once you set up the recording parameters. Most players like to use it for gameplay recording or broadcasting. However, this requires a long and deep learning curve.
Share this post to help more people!
Screen Record with Audio Windows 10 with Xbox Game Bar
Xbox Game Bar recording is an excellent option for a screen and audio recorder Windows. It is mainly designed for capturing gameplay, but it also enables users to screen record other applications or windows with audio.
- Notice: Technically speaking, Game Bar supports all Windows 10 PCs. However, to ensure all features work correctly, Microsoft suggested that a computer running Windows 10 22H2 or newer versions use this feature.
See how to screen record on Windows 10 with audio for free using Xbox Game Bar.
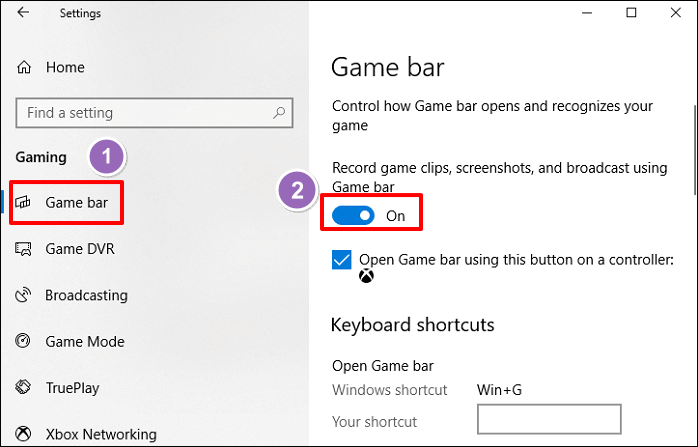
Step 1. Enable Xbox Game Bar in Settings.
If this is the first time you have used this feature to screen recorder with audio Windows 10, activate it first. Go to «Settings» > «Gaming» > «Xbox Game Bar and toggle the option of «Record game clips, screenshots, and broadcast…«. (Detailed words may vary from different Windows versions.)
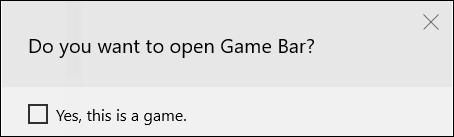
Step 2. Launch Xbox Game Bar.
You can type «Xbox Game Bar» in the search bar to open it or directly use the «Windows +G» shortcuts to open Game Bar. Tick the «Yes, this is a game» checkbox to load the Game Bar if prompted.
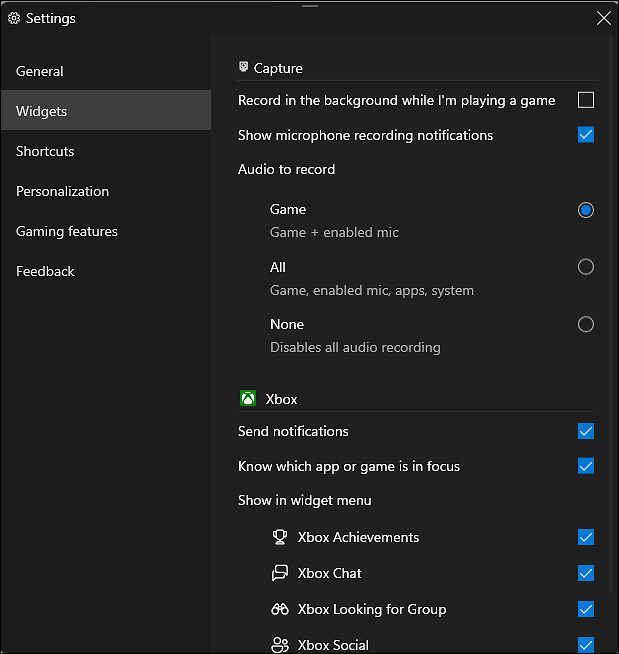
Step 3. Adjust Game Bar recording settings.
On the Windows Game Bar interface, click «Settings«. You can change the audio capture mode, shortcuts, and more here.
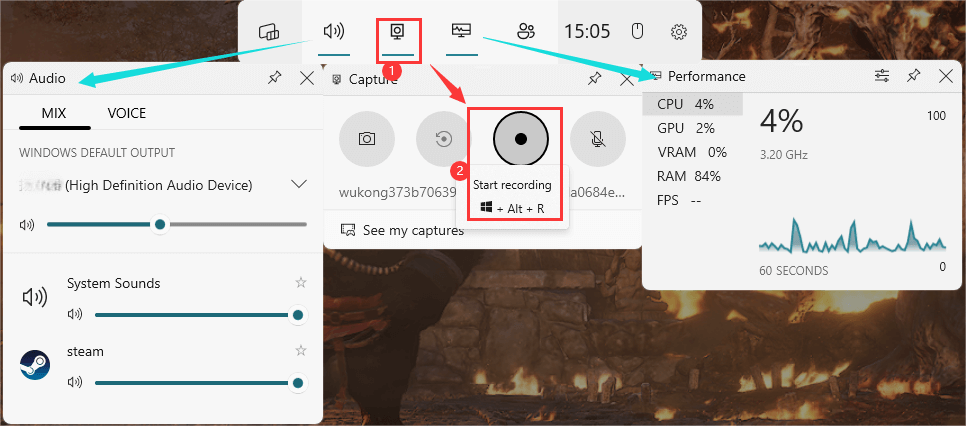
Step 4. Screen record Windows 10 with audio using Game Bar.
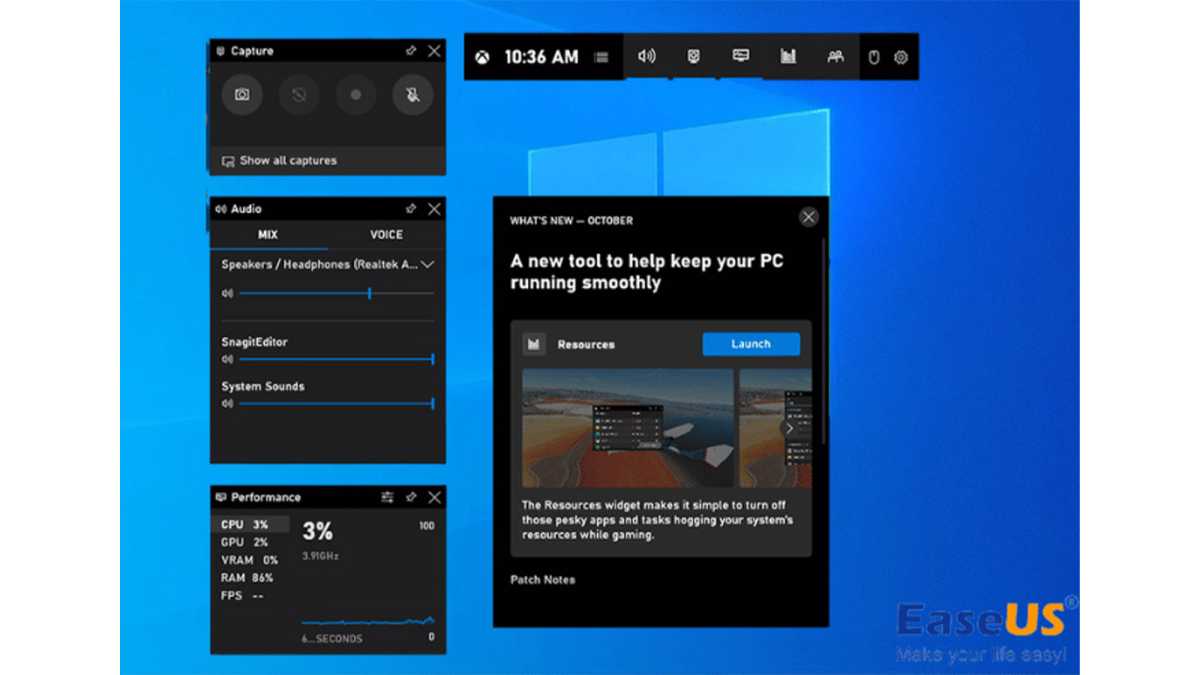
On the game bar toolbar, click «Capture» (the camera icon) to bring up the capture widget. Click the «record» button (or press «Windows + ALT + R» shortcuts) to start recording. Please don’t switch windows during the session; the recording will be terminated automatically.
Step 5. Stop recording Windows 10 computers.
On the Capture Status window, click «Stop recording«. This will end the session immediately. There is no pause and resume button.
Step 6. See your recording file.
A «Game clip recorded» popup will appear once you stop recording. Click on it to see your capture. Or return to Xthe box Game Bar toolbar > «Capture» > «See my captures«.
Top Windows Screen Recorder with Audio: EaseUS RecExperts
What if you want to record multiple windows for your task? Or what if you need to perform more advanced screen recording Windows 10 with audio tasks? You can install a specialized screen recorder.
EaseUS RecExperts is a brilliant alternative to the Xbox Game Bar. It lets you:
- Record a full screen, partial screen, or any region of the Windows computer screen.
- Capture the system audio, application, or microphone sound without compromising quality.
- Boost microphone sound or reduce background noise while recording.
- Screencast a single window/tab or record multiple windows/tabs without interruption.
- Review and edit the recording file with AI-empowered functions.
Let’s see how to screen record on Windows 10 with audio using EaseUS RecExperts.
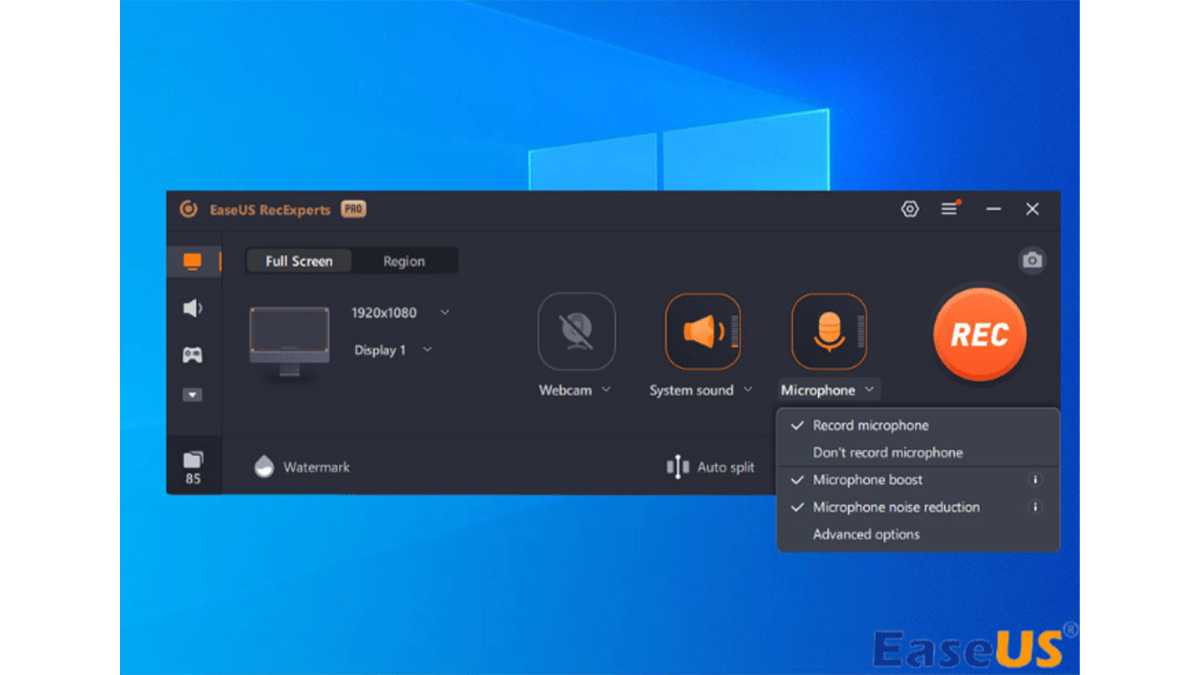
Step 1. Launch EaseUS RecExperts. Choose a recording mode from «Full Screen» or «Region». If you choose the second one, you will need to select the recording area manually.

Step 2. After selecting the recording mode, you need to choose which audio to record. To record the system sound, click on the loudspeaker sign; to record the microphone sound, click on the mic sign; to record no sound, select nothing.
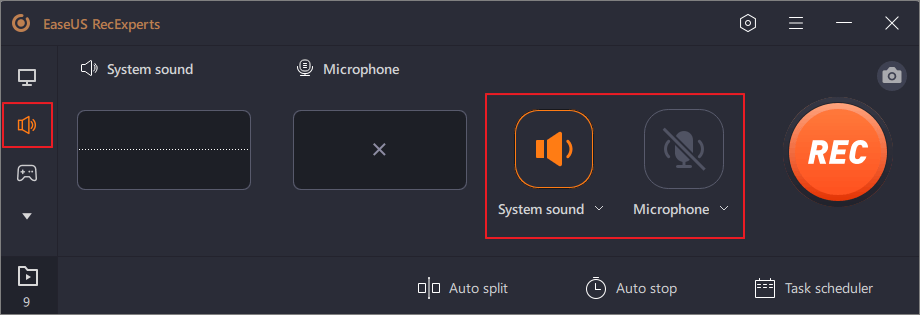
Step 3. Then, you can click the red «REC» button to start recording. If you want to pause the recording, click on the white «Pause» button; to end the recording, click on the red «Stop» button.
Step 4. After recording, the recording list window will open. Here you can view, split, delete, manage your recordings easily.

How to Record Screen in Windows 10 with Audio Without Any Software
EaseUS Online Screen Recorder is an online Windows screen recorder with audio that helps capture a tab, window, or entire screen for free. No installations, extensions, signups, or downloads are required.
Let’s see how to record on Windows with audio without downloading anything.
Step 1. Open the website.
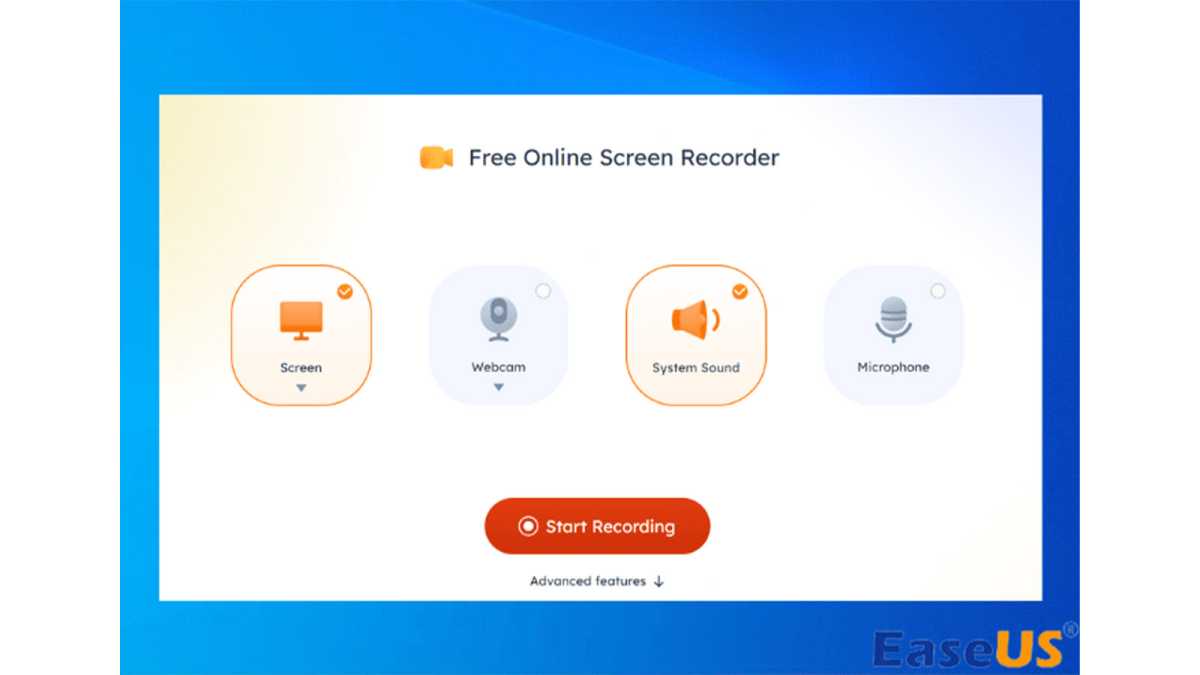
Visit the EaseUS Online Screen Recorder website with a web browser. Click «Start Recording» on the banner.
Step 2. Confirm camera and microphone permissions.
You will be asked to grant recording permission to your cameras and mics. Choose one option from the popup.
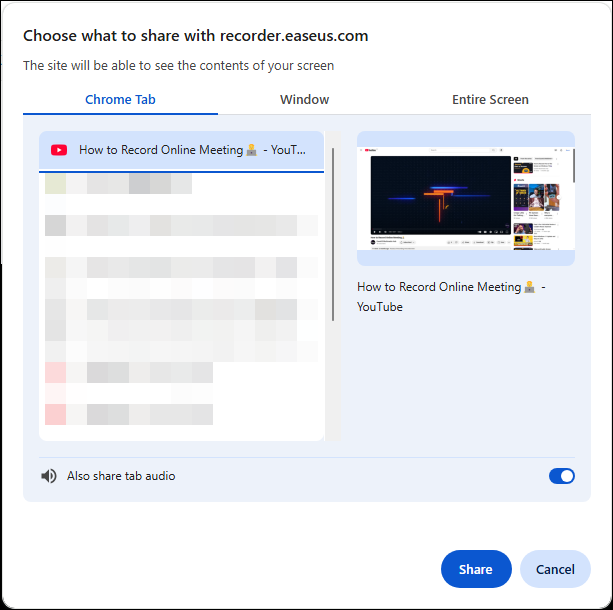
Step 3. Select the content you want to record.
On the following popup, select «Tab«, «Window«, or «Entire Screen» to record, make sure «Also share tab audio» is toggled on, and click «Share«.
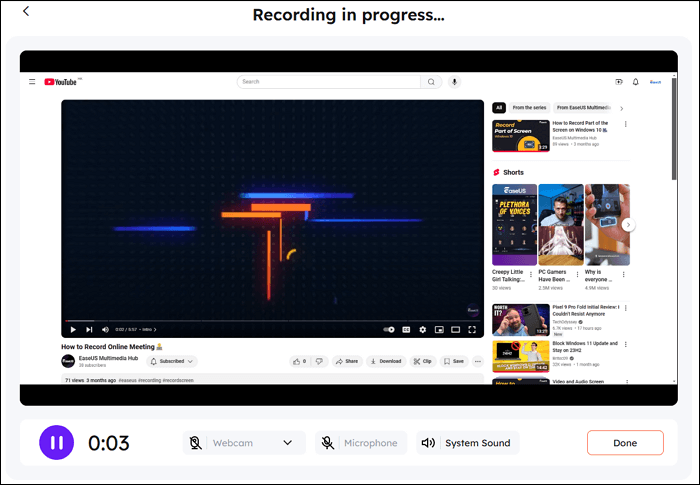
Step 4. Adjust recording settings and start recording.
Turn on «System Sound«, «Microphone«, or «Webcam«. Click the «Record» button to start recording. Once the session is over, click «Done«.
Step 5. Save the recording file to your computer.
Select «Save Video» to save the MP4 file to your Windows 10 PC or «Record Another» to start over.

Screen Recording Windows 10 with Audio Using OBS
OBS Studio is one of the most popular open source screen recorders. Gamers like to use it to record and stream gameplay. It is also a good choice to screen record with audio on Windows, Mac, and Linux.
See how to use the Windows screen recorder with audio.
Step 1. Download and run OBS Studio.
Visit its official website to download OBS to your Windows, follow the on-screen wizard to finish installation, and run the recording program on your PC.
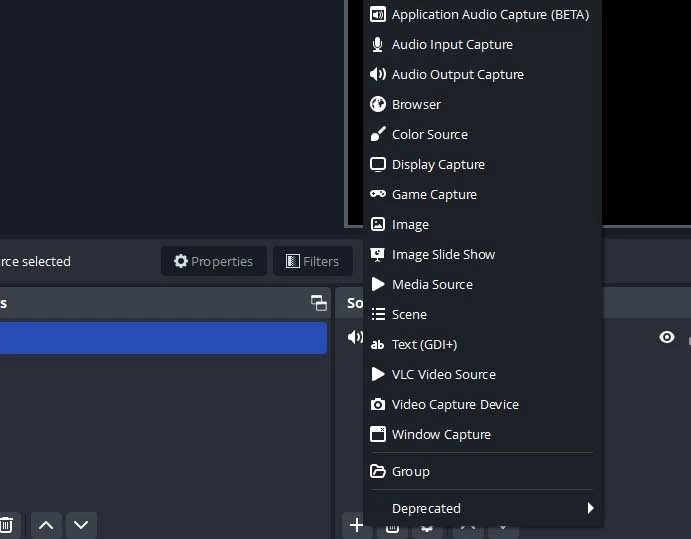
Step 2. Add a Source for your recording.
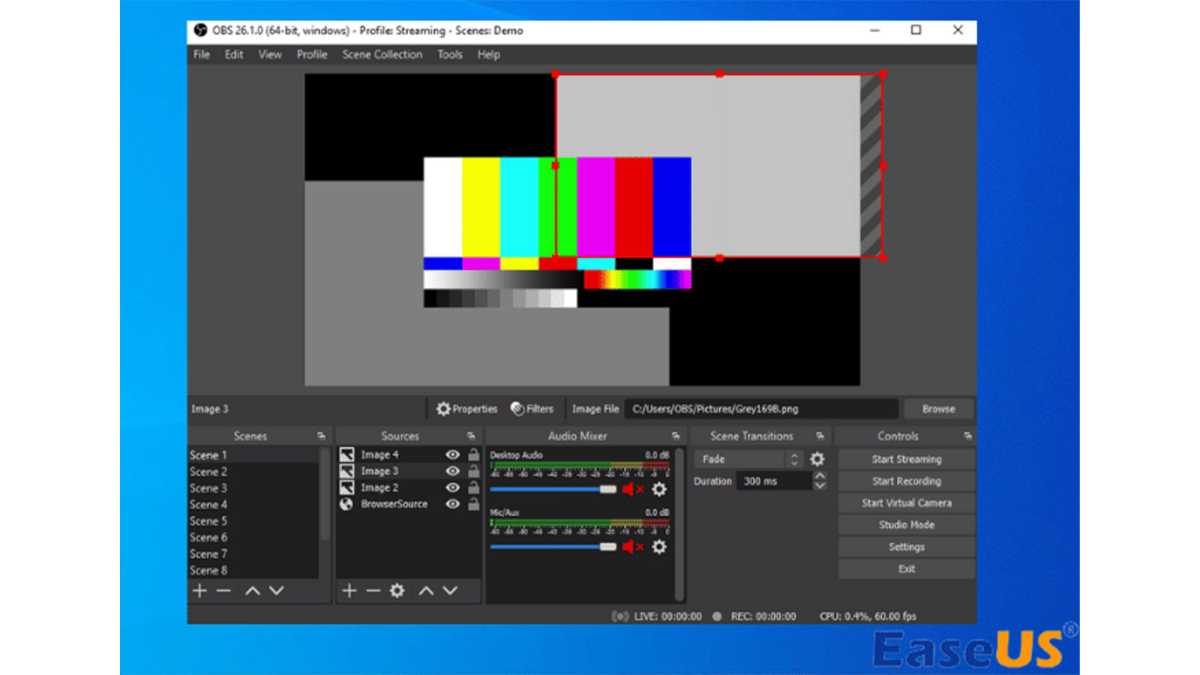
Click the «+» icon under Source, select a source from the list, and create a recording source for your current task. Here, we choose «Display Capture,» which lets you record the entire screen or a specific window on your Windows computer.
Look at other common Sources you may need:
- Audio Input Capture: capture audio from a mic or other input device
- Video Capture Device: record video from a webcam or other input device
- Game Capture: capture gameplay walkthroughs and videos
- Window Capture: record a single window on your PC.
Step 3. Adjust recording settings.
Click «Settings» under «Controls«. You can change the output, audio, video, and other parameters here.
Step 4. Start recording using OBS.
Now, click «Start Recording» under «Controls» to screen record on Windows 10 with audio.
You can share this article with more people!
Final Words
Here, you can learn the top 5 Windows 10 screen recorders with audio to assist you in making screen recordings, which can meet the needs of different groups.
Let’s review what are the differences between these tools for how to screen record on Windows 10 with audio:
- For those who don’t want to install any third-party screen recorder, EaseUS online screen recorder, and Xbox Game Bar are ideal options
- If you’re going to find a completely free yet powerful tool, you can opt for OBS Studio
- People looking for easy yet powerful screen and audio recorder software look no more than EaseUS RecExperts. This software provides users with the best quality at the lowest price.
How to Screen Record on Windows 10 with Audio FAQs
1. Does Windows 10 have a screen recorder with audio?
Yes. Windows 10 has a built-in screen recorder with audio, and it’s called Xbox Game Bar. This freeware lets users screen recording the full screen on Windows 10 with microphone sound. But, if you want to record your screen with system sound, switch to another third-party screen and audio recorder like EaseUS RecExperts.
2. Can I record audio on Windows 10?
Of course, yes. There is a built-in voice and screen recording tool on Windows 10 PC. You can type voice recorder in the search box to bring up the Voice Recorder. Then, you can start recording audio with a simple click.
3. Why is there no Sound when I record my computer screen?
Below are some common reasons you can refer to:
- The sound drivers are not updated
- Screen recorders are not granted permission to access the microphone
- The screen recording software you used is not working
By Adela D. Louie, Last updated: June 13, 2024
In a world where visual communication reigns supreme, the ability to capture on-screen activities accompanied by crystal-clear audio has become an invaluable skill. Enter Windows 11, the latest operating system that promises a seamless and enhanced user experience. Are you ready to unlock its full potential?
In this guide, we delve into how to record screen on Windows 11 with audio integration. Whether you’re a content creator, educator, or just eager to share your expertise, this tutorial aims to empower you with the tools and know-how to effortlessly record your screen alongside captivating audio. Join us on this journey as we navigate through step-by-step instructions, uncovering the tips and tricks to elevate your Windows 11 screen recording game.
Part 1. Methods on How to Record Screen on Windows 11 with AudioPart 2. Best Way to Screen Record on Windows 11 with AudioPart 3. Overview: Windows 11 and its Features for Screen RecordingPart 4. Benefits of Screen Recording with Audio on Windows 11Conclusion
Part 1. Methods on How to Record Screen on Windows 11 with Audio
In Windows 11, there are various methods on how to record your screen with audio, including using the built-in Xbox Game Bar, the Capture widget, or third-party applications. Here are steps for using two primary built-in methods:
Method 1: Using Xbox Game Bar
Here’s how to screen record on windows 11 with audio using the Xbox Gmae Bar.
- Begin by initiating the Xbox Game Bar on your Windows 11 system. This can be done by pressing the key combination
Win + Gon your keyboard. Once activated, the Xbox Game Bar interface will appear on your screen, providing various gaming and recording options. - Upon pressing
Win + G, you might be prompted with a confirmation message asking, «Yes, this is a game.» You’ll need to confirm this to proceed. - In the Xbox Game Bar interface, you’ll find a set of icons and options. To start recording your screen along with audio, look for the «Capture» button and click it, which is represented by a circular icon inside a square.
- Alternatively, you can also use the keyboard shortcut
Win + Alt + Rto start the recording. - If you wish to include audio in your recording, ensure that the «Record mic» option is toggled on within the Xbox Game Bar settings. Enabling this option allows the capture of your microphone input, synchronizing audio with the recorded video.
- To conclude the recording, you have two options. Either click the designated stop button available within the Xbox Game Bar interface, or use the same keyboard shortcut (
Win + Alt + R) that you initially used to start the recording. - Once you’re done recording, open the Xbox Game Bar again and this time, navigate to the Capture tab in the interface. Here you’ll find a collection of your recorded clips. Simply select the desired clip from the list to view or edit it.
These steps outline the process of using the Xbox Game Bar on Windows 11 to record your screen with audio, offering you a convenient way to capture and manage your recorded content.
Method 2: Using the Capture Widget
To make use of this, you could then use the steps provided below:
- To begin, locate and select the Widgets button on the taskbar or press the keyboard shortcut
Win + W. This action will open the Widgets panel, where you can access various Windows 11 widgets and tools. - Within the Widgets panel, search for the Capture widget. Once found, click on the Capture widget to initiate its launch. This action will open the Capture widget interface, ready for use.
- After the Capture widget interface appears, locate and click on the «Record» button within the widget. If you intend to capture audio alongside the video, ensure that the microphone icon is activated or enabled before commencing the recording process.
- To conclude the recording, return to the Capture widget interface. Locate and select the «Stop» button, which will halt the ongoing recording session.
- Your recorded video clips will be automatically saved in the designated «Captures» folder. To access these recordings, navigate through the file explorer by selecting «This PC» > «Videos» > «Captures«.
- Alternatively, you can access the recorded clips via the Xbox Game Bar’s dedicated «Captures» tab, providing a convenient way to review and manage your saved recordings.
These methods offer a convenient way on how to record screen on windows 11 with audio directly without the need for additional software. However, if you require more advanced features or customization options, third-party screen recording applications available on the Microsoft Store or other platforms might also be worth considering.
Part 2. Best Way to Screen Record on Windows 11 with Audio
FoneDog Screen Recorder stands out as a top-tier solution for capturing screen activities with audio on Windows 11. This software is renowned for its user-friendly interface and comprehensive functionalities, making it an excellent choice for those seeking a versatile and efficient screen recording tool.
With FoneDog Screen Recorder, users can easily capture the Windows 11 screen as well as synchronize the audio, allowing for seamless narration, explanations, or any accompanying sound elements during the recording process.
Free Download
For Windows
Free Download
For normal Macs
Free Download
For M1, M2, M3
This software offers a range of features tailored to meet diverse recording needs, such as customizable recording settings for video quality, frame rate adjustments, audio input selection from system sound or microphone, and the ability to capture specific regions or the entire screen.
How to Screen Record:
- Download and install the application on your computer. Once successfully installed, launch the tool to initiate the recording process.
- Within FoneDog Screen Recorder, click «Video Recorder» and choose among «Full Screen» mode, «Custom» mode to select specific areas for recording, or even opt to exclusively record via a connected webcam.
- Once the recording parameters are determined, select the Start Recording button to start the recording session. For convenience, users can choose to configure custom hotkeys to quickly start and end recording sessions.
- During recording, users can pause and resume recording using designated buttons, ensuring easy control and accurate capture of desired segments. In addition, the software provides real-time annotation capabilities, allowing users to overlay text, lines and shapes on recordings, making it easy to take notes or emphasize at any time.
- When ending the recording process, simply press the «Stop» button, indicating that the recording process is complete. After the recording is completed, the user can review the captured content and can make possible edits before the final output, such as deleting unwanted segments.
How to Record Audio:
- The application provides several ways to start recording. You can select the «Audio Recorder» option from the drop-down menu of the application.
- Before starting the recording process, select Microphone or System Sound.
- Once these settings are configured, initiate the recording by clicking the green button.
- Throughout the recording process, users always maintain control and can pause, stop or resume recording at any time using the intuitive control buttons next to the audio.
- After completing the desired audio recording, the user clicks on the «Stop» button to end the session. The individual is then free to save the recorded video to a preferred location on the computer.
Part 3. Overview: Windows 11 and its Features for Screen Recording
Windows 11 is the latest operating system released by Microsoft, succeeding Windows 10. It brings forth several new features as well as those enhancements, including improvements in screen recording capabilities. Here are some of the features in Windows 11 related to screen recording:
- Built-in Screen Recorder: Windows 11 comes with a native screen recording tool, making it easier for users to capture their screen activities without needing third-party software. This tool allows users to record their entire screen or select specific areas.
- Audio Capture: The screen recording feature in Windows 11 enables users to capture not only visuals but also system audio or external audio sources (like a microphone). This is crucial for creating comprehensive tutorial videos, presentations, or gaming content where audio narration or sound effects are required.
- Recording Settings Customization: Users have the flexibility to adjust various recording settings, such as video quality, frame rate, and audio input sources, to suit their specific needs and preferences.
- Ease of Access: Windows 11 aims to streamline the user experience, making the screen recording tool easily accessible through the system’s interface, possibly via the revamped Start menu or within the Settings app.
- Integration with Gaming Features: For gamers, Windows 11 may further enhance the gaming experience by allowing the recording of gameplay with audio, providing an avenue for content creation or sharing gaming highlights.
- Improved User Interface: With Windows 11’s redesigned interface, the screen recording feature might have a more user-friendly layout, offering a smoother and more intuitive recording experience compared to its predecessors.
Part 4. Benefits of Screen Recording with Audio on Windows 11
Screen recording with audio on Windows 11 offers several benefits, catering to a wide range of users across various industries and purposes:
- Enhanced Communication and Instruction: Incorporating audio with screen recordings facilitates clearer communication. Whether it’s a tutorial, demonstration, or instructional video, the addition of audio narration helps in explaining concepts, guiding users through processes, and ensuring better comprehension.
- Comprehensive Demonstrations: By capturing both visual and audio elements, screen recordings on Windows 11 allow for comprehensive demonstrations. This is particularly useful for showcasing software functionalities, troubleshooting steps, or explaining complex tasks with detailed audio-visual guidance.
- Effective Training and Education: In educational settings or professional training, the combination of screen recording and audio enables educators and trainers to create engaging materials. It aids in conveying information effectively, accommodating various learning styles, and ensuring retention of information.
- Content Creation and Sharing: For content creators, influencers, and gamers, the ability to record screens with audio on Windows 11 is invaluable. It allows for the creation of high-quality video content, gameplay recordings, reviews, and tutorials, fostering engagement and sharing across different platforms.
- Collaboration and Remote Work: In remote work scenarios, screen recordings with audio serve as an excellent tool for collaboration. Team members can easily create and share recordings to demonstrate workflows, share ideas, troubleshoot issues, or present project updates in a more comprehensive manner.
- Documentation and Problem-Solving: Screen recordings with audio serve as valuable documentation tools. They help in documenting processes, capturing software bugs or errors for troubleshooting, and creating step-by-step guides that assist in problem-solving.
- Personal and Professional Productivity: Utilizing screen recording with audio on Windows 11 can also enhance personal productivity. It allows individuals to create to-do lists, record presentations, capture brainstorming sessions, or even document personal achievements for self-improvement.
People Also ReadFull Guide 2024: How to Record Screen on Windows 11How Long Can You Screen Record: Anything to Know
Conclusion
Windows 11’s powerful native screen recording capabilities, coupled with versatile solutions like FoneDog Screen Recorder, making it easier to record screen on Windows 11 with audio. The operating system offers intuitive built-in tools like Xbox Game Bar and Capture widgets while providing advanced features through dedicated apps.
This versatility, combined with Windows 11’s user-friendly interface, enhances its potential to meet a wide range of screen recording needs, catering to both regular users and professionals. We hope this helps, and have a great day!
Вопрос о том, как записать звук с экрана компьютера, может возникнуть в разных ситуациях. К примеру, когда нужно сохранить звонок или извлечь музыку из ролика. Для этого можно использовать разные методы ― встроенные средства Windows, десктопное ПО, онлайн-сервисы. Есть приложения и для пользователей смартфонов на Android и iOS. В статье мы подробно расскажем об этих инструментах и сопроводим все инструкциями.
Запись звука на Windows 10
встроенными средствами
Если требуется сделать запись звука с компьютера, но нет возможности или желания устанавливать специальное программное обеспечение, можно использовать встроенные средства ОС Виндовс. Это «Звукозапись» и Game Bar.
Приложение «Звукозапись»
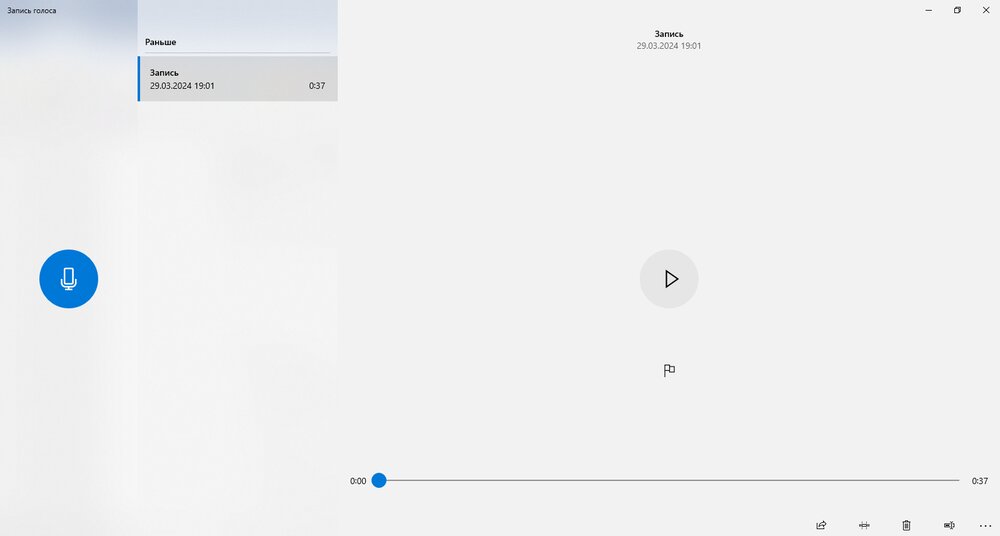
Это внутренний диктофон и называется он по-разному в зависимости от версии операционной системы. К примеру, Windows Voice Recorder, или «Запись голоса».
Утилита бесплатная и удобная, распознает любые модели микрофона. Но она дает мало возможностей для редактирования. Из трека можно удалить лишние фрагменты, но очистить дорожку от посторонних шумов, эха и других дефектов не получится. Придется записывать все качественно сразу.
Инструкция по аудиозаписи:
- Найдите софт на компьютере и запустите его.
- Кликните по иконке с микрофоном и начните процесс.

- Управляйте ходом звукозаписи клавишами на дисплее. Можно поставить ее на паузу или полностью остановить.
- Готовую дорожку обрежьте или сразу поделитесь с друзьями. Если что-то не понравилось, жмите на иконку с мусорной корзиной и начинайте заново.
Приложение Game Bar
Еще один вариант, как записать аудио на компьютере, – запустить Game Bar. Изначально это ПО было создано для любителей игр. В нем легко сделать захват геймплея в высоком разрешении и без потери FPS. Но постепенно софт стал использоваться в качестве средства для съемки монитора. Программа Game Bar доступна бесплатно. Возможности редактирования здесь такие же, как у штатного звукозаписывающего приложения Windows. Зато простой интерфейс, низкие системные требования, также можно записывать и сохранять потоковый видеофайл.
Инструкция по аудиозаписи:
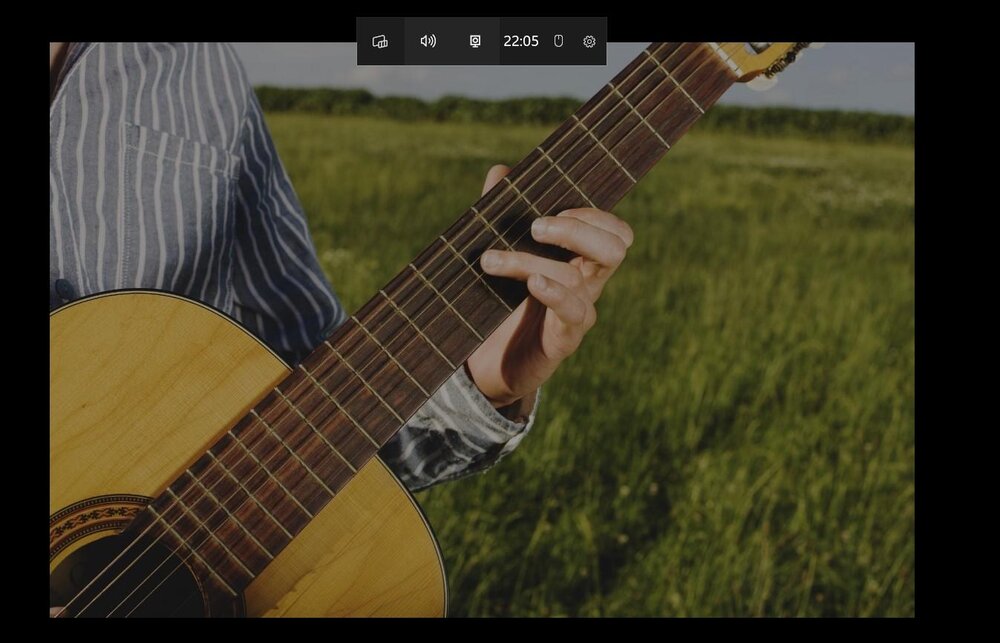
- Убедитесь, что Геймбар включен на вашем ПК. Для этого откройте меню «Пуск», перейдите в «Настройки», затем «Игры» ― и найдите вкладку.
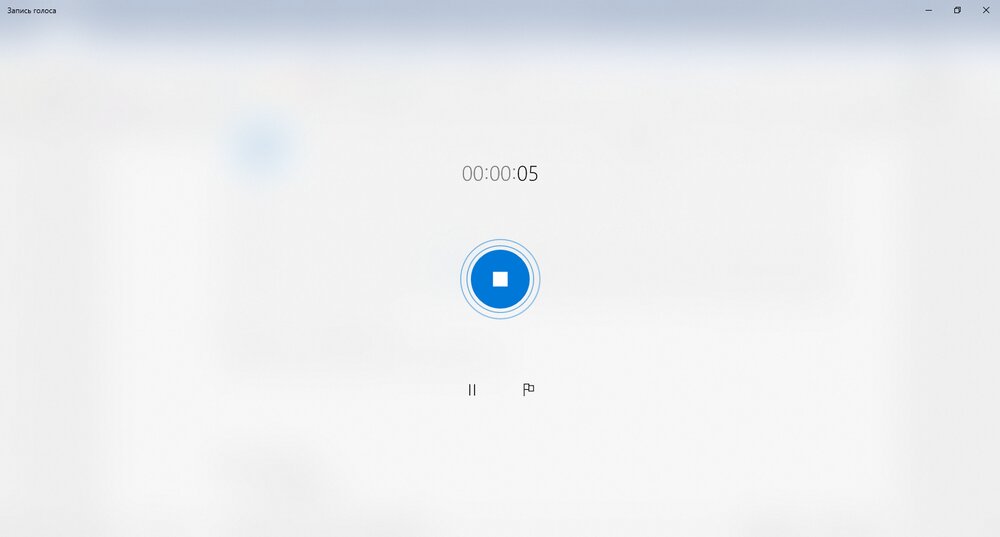
- Откройте приложение, нажав комбинацию клавиш Win + G. На дисплее появится оверлей.
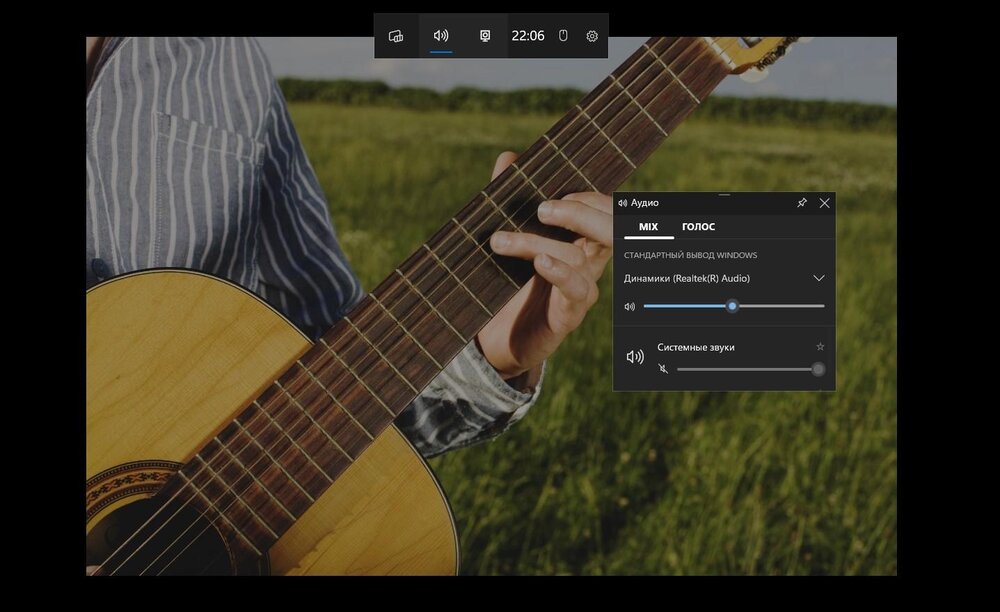
- Найдите иконку микрофона и нажмите на нее, чтобы записать аудио с компьютера.
- Убедитесь, что выбран нужный источник звука. Для этого найдите вкладку «Настройки» и проверьте параметры.
- Чтобы начать, нажмите на кнопку в виде круга.
- Говорите или включите аудио, которое хотите записать.
- Завершите сеанс, кликнув на клавишу с квадратной иконкой.
- Файл сохранится в папке «Видео» в подкаталоге.
Как записать звук на компьютере
с помощью программ
Еще один удобный способ ― установить специальное десктопное ПО. Оно позволяет выполнять аудиозахват без микрофона и предлагает заметно больше средств, чем штатные утилиты ОС. Можно найти софт с низкими системными требованиями, удобным интерфейсом и качественным переводом на русский язык.
Экранная Студия
Главная задача этого софта ― писать видеоролики с рабочего стола. На выбор предлагаются три режима: весь дисплей, отдельный фрагмент или указанное окно. Съемка возможна с любого сайта или источника вне зависимости от настроек приватности.
Важная особенность ПО ― у него есть встроенный редактор. Это значит, что результат легко изменить, например, наложить новую аудиодорожку, обрезать части или склеить их.
Инструкция по аудиозаписи:
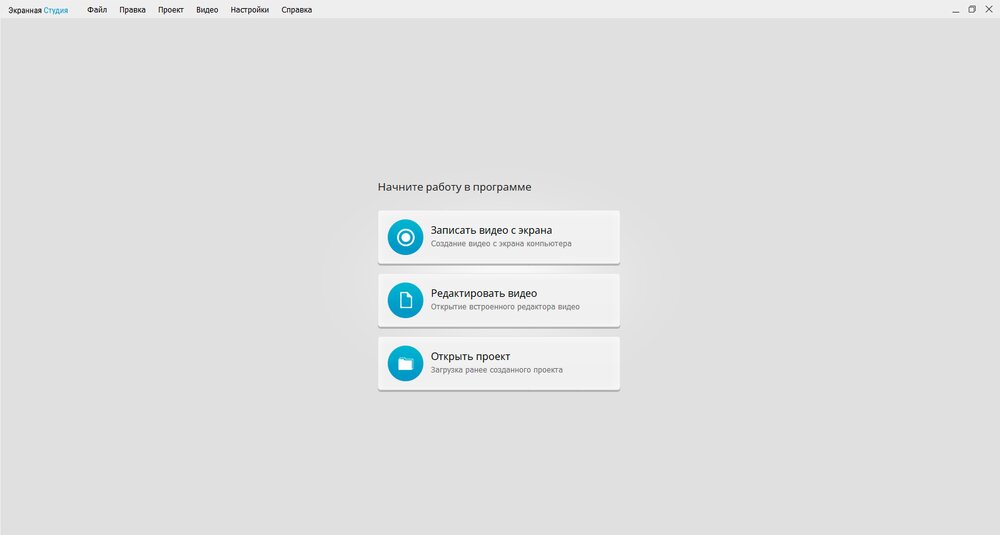
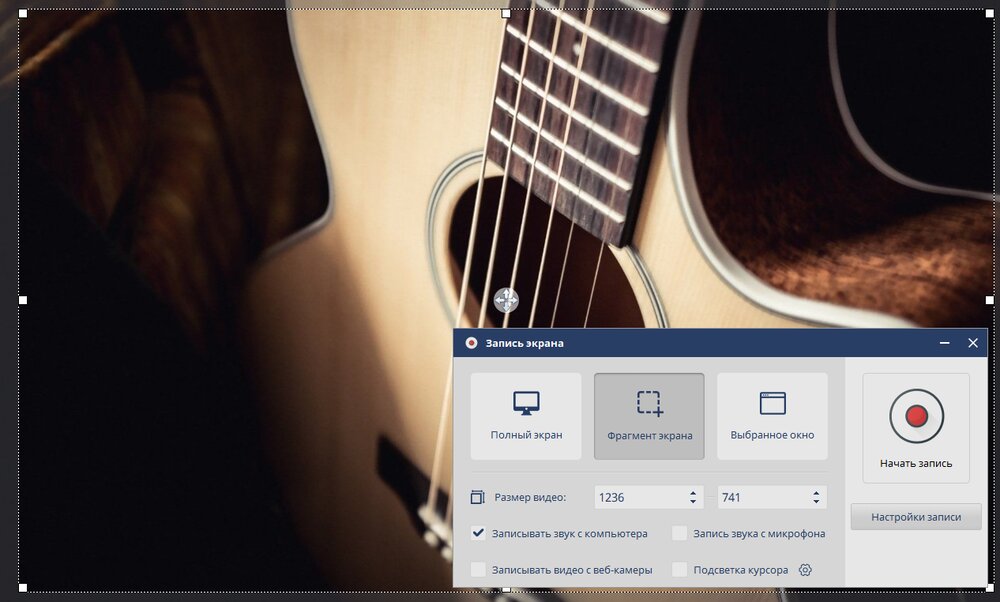
- Откройте софт, кликните на «Записать видео с экрана».
- Проставьте галочки рядом с источниками захвата звуковой дорожки. Это может быть компьютер или микрофон.
- Кликните на красный круг. Паузу можно сделать нажатием на F8, а для остановки используйте F10.
- Кликните «Сохранить видео».
- Выберите расширение, качество и папку для сохранения.
Попробуйте софт бесплатно. Для этого достаточно скачать его:
OBS Studio
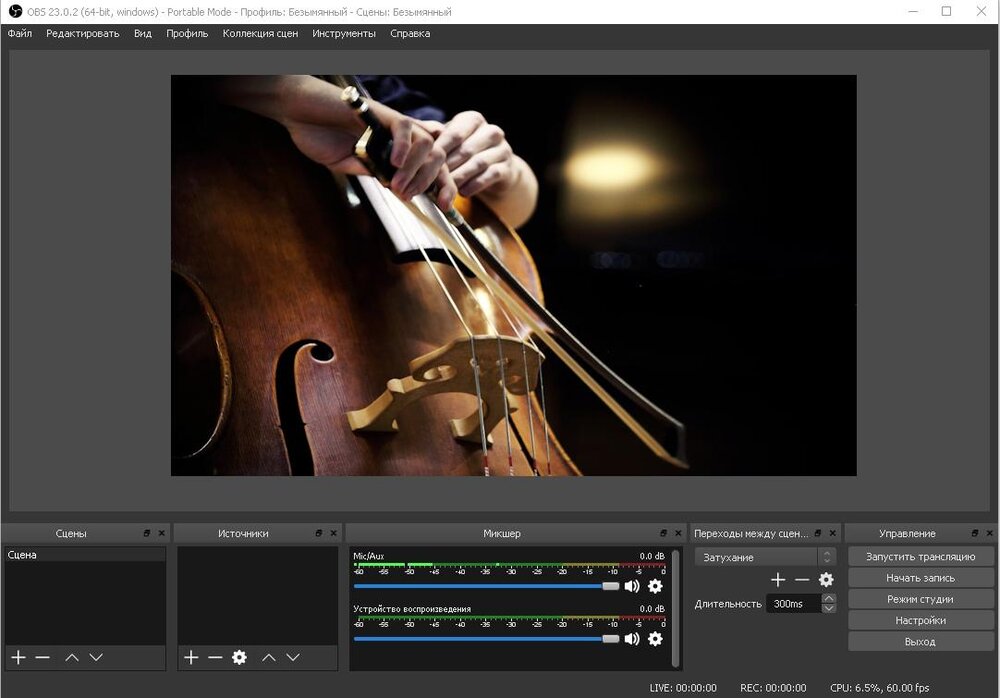
Основная задача этой программы ― создание архива прямых эфиров. Она активно используется стримерами и позволяет в несколько кликов добавить видеофайл в определенную папку. У ПО довольно высокие системные требования, оно сильно нагружает систему. Это следует учитывать при установке и использовании утилиты.
Инструкция по аудиозаписи:
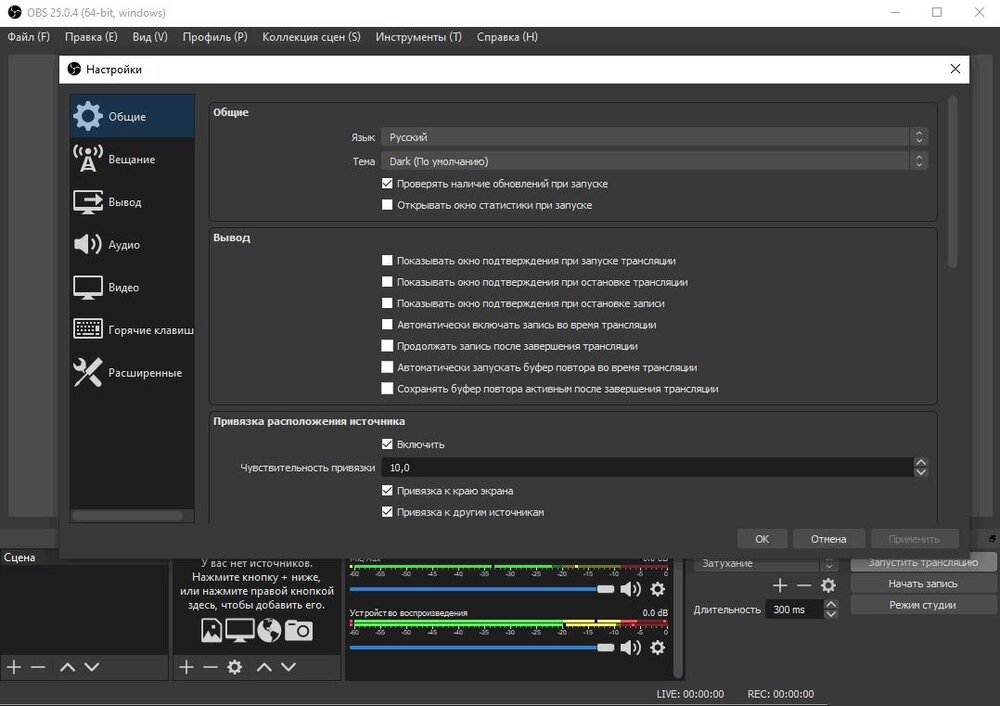
- В главном окне программы создайте новую сцену, нажав на кнопку «+» в одноименном разделе. Внутри добавьте новый звуковой источник, выбрав «Захват входного аудиопотока».
- Откройте «Настройки» > «Аудио» и выберите желаемое качество. В разделе «Вывод» укажите формат и путь для сохранения записанных файлов.
- Нажмите кнопку запуска в правом нижнем углу интерфейса программы. Проверьте, что индикатор активен, и начинайте говорить или воспроизводить аудио.
- Для завершения нажмите кнопку «Остановить».
- Записанный файл будет автоматически сохранен в указанную вами папку. Просмотрите его, чтобы убедиться в успехе сессии записи.
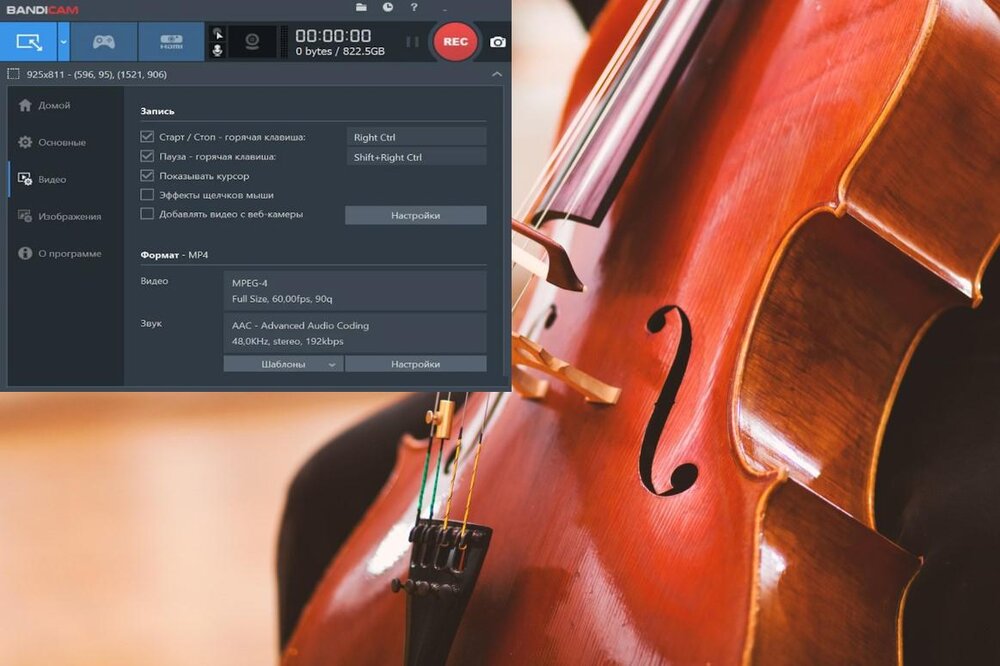
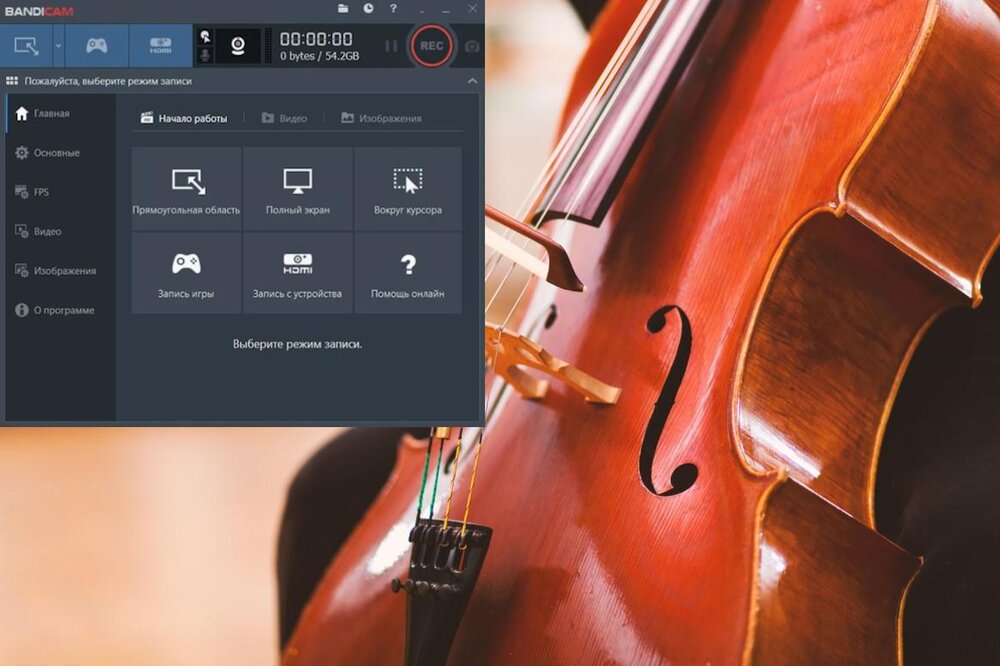
Bandicam
Решение для сохранения клипов и отдельных звуковых дорожек, поддерживает форматы AVI и MP4. Способна записывать весь экран, отдельные области или игровое окно. Поддерживает высокое качество вплоть до 4K Ultra HD. Имеет функции наложения веб-камеры, добавления логотипов в кадр. Позволяет делать скрины в форматах JPG и PNG.
Инструкция по аудиозаписи:
- Перейдите на вкладку «Запись» и выберите режим. Кликните на опцию получения дорожки из системы или с микрофона. Задайте папку, в которую загрузится результат.
- Кликните на REC для старта записи. Индикатор начнет отображать текущий статус.
- По завершению жмите STOP.
Audacity
Бесплатное приложение с открытым исходным кодом, предлагающее, кроме рекордера, редактор аудио. Поддерживает разные форматы, такие как WAV, AIFF, FLAC, MP3 и OGG. Система плагинов достаточно гибкая и позволяет расширять функционал. Подходит как для любительского, так и профессионального использования, предоставляя множество инструментов ― очистку звучания, устранение шумов, реверберацию, выравнивание громкости и многие другие.
Инструкция по аудиозаписи:
- В верхней панели интерфейса выберите устройство захвата.
- Настройте частоту дискретизации (по умолчанию 44100 Гц) и количество каналов. Проверить уровни, чтобы избежать клиппинга и обеспечить оптимальное качество.
- Нажмите на кнопку «Мониторинг» для проверки в реальном времени. Рекомендуем попробовать сначала записать тестовый фрагмент и проверить, нет ли ошибок.
- Кликните на красную кнопку для старта. Чтобы закончить, выберите «Стоп». Готовый файл сохранится автоматически.

Как сделать запись звука онлайн
Еще один способ обойтись без десктопных программ ― воспользоваться онлайн-сервисами. Сегодня есть множество сайтов, которые предлагают функции рекордеров и позволяют менять битрейт, вносить изменения в результат. Их минус заключается в зависимости от стабильности интернет-соединения. Кроме этого, треки потенциально могут попасть в руки к третьим лицам, так как загружаются на облачный сервер.
123apps
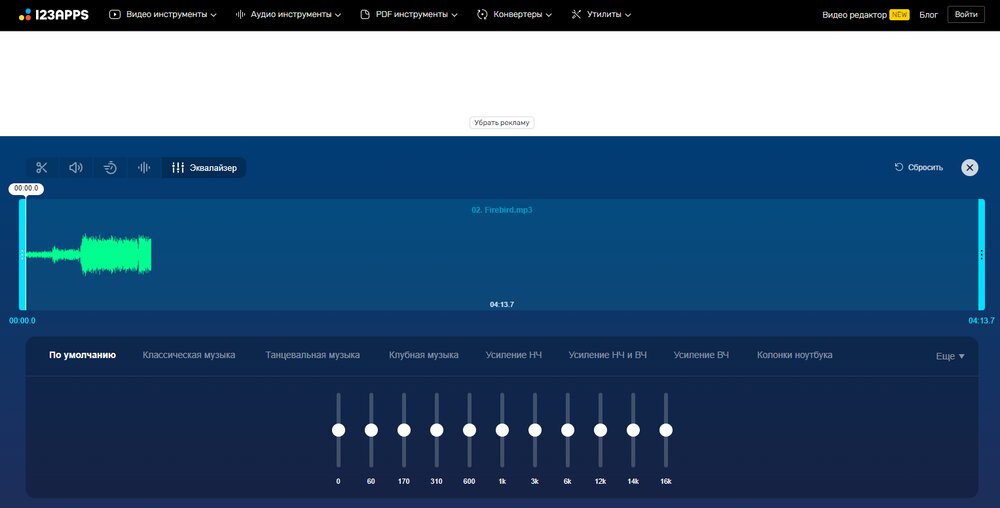
Онлайн-портал, который обладает различными инструментами для работы с мультимедийными файлами. Основные функции включают конвертацию форматов, редактирование дорожек и видеофайлов, рекординг, а также извлечение музыки из видео. Доступно много расширений ― MP3, WAV, FLAC, OGG, MP4, и другие. Интерфейс интуитивно понятен, что позволяет легко освоить основные действия. Установка не потребуется, все запускается прямо в браузере.
Одно из достоинств ― редактор, который позволяет обрезать, соединять и применять разные эффекты к трекам. Он поддерживает работу с популярными аудиоформатами, что делает его гибким решением для различных задач.
Инструкция по аудиозаписи:
- Зайдите на сайт 123apps, выберите нужную опцию.
- Кликните на нее для старта.
- Система запросит доступ к микрофону, разрешите его.
- Управляйте процессом нажатием на клавиши на дисплее.
- Экспортируйте аудиофайл в нужном формате в папку на ПК или залейте в облако.
Anymp4
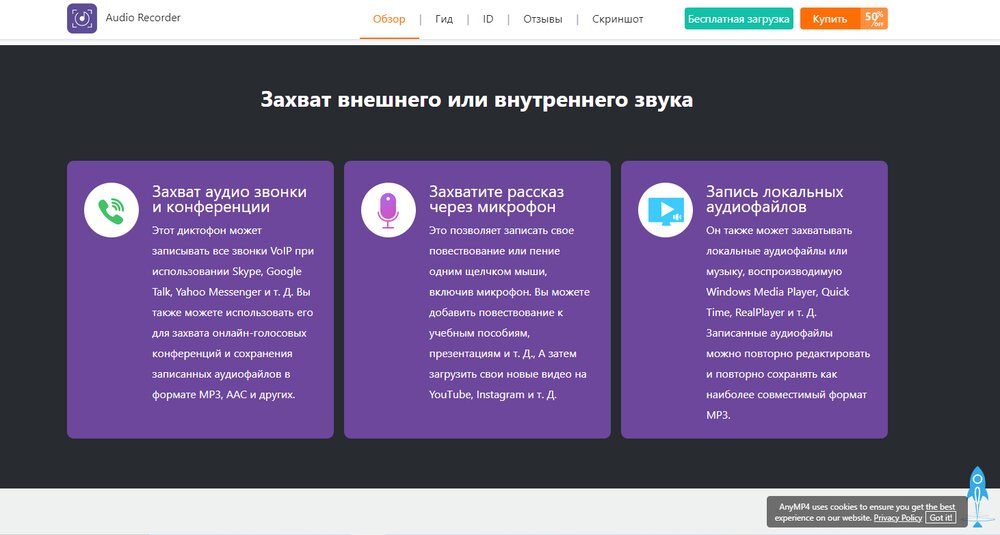
Еще один сервис для работы с мультимедиа. Несмотря на название, кроме MP4 результат сохраняется и в других расширениях ― AVI, MP3, WMV, MOV. Важное преимущество сайта ― поддержка высокого разрешения, включая 4K и HD, что делает его подходящим для современных устройств. Помимо конвертации, Anymp4 имеет инструменты для редактирования: можно обрезать материал, накладывать эффекты и субтитры.
В Anymp4 легко отрегулировать громкость и убрать шумы. Поддерживается много форматов, включая MP3, WAV и FLAC, что делает ПО универсальным для работы со звуковыми материалами. Другая полезная опция ― можно вытащить из видеофайла трек, чтобы сохранить его отдельно.
Инструкция по аудиозаписи:
- Перейдите на сайт, выберите соответствующую функцию.
- Кликните по кнопке «Начать».
- Чтобы остановить сеанс, жмите по клавише «Стоп».
- Далее можно поработать с треком, например, изменить соотношение частот в звучании, очистить дорожку.
Запись звука на телефоне
Не всегда получается использовать рекордер на ПК или ноутбуке. В таком случае можно обойтись и смартфоном. Для этого подойдут штатные средства вашего гаджета. Рассмотрим, как сделать это на Android и iPhone.
На Android
Можно обойтись без установки дополнительных приложений, потому что все, что нужно, уже есть на устройстве. Ограничений для захвата нет ― со звуком будет записывать даже происходящее на мониторе телефона.
Инструкция по аудиозаписи:
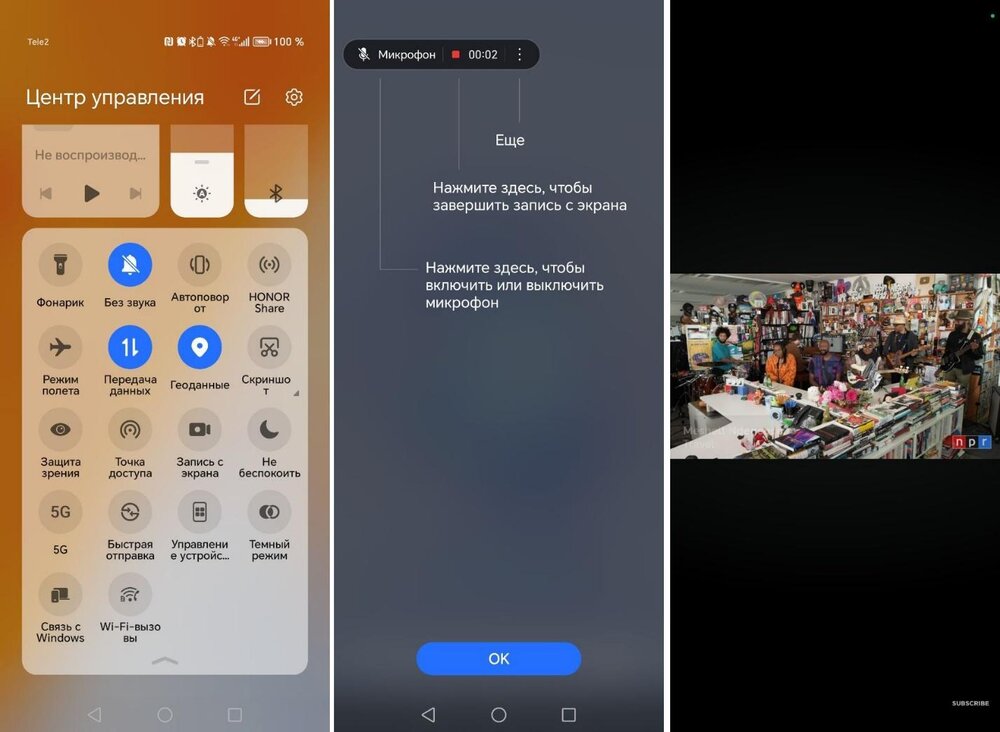
- Свайпните сверху вниз, чтобы вызвать панель инструментов.
- Найдите опцию рекордера и кликните по ней.
- После окончания сеанса, видеофайл автоматически переместится в галерею на устройстве.
- Вытащите из него дорожку с использованием любого онлайн-инструмента или Телеграм-бота.
Если нужен только голос, все еще проще. Воспользуйтесь штатным диктофоном или поставьте стороннее приложение.
На iPhone
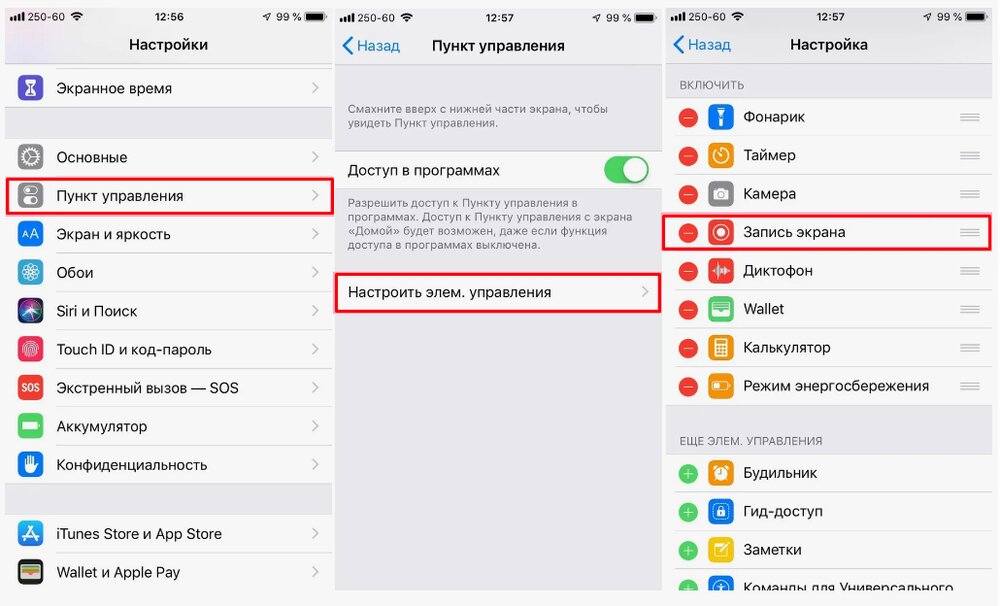
На устройствах от Apple все обстоит схожим образом. Для решения такой задачи потребуется включить приложение «Диктофон», которое находится в папке «Утилиты».
Инструкция по аудиозаписи:
- Откройте «Диктофон», нажмите на кнопку с кругом.
- Управляйте процессом тапами по дисплею.
- Остановите сеанс соответствующей опцией, и файл добавится в галерею на смартфоне.
Итоги
Мы подробно рассказали, как сделать запись звука с экрана. Какие инструменты использовать для этого? Здесь каждый решает сам, исходя из задач ― типа трека, его длительности, необходимости редактирования.
Простое решение ― воспользоваться инструментами операционной системы. Но они подойдут не всем из-за скудного набора функций.
Если у вас ПК под Windows 10, 7, 11, попробуйте приложение Экранная Студия. Оно простое, полностью на русском и предлагает редактор. Если этих функций окажется недостаточно, придется скачивать профессиональный софт, такой как Audacity. Оно запускается и на операционной системе Mac.
Чтобы у вас есть стабильный интернет, применяйте любой онлайн-рекордер. Но предварительно почитайте о модели его распространения и ограничениях, чтобы не столкнуться с неприятными сюрпризами.
Попробуйте разные способы, и вы поймете, как записать звук с компьютера быстрее и удобнее в конкретном случае.
Поделиться с друзьями:
Читайте также:
Contents
3 Simple Ways to Screen Record on Windows with Audio
1. How to Screen Record on Windows with Audio using Vmaker
2. How to Screen Record on Windows PC with Sound using Xbox Game Bar
3. Record your Screen on Windows PC with Sound using Microsoft PowerPoint
4. How to Screen Record on Windows PC with Sound using Movavi Screen Recorder
Looking for ways to record your screen on Windows with audio?
You’ve come to the right place.
In today’s post, we’ll show you how to record your screen on Windows with audio in 3 simple ways.
Let’s get started!
3 Simple Ways to Screen Record on Windows with Audio
When it comes to recording your screen on Windows with audio, you have 3 options. You can:
- Record your screen using a professional screen recorder like Vmaker
- Record your screen using the built-in Windows screen recorder — the Xbox Game Bar
- Record your screen using Microsoft PowerPoint
Without any further ado, let’s explore each of these 3 methods in detail.
1. How to Screen Record on Windows with Audio using Vmaker
In this method, you’ll learn how to screen record on Windows with internal & mic audio using a user-friendly screen recorder called Vmaker.
Vmaker is a Windows screen recorder that lets you record, edit, and share unlimited number of recordings for free!
Unlike Windows Game Bar, Vmaker doesn’t limit your recording duration and allows you to record your videos for unlimited duration.
Now, let’s go ahead and see how you can record your screen on Windows with internal and microphone audio.
i) Sign up & download Vmaker’s Windows application
Head over to Vmaker’s official page and sign up.
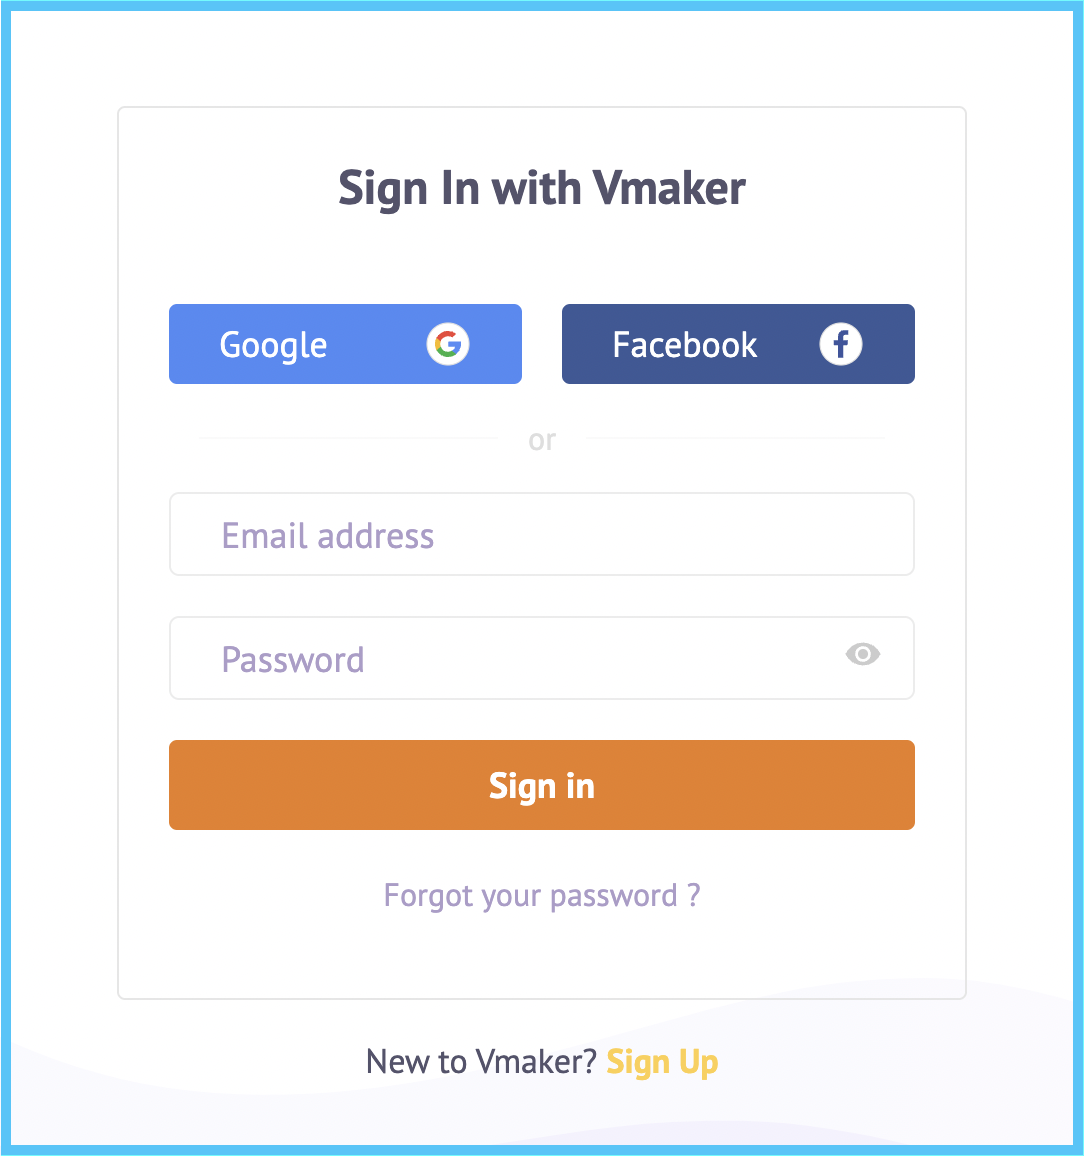
As soon as you sign up, you will be taken to Vmaker’s dashboard.

Click on the ‘Download‘ button on the top right corner of the dashboard and download the software to your Windows computer.

ii) Launch the application on your device
Once the download is complete, you can give all the necessary permissions and launch Vmaker on your computer.
iii) Customize your recording preferences
As soon as you’ve launched the application, you can start customizing your recording preferences according to your personal requirements.
Start by selecting your desired recording mode, recording area, and audio inputs.
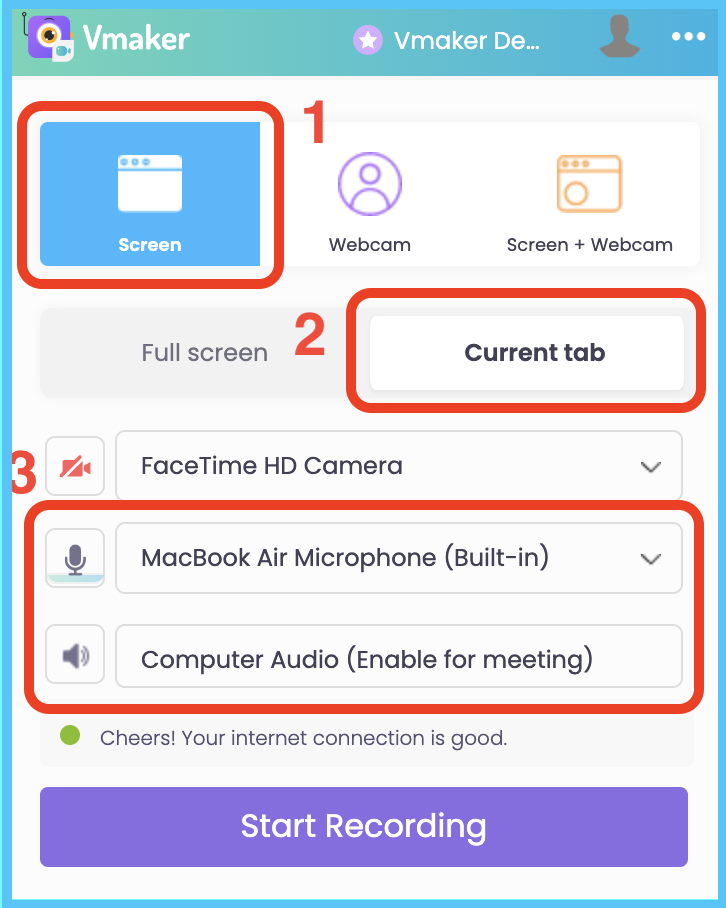
If your requirements are basic, you can proceed with this.
But, if you wish to access advanced features, you can click on the horizontal dot matrix on the top of your pop-up and choose ‘Preferences.’

As soon as you click on the preferences, you will be directed to a tab like the one shown below.
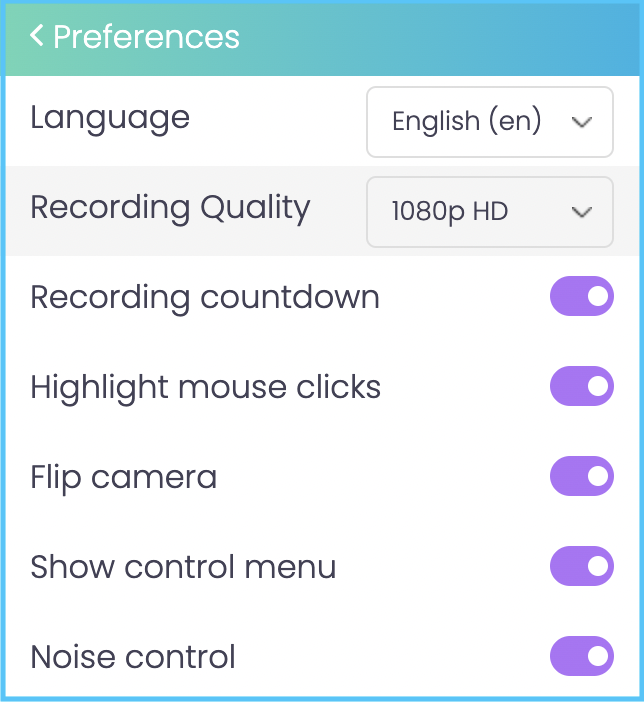
Enable all the features you would like to add to your recording.
iv) Record your screen
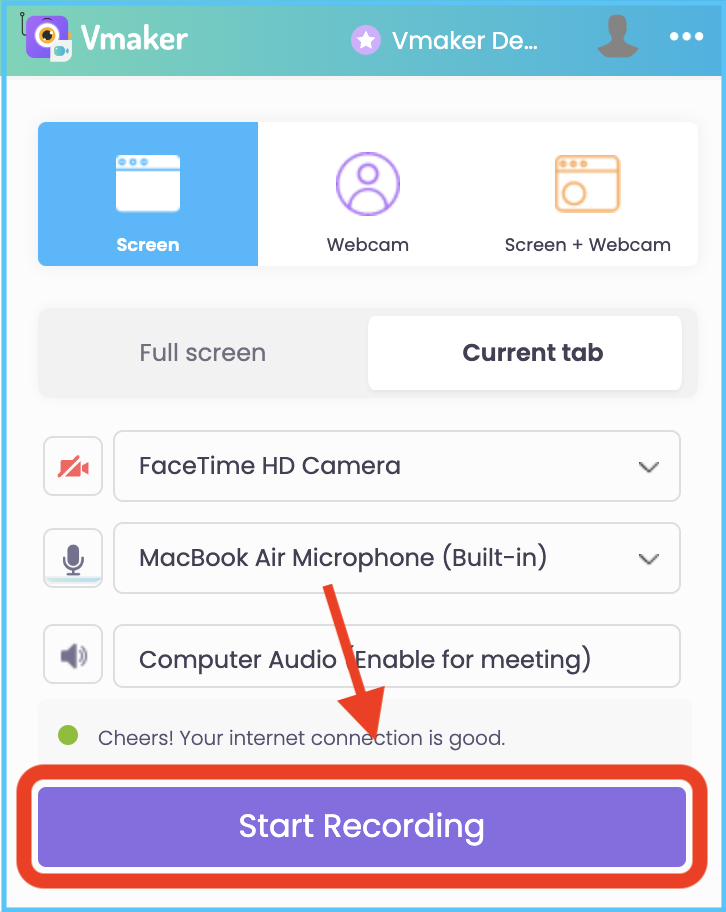
When you’re done customizing all your recording preferences, you can proceed to recording your video.
Just click on the ‘Start Recording‘ button when you’re ready and the video will start recording.
While recording the video, you can make use of Vmaker’s drawing tool to highlight important sections of your screen. This will help in conveying your points clearly and keep your viewers engaged throughout the recording.
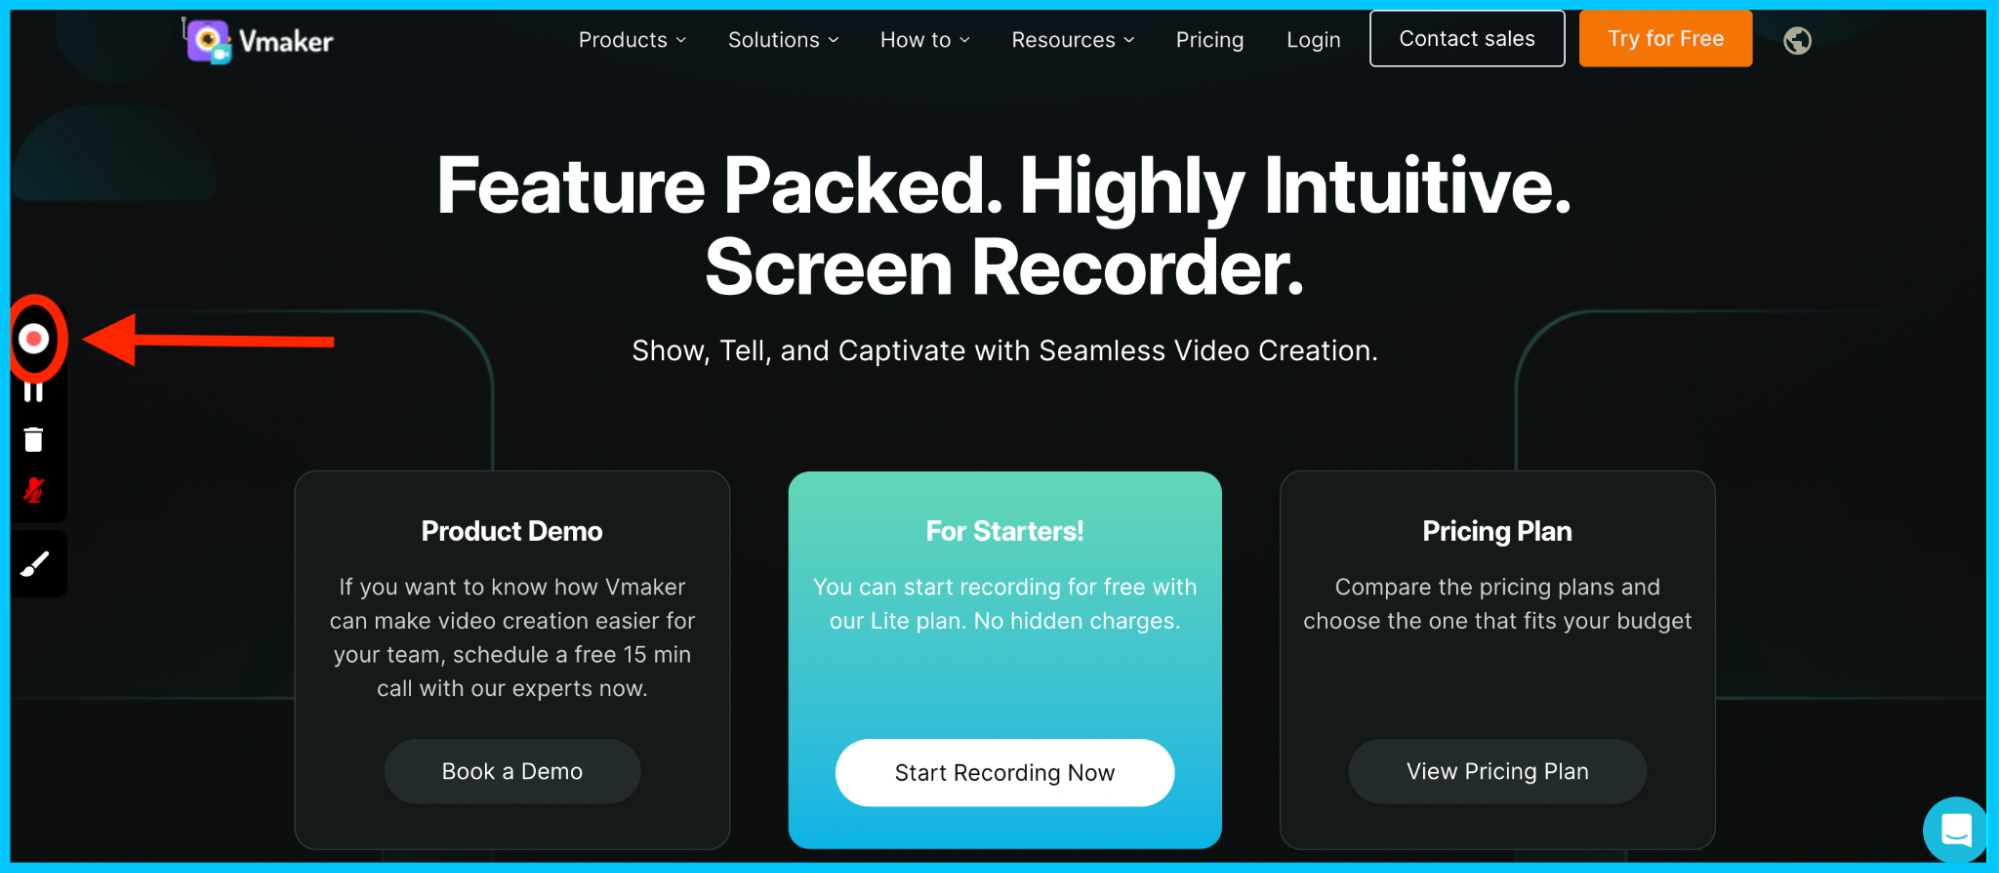
Just click on the brush icon on the left-hand side of your screen and highlight important sections of your screen while explaining your points.
When you’re done, you can stop the recording by clicking on the red dock button on the left-hand side of your screen.
v) Edit & share your recording with others
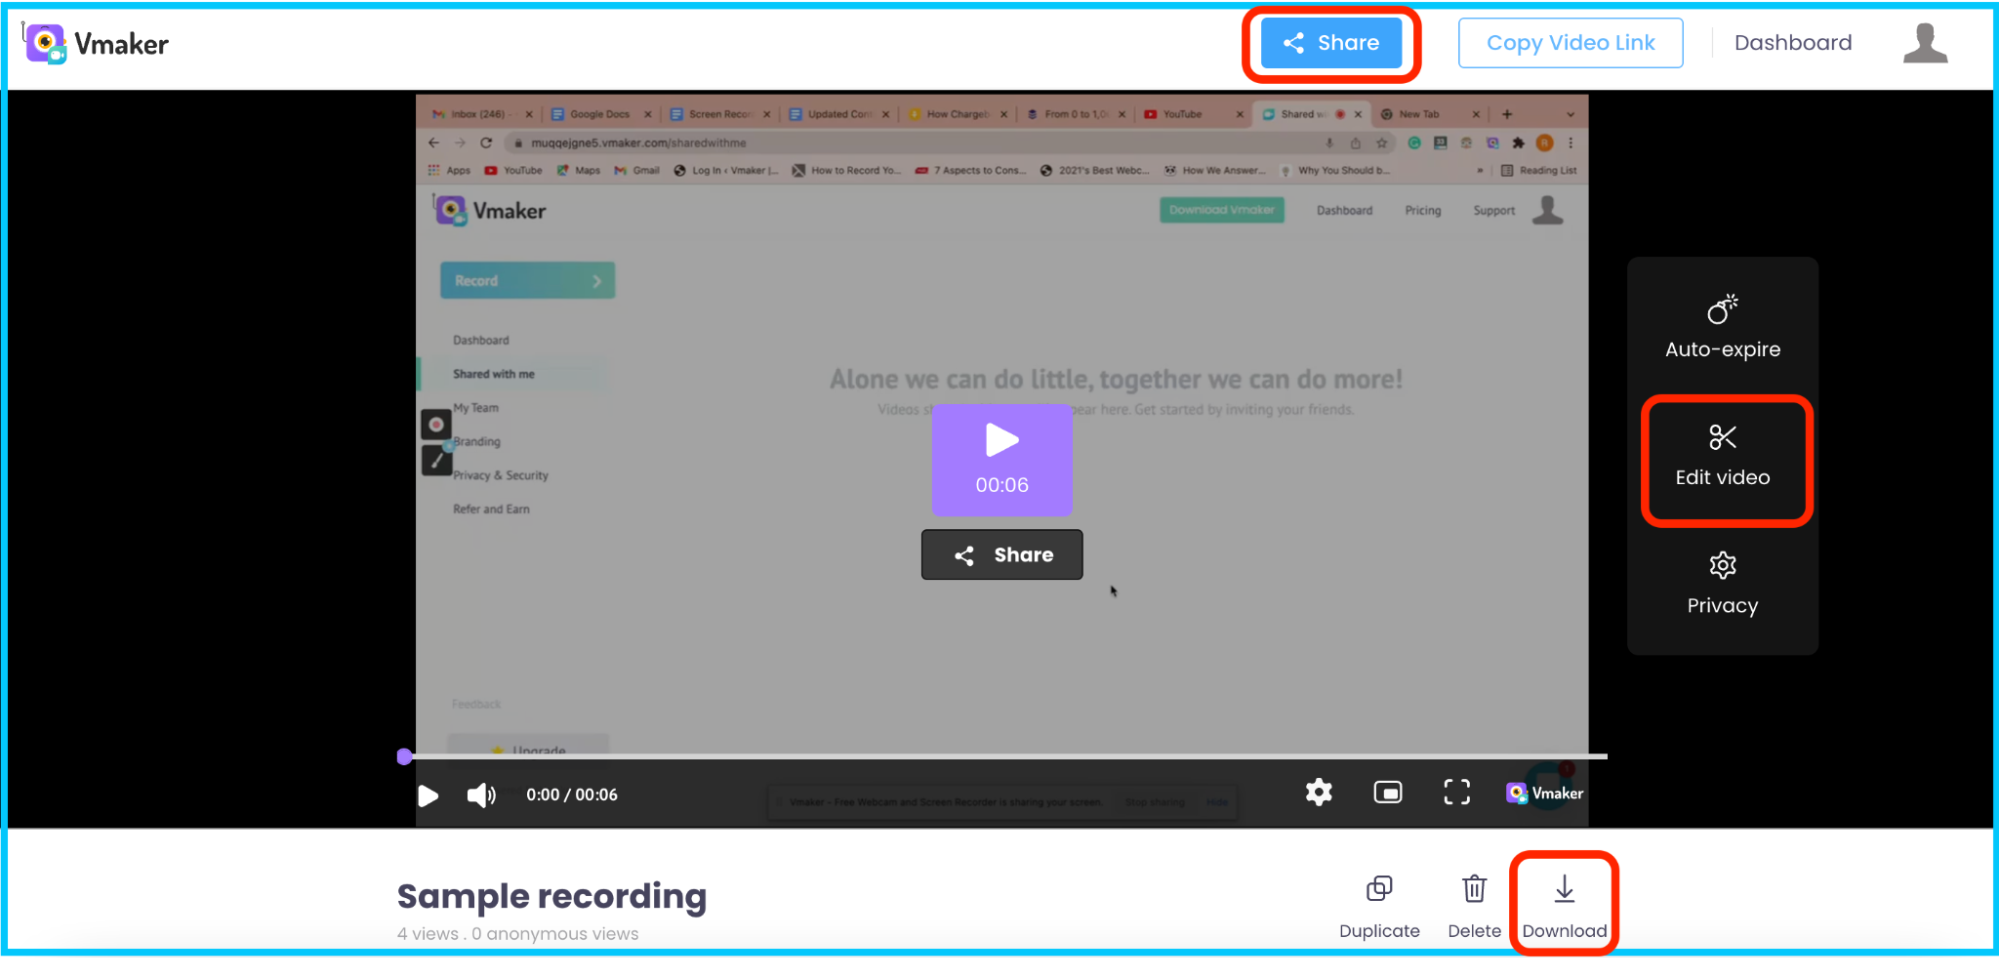
The finished recording will now be available on Vmaker’s player page.
Here, you will have options to download, edit, and share your video with others.
2. How to Screen Record on Windows PC with Sound using Xbox Game Bar
While Xbox Game Bar allows you to record your screen for free, it does have a few serious limitations. Here’s a list of the common problems users face while using the Xbox Game Bar:
- It cannot record internal audio
- It cannot record multiple screens and windows simultaneously
- It has a 2-hour recording time limit
- It can only record one application at a time
- It cannot capture your entire screen or your desktop
But, if you’re a light user who wishes to record just gameplay, you can go ahead and use this tool to record your screen on Windows with sound.
Just follow these simple instructions.
Step 1: Close all the other unnecessary applications running in the background and keep only the application you’d like to record from open.
Step 2: Use the shortcut combination Windows Key + G to open the Xbox Game Bar.
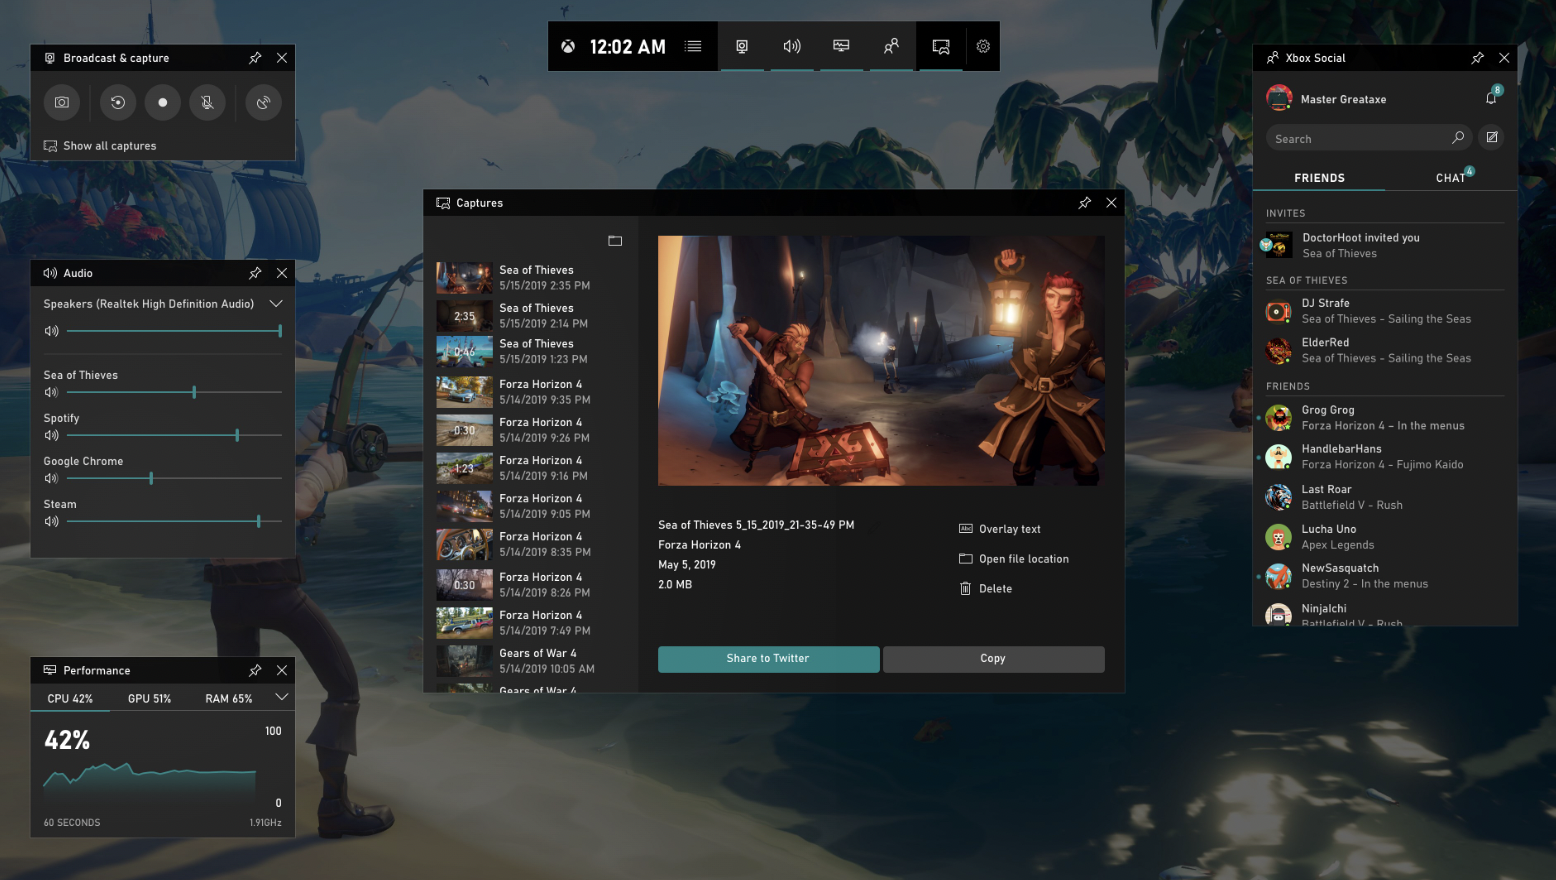
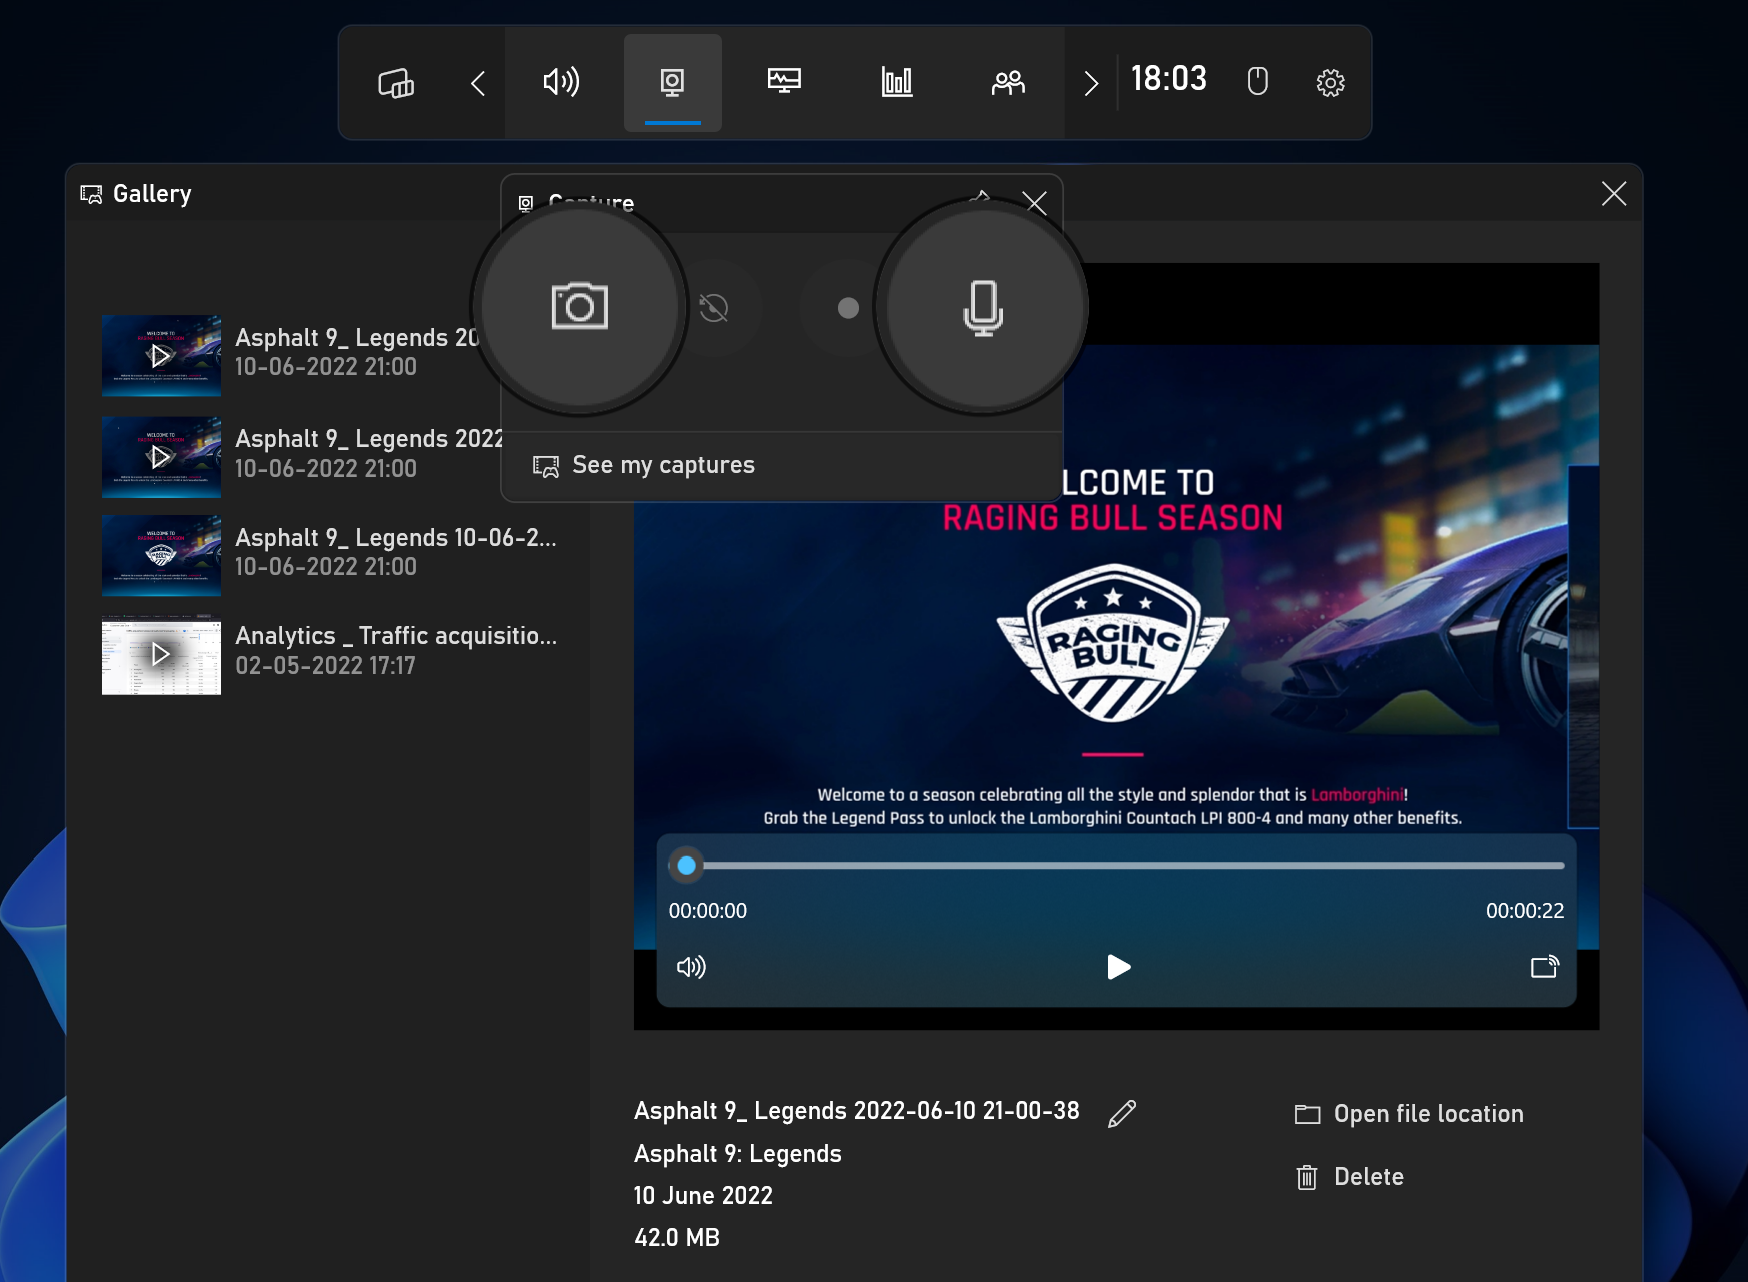
Step 3: Once you have access to the Game Bar, you can go ahead and start recording your screen by clicking on the Capture icon from the menu bar on top of the screen.
Step 4: If you’re recording your gameplay with a voice over, make sure your webcam and microphone are turned on.
Step 5: When you’re ready to record, click on the Record icon.
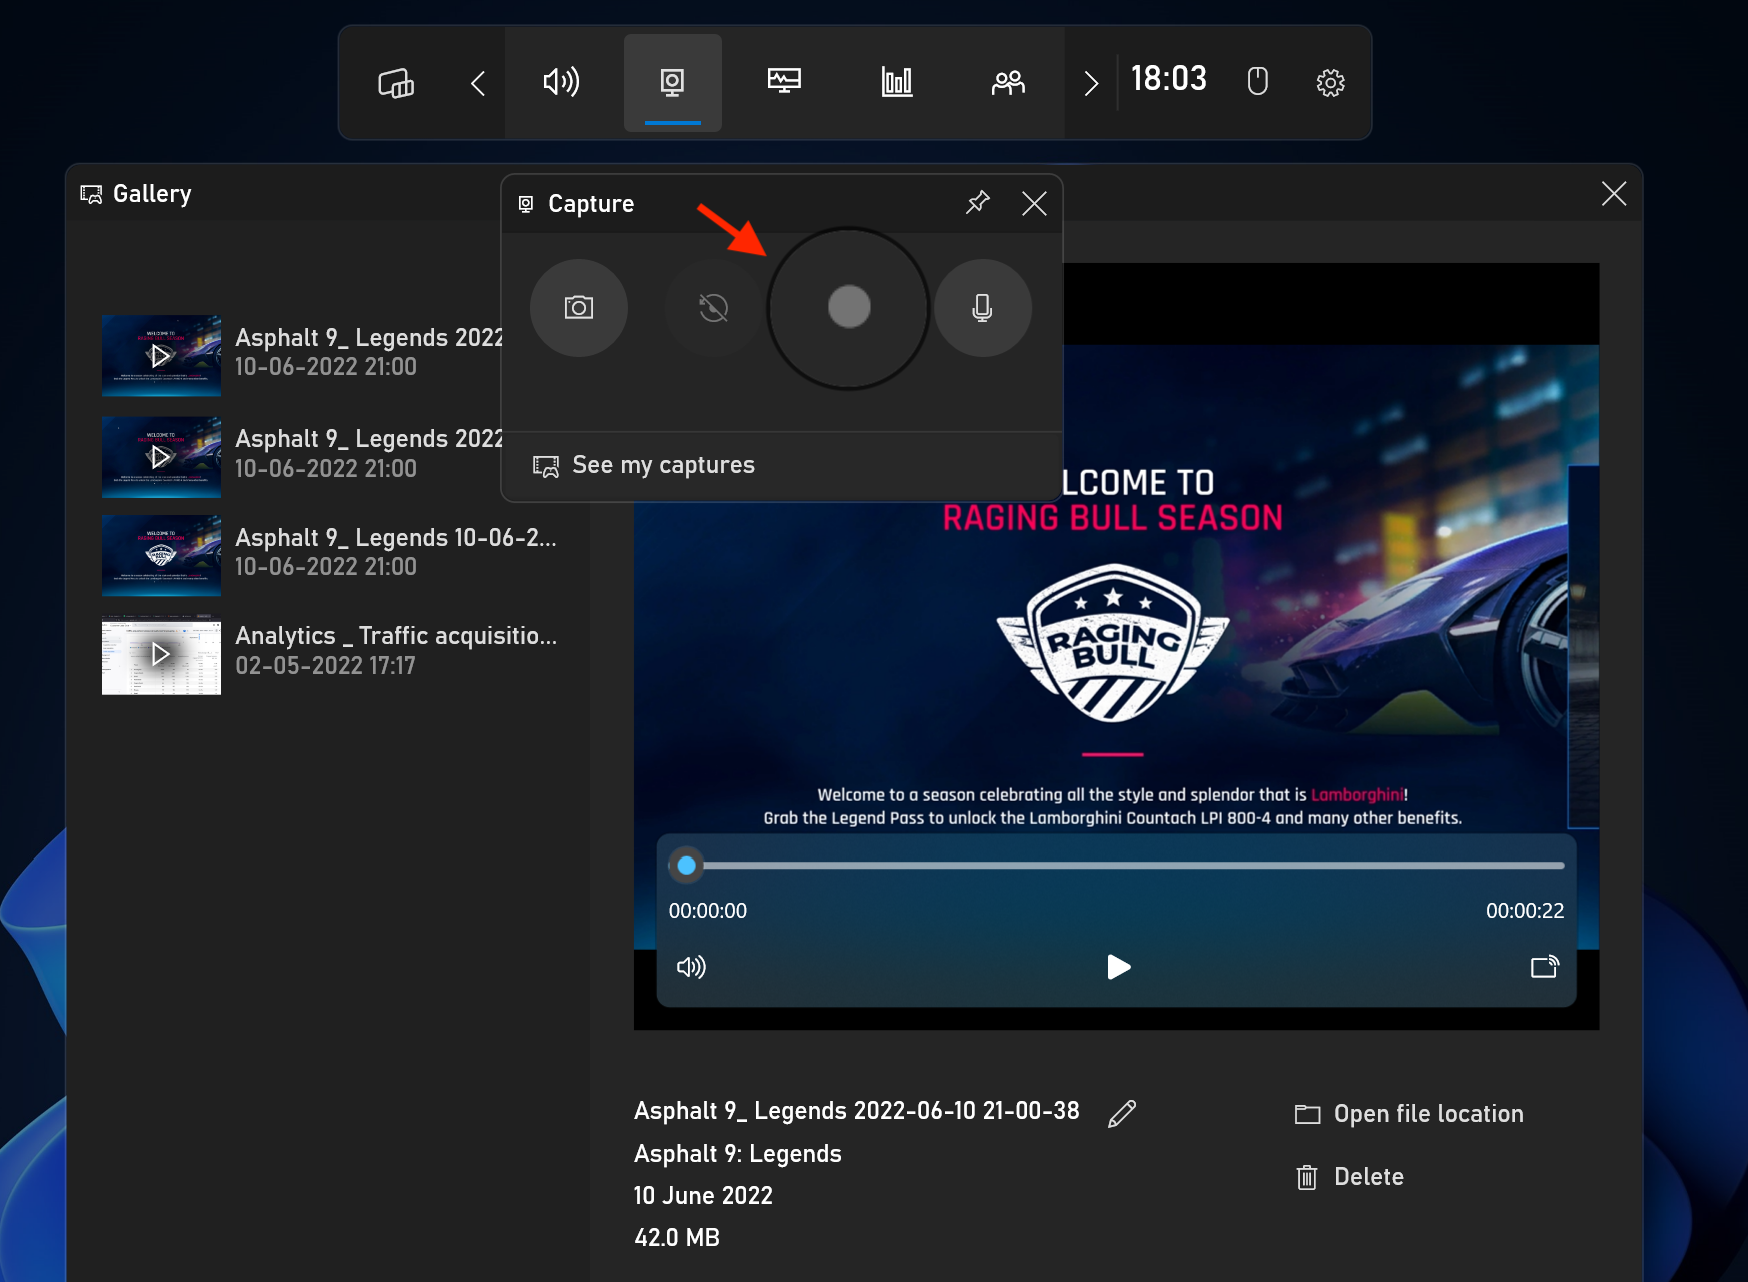
Step 6: Whenever you’re done, you can click on the same button to stop the recording. The video will automatically be saved in the captured file.
You can view your videos by clicking on ‘see my captures‘ option.
3. Record your Screen on Windows PC with Sound using Microsoft PowerPoint
Another quick way to record your screen on Windows with audio is to use Microsoft PowerPoint.
Follow these simple instructions to get started.
Step 1: Open Microsoft PowerPoint.
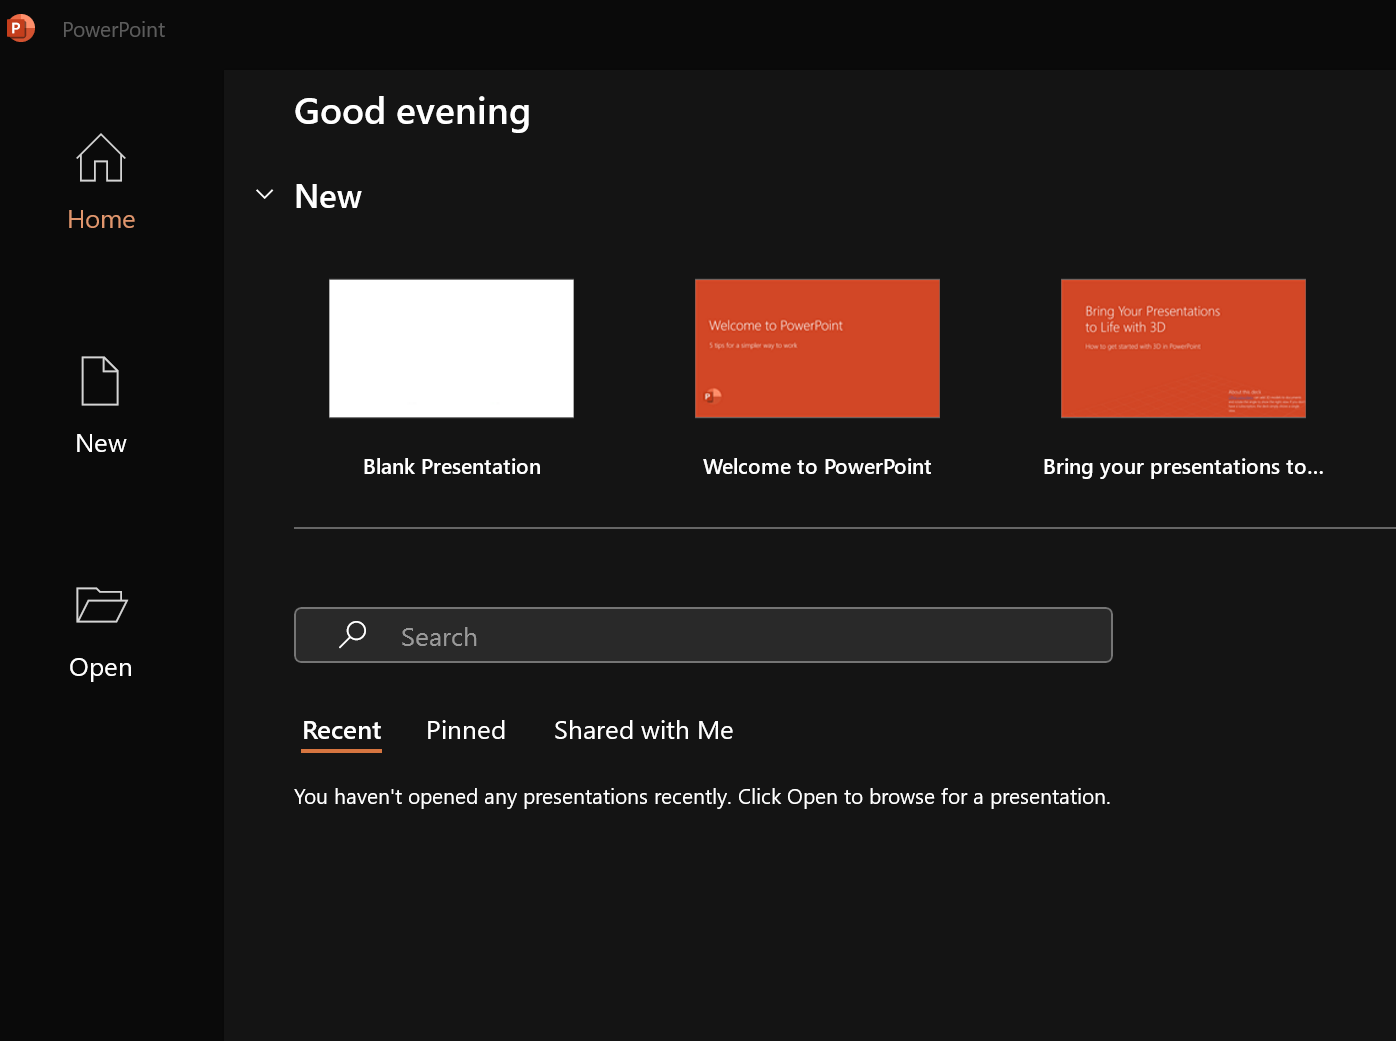
Step 2: Open a new slide and click on the ‘Record’ option in the home tab.
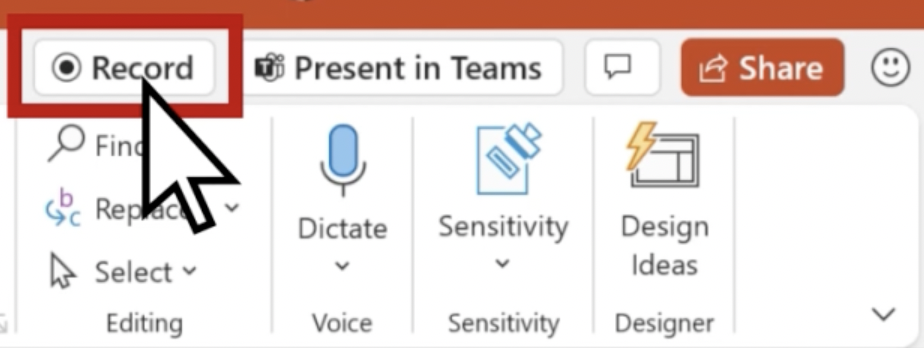
Step 3: As soon as you click on the ‘Record’ option, you will be able to see multiple recording options on your screen. You can customize your recording preferences according to your own needs.
You can enable your camera & microphone, and also change your webcam background.

Step 4: Once you’ve customized your recording preferences, you can go ahead and start recording your video. Just click on the red dock button to get started.

Step 5: When you’re done recording, you can stop the recording and export the video.

4. How to Screen Record on Windows PC with Sound using Movavi Screen Recorder
If you need a versatile desktop screen recorder that has both basic and advanced features, Movavi Screen Recorder can help you out.
In fact, even for free screen recording, it still manages to provide you with a lot of flexibility and control.
Let’s see how you can get started with the program:
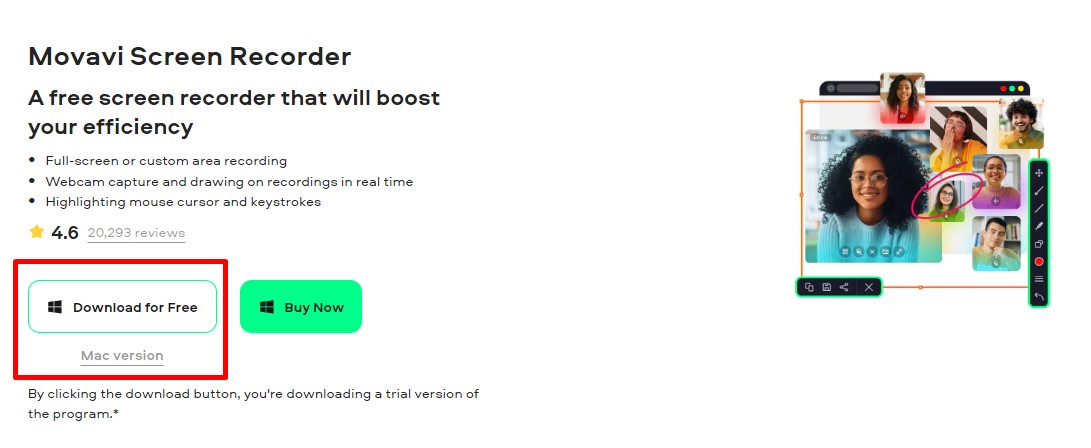
Step 1: Head over to the official website and download this free screen recorder for PC. Choose between Windows and Mac versions.
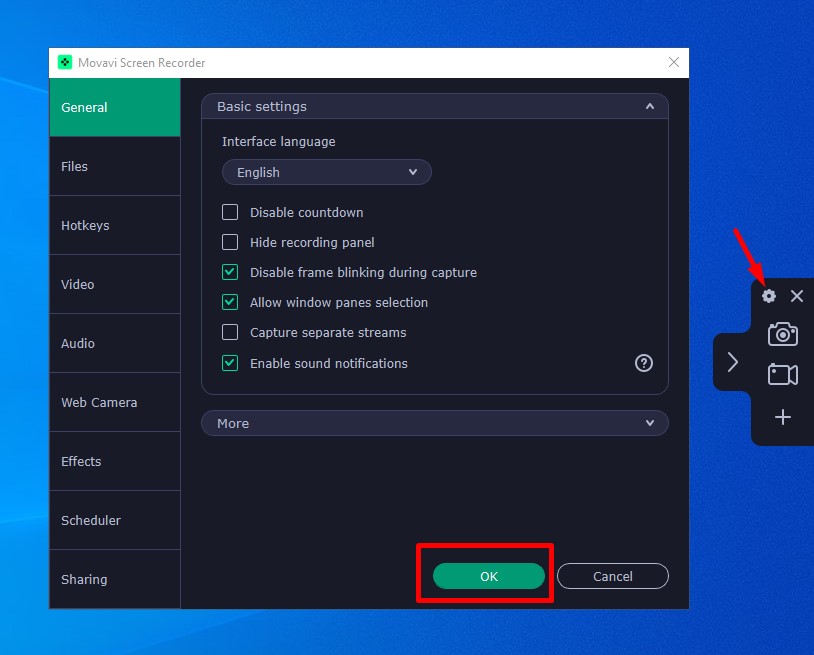
Step 2: Launch Movavi Screen Recorder and head to the Settings.
Here, you can change the basic settings like countdown and sound notification, as well as things like file destination, hotkeys, frame rate, audio quality, cursor effects, etc. Click OK to save the changes.
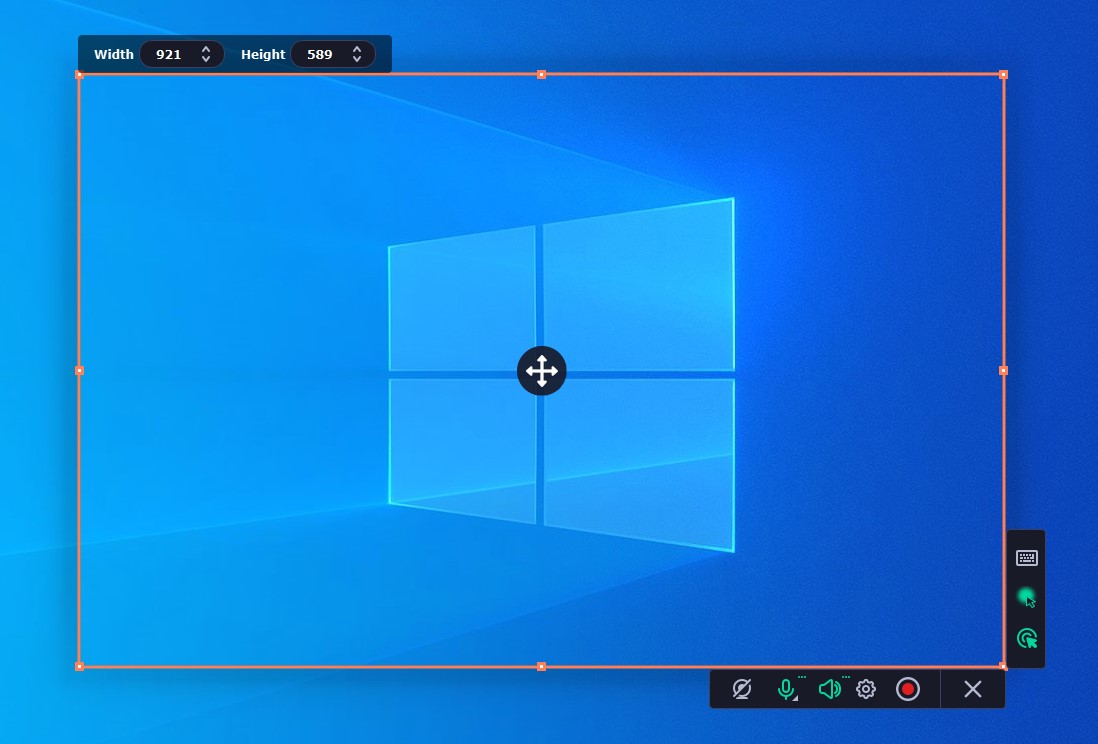
Step 3: On the toolbar, hit on the Screen recording icon. You can also use the default keyboard shortcut F10 to start. Choose the area you want to record.
You can capture a specific window, app, entire screen, or a custom region. Turn any switches on if you need to record audio from a microphone, system sound, or webcam.
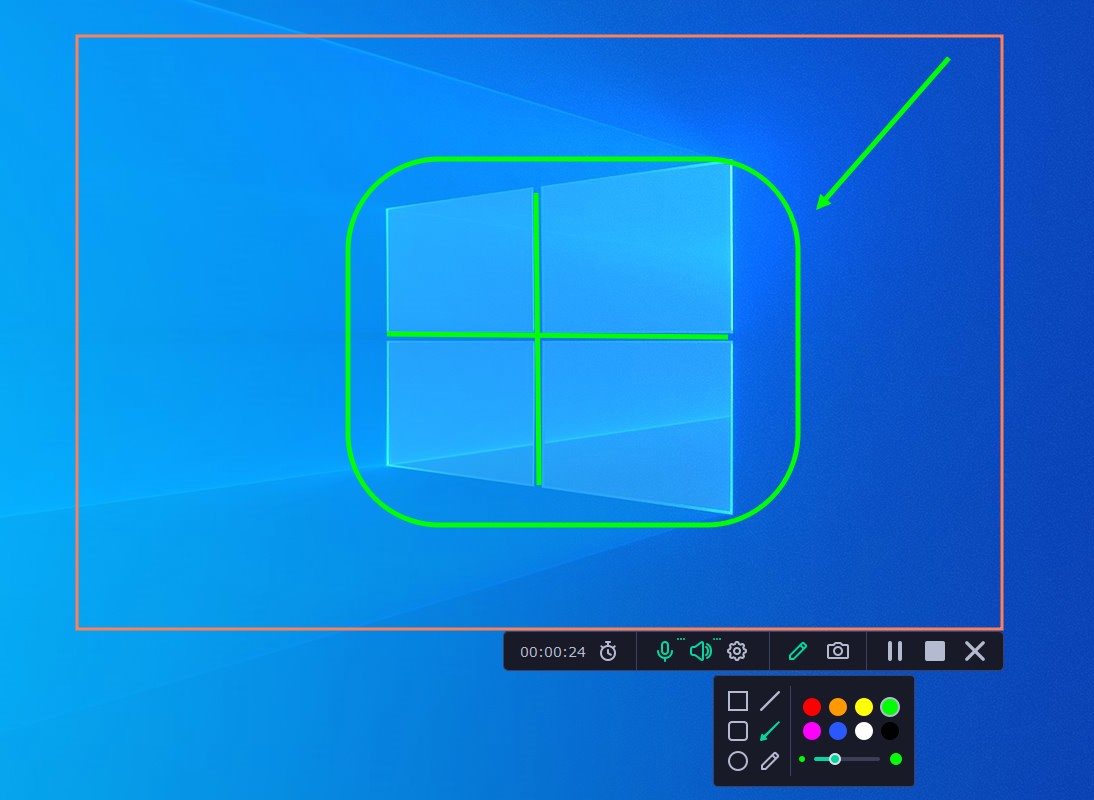
Step 4: Hit the REC button. After a 3-second countdown, the recording will start. You can pause it anytime with the respective button or F9 hotkey.
While recording, add annotations with arrows, shapes, or pen. You can also use your cursor to highlight or point out something important and take screenshots if needed.
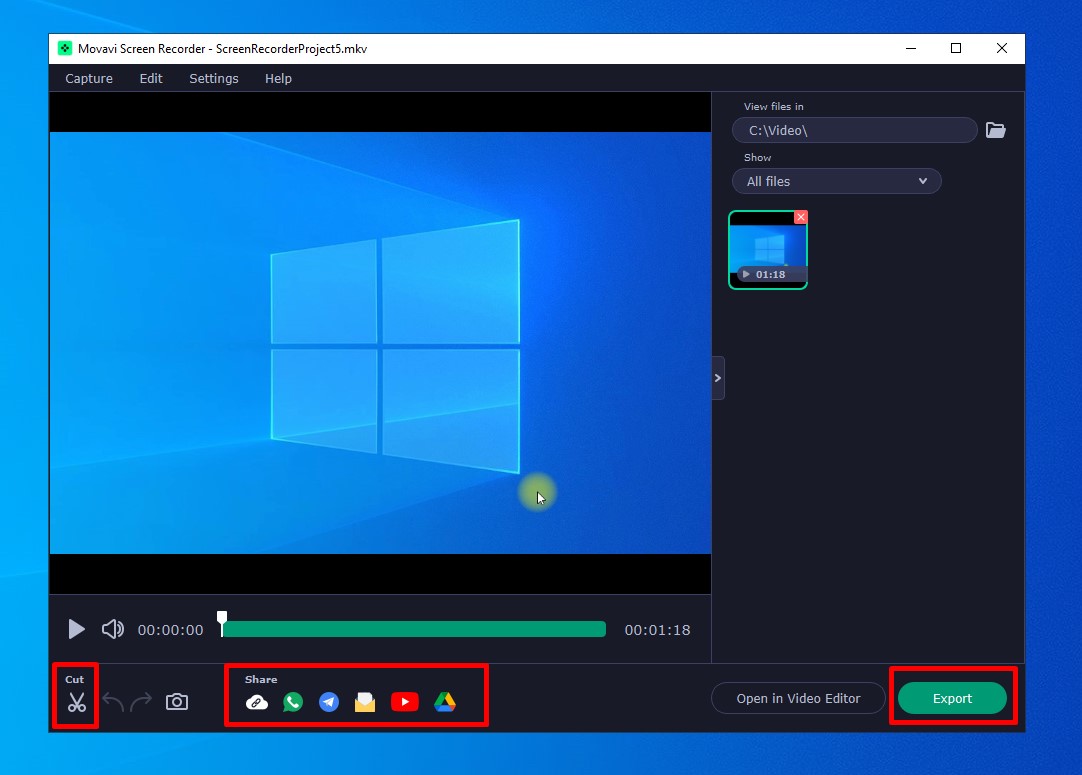
Step 5: When you’re done, click the Stop icon or F10 key to end the session.
You’ll get a preview of your video and a trimming window to cut out the unnecessary parts if needed. Then, use the Export button to save the file in a desired format or share it on YouTube, Google Drive, and some other platforms.
FAQs
1) Does Windows 10 have a screen recorder with audio?
Windows 10 comes with a built-in screen recorder called Xbox Game bar. This screen recorder can record screen, webcam and audio, which can then be used to create interactive digital brochures and other types of media. It’s easy to use, but comes with many disadvantages.
You can also use Vmaker, which is a more advanced screen recorder and comes with an AI video editor too. This editor can help you transform raw videos into stunning videos and offers manual video editing features like cut, crop, trim, resize, rotate, change speed, flip, merge, and more.
2) How do I record screen and audio on Windows 10 for free?
You can use the Windows 10 built-in screen recorder Xbox Game Bar for recording screen with audio for free.
You can also use advanced Windows screen recorders like Vmaker, OBS, & Screenrec. These are free screen recorders with more advanced features.
3) What is the best screen recorder for recording the screen with audio on a Windows PC?
The best screen recorder will depend on the choice of features you’re looking for in a screen recorder and your budget. Here’s a list of 10 best tools for Windows PC for recording screen
- Vmaker
- OBS
- Screenrec
- Bandicam
- Loom
- Icecream screen recorder
- Flashback Pro
- Movavi
- Ashampoo
- Apowersoft
4) How to screen record in laptop with audio?
To screen record in your laptop with audio, you can use a screen recorder like Vmaker. You can follow these simple steps to record your Windows laptop screen using Vmaker:
- Install Vmaker on your laptop
- Open Vmaker and choose your preferences
- Click on the «Start Recording» button
That’s it. You have made the first screen recording video on your laptop using Vmaker.
Recommended Readings:
How to Screen Record on Windows 7 with Audio
How to Screen Record on Windows 11 with Sound
How to Screen Record on Windows with Voice
How to Screen Record on PC with Audio
How to Screen Record on Computer with Audio
How to Screen Record on Laptop with Audio
How to screen record on Windows PC — The easiest way to do that