
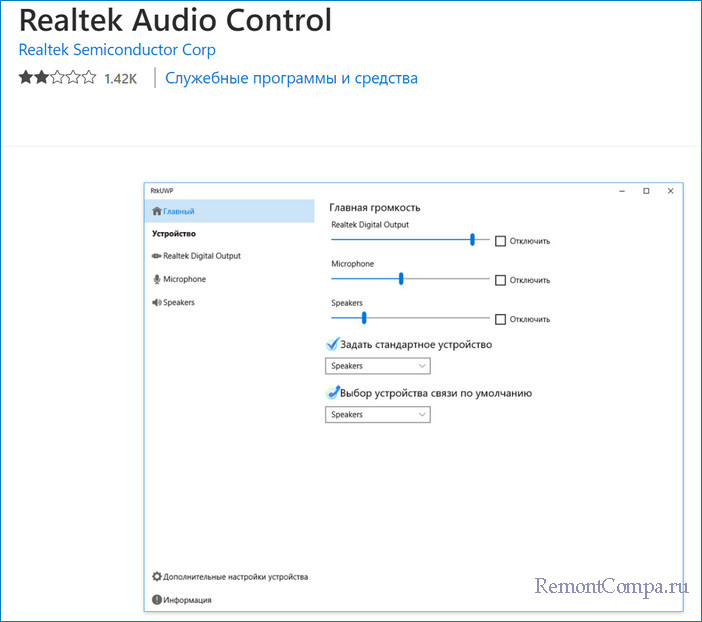
Среди частых вопросов пользователей последних версий Windows — загрузка и установка приложения Realtek Audio Console (или Realtek Audio Control), а также решение проблем с его работой, если оно было установлено.
В этой инструкции подробно о способах скачать и установить Realtek Audio Console, а также о причинах, по которым при установке приложения могут возникнуть проблемы.
Информация про Realtek Audio Console и необходимые условия для работы приложения
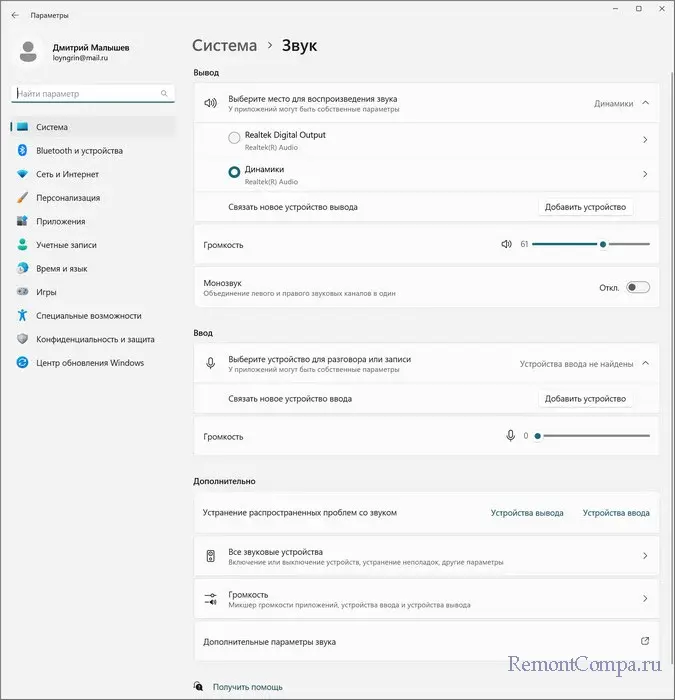
Прежде чем устанавливать Realtek Audio Console необходимо учесть важный нюанс: это приложение предназначено для звуковых карт Realtek, работающих с новыми драйверами DCH или UAD (Universal Audio Driver). Определить версию текущего драйвера в Windows 11 и Windows 10 легко:
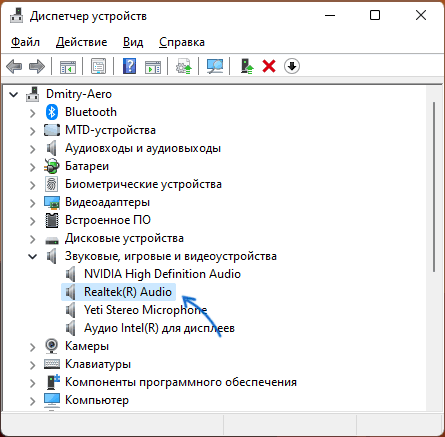
- Нажмите правой кнопкой мыши по кнопке пуск и выберите пункт «Диспетчер устройств» в контекстном меню.
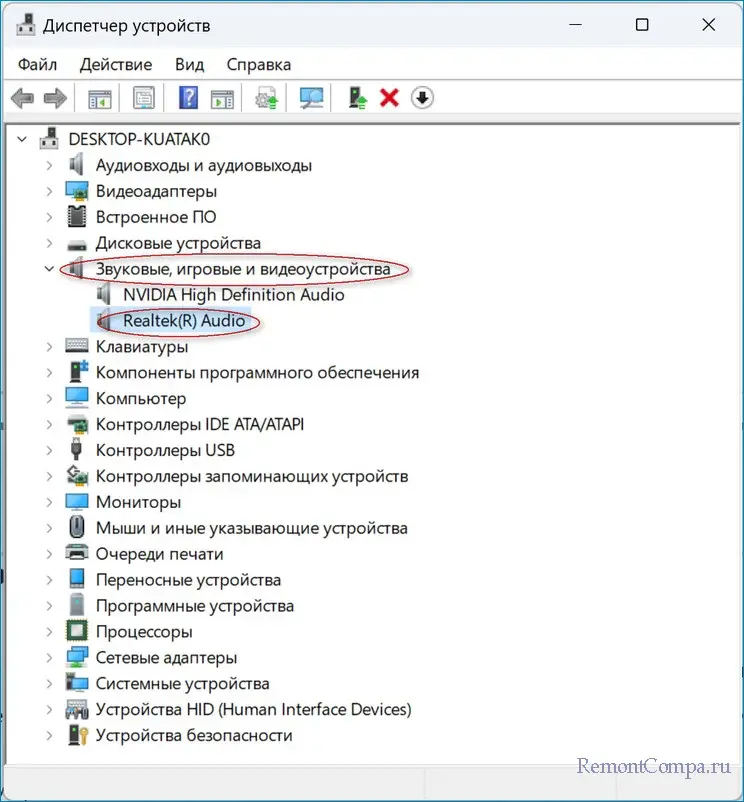
- Посмотрите название вашей звуковой карты в разделе «Звуковые, игровые и видеоустройства».
- Если вы видите Realtek(R) Audio — это говорит о том, что у вас установлен драйвер DCH/UAD и Realtek Audio Console может использоваться.

- Если указано: Realtek High Definition Audio — это говорит о том, что установлен старый драйвер и для управления должно использоваться приложение Realtek HD Audio Manager.
В случае, если у вас используется традиционный (старый) вариант драйвера, вы можете попробовать обновить драйвер прямо в диспетчере устройств: нажмите правой кнопкой мыши по Realtek High Definition Audio, выберите пункт «Обновить драйвер», затем — «Найти драйверы на этом компьютере» — «Выбрать драйвер из списка доступных драйверов на компьютере» и посмотрите, есть ли в списке совместимых устройств Realtek(R) Audio. При наличии — выберите и установите его.
И дополнительный нюанс: в случае если на компьютере установлен новый драйвер Realtek, как правило, установка Realtek Audio Console выполняется автоматически, и вы увидите его в списке установленных приложений. Если же этого не произошло, есть следующие варианты скачать и установить приложение.
Как скачать Realtek Audio Console из магазина Microsoft Store
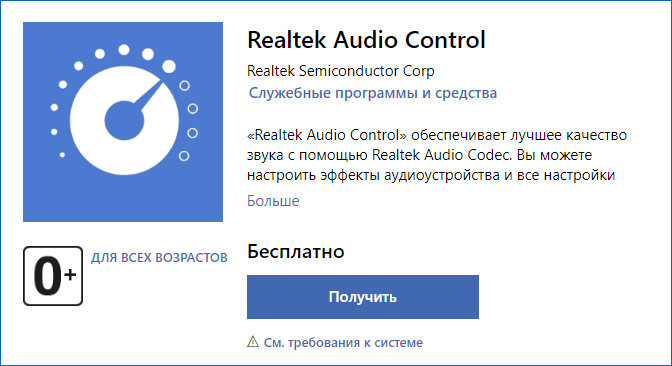
Если выполнять поиск по приложениям в Microsoft Store, приложение, которое в магазине имеет название Realtek Audio Control, вы не найдёте. Однако можно воспользоваться прямой ссылкой:
- Перейдите по ссылке на приложение Realtek Audio Control в Microsoft Store
- Нажмите кнопку «Получить» (если будет предложено открыть в приложении магазина, согласитесь) и установите приложение.

- После установки оно появится в списке приложений под именем Realtek Audio Console.
Напомню, что приложение будет работать лишь при наличии соответствующих драйверов Realtek. В некоторых случаях вы можете получить сообщение об ошибке при подключении к службе RPC, решение описано в инструкции Невозможно подключиться к службе RPC при запуске Realtek Audio Console — как исправить?
Установка Realtek Audio Console вместе с драйверами звуковой карты
Если после установки или переустановки Windows 11 или Windows 10 вы не устанавливали драйверы вручную, при этом имеете не самый старый компьютер или ноутбук, загрузка и установка драйвера звука с официального сайта производителя может решить проблему:
- Найдите официальную страницу поддержки вашей материнской платы (если это ПК) или ноутбука.
- В разделе загрузок найдите драйвер Audio и скачайте его.

- После установки проверьте, появилось ли приложение Realtek Audio Console.
- В некоторых случаях оно появляется не сразу, а загружается из Интернета.
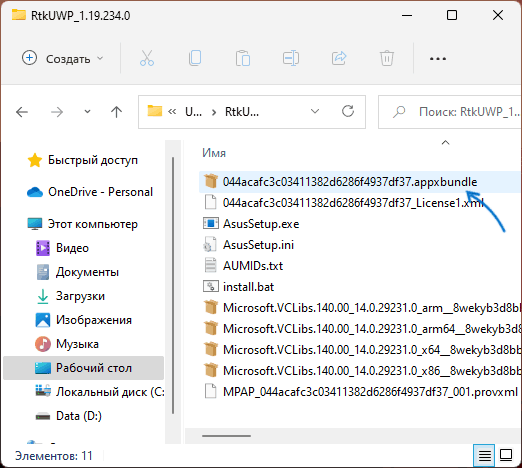
- В некоторых драйверах файлы приложения можно найти внутри архива. К примеру, если открыть архив с драйверами Audio некоторых материнских плат Asus (на примере — B560M), то в нём можно найти папку UWP, распаковать её и запустить файл appxbundle оттуда для установки Realtek Audio Console.


Неофициальный источник Realtek Audio Console и драйверов UAD (DCH)
На GitHub доступен проект, где выкладываются неофициальные сборки драйверов Realtek Universal Audio Driver и приложения Realtek Audio Console. Если другие методы установки для вас не работают, можно попробовать этот вариант:
- Зайдите на страницу https://github.com/pal1000/Realtek-UAD-generic/releases
- Ссылка на установщик Realtek Audio Console находится в разделе Realtek Audio Control app, после распаковки потребуется запустить файл setup.cmd из папки с распакованным архивом.

- Ниже, в разделе Assets вы найдете архив с последней сборкой драйвера Realtek, необходимого для работы приложения. Учитывайте, что он может не работать для достаточно старых звуковых карт Realtek.

В случае, если Realtek Audio Console не запускается, хотя все условия для его работы выполняются, причинами могут быть:
- Отключенные элементы Realtek в автозагрузке.
- Отключенные службы Realtek в списке служб.
- Наличие и работа дополнительных приложений и служб улучшения звука от производителя.
Надеюсь, инструкция поможет или решить проблему и установить Realtek Audio Console или разобраться, почему это не удавалось сделать.
Пользователи Windows 11 последнее время часто задают вопрос о том, как инсталлировать Realtek Audio Console. Это достаточно полезное приложение для настройки звука, причем на разных устройствах. В данной статье рассмотрим как загрузить и установить данное приложение, чтобы не возникло проблем.
Realtek Audio Console для Windows 11
Перед тем как инсталлировать Realtek Audio Console следует убедиться в том, что ваши дрова и аудиокарта его поддерживают.
Звуковуха в обязательном порядке должна быть Realtek и поддерживать DCH или UAD. Чтобы удостовериться, что ваша система соответствует данным требованиям, делаем следующее:
1. Щелкаем ПКМ на Пуск и выбираем «Диспетчер устройств».
2. Переходим в «Звуковые, игровые и видеоустройства» и смотрим имя аудиокарты.
3. Realtek(R) Audio предполагает, что RAC может использоваться на вашем ПК. Мало того, скорее всего она уже на нем, так как обычно с обновленными драйверами устанавливается и новая программа.
4. Если вы увидели Realtek High Definition Audio, то вы должны понимать, что для данного типа RAC применяться не может. Вместо него будет более старый Realtek HD Audio Manager. Но его тоже можно попытаться обновить.
Инсталлировать апдейт Realtek HD Audio Manager можно из диспетчера устройств. Следует нажать ПКМ на Realtek HD Audio Manager и выбрать «Обновить драйвер». После этого нужно кликнуть «Найти драйверы на этом компьютере» — «Выбрать драйвер из списка доступных драйверов на компьютере». При условии, что найден Realtek(R) Audio, указываем его и устанавливаем.
На случай если RAC на ПК в перечне программ не оказалось, а драйвера есть, то придется прибегнуть к ручной установке. Для этого воспользуемся Microsoft Store.
1. Переходим по ссылке
https://apps.microsoft.com/store/detail/9P2B8MCSVPLN?hl=ru-ru&gl=RU
2. Щелкаем «Получить» и устанавливаем его.
Хочется отметить, что если название программы ввести в поиске магазина, то вероятнее всего ничего не будет найдено, поэтому пользуемся приведенной ссылкой.
Когда, например, у вас нет ни подходящего драйвера, ни приложения, то следует воспользоваться официальной страницей для их загрузки. Только перед этим следует удалить остатки старого ПО.
1. Щелкаем ПКМ на Пуск и заходим в диспетчер устройств.
2. В верхней части окна кликаем на «Вид» — «Показать скрытые устройства».
3. Открываем «Звуковые, игровые и видеоустройства».
4. Поочередно щелкаем по драйверам ПКМ и удаляем их.
5. Теперь жмем «Win+I».
6. Открываем «Приложения» — «Установленные приложения».
7. Находим в перечне Realtek High Definition Audio Driver и все что относится к аудио, удаляем.
8. Если вы не в курсе, что у вас за материнка, нужно щелкнуть «Win+R» и ввести «msinfo32». Тут есть необходимая нам информация по материнской плате.
Переходим непосредственно к инсталляции драйверов и утилит.
1. В браузере вводим модель материнки и переходим на офф. портал.
2. На вкладке «Загрузки» или «Download» ищем Audio или RAD, скачиваем его и устанавливаем.
3. Иногда при загрузке файл скачивается в виде архива. При таком раскладе находим директорию UWP, распаковываем ее и открываем «appxbundle» или Setup.exe. Начнется установка Realtek Audio Console.
4. Перезапускаем ПК.

Таким образом мы рассмотрели как можно установить Realtek Audio Console. В случае неудач, можно воспользоваться восстановлением системы до исходного момента.
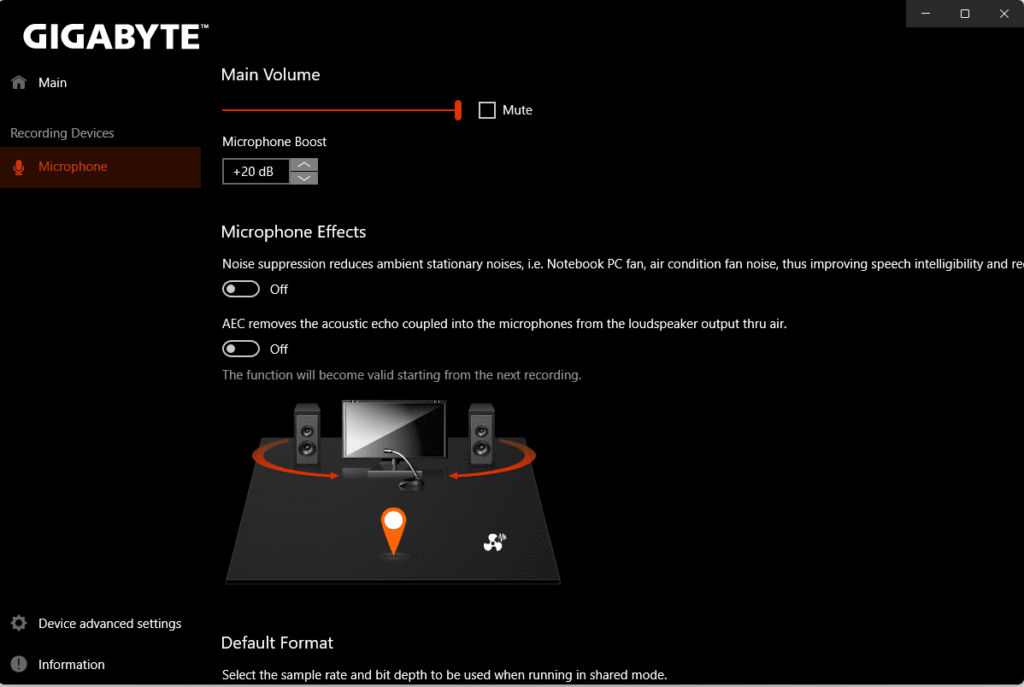
How To Install Realtek Audio Console: The soundscape of our digital world has evolved, and Windows offers an immersive audio experience that deserves to be fully explored. One essential tool for harnessing the power of your audio hardware is the Realtek Audio Console.
In this tutorial, we will walk you through the step-by-step process of installing the Realtek Audio Console on your Windows system, ensuring you have complete control over your sound settings. Let’s dive in!
What is RealTek Audio Console?
Realtek Audio Console is a software application developed by Realtek Semiconductor Corp., a leading manufacturer of audio and network components. It is designed to provide users with advanced control and customization over their audio settings on Windows operating systems.
Realtek Audio Console serves as a centralized hub for managing and adjusting various audio parameters, allowing users to fine-tune their audio experience according to their preferences. It offers a user-friendly interface that enables easy navigation and accessibility to a wide range of audio settings and features.
Key features and functions of Realtek Audio Console include:
- Equalizer Settings: Users can adjust the equalizer to modify the frequency response of their audio output. This allows for customization of bass, treble, and other audio frequencies to enhance the overall sound quality.
- Audio Effects and Enhancements: The application provides a selection of audio effects and enhancements to improve the listening experience. These may include virtual surround sound, voice enhancement, room correction, and more.
- Device Management: Realtek Audio Console supports the management of multiple audio devices, such as speakers, headphones, and microphones. Users can easily switch between devices and configure their audio settings accordingly.
- Audio Jack Configuration: The application allows users to configure the audio jacks on their system, enabling them to assign specific functions to each jack and customize audio routing.
- Real-Time Audio Monitoring: Realtek Audio Console provides real-time audio monitoring, allowing users to visualize audio levels and make adjustments on the fly. This is particularly useful for content creators, musicians, and individuals who require precise control over their audio recordings.
- Audio Presets: The software often includes pre-defined audio presets tailored for specific scenarios, such as gaming, movies, music, and communication. These presets optimize the audio settings to deliver an enhanced experience for each use case.
Why is Realtek Audio Console Significant?
Realtek has earned a reputation for delivering reliable and feature-rich audio solutions. Their drivers and software are trusted by hardware manufacturers worldwide, making Realtek audio technology a common choice for many PC users. Realtek’s commitment to innovation, compatibility, and sound quality has made it a prominent player in the audio industry.
Learn more in detail about Realtek Audio Console.
Benefits of Realtek Audio Console:
- Advanced Audio Customization: The Realtek Audio Console provides an intuitive interface that allows you to fine-tune your audio settings to suit your preferences. You can adjust equalizer settings, enhance bass or treble, and apply audio effects to enhance your listening experience.
- Audio Effects and Enhancements: Realtek Audio Console offers a range of audio effects and enhancements, such as virtual surround sound, voice enhancement, and noise reduction. These features can provide a more immersive and immersive sound experience, whether you’re gaming, watching movies, or listening to music.
- Smart and Automatic Detection: Realtek Audio Console is designed to intelligently detect and configure audio devices connected to your system. It automatically recognizes your speakers, headphones, and microphones, allowing for seamless switching and optimization of audio settings.
- Multiple Device Support: With Realtek Audio Console, you can easily manage and control audio settings for multiple input and output devices simultaneously. Whether you have external speakers, headphones, or a microphone connected to your system, Realtek Audio Console provides a centralized platform for managing your audio devices efficiently.
- Real-Time Audio Monitoring: Realtek Audio Console offers real-time audio monitoring, allowing you to visualize the audio levels and make necessary adjustments on the fly. This feature is particularly useful for content creators, podcasters, and musicians who require precise control over their audio recordings.
What’s the problem with Realtek Audio Console?
The main problem users face with the Realtek Audio Console is when they build or buy a new PC or Computer and install a fresh Windows or any other operating system. The RealTek driver is not available by default in the system. It’s a private application so it is hidden by default. It needs to be installed properly to be working for High Definition Audio experience.
If you are also facing something similar to not being abling to install the Realtek Audio Console app from the Microsoft Store then you are at the right place. All you have to do is to follow the below steps to get the Realtek Audio Console installed on your system.
Step 1: Prepare for Installation
To get started, we need to make sure we have the necessary driver for our motherboard. Realtek Audio Console relies on the proper drivers to function optimally. Here\’s what you need to do:
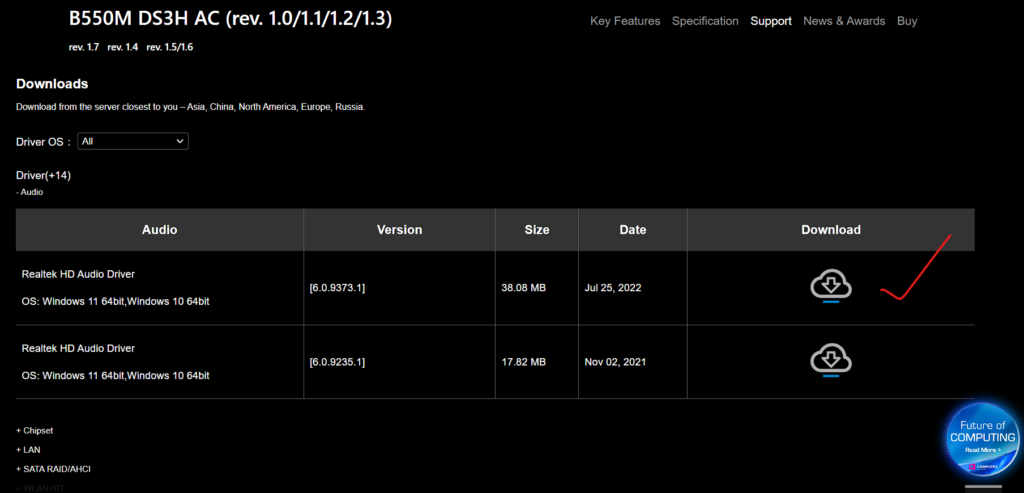
- 1.1 Visit your motherboard manufacturer’s website: Open your preferred web browser and navigate to the official website of your motherboard manufacturer. From there, Look for the ”Support” or ”Downloads” section of that Motherboard page.
- 1.2 Locate the correct driver: On the manufacturer’s website, search for the driver specific to your motherboard model and the version of Windows 11 you’re using. Download the latest version of the Realtek Audio driver package. Make sure to select the correct architecture (32-bit or 64-bit) that matches your operating system.
In our case, I searched for the Gigabyte B550M DS3H AC Motherboard and went to Gigabyte\’s official website with the model name of the motherboard. Here is the Motherboard page for the above-mentioned motherboard model from Gigabyte: https://www.gigabyte.com/Motherboard/B550M-DS3H-AC-rev-10-11-12-13/support#support-dl-driver
Unfortunately, for the time being, the 6.0.9373.1 version has been removed from the official website. You can download it from this Google Drive link: https://drive.google.com/drive/folders/1NzsGQIZ6N14MDTrdIZxV725i1UT8BBW-?usp=sharing
Make sure you know your motherboard model and manufacturer company name to find the compatible driver of Realtek for your motherboard model and company. Otherwise, if you install it from any other source, it might not work.
Remember, without the driver installation first, you won’t be able to install the app from Microsoft Store. You will get an error. So first install the driver and then install the app from Microsoft Store.
Step 2: Install the Realtek Audio Driver
Now that we have the necessary driver, let’s proceed with the installation process:
- 2.1 Locate the downloaded driver file: Open your File Explorer and navigate to the folder where you downloaded the Realtek Audio driver package.
- 2.2 Run the driver installer: Double-click on the driver file to launch the installation wizard. Follow the on-screen instructions to complete the installation process. If prompted, grant administrative privileges to the installer.
- 2.3 Reboot your system: After the installation is complete, it\’s recommended to reboot your computer to ensure the driver is properly integrated into your system.
Step 3: Access the Microsoft Store
To install the Realtek Audio Console, we\’ll need to access the Microsoft Store. Here\’s how you can do it:
- 3.1 Open the Microsoft Store: On your Windows 11 system, click on the Start button in the taskbar, and in the Start Menu, locate and click on the Microsoft Store icon. This will launch the Microsoft Store application.
- 3.2 Sign in to your Microsoft Account (if required): If prompted, sign in to your Microsoft Account to gain access to the store. If you don’t have an account, you can create one easily by following the on-screen instructions.
Step 4: Install Realtek Audio Console from Microsoft Store
Now that you’re in the Microsoft Store, it\’s time to install the Realtek Audio Console:
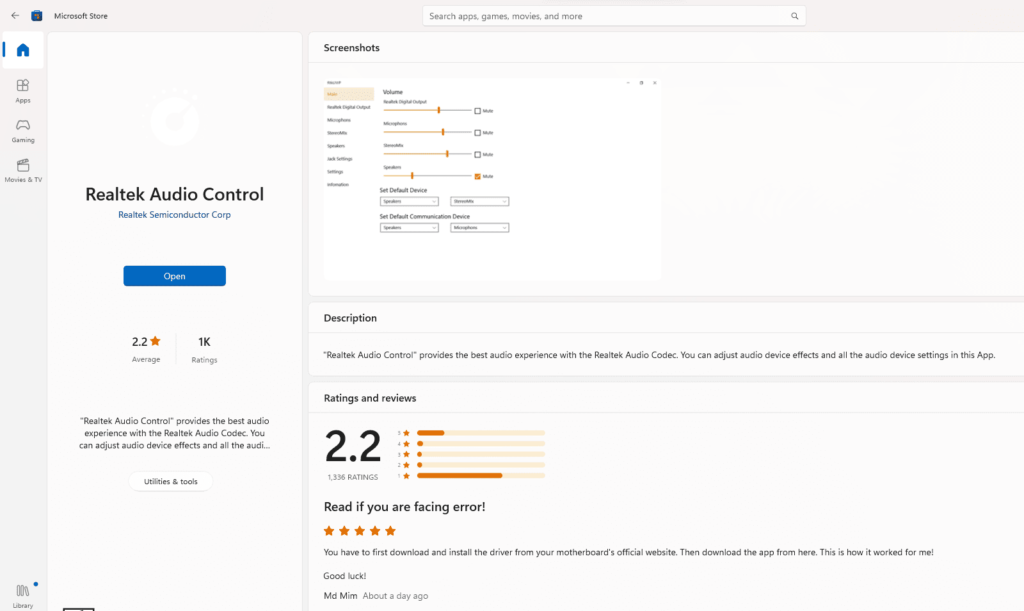
- 4.1 Search for Realtek Audio Console: In the search bar located in the upper-right corner of the Microsoft Store, type ”Realtek Audio Console” and press Enter. Or go to this link: https://www.microsoft.com/store/productId/9P2B8MCSVPLN to install the app. You will be able to install the app now.
- 4.2 Locate and select the correct app: From the search results, locate the Realtek Audio Console app developed by Realtek Semiconductor Corp. Click on the app to open its page.
- 4.3 Install the app: On the Realtek Audio Console page, click on the ”Get” or ”Install” button to begin the installation process. The Microsoft Store will download and install the app on your system automatically.
- 4.4 Launch Realtek Audio Console: Once the installation is complete, you can find the Realtek Audio Console in your Start Menu or by searching for it in the taskbar. Launch the app to start customizing your audio settings.
Video: How to Install Realtek Audio Console Driver & Install Realtek Audio Control App From Microsoft Store
Conclusion: Realtek Audio Console Installation
Congratulations! You have successfully installed the Realtek Audio Console on your Windows 11 system. With this powerful tool, you can now fine-tune your audio settings, enhance your listening experience, and immerse yourself in a world of high-quality sound.
Remember to periodically check for driver updates on your motherboard manufacturer’s website to ensure you have the latest features and compatibility improvements. Enjoy the sonic journey that awaits you on Windows!
If you still fail to install then kindly comment below your issue, and we will try to help you. If you found this article helpful then also share your feedback in the comment below.
Learn how to change the system drive for app installation on Windows 11.
Also, share this with your friends and social media so that more people can be benefitted. Follow us on Google News to stay updated with the latest technology updates.
-
Home
-
News
- Realtek HD Audio Manager Download for Windows 10/11
By Alisa |
Last Updated
This page includes a Realtek HD Audio Manager download guide for Windows 10/11. MiniTool software, offers some free software for Windows computer, e.g. MiniTool Power Data Recovery, MiniTool Partition Wizard, MiniTool MovieMaker, etc.
What Is Realtek HD Audio Manager?
Realtek HD Audio Manager (Realtek High Definition Audio Manager) is the application used to control sound play on Windows computers. It acts as a control panel for your audio adapters. When you add new microphones/speakers/headsets, etc. to your computer, Realtek HD Audio Manager will automatically detects them and let you set up them.
Wonder where to find Realtek HD Audio Manager and where to get Realtek HD Audio Manager downloaded for your Windows 10/11 computer? This post gives a guide.
Check If Your Computer Has Realtek HD Audio Manager
Generally in Windows 10/11, Realtek HD Audio Manager is installed along with Realtek HD audio driver. Normally Windows 10/11 OS has automatically installed Real HD audio driver, and you can find the Realtek HD Audio Manager in Control Panel, but if you can’t find it, you can check how to download Realtek HD Audio Manager for Windows 10/11 PC below.
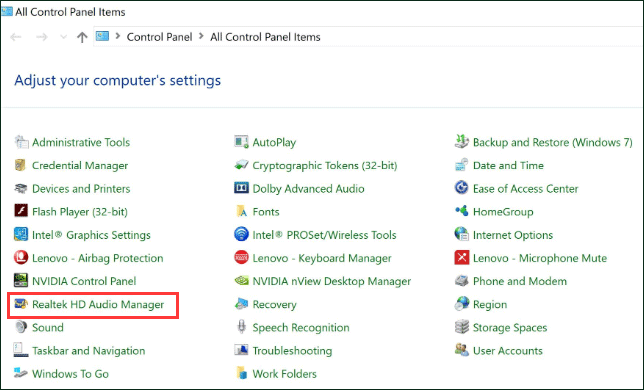
To check if your computer has installed Realtek HD Audio Manager, you can press Windows + R, type control panel, and press Enter to open Control Panel on Windows 10/11.
Next you can type realtek in the search box in Control Panel, and click Realtek HD Audio Manager in the list to open Realtek HD Audio Manager on your Windows 10/11 computer. Alternatively, you can also click Hardware and Sound, and click Realtek HD Audio Manager to open it.
However, if the Realtek HD Audio Manager is missing on Windows 10/11 and you can’t find it in Control Panel, you can get Realtek HD Audio Manager downloaded on your Windows computer. Check how to do it below.
Realtek HD Audio Manager Download for Windows 10/11
Way 1. Download from Realtek Website
You can download Realtek HD Audio Manager from Realtek official website. You can open Realtek HD Audio Manager download page and find the corresponding driver for your Windows 10/11 system. Click the Download icon to download Realtek HD Audio Driver for your computer. You can download Realtek HD Audio driver for Windows 10 64bit or 32bit based on your own needs.
After downloading, you can click the downloaded exe file, and follow the instructions to install the Realtek HD Audio Driver.
Since Realtek HD Audio Manager will be installed along with Realtek HD Audio driver. After you installed the driver, then the Realtek HD Audio Manager application is also installed.
Way 2. Reinstall Realtek Audio Driver
- You can press Windows + X, and select Device Manager to open Device Manager on Windows 10.
- In Device Manager, expand Sound, video and game controllers category, and right-click Realtek High Definition Audio.
- Then you can choose Update driver to update the outdated Realtek Audio driver.
- Or you can click Uninstall device to delete the Realtek High Definition Audio device from your computer. Restart your computer and it will automatically download and install Realtek HD Audio driver and Realtek HD Audio Manager, if not, try Way 1 to manually download and reinstall Realtek HD Audio Manager on Windows 10.
Conclusion
This post introduces how to get Realtek HD Audio Manager downloaded for your Windows 10/11 computer. Hope it helps. For other Windows 10/11 issues, MiniTool software provides data recovery, disk partition management, system backup and restore, video editing, video converting, video downloading, and some other solutions.
About The Author
Position: Columnist
Alisa is a professional English editor with 4-year experience. She loves writing and focuses on sharing detailed solutions and thoughts for computer problems, data recovery & backup, digital gadgets, tech news, etc. Through her articles, users can always easily get related problems solved and find what they want. In spare time, she likes basketball, badminton, tennis, cycling, running, and singing. She is very funny and energetic in life, and always brings friends lots of laughs.