
Среди частых вопросов пользователей последних версий Windows — загрузка и установка приложения Realtek Audio Console (или Realtek Audio Control), а также решение проблем с его работой, если оно было установлено.
В этой инструкции подробно о способах скачать и установить Realtek Audio Console, а также о причинах, по которым при установке приложения могут возникнуть проблемы.
Информация про Realtek Audio Console и необходимые условия для работы приложения
Прежде чем устанавливать Realtek Audio Console необходимо учесть важный нюанс: это приложение предназначено для звуковых карт Realtek, работающих с новыми драйверами DCH или UAD (Universal Audio Driver). Определить версию текущего драйвера в Windows 11 и Windows 10 легко:
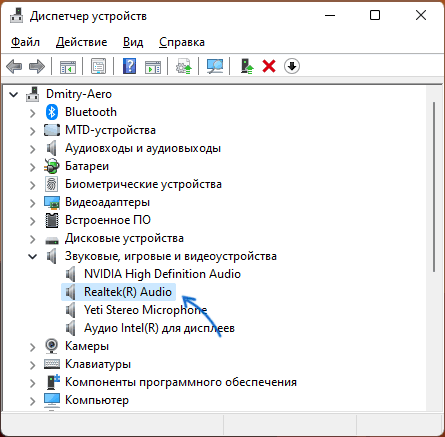
- Нажмите правой кнопкой мыши по кнопке пуск и выберите пункт «Диспетчер устройств» в контекстном меню.
- Посмотрите название вашей звуковой карты в разделе «Звуковые, игровые и видеоустройства».
- Если вы видите Realtek(R) Audio — это говорит о том, что у вас установлен драйвер DCH/UAD и Realtek Audio Console может использоваться.

- Если указано: Realtek High Definition Audio — это говорит о том, что установлен старый драйвер и для управления должно использоваться приложение Realtek HD Audio Manager.
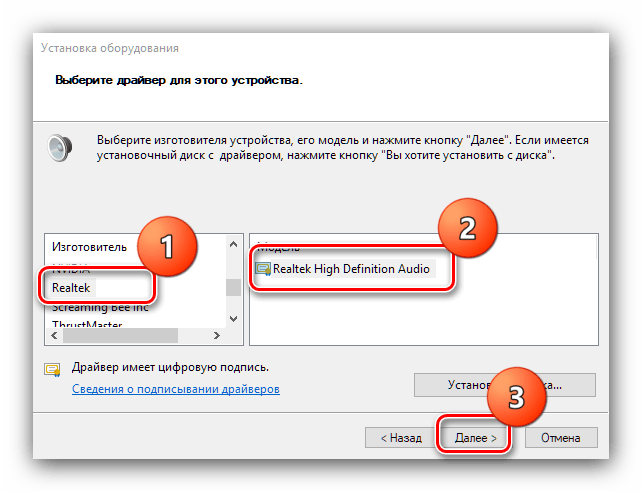
В случае, если у вас используется традиционный (старый) вариант драйвера, вы можете попробовать обновить драйвер прямо в диспетчере устройств: нажмите правой кнопкой мыши по Realtek High Definition Audio, выберите пункт «Обновить драйвер», затем — «Найти драйверы на этом компьютере» — «Выбрать драйвер из списка доступных драйверов на компьютере» и посмотрите, есть ли в списке совместимых устройств Realtek(R) Audio. При наличии — выберите и установите его.
И дополнительный нюанс: в случае если на компьютере установлен новый драйвер Realtek, как правило, установка Realtek Audio Console выполняется автоматически, и вы увидите его в списке установленных приложений. Если же этого не произошло, есть следующие варианты скачать и установить приложение.
Как скачать Realtek Audio Console из магазина Microsoft Store
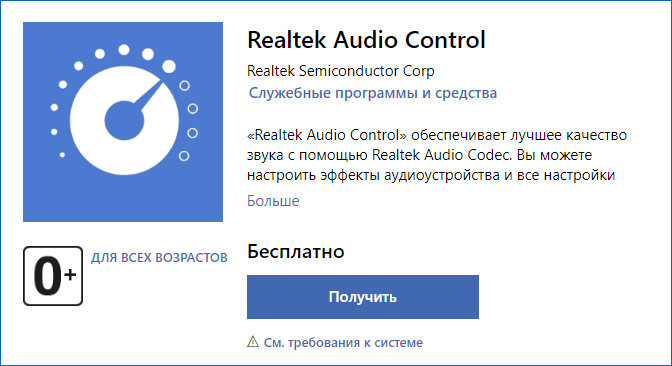
Если выполнять поиск по приложениям в Microsoft Store, приложение, которое в магазине имеет название Realtek Audio Control, вы не найдёте. Однако можно воспользоваться прямой ссылкой:
- Перейдите по ссылке на приложение Realtek Audio Control в Microsoft Store
- Нажмите кнопку «Получить» (если будет предложено открыть в приложении магазина, согласитесь) и установите приложение.

- После установки оно появится в списке приложений под именем Realtek Audio Console.
Напомню, что приложение будет работать лишь при наличии соответствующих драйверов Realtek. В некоторых случаях вы можете получить сообщение об ошибке при подключении к службе RPC, решение описано в инструкции Невозможно подключиться к службе RPC при запуске Realtek Audio Console — как исправить?
Установка Realtek Audio Console вместе с драйверами звуковой карты
Если после установки или переустановки Windows 11 или Windows 10 вы не устанавливали драйверы вручную, при этом имеете не самый старый компьютер или ноутбук, загрузка и установка драйвера звука с официального сайта производителя может решить проблему:
- Найдите официальную страницу поддержки вашей материнской платы (если это ПК) или ноутбука.
- В разделе загрузок найдите драйвер Audio и скачайте его.

- После установки проверьте, появилось ли приложение Realtek Audio Console.
- В некоторых случаях оно появляется не сразу, а загружается из Интернета.
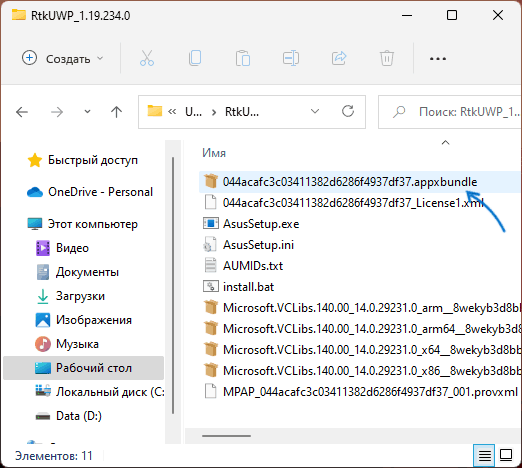
- В некоторых драйверах файлы приложения можно найти внутри архива. К примеру, если открыть архив с драйверами Audio некоторых материнских плат Asus (на примере — B560M), то в нём можно найти папку UWP, распаковать её и запустить файл appxbundle оттуда для установки Realtek Audio Console.


Неофициальный источник Realtek Audio Console и драйверов UAD (DCH)
На GitHub доступен проект, где выкладываются неофициальные сборки драйверов Realtek Universal Audio Driver и приложения Realtek Audio Console. Если другие методы установки для вас не работают, можно попробовать этот вариант:
- Зайдите на страницу https://github.com/pal1000/Realtek-UAD-generic/releases
- Ссылка на установщик Realtek Audio Console находится в разделе Realtek Audio Control app, после распаковки потребуется запустить файл setup.cmd из папки с распакованным архивом.

- Ниже, в разделе Assets вы найдете архив с последней сборкой драйвера Realtek, необходимого для работы приложения. Учитывайте, что он может не работать для достаточно старых звуковых карт Realtek.

В случае, если Realtek Audio Console не запускается, хотя все условия для его работы выполняются, причинами могут быть:
- Отключенные элементы Realtek в автозагрузке.
- Отключенные службы Realtek в списке служб.
- Наличие и работа дополнительных приложений и служб улучшения звука от производителя.
Надеюсь, инструкция поможет или решить проблему и установить Realtek Audio Console или разобраться, почему это не удавалось сделать.
Все способы:
- Шаг 1: Удаление старого драйвера
- Шаг 2: Установка
- Возможные проблемы
- Вопросы и ответы: 0
Шаг 1: Удаление старого драйвера
Если программное обеспечение уже использовалось в операционной системе, то рекомендуется сначала удалить старый драйвер, чтобы избежать конфликта между версиями ПО Realtek HD. Если ОС «чистая» и звуковой драйвер еще не устанавливался, то можно пропустить этот шаг и сразу переходить к следующему.
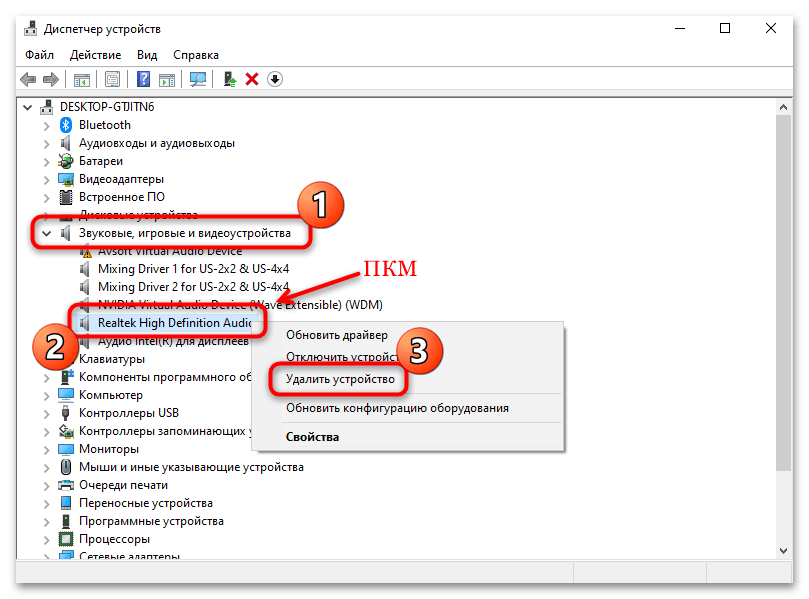
- Откройте встроенное средство «Диспетчер устройств». Для этого можно использовать сочетание клавиш «Win + X», после чего выбрать соответствующий пункт.
- Разверните меню «Звуковые, игровые и видеоустройства» и найдите драйвера для Realtek High Definition Audio. Щелкните по названию правой кнопкой мыши и из контекстного меню выберите функцию удаления устройства.
- В новом окне подтвердите действие.
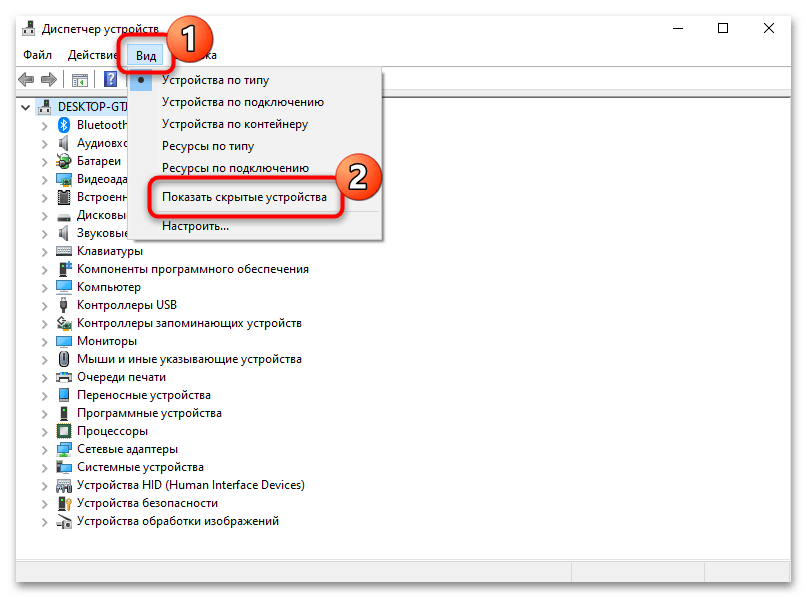
Также рекомендуется поискать дубликаты этого устройства. Для этого на вкладке «Вид» вверху интерфейса «Диспетчера устройств» отметьте опцию «Показать скрытые устройства». Удаляйте ПО аналогичным способом.
После удаления программного обеспечения необходимо перезагрузить операционную систему, чтобы изменения вступили в силу.
Скорее всего, после этого звук пропадет, но после установки Realtek HD все компоненты автоматически возобновят свою работу.
Шаг 2: Установка
Для начала потребуется скачать утилиту Realtek HD, причем нужно определить разрядность и версию операционной системы при загрузке. Процедура инсталляции несложная, поскольку предустановлен пошаговый мастер. Достаточно следовать алгоритму в соответствии с инструкциями.
Скачать Realtek HD
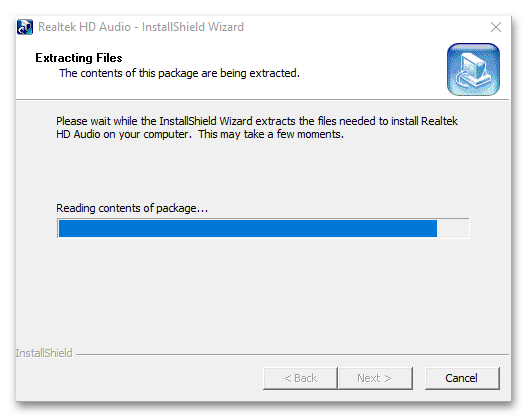
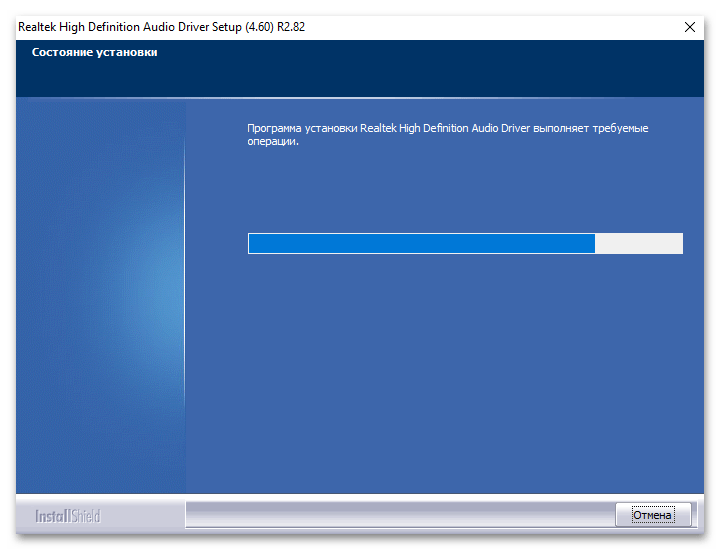
- Скачайте и запустите установочный файл. Автоматически начнется извлечение компонентов, которые необходимы для установки.
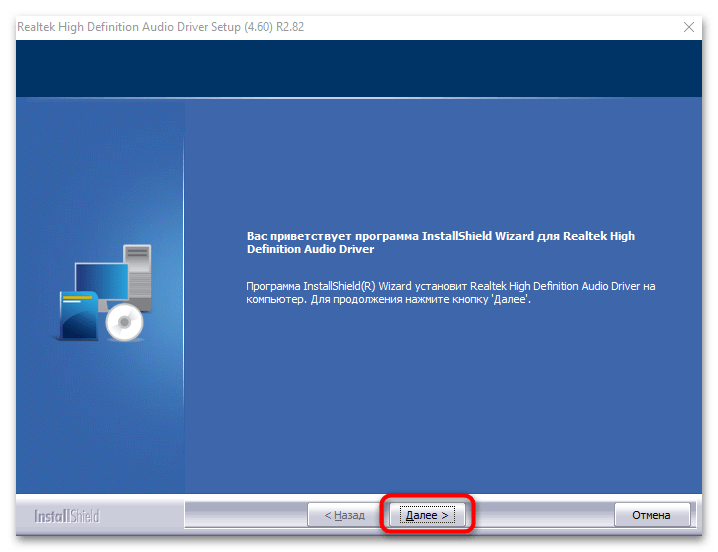
- Запустится пошаговый мастер. Нажмите на кнопку «Далее», чтобы продолжить установку.
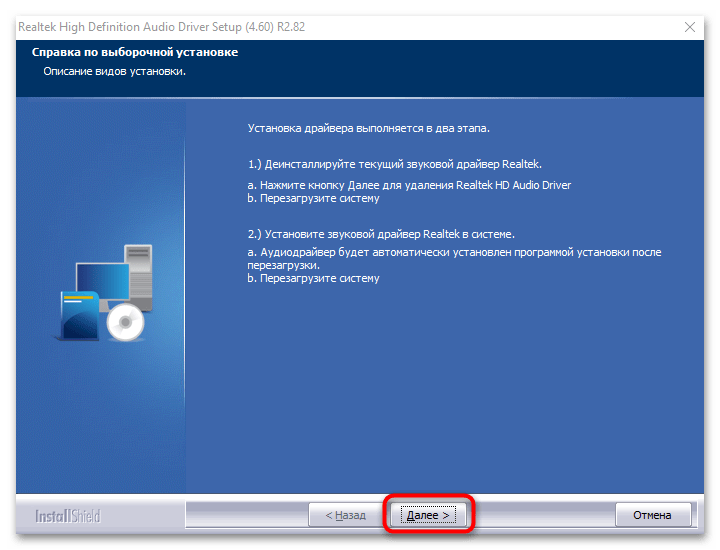
- В следующем окне появится небольшая инструкция. Ознакомьтесь с ней и продолжите инсталляцию.
- Если вы пропустили первый шаг с ручным удалением, мастер установки автоматически удалит обнаруженное старое программное обеспечение. Затем начнется установка нужных компонентов. Это может занять некоторое время.
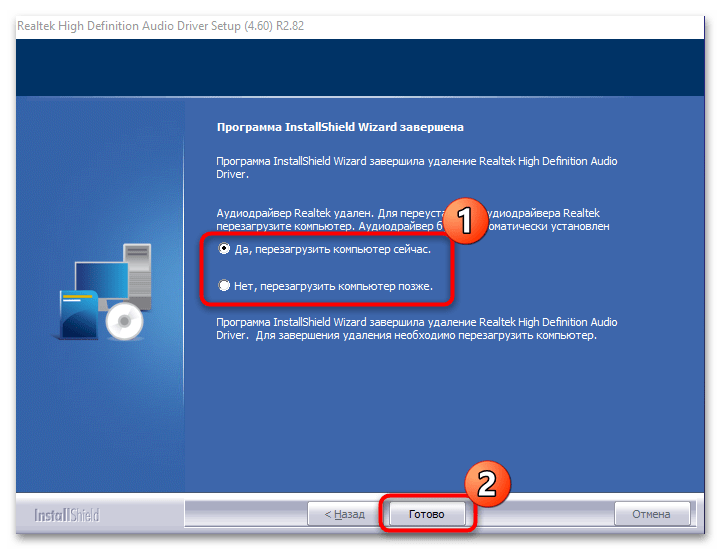
- Когда все будет установлено, программа предложит перезагрузить устройство. Чтобы звук снова появился, рекомендуется сделать это. Но также можно отложить перезапуск на более удобное время. Нажмите кнопку «Готово».
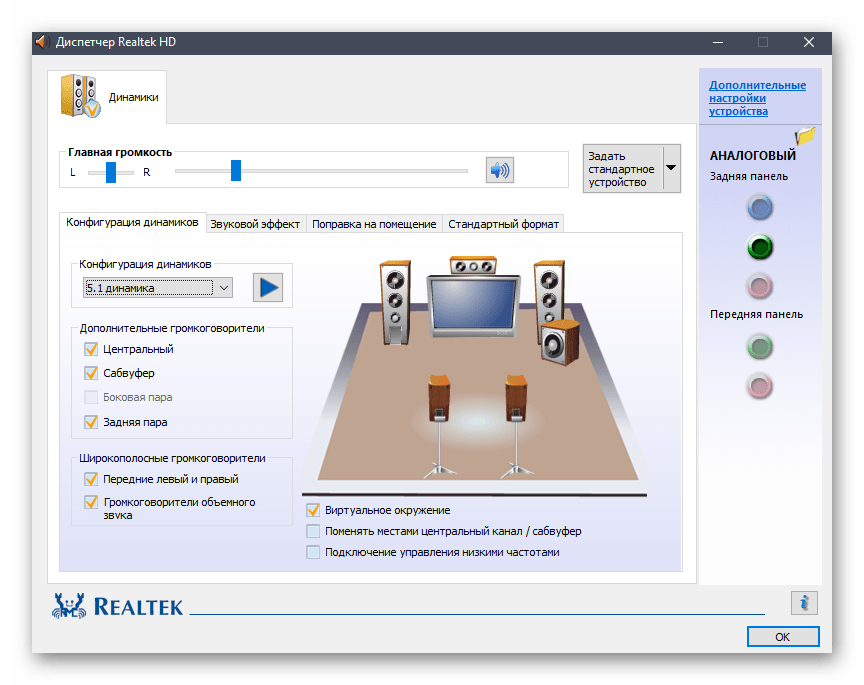
На этом установка Realtek HD завершена. Приложение для дополнительной настройки звука (оно называется Диспетчер Realtek HD) можно найти среди установленного софта, например через поиск в «Пуске» по запросу «realtek». Если не удается найти данную программу, читайте статью дальше.
Кстати, вы также можете устанавливать любые драйверы при помощи специальных помощников.
Подробнее:
Программы для установки драйверов
Как обновить драйверы на компьютере
Возможные проблемы
Если во время установки возникли какие-либо проблемы, то решить большинство из них можно самостоятельно.
Realtek HD не устанавливается
Нередко причиной становится конфликт программного обеспечения или несовместимая с операционной системой версия драйвера. Бывает, что установка Realtek HD не удается из-за неполадок со звуковым оборудованием или чипом на материнской плате; неполадки в Windows также могут стать причиной неудачной инсталляции. Большинство проблем и путей их решения разобрано в нашем отдельном материале.
Подробнее: Не устанавливается Realtek HD в Windows 10
Отсутствует ярлык для запуска / Не стартует вместе с Windows / Автоматически закрывается
Самая распространенная проблема с уже установленным Realtek HD – это отсутствие иконки Диспетчера в трее или значка на рабочем столе. Кроме того, из-за разных сбоев этот Диспетчер может автоматически закрываться или даже не запускаться вместе с операционной системой. Как исправить открытие данного приложения, можете узнать из следующего материала.
Подробнее: Как открыть Диспетчер Realtek HD в Windows 10
Диспетчер Realtek HD не запускается
Если установленный Диспетчер Realtek HD не запускается, источник проблемы следует искать в операционной системе. Наш автор в отдельной инструкции объяснял, что делать в этой ситуации, даже если звуковое оборудование не отображается в «Диспетчере устройств».
Подробнее: Не открывается Realtek HD в Windows 10
Диспетчер пропал из «Панели управления»
Если вы привыкли запускать Диспетчер Realtek HD через «Панель управления» Windows, но теперь его значка там нет, вывести его можно через «Параметры» Windows 10. Существуют альтернативные методы запуска, о которых можно узнать из отдельного руководства на нашем сайте.
Подробнее: Нет значка диспетчера Realtek HD в «Панели управления»
Наша группа в TelegramПолезные советы и помощь
If you are facing “Microphone not working on Windows 10” issue, “No Sound Issue” or “Sound is muffled”, then you are in right place. Here, we are discussing about “How to Fix Windows 10 microphone not working Realtek” in details and providing some recommended tips to fix this issue on Windows devices. Let’s starts the discussion.
What is Realtek microphone driver Windows 10?
Realtek is Taiwan based producer of Microchips and produce & distribute communication Network ICs (Integrated Circuits), Computer Peripherals ICs, and multimedia ICs. Most Motherboard manufacture purchase ICs from them for different components including Audio Chips that require the latest driers in order to work properly.
Realtek Company offers drivers for the ICs. When we talk about Microphone, the company offers Realtek microphone driver for Windows 10/8.1/8 or other version Windows Operating System based devices. The Microphone driver is required to communicate your microphones with your Operating System. In other word, we can say that Mic driver acts as mediator between microphone device and Operating System version like Microsoft Windows or other OS you have.
Now comes to matter, many Windows users reported about “Windows 10 microphone not working Realtek” on various online platforms including Microsoft Official forum site and Realtek Official forum site as well, and asked for the solution. Users explained that they found internal Microphone not working properly on Windows 10. Let’s take have a look at one user report,
“I have been looking for months for Microphone and had just purchased one recently and the thing has not cooperated with me one bit. Is there any solution?”
Users reports indicate that something went wrong with their Windows 10 computer in which their Microphone or headset mic doesn’t work. It can extremely frustrating doing audio and video calls or even during entertaining activities like video gaming or singing. If you are one of them who are facing the same, then you can follow our instructions to fix.
Since, Microsoft releases many updates to fix numerous problems especially when we talk about Windows 10 microphone not working Realtek, Microsoft with Realtek has resolved this issue with its latest updates. However, many users are still facing Realtek microphone driver not working issue on Windows 10. Don’t be panic, please read & follow the instructions given below.
Reasons behind Windows 10 microphone not working Realtek
- It might possible to get this error when microphone itself or audio port you are using, has been corrupted or not working
- Microphone not working error might occur if microphone is disabled for specific application. With your settings, you can enable microphone and check if it works.
- It might possible that your microphone is muted and result of it, you are getting no sound. So, you can simply raise volume of microphone or unmuted the microphone to fix.
- Missing, outdated, corrupted Microphone driver or audio driver causes “No Sound Issue”
- Missing or corrupted Windows update causes serious issues like Windows 10 microphone not working Realtek
- “No Sound” issue or “Realtek microphone driver not working on Windows 10” issue can cause malfunctioning in System drivers.
[Tips& Tricks] How to fix Windows 10 microphone not working Realtek?
Procedure 1: Check Microphone Driver
Step 1: Press “Windows + X” key together from keyboard and select “Device Manager”
Step 2: In the opened “Device Manager” window, locate “Sound, video and game controllers” and expand it
Step 3: You will see “Intel (R) Audio Display” and “Realtek High Definition Audio” under “Sound, video and game controllers” section
Step 4: Right-click on “Intel (R) Audio” and select “Properties”
Step 5: In the opened “Properties” window, click on “General” tab and check to see if the device is working properly.
Step 6: If it is not working properly, then click on “Driver” tab and select “Update” options
Step 7: Once done, restart your computer and check if “No sound” issue is resolved.
Note: you can repeat these steps to check & update other audio drivers.
Procedure 2: Check Sound Settings
Step 1: Right-click on “Speaker icon” at far right corner in Taskbar and select “Sound” options
Step 2: In the “Recording” tab, click on “Microphone” and select “Properties” options
Step 3: Go to “Levels” tab and increase the volume of both Microphone and Microphone Boost
Step 4: Now, go to “Enhancement” tab and check the “Immediate Mode”
Step 5: Finally, click on “Apply” and “Ok” to save changes and then restart your computer.
Procedure 3: Run Sound Troubleshooter
Step 1: Right-click on “Sound” icon at far right corner of Taskbar and select “Troubleshoot Sound Problems”
Step 2: This process will detect any problems exists with your audio and recommended fixes for you.
Step 3: Wait to complete the process. Once done, please check if Windows 10 microphone not working Realtek is resolved.
Procedure 4: Modify Privacy Settings
Step 1: Press “Windows + I” key together from keyboard to open “Settings” App
Step 2: Go to “Privacy > Microphone”
Step 3: Click on “Change” under “Allow apps to access your microphone”
Step 4: Now, scroll down and head over to “Choose which apps can access your Microphone”. You can allow any apps for this
Step 5: Once done, please check if the issue is resolved.
Procedure 5: Re-enable Realtek microphone driver Windows 10
Step 1: Press “Windows + R” key together from keyboard to open “Run Dialog Box”
Step 2: In the opened “Run Dialog Box”, type “devmgmt.msc” and hit “Ok” button to open “Device Manager”
Step 3: In the opened “Device Manager” window, locate “Audios, inputs and outputs” and expand it
Step 4: Right-click on your microphone and select “Disable Device”
Step 5: Wait for 5-10 seconds and then right-click on your Microphone again and select “Enable Device”. Once done, please check if Windows 10 microphone not working Realtek is resolved.
Procedure 6: Update Realtek microphone driver Windows 10
Step 1: Press “Windows + X” key from keyboard and select “Device Manager”
Step 2: Locate “Audio inputs and outputs” and expand it
Step 3: Right-click on your Microphone driver and select “Driver”.
Step 4: In the next window, click on “Search automatically for updated driver software”. This process will automatically install the latest Microphone driver software on machine.
Step 5: Once done, restart your computer and please check if the error is resolved.
Procedure 7: Check for Windows update
Step 1: Go to “Settings App > Update and Security > Windows update”
Step 2: Click on “Check for updates” under “Windows Update” section.
This process will automatically install the available updates in your Windows devices.
Procedure 8: Perform System Restore
System Restore reverts everything to a saved restore point, but you must have created restore point to use this tool. You can apply this method if your microphone stopped working recently and restore your System to such System restore points were created before you started experiencing issues with microphone. To do so, you can read & follow the steps below.
Step 1: Press “Windows + R” keys together from keyboard to open “Run Dialog Box”
Step 2: In the “Run Dialog Box”, type “rstrui.exe” and hit “Ok” button
Step 3: In the opened “System Restore” window, click on “Next”
Step 4: In next window, check the “Show more restore points” checkbox to see more restore points
Step 5: Select any one restore point from list depending to the time created and hit “Next”
Step 6: Do not select a restore point at time when the microphone problem were already preset. And if you are sure that this is correct restore point, then hit “Finish” button to starts restore operation
Step 7: Once done, please check if the problem is resolved.
Conclusion
I am sure this article helped you to “fix Realtek microphone driver not working on Windows 10” with several easy methods. You can follow one or all procedures to fix this issue.
You can also try another possible solution to fix Windows 10 microphone not working Realtek issue. We recommended you to Repair your PCs/Laptops with powerful PC Repair Software/tool that has the ability to delete all viruses or malware, remove faculty software, clean System registry, fix all types of bugs or errors and improves System performance as well.
Is the Realtek HD Audio Manager missing or not opening on your PC? For whatever reason, it is happening, it can be fixed by downloading or updating Realtek Audio Console. Here we explain different ways to do it.
Quick Tip:- Visit the Realtek website to manually download and manually update drivers for Windows 10,11. Search for the device model number > download the driver setup file > run the installation wizard, and update the driver.
If manually updating the driver is not sounding great, try Advanced Driver Updater to update the Realtek audio driver and fix audio issues. To get the tool, click the button below:
What is Realtek Audio Console?
Also known as Realtek Audio Control, it is an interface that helps adjust audio device effects and all the audio device settings. Once an audio device is connected using Realtek Audio Console, you can adjust the microphone and speaker setting as it picks the audio configuration. You can also use it to adjust the volume for each speaker individually.
What Happens When Realtek High Definition Audio Is Outdated?
Realtek High Definition Audio Driver is a common Sound driver for Windows PC, and it helps manage surround sound, Dolby, and DTS sound systems. This makes the driver essential for the audio device to work. Therefore, when it is uninstalled, you face severe audio errors.
How To Open Realtek Audio Console?
If the Realtek audio console is not opening or you cannot find Realtek Audio Console in the System Tray, follow these steps to open it.
1. Press Windows + E to open File Explorer.
2. In the address bar, copy C:\Program Files\Realtek\Audio\HDA\ and press the enter key.
This will open the target directory.
3. Look for the RtkNGUI64 file and double-click it to open Realtek HD Audio Manager in Windows 10.
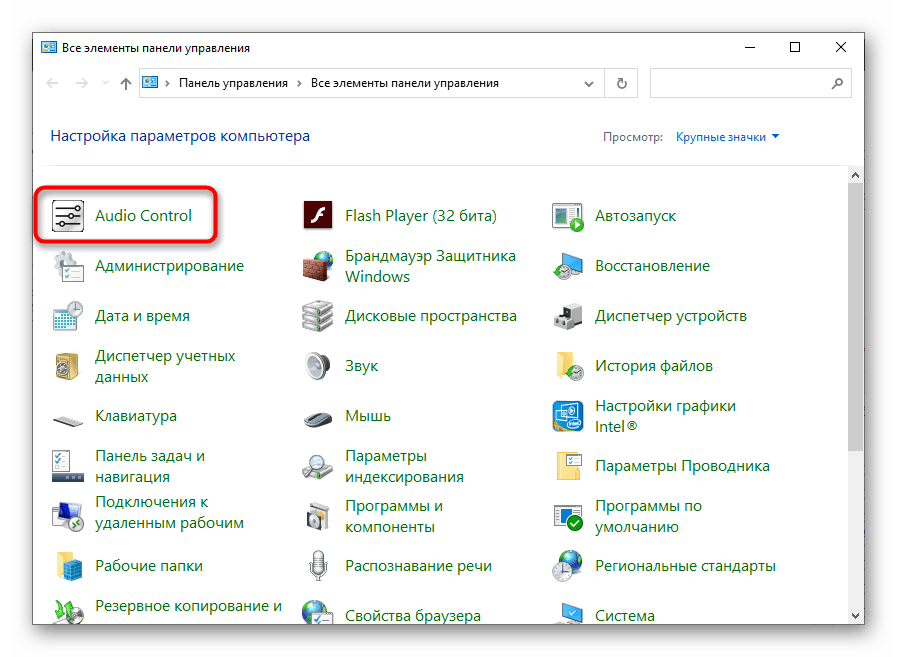
Alternatively, press Windows + R in the Run window type control panel and press the Enter key. View by Small icon > Look for Realtek HD Audio Manager and click on it to open it.
The same steps will work to open the Realtek audio console o Windows 11.
Common Realtek Audio Issues
Before we learn how to download and fix audio issues, let us know the problems we might encounter.
- Missing Audio Manager Icon: After updating Windows, the issue is usually related to outdated or corrupt drivers if you find the Realtek HD icon missing.
- Conflicts with Already installed Microsoft Drivers
Check This- How to Update Realtek Wi-Fi Driver on Windows PC
Download and Update Realtek Audio Console on Windows 10/11
If you’ve recently updated your Windows, after which you are facing audio issues, the first troubleshooting step should be to use the Realtek audio console download. This can be done manually, or you can use Advanced Driver Updater, the best tool to update drivers.
It would be best to have time, patience, and technical knowledge to update drivers manually. To use Advanced Driver Updater, none is required. The tool will scan the system for outdated drivers and show the latest and compatible updates.
Also, updating the driver will create a backup of old drivers. We will explain how to use the driver updating tool and the manual method.
Method 1 – Manual Way to Update Realtek Audio Console Driver
Update audio driver via Windows Update
1. Press Windows + I to open Windows Settings > select Update & Security.

2. Click Check for Updates to download and install the latest updates.

3. If running the updated version of Windows, you will see another option – View optional updates. Click on it to see if any driver update is available.
4. After clicking the down arrow, if you see Driver updates > double click on it and look for the update for sound driver.

5. If available > select > download and install it.
6. Restart the PC to apply changes.
Must Read
Update via Device Manager
1. Press Windows + X > Device Manager
2. Find Sound, video, and game controllers > expand it.
3. Right-click the Realtek High Definition Audio > Update driver.

4. Select, Search automatically for drivers.

5. Wait for Windows to look for an available update; it will automatically update.
6. Restart the system to check whether the problem is solved.
See Here- Update Realtek PCIe GbE Family Controller Driver
Download and Update Audio Driver via the Manufacturer’s Website
If the Device Manager did not help with Realtek audio console update, visit the manufacturer’s website to download the latest driver update.
- Visit the manufacturer’s website and download the sound driver.
- After that, follow the steps to update the sound driver.
1. Press Windows + X > Device Manager
2. Go to Sound, video, and game controllers > double-click on it.

3. Right-click the Realtek High Definition > Update driver.
4. Click, Browse my computer for drivers.

5. Next, click Browse > Go to the location where you have saved the sound driver.

Alternatively, you can use it. Let me pick a list of available drivers on my computer and browse the location where the driver is saved.
6. Click Next and follow the on-screen instructions to download the sound driver.
7. Restart the computer and check whether the problem is fixed.
Alternatively, you can download the Realtek Audio Control app for free from Microsoft Store. You can use it on the latest Windows, 32-bit, and 64-bit versions.
Downloading Realtek Audio Console from MS Store
1. Visit https://apps.microsoft.com/store/detail/realtek-audio-control/9P2B8MCSVPLN
2. Click on the Get in Store app.

3. Select Open Microsoft Store.

4. Click the Get button.

5. Let the installation finish, and use the app.
Read Also- How To Update And Download Realtek 802.11 N WLAN Adapter Driver- Windows 11, 10
Method 2 – Automatically Update Realtek Driver Using Advanced Driver Updater
To use Advanced Driver Updater and update the audio driver, follow the steps below:
1. Download and install Advanced Driver Updater
2. Run the best driver updater and click Start Scan Now.

3. Wait for the scan to finish.

4. Once done, look for the sound driver and click the Update driver next.

Note : If you use the product as a trial user, you must update each driver individually. However, once you upgrade to the Pro version, you can update all outdated drivers by clicking Update All. Also, this user-friendly driver updater comes with a 60-day money-back guarantee.
5. After updating the audio driver, restart the computer.
This should help fix the sound issue you were facing on your PC.
Frequently Asked Question
Fix – Realtek Audio Console Not Working
Using these steps, you can update Realtek Audio Console on Windows 11, 10, 8 & 7. If you don’t like time-consuming procedures, use Advanced Driver Updater to detect and update any corrupt drivers easily.
We hope you liked the article and were able to download the Realtek Audio Driver. If you have any suggestions, do share them in the comments section. Also, you can contact the support team at support@systweak.com for any product-related queries.
Read Here- How to Download and Update Realtek HD Audio Manager on Windows PC