
If you have noticed that in the Realtek Audio Console, there is no Equalizer in Windows 11/10, you are not alone. Many users are in the same boat, and this can be due to various reasons. It can be outdated drivers, incorrect settings, or even software conflicts. Fortunately, there are several ways to resolve the issue which we are going to explore in this article.

If Realtek Audio Console has no Equalizer in Windows 11/10, execute the solutions mentioned below.
- Disable DTSAPO3Service
- Update or reinstall the audio driver
- Install Custom Realtek audio drivers
- Roll back to the previous version of the driver
- Enable or disable Audio Enhancement
- Reinstall Realtek software
- Use Realtek alternatives
Let’s get started with the troubleshooting guide.
1] Disable DTSAPO3Service
DTSAPO3Service can often override or interfere with Realtek’s built-in features and, therefore, cause conflicts between DTS audio processing and the Realtek Audio Console. In this solution, we will disable the service to regain control over audio settings.
- Click Win + R to open the Run dialog box, type services.msc, and hit the OK button.
- Find DTSAPO3Services, double-click on it, and navigate to the Startup Type drop-down menu.
- Set it to Disabled mode, click on the Stop button, and hit the Apply and OK buttons to save the changes.
Once done, check whether the Equalizer is visible. If it is still missing, slide to the next solution.
2] Update or reinstall the audio driver
Next up, you need to check if there is an update available for your audio drivers and install it. You can download the latest version of the Audio driver and see if that helps. In case that is to no avail, let us remove the current installation of the audio driver and install a fresh one. To do so, follow the steps mentioned below.
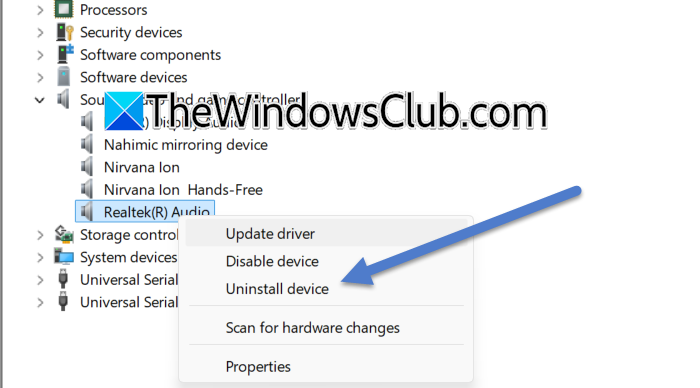
- Open the Device Manager.
- Expand Sound, video, and game controller.
- Right-click on the Realtek audio driver and select Uninstall device.
- Click Yes when the prompt appears.
- Finally, run the Audio driver we asked you to download earlier to install it.
Hopefully, this will do the job for you.
3] Install Custom Realtek audio drivers
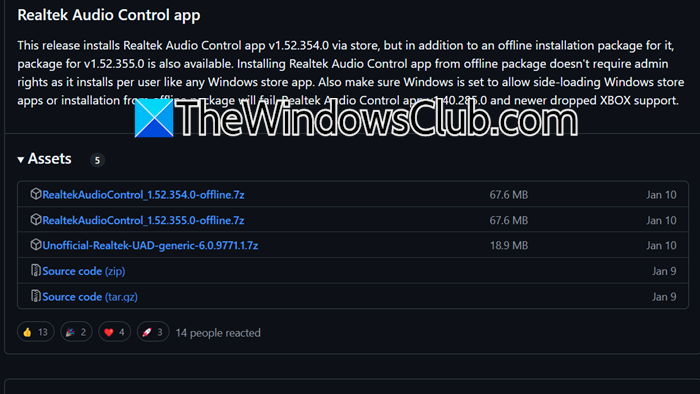
When standard drivers fail to provide full functionality or compatibility, installing custom Realtek audio drivers is necessary. To proceed, first uninstall any existing Realtek drivers and remove premium audio software, if any, as such apps may interfere with Realtek features. Once done, visit github.com to view Realtek UAD Github page to download the required files and refer to the instructions provided for the proper installation. Navigate to the next solution if the issue persists after installing the custom Realtek audio drivers.
4] Roll back to the previous version of the driver

If the issue started right after updating the driver, it could be due to compatibility issues or bugs introduced by recent updates. To rule out this possibility, follow the steps mentioned below, as we will roll back to the previous version of the driver.
- Click Win + X to open the Quick Link Menu, and select Device Manager.
- Next, expand the Sound, video, and game controllers category and right-click on the audio device.
- Once the Properties window appears on the screen, navigate to the Driver tab, and click on the Roll Back Driver option.
See if the Equalizer is available; proceed to the next step if the issue persists.
5] Enable or disable Audio Enhancement
Audio Enhancement is a feature that improves sound quality by applying processing effects. These enhancements can sometimes cause conflicts. In our situation, we recommend disabling the feature to revert to basic sound processing to resolve conflicts or compatibility issues that may cause the equalizer to disappear. However, if it is disabled, enable it to potentially restore the equalizer.
- Open the Control Panel, go to Sound, and go to the Playback tab.
- Right-click on the default device and then navigate to the Advanced tab.
- In the Signal Enhancement section, uncheck the Enable audio enhancement option to disable it, and if it was already disabled, tick the box to enable it.
- Lastly, click the Apply and OK buttons to save the changes.
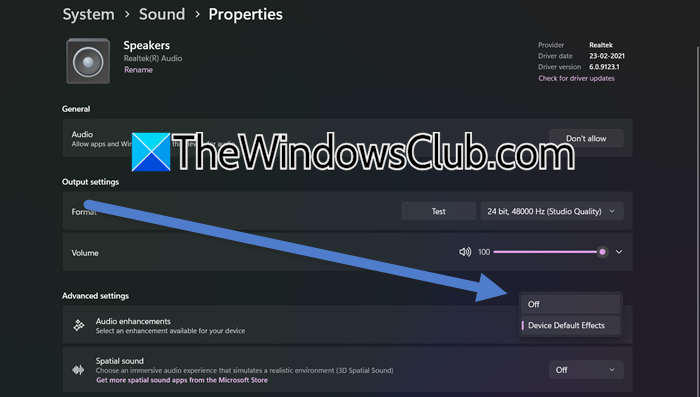
- Alternatively, users can navigate to Settings > System > Sound. Under the Output section, select the audio device, navigate to the Audio Enhancement option, and set it to Off.
After completing the process, see if the Equalizer is now accessible. If it’s still missing, continue with the next solution.
6] Reinstall Realtek software
A corrupted installation or stubborn residual files can prevent the equalizer from appearing in the Realtek Audio Console. However, this can be easily fixed through a fresh installation, which removes corrupted configurations and reinstalls necessary drivers. Here’s how to do the same.
- Click Win + I to open Settings, go to Apps, and then click on Installed apps.
- Find the Realtek Software, and click on the three dots option.
- Select Uninstall and follow the on-screen procedure to do the same.
- Now, go to the Microsoft Store, download Realtek Audio Console, and follow the steps to complete the process.
The problem should be resolved.
7] Use Realtek Alternatives
Last but not least, don’t fret if the equalizer continues to be invisible in the Realtek Console; there are several options available in the market that users can explore. Dolby Atmos stands out as one of the top-notch contenders, which is known for its premium sound quality and advanced customization features, and therefore provides immersive audio experiences. Next, we have EqualizerAPO, which is favored by users for its lightweight nature and extensive audio customization capabilities.
There are more options, such as FxSound, previously known as DFX Sound, which offers user-friendly presets and customizable settings, whereas Boom 3D excels in delivering 3D surround sound and comes equipped with an auto-calibration feature. Lastly, we have EasyEffects, an open-source tool that offers flexibility and advanced features like a parametric equalizer and dynamic range compression.
Read: Realtek Audio Console not detecting Headphones
How to fix Realtek audio No sound in Windows 11?
To fix the No audio issue in Realtek audio, proceed by checking connections and volume settings. If there are no issues with the settings, run the Audio Troubleshooter, ensure that Realtek is set as the default, and update the drivers. If needed, restart the Windows Audio services, and hopefully, there won’t be any problems regarding the sound.
Read: Realtek Audio Console doesn’t support for this machine
What equalizer setting is best for music?
The best equalizer settings vary from person to person since they depend on personal preference and genre. However, a flat ‘EQ’ where all frequency bands remain at their default levels is often recommended for the most accurate and natural sound reproduction.
Also Read: Realtek Audio Console Connector Retasking greyed out.
-
Home
-
News
- Realtek Equalizer Windows 10 for Realtek HD Sound
By Alisa |
Last Updated
The Realtek equalizer Windows 10 controls the Realtek HD sound. This post from MiniTool Software teaches you how to how to open Realtek equalizer in Windows 10 and adjust Realtek audio equalizer settings, how to fix Realtek equalizer missing or not working issues, etc.
What is Realtek equalizer in Windows 10 and how to open and adjust its settings or troubleshoot its issues? Check the answers in this post.
Realtek Equalizer Windows 10
What is Realtek equalizer?
Realtek sound card features a graphic equalizer to let users freely adjust the computer sound. You can go to Realtek equalizer settings window to make proper adjustments for Windows 10 audio.
Realtek equalizer comes along with Realtek sound card in your Windows 10 computer and should work only if the Realtek High Definition Audio driver has been installed.
How to Open Windows 10 Realtek Equalizer
You can open Realtek equalizer in Windows 10 and adjust its settings if you like. Generally, you can access the default Realtek equalizer from Sound settings.
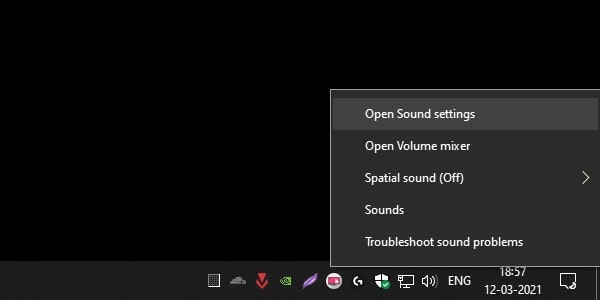
- Right-click Sound icon at the bottom-right corner of Windows taskbar and select Sounds.
- Under Playback tab, right-click Speakers and select Properties.
- Click Enhancements tab and click Equalizer. Click the drop-down icon next to Setting to choose an audio equalizer option.
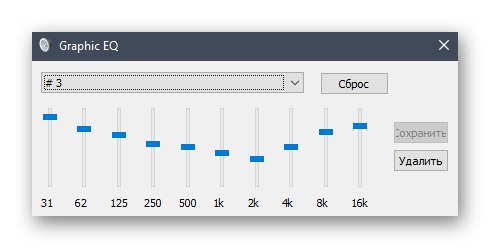
- You can also click the three-dot icon next to Setting to open Graphic EQ to adjust its settings.
Fix Realtek Equalizer Windows 10 Missing or Not Working
Fix 1. Open Realtek Audio Manager to access Realtek equalizer. You can press Windows + R, type C:\Program Files\Realtek\Audio\HDA\ in Run box, and press Enter. Then double-click RtkNGUI64 file to open Realtek HD Audio Manager. Then you can click Equalizer to choose a preferred equalizer setting for Realtek audio. Here you can also click Change to Graphic EQ icon under EQ to activate Realtek sound card equalizer in Windows 10.
Tip: If your computer doesn’t have Realtek HD Audio Manager, you can check how to get Realtek HD Audio Manager download for Windows 10.
Fix 2. If the Realtek equalizer is disappeared from your Windows 10 computer, you can go to Realtek official website to download and install the latest Realtek High Definition Audio driver to make Realtek equalizer work.
Fix 3. Update Realtek High Definition Audio driver. Press Windows + X and select Device Manager to open Device Manager in Windows 10. Expand Sound, video and game controllers. Right-click Realtek High Definition Audio and click Update driver.
Fix Realtek No Enhancements Tab
Some users may find that there is no Enhancements tab in the Speakers Properties window. You can follow the steps to fix Enhancements tab missing issue.
- Press Windows + X and select Device Manager.
- Expand “Sound, video and game controllers” category.
- Right-click Realtek High Definition Audio and select Disable device
- Right-click Realtek High Definition Audio again and select Update driver.
- Click Browse my computer for driver software and select High definition audio device to install the High Definition Audio Device driver.
This should replace the Realtek Audio driver and install the default High Definition Audio Device driver in Windows 10, and get back the Enhancements tab in the Speakers Properties window.
8 Best Free Equalizer for Windows 10 for Better Sound
If you are looking for a top third-party sound equalizer for Windows 10, here we list the top 8 free Windows 10 audio equalizers for you. They are Equalizer APO, Realtime Equalizer, Viper4Windows, FXSound, Boom3D, Graphic Equalizer Studio, Breakaway Audio Enhancer, and EqualizerPro.
About The Author
Position: Columnist
Alisa is a professional English editor with 4-year experience. She loves writing and focuses on sharing detailed solutions and thoughts for computer problems, data recovery & backup, digital gadgets, tech news, etc. Through her articles, users can always easily get related problems solved and find what they want. In spare time, she likes basketball, badminton, tennis, cycling, running, and singing. She is very funny and energetic in life, and always brings friends lots of laughs.
Все способы:
- Способ 1: Сторонние программы
- Способ 2: Диспетчер Realtek HD Audio
- Способ 3: Панель управления звуком
- Вопросы и ответы: 3
Сейчас даже встроенные в материнские платы звуковые карты способны выдавать качественное звучание, однако иногда желаемого результата не получается достичь из-за каких-либо недостатков используемого оборудования для воспроизведения звука. Частично поправить эту ситуацию позволяют настройки эквалайзера — системного элемента операционной системы, который отвечает за регулирование частот и позволяет добиться требуемого звучания. Для начала эту опцию придется включить, чтобы потом настроить по личным предпочтениям. Именно о первоочередной задаче и пойдет речь далее на примере последней версии Windows.
Способ 1: Сторонние программы
В качестве первого варианта активации эквалайзера предлагаем рассмотреть сторонние программы для настройки звука. Зачастую их функциональность просто больше той, которую предлагают встроенные в операционную систему средства. Представителей такого софта существует огромное количество, поэтому все их не получится рассмотреть, а в качестве примера сегодня мы взяли ViPER4Windows.
Скачать ViPER4Windows
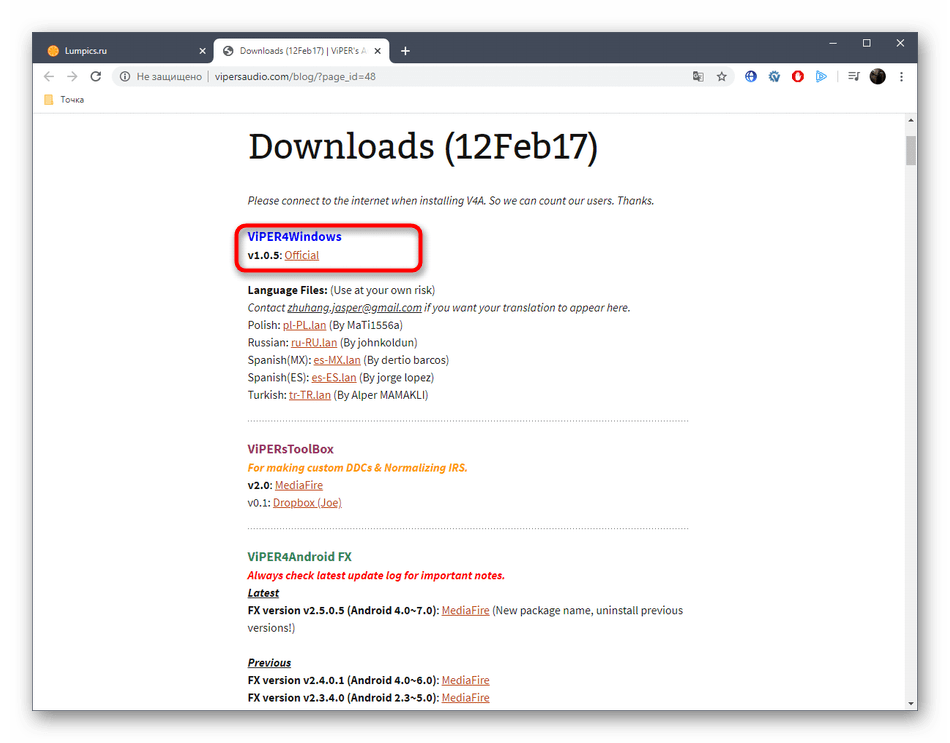
- Любой сторонний софт сначала нужно скачать и инсталлировать. Загрузку лучше производить с официального сайта, чтобы не заразить компьютер вирусами. Что касается ViPER4Windows, то перейти к скачиванию вы можете, кликнув по кнопке-ссылке выше.
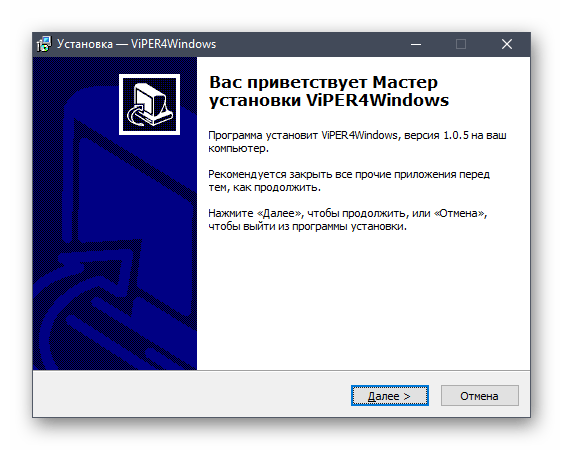
- После скачивания производится стандартная установка, поэтому мы не будем делать акцент на этом аспекте.
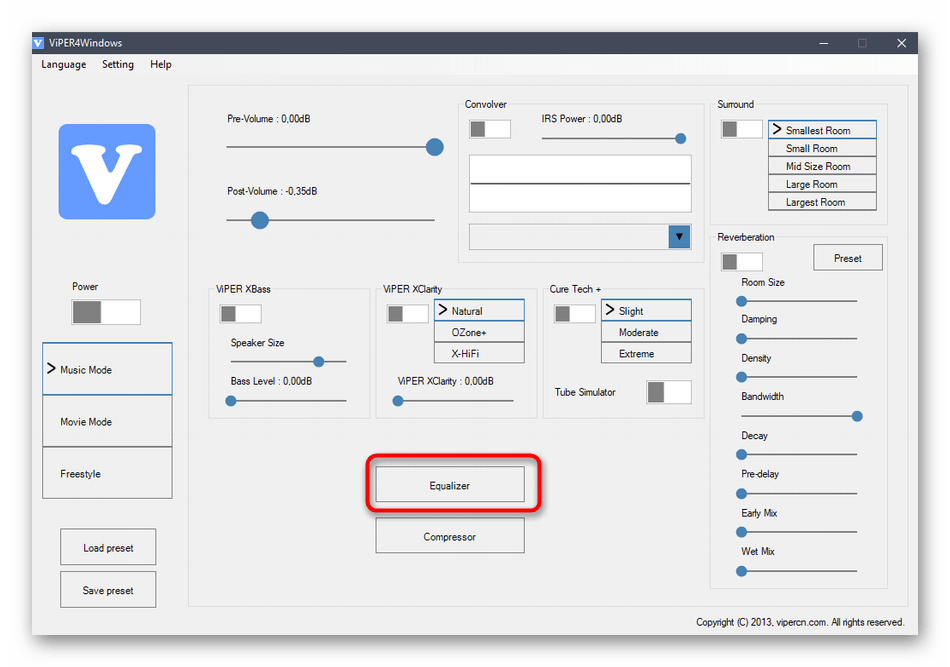
- При первом запуске программы вы можете ознакомиться с ее основными инструментами и опциями, чтобы понять, какое именно влияние на качество воспроизведения она способна оказать. Затем переходите к настройкам эквалайзера, щелкнув по соответствующей кнопке.
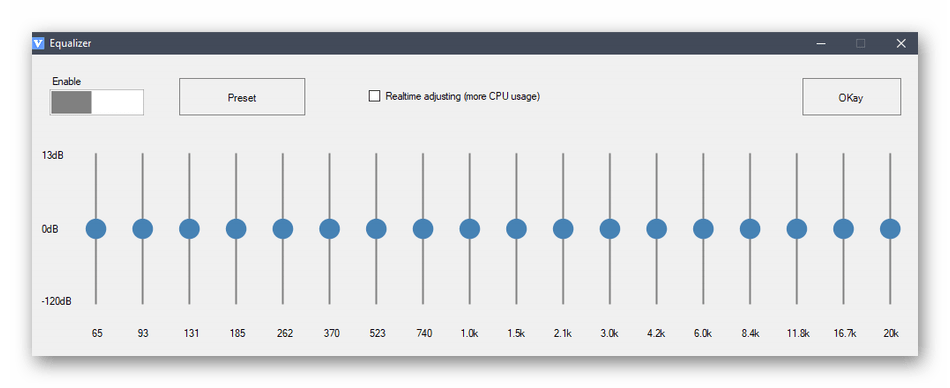
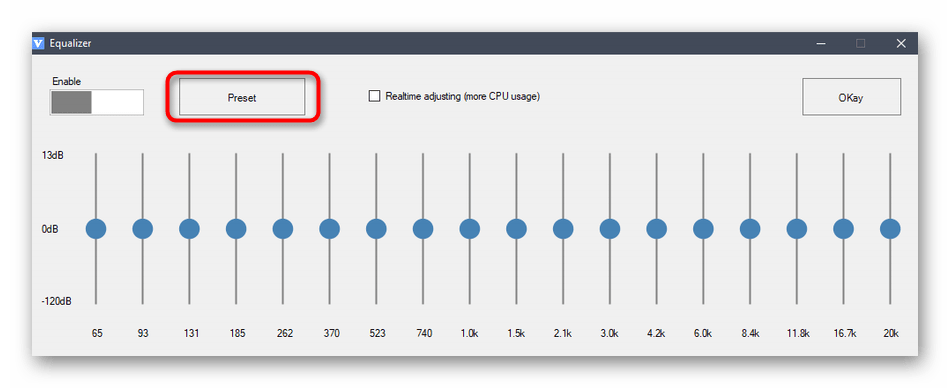
- В открывшемся окне присутствует множество полос с разным частотным диапазоном. Начните их регулировать и прослушивайте изменения в режиме реального времени, чтобы достичь нужного эффекта.
- Обратите внимание и на кнопку «Preset». При нажатии по ней откроется окно с уже заранее заготовленными конфигурациями по разным музыкальным жанрам.
- Если вас удовлетворит один из имеющихся профилей, просто выберите его и сохраните изменения.
Примерно по такому же принципу функционируют и другие программы для настройки звука, внутри которых имеется собственный настраиваемый эквалайзер. Если рассмотренное выше приложение пришлось вам не по нраву, предлагаем ознакомиться со списком альтернативных решений, прочитав обзоры по следующим ссылкам.
Подробнее:
Программы для настройки звука
Программы для усиления звука на компьютере
Способ 2: Диспетчер Realtek HD Audio
Этот метод подойдет всем тем пользователям, кто обладает звуковыми картами от компании Realtek. Сейчас практически все материнские платы имеют звуковую составляющую именно от этой компании, поэтому с настройкой эквалайзера не должно возникнуть никаких проблем. Однако перед началом выполнения следующих действий мы рекомендуем убедиться в том, что все необходимые драйверы и сама панель управления установлены в ОС. Справиться с этой задачей можно, изучив отдельное руководство на нашем сайте по ссылке далее.
Подробнее: Скачиваем и устанавливаем звуковые драйвера для Realtek
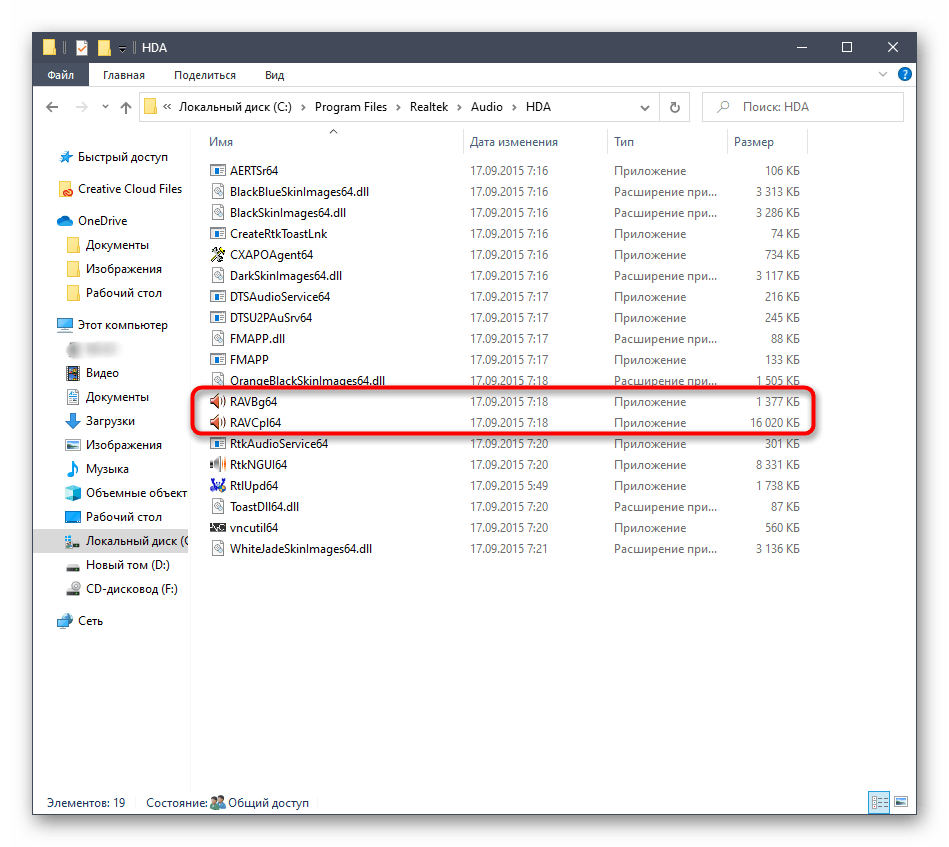
- В первую очередь для настройки эквалайзера нужно открыть Диспетчер Realtek HD. Делается это, например, через значок на панели задач или исполняемый файл в папке с компонентом. Более детально обо всех методах открытия Диспетчера читайте в другой статье на нашем сайте, кликнув по следующей ссылке.
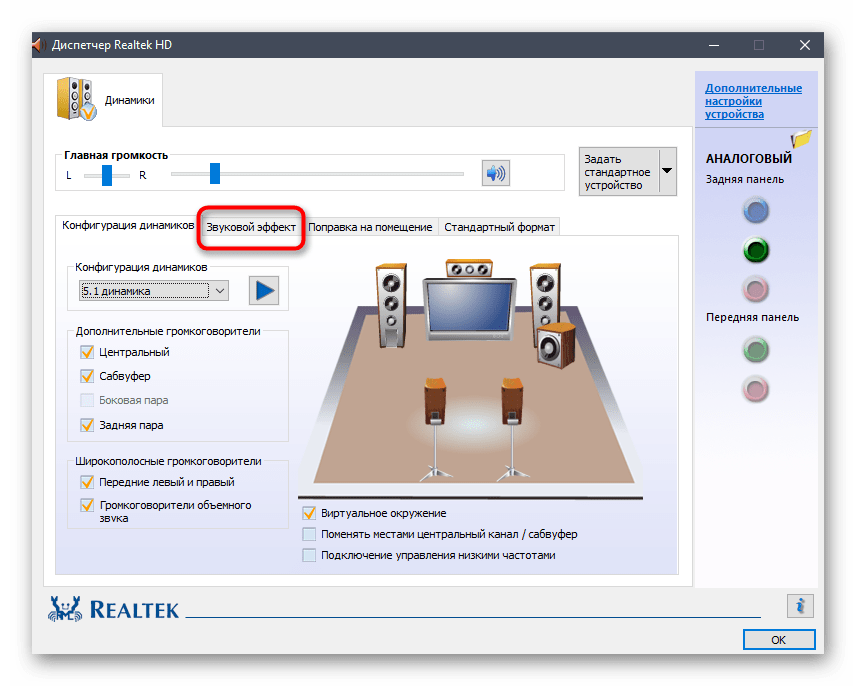
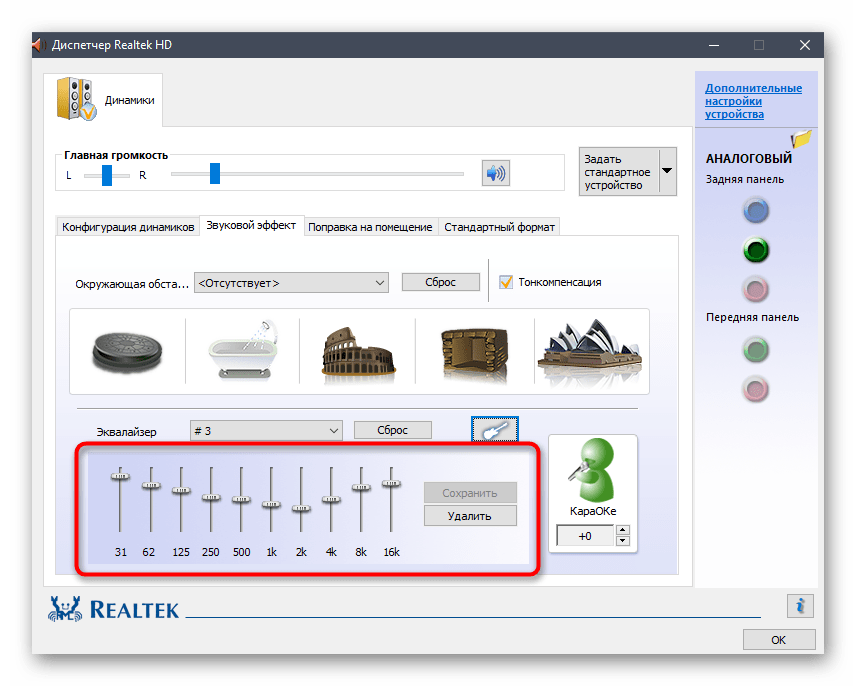
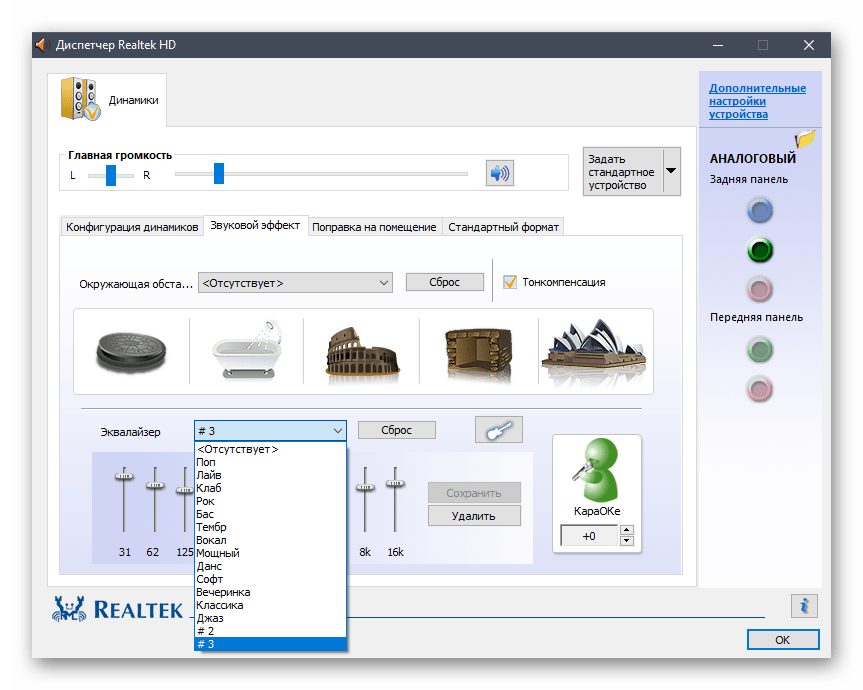
- После запуска переместитесь в раздел «Звуковой эффект».
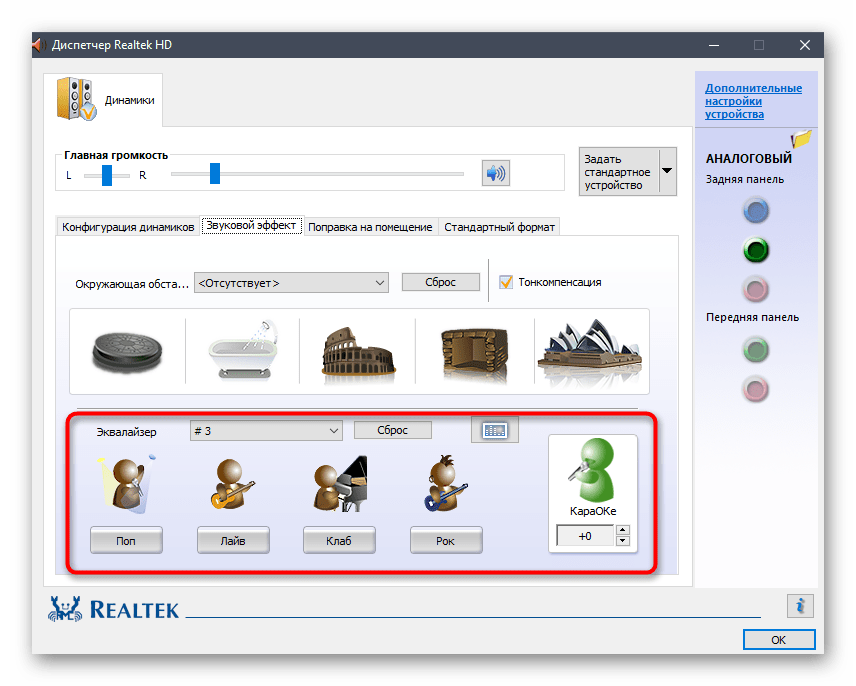
- Здесь вы можете сразу же задать настройку эквалайзера, используя имеющиеся заготовки. Если нужно настроить его самостоятельно, щелкните левой кнопкой мыши по специально отведенной кнопке.
- Осталось только отрегулировать частоты и сохранить изменение в виде отдельного профиля, задав ему соответствующее название.
- Теперь можно переключаться между своими профилями и заготовками, развернув всплывающее меню и выбрав желаемый пункт.
Подробнее: Методы открытия Диспетчера Realtek HD в Windows 10
Способ 3: Панель управления звуком
В операционной системе Windows 10 имеется меню, в котором можно настраивать звук, включая эквалайзер. Если предыдущие два метода вам не удобны, рекомендуем воспользоваться этим, поскольку он является завершающим.
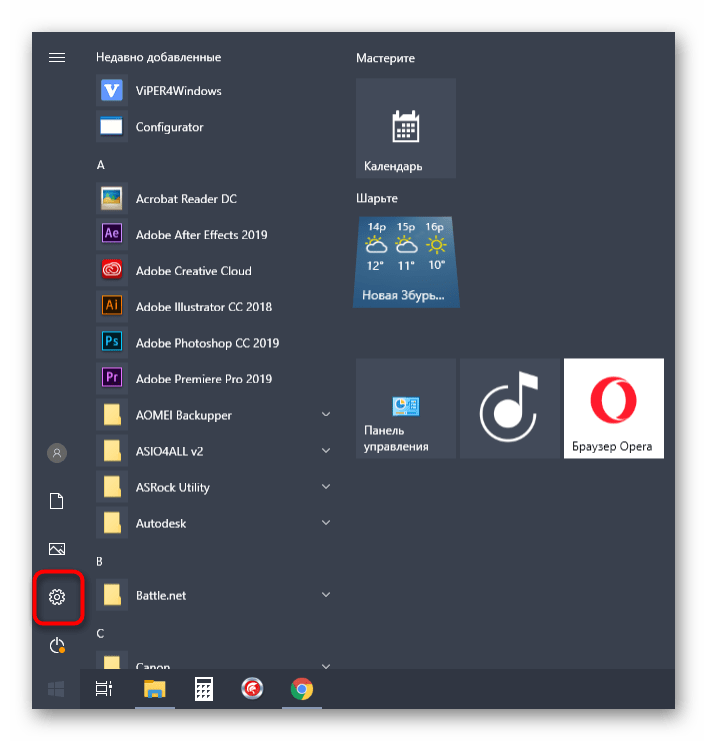
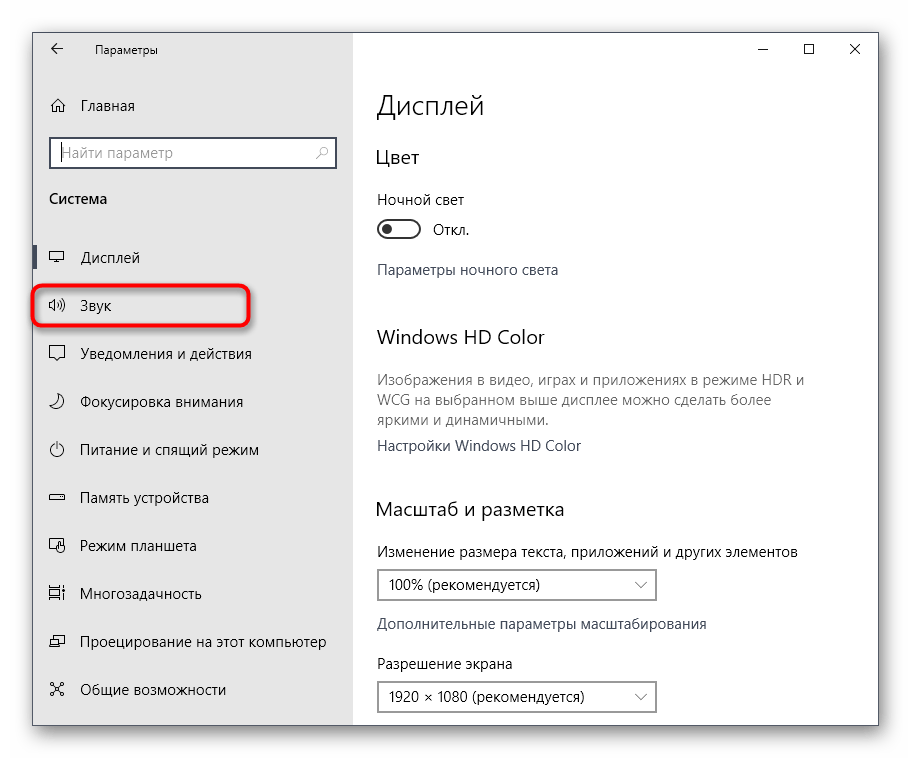
- Откройте «Пуск» и перейдите в «Параметры», кликнув по значку в виде шестеренки.
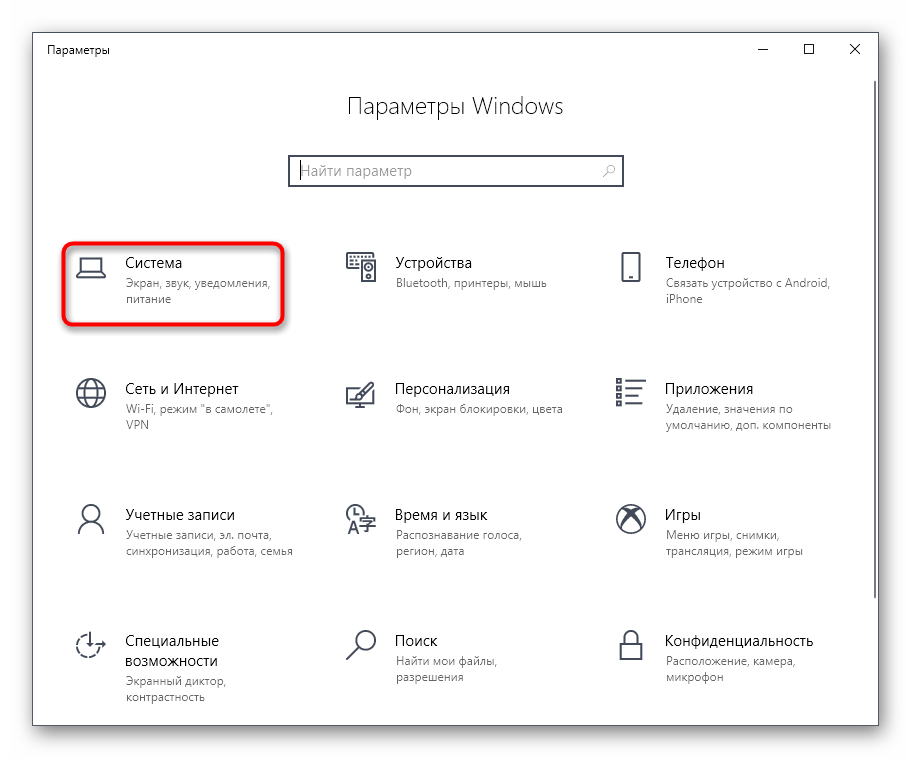
- В появившемся окне вас интересует раздел «Система».
- Через левую панель переместитесь в «Звук».
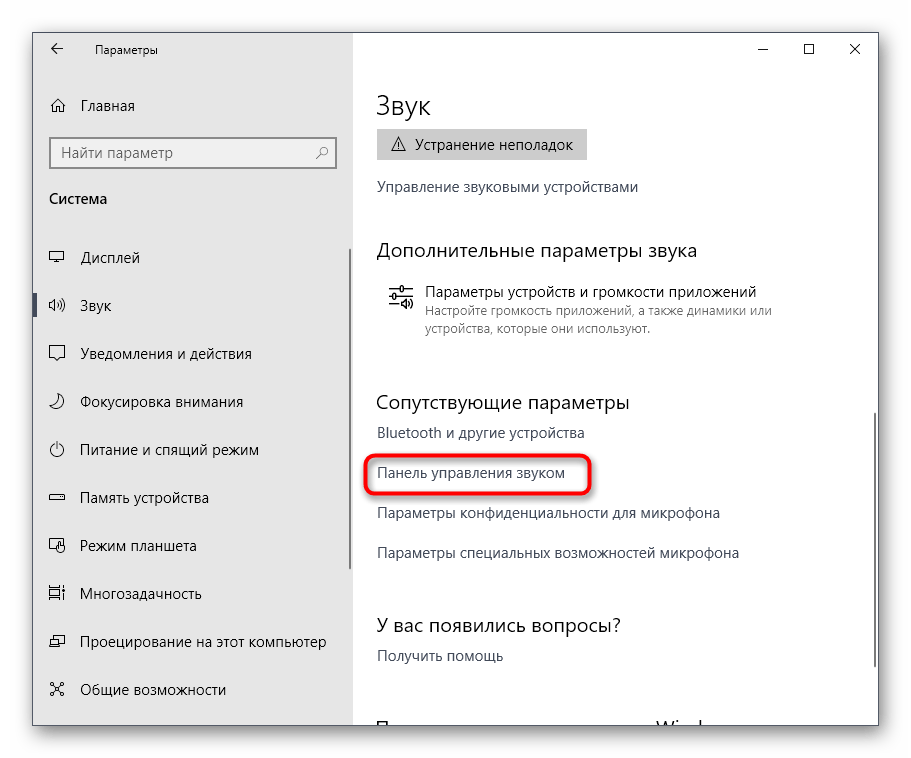
- Нажмите по надписи «Панель управления звуком».
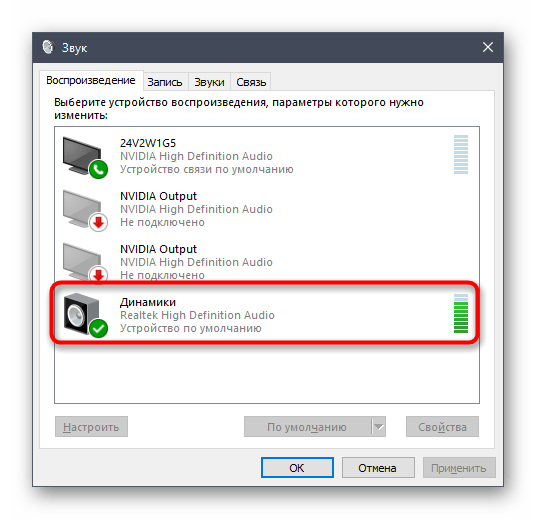
- Откроется отдельное меню во вкладке «Воспроизведение». Здесь отыщите активный динамик и дважды кликните по нему левой кнопкой мыши.
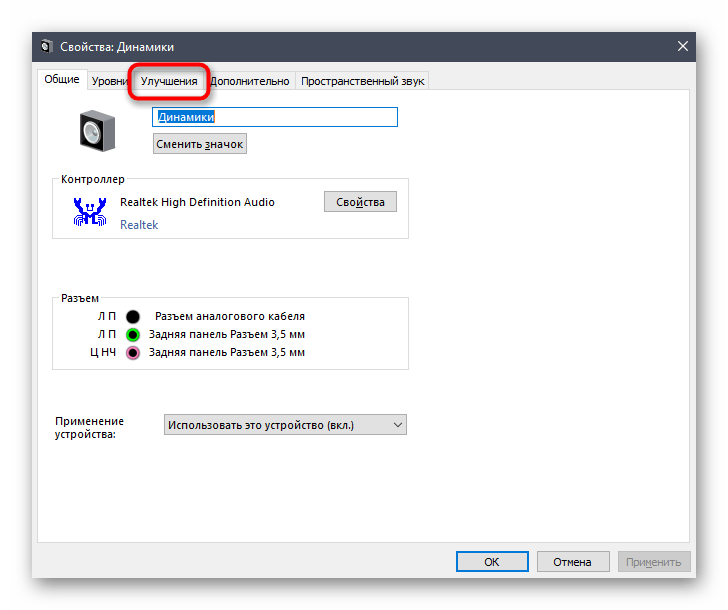
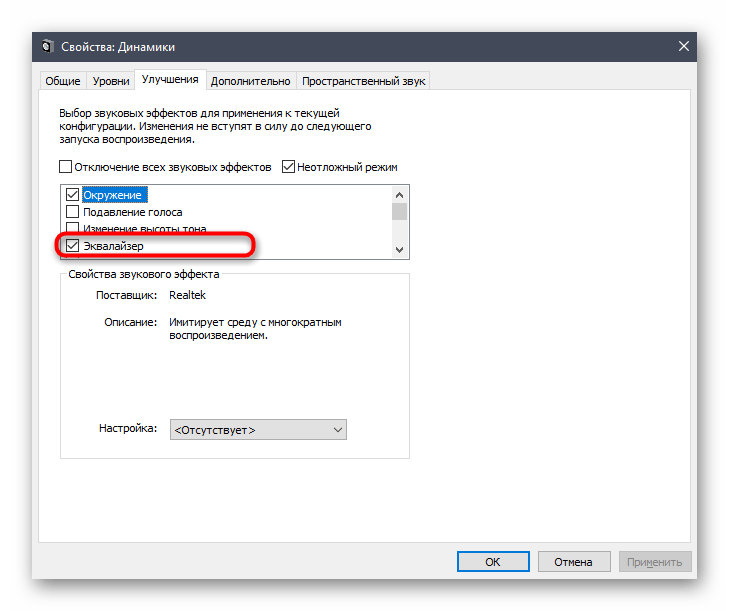
- Перейдите на вкладку «Улучшения».
- Поставьте галочку возле пункта «Эквалайзер».
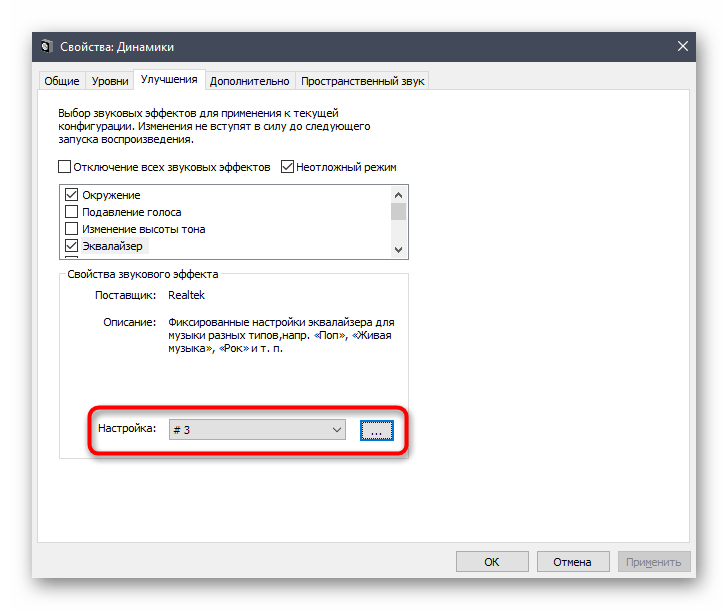
- Теперь вы можете применить имеющиеся настройки или перейти к формированию своей конфигурации.
- Принцип управления ползунками ничем не отличается от рассмотренного ранее, а по завершении не забудьте сохранить все изменения.
В рамках сегодняшнего материала мы разобрали целых три способа включения эквалайзера в Windows 10. Как видно, почти все они универсальны, но обладают разным уровнем функциональности.
Наша группа в TelegramПолезные советы и помощь
An equalizer is a sound engineering tool, that helps to adjust the output of different frequencies. For music lovers (Audiophiles), EQ is definitely a useful tool to manage audio frequencies. If you’re looking for an equalizer for Windows 11/10, then this article will end your search here. Yes, Microsoft offers a few audio enhancement options, but that is not enough for everyone. With the default EQ, you get only a few options like Bass Boost, Virtual Surround, Room Correction, and Loudness Equalization. Definitely, these will give some basic tweaks to audio output. Though, if you’re using Realtek drivers, then you can get some good equalization options.
What is Audio Equalizer?
If you don’t know what equalizer or equalization is – Equalizers are software or hardware filters that allow to equalize or adjust the loudness of specific frequencies. In past, many hardware instruments were required to balance audio frequencies. But now the same work can be done, by using some equalizer software.
Equalizer also lets you cut or boost/enhance the levels of specific audio frequency ranges. Basically does provides more granular control of the sound volume. Yes, there are many equalizer Apps or Tools available for Windows that can help to perform equalizing tasks in just a few seconds. But first, you have to make sure that your audio drivers are up-to-date.
Instruction to check or update audio drivers.
1. First, right-click on the start button of Windows, then from the menu, click on Device Manager.
(Or you can press Windows+X hotkey to open the WinX menu)
2. Now in the device manager, double click on the “Sound, video, and game controllers” to expand all installed sound drivers.
3. To check whether the driver is updated or not – Right-click on the installed driver and select the Update driver option.
4. In update drivers setup windows click on “Search automatically for updated driver software”.
5. Done, Now windows will automatically search and update new sound drivers.
If you’ve built a PC recently, then go to the motherboard manufacturer’s site and download and install the audio driver manually. Similarly, laptop users can go to the laptop manufacturer’s site, to download audio drivers.
Free and Best Equalizer for Windows 11/10
1. Default Windows Audio Equalizer
Yes, as I mentioned earlier in the article Windows comes with few Audio Equalization options. So, before moving to some third-party apps, let’s get to know how you can access those. Though, the older version of Windows used to come with graphic Realtek EQ. But now you will get Microsoft’s Audio Equalizer. Because Realtek has created a distinguish App for Audio equalizers. But for Microsoft Equalizer, the Microsoft High Definition Audio driver should be active.
Follow these steps to access the default windows audio equalizer.
1. Right-click on the speaker icon and then click on Open Sound settings.
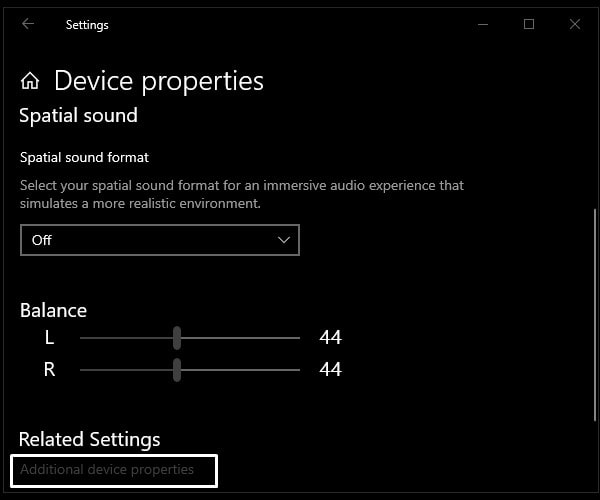
2. Windows 10 settings App will get open, make sure the correct audio output device is selected. And then click on Device properties.
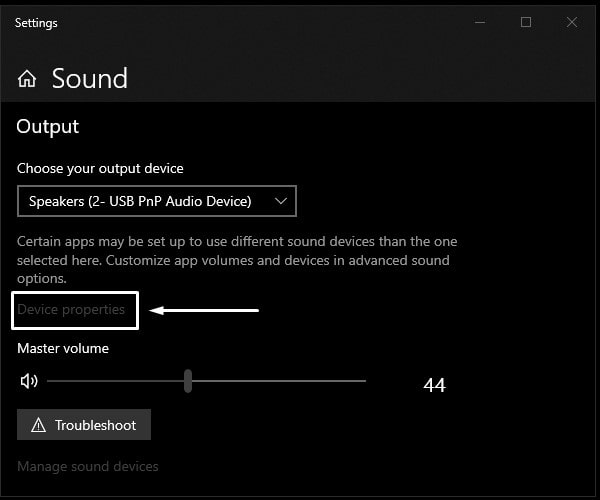
3. Click on Additional device properties. (You”ll find the option under Related Settings.)
4. Speaker properties window will get an open click on Enhancements.
5. If the Enhancement provider is Microsoft then you will get only four equalization options. Select any enhancement of your choice and then click on Apply.

Realtek Equalizer
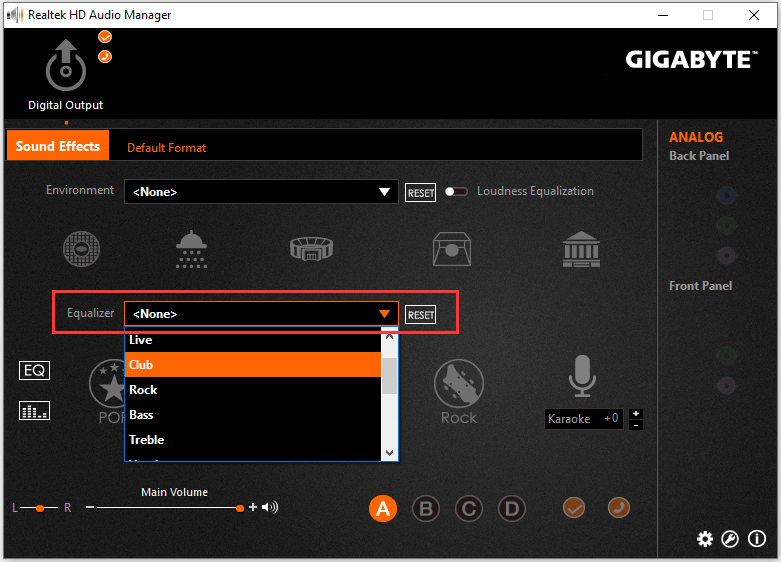
Though, If the Realtek driver is installed for your speaker. Then, you might get an equalizer by Realtek. That comes with ten band equalizers – pop, live, rock, bass, jazz, club, treble, vocal, classical, and country.
1. In the Enhancements tab, you can see a few sound effects lists.
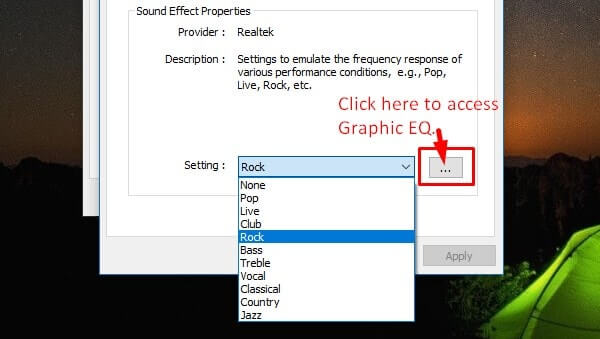
2. From the list, mark the Equalizer option and then click on it once to select it.
3. After selecting the equalizer option, you will be able to see some setting options.

4. From there you can choose a different band equalizer. And, to access Graphic EQ, click on the three dots (…) button.
With this default equalizer, you can balance sound from 31 dB to 16k dB. The sound effect you will select or customize, manually will get applied to all system sounds.
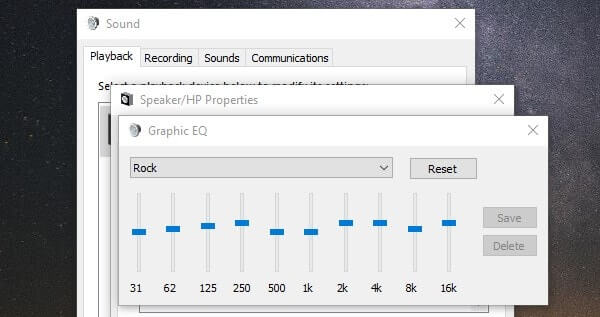
But, the bad part about this default equalizer is, that every time you need to go through the whole process to make changes. That’s the reason, I suggest you check out other free equalizers for windows 10.
2. Realtek Audio Console
If the Realtek Equalizer option is missing in the enhancement tab. Then you can install Realtek Audio Control App from Microsoft Store. This App provides the best audio experience with Realtek Audio Codec. Basically, you can control all audio device settings in the App. Though, if you’ve installed the latest audio drivers, then this App will get auto-installed. The best part is there is a sound effect section in App. In which 13 equalizers are available to select.
1. Install Realtek Audio Control App from Microsoft Store.
2. Open App, and then from the left pane, click on “Realtek Digital Output”.
Here you will find the Equalizer section. From the drop-down menu, you can select any equalizer of your choice.
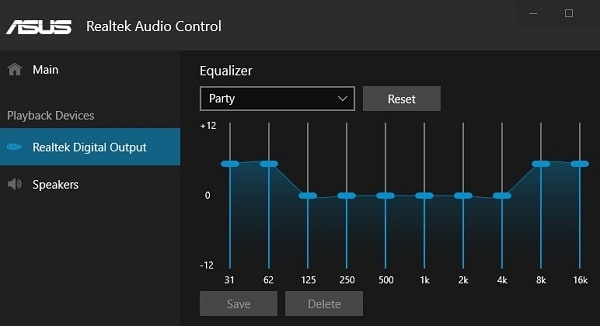
Even, you can manually control sound frequency. Also, you can select an audio environment as well.
3. Equalizer APO
If you’re looking for a global sound equalizer, Which can work system-wide. Then it is the best windows 10 equalizer, for you. This tool not only allows you to balance sound, but you can also enhance the quality of the sound. While installing the tool or software it allows to choose device and channel configuration. Also, the APO tool detects automatically, which device of yours supports APO and Which does not.
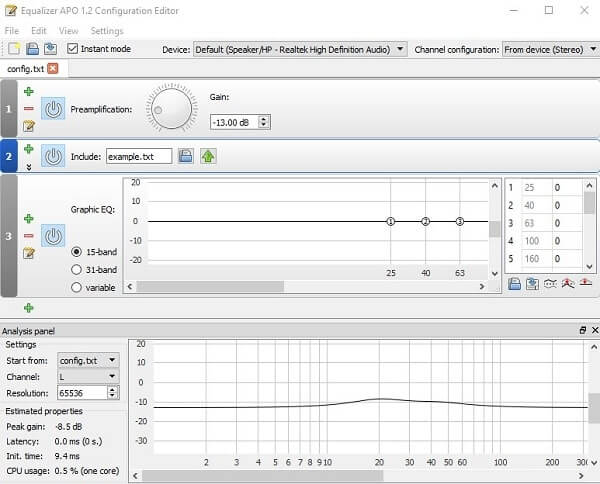
This tool also comes with the Graphic EQ feature, which comes with two bands 15 and 30. The software comes with an analysis panel, which shows real-time peak gain, latency, and CPU usage. The software comes with low latency and low CPU usage, which makes it suitable for interactive applications. It supports the VTS plugin and can be integrated into the Voicemeeter. The installation process of this software is basic and you can do it yourself easily.
But, One thing you need to know – is the software doesn’t create any shortcuts, to access software directly. You need to go into the installation directory to run the program. In the installation directory use Configurator to select the device. (reboot required after selecting the device) And you can equalize sound using the editor application, which appears in the installation directory.
Download APO Equalizer
4. Realtek HD Audio Manager
Like the default equalizer, Windows 11/10 comes with DTS audio control or Realtek HD audio manager. Although you will get the same options that you get in Realtek Audio Console. This open-source equalizer allows the user to change sound settings for playback devices and recording devices. This equalizer also comes with ten bands graphic equalizer, you can also manually equalize sound. This audio manager also allows canceling of background noise, using the “adaptive noise reduction” feature.

As I mentioned before, it comes preinstalled, So you don’t need to download it. To access this sound equalizer follow this small instruction.
- First, Go to this computer directory C:\Program Files\Realtek\Audio\HDA
- Now, run the RtkNGUI64.exe file, to launch Realtek HD Audio Manager.
It comes with a 31 dB to 16L dB band range, Which makes it, the best equalizer for PC. The software comes with environment preset options, including underwater, pipe, forest, room, and many others. Like APO, speaker configuration is also available, you can configure speaker settings in stereo, 5.1 speakers, and Quadraphonic. This advanced option doesn’t come with a default HD audio manager, you need to download the updated version of it.
5. Viper’s Audio
It is another open-source best music equalizer for PC. The installation procedure of this Windows 10 equalizer is similar to equalizer APO. The software comes with three-mode – music, movie, and freestyle. You can also set Pre-Volume and Post-Volume from -120.00 dB to 15.56 dB. The surround sound option allows choosing room sizes from smallest, small, mid-size, large, and largest. The software comes with a compressor and equalizer option, an equalizer allows to balance of sound from 65dB to 20k dB.
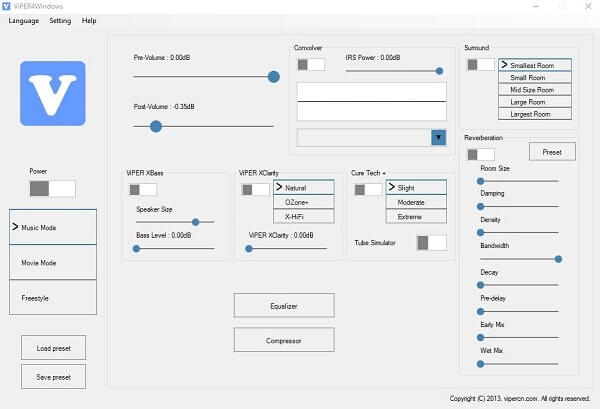
Also, it comes with some preset equalizers – super bass, soft bass, rock music, classical, pop, jazz, and many more. You can also load an external presets and can save presets created by you. You can also find out some advanced options like 3D surround sound and convolver. After installing ViPER’s Audio, it asks to choose the audio device and to reboot the system. Once you reboot the system you can access the equalizer by going into the installation directory. To open the equalizer, run ViPER4WindowsCtrlPanel.exe, and you can start using the equalizer.
6. Voicemeeter Banana
Voicemeeter Banana is another free equalizer for Windows. It is basically Advanced Audio Mixer Application with Virtual I/O to mix and Virtual Audio Device. With Voicemeeter, you can manage any audio devices and apps. If you do lots of podcasts or upload videos on YouTube then you should definitely try Voicemeeter Banana Application.
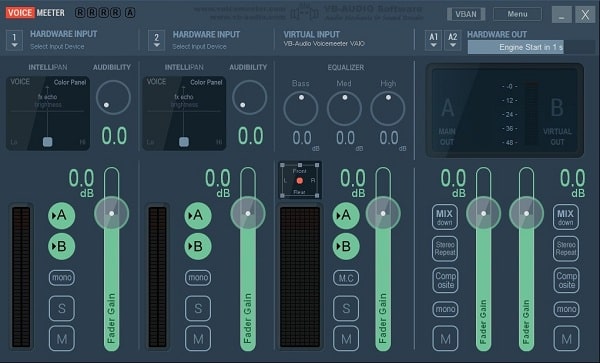
Well yes, this App is not an equalizer only, it is an audio mixer to adjust audio output as well as input. So, if you’re using Discord, Twitch, or any podcast application, then with Voicemeeter Banana, you can make the sound less distorted and crisper. From the Master section, you can manage equalizer settings. This App is donationware, yes you don’t have to pay. But, if you like, then you can donate to developers.
Download Voicemeeter Banana
7. FxSound Free
It is the replaced version of “DFX audio enhancer”, but still provides the same audio experience. FxSound brings you crystal clear sound, bass effects, and real-time music optimization. Also, it provides a studio-quality music experience, without purchasing an expensive sound system. This audio equalizer tool also allows increased bass of your system, beyond your system capability. The installation procedure is easy like normal software installation.
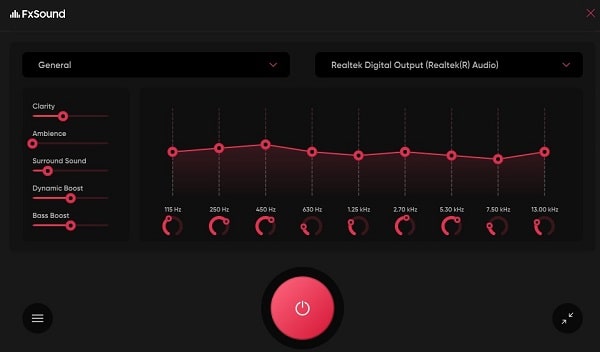
The software run in the background and all you have to do is listen to music on Spotify. Or watch a video on YouTube to enjoy a good listening experience. It also comes with customizing equalizer tool and sound effects option. Overall, it is one of the best windows 11 audio equalizer Software.
Install FxSound for Windows
8. DFX Audio Enhancer
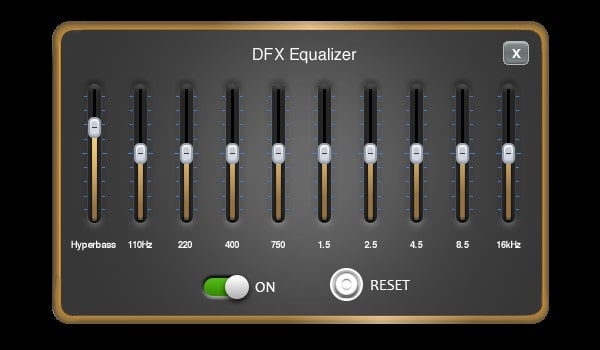
DFX Audio Enhancer is the older version of the FxSound sound equalizer for Windows 11. The user interface of DFX gives an old Windows XP vibe. But, it gives so many options to improve sound quality. You can control audio fidelity, ambiance, 3D surround sound, dynamic boost, and hyper bass with it.
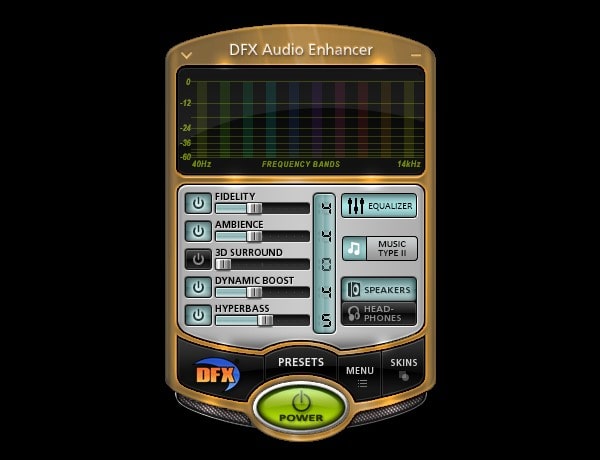
Yes, DFX Audio Enhancer also comes with multiple skins options. Like, Charcol, ClassicBlue, ClassicRed, and Universal. DFX installer might ask you to install additional software with it. So, don’t forget to uncheck it. It comes with a power button, that lets you turn on/off the audio enhancer with a single click. Moreover, it has an Equalizer, which is good enough.
But, if you want to enhance headphone audio then you have to buy the pro version. Else, you can use it for speakers for free. Also, you have to select your speaker first by going into the sound settings of Windows 11. Else, you will hear no sound in Windows 11. Although, I still suggest you install FxSound because it is completely free to use. And, yes, you can download DFX from a third-party website, because it is old software.
Summing – up
Still, many graphic equalizers are available for Windows 11 and Windows 10. But some of them come with the trial version and locked features. And, these mentioned equalizer is free and more than enough to balance sound. But if you’re still confused that, which equalizer, you should download FxSound. Then I suggest you try the default equalizer or Realtek Audio Console App. But if you need some advanced option then the best is ViPER’s Audio.
Realtek Audio Console leaving you tone-deaf when it comes to the equalizer? You’re not alone. Many Windows 11 (and even Windows 10) users have reported that the beloved equalizer seems to have taken a holiday in the Realtek Audio Console. Whether it’s due to outdated drivers, lingering software conflicts, or pesky audio services, rest assured that there are a variety of fixes you can try. In this in-depth guide, we’ll explore a range of troubleshooting techniques that will help you restore full audio control and customization on your Windows machine.

Understanding the Issue
Many Windows users have discovered that, after routine system updates or driver upgrades, the equalizer option simply vanishes from the Realtek Audio Console. This can be frustrating, especially if you rely on the extra customization that the equalizer provides for your audio experience. The problem may range from minor driver glitches to software conflicts with external audio processing services such as DTSAPO3Service. Let’s break down the potential culprits:
- Outdated or incompatible drivers: Updates that don’t match your hardware can cause missing features.
- Software conflicts: Services like DTSAPO3Service might override or conflict with Realtek’s built-in functions.
- Audio enhancement settings: Both enabled and disabled audio enhancements can sometimes throw off the equalizer display.
- Residual or corrupt configurations: Leftover files from previous installations might block the equalizer from showing up.
Before diving into the fixes, it’s worth noting that sometimes the solution involves a combination of methods. Rather than putting all your eggs in one basket, feel free to try multiple approaches until you regain that equalizer.
Step-by-Step Troubleshooting Methods
Below is a comprehensive list of methods to address the missing equalizer issue. Follow them one by one or combine as needed for the best results.
1. Disable DTSAPO3Service
Often the DTSAPO3Service – a background service aimed at handling digital signal processing for DTS audio – interferes with the Realtek Audio Console’s native features. Here’s how to disable it:
- Press Win + R to open the Run dialog box.
- Type “services.msc” and hit Enter.
- In the Services window, locate “DTSAPO3Service.”
- Double-click the service, change the Startup Type to “Disabled,” and click the “Stop” button.
- Click Apply and OK.
After disabling the service, restart your computer and check whether the equalizer appears. This simple service tweak can sometimes resolve the conflict without further action.
2. Update or Reinstall the Audio Driver
Drivers form the lifeblood of hardware compatibility. An update or fresh reinstall might just be what your system needs. Here’s a systematic approach:
- Open the Device Manager by right-clicking the Start button and selecting Device Manager.
- Expand “Sound, video and game controllers.”
- Right-click on the Realtek audio driver and select “Uninstall device.”
- Confirm the uninstallation and restart your machine.
- Download the latest driver available from your PC manufacturer or directly from Realtek’s website.
- Install the driver and reboot the system.
This process ensures your system is running the most current, compatible version of the driver, which can often restore missing features like the equalizer.
3. Install Custom Realtek Audio Drivers
If the standard drivers fail to bring the equalizer back, consider installing custom drivers. Enthusiast communities have created tailored versions of Realtek drivers that might re-enable missing features. Here’s what you need to do:
- Remove any existing Realtek drivers completely.
- Uninstall third-party audio software that might interfere with the process.
- Visit a trusted repository (for instance, GitHub has various Realtek UAD projects) to download custom drivers.
- Follow the provided installation instructions carefully.
Custom drivers can introduce compatibility enhancements that the manufacturer-supplied drivers may lack, unlocking additional features including a working equalizer.
4. Roll Back to a Previous Driver Version
Sometimes, a recent driver update can be the culprit. Rolling back to an earlier, stable version might prove to be a quick fix:
- Press Win + X and choose “Device Manager.”
- Under “Sound, video and game controllers,” right-click the Realtek audio device.
- Select “Properties,” then navigate to the “Driver” tab.
- Click on “Roll Back Driver” if the option is available.
- Follow on-screen instructions and reboot.
This rollback reverts your driver to a version where the equalizer was functioning properly, eliminating the issues introduced in recent updates.
5. Tweak Audio Enhancement Settings
Audio enhancements – designed to improve sound quality – can sometimes lead to conflicts within the Realtek software. You might need to experiment by toggling these settings:
- Via Control Panel:
- Open Control Panel and head to “Sound.”
- Under the Playback tab, right-click your default device and select “Properties.”
- Access the “Advanced” tab.
- Uncheck the “Enable audio enhancement” option if it’s on. Conversely, if it’s already unchecked, try enabling it.
- Click Apply, then OK.
- Via Windows Settings:
- Go to Settings > System > Sound.
- Under the Output section, select your audio device.
- Locate the Audio Enhancement option and toggle it to Off (or On to test).
Changing these settings can remove any unnecessary digital processing that might be blocking the equalizer from rendering. Be sure to test the audio output after each tweak.
6. Reinstall Realtek Software
Corrupted installations or lingering files can cause unexpected software behavior. A reinstallation might do the trick:
- Press Win + I to open Settings.
- Navigate to “Apps” and then “Installed apps.”
- Locate the Realtek software in the list.
- Click on the three-dot option and select “Uninstall.”
- Once uninstalled, reboot your computer.
- Visit the Microsoft Store to download the latest Realtek Audio Console and follow the installation instructions.
By reinstalling the software, you ensure that any corrupted or previous configurations are wiped clean, hopefully restoring that elusive equalizer.
7. Explore Third-Party Audio Alternatives
If all else fails, you might consider shifting gears completely by using alternative audio software. The market offers several feature-rich options to enhance and customize your audio experience, including:
- Dolby Atmos: Known for premium sound quality and advanced customization.
- Equalizer APO: Renowned for its lightweight nature and highly customizable controls.
- FxSound: Offers a user-friendly interface with presets tailored for various audio experiences.
- Boom 3D: Delivers immersive 3D surround sound and auto-calibration features.
- EasyEffects: An open-source tool with advanced features like a parametric equalizer and dynamic range compression.
These alternatives can serve as a temporary or even permanent solution if the Realtek equalizer remains stubbornly missing. Experiment with these programs and see which best suits your audio preferences.
Broader Implications and Additional Considerations
While the disappearance of a seemingly simple equalizer might seem like a minor inconvenience, it reflects larger trends in software updates and driver compatibility that many Windows users face today. With Windows 11 often bringing extensive updates, features like audio processing can sometimes fall through the cracks if drivers lag behind the latest OS enhancements. Here are a few additional points to consider:
- Regular Maintenance: Periodically checking for driver updates and validating settings after major Windows updates can save troubleshooting time.
- Backup Settings: Before making drastic changes (like disabling system services or rolling back drivers), consider creating a system restore point. This ensures you can revert to a previous state if necessary.
- Community Insights: Numerous users share their experiences and fixes on forums. Engaging with these communities can provide alternative solutions if standard troubleshooting fails.
- Broader Ecosystem Impact: Issues like these remind us that while Windows 11 brings a slew of new features, some legacy software occasionally suffers. Keeping an eye on community forums helps in understanding whether it’s a widespread issue that might be addressed in future updates.
Addressing Related Audio Issues
The missing equalizer isn’t the only audio nuisance users encounter with Realtek devices. Some have also faced issues like “Realtek Audio Console not detecting headphones” or “no sound” entirely. If you’re facing such issues, here are a few quick pointers:
- Check physical connections: Ensure that cables and connectors are firmly plugged in.
- Set the default audio device: Sometimes, Windows might default to a different sound output. Confirm the Realtek device is selected.
- Run the Troubleshooter: Use the built-in Windows Audio Troubleshooter to identify and address any detected problems.
- Restart Windows Audio Service: Occasionally, simply restarting the Windows Audio services via services.msc can resolve glitches.
Although these additional fixes extend beyond the equalizer issue, they are crucial steps in ensuring your overall audio system runs smoothly.
Summarizing the Fixes
Here’s a quick recap of the steps you can take when faced with a missing equalizer in the Realtek Audio Console on Windows 11/10:
- Disable the conflicting DTSAPO3Service.
- Update or reinstall your audio drivers through Device Manager.
- Consider installing custom Realtek audio drivers from trusted sources (like GitHub).
- Roll back the driver to a previous, stable version if recent updates led to the problem.
- Tweak audio enhancement settings via Control Panel or Windows settings.
- Reinstall the Realtek software from the Microsoft Store to refresh configurations.
- Explore third-party alternatives like Dolby Atmos or Equalizer APO if needed.
By methodically working through these steps, you can usually restore full functionality to your system’s audio control features.
Final Thoughts
While the disappearance of the equalizer in the Realtek Audio Console can be a minor yet irritating hiccup, it’s a reminder of how intricate and interdependent modern operating system components can be. Whether it’s a driver issue, a software conflict, or an unintended side-effect of an update, troubleshooting these problems can also offer valuable insights into how Windows 11 manages hardware and software interactions.
Have you tried any of these fixes? What’s your experience with maintaining audio performance on Windows 11? By sharing your insights on relevant discussion threads on WindowsForum.com, you can help guide fellow users through similar challenges. Ultimately, staying informed and proactive about updates and settings ensures that your audio experience remains as rich and customizable as you intend it to be—equalizer and all.
With systematic troubleshooting and community support, there’s no reason to let a missing equalizer throw your sound experience off-key. Happy tweaking, and may your Windows 11 audio always hit all the right notes!
Source: The Windows Club Realtek Audio Console No Equalizer in Windows 11 [Fix]