
This guide will help you get started on setting up your very first React Native for Windows app.
Make sure you have installed all of the development dependencies.
For information around how to set up React Native, see the React Native Getting Started Guide.
Interested in migrating to React Native’s New Architecture? New Architecture support in React Native for Windows is now available to preview in 0.76. Note there are several key changes, so if you’d like to be an early adopter, check out the information in the New Architecture Guide.
Create a new React Native project
Remember to call @react-native-community/cli init from the place you want your project directory to live.
npx --yes @react-native-community/cli@next init <projectName> --version ^0.78.0
Navigate into this newly created directory
React Native will have created your project in a new sub-directory, which you must enter before continuing.
cd <projectName>
Add React Native Windows to your project’s dependencies
Using Yarn (Recommended)
Using NPM
yarn add react-native-windows@^0.78.0
npm install --save react-native-windows@^0.78.0
Initialize the React Native Windows native code and projects
Lastly, initialize the React Native for Windows application with the init-windows command:
npx react-native init-windows --overwrite
Note: RNW templates contain a customized
metro.config.jsfile, which is meant to merge cleanly into the default config provided by the standard React Native project template. If you are starting a new app, overwritingmetro.config.jsshould have no impact. However, if you are adding Windows to an existing app with an already modifiedmetro.config.jsfile, please make sure to back up and re-apply your modifications after adding RNW.
Running a React Native Windows App
Make sure a browser is launched and running before running a React Native Windows app.
Also ensure your system meets all the requirements to build a Windows app as well.
-
Without Using Visual Studio
In your React Native Windows project directory, run the run-windows command:
npx react-native run-windowsA new Command Prompt window will open with the React packager as well as your React Native for Windows app. This step may take a while during first run since it involves building the entire project and all dependencies. You can now start developing! :tada:
-
Using Visual Studio
- From the root of the project directory, run the autolink-windows command, which will automatically link your app’s dependencies:
npx react-native autolink-windows - Open the solution file in the application folder in Visual Studio (e.g.,
AwesomeProject/windows/AwesomeProject.slnif you usedAwesomeProjectas<projectName>) - Select the
Debugconfiguration and thex64platform from the combo box controls to the left of theRunbutton and underneath theTeamandToolsmenu item. - Run
yarn start(ornpm start) from your project directory, and wait for the React Native packager to report success. - Click the
Runbutton to the right of the platform combo box control in VS, or select theDebug->Start without Debuggingmenu item. You now see your new app and Chrome should have loadedhttp://localhost:8081/debugger-ui/in a new tab. PressF12orCtrl+Shift+Iin Chrome to open its Developer Tools. :tada:
- From the root of the project directory, run the autolink-windows command, which will automatically link your app’s dependencies:
-
With VS Code
- Open your applications folder in VS Code.
- Install the React Native Tools plugin for VS Code.
- Create a new file in the applications root directory,
.vscode/launch.jsonand paste the following configuration:
{ "version": "0.2.0", "configurations": [ { "name": "Debug Windows", "cwd": "${workspaceFolder}", "type": "reactnative", "request": "launch", "platform": "windows" } ] }- Press
F5or navigate to the debug menu (alternatively pressCtrl+Shift+D) and in the Debug drop-down select «Debug Windows» and press the green arrow to run the application.
Authoring Native Modules
See Native Modules and React Native Windows.
Building a standalone React Native Windows App
Follow these steps to build a version of your app that you can install or publish to the store. This version will package your bundle and assets into the APPX package so you don’t need to run Metro.
- Open the solution in Visual Studio
- Select the Release configuration from the Configuration Manager drop-down.
- Build the solution. You can now launch without first launching Metro.
- If you want to build an APPX package to share or publish, use the Project > Publish > Create App Packages… option.
The Debug configuration uses the Web Debugger by default, which means the application’s JavaScript code runs in Chrome.
If you’re getting different runtime behavior between the Release and Debug configurations, consider disabling theUseWebDebuggersetting inApp.cpporApp.xaml.csto get the same behavior in the Debug configuration.
See also this article for additional details: https://techcommunity.microsoft.com/t5/windows-dev-appconsult/getting-started-with-react-native-for-windows/ba-p/912093#
Provide feedback
Saved searches
Use saved searches to filter your results more quickly
Sign up
React Native — это платформа, позволяющая создавать мобильные приложения на основе JavaScript и React. Разработана Facebook и применяется во многих мировых проектах, среди которых Instagram, Discord, Pinterest, Bloomberg, Wix и другие.
Приложения на React Native имеют согласованный интерфейс: учитесь один раз — пишите где угодно.
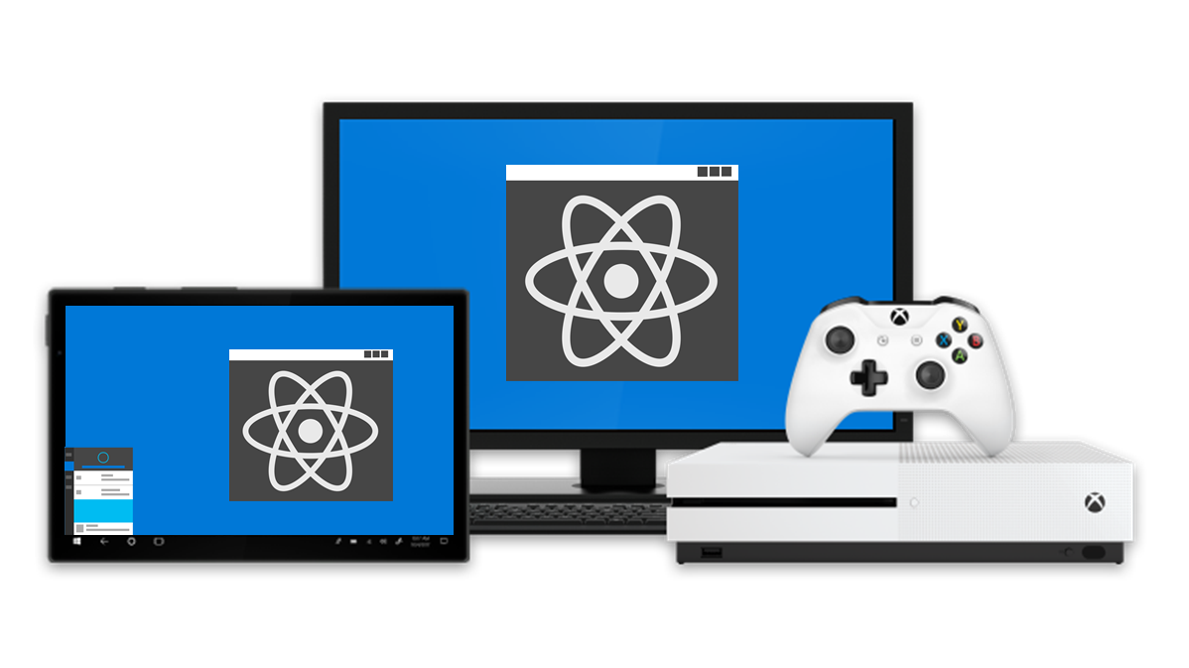
Благодаря репозиторию React Native for Windows приложения на React можно писать для UWP (Universal Windows Platform), а значит под все устройства, которые поддерживают Windows 10 (ПК, планшеты, Xbox, устройства смешанной реальности).
Узнать подробней и начать изучать этот проект можно по его документации. Так же можно ознакомиться с React Native в целом. Следить за последними событиями можно в блоге.
React Native for Windows — это open source проект. Вы сможете помочь им, предложив какую-нибудь фичу или решив имеющуюся проблему.
Building apps is completely transformed with React Native. Although it began as a tool for mobile apps, it now supports desktop applications. With React Native Windows App Development, businesses can build a Windows app using JavaScript and React. The advantage of this approach is that it saves time and effort. Currently, a lot of companies are choosing React Native for Desktop App Development for a variety of reasons.
Microsoft supports React Native Windows Development. React Native for Windows App development allows businesses to extend their reach to a wider audience. Here, we will discuss a step-by-step guide to building a React Native desktop app. In addition to that, we will discuss how a React Native app development company can help you in achieving your goal. Let’s get started.
Why Choose React Native for Windows App Development?
React Native is popular for mobile and desktop applications. It offers many benefits, such as:
React Native desktop app development services are preferred by many businesses as they help reduce costs and increase efficiency. Additionally, productivity is improved because you can reuse code between platforms with React Native. It has also been seen that, while building a React Native Windows App developers can reuse up to 90% of the code, reducing development efforts.
Step 1: Setting Up the Development Environment
Before starting your React Native Windows application development, you must establish the necessary development environment setup.
1. Install Node.js: Download and install Node.js. This is required for package management.
2. Install React Native CLI: Run the following command in your terminal:
npm install -g react-native-cli
3. Install Visual Studio: Download and install Visual Studio 2022 with the necessary workloads for Windows development.
4. Set Up Windows Build Tools: Run:
npx react-native-windows-init --version latest
5. Create a New Project: Use the command:
npx react-native init MyWindowsApp
6. Add Windows Support: Navigate to the project folder and run:
npx react-native-windows-init --overwrite
Now, your environment is ready for development.
Step 2: Building the React Native Windows App
The app’s building process can be started after the setup is completed.
1. Create Components: Create UI components through JavaScript code that operates on multiple operating systems.
2. Use Native Modules: Integrate Windows-specific features for better performance.
3. Style the App: Apply CSS-like styling using React Native’s StyleSheet.
4. Test the App: Run the app on Windows using:
npx react-native run-windows
5. Debug and Optimize: React Developer Tools and built-in debugging features should be used to deliver a smooth experience.
6. Implement UI/UX Best Practices: The Design should be simple, responsive, and easily accessible for all users.
An app development company can help streamline the process of React Native app development and make the process smooth.
Step 3: Adding Features to Your Windows App
Enhance your React Native for Desktop App with additional features:
- Navigation: Use React Navigation for smooth transitions between screens.
- State Management: Implement Redux or Context API for better data handling.
- API Integration: Fetch data from external sources using Axios to make the app dynamic.
- Database Connection: Connect with Firebase, SQLite, or MongoDB for efficient data management.
- Push Notifications: Add notifications using the React Native Push Notification library.
- Offline Functionality: Enable caching to allow the app to work without an internet connection.
- Dark Mode Support: Improve user experience by integrating a dark theme option.
These features improve user experience and app performance, making your application more engaging and useful.
Step 4: Testing and Debugging
Testing is important in React Native Windows Development. Follow these steps:
1. Use Jest for Unit Testing: Write test cases for UI components and logic.
2. Test on Multiple Devices: Check compatibility across different Windows versions and screen sizes.
3. Debug Using React DevTools: Identify and fix issues quickly with real-time monitoring.
4. Optimize Performance: You can minimize memory usage while optimizing rendering by implementing lazy loading techniques.
5. Use End-to-End Testing: The testing process should be automated through the utilization of Cypress or Detox tools.
Applications tested extensively will function better while drawing increased user numbers, which generates better customer satisfaction rates.
Step 5: Deploying the Windows App
After development, deploy your React Native Windows App.
1. Build the App: Use the command:
npx react-native run-windows --release
2. Package the App: Generate an installable file (.appx or .msix package).
3. Sign the App: Use a digital certificate for security and compliance.
4. Publish to Microsoft Store: Submit your app for review and listing on the Windows Store.
5. Monitor Performance: Use tools like App Center for performance tracking and crash reporting.
By following these steps, you can successfully launch your React Native Desktop App.
Key Statistics on React Native Windows Development
1. The Microsoft team revealed in 2024 that their Windows 10 and 11 products had accumulated 1.4 billion active users.
2. The deployment time for desktop applications developed through React Native decreases by 40% for businesses.
3. Businesses using cross-platform frameworks like React Native experience a 30% boost in developer productivity.
As you can see, React Native Windows Development’s growing popularity makes it a desirable option for businesses.
Conclusion
For businesses that want to build powerful Windows applications, React Native Windows App Development is a smart choice. It is cost-efficient, fast to develop, and has good
community support.
So, if you need experts, Shiv Technolabs can provide top-rated React Native window app development services. We have a team of qualified React Native desktop app developers
offering top-of-the-class services that assist your business with exceeding its development requirements.
Our team can deliver the best results whether you need a new app or want to improve an existing one. Contact us to kickstart your development project.
Written by
Hardik Solanki
Hardik Solanki, iOS and macOS developer at Shiv Technolabs Pvt Ltd, passionate about creating seamless and high-performance applications for Apple’s ecosystem. With expertise in Swift, Objective-C, and macOS frameworks, I focus on building intuitive user experiences and optimising app performance. I enjoy tackling complex challenges and constantly strive to deliver innovative and efficient solutions.
facebook
More Reading
As we know, React is a free and open-source JavaScript library written by Facebook to create highly dynamic web UIs. Facebook later created React Native for developing cross-platform native mobile apps by using React as the core interface for developers, which allowed them to build native mobile apps for Android and iOS with a single React syntax-based codebase.
React typically renders its component changes to DOM (Document Object Model), but it can also render components as HTML for server-side rendering (SSR) requirements. For React Native, there was Proton Native, which generated cross-platform desktop applications and let you render native UI elements with the Qt and wxWidgets UI toolkits, but which is no longer actively maintained.
While there is still an active fork of it, in this article, we’ll cover a more stable, actively maintained, and popular project: react-native-windows. This is Microsoft’s extension of React Native for Windows and macOS backends and makes it so that the same React Native-based frontend will natively render on Windows and macOS with platform-specific UI elements.
I will explain how you can develop Windows desktop applications using the react-native-windows project. We’ll also cover how your React Native syntax turns into a native desktop application with the framework’s internal modules.
Setting up the developer environment
Make sure that your computer has the following Windows version installed:
- Windows 10.0.16299.0 (a.k.a., 1709, Redstone 3, or Fall Creators Update) or higher
If your computer passes the above requirement, you can run the following command in an elevated (as in, with administrator privileges) PowerShell window to install the required dependencies.
Set-ExecutionPolicy Unrestricted -Scope Process -Force; iex (New-Object System.Net.WebClient).DownloadString('https://raw.githubusercontent.com/microsoft/react-native-windows/master/vnext/Scripts/rnw-dependencies.ps1')
The above command will turn on developer mode and install Visual Studio, the Chocolatey package manager, and Node.js LTS version. Additionally, it’s great if your computer has a physical memory of 8GB or higher because the Windows build processes typically need above-average physical memory to run.
The above script file recommends having 16GB of physical memory. You can continue with the tutorial if the second execution of the above script gives an output like below.

Creating a React Native Windows app
First, create a new React Native project with the following command. This command will auto-generate a basic React Native app.
npx react-native init rnApp --template react-native@^0.64.0
The official React Native package supports only Android and iOS backends, so you’ll need to run the following command to enable the Windows backend.
npx react-native-windows-init --overwrite
Now we can run our newly created React Native app as a truly native Windows app with the following command. This command will trigger a debug build from the current project’s source code.
npx react-native run-windows
Also, you can add the --useHermes option to use the Hermes JavaScript engine instead of the default Chakra.
The first build process may take quite a while to complete because it will compile many C++ source files. If the build process stops with an error, you can run the same command with the --logging option to find those errors.
You may also want to take note of the following solutions for common errors that might show up during your build process:
- If the build process takes a lot of time, or there are compilation errors related to Chakra, use the
--useHermesoption - If the build process throws an error about missing Windows 10 SDK, install it from the Visual Studio Installer
- If the build process fails with a certificate error, follow these steps to create a new certificate for your autogenerated UWP project with Visual Studio
- Some modules have issues with paths that have spaces. Make sure that your project path doesn’t contain any spaces
Once the build process has completed, you will see a UWP version of your React Native app, as shown below.
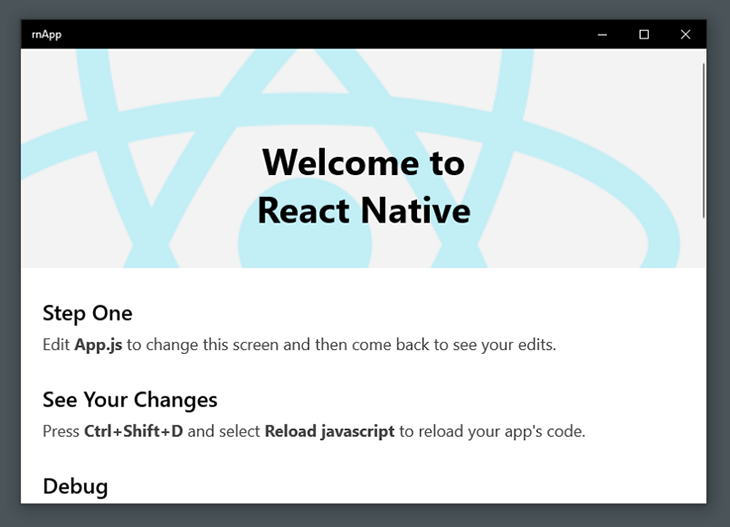
The hot-reload feature is enabled. Also, the run-windows command will open the React Native Debugger on Chrome. You can use Chrome DevTools to set up breakpoints for your app’s JavaScript source files.
Now, let’s learn what is happening behind the scenes.
Inside React Native Windows
The React Native core has several basic pre-defined React components like View, Text, Image, TextInput, and ScrollView. The official React Native runtime can render truly native UI building blocks for Android and iOS operating systems. The React Native team initially made the native rendering module fully extendable. Therefore, the developer community was able to extend it for other platforms as well.
The react-native-windows project added Windows application target support. It can generate a Windows application with a truly native UWP GUI from your typical React Native project. UWP applications work on all popular Windows platforms such as Windows 10, Windows 10 Mobile, Xbox One system software, and Windows Mixed Reality.
However, the JavaScript portion of your application runs on a JavaScript engine similar to the original React Native project. The react-native-windows project initially used the Chakra JavaScript engine, and they later integrated Facebook’s Hermes JavaScript engine to improve performance.
Developing a simple application using react-native-windows
We are going to make a simple UWP app that will show a greeting message when you submit your first and last name. Add the following code into your App.js file.
import React from 'react';
import type {Node} from 'react';
import {
  SafeAreaView,
  ScrollView,
  StyleSheet,
  Text,
  TextInput,
  Button,
  useColorScheme,
  View,
  Alert,
} from 'react-native';
const App: () => Node = () => {
  const isDarkMode = useColorScheme() === 'dark';
  const [firstName, setFirstName] = React.useState('');
  const [lastName, setLastName] = React.useState('');

  const styles = StyleSheet.create({
    dark: {
      color: '#fff',
      backgroundColor: '#000',
    },
    light: {
      color: '#000',
      backgroundColor: '#fff',
    },
    formItem: {
      marginBottom: 6,
    }
  });

  const backgroundStyle = {
    backgroundColor: isDarkMode ? styles.dark : styles.light,
  };

  const showFullName = () => {
    Alert.alert(`Hello ${firstName} ${lastName}`);
  };
return (
    <SafeAreaView style={backgroundStyle}>
      <ScrollView
        contentInsetAdjustmentBehavior="automatic"
        style={backgroundStyle}>
        <View style={{padding: 12}}>
          <Text style={backgroundStyle}>First name</Text>
          <TextInput
            style={styles.formItem}
            value={firstName}
            onChangeText={setFirstName}
          />
          <Text style={backgroundStyle}>Last name</Text>
          <TextInput
            style={styles.formItem}
            value={lastName}
            onChangeText={setLastName}
          />
          <Button
            style={styles.formItem}
            title='OK'
            onPress={showFullName}
            disabled={!firstName || !lastName}>
          </Button>
        </View>
      </ScrollView>
    </SafeAreaView>
  );
};
export default App;
Now, reload the current app via React Native Debugger. You will see an application like the below, styled according to your theme settings.
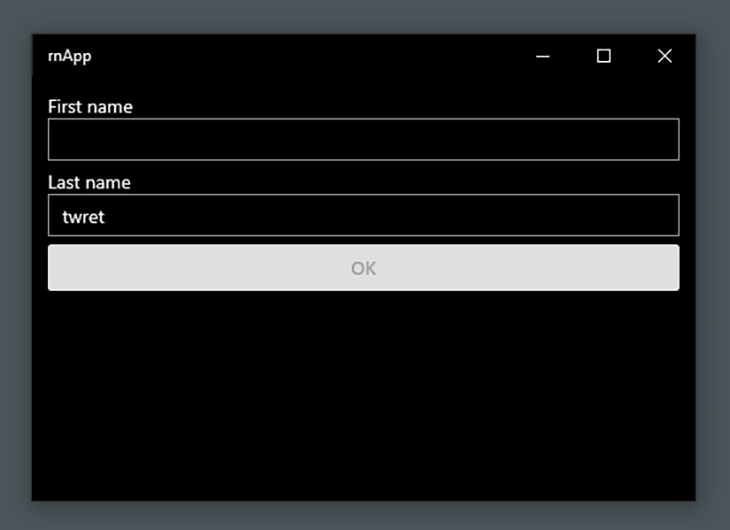
When you click on the OK button after filling in the text inputs, you will get a message box with a greeting, as shown below.
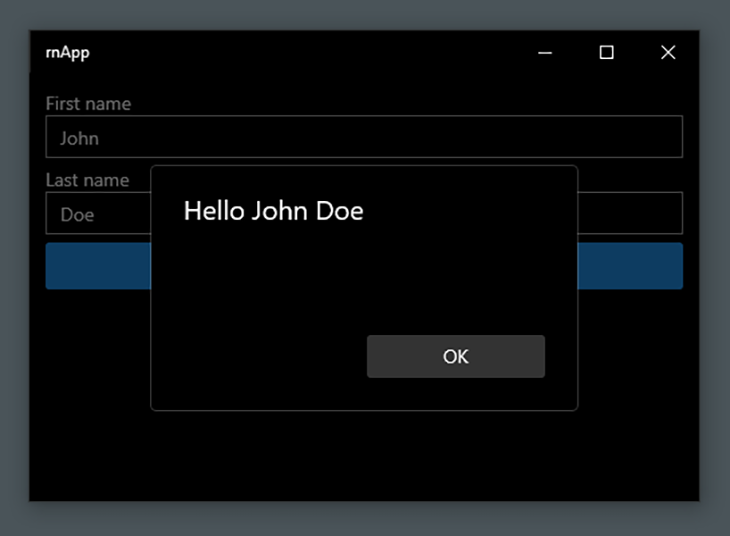
We used several React Native core components and core APIs in this example application, as well as React’s useState Hook to get the current user inputs. As you can see, we finally got native UWP UI elements from React Native components.
Complex layout implementations are also supported with the react-native-windows extension because it supports a Yoga-friendly syntax.
The React Native developer community has also made various remarkable libraries, and several libraries support react-native-windows as well. In other words, some popular React Native libraries will work on Android, iOS, and Windows applications.
Application distribution is possible by opening the UWP application source with Visual Studio.
Conclusion
The react-native-windows project was started alongside the early development stage of the official React Native project. Microsoft has also recently started work on react-native-macos to extend React Native for macOS backends.
The react-native-windows project indeed renders platform-specific UI elements from a JavaScript-based codebase. Therefore, if you are looking for a way to build high-quality Windows desktop apps with React Native, it is the best solution out there.
LogRocket: Instantly recreate issues in your React Native apps

LogRocket is a React Native monitoring solution that helps you reproduce issues instantly, prioritize bugs, and understand performance in your React Native apps.
LogRocket also helps you increase conversion rates and product usage by showing you exactly how users are interacting with your app. LogRocket’s product analytics features surface the reasons why users don’t complete a particular flow or don’t adopt a new feature.
Start proactively monitoring your React Native apps — try LogRocket for free.