
Readers help support Windows Report. We may get a commission if you buy through our links.
Read our disclosure page to find out how can you help Windows Report sustain the editorial team. Read more
Windows includes the User Account Control (UAC) that notifies you when a program or setting is about to make administrator changes to your PC. This feature is accompanied by a prompt that reads: Do you want to allow this app to make changes to your device?
This prompt serves as a protection medium to keep it in check. It also allows you to control whether the program will be able to make the change. However, some users are complaining of getting this prompt unnecessarily and sometimes with no option to accept it.
If you keep getting the message unnecessarily, you can disable UAC, among other fixes in the next section of this guide.
How do I fix Do you want to allow this app to make changes to your device message?
1. Disable the UAC dialog box via User Account Control Settings
-
1. Press the Windows key, type control, and select Control Panel.

-
2. Select User Accounts from the list.

-
3. Now, click the User Accounts option.
-
4. Go to Change User Account Control settings.
-
5. Now drag the bar slider to Never notify.

-
6. Press the OK button to apply the selected setting.
-
7. Click Yes on the UAC window that opens.


You can configure the User Account Control settings to get rid of the do you want to allow this app to make changes to your device pop-up in Windows 11.
This can be quickly done through the built-in Control Panel menu.
2. Set up a desktop shortcut that opens the program with elevated privileges
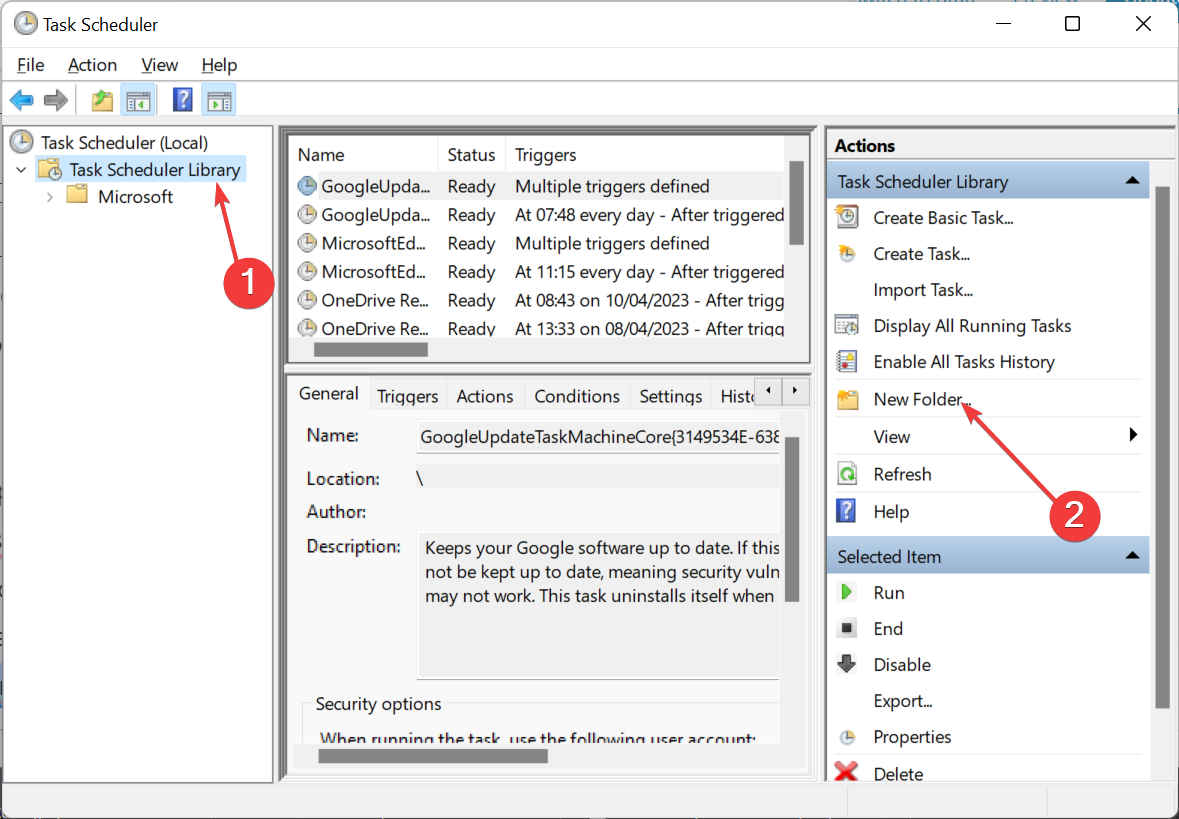
- Press the Windows key, type task, and select the Task Scheduler option.

- Click the Task Scheduler Library folder on the left and select New Folder.

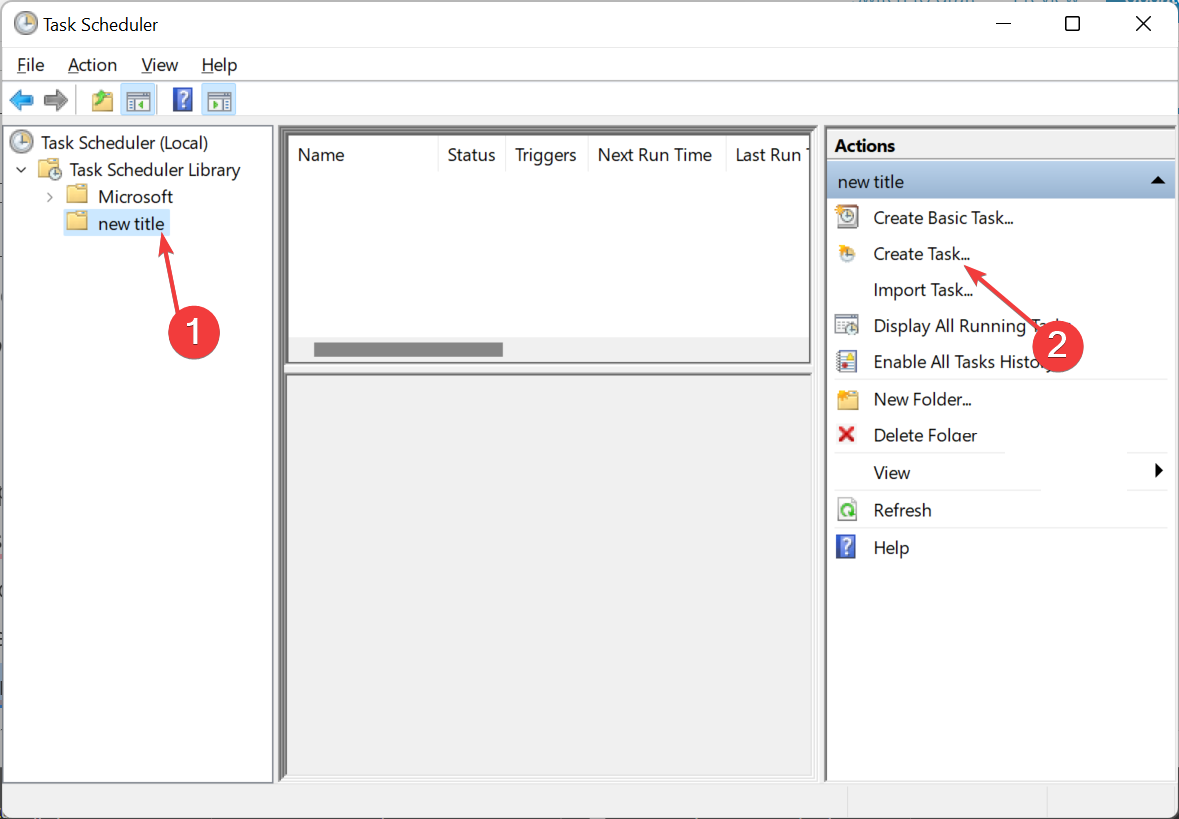
- Now, give the new folder a title and click on it.
- Click on Create Task.
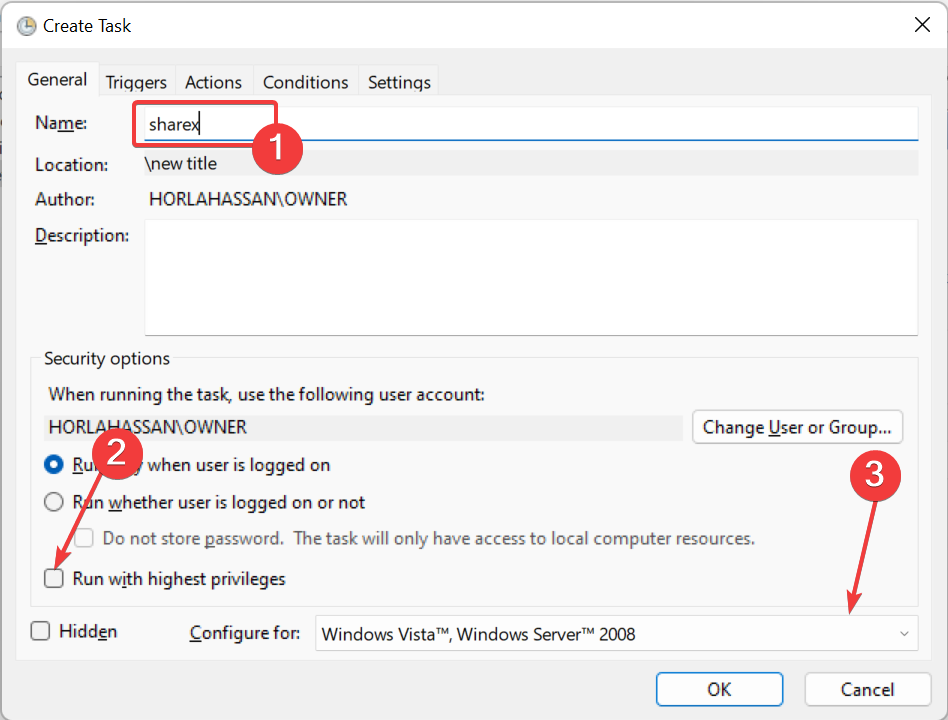
- Next, enter the title of the program you need to open with elevated privileges in the Name box.
- Select the Run with highest privileges option on the General tab.
- Now, select your PC’s platform from the Configure for dropdown menu.

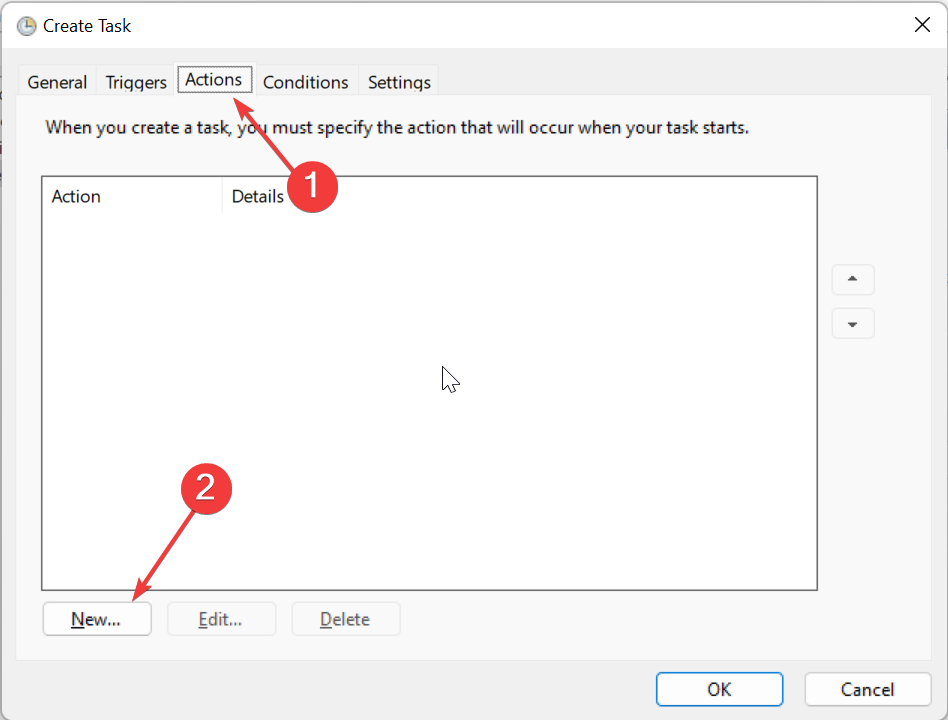
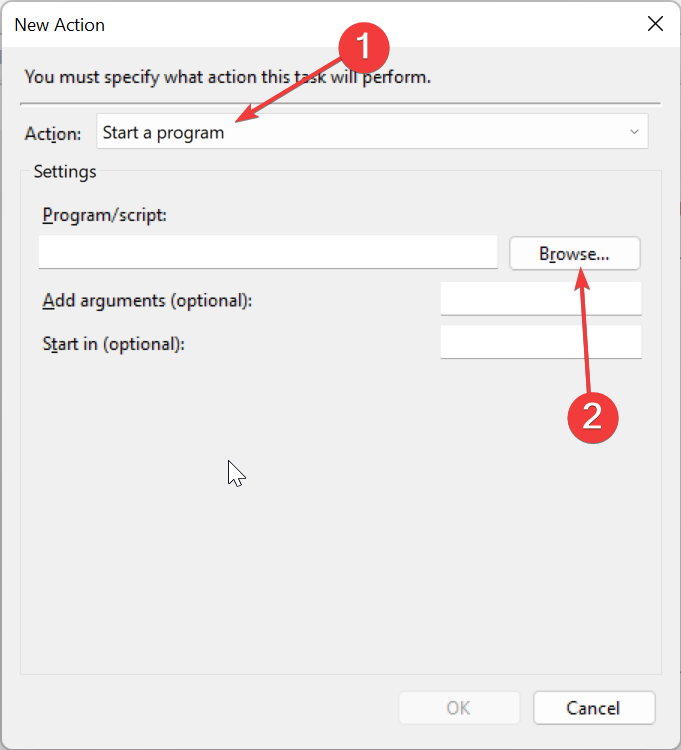
- Click the Actions tab and select New.
- From here, select Start a program from the Action dropdown menu and click the Browse button to select the program for the task to open.

- Next, click the OK button on the New Action and Create Task windows, respectively.
- Now, you should see the task listed in the new folder you set up. Select the task and press the Run button on the right of the window to check that it works.
- Press the End button to close the program.
- From here, right-click your desktop and select New > Shortcut
- Enter schtasks /run /TN “folder\filename” in the text box. Replace the folder with the Task Scheduler Library subfolder title you set up, and replace the filename with the actual task title (as entered in the General tab).
- Press the Next button to input a shortcut title.
- Finally, click the Finish button to add the new shortcut to your desktop.
While switching off the UAC is a quick way to eliminate the do you want to allow this app to make changes to your device pop-up on Genshin Impact, with the only option being No, it comes with a huge risk
However, with an exception list, you can leave the account control settings on while excluding certain programs.
- Recent Windows 11 update lets you disable profanity filter in voice typing
- Microsoft wants Windows 10 users to upgrade to Windows 11 or Copilot + PCs
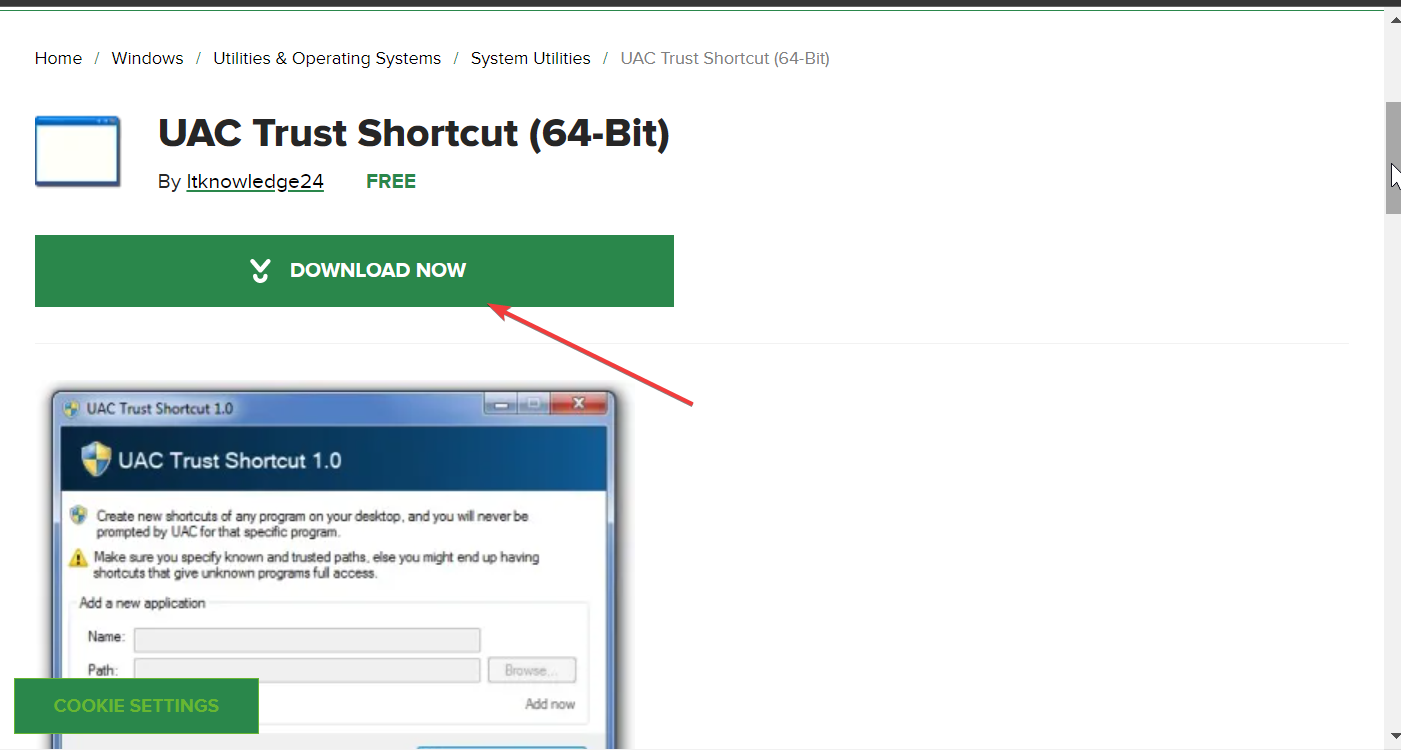
3. Bypass the UAC using the Trust Shortcut
- Download the UAC Trust Shortcut app.

- Extract the content of the zipped file and run the installation folder.

- Now, right-click its system tray icon and select Open UAC Trust.
- Click the Add another program button (and click Yes on the UAC dialog window).
- Enter the software’s title in the first text box.
- Now, click the Browse button and select the software to open.
- Click Add now to add the new software shortcut to the desktop. Then you can select that new shortcut to open the program without a UAC confirmation dialog box.
- You also need to select Start service on the UAC Trust Shortcut system tray icon’s context menu for the new software shortcuts to bypass the UAC.

If you feel solution two above is too lengthy in eliminating the do you want to allow this app to make changes to your device pop-up on Windows 10 or 11, you can use software to reduce the steps considerably, as shown above.
With this, we can conclude this guide on eliminating the do you want to allow this app to make changes to your device pop-up. To keep your PC’s security level high, we recommend leaving the prompt active but creating exceptions for trusted apps.
If you want to how to disable the UAC dialog box alert on Windows 10. check our detailed guide to do it quickly.
Feel free to let us know in the comments below if you encounter any problems applying the fixes above.
Matthew Adams
Windows Hardware Expert
Matthew is a freelancer who has produced a variety of articles on various topics related to technology. His main focus is the Windows OS and all the things surrounding it.
He is passionate about the tech world, always staying up-to-date with the latest and greatest. With an analytical view, he likes problem-solving, focusing on errors and their causes.
In his free time, he likes to read and write about history and tries to always develop new skills.
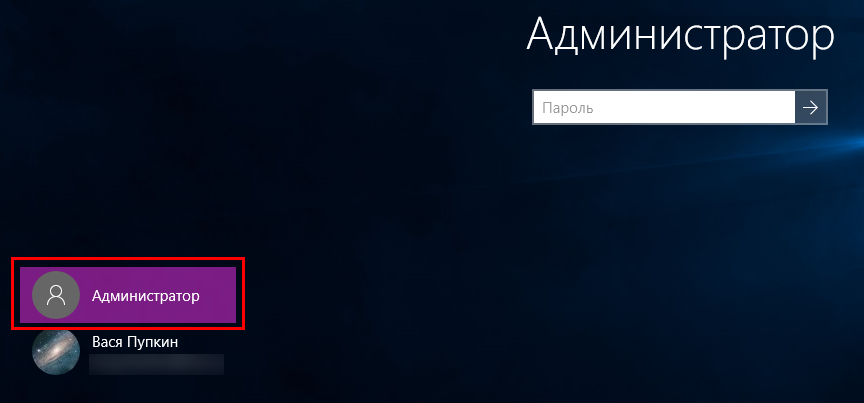
Если вы не отключали на своем компьютере систему контроля учётных записей, при запуске исполняемых файлов обычно появляется окошко UAC, в котором система просит подтвердить запуск. Варианта только два — либо вы жмёте «Да», либо «Нет». Но может случится и такое, что одна из кнопок (как правило, это кнопка «Да») окажется неактивной. Этот баг замечали не только в Windows 10, но и в предыдущих версиях системы с использованием UAC.
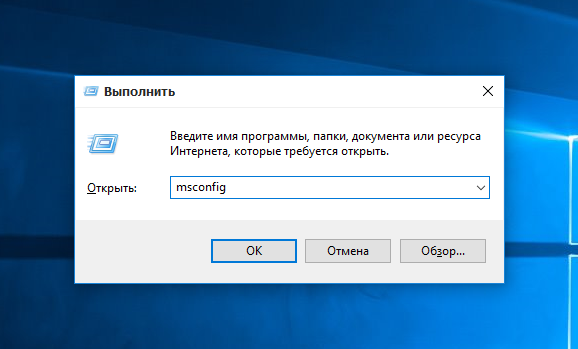
В таких случаях обычно пользователи отключают контроль учётных записей, но можно пойти и другим путём, попробовав исправить ошибку. Для этого нужно перезагрузить Windows в безопасном режиме, а затем подправить в командной строке данные учётной записи администратора.
Теперь обо всём по порядку. Чтобы загрузить Windows 8 или 10 в Safe Mode, выполните в окошке «Run» команду msconfig.
В открывшемся окне утилиты переключитесь на вкладку «Загрузка» и в параметрах загрузки установите галочку «Безопасный режим».
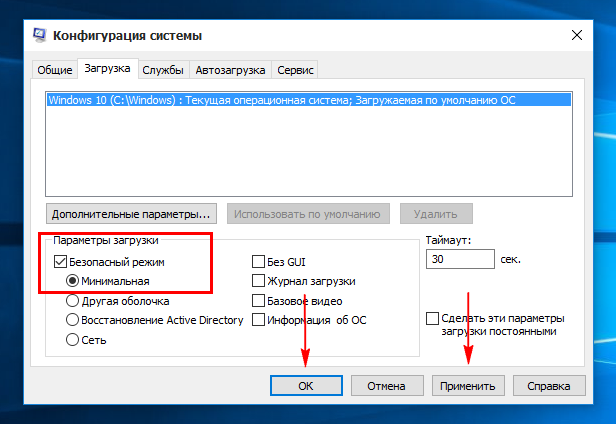
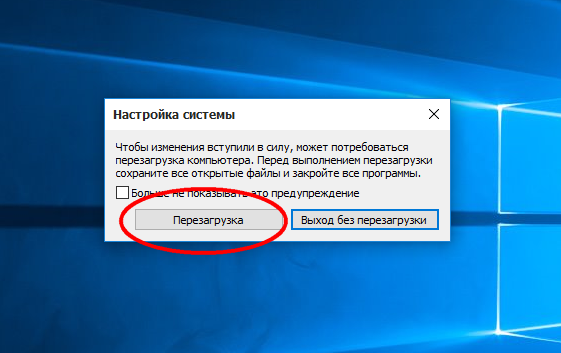
Дополнительный параметр должен быть установлен «Минимальная». Сохраните настройки и перезагрузите компьютер.
После того как Windows загрузится, откройте командную строку от имени администратора и выполните в ней вот такую команду:
net user Администратор /active:yes
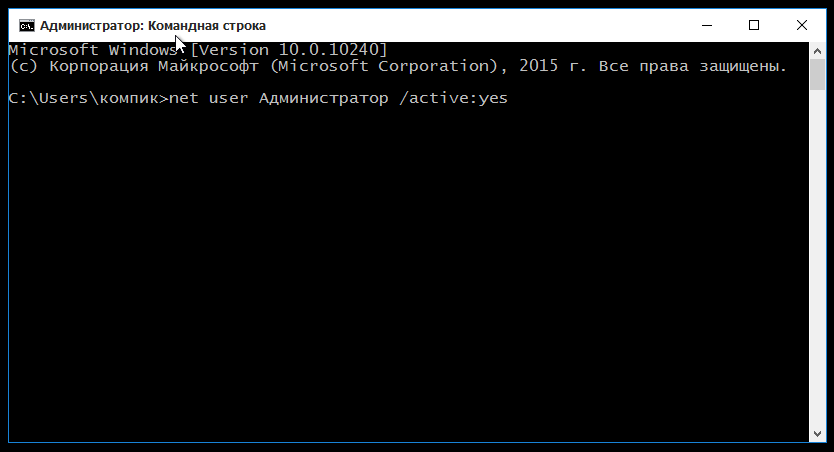
Это активирует встроенную учётную запись администратора. Теперь нужно сбросить пароль встроенного админа. Для этого тут же в консоли выполните следующую команду:
net user Администратор password
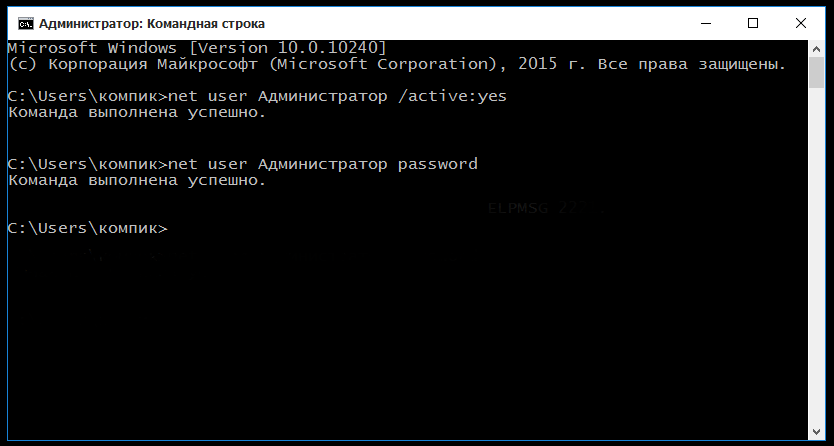
Закройте консоль, а затем вернув в окне утилиты msconfig стандартные параметра загрузки, перезагрузитесь обычным способом и войдите в систему как администратор (учётная запись станет доступной на экране входа в систему, пароль — password).
Опять откройте командную строку с повышенными правами и выполните в ней команду следующего вида:
net localgroup Администраторы USERNAME /add
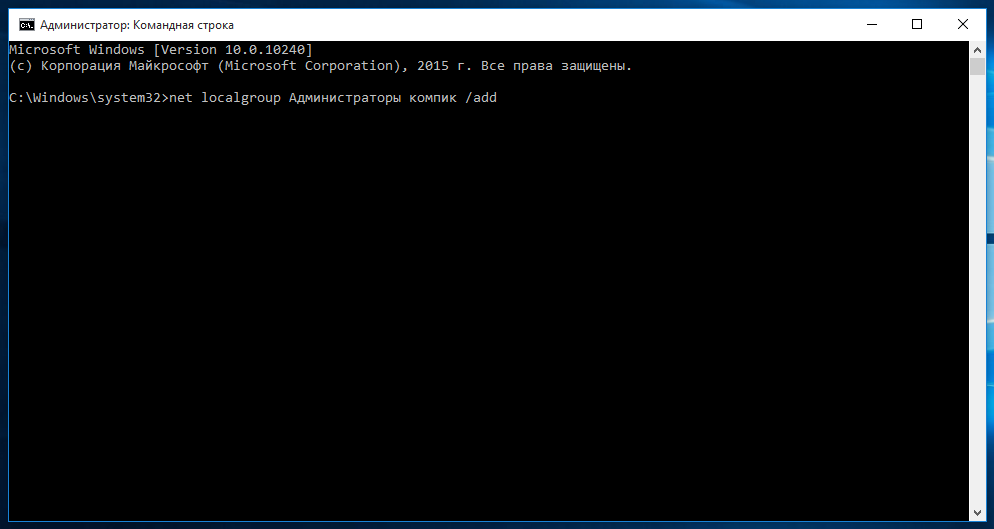
Где USERNAME — ваше имя пользователя. Выполненная команда добавит вашу учётную запись пользователя в группу локальных администраторов. Теперь перезагрузите Windows обычным способом и войдите в систему под своей учётной записью. Если вы всё сделали правильно, проблема с неактивной кнопкой «Да» в окошке UAC должна быть решена.
Реализация DI в PHP
Jason-Webb 13.05.2025
Когда я начинал писать свой первый крупный PHP-проект, моя архитектура напоминала запутаный клубок спагетти. Классы создавали другие классы внутри себя, зависимости жостко прописывались в коде, а о. . .
Обработка изображений в реальном времени на C# с OpenCV
stackOverflow 13.05.2025
Объединение библиотеки компьютерного зрения OpenCV с современным языком программирования C# создаёт симбиоз, который открывает доступ к впечатляющему набору возможностей. Ключевое преимущество этого. . .
POCO, ACE, Loki и другие продвинутые C++ библиотеки
NullReferenced 13.05.2025
В C++ разработки существует такое обилие библиотек, что порой кажется, будто ты заблудился в дремучем лесу. И среди этого многообразия POCO (Portable Components) – как маяк для тех, кто ищет. . .
Паттерны проектирования GoF на C#
UnmanagedCoder 13.05.2025
Вы наверняка сталкивались с ситуациями, когда код разрастается до неприличных размеров, а его поддержка становится настоящим испытанием. Именно в такие моменты на помощь приходят паттерны Gang of. . .
Создаем CLI приложение на Python с Prompt Toolkit
py-thonny 13.05.2025
Современные командные интерфейсы давно перестали быть черно-белыми текстовыми программами, которые многие помнят по старым операционным системам. CLI сегодня – это мощные, интуитивные и даже. . .
Конвейеры ETL с Apache Airflow и Python
AI_Generated 13.05.2025
ETL-конвейеры – это набор процессов, отвечающих за извлечение данных из различных источников (Extract), их преобразование в нужный формат (Transform) и загрузку в целевое хранилище (Load). . . .
Выполнение асинхронных задач в Python с asyncio
py-thonny 12.05.2025
Современный мир программирования похож на оживлённый мегаполис – тысячи процессов одновременно требуют внимания, ресурсов и времени. В этих джунглях операций возникают ситуации, когда программа. . .
Работа с gRPC сервисами на C#
UnmanagedCoder 12.05.2025
gRPC (Google Remote Procedure Call) — открытый высокопроизводительный RPC-фреймворк, изначально разработанный компанией Google. Он отличается от традиционых REST-сервисов как минимум тем, что. . .
CQRS (Command Query Responsibility Segregation) на Java
Javaican 12.05.2025
CQRS — Command Query Responsibility Segregation, или разделение ответственности команд и запросов. Суть этого архитектурного паттерна проста: операции чтения данных (запросы) отделяются от операций. . .
Шаблоны и приёмы реализации DDD на C#
stackOverflow 12.05.2025
Когда я впервые погрузился в мир Domain-Driven Design, мне показалось, что это очередная модная методология, которая скоро канет в лету. Однако годы практики убедили меня в обратном. DDD — не просто. . .
При установке приложений давно у меня выдавали ошибки по типу «Разрешите приложению вносить изменения в ваше устройство». То были заменяемые небольшие программы, которые я просто менял.
Теперь когда я устанавливаю себе на ПК игру(в частности legends of runterra) мне в установщике показывается такое окно
С этой же ошибкой. Кстати никакого «окна с подтверждением» мне не появляется.
Как можно «разрешить доступ приложению вносить изменения в устройство»?
P.S. С самой установки остановил центр обновлений, очистил ОС от всего майкрософтского и убрал UAC, и сейчас даже когда я его включаю ошибка не проходит.
-
Вопрос задан
-
3980 просмотров