
Applies ToWindows 10
Поддержка Windows 10 прекратится в октябре 2025 г.
После 14 октября 2025 г. корпорация Майкрософт больше не будет предоставлять бесплатные обновления программного обеспечения из Центра обновления Windows, техническую помощь и исправления безопасности для Windows 10. Ваш компьютер по-прежнему будет работать, но мы рекомендуем перейти на Windows 11.
Подробнее
Если к компьютеру подключено несколько дисплеев или конфигурация дисплея изменится, некоторые классические приложения могут выглядеть размытыми. Windows 10 (версии 1803 или более поздней) могут попытаться исправить это автоматически, чтобы приложения не отображались размытыми. Windows может не исправить размытость в некоторых приложениях, поэтому они по-прежнему будут выглядеть расплывчато на дисплеях с высоким разрешением.
Вот несколько примеров ситуаций, когда это может происходить.
-
Вы открываете приложение на дисплее с высоким разрешением, а затем перемещаете приложение на другой дисплей с другим разрешением.
-
Вы подключаете ноутбук или планшет к дисплею с другим разрешением, а затем проецируете изображение в режиме Только второй экран.
-
Вы выполняете удаленное подключение к другому компьютеру, разрешение дисплея которого отличается от разрешения дисплея компьютера, с которого выполняется подключение.
Примечания:
-
Чтобы автоматически использовать параметр для автоматического исправления размытых приложений, необходимо установить Windows 10 (версия 1803). Чтобы узнать версию Windows на своем компьютере, изучите статью Какая у меня версия операционной системы Windows?
-
Если у вас установлена Windows 10 (версия 1903), параметр исправления размытых приложений по умолчанию включен. Однако вы можете выключить его в любой момент. Уведомление об исправлении размытых приложений зависит от приложения и может по-прежнему отображаться.
Исправление размытости приложений
Если приложение выглядит размытым или на основном мониторе отображается уведомление о размытых приложениях, выполните следующие действия.
-
Выполните одно из следующих действий в зависимости от того, отобразился ли запрос «Исправить размытость в приложениях?»
-
Если запрос отобразился, выберите Да, открыть параметры и нажмите кнопку Применить.
-
Если запрос не отображается, в поле поиска на панели задач введите дополнительные параметры масштабирования и выберите Исправить размытость в приложениях.
-
-
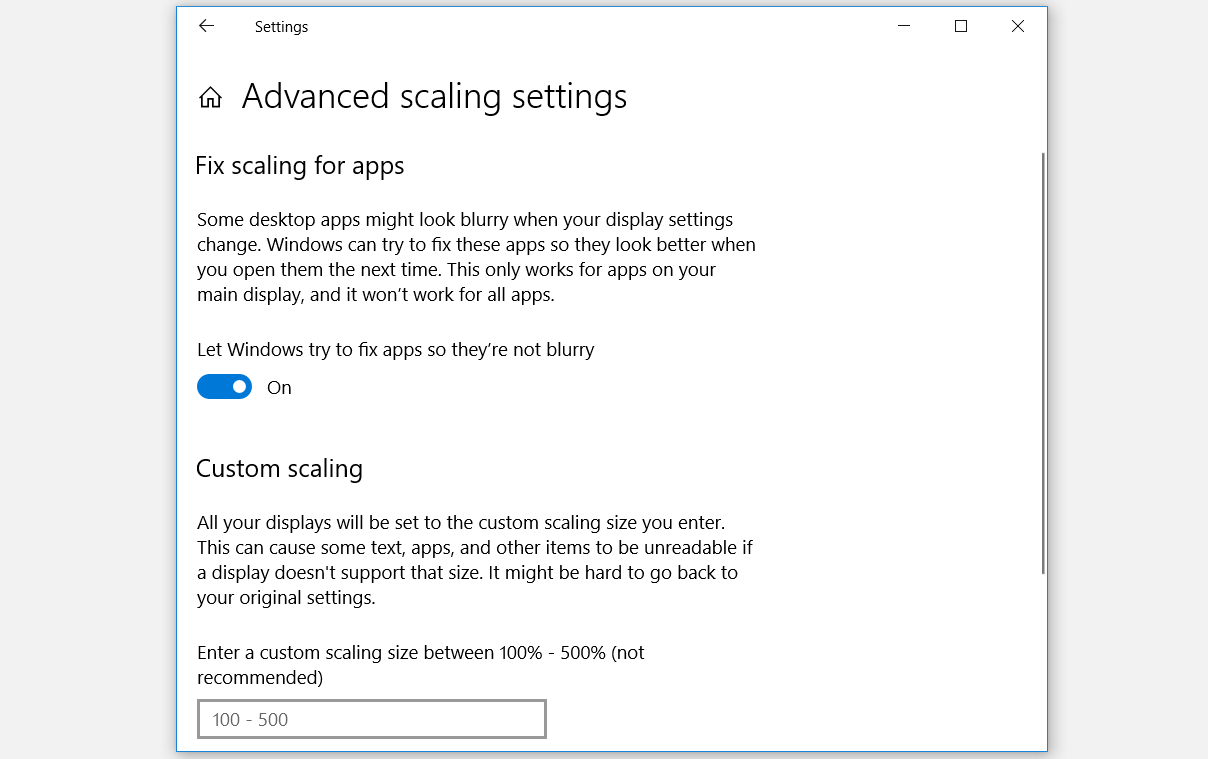
В разделе Исправление масштабирования для приложений включите параметр Разрешить Windows пытаться исправить приложения, чтобы они не были размытыми.

Чтобы проверить способность Windows исправить проблему, закройте классическое приложение, которое выглядит размыто на основном дисплее, а затем снова откройте его.
Если приложение по-прежнему выглядит размытым, можно попробовать использовать другой параметр совместимости с высоким разрешением на дюйм для этого приложения вместо параметра Разрешить Windows исправить приложения, чтобы они не были размытыми . Дополнительные сведения об этом см. в разделе Настройка совместимости старых программ с данной версией Windows.
Независимо от того, были ли у вас размытые приложения или вы видели уведомление о размытых приложениях, вы можете включить или отключить эту функцию в любое время.
-
В поле поиска на панели задач введите расширенные параметры масштабирования и выберите Исправление размытых приложений.
-
В разделе Исправление масштабирования для приложений включите или отключите параметр Разрешить Windows попытаться исправить приложения, чтобы они не были размытыми.
Хотя уведомление о автоматическом исправлении размытых приложений может оказаться полезным, иногда уведомление может не отображаться. Вы можете отключить уведомление двумя способами:
-
Нажмите кнопку Пуск , затем выберите Параметры > Системные > уведомления & действия, а затем отключите Параметры отображения.
-
Выберите Центр уведомлений , а затем — Фокусировка помощи. Эта Windows 10 функция позволяет управлять отображением уведомлений. Дополнительные сведения см. в статье Упрощение фокусировки на задачах.
Нужна дополнительная помощь?
Нужны дополнительные параметры?
Изучите преимущества подписки, просмотрите учебные курсы, узнайте, как защитить свое устройство и т. д.
Are your desktop icons blurry in Windows 10? Well, Windows 10 has a massive scaling problem for high-resolution screens. Because of the broken scaling system, the icons appear to be blurry. Many users have reported that they are facing this issue, and understandably it can be very hard to work on a blurry computer screen.
If you are also facing this issue then don’t worry as in this article, we have discussed the various ways in which you can troubleshoot the Windows 10 blurry icons issue.
We have shown a VIDEO walk through at the end of the post for easy solution.
Why Is Desktop Icon Blurry In Windows 10?
Generally, the blurry screen is caused when the scaling of the screen is not done correctly, but there can also be other reasons for this issue. Let’s take a look at some of the other reasons behind this problem.
- The resolution may not bet set correctly, which can cause the icons to look blurry.
- Faulty or corrupted GPU drivers are known to cause many display-related problems. They can also be the culprit for the icons to look blurry.
- If the Windows is outdated or corrupted, then also this problem can appear.
- A high DPI setting is another common cause of this problem.
Troubleshooting Windows 10 Blurry Icons Issue
As mentioned above, there are various different causes of this issue. In Windows 10, the blurry screen can be fixed by troubleshooting these causes one by one.
Solution 1: Set The Recommended Resolution
As mentioned above, if the resolution is not set as recommended, then you can face blurry icons or a pixelated screen in Windows 10. In this scenario, changing the resolution to the recommended resolution should fix the blurry icons in Windows 10.
To set the recommended resolution, follow the steps given below:
- Right-click on your desktop and then click on the Display settings option from the pop-up menu on your screen.
- Locate the Resolution option in the Scale and Layout section and click on the downward arrow.
- Choose the resolution value that has Recommended written next to it.
If the recommended resolution was already selected for you, then don’t change anything and skip to Solution 2.
- Next, it will ask if you want to keep changes or revert back. Click on the Keep changes option.
Now, check if the desktop icons are still blurry.
Solution 2: Install Appropriate GPU Drivers
Faulty GPU drivers are known to cause these types of display-related issues, it may also be the cause of this problem. The basic graphics drivers are known to not allow the GPU to properly configure the DPI of high-resolution monitors.
In this scenario, downloading the latest driver version for your computer and installing it should fix this problem. If you don’t know the drivers that you are using, then follow the steps given below:
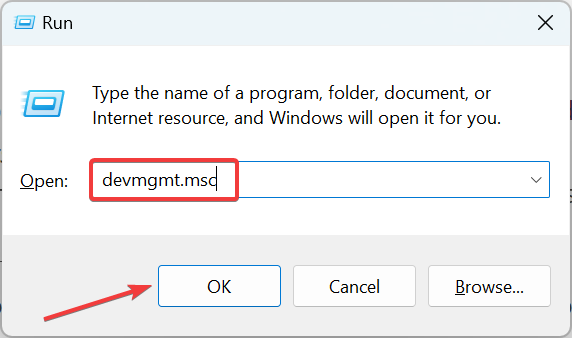
- Press the Windows + R keys to open the Run utility. Type devmgmt.msc and click on OK.
Windows Device Manager will open on your screen.
- Locate the GPU driver and right-click on it.
- Click on the Properties option from the pop-up menu.
- Then, select the Details tab and change the Property to Hardware Ids. Copy the first value given and paste it on the web address bar.
Now, after you have found out the GPU details, visit one of these websites and download the drivers.
- AMD/ATI
- Intel
- NVidia
Once you have downloaded and installed the drivers, check if the problem remains.
Solution 3: Change The DPI Size
If the DPI has been set to a higher level than recommended, then the icons on your screen can become blurry. Normally 100% is the recommended value for the standard monitors, but it can become a problem for the high-resolution monitors as the elements in the interface will become so small that it will be hard to recognize anything.
If you are facing this in a standard monitor, then most likely changing the DPI to 100% should fix this issue.
To change your DPI, follow the steps given below:
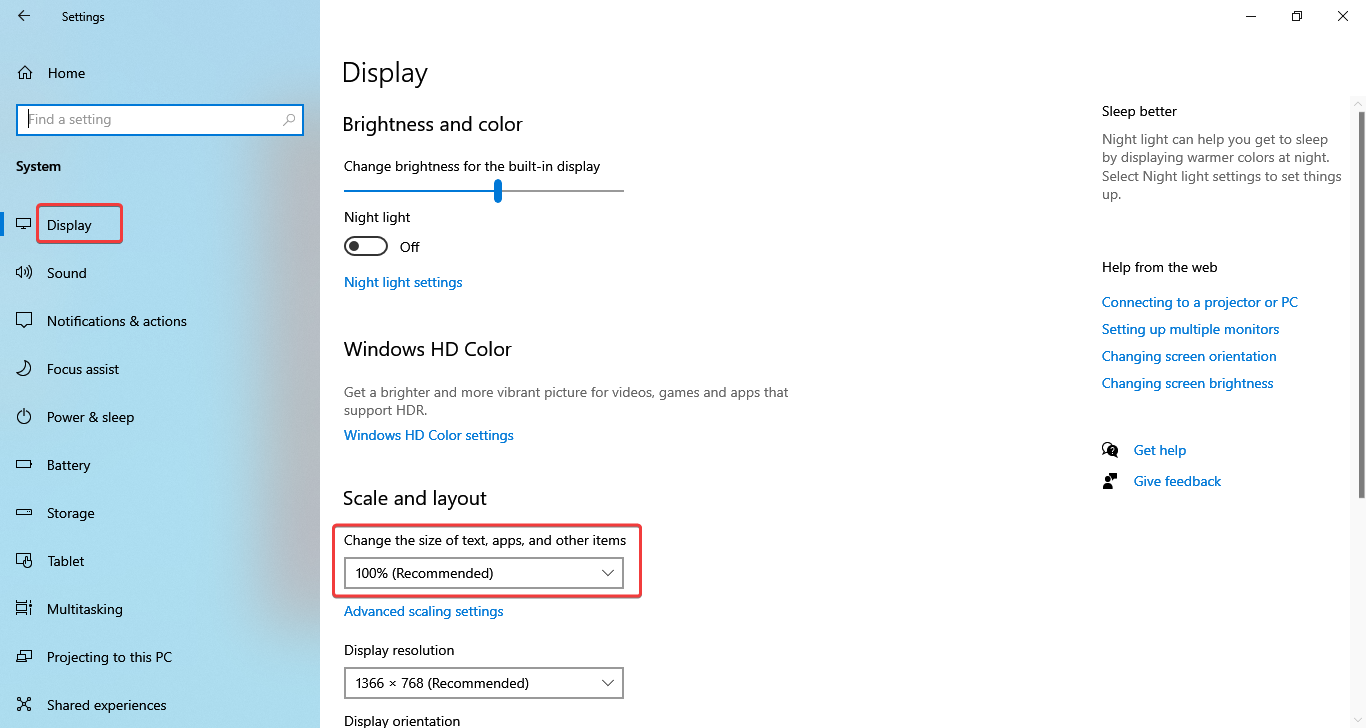
- Open the Display Settings following Solution 1 and scroll down to Scale and layout section.
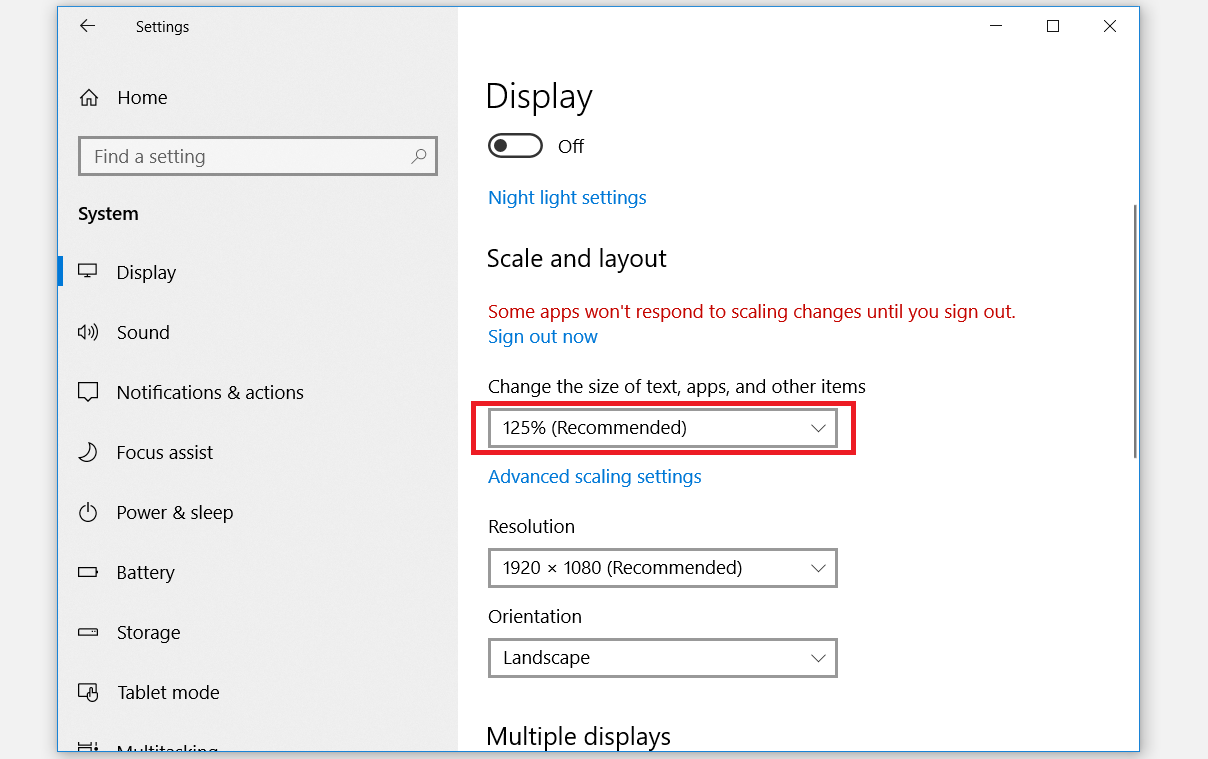
- Click on the Change the size of text, apps, and other items option and select the Recommended option.
- Now, click on the Advanced scaling settings just below the DPI settings.
- Turn on the Let Windows try to fix apps so they’re not blurry toggle.
This should fix the desktop icons blurry in Windows 10 issue if it was caused by high DPI.
Solution 4: Change The Visual Effects Settings
Some users have reported that they fixed this problem by changing the Visual effects settings to Best performance. To change the Visual effects settings, follow the steps given below:
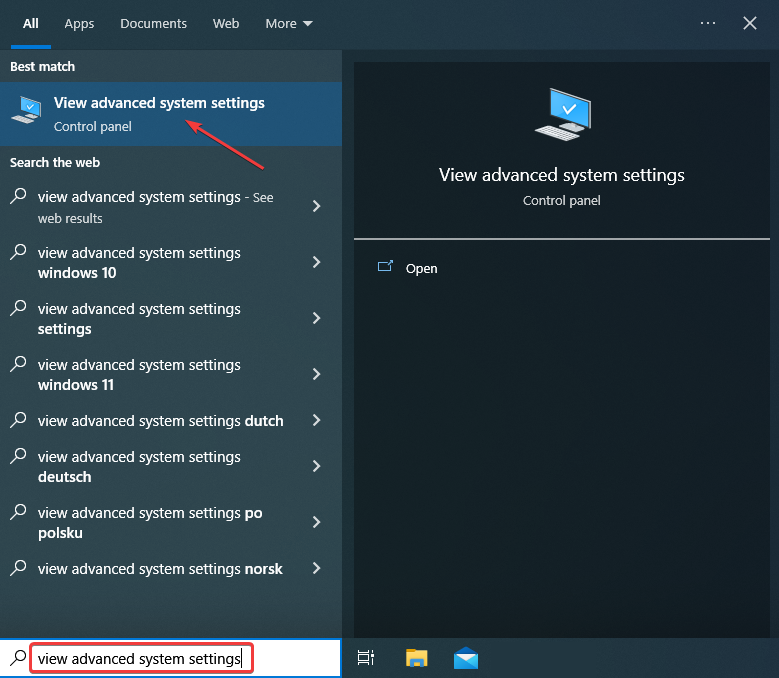
- Type View advanced system settings in the Windows search bar and select the appropriate option.
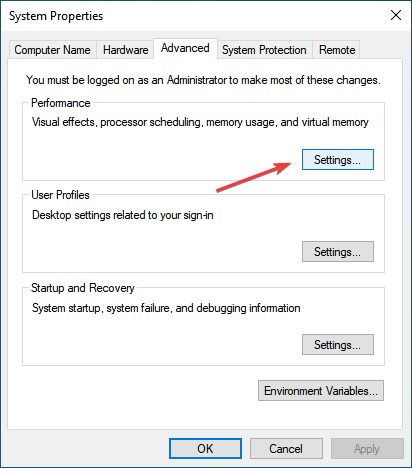
- Click the Settings option in the Performance section. It will open the Performance Options on your screen.
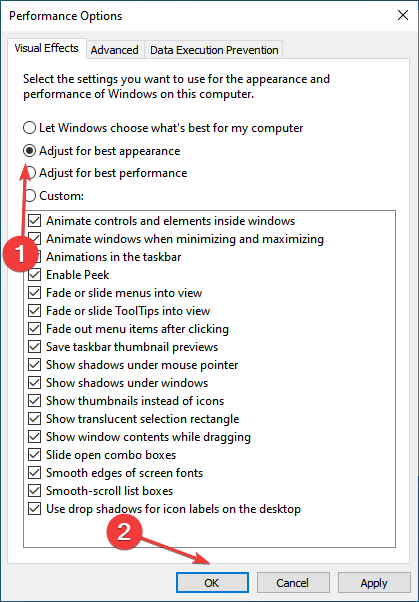
- Select the Adjust for best performance option in the Visual effects tab.
- Finally, click on Apply and OK to save the changes.
Solution 5: Update Windows
If your Windows firmware is outdated, then it can cause several problems for your computer including the pixelated screen in Windows 10 issue. In this scenario, updating the Windows should fix this issue.
To update your Windows, follow the steps given below:
- Type Check for updates in the Windows search bar and select the appropriate option.
- Click on the Check for updates option. Your Windows will now check if any update is available and then download it automatically. Make sure the internet connection is turned on.
Once the update finishes and the Windows restarts to desktop, check if the problem has been fixed.
Solution 6: Reset Your Computer
If none of the above solutions were able to help you fix this issue, then try resetting Windows. Resetting Windows should fix any system corruption on your computer.
To reset Windows, follow the steps given below:
- Type, Reset this PC in the Windows search bar and select the appropriate option.
- In the Reset this PC section, click on the Get started option.
- Now, follow the instructions on your screen and wait for Windows to reset back to factory settings.
Wrapping Up
So if in Windows 10, blurry icons issue happens with you again, then you can easily fix it now. Follow the above troubleshooting methods carefully and you should be able to fix this problem. Don’t forget to share your views on this article in the comment section below.
When using your Windows 10 PC, certain desktop applications may appear blurry and display fuzzy fonts, text, and menus. You might experience this if you’ve just installed a fresh copy of Windows, have multiple monitors connected to your computer, or recently configured your display settings.
In most cases, when Windows detects blurry apps, it’ll pop up a window that’ll prompt you to fix those apps automatically. However, this might not always solve your problem. This article will take you through the best methods you’ll need to fix blurry apps.
1. Configure Advanced Scaling Settings
Windows 10 comes with a built-in feature that automatically fixes blurry apps. This option isn’t enabled by default, but you can turn it on so that your PC can always fix blurry apps automatically. Here’s how you can enable this feature:
Navigate to Windows Start Menu > PC Settings > System > Display > Advanced scaling settings. Turn the button On under the option for Let Windows try to fix apps so they’re not blurry.
To find out if Windows has fixed the problem, try opening an app that you know is problematic and appears blurry. If the app isn’t fixed, try rebooting your computer to save the changes. Otherwise, you can try the other methods in this article.
2. Change the Size of Texts and Apps
Navigate to Windows Start Menu > PC Settings > System > Display. In the Display Settings window, click on the drop-down arrow under Change the size of the text, apps, and other items, and choose the Recommended option.
Reboot your computer to save the changes. In case this method doesn’t work out, try the next one.
3. Configure DPI Settings for a Certain Problematic App
If you’re experiencing display issues for only one specific app and not every other app on your PC, you should configure the app’s DPI (Dots Per Inch) settings. DPI settings control the sizes of text, apps, and icons on your PC. To configure your DPI settings, here’s what you need to do:
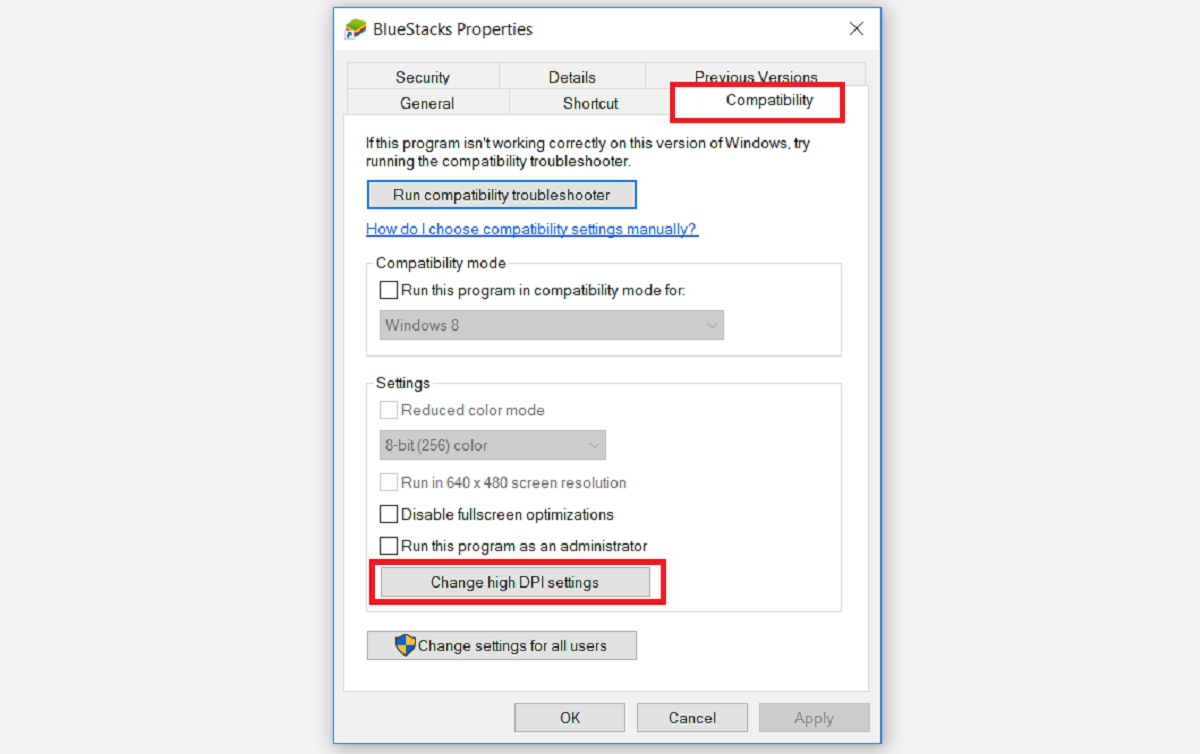
Right-click on the icon of the problematic app and click on Properties. In the Properties window, go to the Compatibility tab and then click Change high DPI settings.
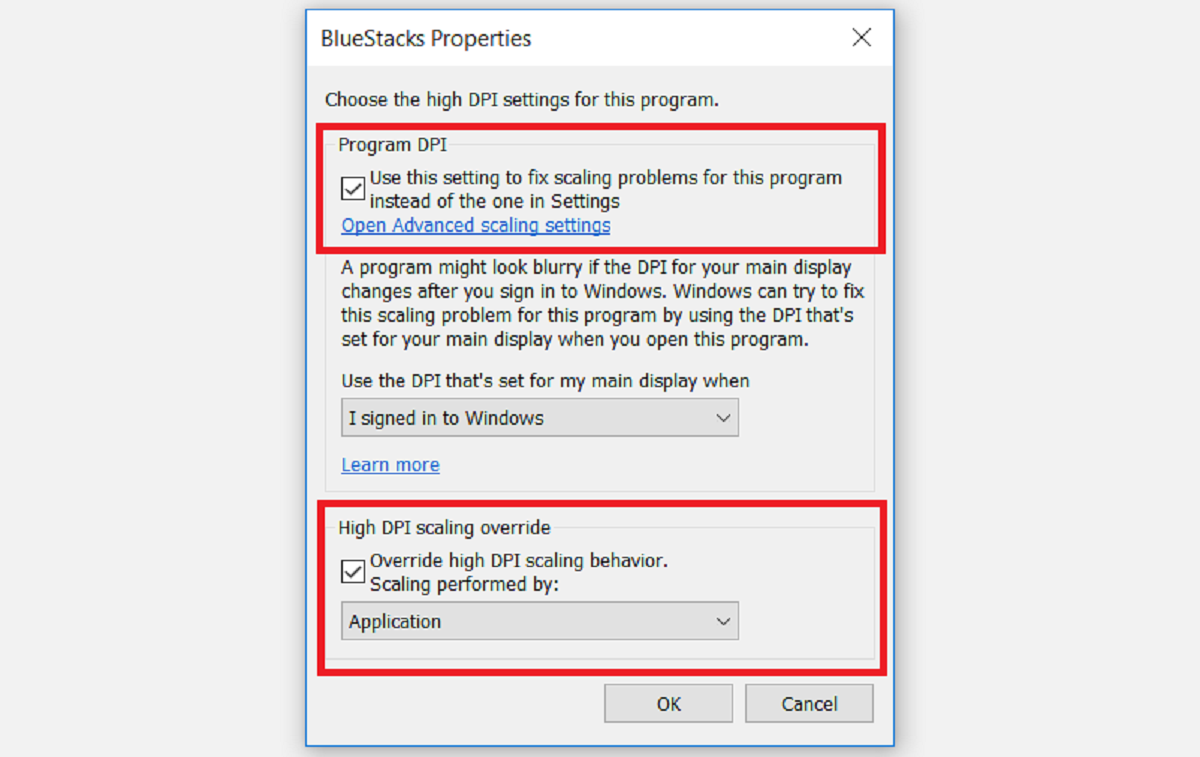
In the window that pops up, check the Use this setting to fix the scaling problems for this program instead of the one in Settings option. In the same window, under the High DPI scaling override settings, check the Override high DPI scaling behavior option and select Application in the drop-down menu. Finally, click OK to save the changes on your computer.
Close and reopen the problematic app to check if the issue persists. In case the issue isn’t yet resolved, reboot your computer and try opening the app again. Otherwise, try the next solution.
4. Adjust ClearType Text for Blurry Fonts
Another way to fix blurry apps and fonts on your PC is by adjusting ClearType text in the Control Panel. Here’s how you can do this:
Type «ClearType» in your Start menu search bar and select the Best Match.
In the ClearType Text Tuner window, check the Turn on ClearType box and click Next. A window will pop up indicating that your display monitor is set to its native resolution; click Next when you’re on this screen.
In the next window, you’ll see some text samples, and you’ll have to choose the one that looks best to you. When you’ve made a choice, click Next to continue. You’ll have to do this for 5 trials. Continue clicking the best text sample on each screen and click Next to continue.
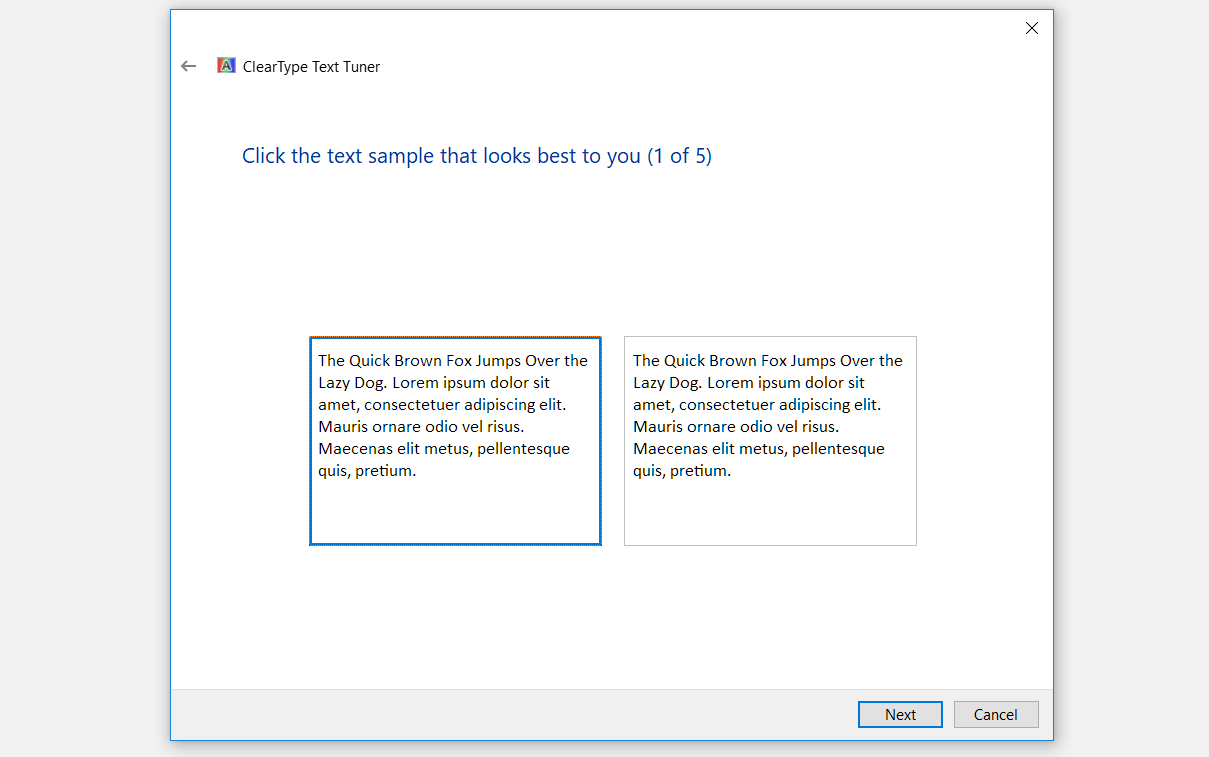
When you finish clicking the best text samples, ClearType Text Tuner will indicate that you have finished tuning the text on your monitor. From here, click on Finish to complete the process.
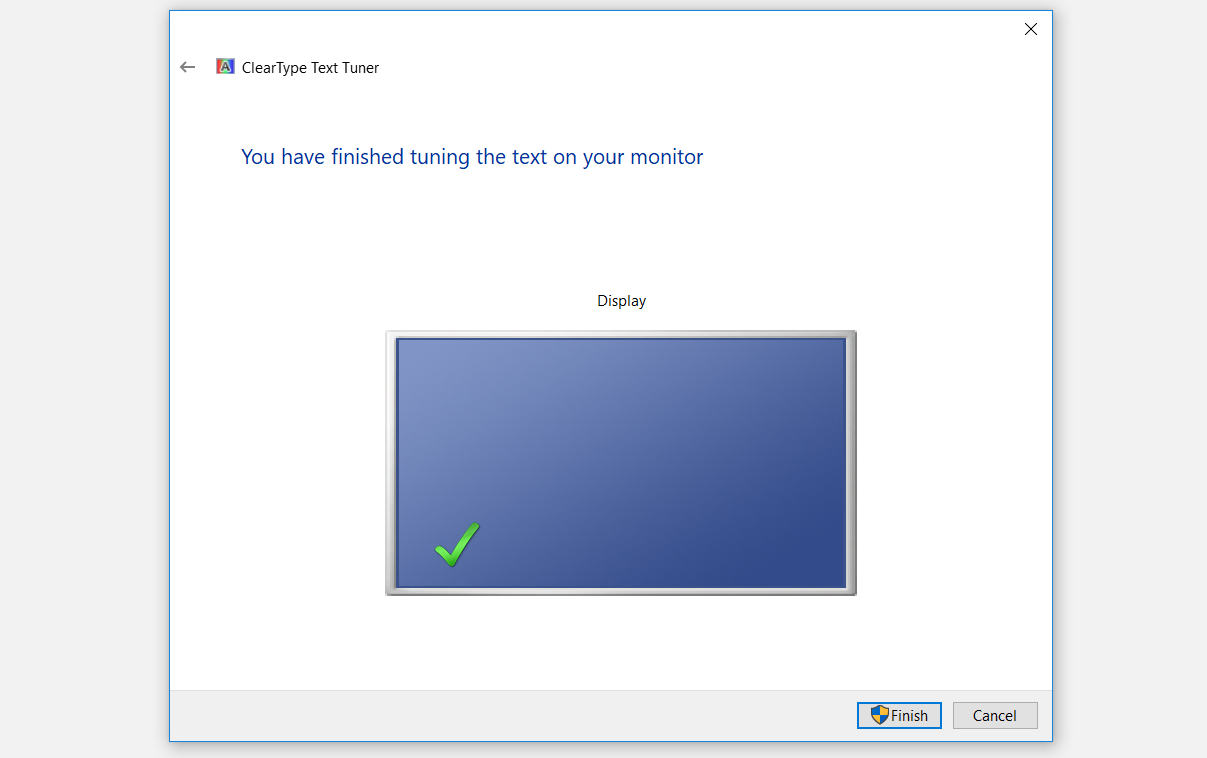
Close the ClearType Text Tuner window and reboot your computer to save the changes. Check if the issue persists and try other methods in case this method doesn’t help.
5. Update Your PC’s Display Drivers
Apps can appear blurry on your PC due to display driver bugs. Updating your display drivers can help solve this issue. Here’s how you can do this:
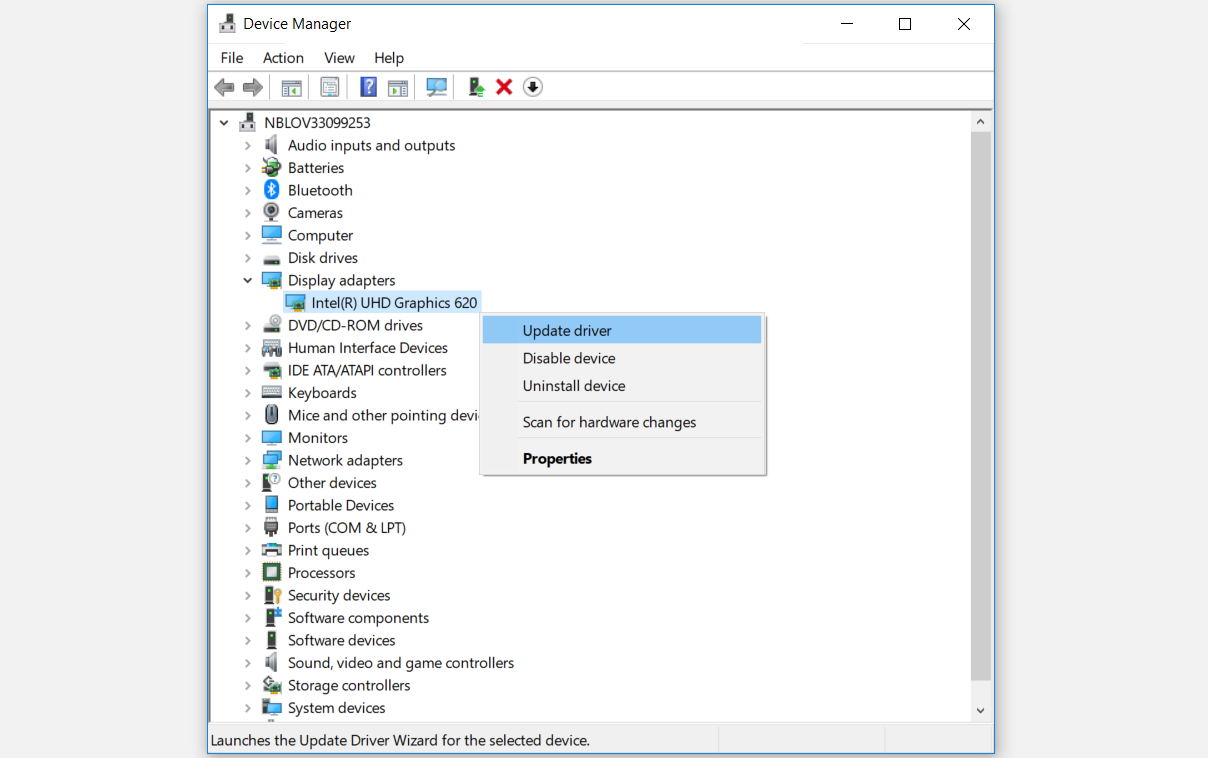
Press Windows Key + X and select Device Manager in the pop-up menu. In the Device Manager window, double-click Display adapters. In the drop-down menu, right-click on the Graphics driver and click Update driver.
A window will pop-up where you’ll be asked, “How do you want to search for the drivers?” Click the Search automatically for updated driver software option. Windows will search for a compatible graphics driver for your PC and will download it.
In case a window pops up stating that “The best driver for your device is already installed,” click the option to Search for updated drivers on Windows Update. This option will install your graphics driver together with a Windows Update.
When you finish updating your graphics driver, close the Device Manager window and reboot your PC. Your apps shouldn’t be blurry anymore.
6. Lower Your PC’s Resolution
Lowering the resolution on your computer can help fix apps that appear blurry. This is mainly because some apps appear blurry on high-resolution displays. For example, this can happen if you connect remotely to another PC with a high-resolution display compared to yours. To lower your screen’s resolution, here’s what you need to do:
Navigate to Windows Start Menu > PC Settings > System > Display. In the right-hand side pane under Scale and layout, click the drop-down arrow on Resolution and select a lower resolution for your PC.
Reboot your computer to save these changes. Your apps should appear perfectly clear by now.
No More Blurry Apps on Your PC
If you’ve had an issue with blurry apps on your PC for quite a while, this shouldn’t be the case anymore. If you apply any of the methods we provide in this article, you’ll easily take care of blurry texts and apps.
If you normally experience blurry apps when you use multiple display screens, it’s always best to know how to set up those multiple monitors correctly.
Владельцы ПК и ноутбуков с высоким разрешением монитора и использующие масштабирование в параметрах дисплея могут обратить внимание, что в некоторых программах шрифты и другие элементы интерфейса выглядят размытыми.
В этой инструкции о том, чем это вызвано и как исправить ситуацию с нечётким текстом и элементами управления отдельных программах Windows 11 и Windows 10.
Поддержка определения DPI в программах
Прежде чем начать, одно примечание: в этом материале рассмотрена ситуация, когда речь идёт лишь об отдельных программах. Если проблема наблюдается в целом, независимо от того, какое приложение используется, на эту тему есть отдельная инструкциях про размытое изображение на экране и размытые шрифты в Windows.
Проблема с нечёткими шрифтами в отдельных программах обычно связана с тем, что используется какое-то старое ПО, либо приложение, в котором задействованы нестандартные библиотеки для отрисовки интерфейса и оно не поддерживает определение DPI (уровня масштабирования) в современных версиях Windows.
Вы можете посмотреть, поддерживает ли запущенная программа определение DPI с помощью диспетчера задач:
- Откройте диспетчер задач, сделать это можно из меню по правому клику на кнопке «Пуск», в Windows 11 перейдите на вкладку «Сведения», в Windows 10 — «Подробности».
- Нажмите правой кнопкой мыши по заголовку любого столбца и нажмите по пункту «Выбрать столбцы».
- Включите показ столбца «Поддержка определения DPI».

- В результате, если для процесса, соответствующего программе, с которой возникла проблема, в столбце отображается «Неизвестно» или «Недоступно», причина, вероятно, именно в отсутствии поддержки определения DPI.


Попробовать решить проблему можно с помощью параметров совместимости программы, изменив параметры высокого DPI:
- Нажмите правой кнопкой мыши по исполняемому файлу или ярлыку программы, выберите пункт «Свойства».
- Перейдите на вкладку «Совместимость» и нажмите кнопку «Изменить параметры высокого DPI».

- Отметьте пункт «Переопределите режим масштабирования высокого разрешения» и выберите опцию «Система (Расширенная)».

- Примените настройки и перезапустите программу.


Пример результата для старой версии текстового редактора, запущенного в Windows 11 при 4k разрешении и с масштабированием 200%: сверху — до переопределения параметров, внизу — после:

На скриншоте результат может быть не совсем явным, но проблема с чёткостью текста была решена.
Переопределить те же параметры можно в реестре:
- Откройте редактор реестра: нажмите клавиши Win+R, введите regedit и нажмите Enter
- Перейдите к разделу реестра
HKEY_LOCAL_MACHINE\SOFTWARE\Microsoft\Windows NT\CurrentVersion\Image File Execution Options
- Создайте новый подраздел с тем же именем, которое имеет исполняемый файл программы и выберите его.
- Нажмите правой кнопкой мыши в правой панели редактора реестра и создайте новый строковый параметр с именем DpiAwareness
- Дважды нажмите по созданному параметру и установите значение system. Также можно попробовать результат со значением PerMonitorV2
Выполнив изменения, закройте редактор реестра и попробуйте снова запустить программу.
Дополнительная информация
Некоторые дополнительные нюансы, касающиеся размытых и нечётких элементов в программах:
- Иногда может помочь запуск программы в режиме совместимости с предыдущей версией Windows.
- В некоторых случаях описанные выше действия решают проблему только со шрифтами, но не со значками и графическими элементами. Причина чаще всего в том, что в программе не предусмотрены ресурсы с изображениями в более высоком качестве и при их масштабировании появляется размытость, «лесенки» и другие артефакты.
- Если вы только что меняли масштабирование в Windows, некоторые элементы могут масштабироваться неправильно до перезагрузки компьютера.
- Если вы настраивали масштабирование вручную (не выбирая из предустановленных вариантов в параметрах дисплея, а вручную вводя значение в поле «Настраиваемое масштабирование»), учитывайте, что этот вариант работает иначе, чем масштабирование в параметрах дисплея. Решить проблему может отключение настраиваемого масштабирование с ручным указанием масштаба и выбор из доступных значений.
Надеюсь, информация будет полезной, а проблема с размытыми элементами решится.
Readers help support Windows Report. We may get a commission if you buy through our links.
Read our disclosure page to find out how can you help Windows Report sustain the editorial team. Read more
A clean and uncluttered desktop is usually the ideal way to go, but how would you react when the desktop icons look blurry even after putting in all effort?
This is a common problem faced by users on almost all iterations of the OS, but Windows 10 seems more likely to be affected. So, let’s find out how to fix blurry icons in Windows 10.
Why do my icons look blurry?
Here are some of the reasons the desktop icons look appear blurry:
- Scaling issues – This is usually the most common problem that leads to blurry icons in Windows. Though, some apps may not respond to scaling changes.
- Running an outdated graphics driver – If you run a corrupt or outdated driver, it will affect the display clarity.
- Icon has a low resolution – Often, a few icons designed for older iterations of the OS have a low resolution and appear blurry in the ones released later.
- A bug in the OS – In case you started encountering the problem after updating Windows, chances are that the issue lies with the installed version.
How do I fix blurry desktop icons?
Before we head to the slightly more complex solutions, let’s first try a few quick ones:
- Restart the computer.
- Check for Windows Update and install the latest available version.
- If the problem is faced on an external monitor, reconnect it and check if it’s fixed.
If nothing worked, let’s head to the other solutions.
1. Change the View settings
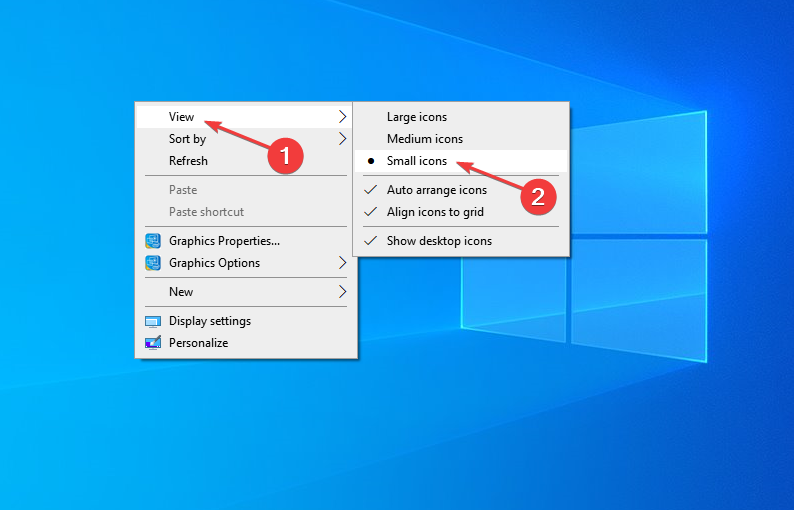
- Right-click on the desktop, hover the cursor over View, and select Small icons.

- Now, check if the problem is fixed.
In many cases, it was a problem with the app icon’s resolution, which started to blur when it increased beyond a specific limit. So it would be best if you had them set to a Small icon for the best results.
2. Update the graphics driver
- Press Windows + R to open the Run, type devmgmt.msc in the text field, and click OK.

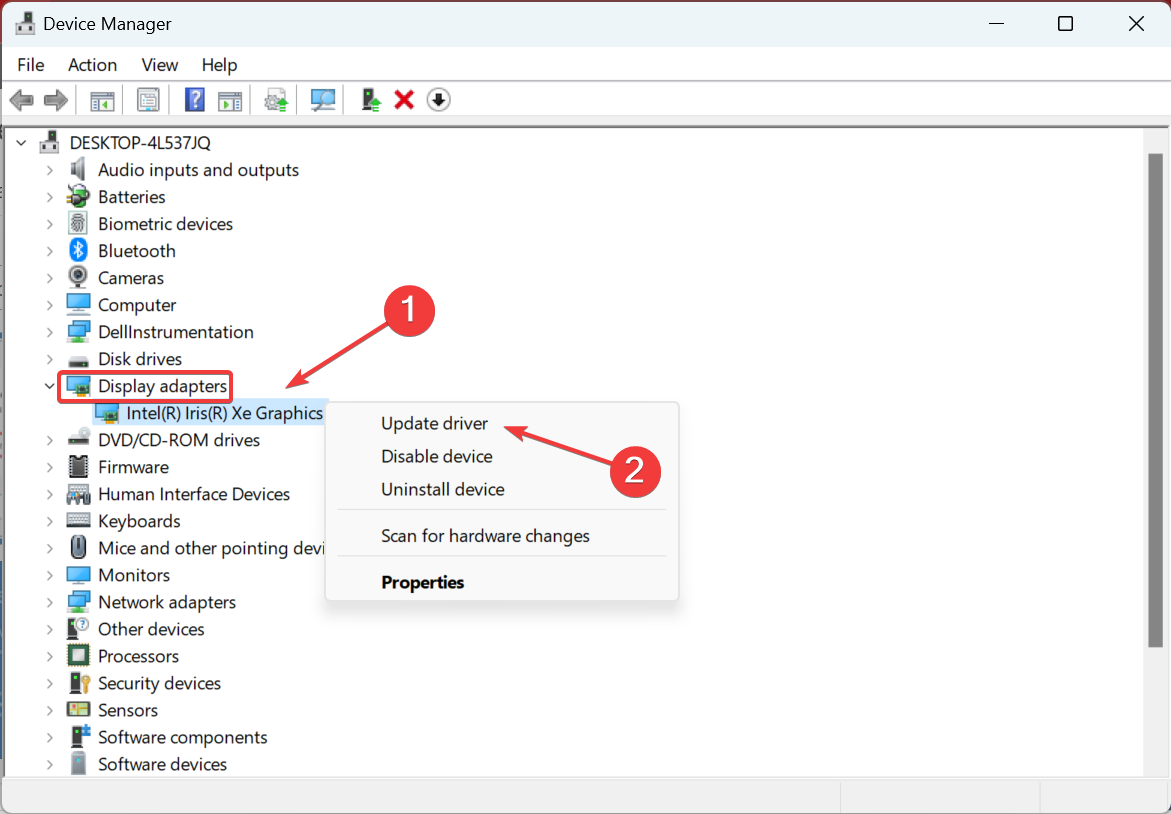
- Expand the Display adapters category, right-click on the graphics adapter, and select Update driver.

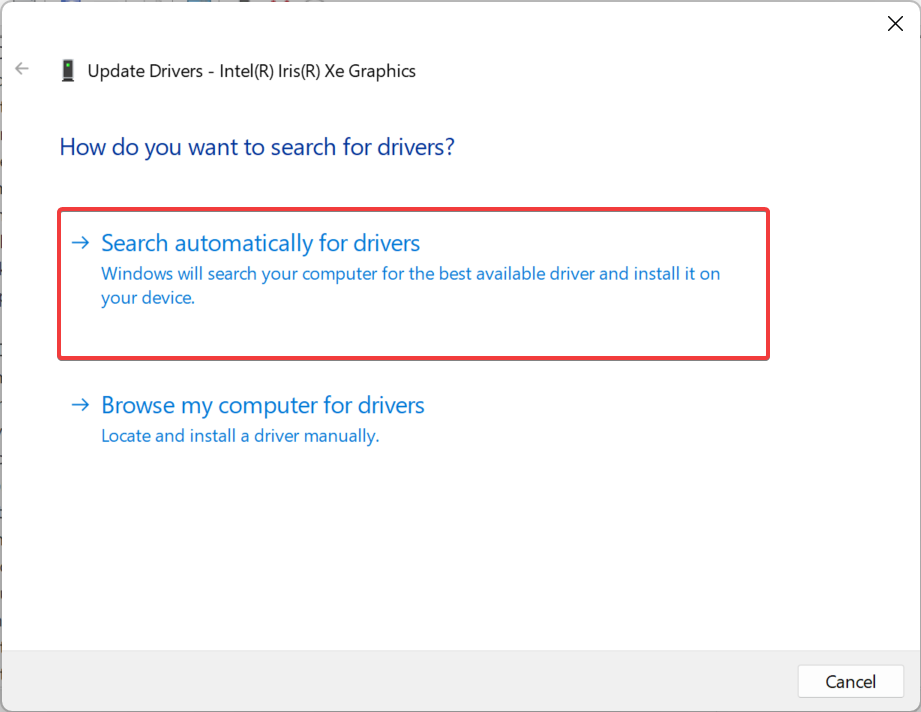
- Now, select Search automatically for drivers.

- Wait for Windows to install the best available driver automatically.
That’s it! The graphics driver should be updated now, and desktop icons shouldn’t be blurry in Windows 10.
In case Windows can’t find a newer version, navigate to the manufacturer’s official website and look it up:
- NVIDIA
- AMD/ATI
- Intel
Update drivers automatically
If you don’t want to download the drivers manually, you can always download them automatically using a third-party tool.
The significant advantage of using such a tool is that it finds compatible versions and works on your system.
Thus, it keeps you away from damaging your PC by downloading and installing the wrong driver versions.
Outbyte Driver Updater is a simple tool that can automatically update all your drivers with just a single click, so if you don’t want to search and download the drivers manually, be sure to try this tool.
Its interface is straightforward to use, and once the scan is completed, the tool will compare your current drivers with the ones found in its built-in database.
Afterward, Outbyte Driver Updater will fix and update any missing or broken drivers.
Outbyte Driver Updater
A well-founded tool that can effortlessly help you find the correct driver versions for your device.
3. Modify scaling
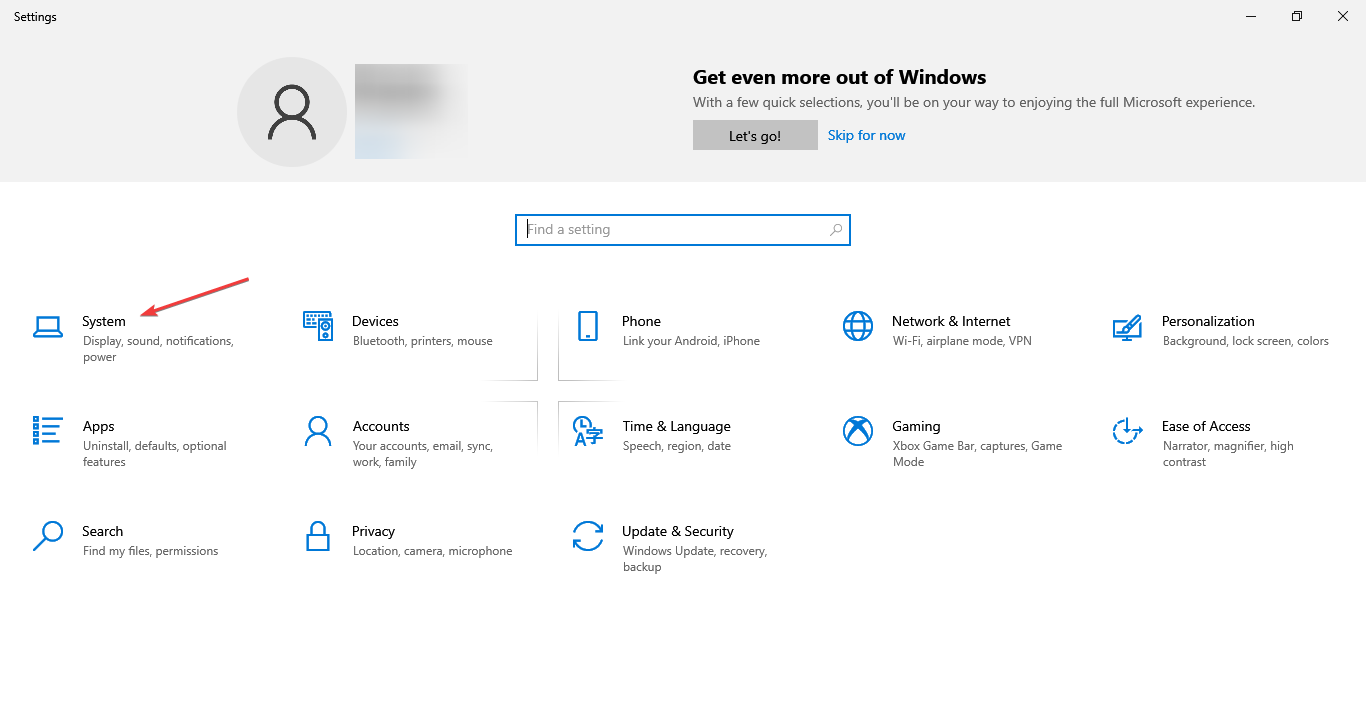
- Press Windows + I to open Settings, and choose System.

- In the Display tab, choose 100% from the Change the size of text, apps, and other items dropdown menu.
Scaling is probably the reason behind pixelated desktop icons if it wasn’t for the drivers. Some users reported that scaling was set to a higher level on their PC, resulting in blurry desktop icons, and putting it to 100% did the trick.
- Fix: PRIMARY_TRANSPORT_CONNECT_FAILED Error
- ERROR_IO_PRIVILEGE_FAILED: How to Fix
- How to Fix MFReadWrite.dll is Missing on Windows N
- DWMAPI.DLL Missing/Loading Errors – Fix-it Guide
- MUI_NO_VALID_SYSTEM_LANGUAGE BSOD Error [Fixed]
4. Adjust Visual Effects for the best appearance
- Type View advanced system settings in the Search bar and click on the relevant search result.

- Click on the Settings button under Performance.

- Select the Adjust for best appearance option, and click OK to save the changes.

This is another viable solution suggested by one of the users who had blurry text with high resolution in Windows 10.
You can optimize your PC to perform better without the UI visual effects. However, remember that this might affect your system performance, mainly if you use a low-spec PC.
5. Create a new user profile
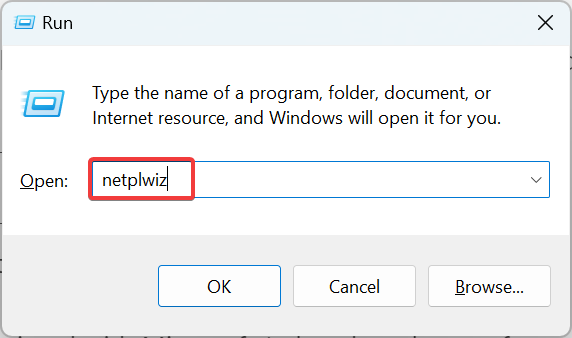
- Press Windows + R to open Run, type netplwiz, and hit Enter.
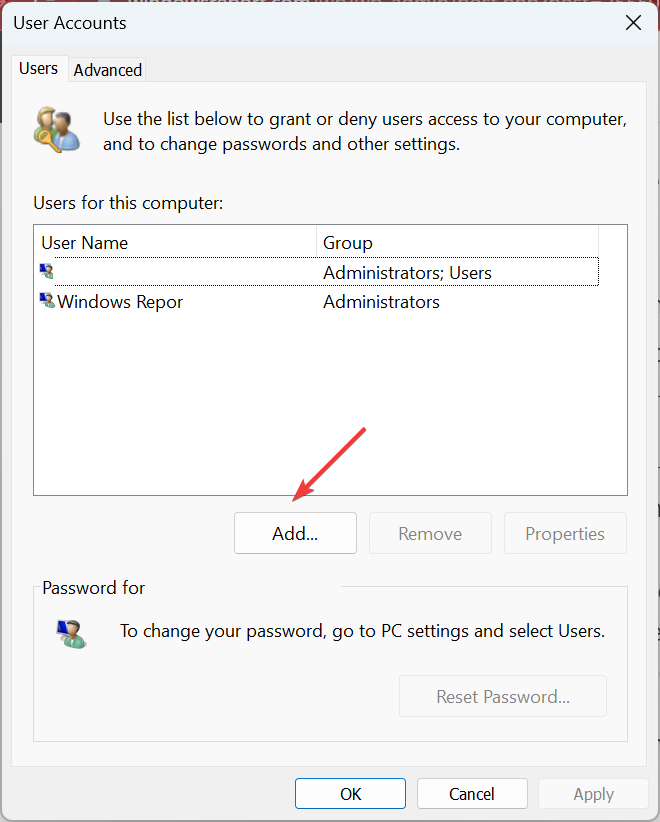
- Click on Add.

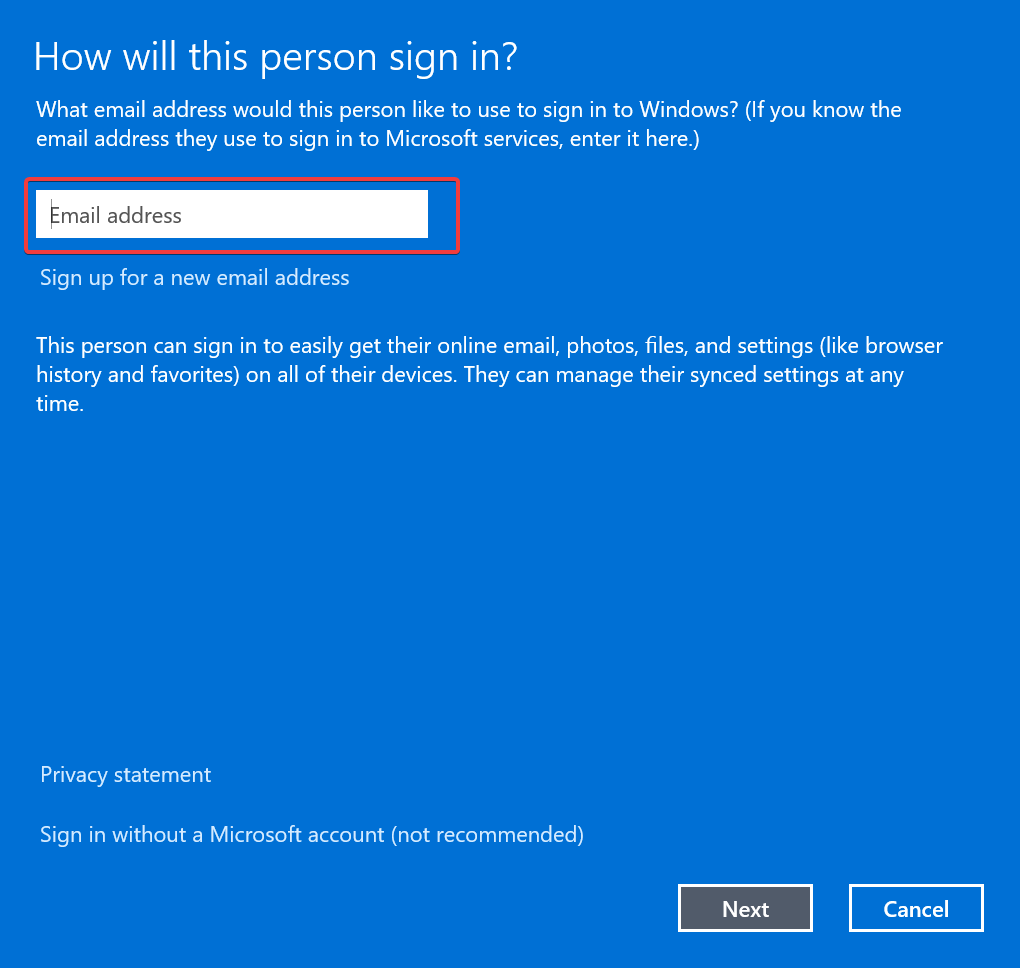
- Now, enter an email address associated with Microsoft (other than the one for your current account), and follow the on-screen instructions to complete the process.

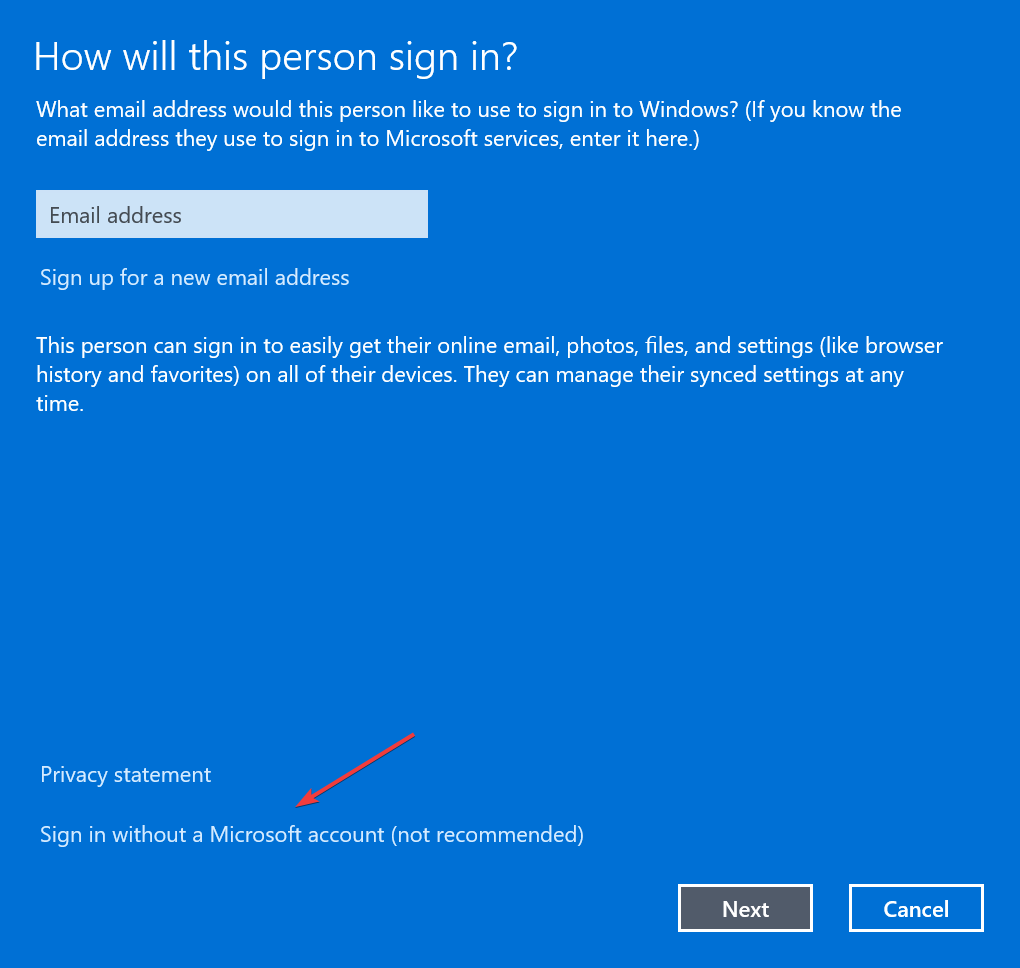
- Alternatively, you can create a local account by clicking on Sign in without a Microsoft account (not recommended).
- Now, click on Local account.
- Enter the details for the new account, and follow the on-screen instructions to complete the process.
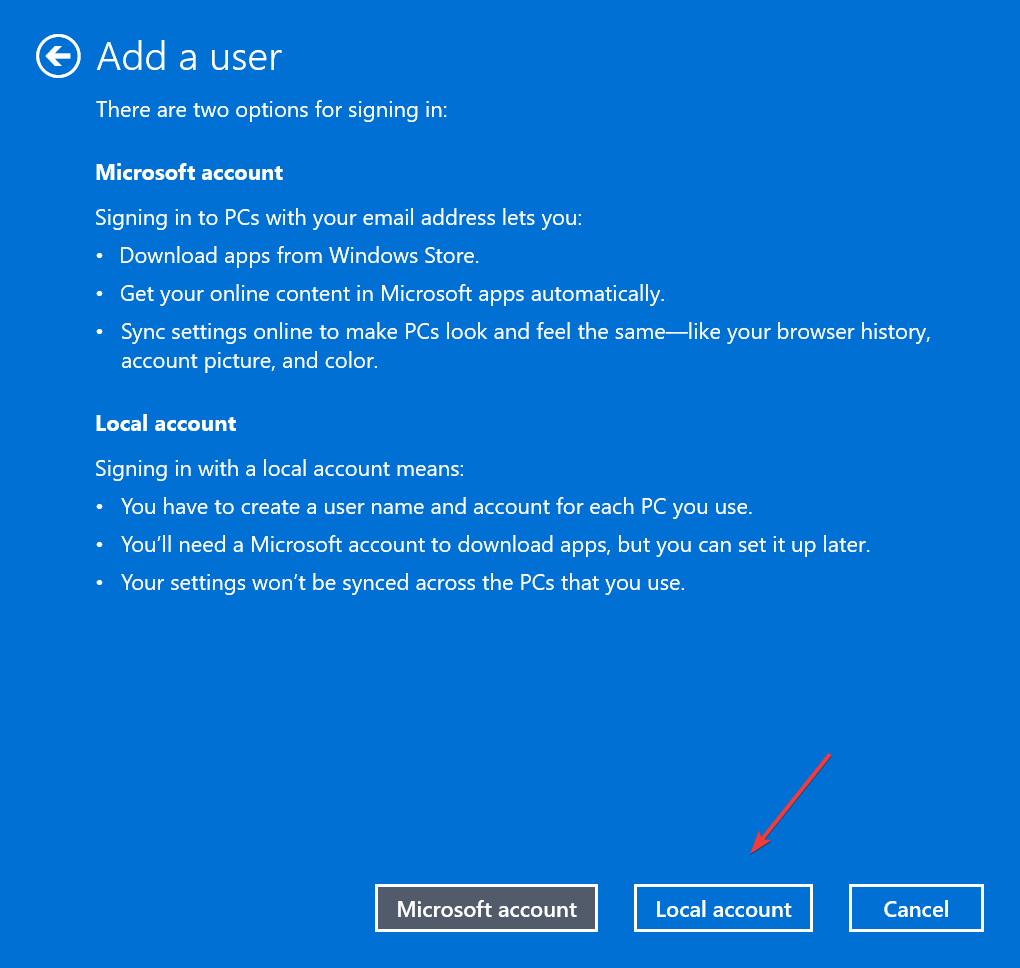
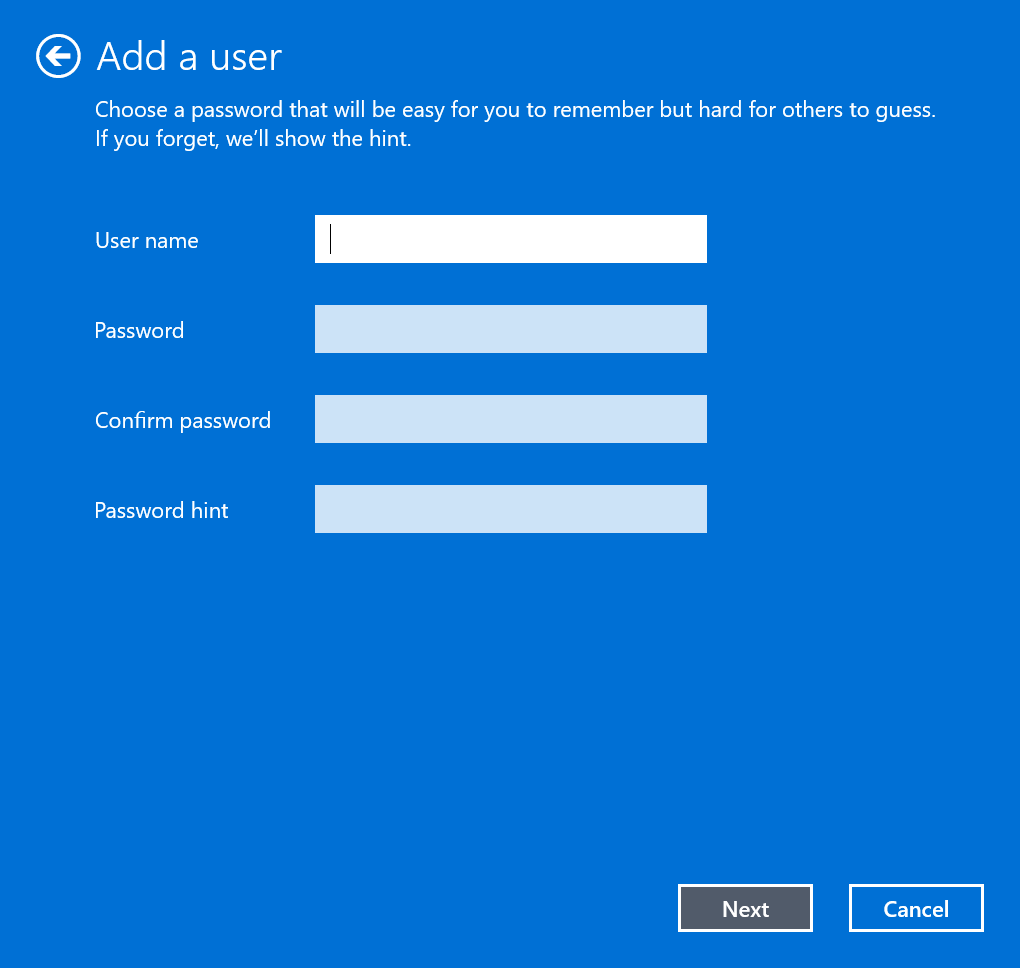
If nothing else has worked, it’s likely a corrupt user profile to blame for blurry desktop icons. And the simplest solution, in this case, is to create a new one, either Microsoft Account or a Local Account.
Once done, use a reliable backup tool to transfer data between the two profiles.
By now, the blurry desktop icons would be visible, and the root cause of the problem would be eliminated. Also, the solutions listed here would work for blurry taskbar icons in Windows 10.
Besides, find out the best display settings for enhanced Windows graphics.
Drop in the comments section if you have any queries or know of another solution.
Aleksandar Ognjanovic
Aleksandar’s main passion is technology. With a solid writing background, he is determined to bring the bleeding edge to the common user. With a keen eye, he always spots the next big thing surrounding Microsoft and the Windows OS.
Focused on Windows errors and how to solve them, he also writes about the OS’s latest features as well as its interface.
In his free time, he likes to read, listen to music, and enjoy the nature. Hiking is one of his newly found passions.