Довольно часто приходится расширять диски виртуальных машин, когда на системном диске заканчивается свободное место. Например, вы увеличили размер диска в настройках виртуальной машины VMware или Hyper-V, и теперь нужно расширить раздел в гостевой операционной системе (Windows).
Содержание:
- Не активна кнопка “Расширить том” в Windows
- Не могу расширить диск в Windows из-за раздела восстановления
- Перенос и расширение раздела в Windows с помощью LiveCD GParted
Не активна кнопка “Расширить том” в Windows
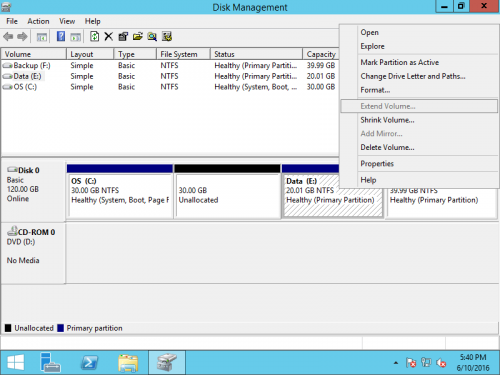
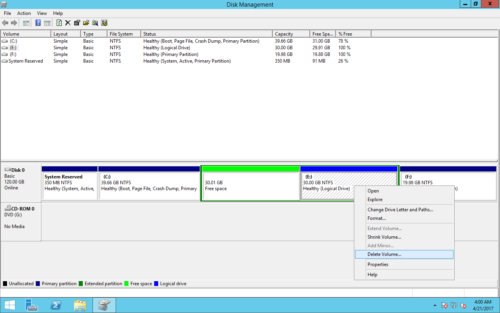
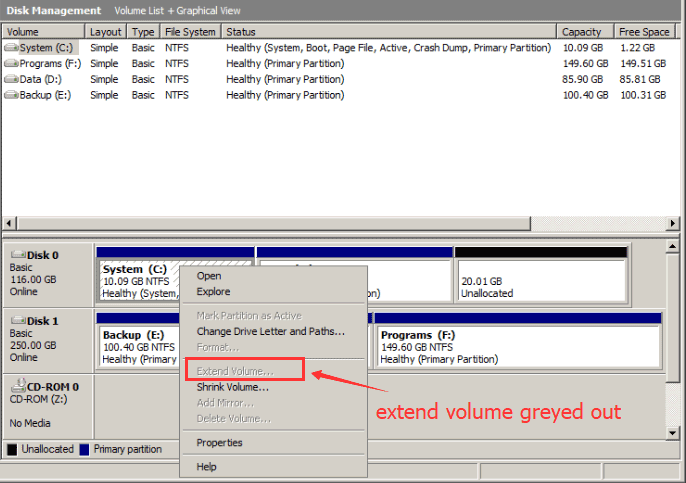
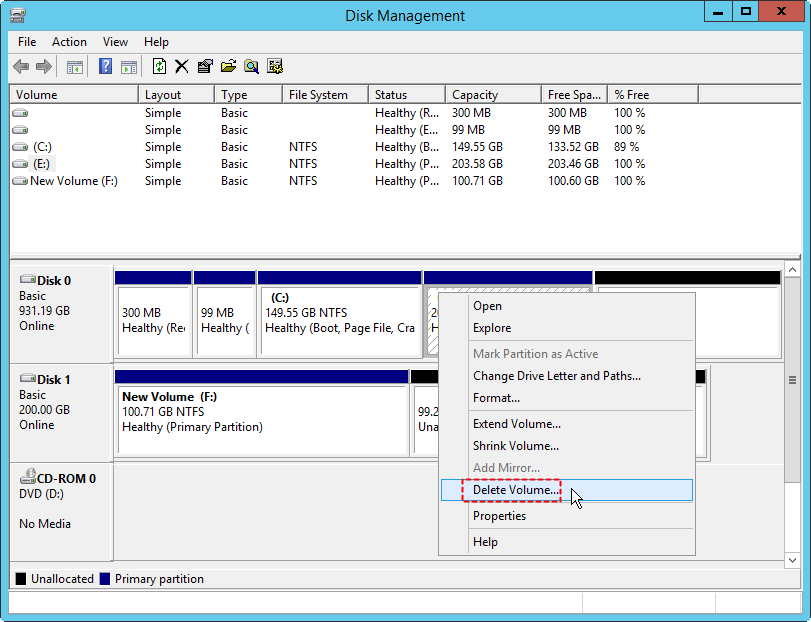
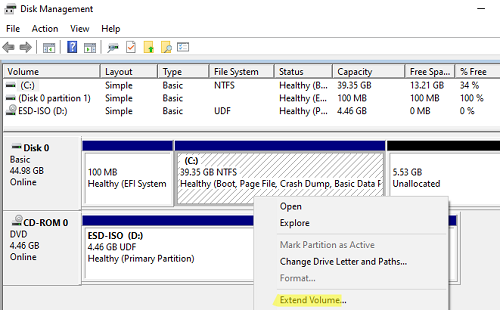
Откройте диспетчер управления дисками (
diskmgmt.msc
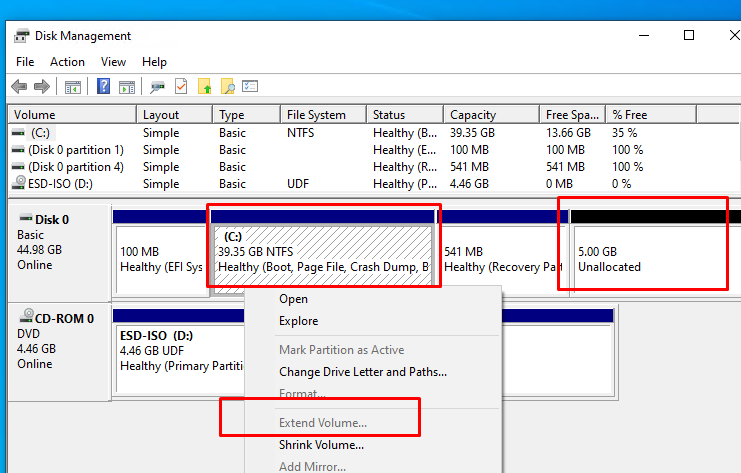
) и щелкните правой кнопкой по разделу, который нужно расширить (в моем примере это логический том, которому назначена буква диск C:\). Как вы видите, кнопка “Расширить том” (Extend Volume) недоступна (серая). Дело в том, что вы можете расширить раздел средствами Windows, только если справа от него есть неразмеченная (Unallocated) область. В моем случае раздел C:, нельзя расширить из-за наличия справа от него раздела восстановления (Windows RE / Recovery Partition)
Вы не сможете расширить раздел диска в Windows (Windows Server) если:
- Справа от раздела, которые вы хотите расширить находится другой раздел;
- Раздел отформатирован в файловой системе, которая не поддерживается расширение (FAT32, exFAT). Можно расширить только тома с NTFS/ReFS;
- Нельзя создать разделы более 2 Тб на дисках с таблицей разделов MBR. На дисках размером более 2 Тб нужно использовать таблицу разделов GPT (можно сконвертировать MBR в GPT без потери данных). Тип таблицы разделов можно посмотреть на вкладке Volumes диска в диспетчере устройств. В этом примере на моей ВМ Windows 10 установлена в режиме EFI (GPT разметка на диске).
В этой статье мы рассмотрим, как правильно расширить раздел в Windows, если кнопка расширить диск недоступна.
Настоятельно рекомендуем создать бэкап (снапшот) вашего диска перед изменением таблицы разделов.
Не могу расширить диск в Windows из-за раздела восстановления
В самом простом случае вы можете просто перенести файлы среды восстановления с раздела WinRE на системный диск C: и полностью удалить раздел восстановления размером 541Мб.
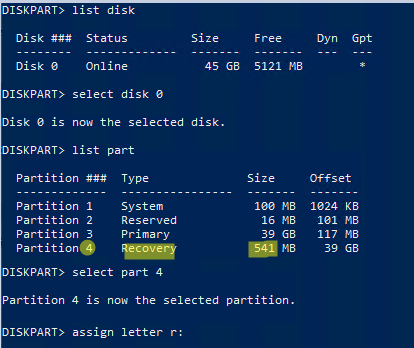
Сначала нужно назначить букву диска разделу восстановления. Откройте командную строку с правами администратора и выполните:
Diskpart
Выведите список дисков:
list disk
Выберите ваш диск:
select disk 0
Выведите список разделов.
list part
Выберите раздел восстановления (в вашем случае может быть другой номер):
select part 4
Назначьте ему букву диска R:
assign letter r:
exit
Отключите среду восстановления Windows (WinRE) командой:
reagentc /disable
Теперь нужно удалить раздел восстановления размером 541 (в нашем примере это Partition 4).
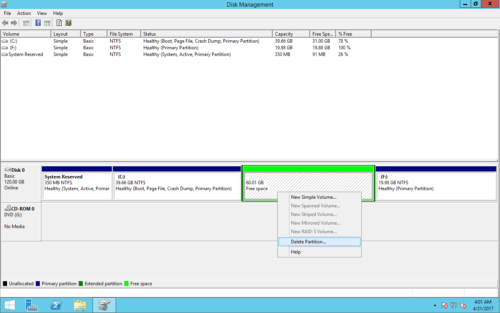
Если вы попробуете удалить раздел восстановления из графического интерфейса управления разделами, нажав на Delete Volume (иногда свойства диска вообще не доступны), появится ошибка:
Virtual Disk Manager
Cannot delete a protected partition without the force protected parameter set.
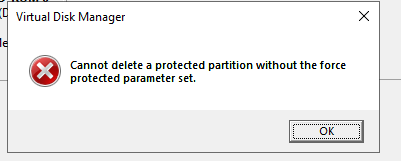
Вы сможете удалить такой защищенный раздел только с помощью diskpart. Выберите ваш раздел, который вы хотите удалить (смотрите на вывод своих команд, т.к. номера дисков и разделов у вас могут отличаться).
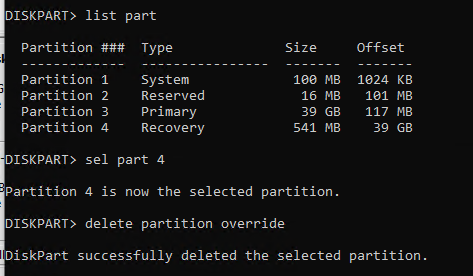
DISKPART> rescan
DISKPART> list disk
DISKPART> select disk 0
DISKPART> list part
DISKPART> select part 4
DISKPART> delete partition override
Параметр override разрешает утилите diskpart удалить любой раздел независимо от его типа (будь то активный, системный или загрузочный раздел).
DiskPart successfully deleted the selected partition.
DISKPART> Rescan
Please wait while DiskPart scans your configuration...
DiskPart has finished scanning your configuration.
DISKPART> exit
Включите WinRE и обновите конфигурацию в файле ReAgent.xml с помощью команды:
reagentc /enable
Выполните команду, чтобы убедитесь, что WIM файл среды восстановления был пересоздан на диске C:
bcdedit /enum all | find "osdevice"
ramdisk=[C:]\Recovery\WindowsRE\Winre.wim,{e668f79e-60da-11ed-b27a-ea3359f08732}

Проверьте конфигурацию WinRE::
reagentc.exe /info
Windows Recovery Environment (Windows RE) and system reset configuration
Information:
Windows RE status: Enabled
Windows RE location: \\?\GLOBALROOT\device\harddisk0\partition3\Recovery\WindowsRE
Boot Configuration Data (BCD) identifier: e668f79d-60da-11ed-b27a-ea3359f08732
Recovery image location:
Recovery image index: 0
Custom image location:
Custom image index: 0
REAGENTC.EXE: Operation Successful.
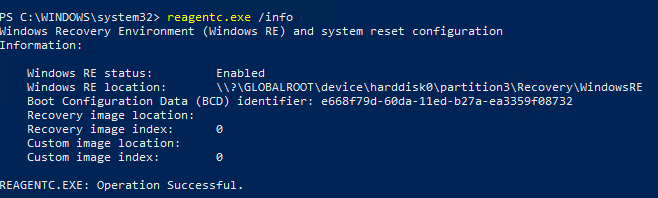
В данном примере мы полностью отказались от отдельного 540 Мб раздела для WinRE. Теперь файл среды восстановления winre.wim находятся на разделе, на который установлена Windows.
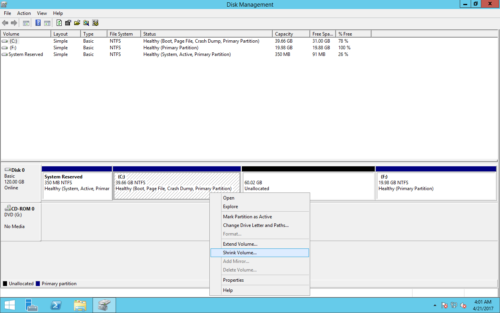
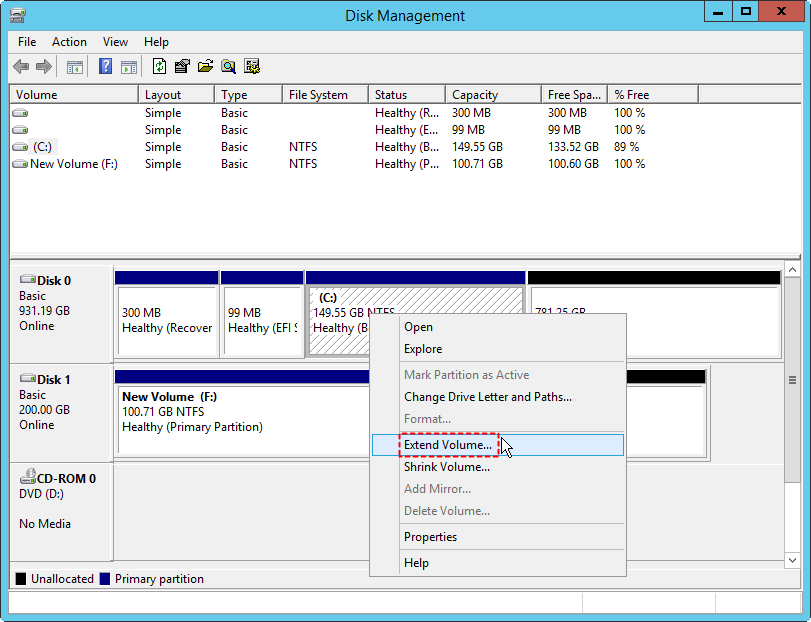
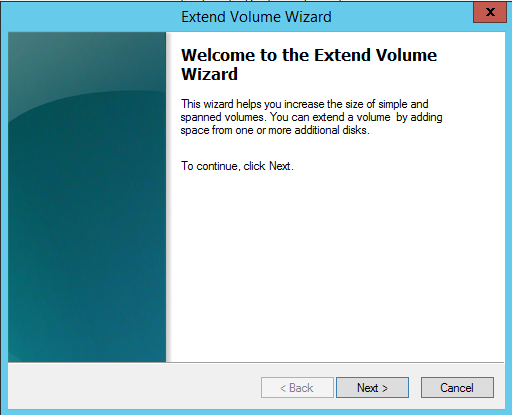
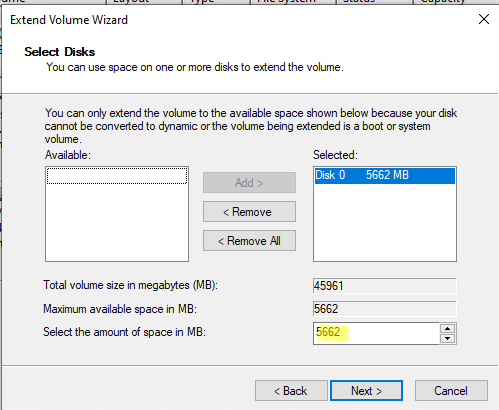
Теперь можно расширить системный диск:
- Откройте консоль
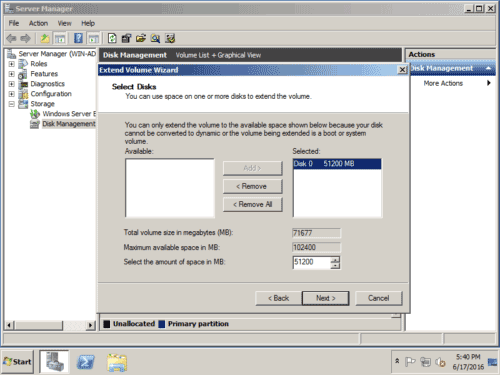
diskmgmt.msc - Щелкните по диску, который нужно расширить и выберите Extend Volume;

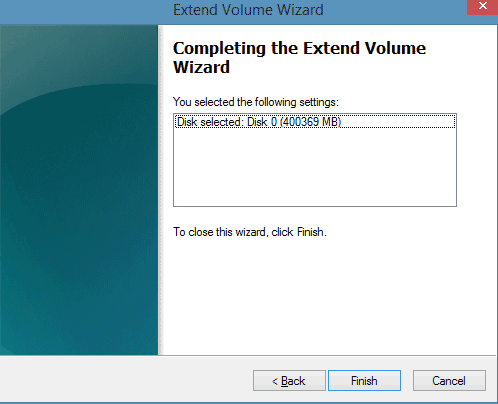
- В поле Select the amount of space in MB укажите на сколько нужно увеличить раздел за счет свободного места. В моем случае я расширю диск C: на 5 Гб и нажмите Next -> Finish;
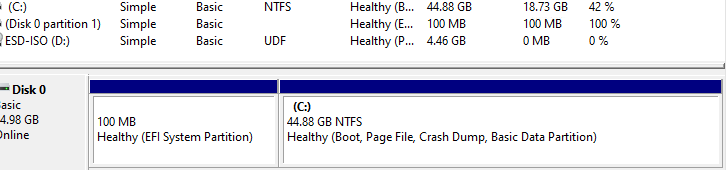
- Диск был расширен успешно.
Если на диске есть и другие разделы восстановления вендора, которые не дают вам расширить основной том, воспользуйтесь статьей: Удаление OEM разделов.
Windows опознает раздел восстановления по специальным меткам: GUID — de94bba4-06d1-4d40-a16a-bfd50179d6ac и GPT атрибуту 0x8000000000000001
При проблемах с загрузчиком и разделом EFI на компьютерах с UEFI воспользуйтесь статьями по ссылкам.
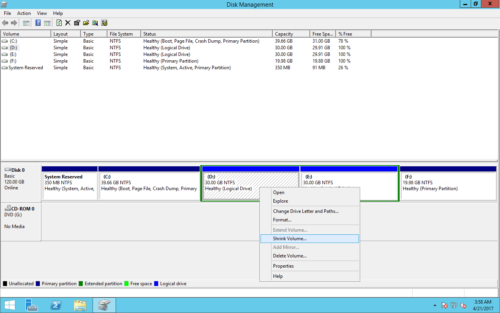
Перенос и расширение раздела в Windows с помощью LiveCD GParted
Если вы опасаетесь удалять существующие разделы на дисках, вы можете перенести в конец диска раздел, который мешает расширению, с помощью сторонних утилит. Для управления разделами можно использовать бесплатный загрузочный диск GParted (GNOME Partition Editor). Это Live CD на базе Linux Debian с графической оболочкой для утилиты parted (консольная утилита для управления разделами в Linux).
Скачайте ISO образ gparted-live-1.4.0-6-amd64.iso (https://gparted.org/download.php , около 484 Мб).
Загрузите виртуальную машину с ISO образа
gparted-live-1.4.0-6-amd64.iso
(если вы хотите расширить диск на физическом компьютере, проще всего записать ISO образ на USB флешку с помощью утилиты rufus).
Выберите:
- Don’t touch keymap
- Английский язык по умолчанию (33)
- Режим 0 – Continue to start X to use GParted automatically
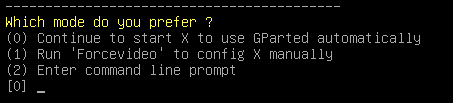
Автоматически запустится графический редактор разделов GParted.
Найдите раздел, который вы хотите переместить вправо. Обратите внимание, что для имен разделов в GParted используется Linux формат. Проще всего найти раздел восстановления Windows по его размеру. В нашем случае это раздел
/dev/vvme0n1p4
размером 541 Мб. Щелкните по разделу и выберите Resize/Move.

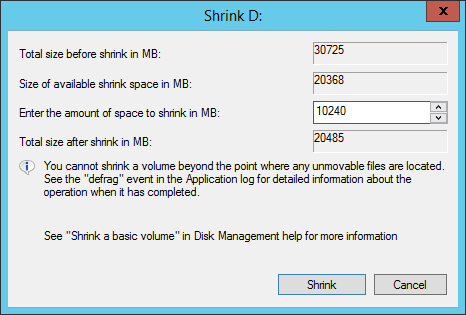
Укажите значение 0 в поле Free space following (MiB) для переноса раздела в конец диска.
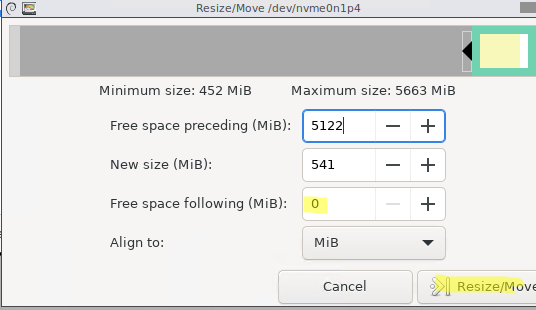
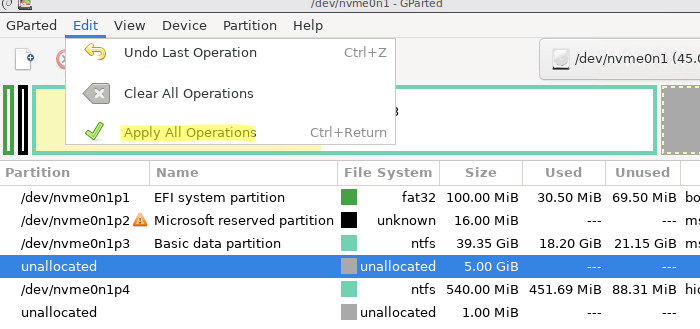
Нажмите кнопку Resize/Move. Чтобы запустить перенос разделов, выберите в меню Edit -> Apply all operations. В нашем случае небольшой раздел был перемещен за пару секунд.
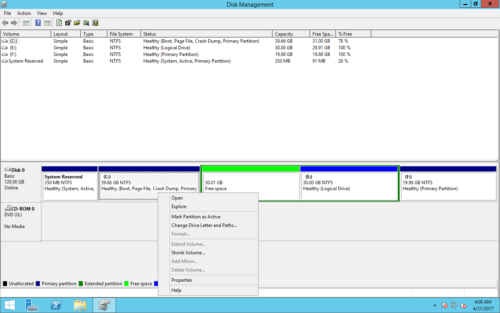
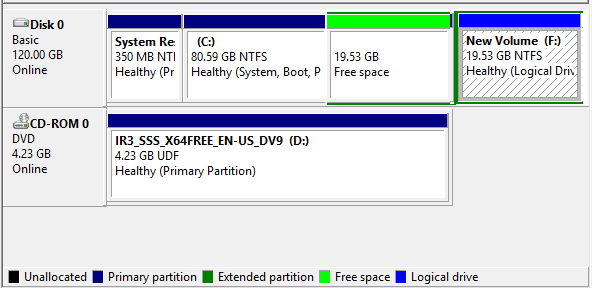
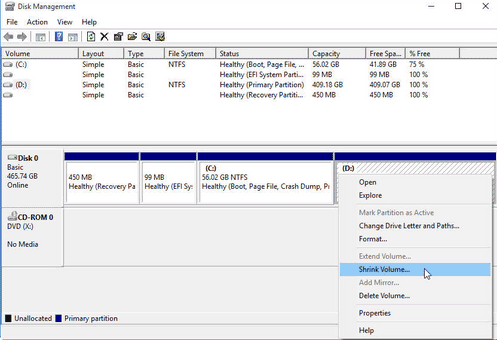
Перезагрузите ВМ и запустите Windows. Откройте консоль Disk Management. Как вы видите, раздел восстановления был перенесен в конец диска. Неразмеченная область теперь находится справа от тома с буквой диска C:.
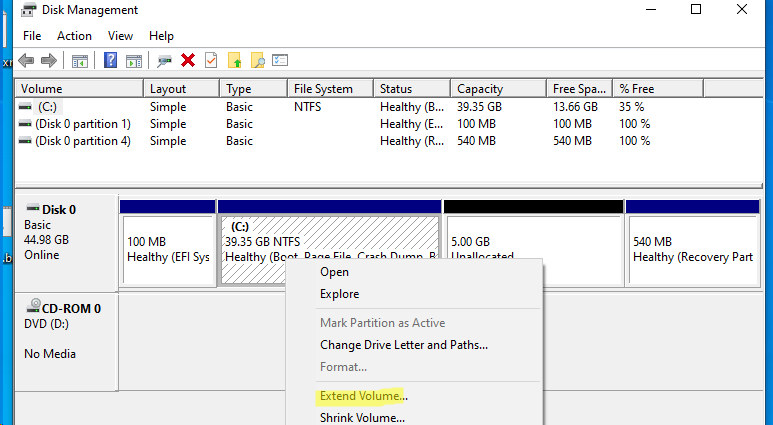
Теперь кнопка
Extend volume
стала доступна, и вы можете расширить системный раздел вашего системного диска. При этом среда работоспособность среды восстановления Windows не нарушается.