
Некоторые пользователи могут обнаружить, что папка «Рабочий стол», а также такие папки как «Документы» и «Изображения» находятся не в папке пользователя, а во вложенной папке OneDrive, а иногда, после удаления или отключения OneDrive могут возникнуть проблемы, например сообщение о недоступности папки Рабочий стол.
В этой инструкции подробно о том, как убрать рабочий стол из OneDrive и вернуть стандартного расположение папки рабочего стола в Windows 11 и Windows 10, про возврат других папок и решение возможных проблем.
Как убрать Рабочий стол из OneDrive
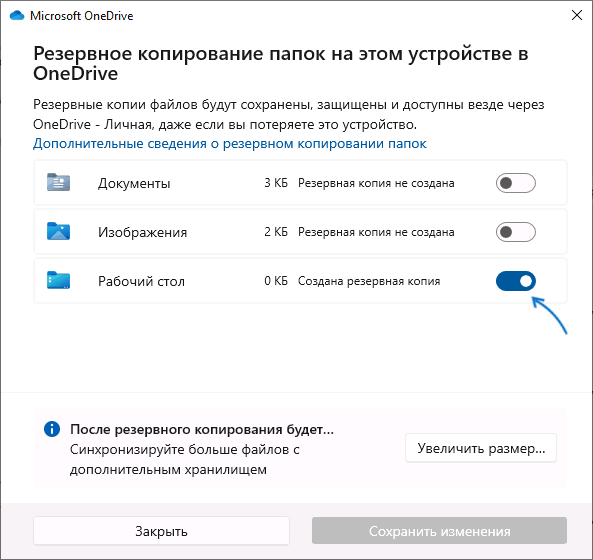
Причина, по которой папка «Рабочий стол» оказалась в OneDrive — включение резервного копирования этой папки (а возможно, также папок «Документы» и «Изображения») с OneDrive, вероятно, на этапе первоначальной настройки Windows.
В случае, если OneDrive не удален и вы ещё не успели столкнуться с ошибками, связанными с недоступностью папки рабочего стола (если столкнулись — решение в следующем разделе), достаточно выполнить следующие действия для отключения синхронизации, при этом папка Рабочий стол вернётся в прежнее расположение:
- Нажмите по значку OneDrive в области уведомлений, затем — по кнопке настроек и выберите пункт «Параметры».
- В разделе «Синхронизация и резервное копирование» нажмите «Управление резервным копированием».

- Отключите синхронизацию папок, которые синхронизировать и помещать в папку OneDrive не нужно, например — «Рабочий стол».

- Подтвердите остановку резервного копирования для каждой папки.


После отключения синхронизации пути к папкам будут изменены на прежние, без помещения их в OneDrive, а для рабочего стола появится новый значок на рабочем столе, позволяющий перейти к папкам, файлам и ярлыкам, которые находились в папке рабочего стола OneDrive и перенести их на ваш рабочий стол.
Исправление пути к папке Рабочий стол вручную в редакторе реестра
Если в попытках разобраться с нахождением рабочего стола в папке OneDrive вы столкнулись с ошибками, видите сообщения о том, что папка Рабочий стол в C:\Users\Имя\OneDrive\Desktop недоступна или OneDrive был удален с компьютера, вы можете исправить путь к рабочему столу на стандартный путь по умолчанию с помощью редактора реестра:
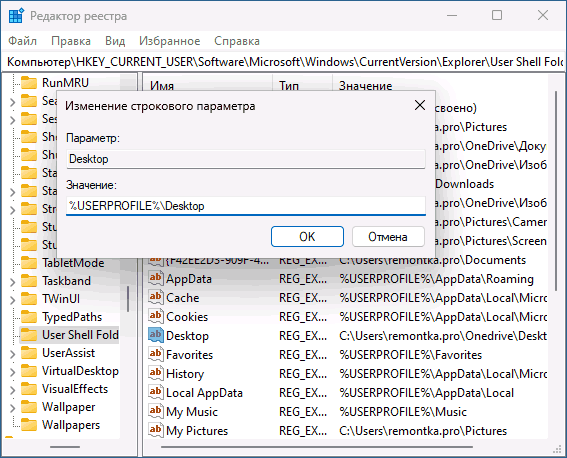
- Нажмите клавиши Win+R на клавиатуре, введите regedit и нажмите Enter для запуска редактора реестра.
- В редакторе реестра перейдите к разделу
HKEY_CURRENT_USER\SOFTWARE\Microsoft\Windows\CurrentVersion\Explorer\User Shell Folders
- В правой панели редактора реестра дважды нажмите по параметру с именем Desktop и измените его значение на
%USERPROFILE%\Desktop

- При наличии параметра с именем
{754AC886-DF64-4CBA-86B5-F7FBF4FBCEF5}также нажмите по нему дважды и измените значение на
%USERPROFILE%\Desktop
- Закройте редактора реестра и выполните перезагрузку компьютера.
Готово, теперь рабочий стол находится там, где должен находиться по умолчанию. Если при этом с него пропали значки, вы сможете найти их в папке OneDrive\Рабочий стол и перенести их на текущий рабочий стол.
В том же разделе реестра при необходимости можно исправить пути и к другим папкам, например, «Документы» или «Изображения».
Если остаются вопросы или ваша ситуация в чем-то отличается от описанных, опишите всё в деталях в комментариях ниже, я постараюсь помочь.
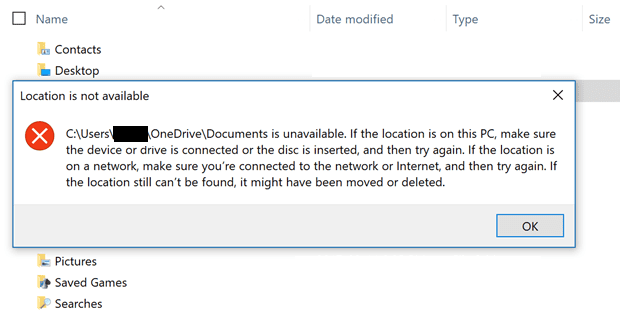
Not being able to access your documents on your Windows 10 computer is really annoying. Especially when you’re in a hurry. When this happens, you may get the following error message:
“C:\Users\UserName\OneDrive\Documents is unavailable”.
This results in not being able to access any of the folders stored on your computer.
Contents
- 1 Fix OneDrive Documents Folder is Unavailable
- 1.1 Recreate the Missing Documents Folder
- 1.2 Restore the Documents Folder
- 1.3 Verify the Permissions
Fix OneDrive Documents Folder is Unavailable
Recreate the Missing Documents Folder
One potential solution consists of recreating the missing Documents folder.
Close OneDrive completely. You can also launch the Task Manager and close any OneDrive-related processes still listed there.
Then navigate to C:\Users\UserName\OneDrive. If the Documents folder is nowhere to be seen, create it yourself. Next, right-click on an empty area and select New → Folder. Name it Documents.

If the folder is visible, create a copy of it. Then, move the original folder to your desktop. Edit the name of the copy folder that remained in the OneDrive folder. Delete the ‘copy‘ part from the name.
Launch OneDrive and check if this workaround solved the problem.
Restore the Documents Folder
Restoring the Documents folder is another solution you can try out.
- Exit OneDrive.
- Open File Explorer (press Windows Key + E).
- Locate the Documents folder in the left-hand pane.
- Right-click on the Documents folder.
- Then select Properties.
- Select the Location tab. This should show you the current location of the Documents folder.
- Select the Restore Default option.

- As a result, this will bring the Documents folder back to C:\Users\UserName\Documents.
- Save the changes. Check if OneDrive can locate the Documents folder now.

Verify the Permissions
Similarly, the permissions set to the Documents folder may block other programs from accessing it.
- Launch the File Explorer.
- Right-click again on the Documents folder. Click on Properties.
- Then navigate to Security → Advanced.
- Locate this box: Replace all child object permission entries with inheritable permission entries from this object. Tick this option.
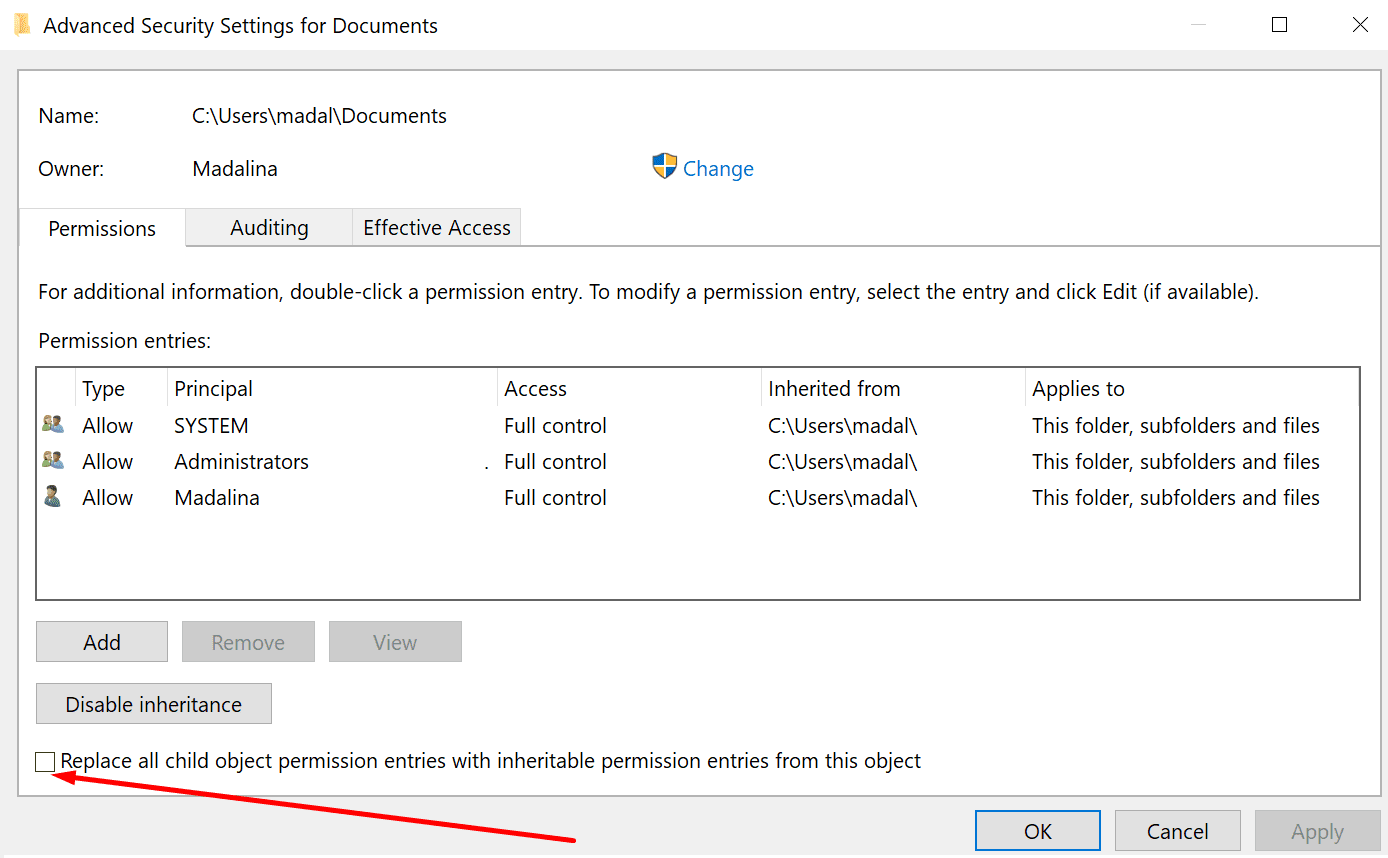
Save the changes. Launch OneDrive again. Check if the issue is gone.
Author Madalina Dinita
Madalina has been a Windows fan ever since she got her hands on her first Windows XP computer.
She is interested in all things technology, especially emerging technologies — AI and DNA computing in particular.
Приветствую смотрящих. Сам недавно столкнулся с такой же проблемой. Я не знаю можно делать нижеописанные действия со своей учётной записи или с учётной записи администратора, но я делал с администратора, поэтому прикладываю инструкцию, как включить запись администратора.
1. запускаете cmd с правами администратора
2. net user Администратор /active:yes
3. Меняете учётную запись (обычная смена пользователя)
Далее, чтобы исправить ошибку с Рабочим столом:
1. Win + R
2. regedit
3. \HKEY_CURRENT_USER\SOFTWARE\Microsoft\Windows\CurrentVersion\Explorer\User Shell Folders
4. Дабл клик по параметру Desktop и в нём меняете имя пользователя на текущее
Так же лучше поменять имя везде, где возможно. Для этого, все ещё находясь в реестре, Правка -> Найти -> вводите СТАРОЕ имя пользователя, находите и поправляете на текущее. Правка -> Найти далее. Так и повторяете операцию.
Заходите на свою учётную запись. Отключаете запись Администратора
1. запускаете cmd с правами администратора
2. net user Администратор /active:no
3. Перезагрузитесь, чтобы проверить
Лично я не смог изменить пару параметров по итогу и имя пользователя там осталось старое, но данная проблема ушла и сбоев в работе пока не было.
Все способы:
- Способ 1: Изменение владельца
- Способ 2: «Командная строка»
- Способ 3: «Редактор групповых политик»
- Способ 4: Отключение контроля учётных записей
- Вопросы и ответы: 2
Пользователи десятой версии ОС от Майкрософт иногда сталкиваются с ошибкой «Расположение недоступно. Отказано в доступе» при попытке открыть ту или иную папку либо съёмный накопитель. Давайте разберёмся, почему эта проблема возникает и как её можно устранить.
Читайте также: Решение проблемы «Отказано в доступе» к флешке
Важно! Все последующие манипуляции необходимо совершать только с правами администратора!
Урок: Как получить права администратора в Windows 10
Способ 1: Изменение владельца
Первое решение рассматриваемой проблемы — изменение владельца директории.
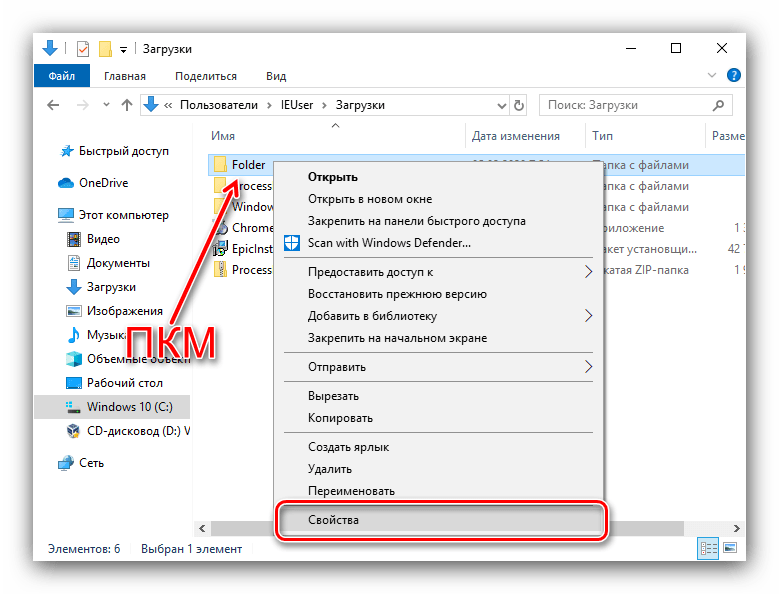
- Откройте местоположение проблемного каталога. Выделите его, кликните правой кнопкой мыши и выберите в контекстном меню пункт «Свойства».
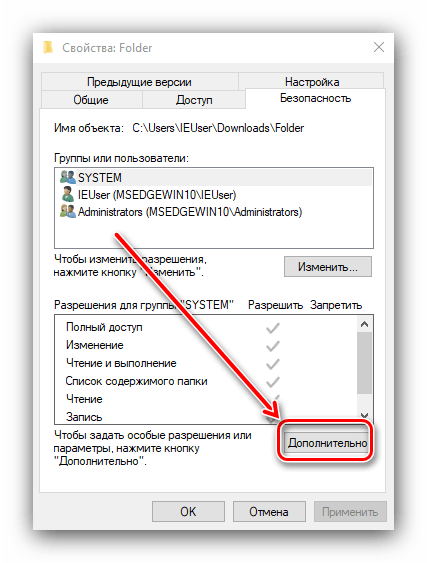
- В появившемся окне перейдите к вкладке «Безопасность». Найдите в ней раздел «Группы и пользователи» и кликните по кнопке «Дополнительно».
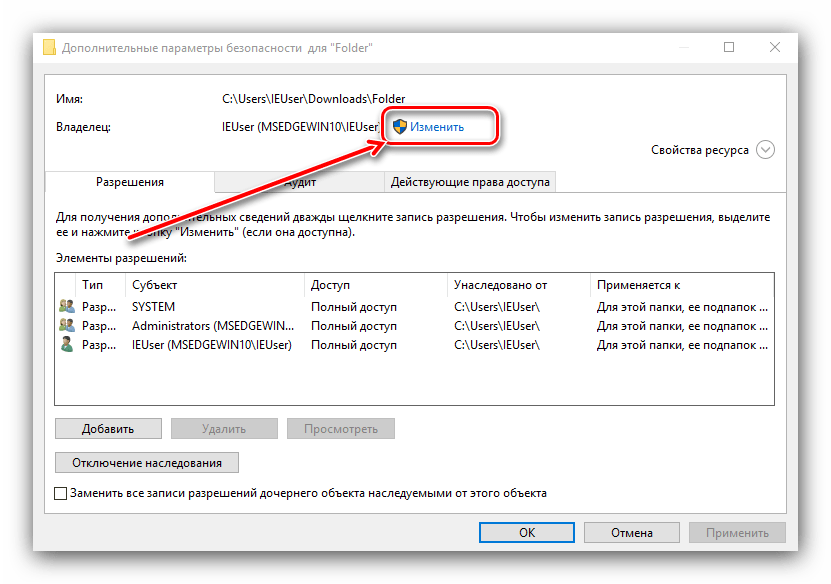
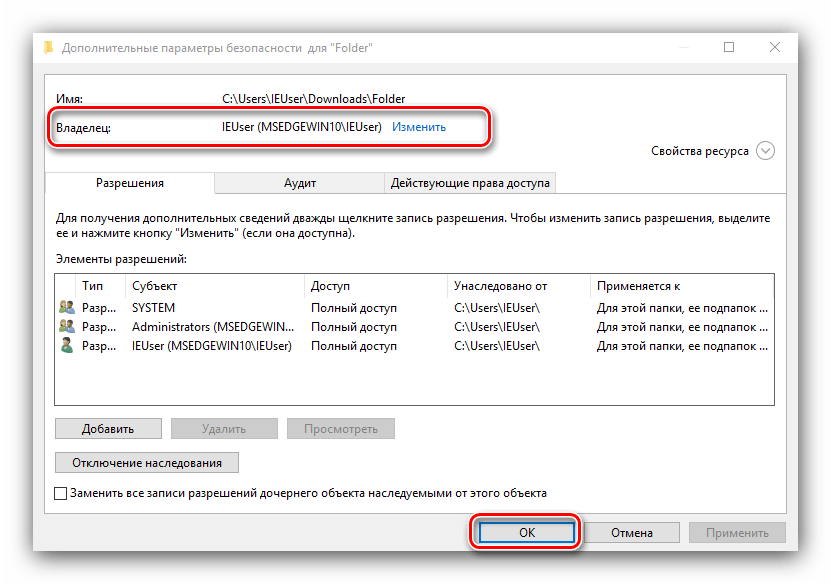
- В дополнительных свойствах безопасности найдите строку «Владелец» и нажмите «Изменить».
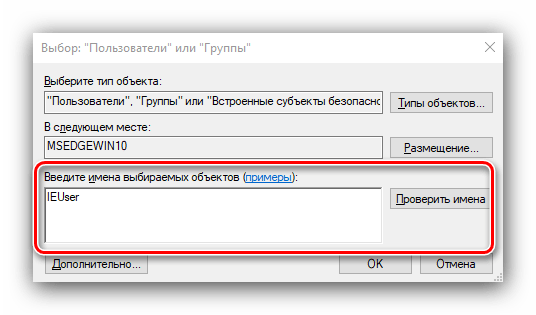
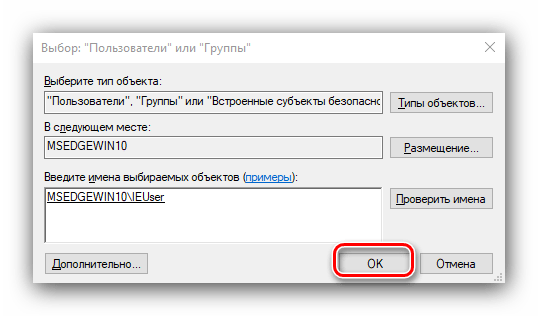
- В следующем окне напечатайте имя вашей учётки в отмеченном на изображении блоке и нажмите «Проверить имена».

Аккаунт будет найден и добавлен. Щёлкните «ОК» и переходите к следующему шагу.
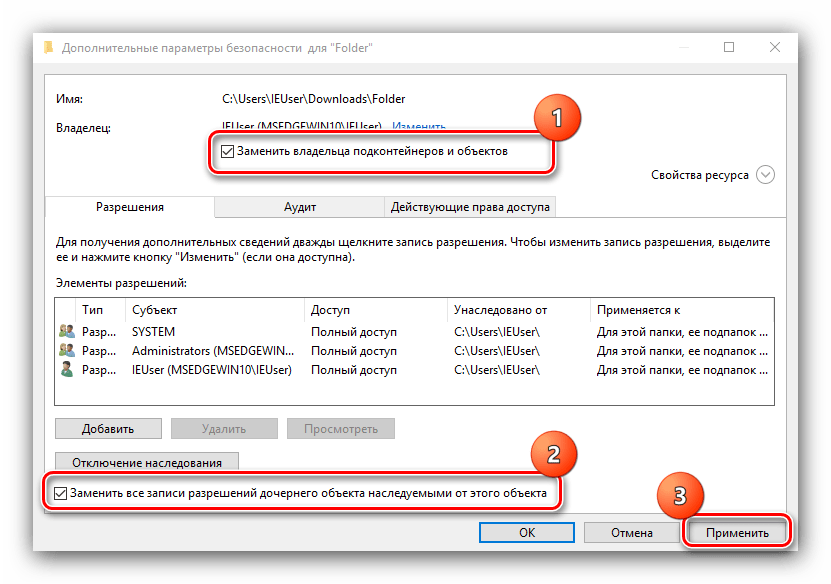
- По возвращении к окну дополнительных свойств следует отметить пункты «Заменить владельца подконтейнеров и объектов» и «Заменить все записи разрешений дочернего объекта наследуемыми от этого объекта», чтобы не возникало проблем с открытием и редактированием файлов в целевой папке. Воспользуйтесь кнопкой «Применить».

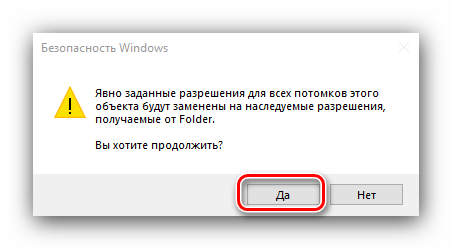
Появится предупреждение, кликните в нём «Да».

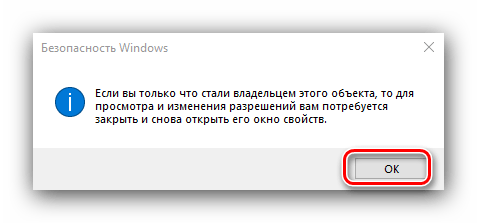
В следующем – «ОК».
- Убедитесь, что в качестве владельца теперь указан именно ваш аккаунт, после чего нажмите на кнопку «ОК».
Этот вариант помогает в большинстве случаев.
Способ 2: «Командная строка»
Альтернативный метод предоставление разрешений заключается в использовании «Командной строки».
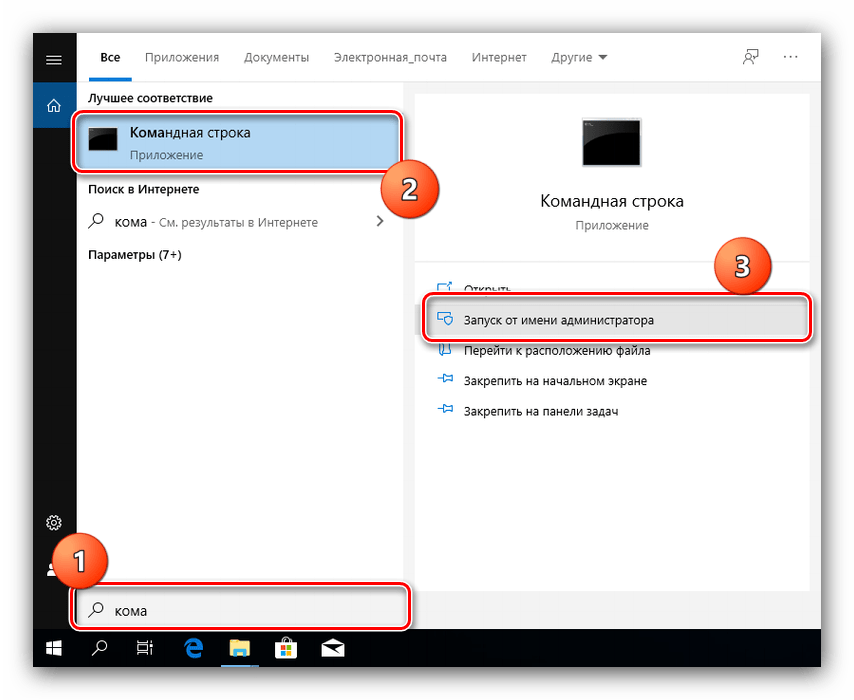
- Вызовите интерфейс ввода команд от имени администратора любым подходящим способом – например, найдите его через «Поиск» и воспользуйтесь одноимённым пунктом в боковом меню.
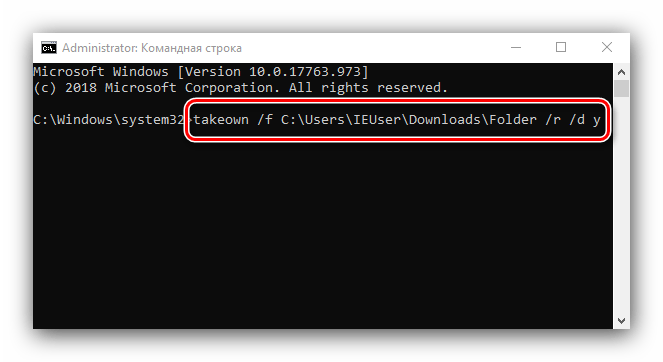
- После запуска средства введите в его окно следующую команду:
takeown /f *путь к папке* /r /d yВместо
*путь к папке*пропишите полный путь к проблемному каталогу и нажмите Enter. - Далее введите команду:
icacls *путь к папке* /grant administrators:F /T
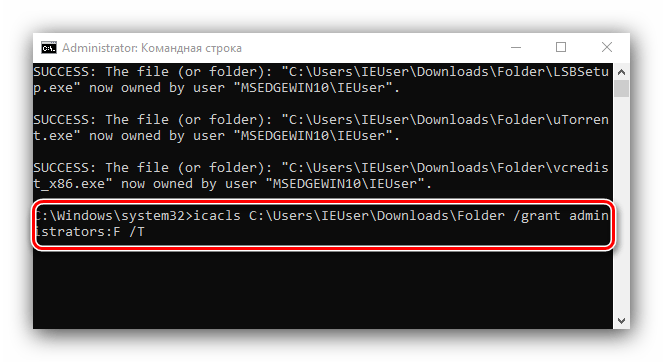
Закрывайте «Командную строку» и перезапустите ПК или ноутбук.
Способ 3: «Редактор групповых политик»
Также в Windows 10 есть групповая политика, предназначенная как раз для решения рассматриваемой проблемы. Включить её можно через «Редактор групповых политик».
Обратите внимание! Оснастка «Редактор групповых политик» отсутствует в редакции Windows 10 Домашняя!
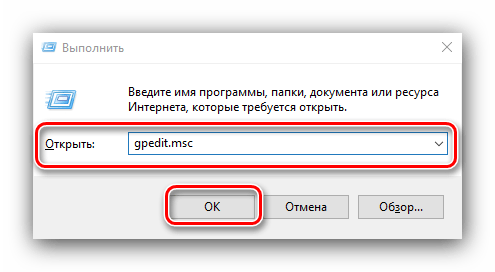
- Вызовите средство «Выполнить» комбинацией клавиш Win+R, в котором введите команду
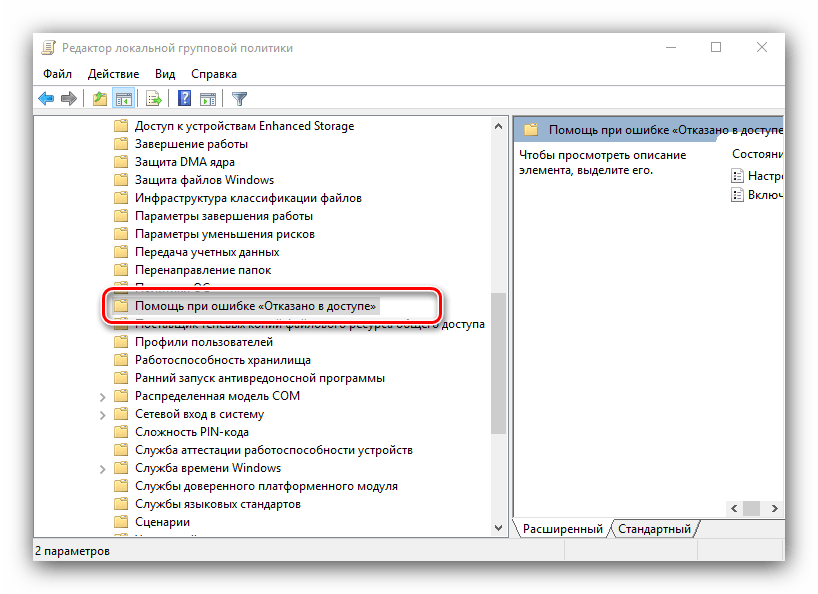
gpedit.mscи нажмите «ОК». - Перейдите к следующему расположению:
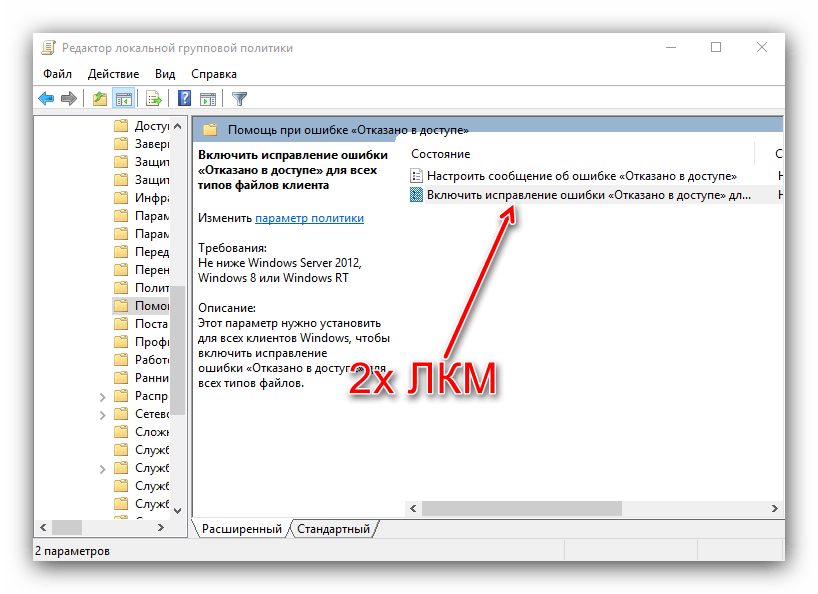
Конфигурация компьютера/Административные шаблоны/Система/Помощь при ошибке «Отказано в доступе» - В правой части окна найдите параметр «Включить исправление ошибки “Отказано в доступе”» и дважды кликните по нему левой кнопкой мыши.

Переведите его в состояние «Включено».

Кликните «Применить» и «ОК».
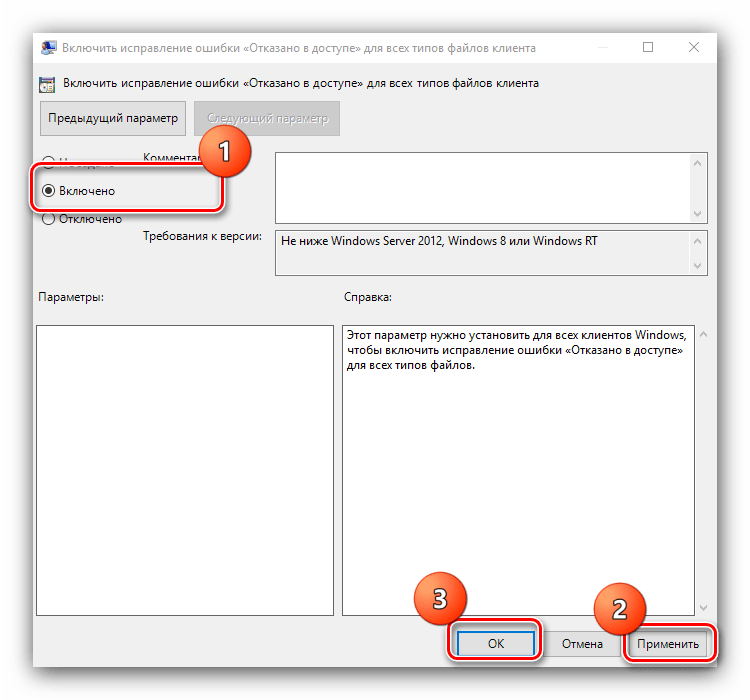
Для сохранения изменений желательно перезагрузить компьютер.
Способ 4: Отключение контроля учётных записей
Наиболее радикальный вариант решения рассматриваемой проблемы – полное отключение системы контроля учётных записей (UAC). Делать это рекомендуется в самом крайнем случае, поскольку при отключении UAC снижается безопасность операционной системы.
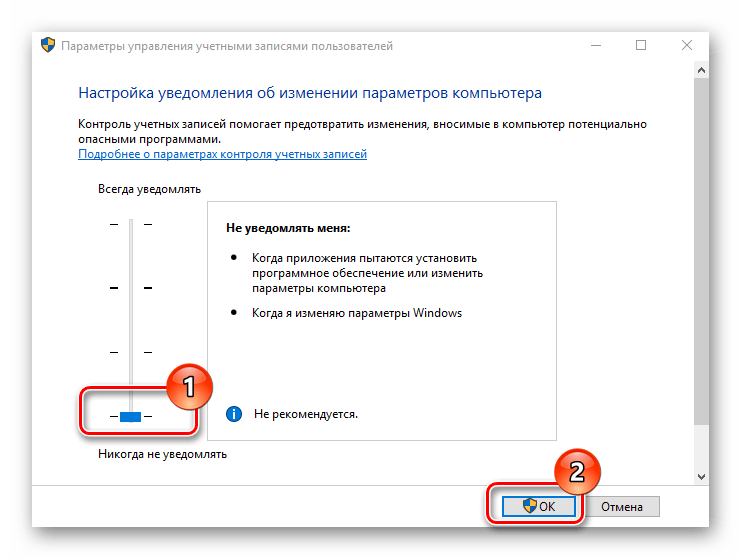
Урок: Отключение UAC в Windows 10
Мы рассмотрели варианты устранения ошибки «Расположение недоступно. Отказано в доступе». Как видим, проблема заключается в сбоях прав доступа, и все решения так или иначе их устраняют.
Наша группа в TelegramПолезные советы и помощь
Issue: OneDrive gives me an error that tells “The folder can’t be displayed” and I cannot access any of my files. I restarted my computer and tried a couple of times again. However, nothing has helped!
Solved Answer
“The folder can’t be displayed” is an error message that might be delivered when you try to access a specific folder on OneDrive.[1] Judging from the user’s reports, the majority of people who have encountered this error are Windows 10 users.[2] However, there’s no information that this issue cannot be encountered on older OS versions.
When trying to access a folder on OneDrive, users just see a blank page and an error message:
The folder can’t be displayed
Sorry, there was a problem. Please try again in a few minutes.
Often “The folder can’t be displayed” OneDrive error is triggered by connectivity problems. It’s a UWP app which requires an internet connection to operate properly. Hence, if you are not connected to Wi-FI or your cable connection was disturbed, you might not be able to access folders on OneDrive.

Methods to fix “The folder can’t be displayed” error in Windows 10
Below you can find methods that should help to fix this OneDrive error in Windows 10. However, before you start, you have to make sure that your internet connection is proper. If you are using Wi-Fi, you should connect using a cable (or opposite). OneDrive is UWP app[3] that requires an internet connection to operate properly.
However, if your connection is perfect and the error persists, you should try these methods:
Method 1. Run Windows troubleshooter for apps
Fix it now!
To repair damaged system, you will have a 24hr Free Trial and the ability to purchase the licensed version of the Fortect.
Windows app troubleshooter helps to fix various problems with apps installed from Microsoft Store. Therefore, this built-in tool might help to solve “The folder can’t be displayed” error too. Follow these steps:
- Right-click Start.
- Choose Settings.
- Navigate to Update & Security.
- Choose Troubleshoot which is located in the left pane.
- At the end of the page, you should find Windows Store apps troubleshooter option. Expand it.

- Click Run the troubleshooter button.
- Windows should find the solution and fix it automatically.

Method 2. Update OneDrive
Updates quite often cause problems and make programs crash. Therefore, this OneDrive error may have occurred due to the available updates. Follow these steps to update the app:
- Open Microsoft Store.
- Click on the three-dot menu.
- Choose Download and updates option.
- Click Get updates button.
- Wait until installation finishes and check if the error comes back.

Method 3. Sign out and sign in to your OneDrive account
Fix it now!
To repair damaged system, you will have a 24hr Free Trial and the ability to purchase the licensed version of the Fortect.
Logging out from your OneDrive account and logging in again is one of the easiest methods to fix “The folder can’t be displayed” error in Windows 10. Follow these steps:
- Open OneDrive.
- Click on the menu icon and expand its options.
- Click Accounts to see your OneDrive (or Microsoft) account.
- Choose Sign out.
- Close program and open it again.
- Follow the previous steps and sign in using your username and password.
Method 4. Uninstall and reinstall OneDrive
If none of the methods helped to fix “The folder can’t be displayed” error, there’s nothing else left to do, just reinstall the app. Follow these steps to uninstall OneDrive from your Windows computer:
- Open the Settings app by clicking Windows key + I.
- Click on the Apps in the menu.
- Under the Apps and features section, you have to find OneDrive.
- Click on it and hit Uninstall button.

After uninstallation, you might need to reboot your computer. Then you have to open Microsoft Store, find OneDrive and install it again.
Repair your Errors automatically
ugetfix.com team is trying to do its best to help users find the best solutions for eliminating their errors. If you don’t want to struggle with manual repair techniques, please use the automatic software. All recommended products have been tested and approved by our professionals. Tools that you can use to fix your error are listed bellow:
do it now!
Download Fix
Happiness
Guarantee
Compatible with Microsoft Windows
Still having problems?
If you failed to fix your error using Fortect, reach our support team for help. Please, let us know all details that you think we should know about your problem.
Fortect will diagnose your damaged PC. It will scan all System Files that have been damaged by security threats. To repair damaged system, you will have a 24hr Free Trial and the ability to purchase the licensed version of the Fortect malware removal tool.
Access geo-restricted video content with a VPN
Private Internet Access is a VPN that can prevent your Internet Service Provider, the government, and third-parties from tracking your online and allow you to stay completely anonymous. The software provides dedicated servers for torrenting and streaming, ensuring optimal performance and not slowing you down. You can also bypass geo-restrictions and view such services as Netflix, BBC, Disney+, and other popular streaming services without limitations, regardless of where you are.
Don’t pay ransomware authors – use alternative data recovery options
Malware attacks, particularly ransomware, are by far the biggest danger to your pictures, videos, work, or school files. Since cybercriminals use a robust encryption algorithm to lock data, it can no longer be used until a ransom in bitcoin is paid. Instead of paying hackers, you should first try to use alternative recovery methods that could help you to retrieve at least some portion of the lost data. Otherwise, you could also lose your money, along with the files. One of the best tools that could restore at least some of the encrypted files – Data Recovery Pro.