
Если сбои системы, синие экраны BSoD или иные проблемы при работе Windows 10, 8.1 или Windows 7 наводят вас на мысли о том, что имеются какие-либо проблемы с оперативной памятью компьютера, может иметь смысл выполнить её проверку, а начать можно со встроенного средства диагностики проверки памяти Windows.
В этой инструкции подробно о способах запустить средство проверки памяти средствами Windows, причём даже в тех случаях, когда вход в систему невозможен, а также о возможных вариантах действий в случае, если в результате теста средство диагностики памяти сообщает о том, что были обнаружены проблемы оборудования. На схожую тему: Устранение неполадок Windows 10.
- Способы запуска средства проверки памяти
- Использование средства и просмотр результатов
- Обнаружены проблемы оборудования в средстве диагностики памяти
- Видео инструкция
Как запустить средство проверки памяти в Windows 10 и предыдущих версиях системы
В случае, если операционная система запускается, вход в неё и работа возможны, вы можете использовать один из следующих вариантов запуска средства проверки памяти:
- Найти нужный пункт в разделе «Средства администрирования Windows» меню «Пуск».
- Нажать клавиши Win+R на клавиатуре, ввести mdsched.exe и нажать Enter.

- Открыть панель управления, выбрать пункт «Администрирование» и запустить «Средство проверки памяти Windows».
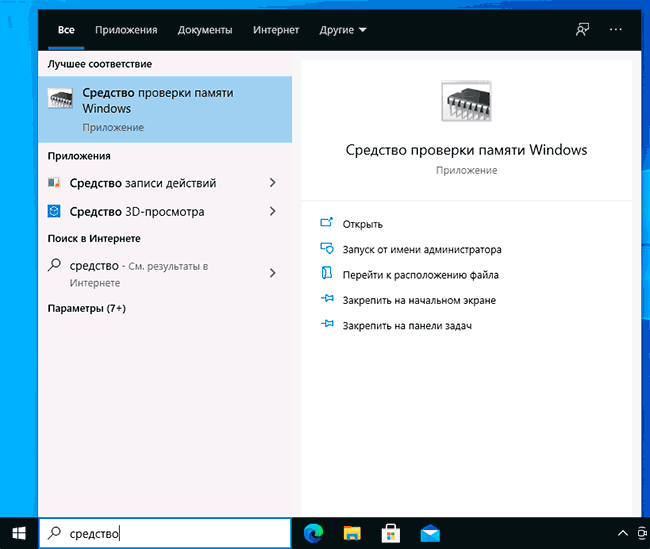
- Использовать поиск в панели задач Windows 10, начав вводить «Средство проверки памяти». Или встроенные средства поиска в предыдущих версиях ОС.

- Вручную запустить файл C:\Windows\System32\MdSched.exe

Если же ситуация осложняется тем, что Windows не запускается, вход в неё невозможен, либо сразу после него происходят сбои, можно использовать следующие способы запуска средства диагностики оперативной памяти:
- Загрузить компьютер или ноутбук с загрузочной флешки с Windows 10 или другой версией Windows, можно и с загрузочного диска. На экране программы установки нажать клавиши Shift+F10 (Shift+Fn+F10 на некоторых ноутбуках), ввести mdsexe в открывшейся командной строке и нажать Enter. После выбора в утилите проверки пункта «Выполнить перезагрузку и проверку», загружайте компьютер не с флешки, а с обычного загрузочного HDD или SSD.

- Средство проверки памяти можно запустить из среды восстановления Windows 10 — нажав кнопку «Дополнительные параметры» на синем экране с ошибкой или, находясь на экране блокировки Windows 10 (с выбором имени пользователя) нажать по изображенной справа внизу кнопке «Питания», а затем, удерживая Shift, нажать «Перезагрузка». В среде восстановления выбираем «Поиск и устранение неисправностей» — «Дополнительные параметры» — «Командная строка». А в ней, как и в предыдущем случае используем команду mdsched.exe.

- Если у вас есть подготовленный диск восстановления Windows, запуск можно осуществить, загрузившись с него.


Использование средства проверки памяти Windows и просмотр результатов

После запуска средства проверки памяти вам будет предложено перезагрузить компьютер, после согласия, процесс будет выглядеть следующим образом:
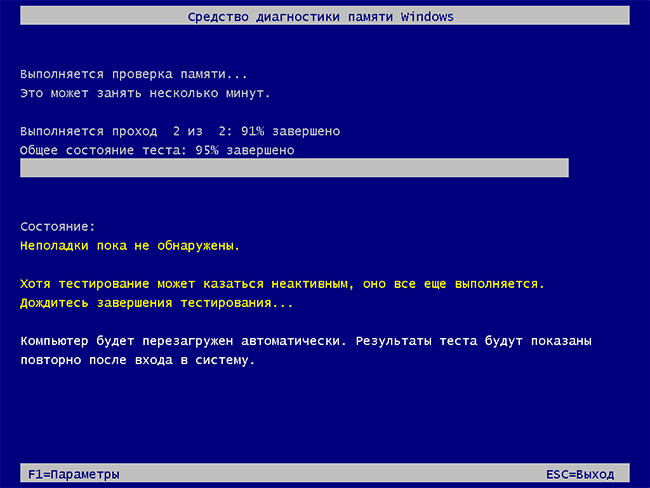
- Начнётся проверка оперативной памяти, которая может занять продолжительное время. Может показаться, что средство диагностики зависло: на всякий случай подождите в такой ситуации 5-10 минут. Если же действительно произошло зависание, не исключено что есть проблемы с оборудованием, вероятно — с оперативной памятью, но не обязательно.

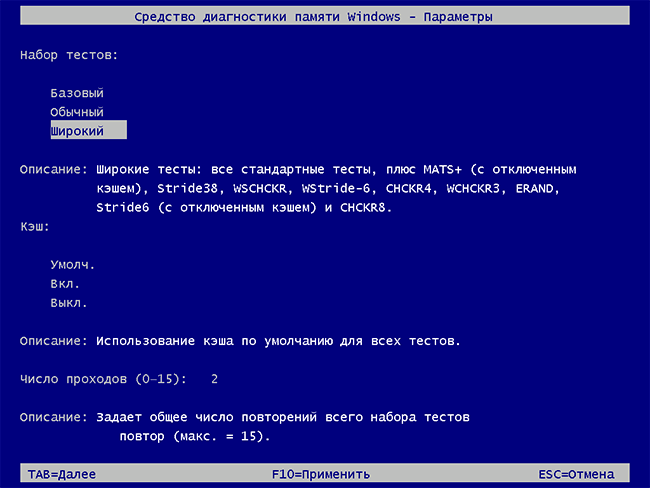
- Если в ходе проверки нажать клавишу F1 (или Fn+F1, если F1 не срабатывает), вы попадёте в настройки средства диагностики памяти Windows. Здесь можно выбрать набор тестов (по умолчанию — обычный), использование кэша, и число проходов. Переключение между разделами настроек выполняется клавишей Tab, изменение параметров — стрелками и вводом цифр (для числа проходов), применение параметров — клавишей F10. После изменения настроек тест перезапускается.
- В ходе проверки вы будете видеть информацию вида «Неполадки пока не обнаружены» или «Были обнаружены проблемы оборудования».
После завершения проверки компьютер будет автоматически перезагружен. Дальнейшие шаги — просмотр результатов.
- После перезагрузки в случае Windows 10 вы можете увидеть уведомление в области уведомлений, сообщающее о результате проверки памяти. Но оно отображается не всегда.
- Можно зайти в просмотр событий, для этого нажимаем Win+R, вводим eventvwr.msc и нажимаем Enter. Там открываем раздел «Журналы Windows» — «Система», находим пункты, где в столбце «Источник» указано MemoryDiagnostics-Results и просматриваем результаты.


Учитывайте, что ошибки, «вылеты», синие экраны и зависания не всегда связаны с проблемами оперативной памяти: если средство диагностики показывает, что всё в порядке, есть и иные возможные причины: отключенный файл подкачки, проблемы с HDD или SSD (или с их подключением, например — неисправный кабель), сторонние антивирусы или, наоборот, вредоносные программы, неправильная работа драйверов оборудования.
Что делать, если были обнаружены проблемы оборудования в средстве диагностики памяти
К сожалению, средство диагностики не сообщает о том, какие именно проблемы были обнаружены в ходе проверки, а лишь рекомендует обратиться к производителю оборудования. Что можно сделать:
- Отключить любые опции ускорения памяти (изменение частоты, таймингов и другие) при наличии соответствующих опций в БИОС или ПО производителя материнской платы или ноутбука.
- Попробовать проверить планки памяти по одной, в других слотах на материнской плате для того, чтобы выяснить, появляются ли проблемы только с одним конкретным модулем памяти или в одном конкретном разъеме.
- Использовать другие утилиты для проверки оперативной памяти при необходимости.
- Прочитать документацию к материнской плате ПК — возможно, это какая-то несовместимость с памятью с конкретными характеристиками (если вы недавно добавили новые модули памяти или только что самостоятельно собрали компьютер).
- Иногда может помочь обновление БИОС.
Видео инструкция
Если вы разобрались, чем была вызвана именно ваша проблема, буду благодарен комментарию к статье: возможно, для кого-то он окажется полезным.
Your Windows 11-equipped PC optimized for maximum performance right from the box. After time, you may encounter performance issues such as system slowdowns, application crashes, or unexpected errors. In these cases, the culprit might be your device’s random-access memory (RAM), a key component of your PC’s operations. Here’s why you might need to use Windows Memory Diagnostic tools and how you can access them so your device won’t miss a beat. device won’t miss a beat.
What is random-access memory?
Random-access memory (RAM) is a type of computer memory that stores data temporarily and allows fast access to it. When you open programs or files, the data that they use are loaded into the RAM for quick access by the central processing unit (CPU). An essential part of your device’s performance, RAM is like a workspace that your computer uses to work with more information at the same time, such as running multiple programs or tabs. When you close a program or operation, RAM no longer holds that data and resets, allowing you to use that space for something else.
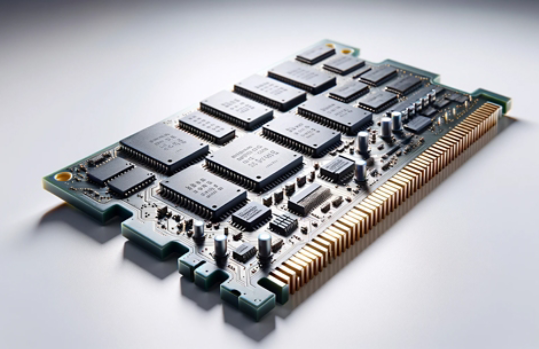
Credit: Image created with AI
Issues with RAM and memory
When your PC’s RAM isn’t performing well on memory-intensive applications, you’ll notice because webpages and apps will load slowly. Here are examples that indicate when RAM issues might affect your Windows 11 device:
- Sluggish performance: If your device is taking longer to respond or open applications, it could be due to insufficient RAM.
- Frequent freezing or crashing: When running multiple applications simultaneously, your system might freeze or crash due to inadequate RAM capacity.
- Error messages: Messages indicating memory-related issues like «low memory» or «out of memory» can alert you to potential RAM problems.
Using the Windows Memory Diagnostic Tool
The Windows Memory Diagnostic tool is a built-in feature available in the latest Windows 11 operating systems. It can conduct a RAM test to detect possible problems with your PC’s memory.
Because chances are that you won’t need to use this tool frequently, it can be tricky to find. Here are multiple ways that you can access this tool on your PC:
- In the Start menu’s search box, enter windows memory. The Windows Memory Diagnostic app will appear as the first result.
- On your keyboard, select the Windows logo key + R to open the Run application function. Enter mdsched to open the Windows Memory Diagnostic app.
- In the Settings menu, enter memory in the search box in the left panel. Select Diagnose your computer’s memory problems to access the Windows Memory Diagnostic app.
Running the Windows Memory Diagnostic app
Before you run Windows Memory Diagnostic app, be sure to save all the content you’re working on and exit out of any currently running programs. Once that’s set, begin by selecting Restart now and check for problems (recommended).
Your PC’s system will reboot and start the Windows Memory Diagnostic tool, performing a thorough analysis of the computer’s RAM for issues. Once the test is complete, the system will restart, displaying the test results in the notification area.
More ways to enhance RAM performance
Windows uses this diagnostic tool to optimize memory usage and enhance performance, but users can further leverage Windows tools to help get the very best performance out of their devices. Users can:
- Optimize RAM usage: Windows comes with built-in features to manage RAM efficiently. Explore the settings to tweak the RAM usage as per your requirements.
- Monitor resource consumption: Use Task Manager to keep an eye on memory usage. Identify memory-hungry apps and manage them accordingly for smoother performance.
If you find that your PC isn’t performing to as-new standards, these RAM tools can help. Regularly check your device’s RAM health using Windows Memory Diagnostic and leverage the RAM tools available. And if you’re looking for your next favorite Windows 11 device, see which Surface device could be right for you.
Неожиданные перезагрузки, «синие экраны смерти», зависания операционной системы, фризы в интерфейсе Windows – все это признаки неисправной оперативной памяти. Сегодня мы расскажем, как проверить ОЗУ на ошибки, какие программы для этого понадобятся и что делать, если обнаружились неполадки.
Почему оперативная память начинает работать с ошибками
В большинстве случаев причина в заводском браке. Микросхемы памяти со временем деградируют, и производственные дефекты выходят наружу. Они приводят к нестабильной работе модулей ОЗУ и различным ошибкам в системе.
Также причины поломок могут быть следующие:
-
неверно выставленные параметры в BIOS материнской платы;
-
повреждение разъемов ОЗУ на материнской плате;
-
неисправность контроллера памяти ЦП;
-
окисление контактных площадок ОЗУ.
Ошибки в работе ОС Windows могут быть вызваны не только модулями оперативной памяти. Например, если компьютер устаревший, в нем может быть неисправный жесткий диск или какое-то другое комплектующее. Однако диагностику ПК всегда следует начинать с проверки ОЗУ, так как это одна из самых распространенных причин неисправной работы системы.

Как проверить ОЗУ на ошибки
Для этого понадобится скачать бесплатную программу TestMem5. Устанавливать ее не нужно. На ваш компьютер загрузится архивный файл, который нужно распаковать в любое удобное место, хоть на рабочий стол. Также скачайте готовые конфигурации, распакуйте их и переместите файл extreme@anta777 в папку TM5.
Теперь запустите утилиту через ярлык TM5.exe и нажмите «Настроить и выйти». Выберите файл extreme@anta777, и программа закроется. Теперь снова запустите утилиту, и она начнет автоматический поиск ошибок.
Дождитесь завершения процесса и посмотрите на результат в диалоговом окне. Если появилась надпись «без ошибок», то с вашей ОЗУ все хорошо, но если обнаружились неполадки, стоит попробовать их устранить.
Что делать, если обнаружились ошибки
Для начала перейдите в BIOS материнской платы и сбросьте настройки. Для этого перезагрузите компьютер и во время включения нажимайте клавишу Delete на клавиатуре. Когда откроется BIOS, перейдите во вкладку «Save and Exit Setup». Выберите пункт «Load Setup Defaults» и компьютер перезагрузится.
Снова запустите утилиту TestMem5 и посмотрите на результаты проверки. Если ошибки сохранились, ваша задача – найти неисправную планку ОЗУ. Выключайте ПК, отключайте блок питания, переведя тумблер в положение «0», откручивайте боковую крышку и вытаскивайте одну планку оперативной памяти. Имейте в виду, что она удерживается в разъеме при помощи двух фиксаторов. Они располагаются сверху и снизу модулей ОЗУ. Их нужно опустить, чтобы достать оперативку.
Вытаскивайте по одной планке ОЗУ, запускайте компьютер и проводите тестирование с помощью утилиты TestMem5. Так вы поймете, какая планка оперативной памяти работает со сбоями. Когда вы найдете неисправный модуль ОЗУ, не спешите его выкидывать. Возьмите ластик и почистите им металлические контакты оперативки. Затем возьмите кисточку или сухую салфетку и уберите остатки мусора. Есть вероятность, что контакты просто окислились, и их очистка поможет вернуть работоспособность памяти.
Если очистка не помогает и ошибки остаются, выкидывайте неисправный модуль ОЗУ и покупайте новую планку с теми же характеристиками частоты и таймингов. Ремонтировать оперативную память слишком дорого, и намного дешевле просто купить новый модуль ОЗУ. Если оперативка на гарантии, можете вернуть ее в магазин.
Итоги
Чтобы проверить оперативную память на ошибки:
-
Скачайте и распакуйте утилиту TestMem5;
-
Скачайте и распакуйте файл конфигурации extreme@anta777 в папку TM5;
-
Запустите проверку и дождитесь результатов тестирования.
Чтобы проверить ОЗУ на ошибки, не обязательно скачивать специальную утилиту. В операционной системе Windows есть своя программа для проверки ОЗУ. Однако она может обнаружить только критические ошибки. Мелкие дефекты, которые встречаются чаще всего, встроенная программа Windows не найдет. Поэтому мы рекомендуем пользоваться утилитой TestMem5.
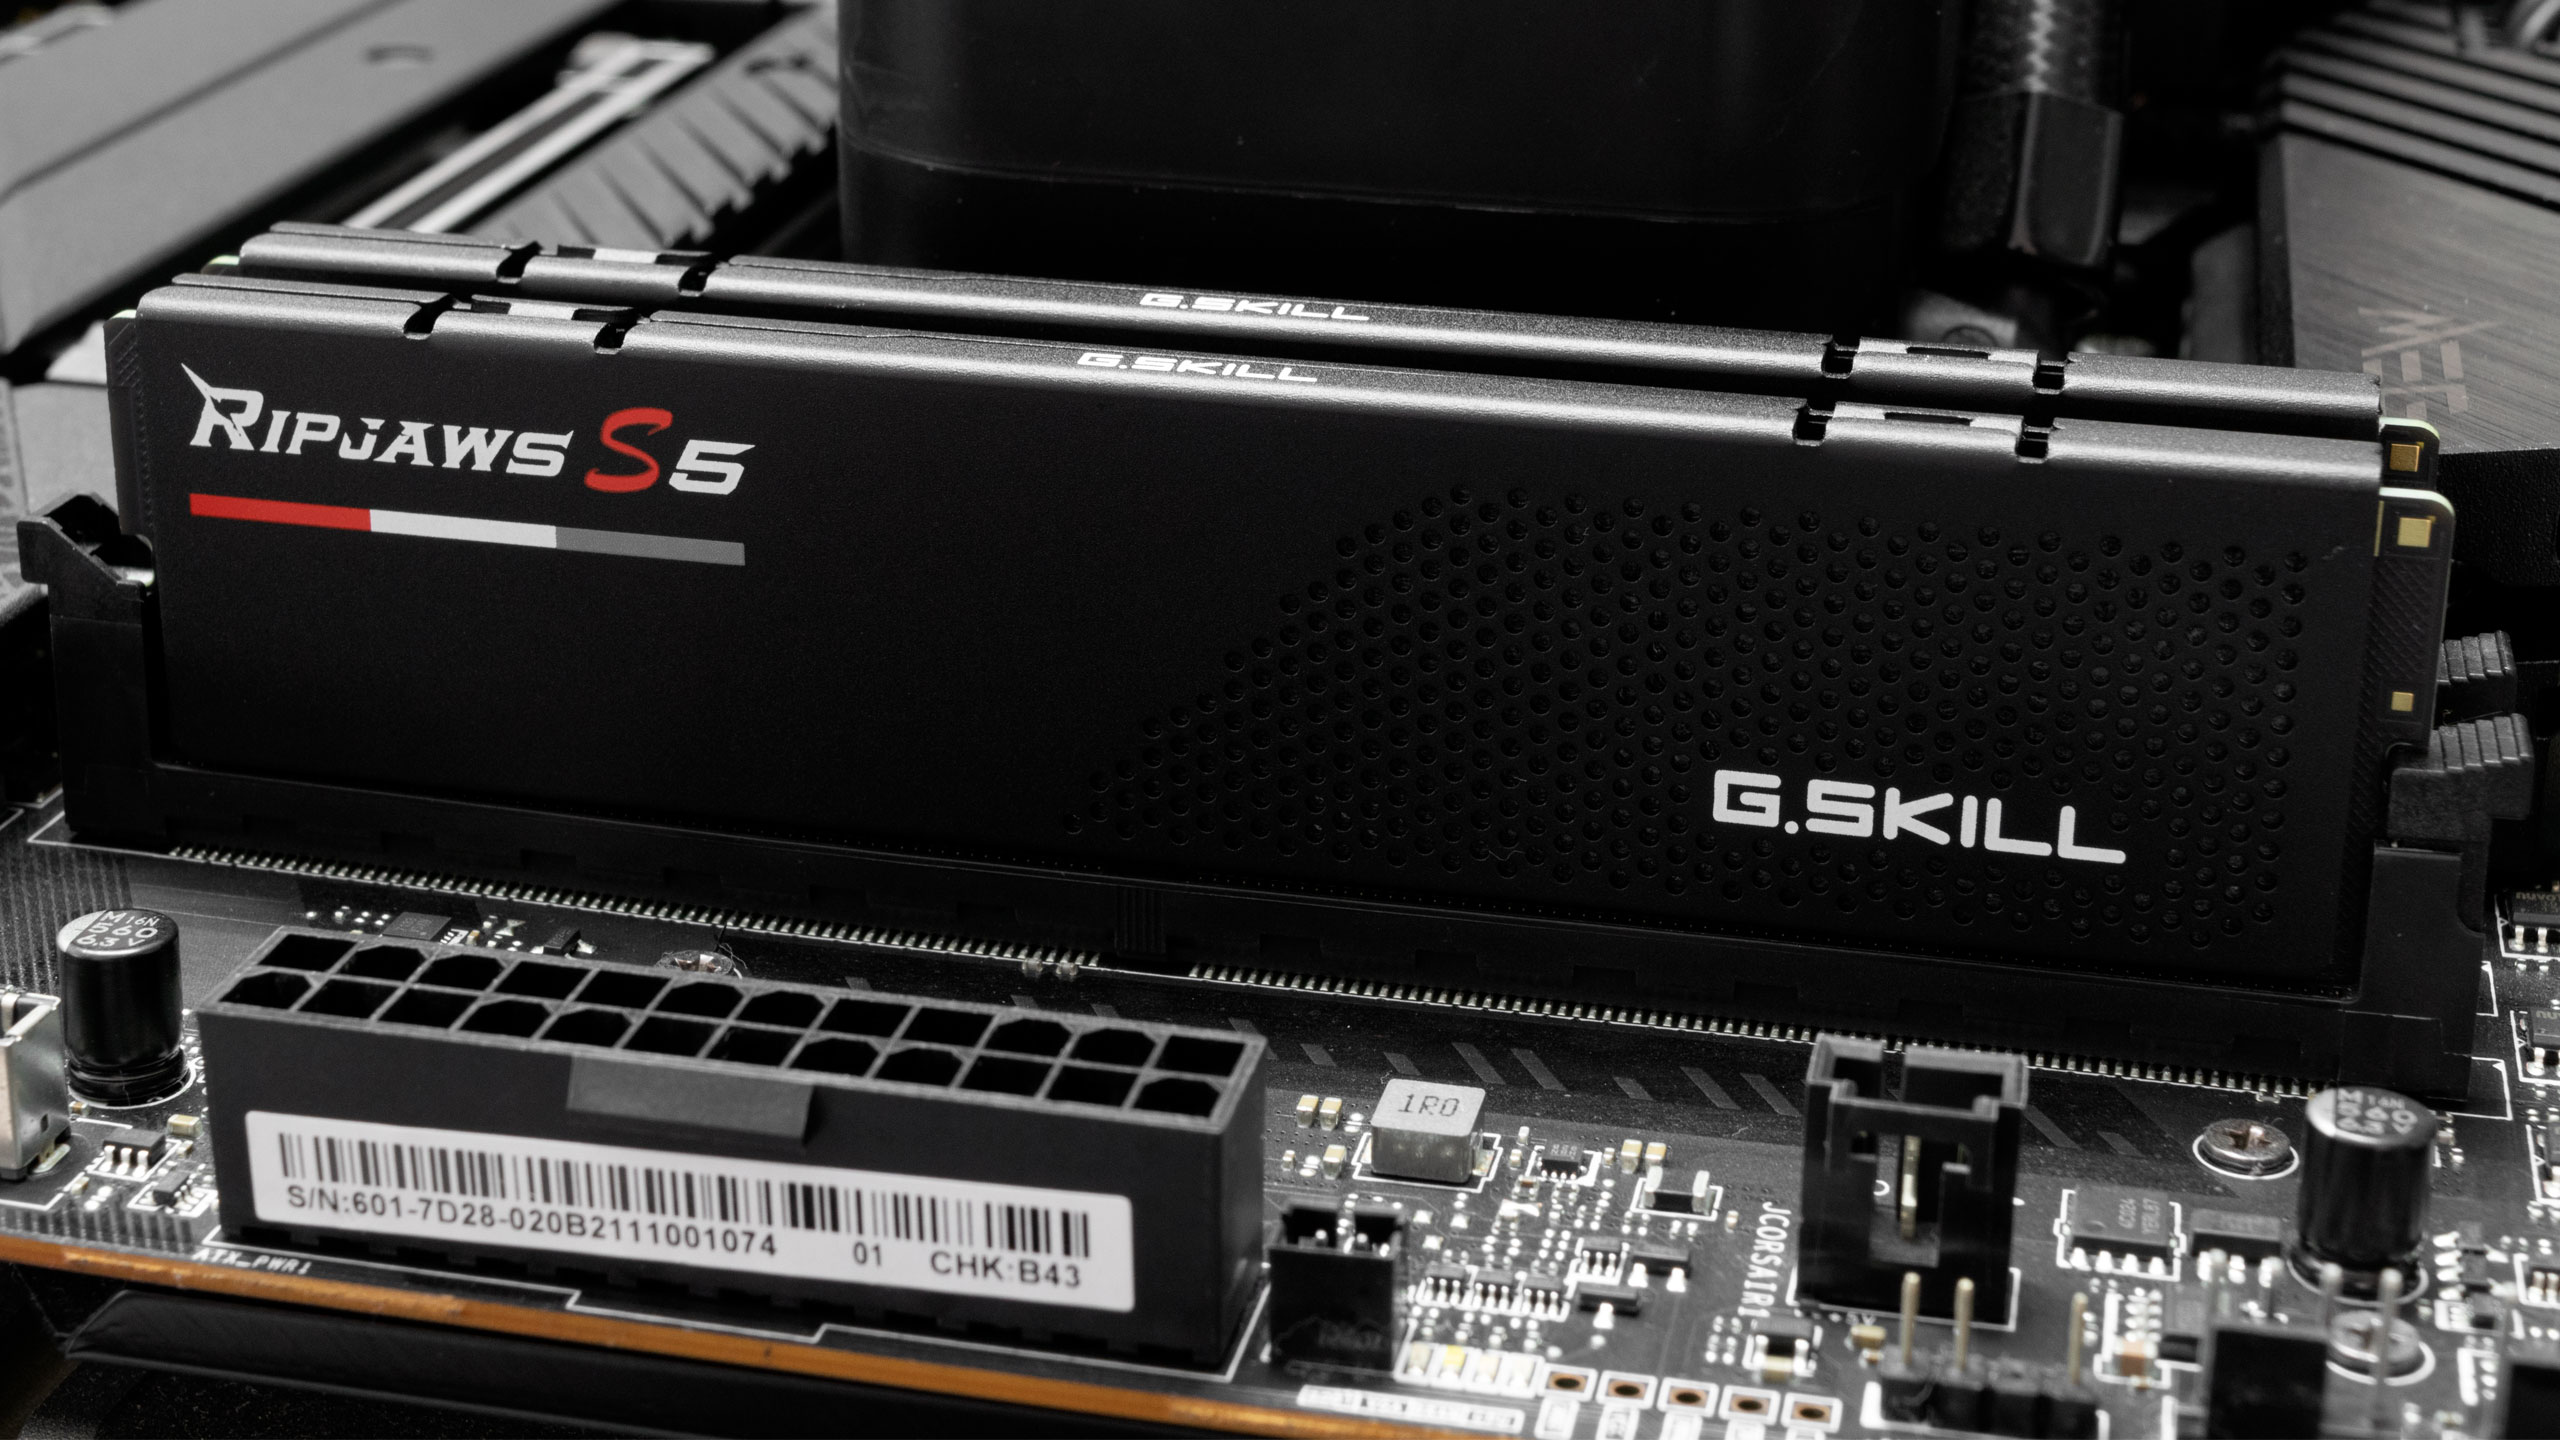
RAM is a crucial component that ensures a system’s correct operation. Simply put, RAM is equivalent to short-term memory, where your system stores information while working on a current task. Therefore, defective memory can have a catastrophic impact on your work. In most cases, RAM typically outlasts the rest of the components inside your system, unless you’re transitioning from an old standard to a new one, like DDR4 to DDR5. It’s rare for RAM to fail, but it does happen. Like any computer part, even the best RAM will eventually fail, so you’ll want to know what to do when it happens to you.
RAM doesn’t usually stop working out of the blue. Often, there are early signs of a failing or faulty DIMM. But yes, receiving DOA (dead on arrival) RAM isn’t uncommon, like any other PC component. General symptoms of bad RAM include random blue screens of death (BSOD), system crashes or restarts, operating system freezes, and missing memory. In a worst-case scenario, your system might not even post and welcome you with multiple beeps.
Before running any diagnostics on your RAM, you should ensure it’s running at the stock default frequency. Many of you are running Intel XMP 3.0 or AMD EXPO memory kits, so it’s best to differentiate between an unstable memory overclock from a defective DIMM or DIMMs. A shaky overclock causes similar symptoms as faulty RAM. Therefore, the first step to detecting faulty memory is to return your system to the factory default. You can do so by resetting the firmware to default inside your motherboard’s BIOS or pressing some motherboards’ dedicated «Clear CMOS» button from the rear panel.
In contemporary times, we don’t expect anyone to have a single DIMM in their system. Most probably use at least a dual-channel configuration. In a scenario with multiple DIMMs, it’s easier to diagnose each DIMM individually. Otherwise, you won’t know which DIMM is the culprit, even if the software returns with an error — it comes down to a process of elimination. To our knowledge, only one software on the market can correctly pinpoint which specific DIMM has faulty integrated circuits (ICs), which we’ll get into later.
The best software for weeding out defective RAM depends on who you ask. From our experience, testing your RAM with at least two different programs should be sufficient. The odds of one software not detecting the faulty DIMM are present, but it’s unlikely to fool two testers. Of course, if your results come back negative, but you still have heavy suspicions that you have a bad DIMM, it wouldn’t hurt to as for a third opinion. All the software that we’re rounded up is free. Payment unlocks additional options, but the basic version is more than enough for diagnosing bad DIMMs. There are other options out there too. Coincidentally, the software for detecting faulty DIMMs is also popular for overclockers evaluating the stability of memory overclocks. Although we’re using DDR5 for the article, the guide is still valid on older formats, such as DDR4 and prior.
How To Test RAM With HCI Memtest
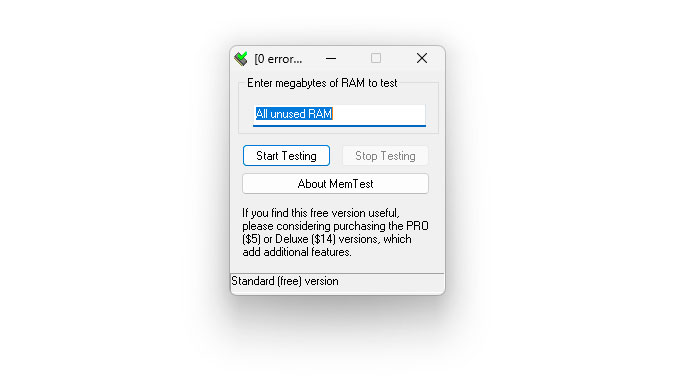
HCI Memtest is one of the simplest and easiest software for detecting errors with RAM. Unfortunately, the basic version only has one user-modifiable section where you input the amount of RAM to test, and the software does the rest. One of its limitations is that it can only test 2GB to 3.5GB of RAM per instance, which can be a nuisance when testing considerable amounts of RAM or a processor with lots of threads.
For optimal testing, it’s best to test the total amount of RAM split across all the threads from a processor. This means opening on Memtest instance per thread. Admittedly, testing RAM with processors with many threads becomes a nuisance. However, the Pro version of HCI Memtest costs a mere $5 and automates the whole process. Furthermore, some wrappers can do a similar job with the free version if you Google them.
Get Tom’s Hardware’s best news and in-depth reviews, straight to your inbox.
1. Download HCI Memtest and extract the contents from the ZIP file.
2. Run memtest.exe. It’s the only executable file in the folder, so you can’t go wrong.
3. Open Windows Task Manager and take note of the free RAM available.
4. Divide the amount of free RAM by the total number of threads from your processor.
5. Open the number of Memtest instances equal to your processor’s threads and input the result from the last step into each instance.
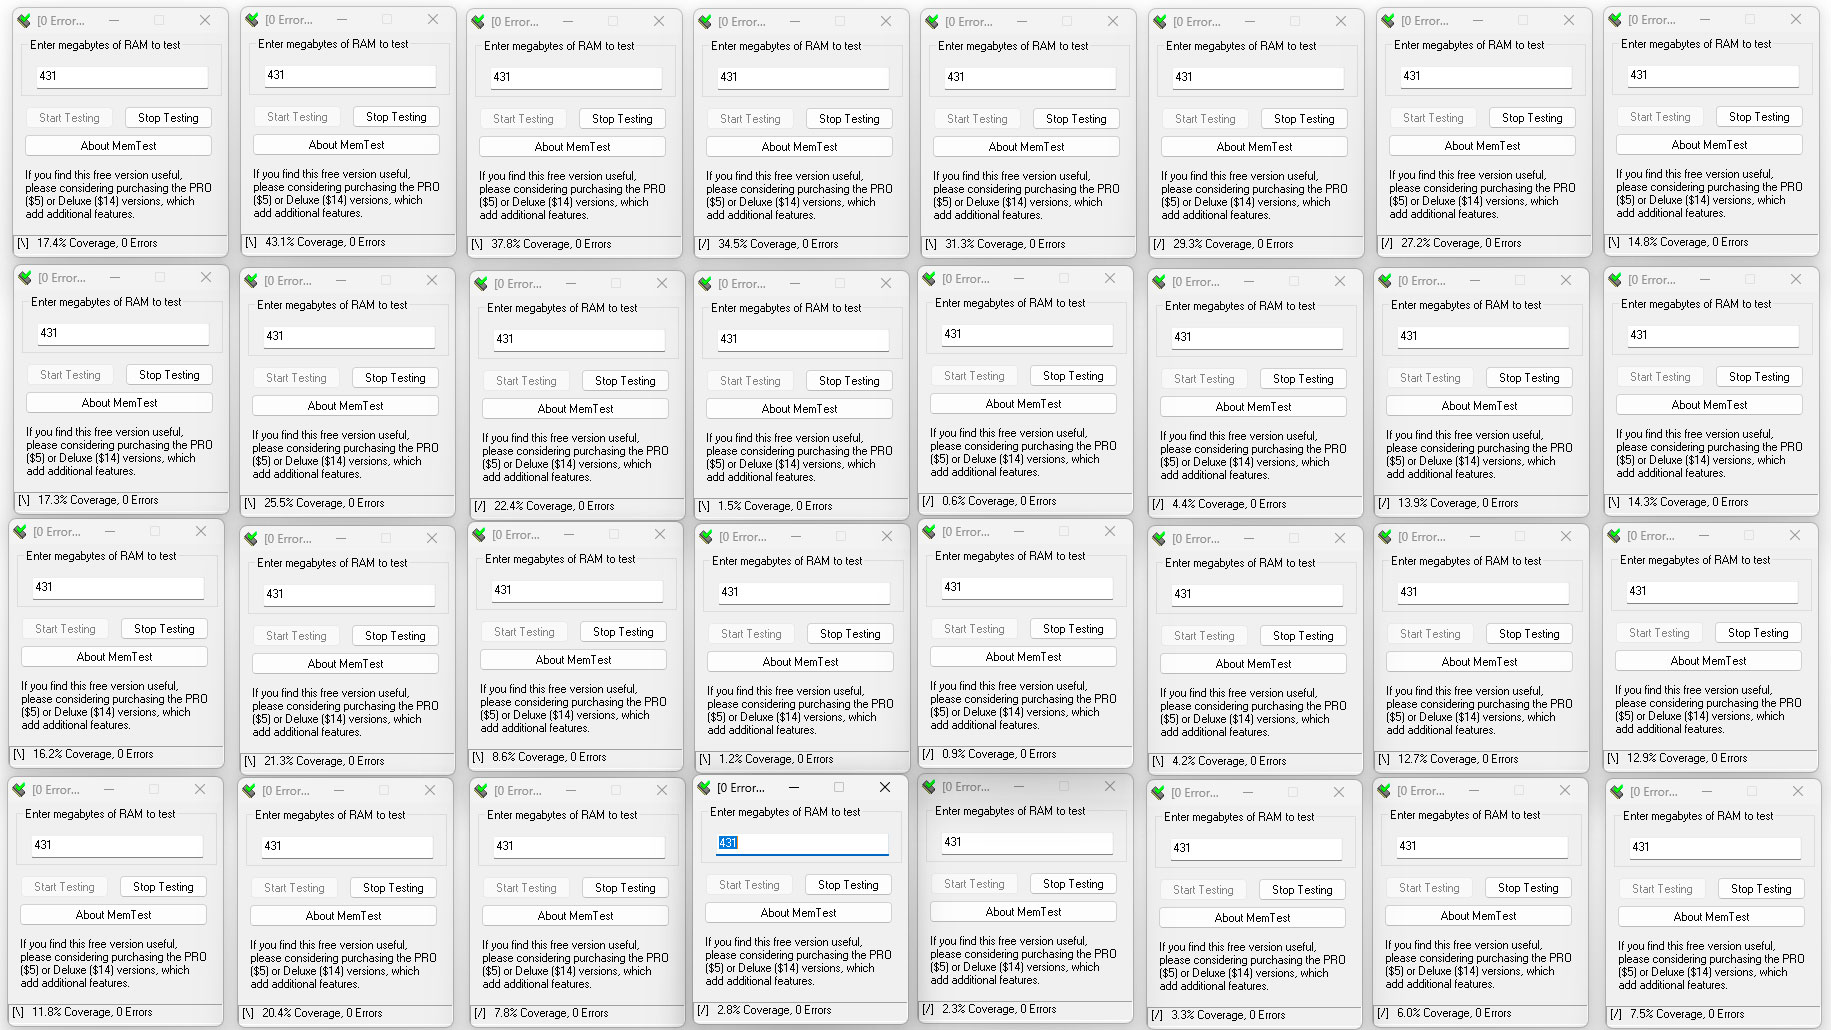
For example, we’re testing a 16GB DDR5 DIMM on our Core i9-13900K system. The processor has 32 threads, so we ran 32 instances of Memtest. We had around 13.79GB free, which amounts to 431MB per instance.
Depending on your processor and the amount of memory, a complete pass takes around an hour or so. However, one to two passes should suffice for picking out faulty RAM.
How To Test RAM With TestMem 5
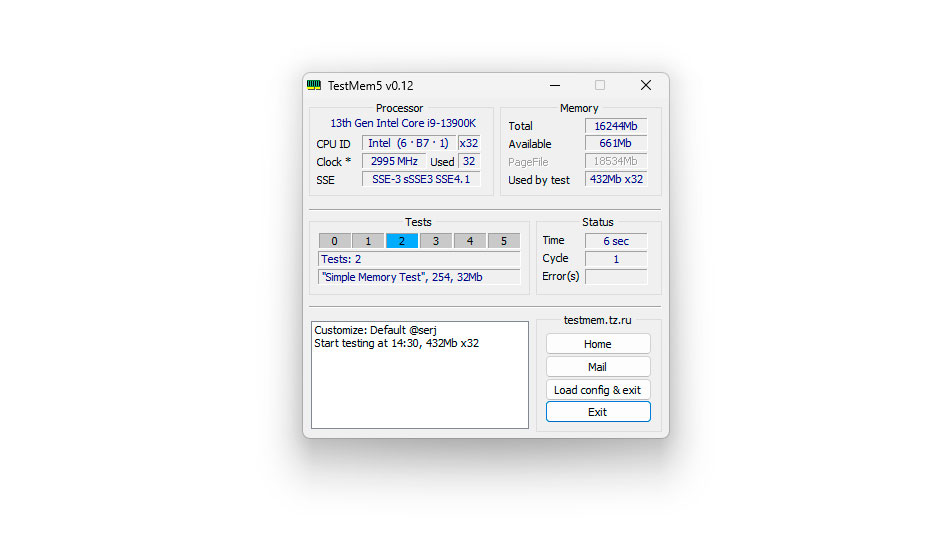
TestMem dates back to the DOS days. The program debuted in 1998 and has evolved quite a bit over the years. The program is currently on its fifth version. TestMem 5 comes with 16 tests, which users can modify to their heart’s content. The software is very lightweight and has a minimalistic interface that’s very friendly to beginners. Unlike HCI Memtest, TestMem 5 is entirely free.
TestMem 5 supports custom user configurations, opening the doors to infinite testing options. In the meantime, the Extreme and Absolut presets from user Anta777 are the favorite among enthusiasts and overclockers.
1. Download TestMem 5 and extract the ZIP file to your desktop.
2. Right-click and run the «TM5» executable file with administrator privileges.
3. Hit the «Load config & exit» button to load your preset. You can download different user presets from the MemTestHelper GitHub page.
4. Once the preset is loaded, TestMem 5 will close. Rerun it with administrator privileges, and the new preset will take effect.
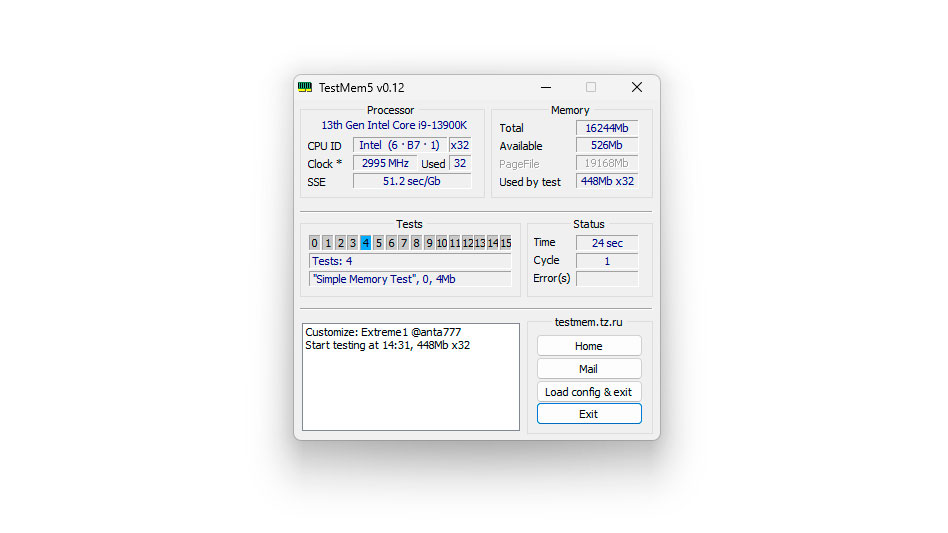
TestMem 5 takes around 25 to 30 minutes to complete a cycle on 16GB of RAM. The commonly accepted standard is three cycles, amounting to an hour and a half to two hours of operation.
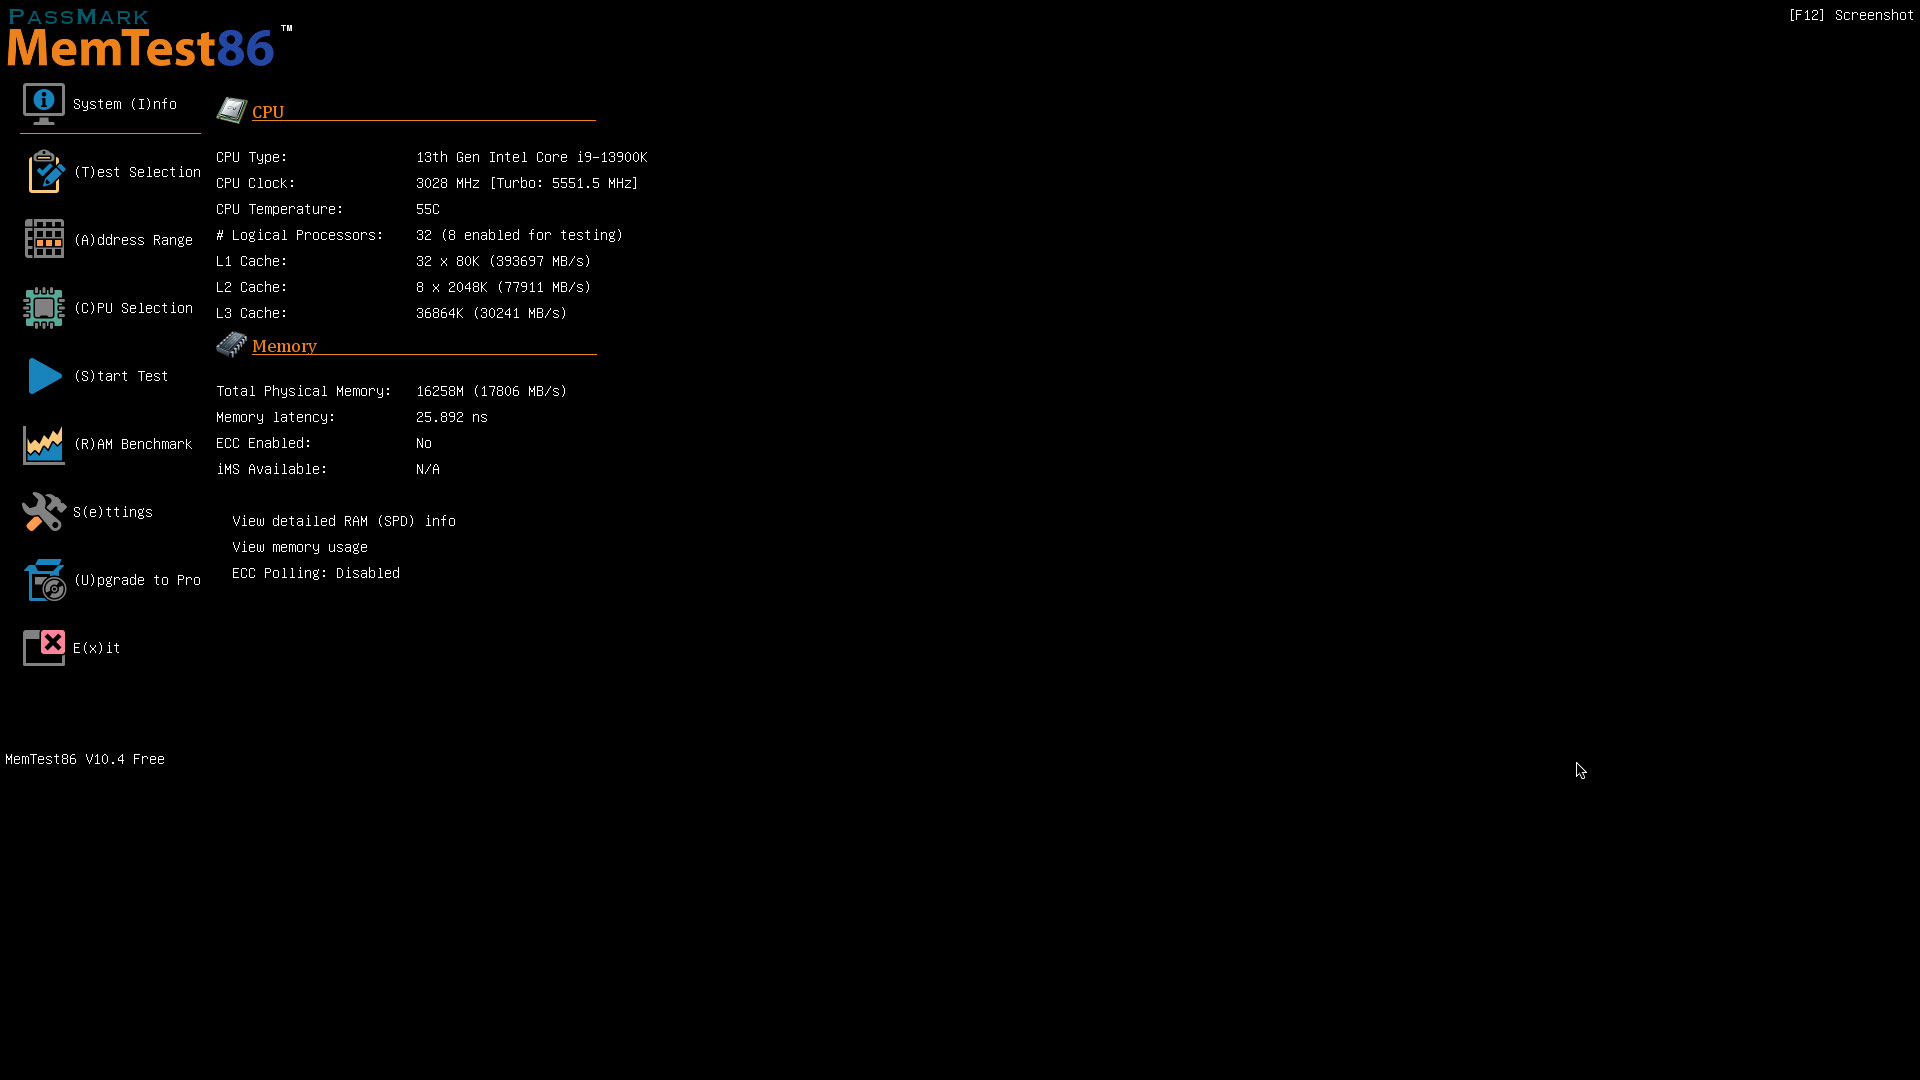
How to Test RAM With Passmark MemTest86
PassMark’s MemTest86 is a reliable tool for testing memory without the need for an operating system, meaning it will work on Windows machines as well as Linux computers. It runs off a bootable USB stick, and although it looks complicated, it is very straightforward to use.
MemTest86 is presently the only software that can indicate the faulty DIMM or DIMMs, even if all your memory slots are populated. It’s a paid feature, though. In its current state, it’s only supported on select platforms leveraging DDR5 memory.
1. Download PassMark MemTest86.
2. Extract the contents into a folder on your desktop.
3. Insert a USB stick into your PC. Back up any data on it, as PassMark’s tool will format the USB stick.
4. Run the «imageUSB» executable.
5. Select the correct USB drive at the top, and press the «Write» button.
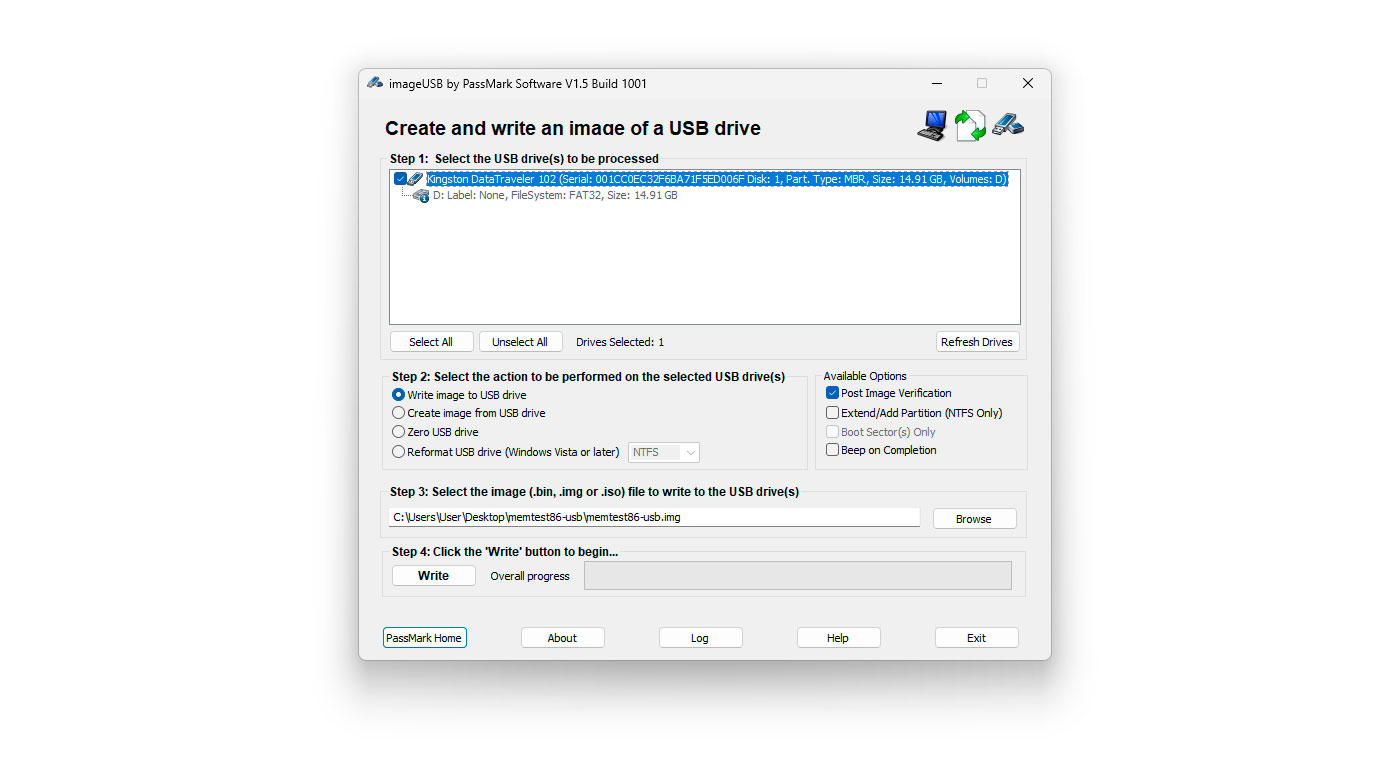
6. Restart your computer, and enter the boot menu by pressing F2, Del, F8, F10, or whichever key your system uses. It will say on your post screen.
7. Boot off the USB stick.
8. Select the «Config» button on the right side using your keyboard or mouse.
9. Select the «(S)tart Test» option in the Memtest86 home screen to let testing commence.
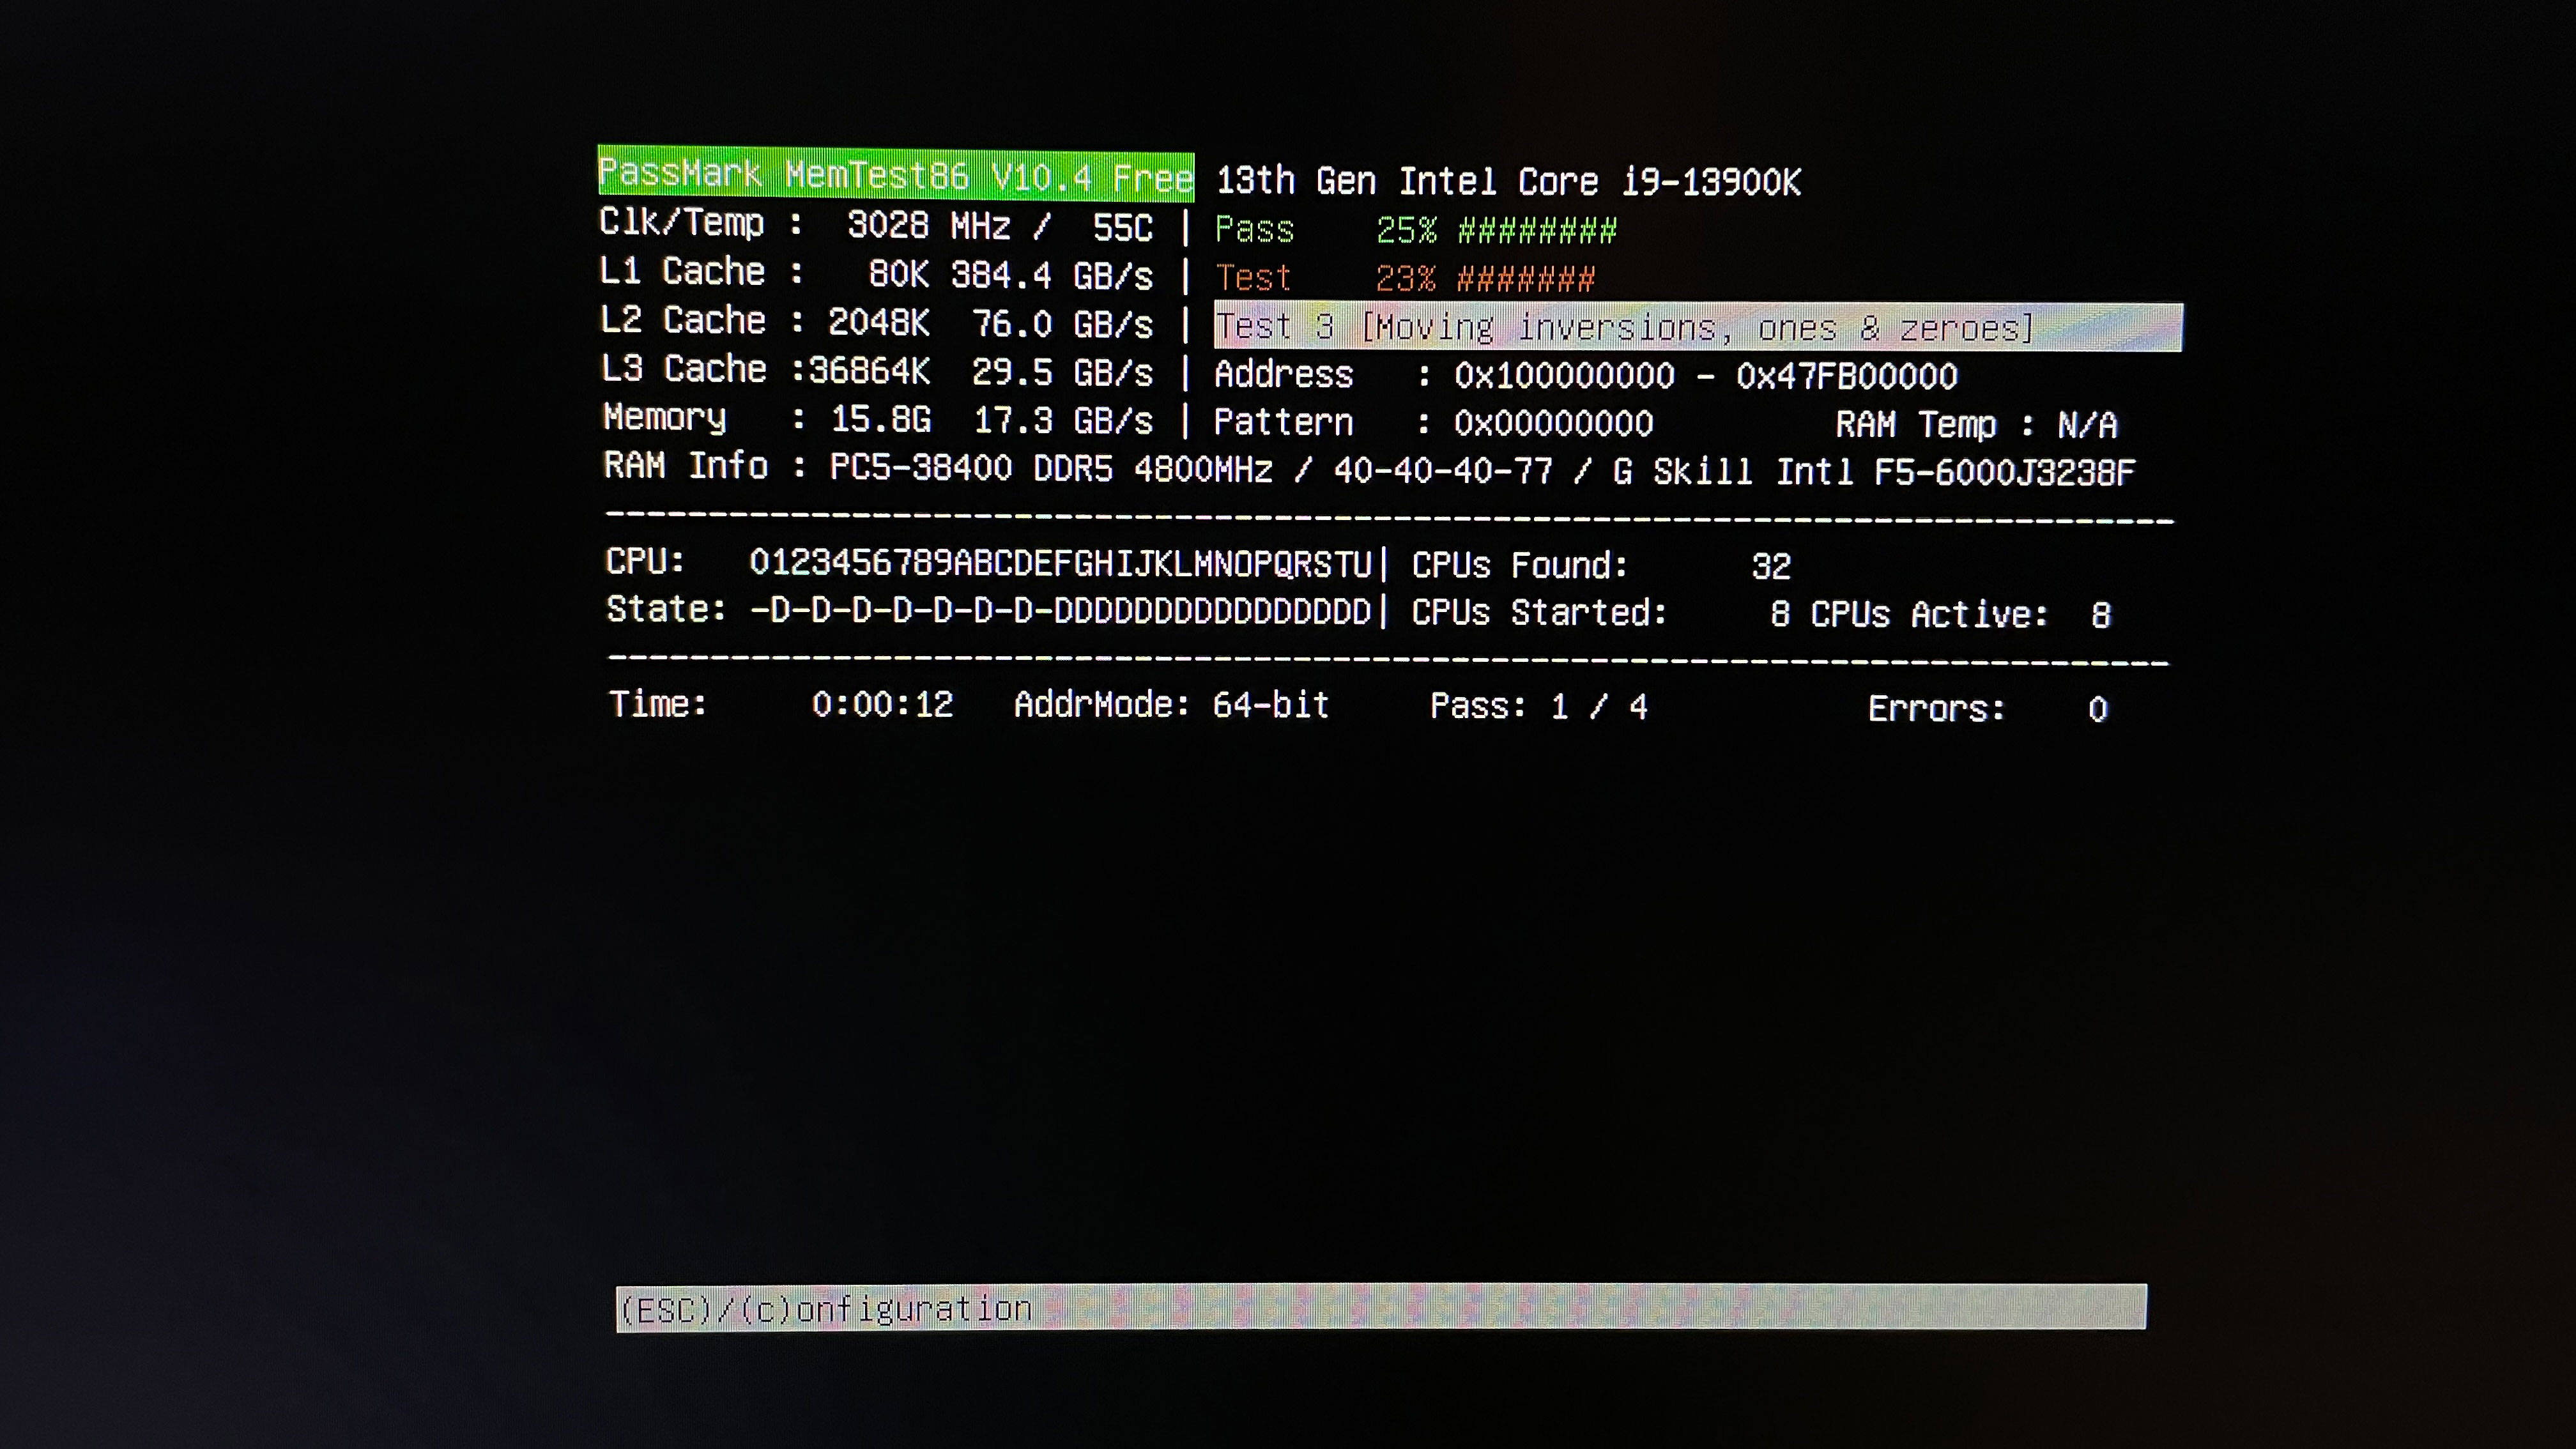
Now let the application run the test until completion or until errors appear. You can monitor the progress of the test at the top of the screen. Testing can take 20 minutes to a few hours, depending on the capacity of your DIMM. If errors appear, there is no point in continuing testing.
How To Test RAM With Google Stressful Application Test (GSAT)
For Linux users, the Google Stressful Application Test (GSAT) is an excellent tool for diagnosing memory errors. Alternatively, you can run GSAT in Windows using Windows Subsystem for Linux (WSL). However, it doesn’t have the same effect, which is why we so we recommend using GSAT in its native environment.
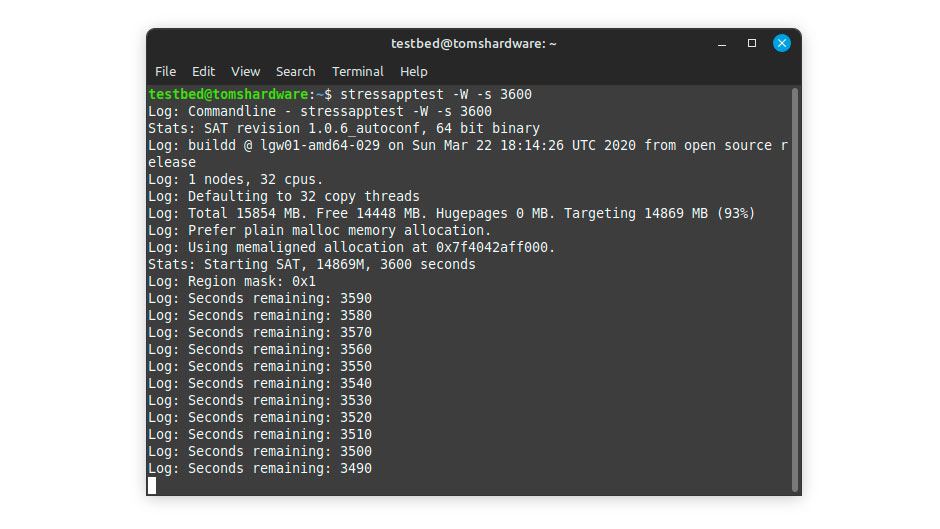
1. Open a terminal and use the following command to download and install GSAT: sudo apt-get install stressapptest
2. Once installed, put GSAT into motion with this command: stressapptest -W -s 3600.
The -W argument asks GSAT to utilize a more stressful memory copy for the processor. Meanwhile, the -s argument refers to the number of seconds to run the tool. Unlike other software based on passes or cycles, GSAT runs according to your specified time. On the norm, one to two hours are more than adequate to assess whether you have a bad DIMM.
What If My RAM Is Bad?
If you didn’t get any errors: congratulations. Your memory is in working order. However, if BSODs and other problems continue to plague your system, the problem lies elsewhere. The only way to solve a faulty DIMM issue is to replace it with a working one. Technically, you can repair DIMMs by swapping the defective ICs for fresh ones. However, it’s not a procedure for the average consumer. Luckily, the majority, if not all, RAM comes with a limited lifetime warranty. Therefore, the first thing you should do is contact the manufacturer and request an RMA.
The RMA should go through without hiccups if you’ve been using your RAM within the vendor’s specifications. If, for some reason, your RMA is denied and you need to buy a replacement with your own money, we keep an updated hierarchy of the fastest DDR4 and DDR5 memory kits for the latest Intel and AMD processors.
Zhiye Liu is a news editor and memory reviewer at Tom’s Hardware. Although he loves everything that’s hardware, he has a soft spot for CPUs, GPUs, and RAM.