
Автор
Taker1993
Добрый день. Борюсь с этим майнером уже приличное время, пробовал разные антивирусы и думал что он пропал, так как используя несколько разных антивирусов от основной части майнера я вроде избавился, но заметил ещё тогда что много ошибок в системе 0xc0000017 при исполнении команд dism в командной строке (которую я вчера исправил), при обновлении всех компонентов windows и т.п. (пробовал откатывать удаляя по гайдам папку с апдейтами используя утилиты для активации обнов — но безрезультатно), также есть ошибка с безопасностью, в начале была проблема с целостностью ядра и я удалил два мешающих файла исправив проблему, но ошибка с этим так до конца и не решилась и он пишет про отсутствие TPM — а конкретно NET HELPMSG 2182 Problem with BITS; также есть проблема с невозможностью запуска диспетчера устройств и других подобных окон и некоторых команд в комбинации Win+R. Почему я думал, что избавился от майнера полностью: грузить систему перестало на постоянке и сильных нагрузок не было, а с остальным думал уже ничего не сделаешь и нужно переустанавливать Windows, оставил на потом, так как есть немало сторонних лицензионных программ,, которые шли вместе с ноутбуком и я боялся к ним потерять доступ, ну и так как не было точек восстановления и если даже они были я не могу к ним получить доступ, а оказывается всё-таки нет майнер на месте.
Несколько месяцев спустя заметил, а конкретно вчера: что изменилась возможность администрирования и я не могу получить доступ к системным файлам, не мог удалить, изменять, переименовывать файлы которые вызывали нарушение целостности ядра (xusb21.sys и STTub30.sys), но по итогу через стороннюю утилиту я их удалил (один из них STTub30.sys я потом воcстановил найдя на github). Вернул также сегодня в ночь через реестр доступ к DISM и сделал успешный запуск и восстановление по команде Dism /Online /Cleanup-Image /RestoreHealth, а SFC и прежде работала, но это ничего не поменяло; вообще все последние именно операции делал по одному гайду и там после восстановления DISM советовали воспользоваться Farbar Recovery Scan Tool 64-бит, но наткнулся поздновато и это не помогло, так как нужен составленный fixlist.txt, да и Fabar раз 6 выдал ошибку при сканировании bcdedit.exe (в процессе написания текста сделал повторное сканирование c Fabar и ошибок было уже штуки 3-4 bcdedit.exe, а результаты этого сканирования прикрепил в качестве файлов Addition.txt и FRST.txt вдруг пригодятся).
Сегодня заметил, что даже с включённым лицензионным Касперычем майнер снова поменял и ограничил что-то там в брандмауэре Windows — было уведомление (понимаю, что он уже давно в исключениях, но всё же). Ни Kaspersky Virus Removal Tool, ни Dr.Web Cruelt! ни нашли ничего, вероятно майнер добавил их уже в исключения, так как при удалении основных компонентов майнера я уже пользовался ими раньше, но до этого я пользовался AV block Remover и он удалял майнер, но спустя время он появляется снова.
Был бы очень рад если бы получилось решить данную проблему, Windows лицензионный шедший вместе с ноутом переустанавливать всё же не хочется и я не уверен что и там не будет ошибок в процессе.
Заранее всем откликвнушимся большое спасибо и с пасхой!
CollectionLog-2025.04.20-14.19.zip Addition.txt FRST.txt
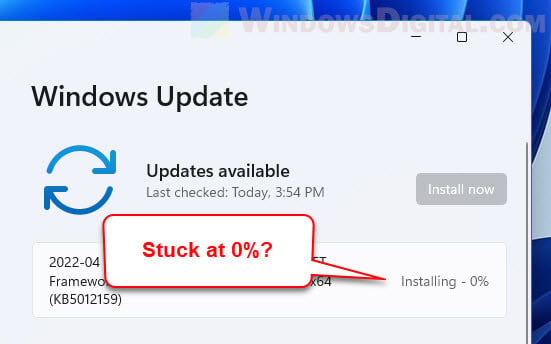
Many people have recently reported the very same issue — Windows update stuck at 100. If you are one of them and trying to find some efficient methods to get rid of this issue, then this post written by MiniTool can help you.
Windows Updates Stuck at 100
Windows Update is a key part of the system to ensure smooth system performance. Windows 11/10 automatically downloads and installs important updates from Microsoft Server, but sometimes update installations get stuck or freeze when processing updates on Startup.
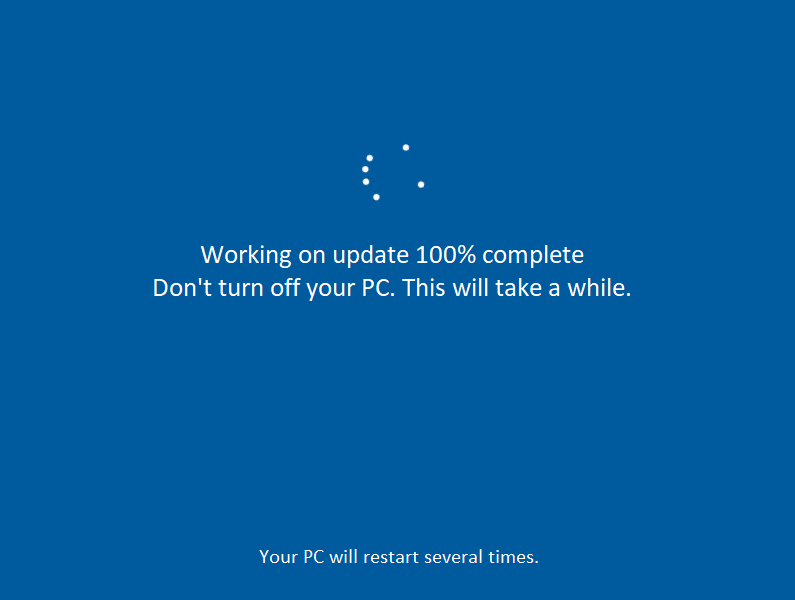
You may see the following message: “Working on update 100% complete. Don’t turn off your PC. This will take a while.” and you will be stuck on the Windows update screen. There are many reasons for the issue, but most of the time it caused by the conflicts with software or drivers.
Now, it’s time to see how to actually fix the “Windows update stuck at 100” issue with the below-listed troubleshooting guide.
How to Fix the “Windows Updates Stuck at 100” Issue
- Remove any USB peripherals
- Run Windows Update Troubleshooter
- Rename SoftwareDistribution Folder
- Perform a Clean Boot
- Uninstall the Particular Update
- Run DISM in Safe Mode
- Run Automatic Repair
- Perform System Restore in WinRE
It’s frustrating to encounter the “Windows stuck on update” error frustrating, but you should notice that your update probably isn’t stuck, and you’ll just have to wait for a while to complete the installation. If it is still stuck at the interface, you can try the methods below.
Method 1: Remove Any USB Peripherals
If your Windows update stuck at 100, the first thing you can try is to remove any external device connected to PC and make sure you also disconnect any device connected via USB like pen drives, mouse or keyboard, portable hard disk, etc.
Once you have successfully removed any USB peripherals, try to update the Windows again and check if the issue has been fixed or not.
Method 2: Run Windows Update Troubleshooter
If you are still stuck on the screen, then you should restart your computer in Safe Mode before you do any operations. You can use Windows 11/10 recovery bootable media like a DVD/USB bootable drive to enter WinRE to enter into Safe Mode. Here are the steps:
Step 1: Insert your Windows installation CD/DVD or USB bootable drive to your computer, and start the computer.
Step 2: Enter the BIOS.
Step 3: Choose the DVD or USB flash drive as the first boot device and boot the Windows 11/10 PC from the device.
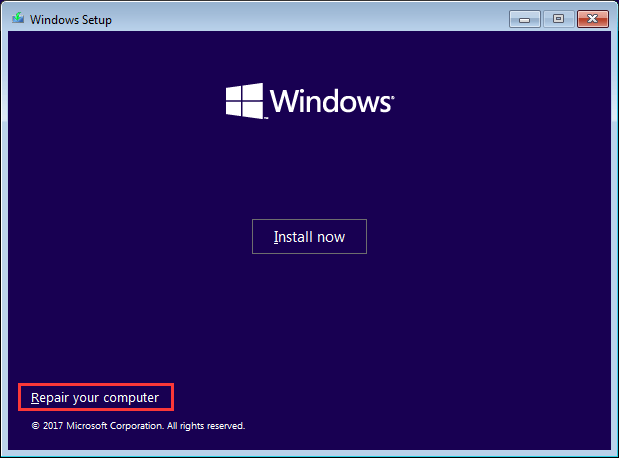
Step 4: Click Repair your computer to enter into WinRE successfully.
Now, you can continue to enter Safe Mode.
Step 1: From the Choose an option screen, click the Troubleshoot option. Next, click Advanced options.
Step 2: Click the Startup Settings option.
Step 3: Click the Restart button.
Step 4: Then you will see multiple options for startup. Press the F4 key to enable Safe Mode.
Tip: You should try Method 2 to 6 in Safe Mode. Try 7 to 8 in WinRE (Windows Recovery Environment ).
Now your PC will restart in Safe Mode. Then running Windows Update Troubleshooter is the easiest and fastest method to fix the “Windows update stuck at 100” error. Windows Update Troubleshooter is a built-in feature designed to fix Windows update errors.
Now you can follow the instructions step by step below to run Windows Update Troubleshooter:
Step 1: Type Settings in the Search box to open it.
Step 2: Choose Update & Security and then select Troubleshoot in the left panel.
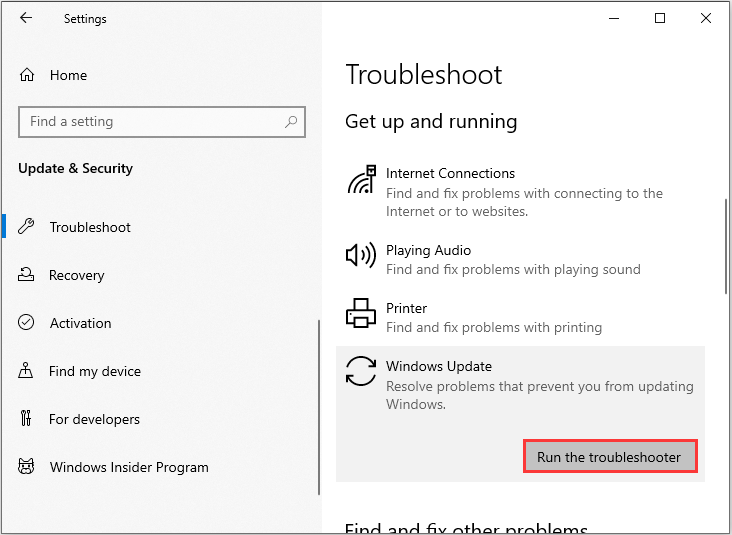
Step 3: Click Windows Update under the Get up and running section in the right panel and then click Run the troubleshooter.
Step 4: It will start to detect the existing problems and you just need to wait for the process finished. Then click Apply this fix.
Step 5: Follow the on-screen instructions to finish the repair process.
Restart your computer and then check if the “working on updates 100 complete” issue still exists. If this method cannot fix the error, try the next methods.
Method 3: Rename SoftwareDistribution Folder
The next method for you is to rename the SoftwareDistribution folder. Here is how to do that:
Step 1: Type Command Prompt in the Search box, then right-click the first result to choose Run as administrator.
Step 2: Now type the following commands to stop Windows Update Services and then press Enter after each one:
net stop wuauserv
net stop cryptSvc
net stop bits
net stop msiserver

Step 3: Next, type the following command to rename SoftwareDistribution Folder and then press Enter:
ren C:\Windows\SoftwareDistribution SoftwareDistribution.old
Step 4: Finally, type the following commands to start Windows Update Services and press Enter after each one:
net start wuauserv
net start cryptSvc
net start bits
net start msiserver
Reboot your PC and check if the “working on updates 100” issue has gone.
Tip: To learn more information about renaming or deleting SoftwareDistribution Folder, this post – How to Rename or Delete Software Distribution Folder on Windows is what you need.
Method 4: Perform a Clean Boot
Performing a clean boot can help you start Windows through a minimal set of drivers and startup programs, which can avoid software conflicts while installing Windows updates. In order to perform a clean boot, you need to do:
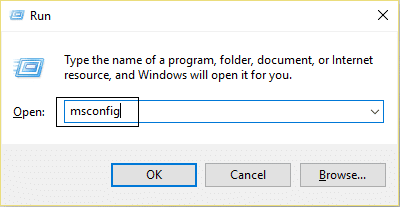
Step 1: Type msconfig in the Run box(pressing the Windows +R keys), and press Enter.
Step 2: Then go to the Services tab. Check the Hide All Microsoft Services box.
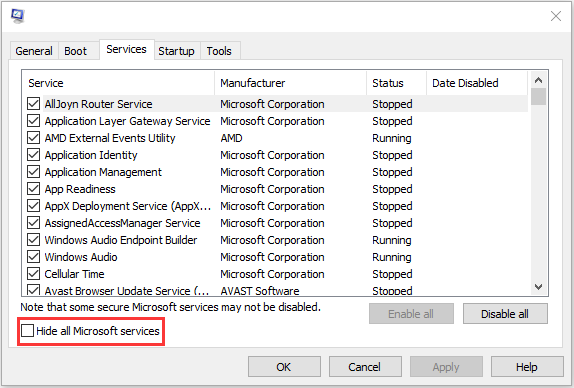
Step 3: Now, click the Disable all button, and click Apply to save the change.
Step 4: Navigate to the Startup tab and click Open Task Manager.
Step 5: In the Task Manager tab, select the first enabled application and click Disable. Here you need to disable all enabled applications one by one. After disabling all programs, close Task Manager and click OK.
Afterward, you can restart the computer to update Windows again. If the “working on updates 100% complete” error doesn’t occur when in a clean boot state, then it indicates that one of the programs was causing the error.
Method 5: Uninstall the Particular Update Causing the Issue
If the error still occurs, you can also try uninstalling the particular update that causes the issue. The steps are as follows:
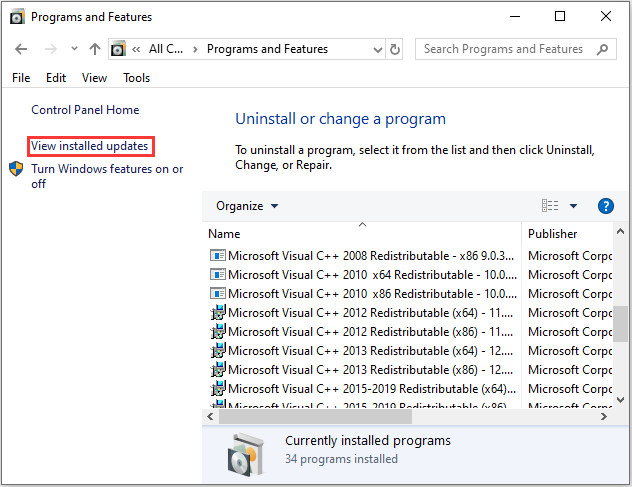
Step 1: Open Control Panel. Click the Programs and Features section.
Step 2: From the left-hand menu, click View installed updates.
Step 3: Now right-click the particular update which is causing this problem and select Uninstall.
Restart your PC and the “Windows update stuck at 100” issue should be fixed.
Method 6: Run DISM in Safe Mode
You can also try running DISM, which allows you to repair corrupted system files. Please refer to the following steps:
Step 1: Type cmd in the Search box, then right-click the first result to choose Run as administrator.
Step 2: Type the following commands and press Enter after each one:
Dism /Online /Cleanup-Image /CheckHealth
Dism /Online /Cleanup-Image /ScanHealth
Dism /Online /Cleanup-Image /RestoreHealth
Step 3: Let the DISM command run and wait for it to finish. If the above commands won’t work, then try the commands below:
Dism /Image:C:\offline /Cleanup-Image /RestoreHealth /Source:c:\test\mount\windows
Dism /Online /Cleanup-Image /RestoreHealth /Source:c:\test\mount\windows /LimitAccess
Reboot your PC and this should fix the “Windows stuck on update“ issue.
Method 7: Run Automatic Repair
If the working on updates 100 complete issue still occurs, you have to run Automatic Repair. I will show you how to run it step by step.
Step 1: Click Repair your computer in the bottom-left corner to enter WinRE.
Step 2: You need to click Troubleshoot in the popup window to continue.
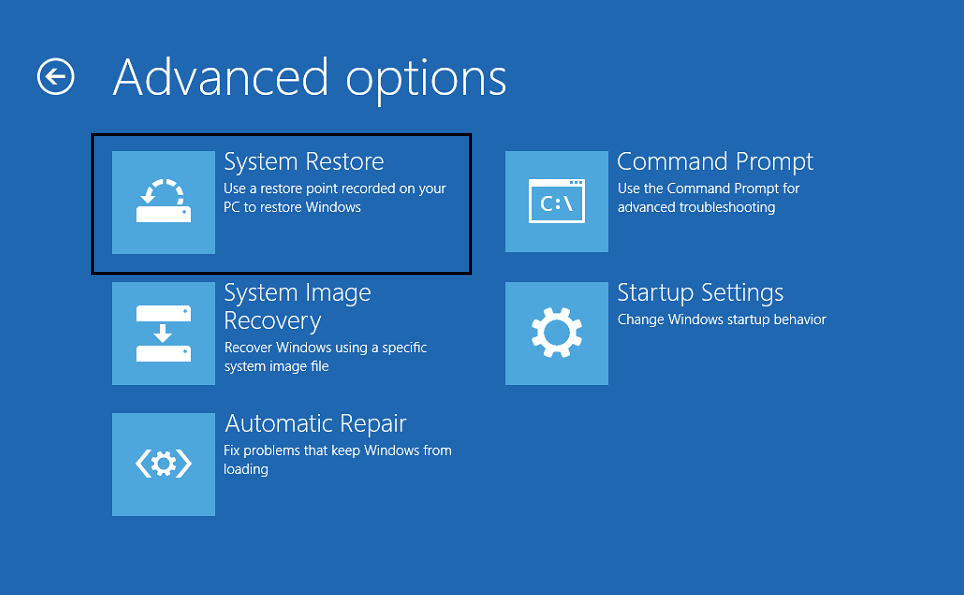
Step 3: Click Advanced options to go to the next page.
Step 4: Choose the Startup Repair in the Advanced options screen and wait for the process to be completed.
Now, when the process is finished, you can restart your computer and run Windows update to check whether the working on updates 100 is solved.
Tip: If you find that Windows Automatic Repair is not working, this post – How To Fix “Windows Automatic Repair Not Working” can help you fix this issue.
Method 8: Perform System Restore in WinRE
If the previous methods don’t work, you should perform a system restore via WinRE. Here is how to do that:
Tip: Only if you have created a restore point in advance, you can try this method.
Step 1: Enter WinRE.
Step 2: You should click Troubleshoot in Choose an option, and then choose Advanced options.
Step 3: Choose System Restore in Advanced options.
Step 4: Follow the on-screen instructions to complete the restore.
Now, try to run Windows update and the issue should be fixed.
More useful solutions you can find by watching this video:
My Windows update was stuck at 100 and I didn’t know how to fix it. Thanks to this post, it helped me solve the issue. I’d like to share it with more friends.Click to Tweet
What to Do After Solving Windows Update Stuck at 100?
After solving the problem of Windows update stuck at 100%, you had better create a system image to restore your system when it crashes.
Referring to create a system image, it is highly recommended you to use MiniTool ShadowMaker – a piece of fantastic and professional backup software. It is pretty easy and safe to back up and restore your system.
In addition to backing up your operating system, you can also use MiniTool ShadowMaker to back up files and folders, disks and partitions. What’s better, you can use it for free within 30 days, so just download it and have a try.
MiniTool ShadowMaker TrialClick to Download100%Clean & Safe
Here are the instructions to create a system image with MiniTool ShadowMaker:
Step 1: Launch MiniTool ShadowMaker, then click Keep Trial.
Step 2: MiniTool ShadowMaker selects the source by default. Thus, you just need to choose the backup destination.
Step 3: Go to the Backup page. Click Back Up Now to start creating a system image.
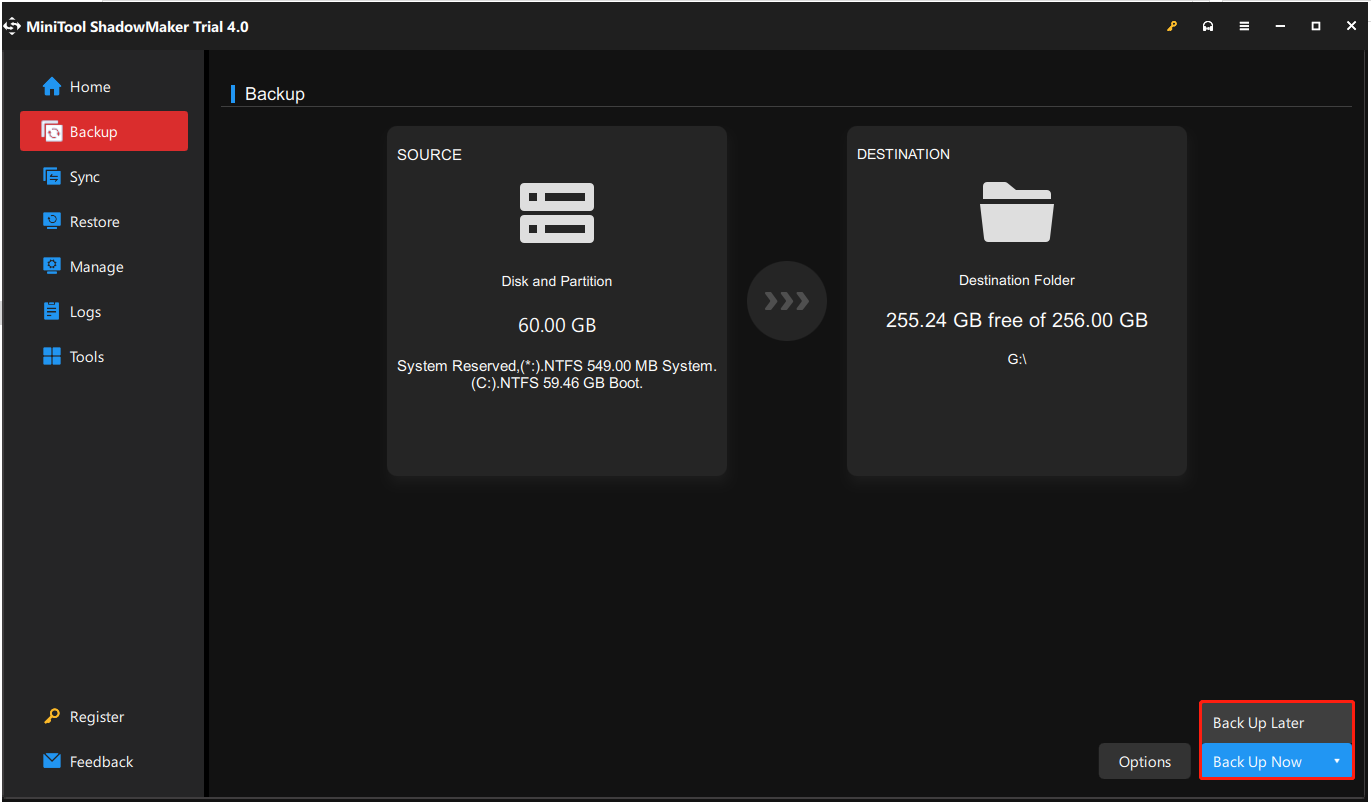
Tip: If you click Back Up Later, then you can click Back up Now to begin the backup task on the Manage page.
Step 4: Wait for MiniTool ShadowMaker to finish backing up the operating system.
In order to keep my system safe, I make a backup of it successfully with MiniTool ShadowMaker. It helps me a lot!Click to Tweet
Final Words
To sum up, this post has introduced what causes the error of Windows update stuck at 100 and shown 8 solutions to fix it. If you come across the same issue, try these solutions. If you have any better solution to fix the issue, you can share it in the comment zone.
After fixing this problem, it is recommended you create a system image. If you have any problem when using MiniTool program, please feel free to contact us via the email [email protected] and we will reply to you as soon as possible.
Windows Updates Stuck at 100 FAQ
How long should Windows update take?
In general, the update should be between 10 and 30 minutes on a computer. However, if you install your Windows on a conventional hard drive, the process will take a while. You can schedule the installation within the next five days, but you cannot delay it indefinitely.
Can I stop a Windows update in progress?
- Search for Control Panel in the Windows 10 Search box and select the relevant result.
- Select Security and Maintainance from the list of menu options.
- Click Maintenance, select Stop Maintenance.
What happens if I shut down during the Windows update?
Your PC will be seriously damaged if you shut down in the middle of the update installation. If the PC shuts down because of power failure, you need to wait for some time and then restart the computer to install the updates one more time. Your computer is likely to become bricked.
Can you fix a bricked computer?
Bricked devices cannot be powered on and function properly. Bricked devices cannot be fixed by conventional methods. For example, if Windows fails to start on your computer, your computer is not “bricked” because another operating system can be installed on it.
Fix Working on updates 100% complete Don’t turn off your computer: Windows updates are a crucial part of System which ensures smooth system performance. Windows 10 automatically download & install important updates from Microsoft Server but sometimes while working on updates on Shutdown or Startup, the update installation get stuck or freezes. In short, you will be stuck on the Windows update Screen and you will see one of the following messages persist for a long time:

Working on updates
100% complete
Don't turn off your computer

Preparing to configure Windows.
Do not turn off your computer.

Please do not power off or unplug your machine.
Installing update 2 of 5...

Configuring Windows updates
100% complete
Do not turn off your computer.

Getting Windows ready
Don't turn off your computer

Keep your PC on until this is done
Installing update 3 of 5...
If you are stuck on anyone of the screen then the only option you have is restarting your PC. There are several reasons as to why Windows updates get stuck or freezes but most of the times it’s related to software or drivers conflict. So without wasting any more time let’s see how to actually Fix Working on updates 100% complete Don’t turn off your computer with the below-listed troubleshooting guide.
Table of Contents
It’s possible that the Windows update might be taking time and it’s not actually stuck, so it’s advice to wait for few hours before trying the below guide.
If you can access the Windows after a restart:
Method 1: Run the Windows Update Troubleshooter
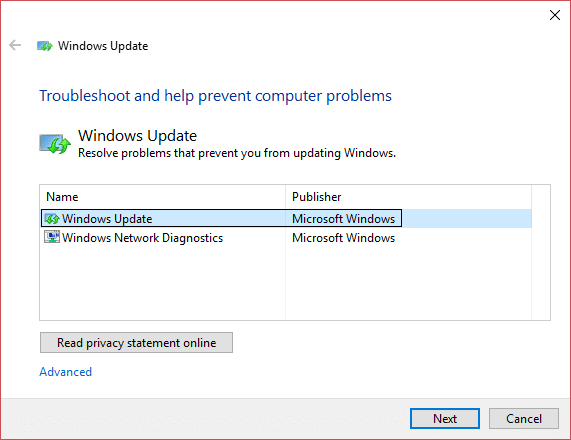
1.Type “troubleshooting” in Windows Search bar and click on Troubleshooting.
2.Next, from the left window pane select View all.
3.Then from the Troubleshoot computer problems list select Windows Update.
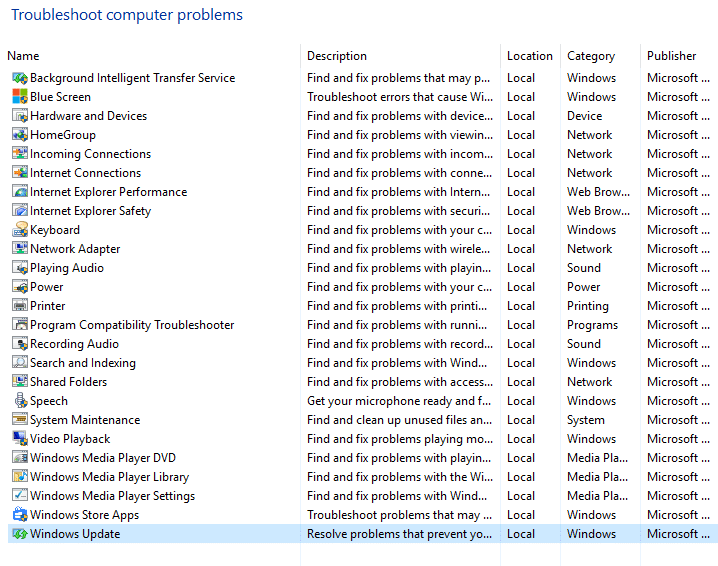
4.Follow on-screen instruction and let the Windows Update Troubleshoot run.
5.Restart your PC to save changes.
This should help you to Fix Working on updates 100% complete Don’t turn off your computer but if not then continue with the next method.
Method 2: Rename SoftwareDistribution Folder
1.Press Windows Key + X then select Command Prompt (Admin).
2.Now type the following commands to stop Windows Update Services and then hit Enter after each one:
net stop wuauserv
net stop cryptSvc
net stop bits
net stop msiserver

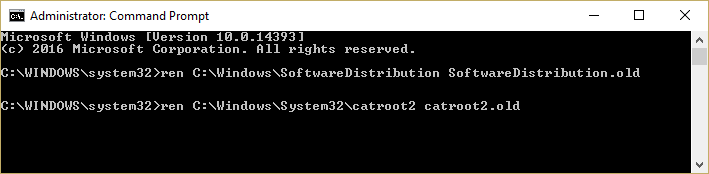
3.Next, type the following command to rename SoftwareDistribution Folder and then hit Enter:
ren C:\Windows\SoftwareDistribution SoftwareDistribution.old
ren C:\Windows\System32\catroot2 catroot2.old
4.Finally, type the folowing command to start Windows Update Services and hit Enter after each one:
net start wuauserv
net start cryptSvc
net start bits
net start msiserver

5.Reboot your PC to save changes and this should Fix Working on updates 100% complete Don’t turn off your computer issue.
Method 3: Reset Windows Update components
1.Press Windows Key + X then select Command Prompt (Admin).
2.Type the following command into cmd and hit Enter after each one:
net stop bits
net stop wuauserv
net stop appidsvc
net stop cryptsvc
3.Delete the qmgr*.dat files, to do this again open cmd and type:
Del “%ALLUSERSPROFILE%\Application Data\Microsoft\Network\Downloader\qmgr*.dat”
4.Type the following into cmd and hit Enter:
cd /d %windir%\system32

5.Reregister the BITS files and the Windows Update files. Type each of the following commands individually in cmd and hit Enter after each one:
regsvr32.exe atl.dll
regsvr32.exe urlmon.dll
regsvr32.exe mshtml.dll
regsvr32.exe shdocvw.dll
regsvr32.exe browseui.dll
regsvr32.exe jscript.dll
regsvr32.exe vbscript.dll
regsvr32.exe scrrun.dll
regsvr32.exe msxml.dll
regsvr32.exe msxml3.dll
regsvr32.exe msxml6.dll
regsvr32.exe actxprxy.dll
regsvr32.exe softpub.dll
regsvr32.exe wintrust.dll
regsvr32.exe dssenh.dll
regsvr32.exe rsaenh.dll
regsvr32.exe gpkcsp.dll
regsvr32.exe sccbase.dll
regsvr32.exe slbcsp.dll
regsvr32.exe cryptdlg.dll
regsvr32.exe oleaut32.dll
regsvr32.exe ole32.dll
regsvr32.exe shell32.dll
regsvr32.exe initpki.dll
regsvr32.exe wuapi.dll
regsvr32.exe wuaueng.dll
regsvr32.exe wuaueng1.dll
regsvr32.exe wucltui.dll
regsvr32.exe wups.dll
regsvr32.exe wups2.dll
regsvr32.exe wuweb.dll
regsvr32.exe qmgr.dll
regsvr32.exe qmgrprxy.dll
regsvr32.exe wucltux.dll
regsvr32.exe muweb.dll
regsvr32.exe wuwebv.dll
6.To reset Winsock:
netsh winsock reset

7.Reset the BITS service and the Windows Update service to the default security descriptor:
sc.exe sdset bits D:(A;;CCLCSWRPWPDTLOCRRC;;;SY)(A;;CCDCLCSWRPWPDTLOCRSDRCWDWO;;;BA)(A;;CCLCSWLOCRRC;;;AU)(A;;CCLCSWRPWPDTLOCRRC;;;PU)
sc.exe sdset wuauserv D:(A;;CCLCSWRPWPDTLOCRRC;;;SY)(A;;CCDCLCSWRPWPDTLOCRSDRCWDWO;;;BA)(A;;CCLCSWLOCRRC;;;AU)(A;;CCLCSWRPWPDTLOCRRC;;;PU)
8.Again start the Windows update services:
net start bits
net start wuauserv
net start appidsvc
net start cryptsvc
9.Install the latest Windows Update Agent.
10.Reboot your PC and see if you’re able to Fix Working on updates 100% complete Don’t turn off your computer issue, if not then continue.
Method 4: Perform a Clean Boot
1.Press Windows Key + R then type msconfig and hit enter to System Configuration.
2.On General tab, choose Selective Startup and under it make sure the option “load startup items” is unchecked.

3.Navigate to the Services tab and checkmark the box that says “Hide all Microsoft services.“

4.Next, click Disable all which would disable all the other remaining services.
5.Restart your PC check if the problem persists or not.
6.If the issue is resolved then it’s definitely caused by a third party software. In order to zero in on the particular software, you should enable a group of services (refer the previous steps) at a time then reboot your PC. Keep doing this until you figure out a group of services which are causing this error then check the services under this group one by one until you find which one is causing the problem.
6.After you had finish troubleshooting make sure to undo the above steps (select Normal startup in step 2) in order to start your PC normally.
Method 5: Run System Restore
1.Press Windows Key + R and type”sysdm.cpl” then hit enter.
2.Select System Protection tab and choose System Restore.

3.Click Next and choose the desired System Restore point.

4.Follow on-screen instruction to complete system restore.
5.After reboot, you may be able to Fix Working on updates 100% complete Don’t turn off your computer.
Method 6: Uninstall the particular update causing the issue
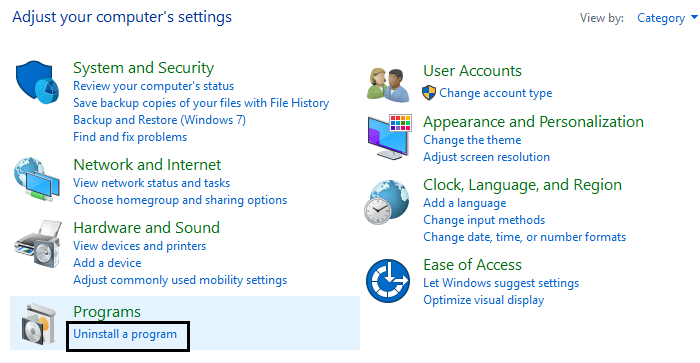
1.Press Windows Key + X then select Control Panel.
2.Under Programs click Uninstall a program.
3.From the left-hand menu click on View installed updates.

4.Now from the list right-click on the particular update which is causing this problem and select Uninstall.

If you can’t access the Windows:
First, enable legacy Advanced boot option
Method 1: Remove any USB peripherals
If you’re stuck with “Working on updates 100% complete Don’t turn off your computer” then you might want to try to remove any external device connected to PC and make sure you also disconnect any device connected via USB such as pen drives, mouse or keyboard, portable hard disk, etc. Once you have successfully disconnected any such device then again try to update the Windows.
Method 2: Boot into Safe Mode and uninstall that particular update
1. Restart your Windows 10.
2.As the system restarts enter into BIOS setup and configure your PC to boot from CD/DVD.
3.Insert the Windows 10 bootable installation DVD and restart your PC.
4.When prompted to Press any key to boot from CD or DVD, press any key to continue.
5.Select your language preferences, and click Next. Click Repair your computer in the bottom-left.

6.On choose an option screen, click Troubleshoot.

7.On Troubleshoot screen, click Advanced option.

8.On Advanced options screen, click Command Prompt.

9.When the Command Prompt(CMD) open type C: and hit enter.
10.Now type the following command:
BCDEDIT /SET {DEFAULT} BOOTMENUPOLICY LEGACY
11.And hit enter to Enable Legacy Advanced Boot Menu.

12.Close Command Prompt and back on the Choose an option screen, click continue to restart Windows 10.
13.Finally, don’t forget to eject your Windows 10 installation DVD, in order to get Boot options.
14.On Boot Option screen choose “Safe Mode.“

15.Once you are in Safe Mode follow the method 6 to uninstall the update causing the trouble.
Method 3: Run Automatic/Startup Repair
1.Insert the Windows 10 bootable installation DVD and restart your PC.
2.When prompted to Press any key to boot from CD or DVD, press any key to continue.

3.Select your language preferences, and click Next. Click Repair your computer in the bottom-left.
4.On choose an option screen, click Troubleshoot.
5.On Troubleshoot screen, click Advanced option.

6.On the Advanced options screen, click Automatic Repair or Startup Repair.

7.Wait til the Windows Automatic/Startup Repairs complete.
8.Restart and you have successfully Fix Working on updates 100% complete Don’t turn off your computer issue.
Also, read How to fix Automatic Repair couldn’t repair your PC.
Method 4: Run MemTest86+
Note: Before starting, make sure you have access to another PC as you will need to download and burn Memtest86+ to the disc or USB flash drive.
1.Connect a USB flash drive to your system.
2.Download and install Windows Memtest86 Auto-installer for USB Key.
3.Right-click on the image file which you just downloaded and select “Extract here” option.
4.Once extracted, open the folder and run the Memtest86+ USB Installer.
5.Choose your plugged in USB drive to burn the MemTest86 software (This will format your USB drive).

6.Once the above process is finished, insert the USB to the PC which is giving the A disk read error occurred message.
7.Restart your PC and make sure that boot from the USB flash drive is selected.
8.Memtest86 will begin testing for memory corruption in your system.

9.If you have passed all the test then you can be sure that your memory is working correctly.
10.If some of the steps were unsuccessful then Memtest86 will find memory corruption which means that your “A disk read error occurred” is because of bad/corrupt memory.
11.In order to Fix Working on updates 100% complete Don’t turn off your computer issue, you will need to replace your RAM if bad memory sectors are found.
Method 5: Run System Restore
1.Put in the Windows installation media or Recovery Drive/System Repair Disc and select your language preferences, and click Next
2.Click Repair your computer at the bottom.
3.Now choose Troubleshoot and then Advanced Options.
4..Finally, click on “System Restore” and follow onscreen instructions to complete the restore.

5.Restart your PC to save changes.
Method 6: Reset Windows Update components in Safe Mode
Again boot into Safe Mode and follow the method 3 in order to reset Windows Update components which would Fix Working on updates 100% complete Don’t turn off your computer.
Method 7: Run DISM
1.Again open the Command Prompt from the above-specified method.
2.Type the following command in cmd and hit enter after each one:
a) Dism /Online /Cleanup-Image /CheckHealth
b) Dism /Online /Cleanup-Image /ScanHealth
c) Dism /Online /Cleanup-Image /RestoreHealth

3.Let the DISM command run and wait for it to finish.
4. If the above command doesn’t work then try on the below:
Dism /Image:C:\offline /Cleanup-Image /RestoreHealth /Source:c:\test\mount\windows
Dism /Online /Cleanup-Image /RestoreHealth /Source:c:\test\mount\windows /LimitAccess
Note: Replace the C:\RepairSource\Windows with the location of your repair source (Windows Installation or Recovery Disc).
5.Reboot your PC to save changes and this should Fix Working on updates 100% complete Don’t turn off your computer.
Recommended for you:
- 0xc000000f: An Error occurred while attempting to read the boot configuration data
- Fix Error 2502 and 2503 while installing or uninstalling
- Error code: 0x80070035 The network path was not found
- How to Fix Chrome Won’t Open or Launch
That’s it you have successfully Fix Working on updates 100% complete Don’t turn off your computer issue but if you still have any questions regarding this post then feel free to ask them in the comment’s section.
Similar to that of Windows 10, the Windows 11 update process includes checking for updates, downloading the updates and installing the updates. The downloading and installing process may sometimes stuck at certain percentage, particularly at 0% or 100% (sometimes at 99%, 94%, 88%, 91%, etc.).
In this guide, we will show you the possible causes that may trigger the Windows 11 update downloading or installing stuck at 100% or 0% problem, and how to fix the issue in order to complete the update.
Why does Windows 11 update stuck?
To correctly resolve the Windows 11 update stuck issue, you first need to figure out what could be the most possible cause of the stuck problem.
Unstable and inconsistent internet connection
If you are using an internet connection that would go on and off (disconnect) from time to time, it may cause disruption to the Windows Update process in Windows 11. Repeatedly pausing and resuming a Windows update download would cause the download to be corrupted, thus causing the downloading process to stuck at 0% or 100%, or other even more complicated issues.
Check your Ethernet, WiFi or cellular internet connection. Try to temporarily switch to a different Wi-Fi network and retry the Windows Update.
Insufficient storage space on Windows drive
Another common cause for Windows 11 update downloading to stuck at 0% or 100% is when your C: drive (or the drive where your Windows installation is) runs out of storage space, thus, causing the update to stuck because no new files can be downloaded due to insufficient storage space.
Double check your C: drive and make sure it has enough storage space for future updates. Make sure the drive has at least 5-10 GB free space for any update to be downloaded and installed.
Frequent suddenness of power outage
If your computer frequently gets forced switched off without properly shutting down due to power outage, power supply issue or habit, it may cause Windows Update downloads or downloaded files to be corrupted, which may cause the Windows 11 update installing stuck at 0% or 100% issue. To fix a corrupted Windows update download, refer to the solution below.
How to fix Windows 11 update stuck at 0% or 100%
Before you try any of the following solutions, make sure you have waited long enough for the Windows 11 Update process to complete. If the update has been stuck at the same percentage for over 2 hours, proceed with the following fixes.
Restart computer, modem and router
Before going for the more complicated solution, let’s try the basic fixes first. Most Windows Update stuck issues can be resolved by simply restarting your PC, modem and router.
To properly restart your modem and router, unplug the power from the devices. Wait for 2 to 3 minutes for the modem and router to fully power off. Then, turn them back on.
Stop services and clear Windows Update download cache
This method is the most effective solution to fix Windows 11 update stuck and other related issues. It involves first to stop the Windows Update services, delete all sub-folders in the SoftwareDistribution folder (a folder where Windows Update stores downloaded files before installing them), and then restart your computer.
If any Windows update downloaded file is corrupted, or if there is any error or conflict occurred during the Windows update processes, doing the steps below will be as if you have never downloaded the problem (stuck) update, allowing you to download and install the same updates all over again.
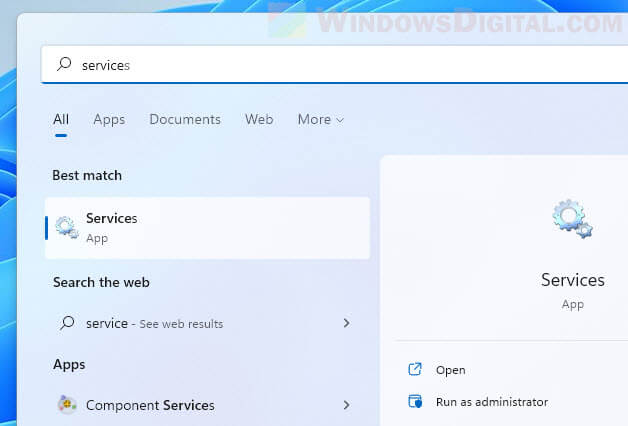
1. First, we will need to stop the Windows Update and Background Intelligence Transfer service to prevent them from interrupting until next restart. To do so, go to start, search for and open “Services“.
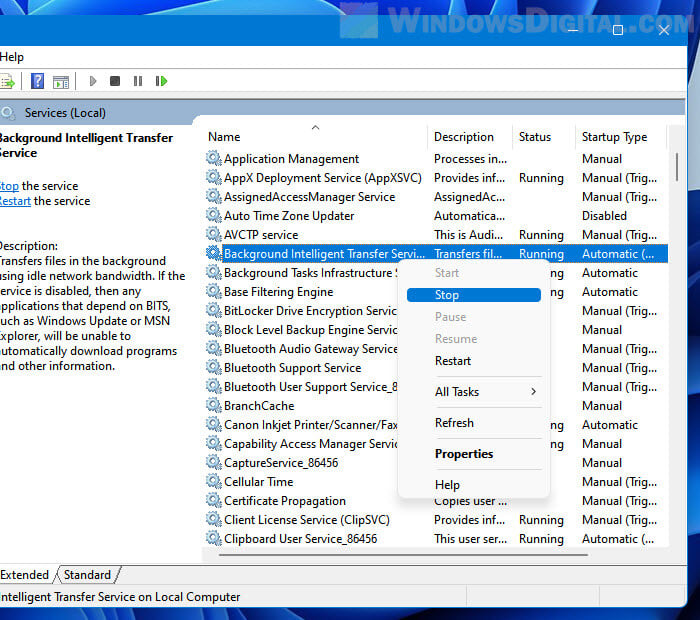
2. In the Services window, look for a service called “Background Intelligent Transfer Service“. Right-click it and select Stop to stop the service.
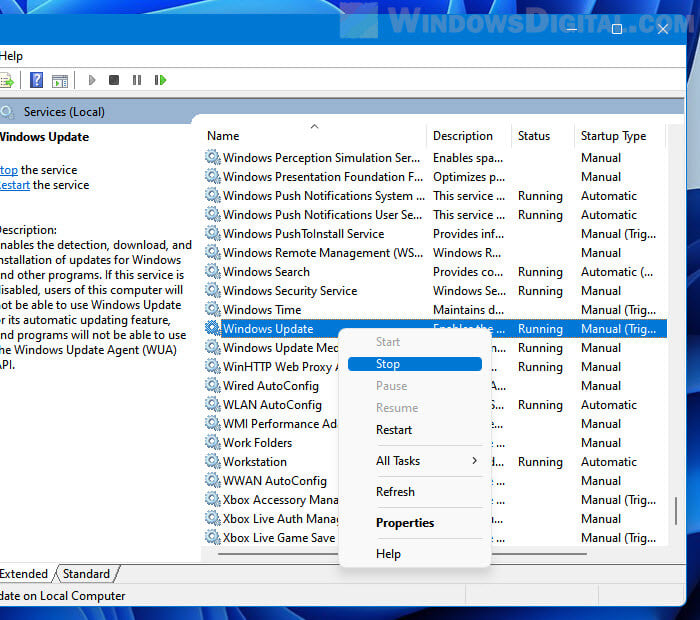
3. Next, look for “Windows Update” service, right-click it and select Stop.
4. After stopping the services, open File Explorer and navigate to C:\Windows\SoftwareDistribution folder. This folder stores files downloaded by Windows Update. Select all the folders in this directory and then Delete them.
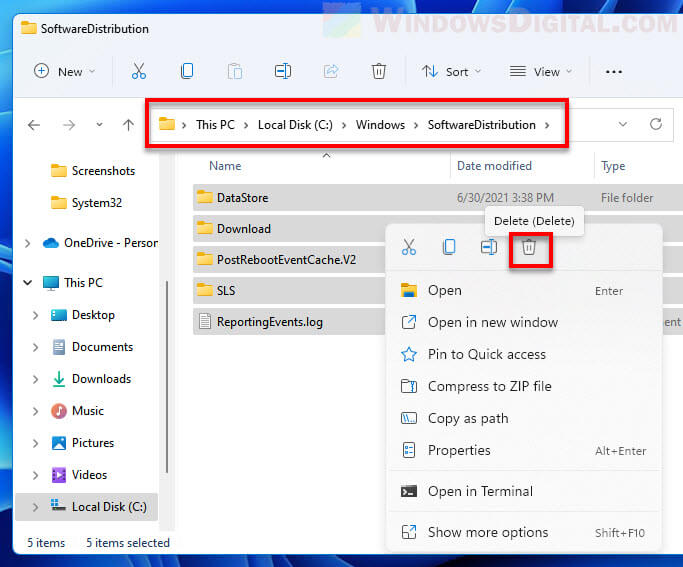
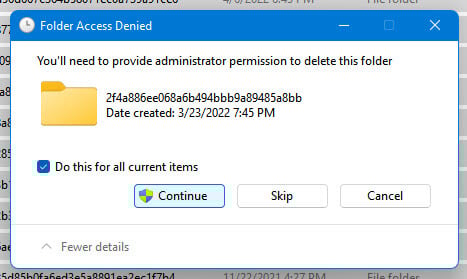
5. The deletion of these folders require administrator permission. Make sure you are signed into an administrator account in Windows 11, otherwise you will not have the privileges to delete these files. When the “Folder Access Denied” dialogue box prompts, select the “Do this for all current items” checkbox and then click Continue to proceed deleting the files.
6. Restart your computer and retry “Check for updates” in Windows Update.
Run Windows Update troubleshooter
If the workaround above doesn’t resolve the Windows 11 update stuck issue, try to run the Windows Update troubleshooter to allow Windows to automatically troubleshoot and fix the issue. To run the Windows Update troubleshooter in Windows 11, follow the steps below.
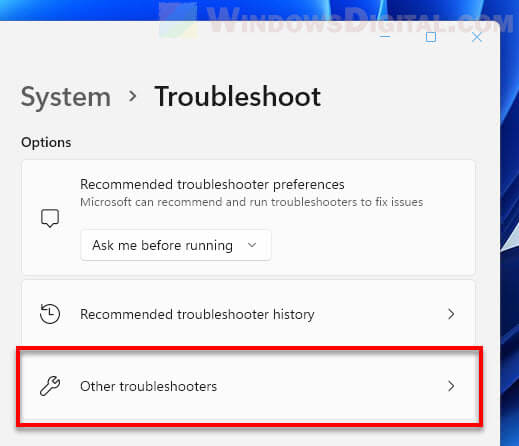
Press Win + i to open Settings and then navigate to System > Troubleshoot > Other troubleshooters.
Next, look for Windows Update from the list of available troubleshooters, then click Run next to it.
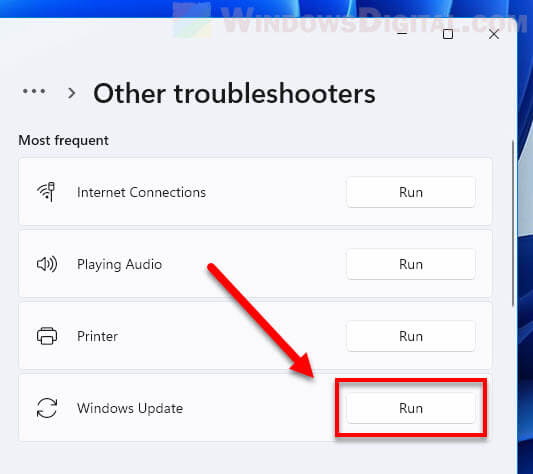
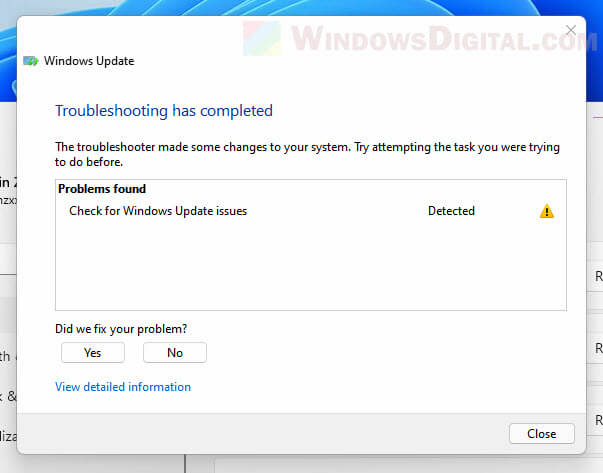
The troubleshooter will then automatically start to check for any possible issue related to Windows Update. Once the troubleshooter has completed, it will show you a list of all problems found and will notify you about the changes it has made during the troubleshooting. After that, retry running Windows Update again and see if the update stuck issue is resolved.
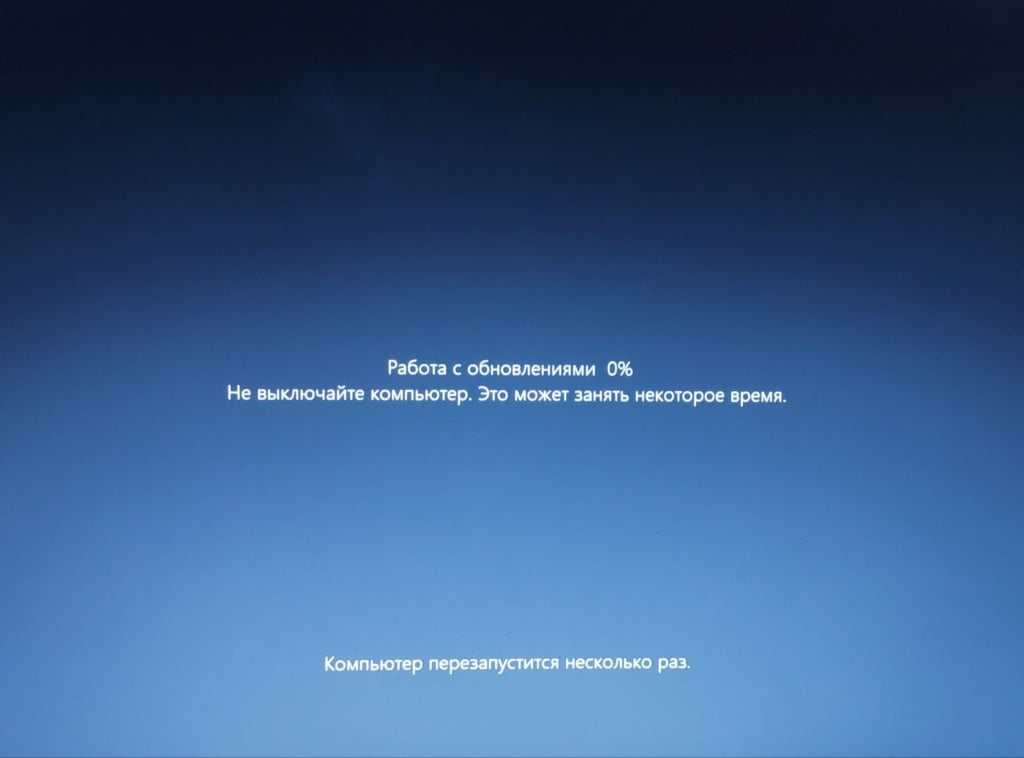
Почему ПК зависает на этапе «Работа с обновлениями» и как это исправить
Процесс установки обновлений может зависнуть с сообщением «Работа с обновлениями» без дальнейшего продвижения. Чаще всего причиной являются поврежденные системные файлы, которые нарушают процесс установки обновления, делая его невозможным для завершения.
К дополнительным факторам могут относиться неправильно установленные файлы обновлений, приводящие к конфликтам с другими апдейтами, а также устаревшие или несовместимые драйверы, которые могут препятствовать непосредственно самому процессу установки обновлений.
В большинстве случаях зависшую установку можно решить, переподключив периферийные устройства и немного подождать. В течение небольшого промежутка времени (где-то 1-3 часа) все обновления будут загружены и установлены самой операционной системой. Но если процесс не двигается от слова совсем, рекомендуем опробовать нижеуказанные решения.
1. Дайте обновлению время
Вначале нужно дать обновлению некоторое время на самостоятельное завершение. Некоторые апдейты, особенно крупные, кумулятивные, могут потребовать длительного времени для завершения.
Время завершения также может зависеть от технических характеристик вашего ПК. Например, старое оборудование может затянуть процесс установки. Поэтому в качестве меры предосторожности рекомендуется оставить экран обновления без внимания примерно на 1-3 часа.
Если по истечении этого времени экран остается неподвижным, перезагрузка системы может решить проблему визуальной заморозки, но в остальном процесс обновления должен быть завершен.
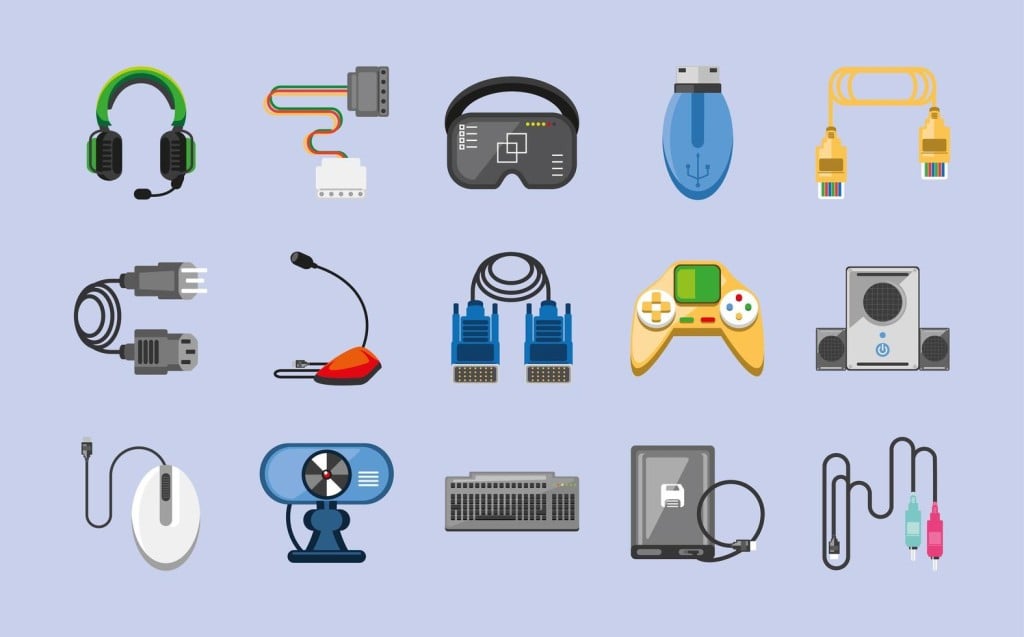
2. Отключение периферии
Полное отключение внешних периферийных устройств от компьютера может помочь. Эти устройства, в теории, могут мешать процессу обновления. К таким устройствам относятся устройства резервного копирования или любые другие неосновные периферийные устройства, помимо клавиатуры и мыши. Отключите эти дополнительную периферию от ПК и проверьте, сохраняется ли проблема. Для того чтобы это решение было эффективным, может потребоваться перезагрузка системы.
3. Отключение доступа в Интернет
Активное подключение к Интернету также может привести к тому, что обновление застрянет на экране «Работа с обновлениями». Это происходит, когда Windows пытается выполнить сетевой запрос, который не удается завершить.
Отсоедините Ethernet-кабель от компьютера (или отключите Wi-Fi) и проверьте, продолжается ли обновление. Если проблема осталась, перезагрузите систему и повторите попытку обновления.
4. Восстановление системных файлов
Поврежденные системные файлы – одна из распространенных причин проблем с обновлением. Это может произойти в результате того, что Windows пытается извлечь файлы обновления на ваш ПК.
Воспользуйтесь средой восстановления Windows, чтобы восстановить системные файлы с помощью утилит System File Checker (SFC) и Deployment Image Servicing and Management (DISM).
- Перезагрузите компьютер, удерживая нажатой клавишу SHIFT на клавиатуре. Это действие приведет к загрузке компьютера в среду восстановления Windows.
- Выберите меню «Устранение неполадок» → «Дополнительные параметры» → «Командная строка».
- В командной строке введите:
- sfc /scannow
- Позвольте системным файлам пройти процедуру сканирования и восстановления.
- После завершения введите следующую команду:
- DISM /Online /Cleanup-Image /RestoreHealth
- Убедитесь, что ваше устройство подключено к Интернету, и дождитесь завершения процесса.
- После этого выйдите из командной строки и перезагрузите ПК, чтобы проверить, завершилось ли обновление.
5. Применение точки восстановления
Использование точки восстановления системы – это еще один способ преодолеть экран «Работа с обновлениями», если он застрял. Windows автоматически создает такие точки восстановления периодически (если они не отключены), чтобы в случае возникновения проблем вернуть систему в предыдущее состояние.
Восстановление системы можно инициировать через среду восстановления Windows.
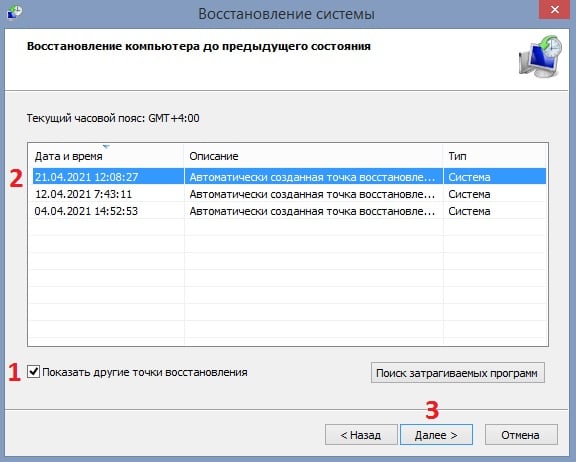
- Снова перезагрузите компьютер, удерживая нажатой клавишу Shift во время загрузки.
Перейдите к пункту «Устранение неполадок» → «Дополнительные параметры» → «Восстановление системы». - Выберите свой профиль и введите соответствующий пароль.
- Определите ПО, затронутое восстановлением, с помощью функции «Сканирование на наличие затронутых программ».
- Затем выберите точку восстановления системы до возникновения проблем с обновлением и нажмите «Далее».
- Чтобы начать восстановление, нажмите кнопку «Завершить».
6. Чистая установка Windows
Если вышеупомянутые методы не помогли решить проблему, последним вариантом будет чистая установка Windows. Этот процесс устанавливает свежую версию Windows на ваш диск и, следовательно, устраняет зависший экран с сообщением «Работа с обновлениями». Радикальное решение, но оно точно сработает.