
Qemu is open-source software for virtualization on Windows 10/8/7, Linux, and macOS but with a command-line interface, lightweight, and low hardware requirements.
Qemu installation on Windows 10 with Qtemu GUIStep 1: Download Qemu for WindowsStep 2: Install Qemu Step 3: Install GUI for QEMU on Windows 10Step 4: Setup QEMU manager Qtemu GUIStep 5: Create a Virtual machineStep 6: Set bootable medium CD/DVDStep 7: Insert ISO file in QEMU via Qtemu GUIStep 8: Boot Qemu Virtual Machine via GUI
QEMU stands for “Quick Emulator” and is the standard tool for virtualization and CPU emulation under Linux, Windows, and macOS. On Linux systems, QEMU uses the functions of the Linux kernel for virtualization (KVM- Kernel Virtual Machine), which are not available under Windows.
Thus, the binaries of Qemu’s ported version for Windows by Stefan Weil couldn’t provide the performance as it gives on Linux OS with KVM. Thus VirtualBox or Vmware player will be the best alternative options; still, if you want to try then here in this Qemu tutorial, we will let know the way to download, install and use Qemu on Windows 10 or 7 using its GUI VM manager Qtemu, an open-source software.
Qemu installation on Windows 10 with Qtemu GUI
Step 1: Download Qemu for Windows
From the official website of the Qemu, we can download it easily even the source code. Visit it and click on the Windows tab, it will take you to another page https://qemu.weilnetz.de to download 32 bit or 64 bit of this virtualization platform. Here we are getting the 64 bit.
Step 2: Install Qemu
Now, like any other Windows 10/7 software, just double click on the downloaded setup of Qemu and follow the installation wizard.
- Accept the suggested language setting, by default it will be English. Select the “OK” button.
- Press the NEXT button.
- Confirm the usual license terms (GNU General Public License) with “Accept“.
- All modules required for QEMU have already been selected in the “Select components” dialogue. Confirm with “Next”.
- Check the suggested destination folder and go to “Install“.
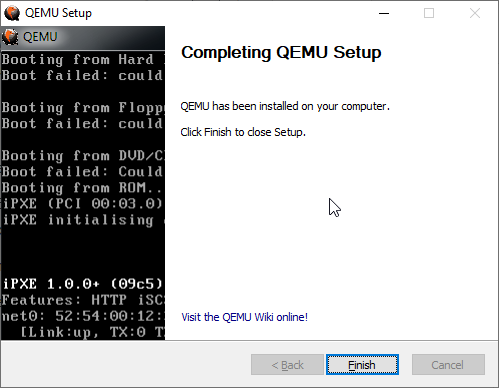
- Click on “Finish” to complete the setup of QEMU.
Step 3: Install GUI for QEMU on Windows 10
As we know the QEMU uses the command line to create virtual machines by default. But it would be not feasible for standard computer users using CLI to manage virtual machines, thus we install another open-source application to provide a Graphical user interface (GUI) to QEMU. This program is known as Qtemu which is a fork of a dead project available at https://qtemu.org.
Here are the links to download an active Qtemu project for Windows 10/8/7 available on Gitlab.
Windows x86_64 installer
If you don’t want to install it, go for the portable version.
Windows x86_64 portable
Gitlab Page Link of the project.
Step 4: Setup QEMU manager Qtemu GUI
After the installation of Qtemu run it from the Windows Start menu.
- In the first column “QEMU binaries path” copy-paste this: C:\Program Files\qemu\ Or enter the path where you have installed the QEMU.
- For the second column enter the path of the Qemu-img file that is: C:\Program Files\qemu\qemu-img.exe
- Now create a folder anywhere on your computer where you want to save the virtual machines created by QEMU. And click on the folder icon given in the front of the third column to select that particular folder.
Note: You can change this configuration any time from the Qtemu Settings.

After that click on the Finish button.
Step 5: Create a Virtual machine
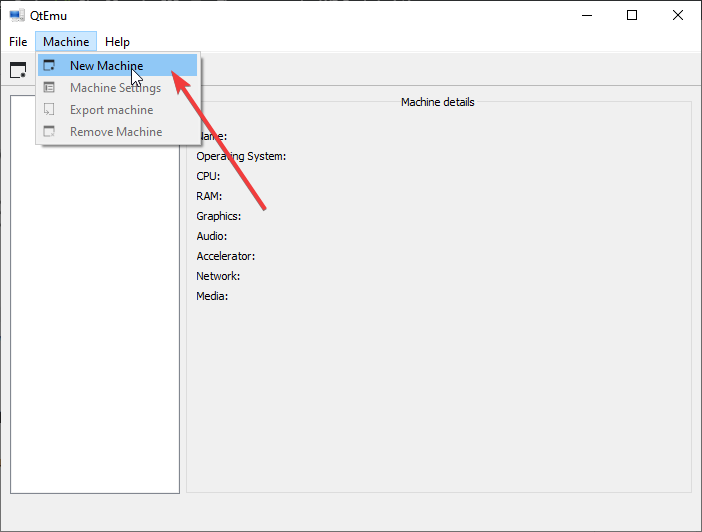
Now, from Qemu GUI manager Qtemu, simply click on Machine and select New Machine.
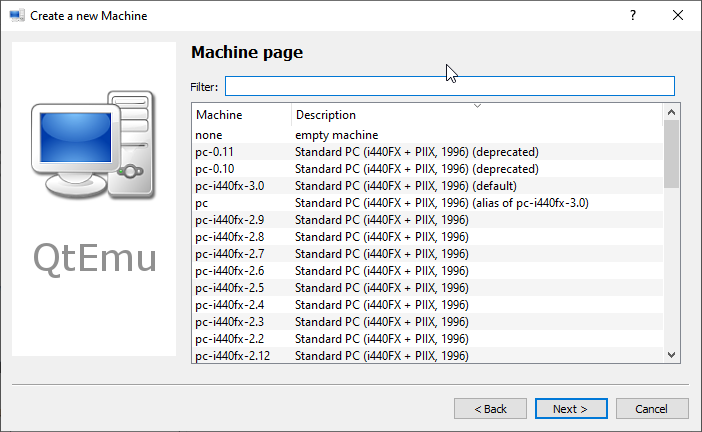
Leave the Machine which is meant to select some particular motherboard chipset.
Configure the Virtual Machine hardware, select the CPU type such as Core 2 Duo, Base, or any CPU that Qemu would be able to emulate on your system whereas setting the CPU count, cores, Thread as shown below screenshot.
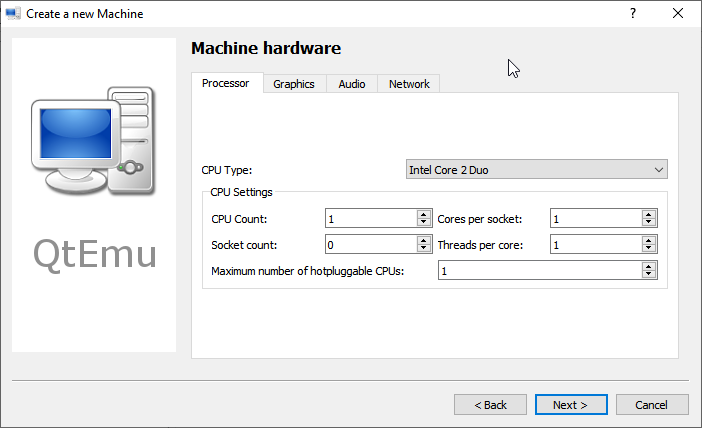
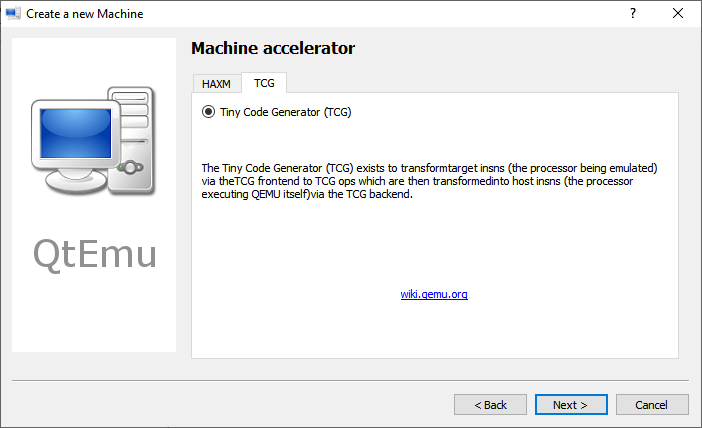
By Default, the HAXM- Hardware Accelerated Execution will be selected in the Qtemu but in case the HAXM is not supported by your system or not available, thus uncheck it and check TCG- Tiny Code Generator.
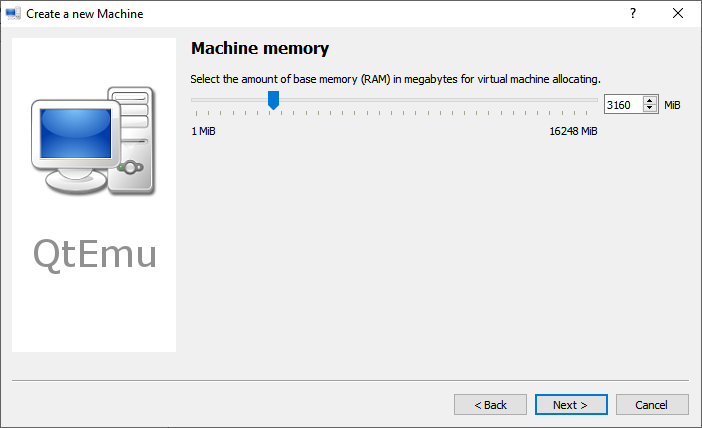
Set the amount of RAM you want to assign to your VM.

Step 6: Set bootable medium CD/DVD
Now, everything is ready, we have created a Virtual machine, its time to set a bootable medium to CD; so that our ISO file could be used while booting the QEMU VM.
For that right-click on the created VM on the QTEMU interface and select Machine Settings.
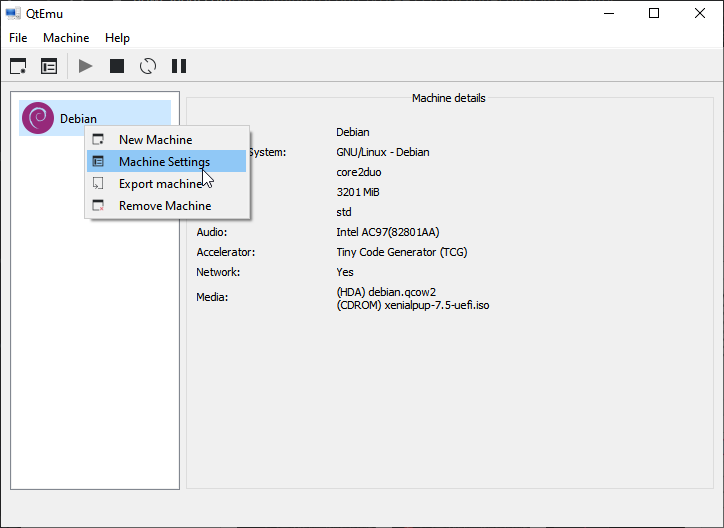
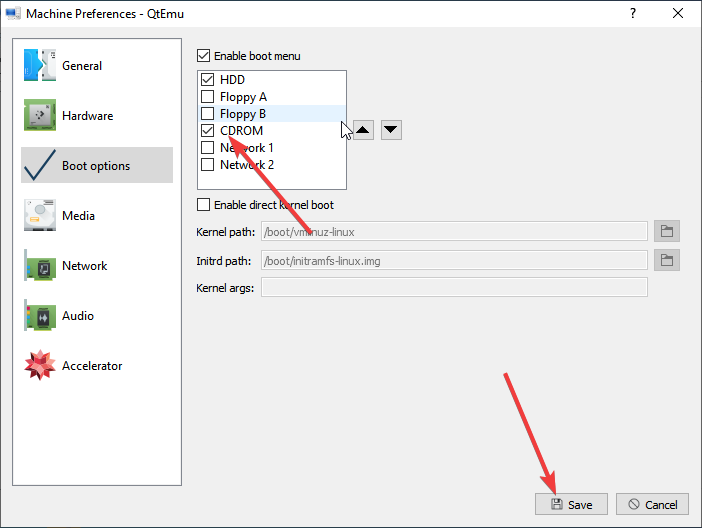
There select the Boot options from the right-side panel and after that check the “Enable boot menu” and then the CD ROM option following the Save button.
Step 7: Insert ISO file in QEMU via Qtemu GUI
Under the Machine settings, go to the Media menu and click on the CD icon. This will open the Windows file explorer, navigate to the ISO file of the OS with which you want to boot in QEMU, and click on the Save button.

Step 8: Boot Qemu Virtual Machine via GUI
Now, on the main interface of the Qtemu GUI, select the created VM and click on the start button. This will open the boot screen.
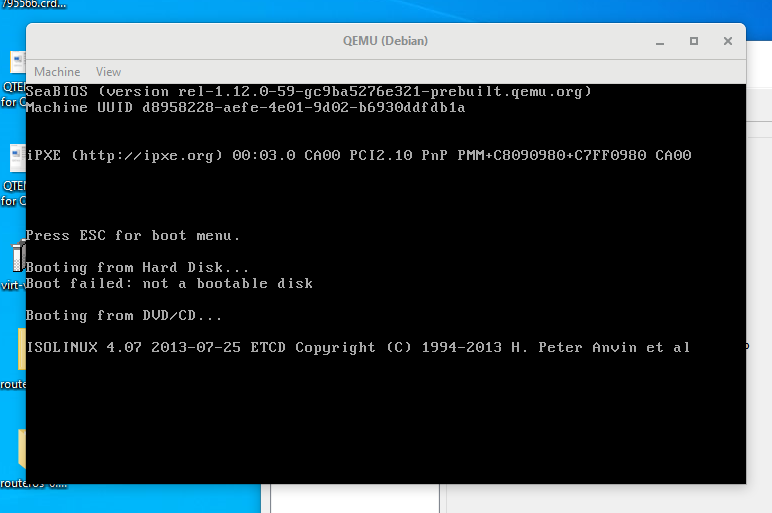
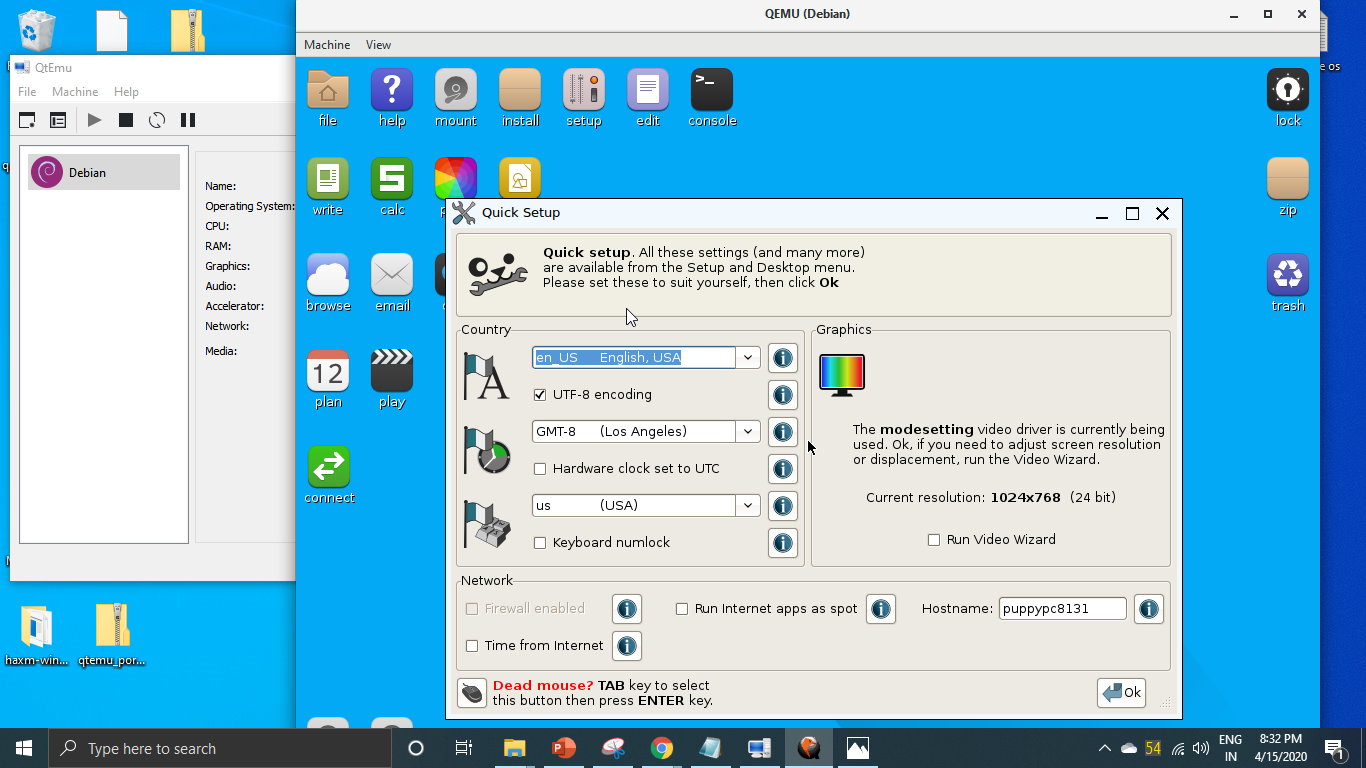
Wait for a few minutes depending upon the OS distribution you are using, it will show the LIVE screen of the same. However, I tried to boot and install Windows 10 on Qemu using the GUI but it was quite sluggish and slow.
Verdict:
Although the CLI can be used to create and manage a Virtual machine on Windows 10 using the QEMU, with the Qtemu GUI tool it becomes quite easy, however, in my case it worked well with Lightweight Linux Distros but for Windows guest VMs quite slow and low performance. I recommend using VirtualBox instead. Yet, if someone wants to experience Qemu on Windows 10 this is the easiest possible way. Still, be cautious with Qtemu hardware configuration because slight here and there will not let you boot the VM.
QtEmu – Qt-based front-end for QEMU emulator
Stable version: 2.1.1
Development version: 2.1.2
Website: https://github.com/MateuszKrawczuk/QtEmu/
Source: https://github.com/MateuszKrawczuk/QtEmu/
License
This program is licensed under the GNU General Public License version 2.
See the LICENSE file for more information
Description
QtEmu is a graphical user interface for QEMU written in Qt.
It has the ability to run virtual operating systems on native systems.
This way you can easily test a new operating system or try a Live CD on your system without any troubles and dangers.
Versions history
See CHANGELOG file.
Installation
See INSTALL file.
Downloads
Prebuild binaries and installers
- Windows
- QtEmu installer for Windows x86_64
Development
Urs Wolfer started QtEmu as school project. Ben Klopfenstein began adding some features that he wanted.
And in 2009 the project stoped its development.
In 2017 Sergio Carlavilla started from scratch the development of the 2.0 version. The new UI has based on
VirtualBox OSE and Virt-manager.
In 2022 Mateusz Krawczuk started bugfixing 2.0 version. Application was ported to Qt 6.
Languages
QtEmu version 1.0.5 is available in English, Czech, German, Russian, Spanish, Turkish, French, Italian,
Brazilian Portuguese and Polish.
QtEmu version 2.x is only available in English.
If you want to translate to another language be free to do it 
Developers
- 2022-now, Mateusz Krawczuk
- 2017-now, Sergio Carlavilla (https://www.carlavilla.es) <sergio.carlavilla91 gmail com>
- 2006-2009, Ben Klopfenstein
- 2006-2009, Urs Wolfer
Contributing
If you want to contribute to the project, please see CONTRIBUTING file.
Extra links
- QEMU Web Page
- QEMU Wiki
- Qt Docs
- Qt Linguist
gui
Development
- Savannah project page
- QEMU patches from the mailing list
- IRC channel: #qemu on irc.oftc.net
Developers
A few blogs from developers are syndicated at Virt Tools Planet. For enrolling a blog into the planet, please submit a patch to this file to Dan Berrange.
Unofficial QEMU binaries
- Precompiled Windows versions (32 and 64 bit), provided by Stefan Weil
- Precompiled Windows versions (currently only up to 2.6.0), provided by Eric Lassauge
- Slackware packages
Alternate QEMU repositories / Forks
- Openmoko (Neo1973) target
- Malc’s GIT repository including audio improvements, an x86 interpreter (useful for MSDOS demos heavily using self modifying code), full A/V capture
- Android emulation — see also http://gsoc11-qemu-android.blogspot.de/
- AR7 routers, TCG interpreter (maintained by Stefan Weil)
- Motorola 680×0 (not coldfire — maintained by Laurent Vivier)
- PA-RISC target — early stages (needs linux-user rework for stack growing up)
- kqemu archive includes patches for the former acceleration module
- qemu-linaro — obsolete (but includes OMAP3 support)
- Blackfin target (maintained by Mike Frysinger)
- 6502 CPU target
- AT91SAM9263 emulation
- Android Goldfish
- Android Ranchu
- Imagination META
- Macintosh 128k
- QEMU with Windbg stub
GUIs and management tools/systems
- libvirt provides an API for managing QEMU/KVM (and other hypervisors) exposed in C, Perl, Python, OCaml, Ruby, and Java, with bridges to AMQP/QMF and DMTF CIM.
- virt-install, virt-clone, virt-convert a set of command line tools for provisioning new VMs from install media, existing VMs and appliances, respectively. See also ‘virsh’ command line shell with libvirt.
- virt-manager, Virtual Machine Manager. A graphical desktop management app using libvirt. Can manage a single local host, or securely multiple remote hosts. Support QEMU, KVM, Xen and more
- AQEMU GUI for QEMU and KVM (Linux), docs (German)
- Ganeti, a cluster virtual server management software tool built on top of existing virtualization technologies such as Xen or KVM and other Open Source software.
- qemu-java, a full Java API to QEmu’s QApi, commandline image manipulation. This is a good foundation API for building integration testing systems, richer QEmu-based applications, and so forth.
- QtEmu, a graphical user interface for QEMU written in Qt5 for GNU/Linux, FreeBSD, Windows and MacOS
Legacy GUI front ends
These projects seem to be abandoned, thus these GUIs likely do not work with the latest version of QEMU anymore and the links are only provided here for historical reasons:
- qemudo, QEMU Web Interface
- JavaQemu, a GUI for QEMU written in Java
BIOSes and firmware used by QEMU
- The PC BIOS from the Bochs IA-32 Emulator Project
- The LGPL VGA BIOS project
- The OpenBIOS project, an open source Open Firmware implementation
- The OpenHackWare (archived 2008-01-24) Open Firmware implementation
- SLOF, the Slimline Open Firmware, is used in QEMU for the «pseries» machine
- Etherboot images from ROM-o-matic
- The EFI BIOS comes from the TianoCore Project.
- OVMF provides UEFI support for IA32 (x86) and X64 (x86-64) guests.
- U-Boot, a firmware which is used for some PowerPC boards in QEMU
Projects using the QEMU code
- The Xen virtual machine monitor
- KVM, Kernel-based Virtual Machine for Linux
- VirtualBox, an open source x86 virtualizer.
- SerialICE, a system software debugger
- MARSSx86, a cycle accurate accurate x86 simulator that uses QEMU
Other emulators
- The Bochs IA-32 Emulator Project
- The EM86 x86 emulator on Alpha-Linux
- The bintrans Dynamic Binary Translator
- MINDE, an emulator for some old x86 demos
- SkyEye, an ARM simulator
- Softgun, an ARM simulator
- SIMH, The Computer History Simulation Project
- GXemul, emulator for multiple systems including m88k
- ARAnyM, emulator for Atari ST/TT/Falcon family
- Hercules, S/370, S/390 and z/Arch emulator
- The PearPC PowerPC Architecture Emulator (development stalled)
- TME, The (Sun) Machine Emulator
- Book «qemu-kvm & libvirt«, 4. Edition 2010, ISBN 978-3-8370-0876-0, https://web.archive.org/web/20191029014310/http://qemu-buch.de/
- Valgrind, an open-source memory debugger for x86-GNU/Linux
- TLMu: TLMu — A SystemC TLM-2.0 integration of QEMU
If you’re someone who uses VMs in their day-to-day activities, you probably know about QEMU, or Quick EMUlator. What you might not know is that they have a GUI version for Windows. Yep, you heard me, the hard-to-learn-VM-with-CLI-in-QEMU times are finished. Instead, you can use QEMU like a Pro. I’ll show you exactly how!
Note: Tut only applicable for Windows.
Download QTEMU. For simplicity’s sake, QTEMU package already includes x86 and x86-64 emulation images, so you don’t have to install QEMU. However, if you want more architectures (like ARM and PowerPC), you’ll have to install QEMU and import them yourself!
First, install QTEMU.

Once QTEMU is installed, just open the shortcut on your desktop and enjoying QEMUing!


I know! The interface of a bygone era! But, until a better GUI interface for QEMU is created, this’ll have to do!
This is the only functional graphical front-end for QEMU for Windows that works properly. If you find a better front-end, to drop a comment and share the knowledge with the world!