
Introduction — What is qemu-guest-agent
The qemu-guest-agent is a helper daemon, which is installed in the guest. It is used
to exchange information between the host and guest, and to execute command in the guest.
In Proxmox VE, the qemu-guest-agent is used for mainly three things:
- To properly shutdown the guest, instead of relying on ACPI commands or windows policies
- To freeze the guest file system when making a backup/snapshot (on windows, use the volume shadow copy service VSS). If the guest agent is enabled and running, it calls guest-fsfreeze-freeze and guest-fsfreeze-thaw to improve consistency.
- In the phase when the guest (VM) is resumed after pause (for example after shapshot) it immediately synchronizes its time with the hypervisor using qemu-guest-agent (as first step).
Installation
Host
You have to install guest-agent in each VM and then enable it, you can do that in the Proxmox VE Webinterface (GUI)
or via CLI: qm set VMID --agent 1
Guest
Linux
On Linux you have to simply install the qemu-guest-agent, please refer to the documentation of your system.
We show here the commands for Debian/Ubuntu and Redhat based systems:
on Debian/Ubuntu based systems (with apt-get) run:
apt-get install qemu-guest-agent
and on Redhat based systems (with yum):
yum install qemu-guest-agent
Depending on the distribution, the guest agent might not start automatically after the installation.
Start it either directly with
systemctl start qemu-guest-agent
Then enable the service to autostart (permanently) if not auto started, with
systemctl enable qemu-guest-agent
(should work for most distributions) or reboot the guest.
Windows
First you have to download the virtio-win driver iso (see Windows VirtIO Drivers).
Then install the virtio-serial driver:
- Attach the ISO to your windows VM (virtio-*.iso)
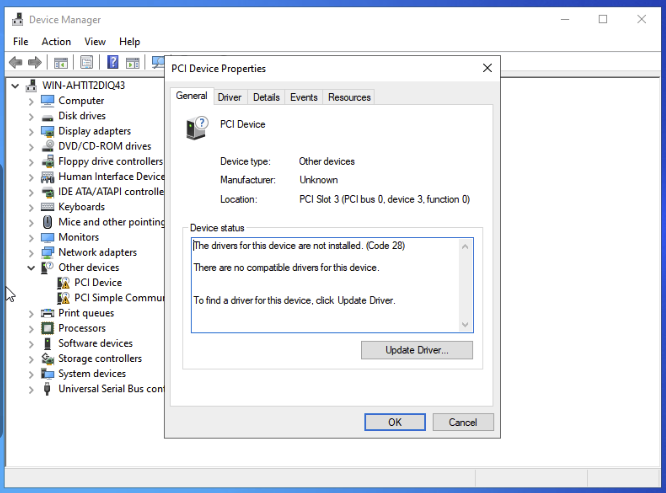
- Go to the windows Device Manager
- Look for «PCI Simple Communications Controller»
- Right Click -> Update Driver and select on the mounted iso in DRIVE:\vioserial\<OSVERSION>\ where <OSVERSION> is your Windows Version (e.g. 2k12R2 for Windows 2012 R2)
After that, you have to install the qemu-guest-agent:
- Go to the mounted ISO in explorer
- The guest agent installer is in the directory guest-agent
- Execute the installer with double click (either qemu-ga-x86_64.msi (64-bit) or qemu-ga-i386.msi (32-bit)
After that the qemu-guest-agent should be up and running. You can validate this in the list of Window Services, or in a PowerShell with:
PS C:\Users\Administrator> Get-Service QEMU-GA

Status   Name               DisplayName
------   ----               -----------
Running  QEMU-GA            QEMU Guest Agent
If it is not running, you can use the Services control panel to start it and make sure that it will start automatically on the next boot.
Testing that the communication with the guest agent is working
The communication with the guest agent takes place over a unix socket located in /var/run/qemu-server/<my_vmid>.qga
You can test the communication qm agent:
qm agent <vmid> ping
if the qemu-guest-agent is correctly runnning in the VM, it will return without an error message.
See Also
http://wiki.qemu.org/Features/GuestAgent
https://access.redhat.com/documentation/en-us/red_hat_enterprise_linux/7/html/virtualization_deployment_and_administration_guide/chap-kvm_guest_timing_management
Home » Proxmox » QEMU Guest Agent Installation in Proxmox VE
If you are running a Proxmox VE server in your home lab or production, there is a component that you will want to know and use with your guest virtual machines in the environment. The QEMU agent is a component that is akin to VMware Tools in VMware vSphere that will help your VMs have the best integration possible with your hypervisor host. Let’s look at the QEMU guest agent installation in Proxmox for performance and integration.
Table of contents
- QEMU Guest Agent (QEMU GA) brief overview
- Proxmox virtual machine management
- Installing the QEMU Guest Agent in Proxmox VE Server
- Install QEMU guest agent in Linux
- Install QEMU agent in Windows
- Enable QEMU guest agent in Proxmox via the command line
- Understanding QEMU Guest Agent Communication
- Best Practices for Virtual Machine Optimization
- Troubleshooting the QEMU guest agent
- Wrapping up
QEMU Guest Agent (QEMU GA) brief overview
First of all, let’s talk about the QEMU agent in Proxmox, what it does, why you need it, and how it can help with your virtualized environment. The QEMU agent is a helper daemon in your virtual machine that passes information back and forth between the guest operating system and the hypervisor.
It does many things related to getting information, backups, proper shutdowns, etc:
- It allows executing commands in the guest OS and is used for proper shutdown of the guest
- It is responsible for freezing the guest file system during backups or snapshot operations
- It allows managing your guest virtual machines and displaying information for your guest environment such as IP addresses, etc.
Proxmox virtual machine management
Note the following benefits specific to the virtual machine qemu agent in Proxmox VE server:
- The QEMU Agent provides a system-level agent via standard QMP commands
- It enables the host to issue commands using libvirt and the guest operating system responds to these commands asynchronously
- The QEMU Agent adds features like guest time management
Installing the QEMU Guest Agent in Proxmox VE Server
If you are running Proxmox, how do you install the QEMU agent in your guest virtual machines? Let’s look at that process.
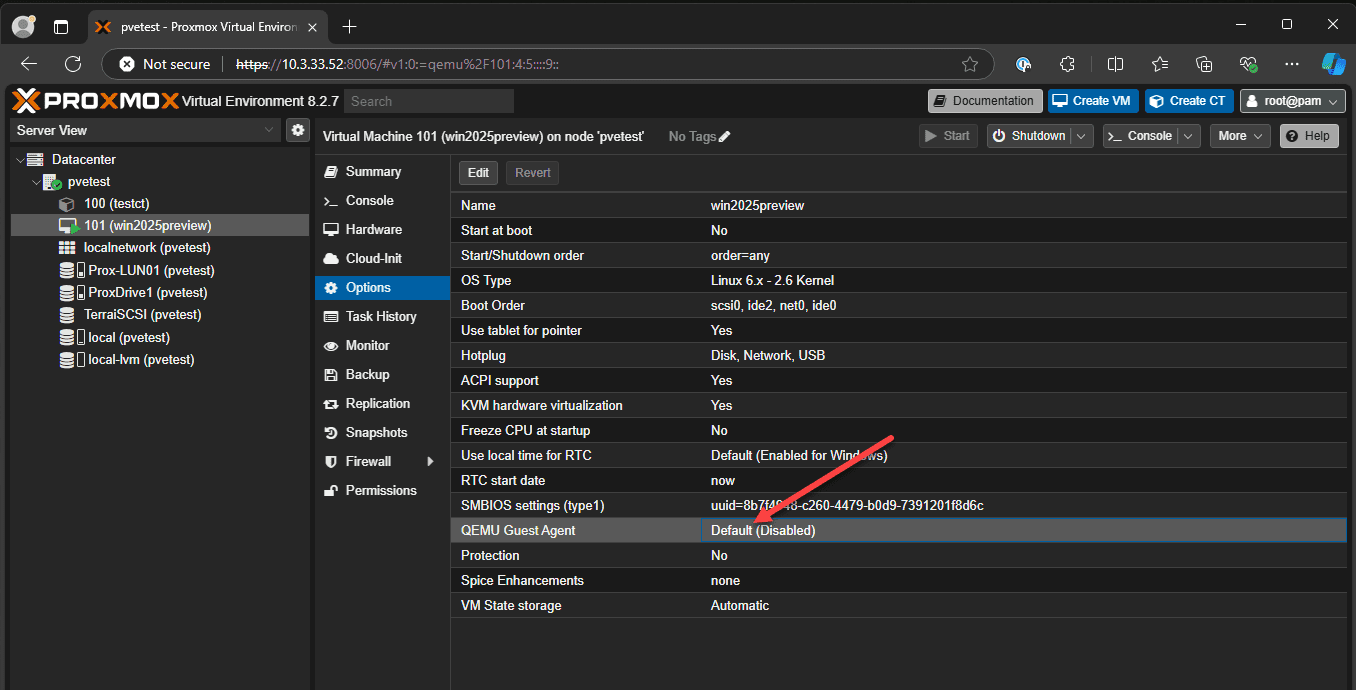
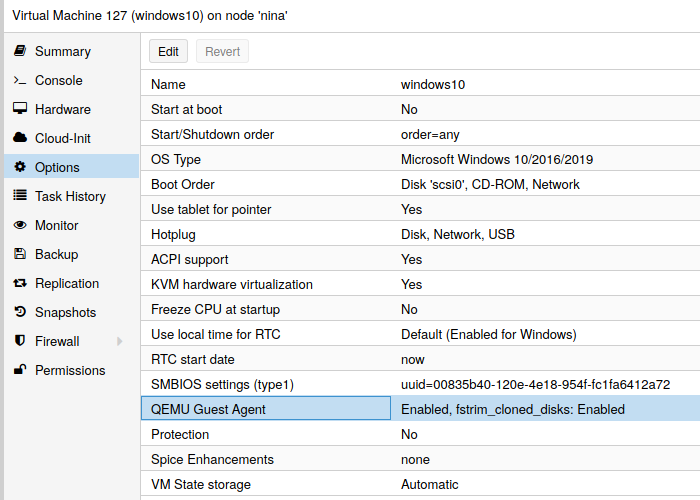
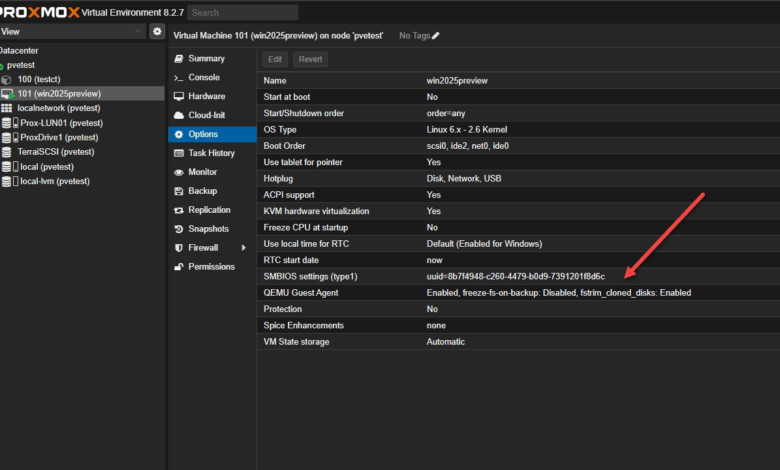
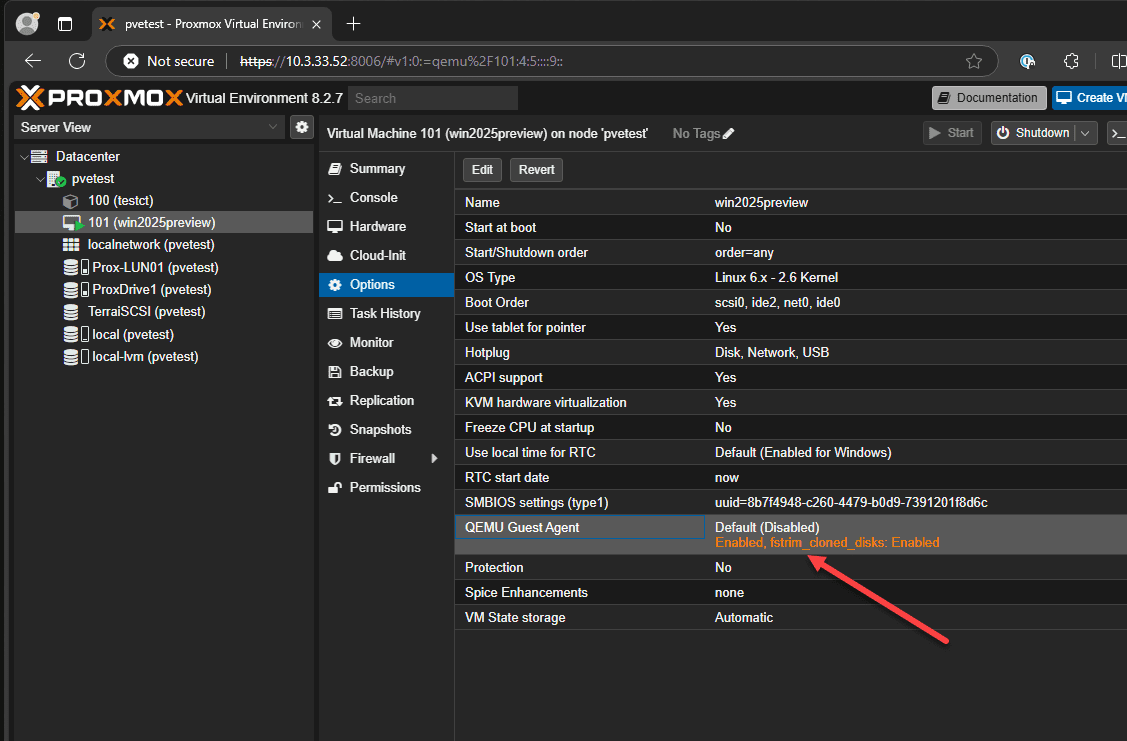
When you edit the QEMU agent configuration, you can enable:
- Use QEMU agent
- Run guest-trim after a disk move or VM migration
- Freeze/thawing (guest fsfreeze freeze) file systems on backup for consistency
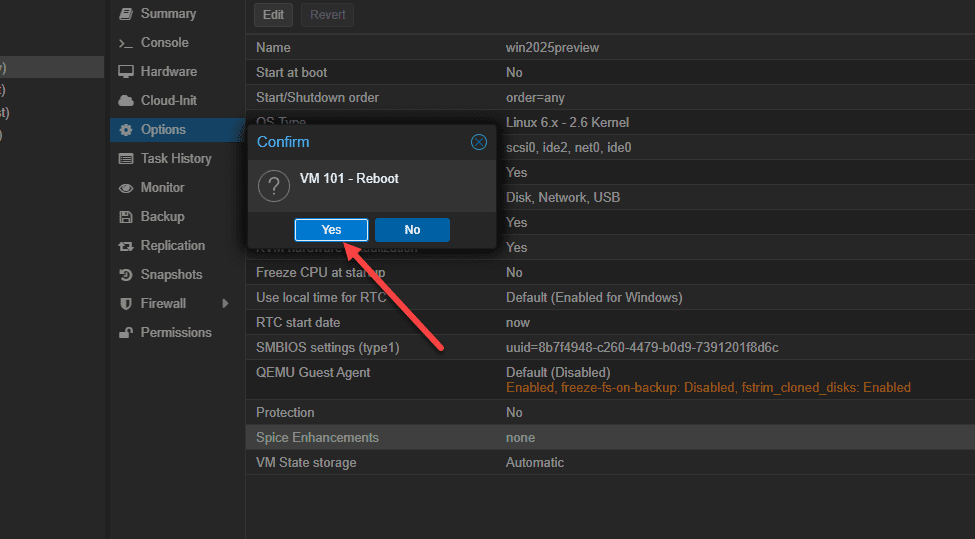
You will see the QEMU agent enabled, but we need to reboot at this point. Note any error message you might receive. However, this process is generally very straightforward.
We choose to reboot the VM to install the qemu agent and so the agent is started on the next boot.
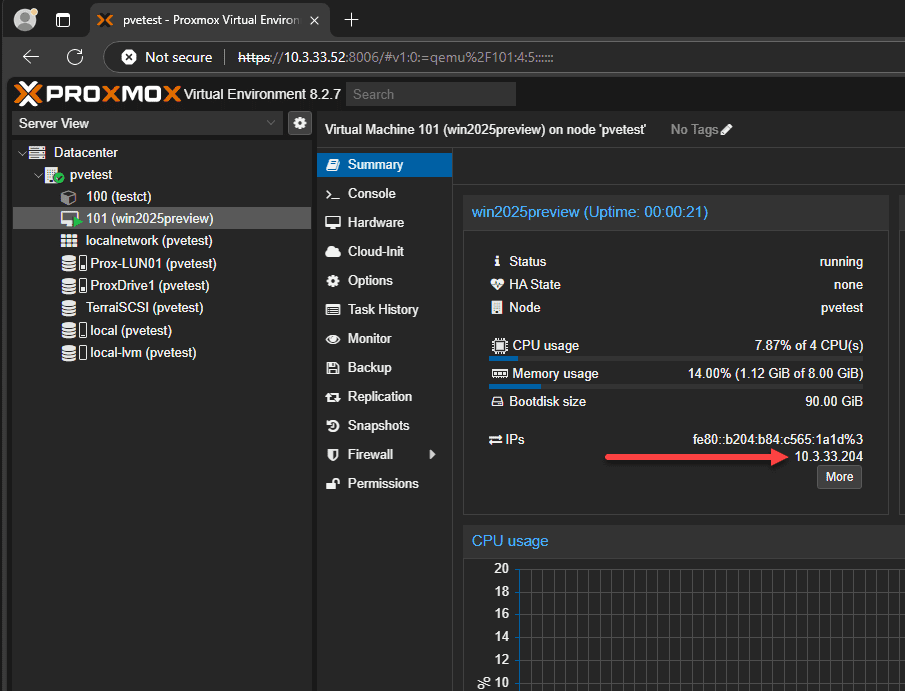
After the VM reboots, like VMware Tools does, we can see the IP address for the guest operating system, showing us the QEMU agent tools are installed.
Install QEMU guest agent in Linux
You can also install the QEMU agent in Linux using the command:
sudo apt install qemu-guest-agentWe can use QEMU agent systemctl commands to enable and start the service. Enable the Service to Start on Boot:
sudo systemctl enable qemu-guest-agentStart the Service:
sudo systemctl start qemu-guest-agentInstall QEMU agent in Windows
Download the Installer:
- Download the latest VirtIO drivers here: https://fedorapeople.org/groups/virt/virtio-win/direct-downloads/latest-virtio/virtio-win.iso
Install the VirtIO drivers:
- Run the installer and follow the wizard instructions
Verify the Service is started:
- Make sure the QEMU Guest Agent service is running in the Services management console.
Enable QEMU guest agent in Proxmox via the command line
You can enable QEMU guest agent in Proxmox using the command line with the following command with replacing the VMID with your virtual
qm set <VMID> --agent enabled=1Understanding QEMU Guest Agent Communication
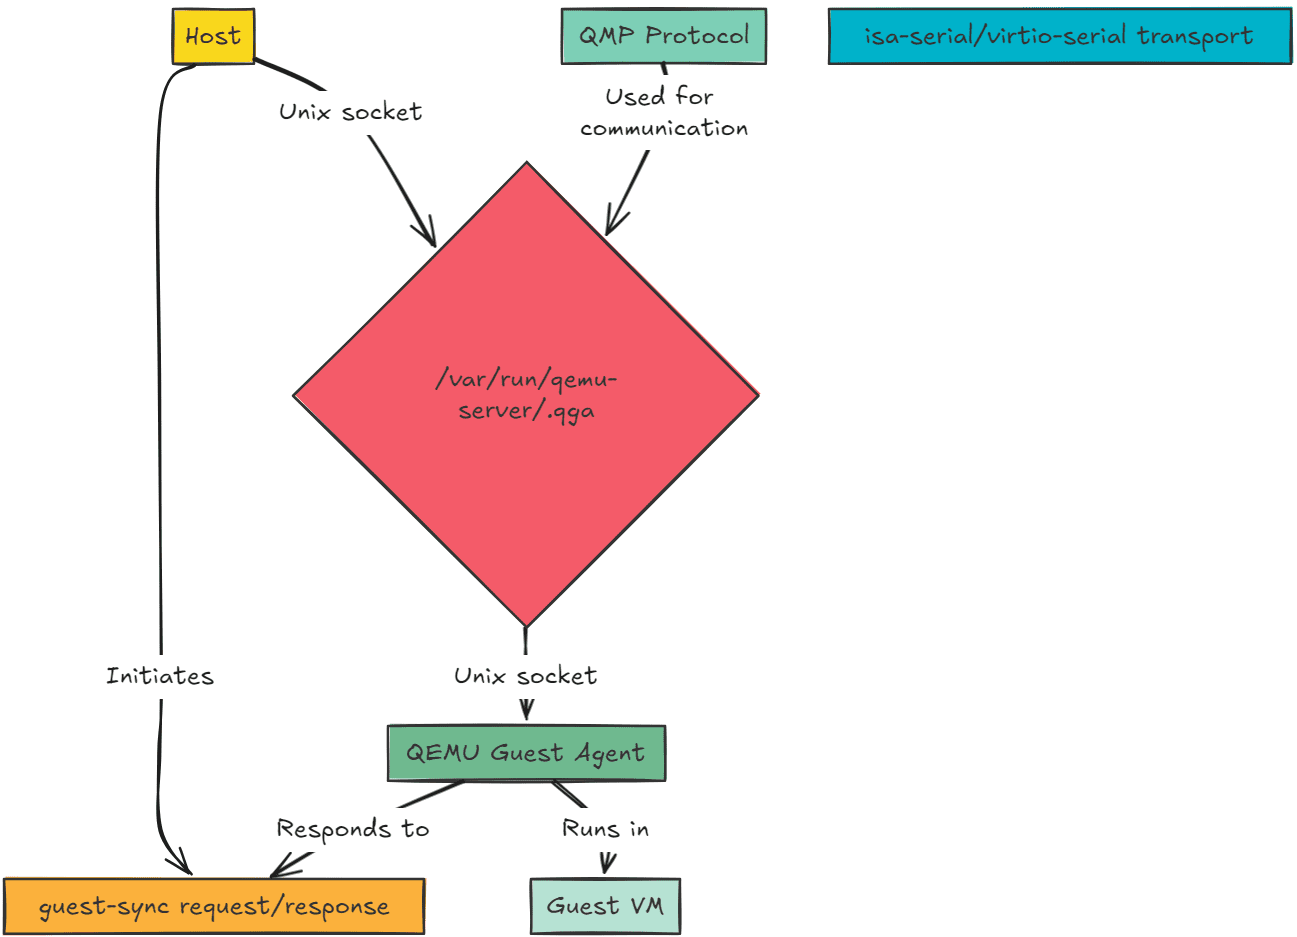
Note the following aspects of the QEMU guest agent communication and how it communicates with the host, protocols used, and guest-sync exchange:
- The QEMU Agent communicates with the host over a Unix socket located in
/var/run/qemu-server/<my_vmid>.qga - The QEMU Agent protocol uses the same protocol as QMP. It also has some additional aspects for its isa-serial/virtio-serial transport
- The guest-sync request/response exchange is used to make sure of safe communications between the host and guest
Below is a graphical overview of how the QEMU guest agent communicates with the host and protocols used.
Best Practices for Virtual Machine Optimization
There are several best practices for virtual machine optimization when thinking about installing the QEMU agent. Note the following
- You will want to install the QEMU agent on all virtual machines to enable enhanced virtual machine management.
- Start the agent automatically on boot using the command
sudo systemctl enable qemu-guest-agent. - You can use the QEMU agent to optimize virtual machine performance, including disk usage and clipboard open code
Troubleshooting the QEMU guest agent
You may run into a few issues with the QEMU agent running in guest operating systems in a Proxmox VE server environment. What are some of those?
- The agent is not responding: You may need to restart the agent, using the command
sudo systemctl restart qemu-guest-agent - You suspect their are issues with the QEMU agent: You may need to take a look at the QEMU agent logs for the service. You can do that with the command:
sudo journalctl -u qemu-guest-agent. - You can also check the status of the service using the command:
sudo systemctl status qemu-guest-agent
Wrapping up
The QEMU guest agent is an important component to a performant and manageable virtualization platform running on Proxmox. It is easy to install using the Proxmox web UI and the command line and it is an easy win for admins to make sure backups and snapshots are quiesced properly and you have the information you need for guest operating systems at your fingertips.
Making sure you have the QEMU agent installed is an aspect of making sure your Proxmox VE Server environment and the guest virtual machines are running according to best practices and the environment will perform and be stable when running your guest virtual machine workloads.
Brandon Lee is the Senior Writer, Engineer and owner at Virtualizationhowto.com, and a 7-time VMware vExpert, with over two decades of experience in Information Technology. Having worked for numerous Fortune 500 companies as well as in various industries, He has extensive experience in various IT segments and is a strong advocate for open source technologies. Brandon holds many industry certifications, loves the outdoors and spending time with family. Also, he goes through the effort of testing and troubleshooting issues, so you don’t have to.

Сегодня расскажу как подключить на виртуальную машину (ВМ) в Proxmox утилиту qemu-guest-agent для просмотра IP-адреса через WEB-интерфейс и правильной завершении работы ВМ.
Содержание
1. Что такое qemu-guest-agent
2. Установка qemu-guest-agent
2.1. На Proxmox
2.2. На Linux VM
2.3. На Windows VM
3. Настройка qemu-guest-agent в Linux
4. Проверка того, что связь с гостевым агентом работает
Что такое qemu-guest-agent
qemu-guest-agent — это вспомогательный демон, который устанавливается в гостевой системе. Он используется для обмена информацией между хостом и гостем, а также для выполнения команды в госте.
В Proxmox VE qemu-guest-agent используется в основном для двух вещей:
- Чтобы правильно завершить работу гостя, вместо того чтобы полагаться на команды ACPI или политики Windows
- Чтобы заморозить гостевую файловую систему при создании резервной копии (в Windows используйте службу теневого копирования томов VSS).
Установка qemu-guest-agent
На Proxmox
Вы должны установить гостевой агент в каждой виртуальной машине, а затем включить его, вы можете сделать это в веб-интерфейсе Proxmox VE (GUI).
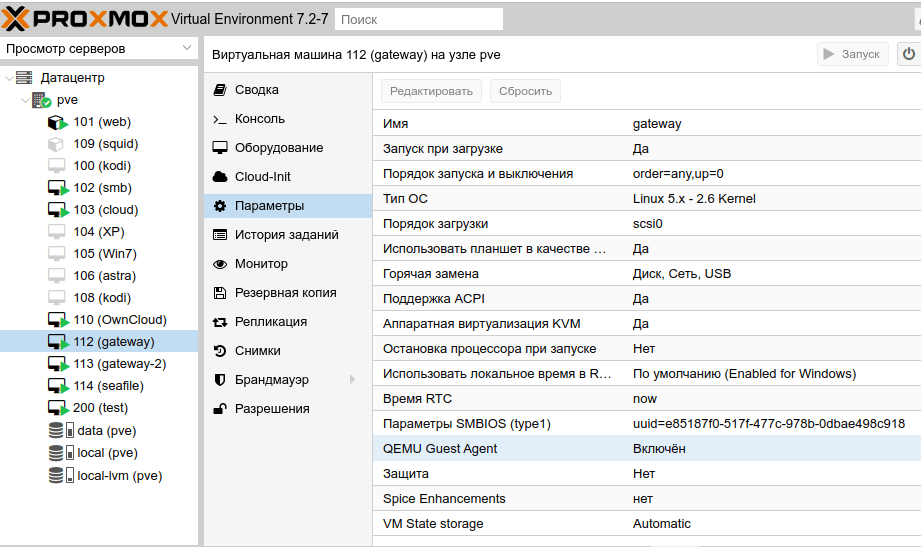
Активируем qemu-guest-agent в Proxmox
или через CLI:
qm set VMID --agent 1
На Linux VM
В Linux вам нужно просто установить пакет qemu-guest-agent.
Здесь мы покажем команды для систем на базе Debian/Ubuntu и Redhat:
В системах на Debian/Ubuntu выполняем следующие команды:
sudo apt install qemu-guest-agent
sudo systemctl enable qemu-guest-agent
sudo systemctl start qemu-guest-agent
На системах на базе Redhat:
yum install qemu-guest-agent
sudo systemctl enable qemu-guest-agent
sudo systemctl start qemu-guest-agent
На Windows VM
Сначала вы должны скачать драйвер virtio-win iso (см. Windows VirtIO Drivers).
Затем установите драйвер virtio-serial:
- Прикрепите ISO к виртуальной машине Windows (virtio-*.iso)
- Перейдите в Диспетчер устройств Windows
- Найдите «PCI Simple Communications Controller«
- Щелкните правой кнопкой мыши -> Обновить драйвер и выберите на смонтированном iso DRIVE:\vioserial\<OSVERSION>\ where <OSVERSION> is your Windows Version — ваша версия Windows (например, W7 для Windows 7)
После этого необходимо установить qemu-guest-agent:
- Перейти к смонтированному ISO в проводнике
- Установщик гостевого агента находится в каталоге гостевой агент
- Запустите установщик двойным щелчком (либо qemu-ga-x86_64.msi (64-разрядная версия), либо qemu-ga-i386.msi (32-разрядная версия)
После этого qemu-guest-agent должен быть запущен.
Если он не запущен, вы можете использовать панель управления Службами, чтобы запустить его и убедиться, что он запустится автоматически при следующей загрузке.

Настройка qemu-guest-agent в Linux
В зависимости от дистрибутива гостевой агент может не запускаться автоматически после установки. Для запуска воспользуемся следующими командами:
sudo systemctl enable qemu-guest-agent sudo systemctl start qemu-guest-agent
Проверка того, что связь с гостевым агентом работает
Связь с гостевым агентом происходит через сокет unix, расположенный в /var/run/qemu-server/<my_vmid>.qga Вы можете проверить связь агента qm в proxmox:
qm agent <vmid> ping
если qemu-guest-agent правильно запущен в виртуальной машине, он выдаст пустое сообщения.
Как и многие другие гипервизоры для корректной работы виртуальных машин Proxmox рекомендуется, чтобы была выполнена установка гостевых средств интеграции Proxmox. Например, такие же рекомендации есть и для гипервизоров ESXi, VMware Workstation, VirtualBox. Установка гостевых средств интеграции позволяет получить полный набор всех доступных возможностей, которые вам может предоставить Proxmox – расширенное управление электропитанием, получение дополнительной информации в веб панели управления гипервизора, дополнительные драйвера т.д.

В этой публикации я покажу установку гостевых средств интеграции для платформы Windows и для платформы Linux.
Установка гостевых средств интеграции Proxmox для Linux
Установка гостевых средств интеграции для Linux проще, чем для Windows. Для наиболее популярных дистрибутивов гостевые средства интеграции Proxmox уже доступны в репозиториях с программных обеспечением дистрибутива.
Debian дистрибутивы
Для установки гостевых средств интеграции на Debian подобных дистрибутивах выполните следующую действия:
1. Включаем гостевые средства интеграции в настройках виртуальной машины:

2. В гостевой операционной системе установите средства интеграции:
sudo apt install qemu-guest-agent3. Затем включите службу гостевых средств интеграции:
sudo systemctl enable qemu-guest-agent4. Останавливаем виртуальную машину.
5. Заново запускаем виртуальную машину.
RHEL дистрибутивы
Для установки гостевых средств интеграции на Debian подобных дистрибутивах выполните следующую действия:
1. Включаем гостевые средства интеграции в настройках виртуальной машины:
2. В гостевой операционной системе установите средства интеграции:
yum install qemu-guest-agent3. Затем включите службу гостевых средств интеграции:
systemctl enable qemu-guest-agent4. Останавливаем виртуальную машину.
5. Заново запускаем виртуальную машину.
Установка гостевых средств интеграции Proxmox для Windows
Процесс установки средств интеграции на Windows немного длиннее:
1. Загружаем дистрибутив с VirtIO.
2. Монтируем образ из п. 1 – либо непосредственно в гостевой ОС, либо через виртуальный CD/DVD привод в Proxmox.
3. Включаем гостевые средства интеграции в настройках виртуальной машины.

4. В корне смонтированного образа находим файл с дистрибутивом VirtIO нужной вам разрядности и запускаем его.

5. Следуя шагам мастера выполняем установку дистрибутива VirtIO.
6. Затем запустите дистрибутив “virtio-win-guest-tools.msi”. Следуя шагам мастера выполните установку.
7. Останавливаем виртуальную машину.
8. Заново запускаем виртуальную машину.
Процедуру проверки стоит начать с веб интерфейса администрирования Proxmox. В случае успешной установки и корректной работы гостевых средств интеграции вы должны увидеть на вкладке “Summary” сводную информацию об IP-адресах виртуальной машины.

Также в консоли Proxmox вы можете выполнить вот такую команду:
qm agent <vmid> ping
В случае, если гостевые средства интеграции доступы эта команда возвращает пустой вывод. Если средства интеграции по какой-то причине не доступны, то должна отобразиться какая-то ошибка.
Если ошибка все же возникла, то проверьте статусы служб интеграции в гостевой операционной системе. Для Linux систем это служба qume-quest-agent:
systemctl status qemu-quest-agent

Для Windows систем это служба “QEMU-GA”.

Proxmox documentation is exceptional but we have created a quick guide for setting up a Windows host as it’s not the same defaults to be used when setting up Linux. The guide on Proxmox’s Wiki for Windows 2019 and Windows 10 seems exactly the same. We’ve included both links in the references. When doing this operation you want to focus on Virtio disk.
This article highlights the non defaults.
Table of Contents
TL;DR
- Download Windows (server = 5 GB+):
- https://www.microsoft.com/en-us/evalcenter/download-windows-server-2019
- When installing choose the desktop experience otherwise you’ll have no UI
- https://www.microsoft.com/en-us/evalcenter/download-windows-server-2019
- Download special disk, network, and ballooning drivers here: https://fedorapeople.org/groups/virt/virtio-win/direct-downloads/stable-virtio/virtio-win.iso
- If you’ve downloaded this before, choose IDE / local disk / virtio
- This is stored on Proxmox on /var/lib/vz/template/iso
- If you’ve downloaded this before, choose IDE / local disk / virtio
- In addition to mounting the Windows ISO, also mount that fresh ISO as IDE device #3 (some strange default occurs
- Be sure to mount the ISO when creating the VM otherwise you’ll have to reboot before the OS will recognize it.
- Ensure you select QEMU Agent on the second tab of the wizard.
- CPU
- Turn on
numa
- Turn on
- Disk settings:
- Set “Write back” as cache option for best performance
- Tick “Discard” to optimally use disk space (TRIM)
- Options
- On Guest Agent, also select: Run guest-trim after a disk move or VM migration
- Turn on protection
- Turn on hotplug for memory (requires
numa) and CPU
- Driver locations on Virtio CD:
- Hard disk: vioscsi\2k19\amd64
- Network: NetKVM\2k19\amd64
- Memory Balloon: Balloon\2k19\amd64
- Prep for QEMU Guest Agent
- Device Manager / Look for “PCI Simple Communications Controller”
- Update to D:\vioserial\2k19\amd64
- Device Manager / Look for “PCI Simple Communications Controller”
- You want to install all four drivers, starting with the disk driver which is needed before the disk will be seen.
- Choose SCSI bus as you normally would for the disk
- Choose this network device: VirtIO (paravirtualized)
Proxmox Wizard Steps
If you are import an existing QCOW2, then you probably only need the Proxmox wizard stuff to fill in:
- General Tab
- Name
- OS Tab
- Do not use any media
- Guest OS: Microsoft Windows version 10/2016/2019
- System Tab
- Tick Qemu Agent
- Hard Disk Tab
- Bus/Device: SCSI. That will default next line to VirtIO SCSI
- Storage: raid1 or whatever volume you decide on
- Cache: Write back
- Discard: Tick this
- CPU
- Memory
- Network
- VirtIO (paravirtualized)
Proxmox Wiki Guides
- https://pve.proxmox.com/wiki/Windows_2019_guest_best_practices
- https://pve.proxmox.com/wiki/Windows_10_guest_best_practices
Further Steps
Install QEMU Guest Agent for Windows
- Make sure you’ve followed the step to update the unknown PCI Simple Communications Controller as per previous step
- Browse to the ISO and guest-agent and install the 64bit guest agent.
- Test so:
- Services or Powershell
- Get-Service QEMU-GA
- Services or Powershell
Memory Ballooning
You should also install the VirtIO Balloon Driver to avoid an exclamation mark in your Device Manager.
Browse to the CD, Balloon, your OS, and then amd64 folder.
VirtIO Serial Driver
That’s the other exclamation mark, “PCI Simple Communications Device”.
Simply specify to browse the root of the CD to install that.
Allow Ping for Windows Server 2019
By default Windows Server 2019 doesn’t allow ping. If you want to set it, do this:
https://kb.vander.host/operating-systems/unable-to-ping-newly-installed-windows-2019-server/
Enable Remote Desktop Connection
You probably want RDP enabled:
https://kb.vander.host/operating-systems/how-to-enable-remote-desktop-protocol-for-administration-purposes-on-newly-created-windows-2019-server/
Group Policy Changes
Allow More Than One RDP Connection
- Start / Run / gpedit.msc
- Navigate to Computer Configuration >> Administrative Templates >> Windows Components >> Remote Desktop Services >> Remote Desktop Session Host >> Connections.
- Double click on “Restrict Remote Desktop Services user to a single Remote Desktop Services session and set this to Disabled.
- Next, double click on “Limit number of connections”, Enable, and set the RD Maximum Connections allowed to the maximum which is 999999 (6 x 9s).
Account Lockout
Some people like to have RDP on exposed on the internet. Your server will immediately become part of a dictionary attack. Very soon the lockout policy of RDP security will be reached. If you really have to, you can follow the route below:
Settings > Edit Group Policy
Group Policy > Computer Configuration > Windows Settings > Security Settings > Account Policies > Account Lockout Policy > Account Lockout Threshold