
Introduction — What is qemu-guest-agent
The qemu-guest-agent is a helper daemon, which is installed in the guest. It is used
to exchange information between the host and guest, and to execute command in the guest.
In Proxmox VE, the qemu-guest-agent is used for mainly three things:
- To properly shutdown the guest, instead of relying on ACPI commands or windows policies
- To freeze the guest file system when making a backup/snapshot (on windows, use the volume shadow copy service VSS). If the guest agent is enabled and running, it calls guest-fsfreeze-freeze and guest-fsfreeze-thaw to improve consistency.
- In the phase when the guest (VM) is resumed after pause (for example after shapshot) it immediately synchronizes its time with the hypervisor using qemu-guest-agent (as first step).
Installation
Host
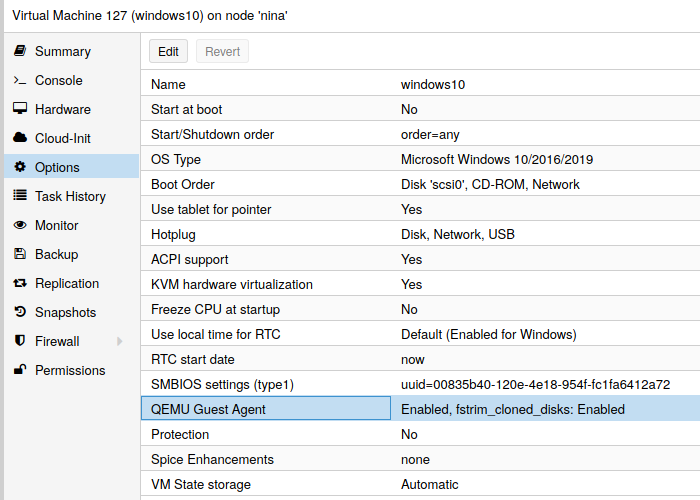
You have to install guest-agent in each VM and then enable it, you can do that in the Proxmox VE Webinterface (GUI)
or via CLI: qm set VMID --agent 1
Guest
Linux
On Linux you have to simply install the qemu-guest-agent, please refer to the documentation of your system.
We show here the commands for Debian/Ubuntu and Redhat based systems:
on Debian/Ubuntu based systems (with apt-get) run:
apt-get install qemu-guest-agent
and on Redhat based systems (with yum):
yum install qemu-guest-agent
Depending on the distribution, the guest agent might not start automatically after the installation.
Start it either directly with
systemctl start qemu-guest-agent
Then enable the service to autostart (permanently) if not auto started, with
systemctl enable qemu-guest-agent
(should work for most distributions) or reboot the guest.
Windows
First you have to download the virtio-win driver iso (see Windows VirtIO Drivers).
Then install the virtio-serial driver:
- Attach the ISO to your windows VM (virtio-*.iso)
- Go to the windows Device Manager
- Look for «PCI Simple Communications Controller»
- Right Click -> Update Driver and select on the mounted iso in DRIVE:\vioserial\<OSVERSION>\ where <OSVERSION> is your Windows Version (e.g. 2k12R2 for Windows 2012 R2)
After that, you have to install the qemu-guest-agent:
- Go to the mounted ISO in explorer
- The guest agent installer is in the directory guest-agent
- Execute the installer with double click (either qemu-ga-x86_64.msi (64-bit) or qemu-ga-i386.msi (32-bit)
After that the qemu-guest-agent should be up and running. You can validate this in the list of Window Services, or in a PowerShell with:
PS C:\Users\Administrator> Get-Service QEMU-GA

Status   Name               DisplayName
------   ----               -----------
Running  QEMU-GA            QEMU Guest Agent
If it is not running, you can use the Services control panel to start it and make sure that it will start automatically on the next boot.
Testing that the communication with the guest agent is working
The communication with the guest agent takes place over a unix socket located in /var/run/qemu-server/<my_vmid>.qga
You can test the communication qm agent:
qm agent <vmid> ping
if the qemu-guest-agent is correctly runnning in the VM, it will return without an error message.
See Also
http://wiki.qemu.org/Features/GuestAgent
https://access.redhat.com/documentation/en-us/red_hat_enterprise_linux/7/html/virtualization_deployment_and_administration_guide/chap-kvm_guest_timing_management
A Red Hat Enterprise Linux host machine can issue commands to Windows guests by running the QEMU guest agent in the guest. This is supported in hosts running Red Hat Enterprise Linux 6.5 and newer, and in the following Windows guest operating systems:
-
Windows XP Service Pack 3 (VSS is not supported)
-
Windows Server 2003 R2 — x86 and AMD64 (VSS is not supported)
-
Windows Server 2008
-
Windows Server 2008 R2
-
Windows 7 — x86 and AMD64
-
Windows Server 2012
-
Windows Server 2012 R2
-
Windows 8 — x86 and AMD64
-
Windows 8.1 — x86 and AMD64
Windows guest virtual machines require the QEMU guest agent package for Windows, qemu-guest-agent-win. This agent is required for VSS (Volume Shadow Copy Service) support for Windows guest virtual machines running on Red Hat Enterprise Linux. More information can be found here.
Procedure 10.2. Configuring the QEMU guest agent on a Windows guest
Follow these steps for Windows guests running on a Red Hat Enterprise Linux host machine.
-
Prepare the Red Hat Enterprise Linux host machine
Make sure the following package is installed on the Red Hat Enterprise Linux host physical machine:
-
virtio-win, located in
/usr/share/virtio-win/
To copy the drivers in the Windows guest, make an
*.isofile for the qxl driver using the following command:#
mkisofs -o /var/lib/libvirt/images/virtiowin.iso /usr/share/virtio-win/drivers -
-
Prepare the Windows guest
Install the virtio-serial driver in guest by mounting the
*.isoto the Windows guest in order to update the driver. Start the guest, then attach the driver .iso file to the guest as shown (using a disk named hdb):#
virsh attach-disk guest /var/lib/libvirt/images/virtiowin.iso hdbTo install the drivers using the Windows , navigate to the following menus:
-
To install the virtio-win driver — Select > > .
-
-
Update the Windows guest XML configuration file
The guest XML file for the Windows guest is located on the Red Hat Enterprise Linux host machine. To gain access to this file, you need the Windows guest name. Use the
# virsh listcommand on the host machine to list the guests that it can recognize. In this example, the guest’s name is win7x86.Add the following elements to the XML file using the
# virsh edit win7x86command and save the changes. Note that the source socket name must be unique in the host, named win7x86.agent in this example:... <channel type='unix'> <source mode='bind' path='/var/lib/libvirt/qemu/win7x86.agent'/> <target type='virtio' name='org.qemu.guest_agent.0'/> <address type='virtio-serial' controller='0' bus='0' port='1'/> </channel> <channel type='spicevmc'> <target type='virtio' name='com.redhat.spice.0'/> <address type='virtio-serial' controller='0' bus='0' port='2'/> </channel> ...Figure 10.2. Editing the Windows guest XML to configure the QEMU guest agent
-
Reboot the Windows guest
Reboot the Windows guest to apply the changes:
#
virsh reboot win7x86 -
Prepare the QEMU guest agent in the Windows guest
To prepare the guest agent in a Windows guest:
-
Install the latest virtio-win package
Run the following command on the Red Hat Enterprise Linux host physical machine terminal window to locate the file to install. Note that the file shown below may not be exactly the same as the one your system finds, but it should be latest official version.
#
rpm -qa|grep virtio-winvirtio-win-1.6.8-5.el6.noarch #rpm -iv virtio-win-1.6.8-5.el6.noarch -
Confirm the installation completed
After the virtio-win package finishes installing, check the
/usr/share/virtio-win/guest-agent/folder and you will find an file named qemu-ga-x64.msi or the qemu-ga-x86.msi as shown:# ls -l /usr/share/virtio-win/guest-agent/ total 1544 -rw-r--r--. 1 root root 856064 Oct 23 04:58 qemu-ga-x64.msi -rw-r--r--. 1 root root 724992 Oct 23 04:58 qemu-ga-x86.msi
-
Install the .msi file
From the Windows guest (win7x86, for example) install the qemu-ga-x64.msi or the qemu-ga-x86.msi by double clicking on the file. Once installed, it will be shown as a qemu-ga service in the Windows guest within the System Manager. This same manager can be used to monitor the status of the service.
-
10.3.1. Using libvirt Commands with the QEMU Guest Agent on Windows Guests
The QEMU guest agent can use the following virsh commands with Windows guests:
-
virsh shutdown --mode=agent— This shutdown method is more reliable thanvirsh shutdown --mode=acpi, asvirsh shutdownused with the QEMU guest agent is guaranteed to shut down a cooperative guest in a clean state. If the agent is not present, libvirt has to instead rely on injecting an ACPI shutdown event, but some guests ignore that event and thus will not shut down.Can be used with the same syntax for
virsh reboot. -
virsh snapshot-create --quiesce— Allows the guest to flush its I/O into a stable state before the snapshot is created, which allows use of the snapshot without having to perform a fsck or losing partial database transactions. The guest agent allows a high level of disk contents stability by providing guest co-operation. -
virsh dompmsuspend— Suspends a running guest gracefully using the guest operating system’s power management functions.
Summary
Implement support for QMP commands and events that terminate and originate
respectively within the guest using an agent built as part of QEMU.
Detailed Summary
Ultimately the QEMU Guest Agent aims to provide access to a system-level agent via standard QMP commands.
This support is targeted for a future QAPI-based rework of QMP, however, so currently, for QEMU 0.15, the guest agent is exposed to the host via a separate QEMU chardev device (generally, a unix socket) that communicates with the agent using the QMP wire protocol (minus the negotiation) over a virtio-serial or isa-serial channel to the guest. Assuming the agent will be listening inside the guest using the virtio-serial device at /dev/virtio-ports/org.qemu.guest_agent.0 (the default), the corresponding host-side QEMU invocation would be something:
 qemu \
 ...
 -chardev socket,path=/tmp/qga.sock,server=on,wait=off,id=qga0 \
 -device virtio-serial \
 -device virtserialport,chardev=qga0,name=org.qemu.guest_agent.0
Commands would be then be issued by connecting to /tmp/qga.sock, writing the QMP-formatted guest agent command, reading the QMP-formatted response, then disconnecting from the socket. (It’s not strictly necessary to disconnect after a command, but should be done to allow sharing of the guest agent with multiple client when exposing it as a standalone service in this fashion. When guest agent passthrough support is added to QMP, QEMU/QMP will handle arbitration between multiple clients).
When QAPI-based QMP is available (somewhere around the QEMU 0.16 timeframe), a different host-side invocation that doesn’t involve access to the guest agent outside of QMP will be used. Something like:
 qemu \
 ...
 -chardev qga_proxy,id=qga0 \
 -device virtio-serial \
 -device virtserialport,chardev=qga0,name=org.qemu.guest_agent.0
 -qmp tcp:localhost:4444,server
Currently this is planned to be done as a pseudo-chardev that only QEMU/QMP sees or interacts with, but the ultimate implementation may vary to some degree. The net effect should the same however: guest agent commands will be exposed in the same manner as QMP commands using the same QMP server, and communication with the agent will be handled by QEMU, transparently to the client.
The current list of supported RPCs is documented in qemu.git/qapi-schema-guest.json.
Example usage
build:
 # for linux
 ./configure
 make qemu-ga #should be built on|for target guest
 # for Windows using MinGW on linux/cygwin (example for Fedora 18)
 ./configure --enable-guest-agent --cross-prefix=i686-w64-mingw32-
 make qemu-ga.exe
install:
 # for linux
 sudo make install
 # for Windows
 1. make sure virtio-serial Windows drivers are installed and
    working correctly (vioser-test utility that ships with
    virtio-win ISO can help to confirm this)
    (http://alt.fedoraproject.org/pub/alt/virtio-win/latest/images/bin/)
 2. copy qemu-ga.exe to a directory on your windows guest, along
    with the following libraries all extracted/installed to the
    same directory:
    a) Contents of 'bin' directory from 'GLib' runtime
       (http://www.gtk.org/download/win32.php)
    b) 'intl.dll' for 'gettext' runtime
       (http://www.gtk.org/download/win32.php)
    c) depending on your build environment, you may also need
       'libssp-0.dll', which can be obtained from your mingw sys-root
 3. Make sure C:\Program Files\QEMU\run exists (create it if it doesn't)
 4. open a command prompt (as administrator), and run
    `qemu-ga.exe -s install` to install qemu-ga service
 5. manually start qemu-ga service via `net start qemu-ga`, or enable
    autostart for qemu-ga service via 'Control Panel'>'Services'
    configuration menu.
start guest:
 qemu \
 -drive file=/home/mdroth/vm/rhel6_64_base.raw,snapshot=off,if=virtio \
 -net nic,model=virtio,macaddr=52:54:00:12:34:00 \
 -net tap,script=/etc/qemu-ifup \
 -vnc :1 -m 1024 --enable-kvm \
 -chardev socket,path=/tmp/qga.sock,server=on,wait=off,id=qga0 \
 -device virtio-serial \
 -device virtserialport,chardev=qga0,name=org.qemu.guest_agent.0"
use guest agent:
 ./qemu-ga -h
 ./qemu-ga -m virtio-serial -p /dev/virtio-ports/org.qemu.guest_agent.0
start/use qmp:
 mdroth@illuin:~$ sudo socat unix-connect:/tmp/qga.sock readline
 {"execute":"guest-sync", "arguments":{"id":1234}}
 {"return": 1234}
 {"execute":"guest-ping"}
 {"return": {}}
 {"execute": "guest-info"}
 {"return": {"version": "1.0"}}
 // write "hello world!\n" to /tmp/testqga
 {"execute":"guest-file-open", "arguments":{"path":"/tmp/testqga","mode":"w+"}}
 {"return": 0}
 {"execute":"guest-file-write", "arguments":{"handle":0,"buf-b64":"aGVsbG8gd29ybGQhCg=="}}
 {"return": {"count": 13, "eof": false}}
 {"execute":"guest-file-close", "arguments":{"handle":0}}
 {"return": {}}
 // read back the "hello world!\n" from /tmp/testqga
 {"execute":"guest-file-open", "arguments":{"path":"/tmp/testqga","mode":"r"}}
 {"return": 1}
 {"execute":"guest-file-read", "arguments":{"handle":1,"count":1024}}
 {"return": {"buf-b64": "aGVsbG8gd29ybGQhCg==", "count": 13, "eof": true}}
 {"execute":"guest-file-close","arguments":{"handle":1}}
 {"return": {}}
 // freeze and unfreeze freezable guest filesystems
 {"execute":"guest-fsfreeze-status"}
 {"return": "thawed"}
 {"execute":"guest-fsfreeze-freeze"}
 {"return": 3}
 {"execute":"guest-fsfreeze-status"}
 {"return": "frozen"}
 {"execute":"guest-fsfreeze-thaw"}
 {"return": 3}
 {"execute":"guest-fsfreeze-status"}
 {"return": "thawed"}
Example using vsock
start guest (cid = 3):
host$ qemu -device vhost-vsock-pci,guest-cid=3 ...
start guest agent using vsock device:
guest$ qemu-ga -m vsock-listen -p 3:1234
start/use qmp:
 host$ nc --vsock 3 1234
 {"execute":"guest-sync", "arguments":{"id":1234}}
 {"return": 1234}
Schema Definition
All guest commands will use a guest- prefix to distinguish the fact that
the commands are handled by the guest. Type names (complex types and enums) do
not require a special prefix. The following is an example of the proposed guest
agent schema:
##
# @guest-ping:
#
# Ping the guest agent, a non-error return implies success
#
# Since: 0.15.0
##
{ 'command': 'guest-ping' }

##
# @guest-info:
#
# Get some information about the guest agent.
#
# Since: 0.15.0
##
{ 'type': 'GuestAgentInfo', 'data': {'version': 'str'} }
{ 'command': 'guest-info',
  'returns': 'GuestAgentInfo' }
This would result is types being created as described for QAPI, with signatures as follows:
void qmp_guest_ping(Error **errp);
GuestAgentInfo * qmp_guest_info(Error **errp);
libqmp
In libqmp, the code generated for a guest command is nearly identical to the code
generated for a normal command.
For instance, the guest-info command will have the following signature:
GuestAgentInfo *qmp_guest_info(QmpSession *sess, Error **errp);
QEMU
The only role QEMU plays in guest commands is unmarshalling and remarshalling
the input and output. This means that data from the guest is not being sent
directly to a management tool which significantly decreases the guest attack
surface.
Here is an example of the code that will be generated handle agent commands:
static void qmp_marshal_output_guest_info(GuestAgentInfo * ret_in, QObject **ret_out, Error **errp)
{
    QapiDeallocVisitor *md = qapi_dealloc_visitor_new();
    QmpOutputVisitor *mo = qmp_output_visitor_new();
    Visitor *v;

    v = qmp_output_get_visitor(mo);
    visit_type_GuestAgentInfo(v, &ret_in, "unused", errp);
    if (!error_is_set(errp)) {
        *ret_out = qmp_output_get_qobject(mo);
    }
    qmp_output_visitor_cleanup(mo);
    v = qapi_dealloc_get_visitor(md);
    visit_type_GuestAgentInfo(v, &ret_in, "unused", errp);
    qapi_dealloc_visitor_cleanup(md);
}

static void qmp_marshal_input_guest_info(QDict *args, QObject **ret, Error **errp)
{
    GuestAgentInfo * retval = NULL;
    if (error_is_set(errp)) {
        goto out;
    }
    retval = qmp_guest_info(errp);
    qmp_marshal_output_guest_info(retval, ret, errp);

out:

    return;
}
QEMU Guest Agent Protocol
In general, qemu-ga uses the same protocol as QMP. There are a couple issues
regarding it’s isa-serial/virtio-serial transport that incur some additional
caveats, however:
1) there is no way for qemu-ga to detect whether or not a client has connected
   to the channel (usually a chardev with a unix socket front-end and
   virtio-serial backend)
2) there is no way for a client to detect whether or not qemu-ga has
   [re-]connected or disconnected to the backend
3) if qemu-ga has not connected to the channel since the virtio-serial device
   has been reset (generally after reboot or hotplug), data from the client
   will be dropped
4) if qemu-ga has connected to the channel since the virtio-serial device has
   been reset, data from the client will be queued (and eventually throttled
   if available buffers are exhausted), regardless of whether or not qemu-ga
   is still running/connected.
Because of 1) and 2), a qemu-ga channel must be treated as «always-on», even if
qemu-ga hasn’t even been installed on the guest. We could add start-up
notifications to the agent, but there’s no way of detecting if, after a
notification, qemu-ga was stopped and uninstalled, and the machine subsequently
rebooted (we can probe for the this, but that only tells use the state for that
exact instance in time. Stop notifications would be needed to build any notion
of a «session» around such events, but there’s no way to guarantee a stop
notification’s delivery before agent shutdown or device/buffer reset).
This means robust clients *must* implement a client-side timeout mechanism when
attempting to communicate with the agent. It also means that when a client
connects, or after a client times out waiting for a response to a request,
there may be garbage received due to the agent starting up and responding to
requests that were queued by previous client connections, or to stale requests
from the current client connection that had timed-out on the client-side.
It also means that, due to 4), a client can block indefinitely when writing to
a channel that’s been throttled due to a backlog of unhandled/queued requests,
and so should be written with this possibility in mind (separate thread, event
loop, etc.).
qemu-ga uses the guest-sync or guest-sync-delimited command to address the
problem of re-sync’ing the channel after [re-]connection or client-side
timeouts. These are described below.
guest-sync
The guest-sync request/response exchange is simple. The client provides a
unique numerical token, the agent sends it back in a response:
   > { "execute": "guest-sync", "arguments": { "id": 123456 } }
   < { "return": 123456}
A successful exchange guarantees that the channel is now in sync and no
unexpected data/responses will be sent.
Note that for the reasons mentioned above there’s no guarantee this request
will be answered, so a client should implement a timeout and re-issue this
periodically until a response is received for the most recent request.
This alone does not handle synchronisation for all cases, however. For instance, if qemu-ga’s
parser previously received a partial request from a previous client connection,
subsequent attempts to issue the guest-sync request can be misconstrued as
being part of the previous partial request. Eventually qemu-ga will hit it’s
recursion or token size limit and flush its parser state, at which point it
will begin processing the backlog of requests, but there’s no guarantee this
will occur before the channel is throttled due to exhausting all available
buffers. Thus there is potential for a deadlock situation occurring for
certain instances.
To avoid this, qemu-ga/QEMU’s JSON parser have special handling for the 0xFF
byte, which is an invalid UTF-8 character. Clients should precede the
guest-sync request with to ensure that qemu-ga flushes it’s parser state as
soon as possible. So long as all clients abide by this, the deadlock state
should be reliably avoidable.
A similar situation can happen WRT to qemu-ga attempting to communicate with
a client, however. If the client receives a partial response from a previous
qemu-ga instance, the client might misconstrue responses to guest-sync as being
part of this previous request. For client implementations that treat newlines
as a delimiter for qemu-ga responses, this is easy to recover from (one valid
response may be lost, but we can recover on the subsequent try).
For some implementations, in particular, JSON stream-based implementations
which do not rely on newline delimiters, it may be invasive to implement a
client’s response/JSON handling in a such a way that this same deadlock scenario
can be avoided on the client-side. To make this situation easier to deal with,
the guest-sync-delimited command can be used to tell qemu-ga to send precede
the response with this same 0xFF character.
guest-sync-delimited
> { "execute": "guest-sync-delimited", "arguments": { "id": 123456 } }
< { "return": 123456}
Actual hex values sent:
> 7b 27 65 78 65 63 75 74 65 27 3a 27 67 75 65 73 74 2d 73 79 6e 63 2d 64 65
  6c 69 6d 69 74 65 64 27 2c 27 61 72 67 75 6d 65 6e 74 73 27 3a 7b 27 69 64
  27 3a 31 32 33 34 35 36 7d 7d 0a
< ff 7b 22 72 65 74 75 72 6e 22 3a 20 31 32 33 34 35 36 7d 0a
As stated above, the request should also be preceded with a 0xFF to flush
qemu-ga’s parser state.
Guest Agent
The guest agent will be a daemon that connects to a virtio-serial device and
feeds the input to a JSON parser. When a new command is received, it will hand
the command over to the QAPI generated dispatch routines.
The guest agent will implement the server side of the QMP commands using the
native signature for the function.
Asynchronous Commands
Since QEMU cannot rely on the guest agent responding immediately to a command
(it is in fact impossible for it to do so), all guest commands most be
implemented as asynchronous commands within QEMU. This does not change anything
from a protocol visible perspective but is simply an implementation detail
within QEMU.
These details will be worked out in the context of QAPI-based QMP. The current, standalone host service requires that clients provide for their own timeout mechanisms. The reset mechanism descibed under «virtio-serial Transport» should be employed upon each connection to the guest agent to re-sync the streams with the guest agent in case a timeout from a client left the stream in a bad state.
Security Considerations
The following security issues need to be resolved in QMP:
- The JSON parser uses a recursive decent parser. Malicious input could potentially cause a stack overflow. Either implement a recursion depth counter, or switch the parser to only use tail recursion.
- The JSON parser may not handle premature EOI all that well. I think I’ve worked out most of these issues but more rigorous testing is needed.
VirtIO drivers are paravirtualized device drivers required for Microsoft Windows virtual machines (VMs) to run in OKD Virtualization. The drivers are shipped with the rest of the images and do not require a separate download.
The container-native-virtualization/virtio-win container disk must be attached to the VM as a SATA CD drive to enable driver installation. You can install VirtIO drivers during Windows installation or added to an existing Windows installation.
After the drivers are installed, the container-native-virtualization/virtio-win container disk can be removed from the VM.
Table 1. Supported drivers
| Driver name | Hardware ID | Description |
|---|---|---|
|
viostor |
VEN_1AF4&DEV_1001 |
The block driver. Sometimes labeled as an SCSI Controller in the Other devices group. |
|
viorng |
VEN_1AF4&DEV_1005 |
The entropy source driver. Sometimes labeled as a PCI Device in the Other devices group. |
|
NetKVM |
VEN_1AF4&DEV_1000 |
The network driver. Sometimes labeled as an Ethernet Controller in the Other devices group. Available only if a VirtIO NIC is configured. |
Attaching VirtIO container disk to Windows VMs during installation
You must attach the VirtIO container disk to the Windows VM to install the necessary Windows drivers. This can be done during creation of the VM.
Procedure
-
When creating a Windows VM from a template, click Customize VirtualMachine.
-
Select Mount Windows drivers disk.
-
Click the Customize VirtualMachine parameters.
-
Click Create VirtualMachine.
After the VM is created, the virtio-win SATA CD disk will be attached to the VM.
Attaching VirtIO container disk to an existing Windows VM
You must attach the VirtIO container disk to the Windows VM to install the necessary Windows drivers. This can be done to an existing VM.
Procedure
-
Navigate to the existing Windows VM, and click Actions → Stop.
-
Go to VM Details → Configuration → Disks and click Add disk.
-
Add
windows-driver-diskfrom container source, set the Type to CD-ROM, and then set the Interface to SATA. -
Click Save.
-
Start the VM, and connect to a graphical console.
Installing VirtIO drivers during Windows installation
You can install the VirtIO drivers while installing Windows on a virtual machine (VM).
|
This procedure uses a generic approach to the Windows installation and the installation method might differ between versions of Windows. See the documentation for the version of Windows that you are installing. |
Prerequisites
-
A storage device containing the
virtiodrivers must be attached to the VM.
Procedure
-
In the Windows operating system, use the
File Explorerto navigate to thevirtio-winCD drive. -
Double-click the drive to run the appropriate installer for your VM.
For a 64-bit vCPU, select the
virtio-win-gt-x64installer. 32-bit vCPUs are no longer supported. -
Optional: During the Custom Setup step of the installer, select the device drivers you want to install. The recommended driver set is selected by default.
-
After the installation is complete, select Finish.
-
Reboot the VM.
Verification
-
Open the system disk on the PC. This is typically
C:. -
Navigate to Program Files → Virtio-Win.
If the Virtio-Win directory is present and contains a sub-directory for each driver, the installation was successful.
Installing VirtIO drivers from a SATA CD drive on an existing Windows VM
You can install the VirtIO drivers from a SATA CD drive on an existing Windows virtual machine (VM).
|
This procedure uses a generic approach to adding drivers to Windows. See the installation documentation for your version of Windows for specific installation steps. |
Prerequisites
-
A storage device containing the virtio drivers must be attached to the VM as a SATA CD drive.
Procedure
-
Start the VM and connect to a graphical console.
-
Log in to a Windows user session.
-
Open Device Manager and expand Other devices to list any Unknown device.
-
Open the Device Properties to identify the unknown device.
-
Right-click the device and select Properties.
-
Click the Details tab and select Hardware Ids in the Property list.
-
Compare the Value for the Hardware Ids with the supported VirtIO drivers.
-
-
Right-click the device and select Update Driver Software.
-
Click Browse my computer for driver software and browse to the attached
SATA CD drive, where the VirtIO drivers are located. The drivers are arranged
hierarchically according to their driver type, operating system,
and CPU architecture. -
Click Next to install the driver.
-
Repeat this process for all the necessary VirtIO drivers.
-
After the driver installs, click Close to close the window.
-
Reboot the VM to complete the driver installation.
Installing VirtIO drivers from a container disk added as a SATA CD drive
You can install VirtIO drivers from a container disk that you add to a Windows virtual machine (VM) as a SATA CD drive.
|
Downloading the |
Prerequisites
-
You must have access to the Red Hat registry or to the downloaded
container-native-virtualization/virtio-wincontainer disk in a restricted environment.
Procedure
-
Add the
container-native-virtualization/virtio-wincontainer disk as a CD drive by editing theVirtualMachinemanifest:# ... spec: domain: devices: disks: - name: virtiocontainerdisk bootOrder: 2 (1) cdrom: bus: sata volumes: - containerDisk: image: container-native-virtualization/virtio-win name: virtiocontainerdisk1 OKD Virtualization boots the VM disks in the order defined in the VirtualMachinemanifest. You can either define other VM disks that boot before thecontainer-native-virtualization/virtio-wincontainer disk or use the optionalbootOrderparameter to ensure the VM boots from the correct disk. If you configure the boot order for a disk, you must configure the boot order for the other disks. -
Apply the changes:
-
If the VM is not running, run the following command:
$ virtctl start <vm> -n <namespace> -
If the VM is running, reboot the VM or run the following command:
-
-
After the VM has started, install the VirtIO drivers from the SATA CD drive.