
Version numbering
Since version 3.0.0, QEMU uses a time based version numbering scheme:
- major
- incremented by 1 for the first release of the year
- minor
- reset to 0 with every major increment, otherwise incremented by 1 for each release from git master
- micro
- always 0 for releases from git master, incremented by 1 for each stable branch release
The implication of this is that changes in major version number
do not have any bearing on the scope of changes
included in the release. Non-backward compatible changes may be made
in any master branch release, provided they have followed the
deprecation
policy which calls for warnings to be emitted for a minimum of two
releases prior to the change.
Qemu is open-source software for virtualization on Windows 10/8/7, Linux, and macOS but with a command-line interface, lightweight, and low hardware requirements.
Qemu installation on Windows 10 with Qtemu GUIStep 1: Download Qemu for WindowsStep 2: Install Qemu Step 3: Install GUI for QEMU on Windows 10Step 4: Setup QEMU manager Qtemu GUIStep 5: Create a Virtual machineStep 6: Set bootable medium CD/DVDStep 7: Insert ISO file in QEMU via Qtemu GUIStep 8: Boot Qemu Virtual Machine via GUI
QEMU stands for “Quick Emulator” and is the standard tool for virtualization and CPU emulation under Linux, Windows, and macOS. On Linux systems, QEMU uses the functions of the Linux kernel for virtualization (KVM- Kernel Virtual Machine), which are not available under Windows.
Thus, the binaries of Qemu’s ported version for Windows by Stefan Weil couldn’t provide the performance as it gives on Linux OS with KVM. Thus VirtualBox or Vmware player will be the best alternative options; still, if you want to try then here in this Qemu tutorial, we will let know the way to download, install and use Qemu on Windows 10 or 7 using its GUI VM manager Qtemu, an open-source software.
Qemu installation on Windows 10 with Qtemu GUI
Step 1: Download Qemu for Windows
From the official website of the Qemu, we can download it easily even the source code. Visit it and click on the Windows tab, it will take you to another page https://qemu.weilnetz.de to download 32 bit or 64 bit of this virtualization platform. Here we are getting the 64 bit.
Step 2: Install Qemu
Now, like any other Windows 10/7 software, just double click on the downloaded setup of Qemu and follow the installation wizard.
- Accept the suggested language setting, by default it will be English. Select the “OK” button.
- Press the NEXT button.
- Confirm the usual license terms (GNU General Public License) with “Accept“.
- All modules required for QEMU have already been selected in the “Select components” dialogue. Confirm with “Next”.
- Check the suggested destination folder and go to “Install“.
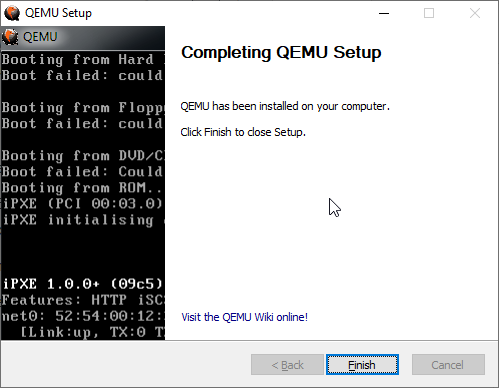
- Click on “Finish” to complete the setup of QEMU.
Step 3: Install GUI for QEMU on Windows 10
As we know the QEMU uses the command line to create virtual machines by default. But it would be not feasible for standard computer users using CLI to manage virtual machines, thus we install another open-source application to provide a Graphical user interface (GUI) to QEMU. This program is known as Qtemu which is a fork of a dead project available at https://qtemu.org.
Here are the links to download an active Qtemu project for Windows 10/8/7 available on Gitlab.
Windows x86_64 installer
If you don’t want to install it, go for the portable version.
Windows x86_64 portable
Gitlab Page Link of the project.
Step 4: Setup QEMU manager Qtemu GUI
After the installation of Qtemu run it from the Windows Start menu.
- In the first column “QEMU binaries path” copy-paste this: C:\Program Files\qemu\ Or enter the path where you have installed the QEMU.
- For the second column enter the path of the Qemu-img file that is: C:\Program Files\qemu\qemu-img.exe
- Now create a folder anywhere on your computer where you want to save the virtual machines created by QEMU. And click on the folder icon given in the front of the third column to select that particular folder.
Note: You can change this configuration any time from the Qtemu Settings.

After that click on the Finish button.
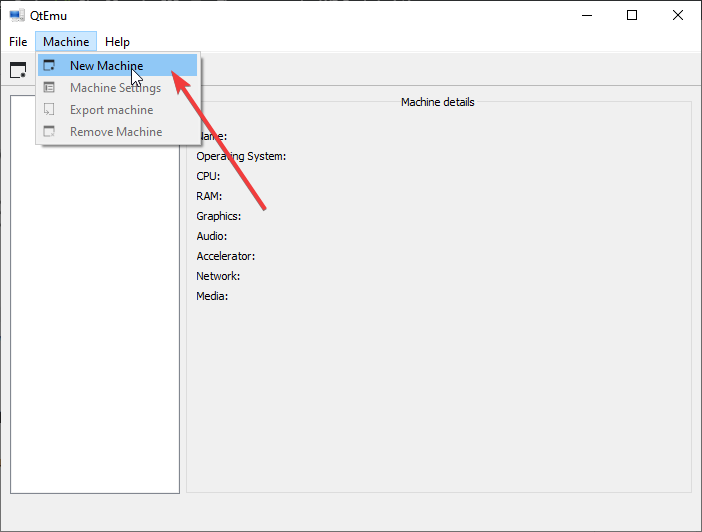
Step 5: Create a Virtual machine
Now, from Qemu GUI manager Qtemu, simply click on Machine and select New Machine.
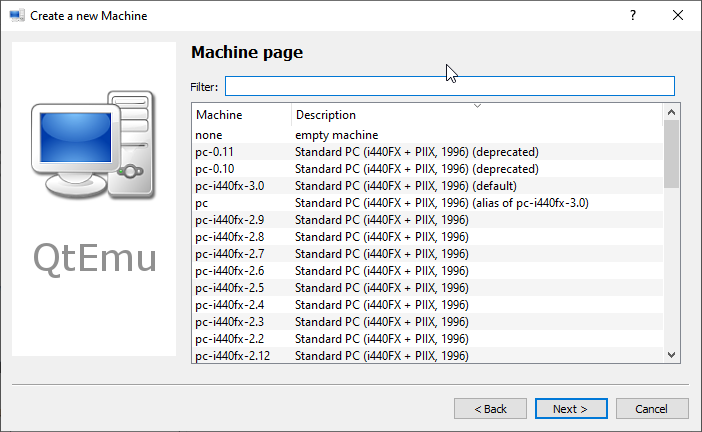
Leave the Machine which is meant to select some particular motherboard chipset.
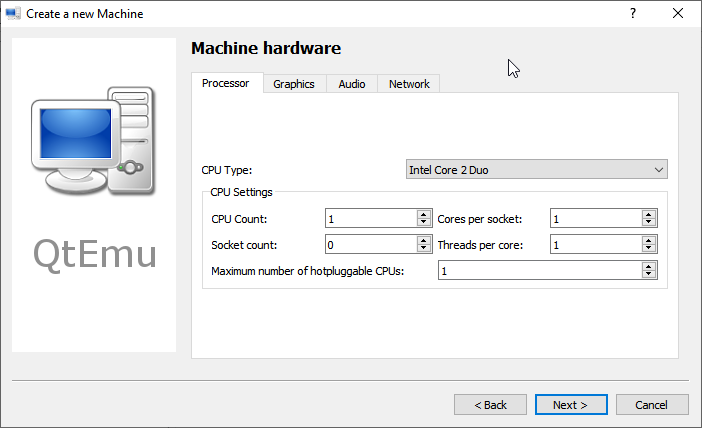
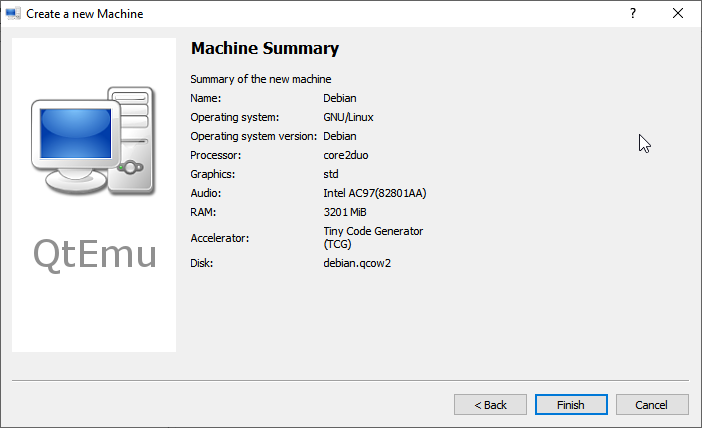
Configure the Virtual Machine hardware, select the CPU type such as Core 2 Duo, Base, or any CPU that Qemu would be able to emulate on your system whereas setting the CPU count, cores, Thread as shown below screenshot.
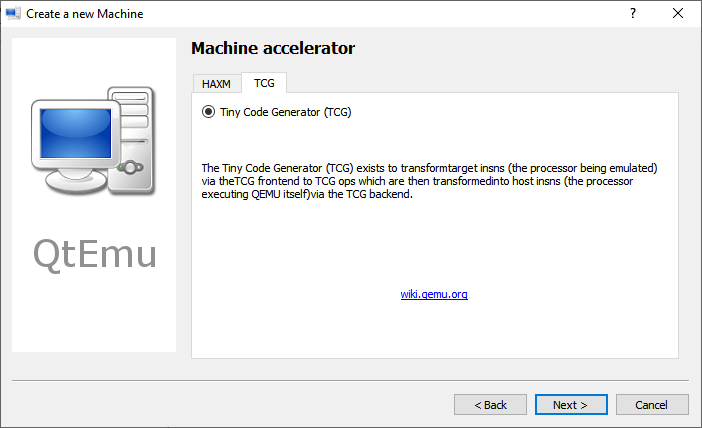
By Default, the HAXM- Hardware Accelerated Execution will be selected in the Qtemu but in case the HAXM is not supported by your system or not available, thus uncheck it and check TCG- Tiny Code Generator.
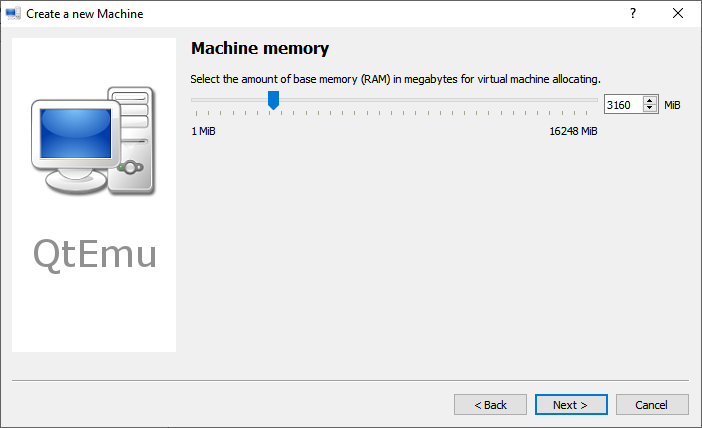
Set the amount of RAM you want to assign to your VM.

Step 6: Set bootable medium CD/DVD
Now, everything is ready, we have created a Virtual machine, its time to set a bootable medium to CD; so that our ISO file could be used while booting the QEMU VM.
For that right-click on the created VM on the QTEMU interface and select Machine Settings.
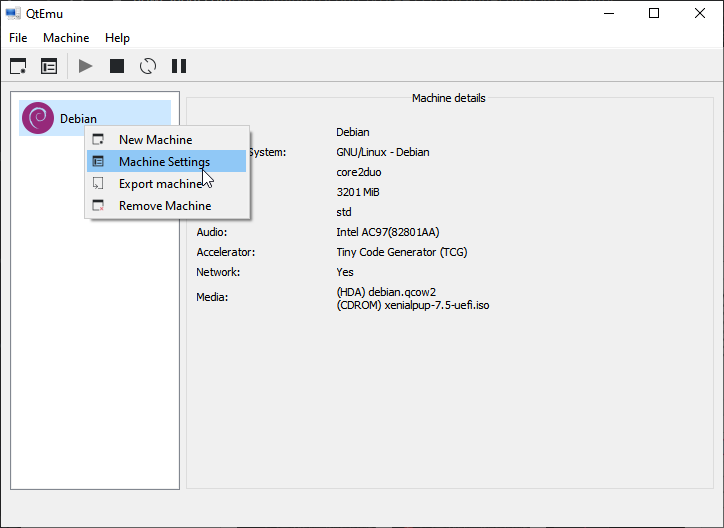
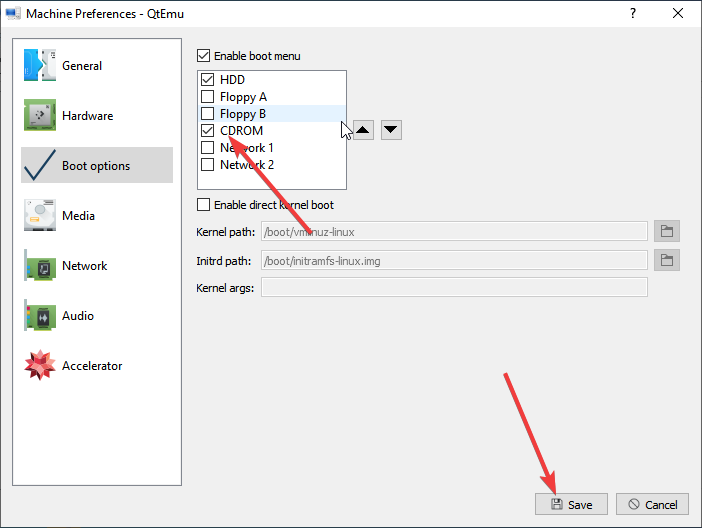
There select the Boot options from the right-side panel and after that check the “Enable boot menu” and then the CD ROM option following the Save button.
Step 7: Insert ISO file in QEMU via Qtemu GUI
Under the Machine settings, go to the Media menu and click on the CD icon. This will open the Windows file explorer, navigate to the ISO file of the OS with which you want to boot in QEMU, and click on the Save button.

Step 8: Boot Qemu Virtual Machine via GUI
Now, on the main interface of the Qtemu GUI, select the created VM and click on the start button. This will open the boot screen.
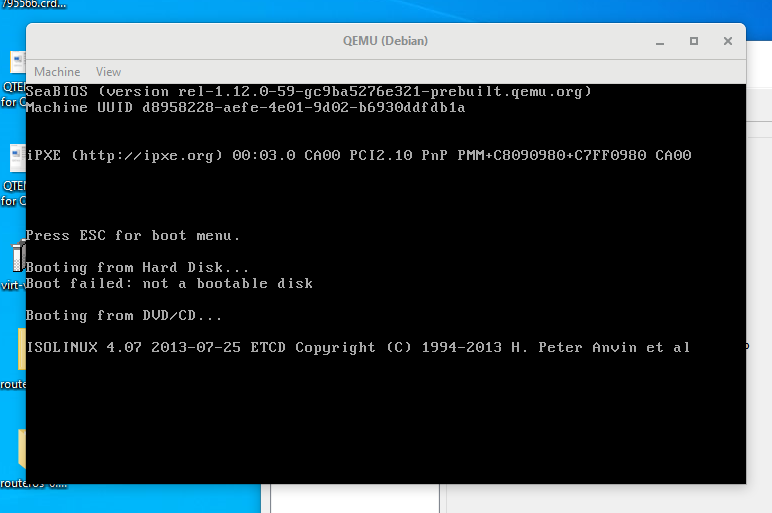
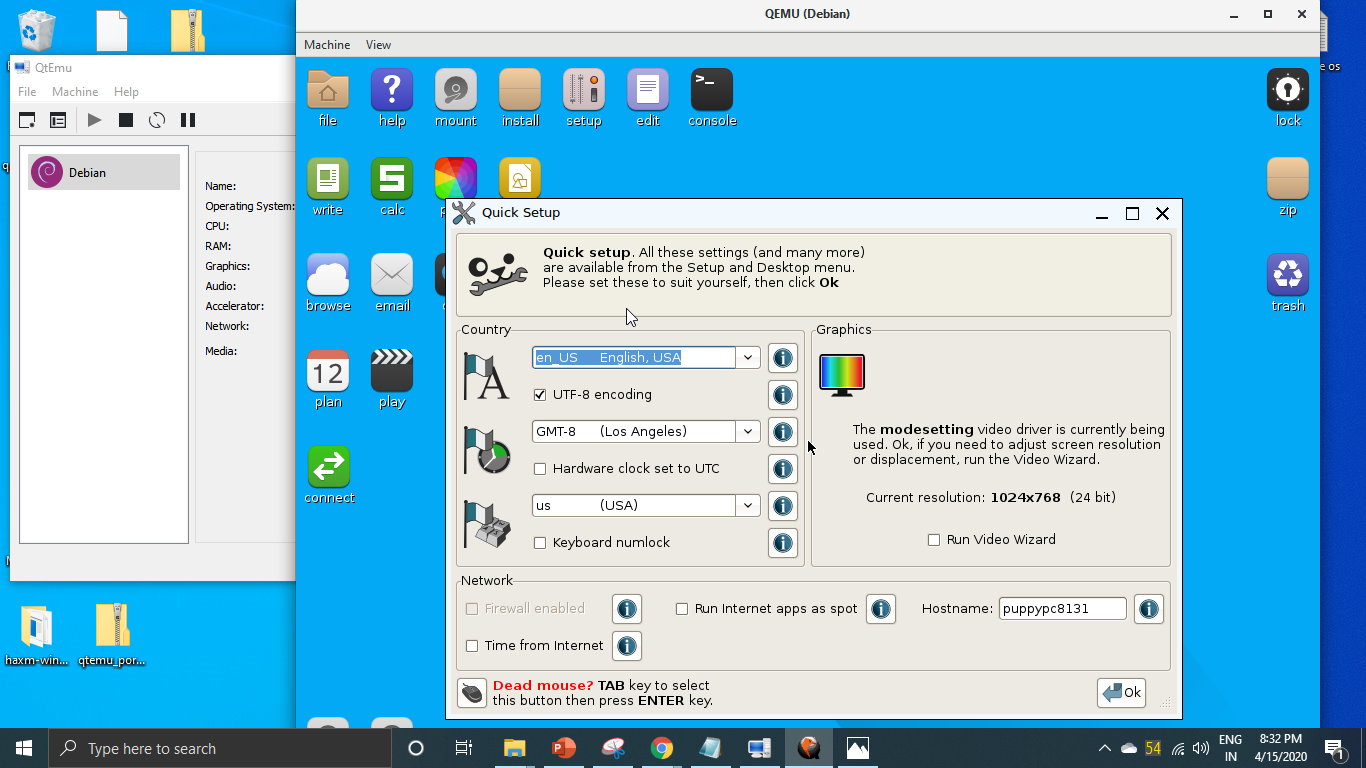
Wait for a few minutes depending upon the OS distribution you are using, it will show the LIVE screen of the same. However, I tried to boot and install Windows 10 on Qemu using the GUI but it was quite sluggish and slow.
Verdict:
Although the CLI can be used to create and manage a Virtual machine on Windows 10 using the QEMU, with the Qtemu GUI tool it becomes quite easy, however, in my case it worked well with Lightweight Linux Distros but for Windows guest VMs quite slow and low performance. I recommend using VirtualBox instead. Yet, if someone wants to experience Qemu on Windows 10 this is the easiest possible way. Still, be cautious with Qtemu hardware configuration because slight here and there will not let you boot the VM.
DAEMON Tools Lite 12.2.0.2259
Daemon Tools — небольшое, бесплатное, но при этом очень функциональное приложение для создания…
Alcohol 120% 2.1.1.2201
Alcohol 120% — популярный эмулятор CD/DVD-дисков, который создает на жестком диске ПК пользователя…
Alcohol 120% 2.1.1.2201 Free Edition
Alcohol 120% Free — бесплатная версия популярного эмулятора приводов. Программа умеет записывать…
DAEMON Tools Ultra 6.2.0.1813
DAEMON Tools Ultra — мощное многофункциональное приложение, которое сочетает в себе все основные…
Alcohol 52% Free Edition 2.1.1.2201
Alcohol 52% Free Edition — бесплатная версия популярного эмулятора CD/DVD-приводов. Позволяет создавать…
DAEMON Tools Pro 8.3.1.0811
DAEMON Tools Pro — популярный инструмент для эмуляции оптических дисков и виртуализации приводов с дополнительными возможностями монтирования образов…
In the world of virtualization technology, QEMU (Quick Emulator) stands out as one of the best options for users looking to run multiple operating systems on a single hardware configuration. It is an open-source emulator that enables you to run various operating systems alongside Windows. With the release of Windows 11, many users are exploring how to utilize their powerful machines for different operating system experiences, and QEMU offers a versatile solution for this purpose.
This article serves as a comprehensive guide for installing QEMU on Windows 11, ensuring that you can efficiently run virtual machines with minimal hassle. We will cover everything from system requirements to step-by-step installation instructions, along with troubleshooting tips and additional configurations to enhance your virtualization experience.
Understanding QEMU
Before diving into the installation process, let’s briefly explore what QEMU is and what it can do:
-
Emulator: QEMU is an open-source machine emulator and virtualizer that can be used to emulate various hardware environments. This makes it possible to run different operating systems without the need for dual-booting.
-
Use Cases:
- Testing software on different operating systems.
- Running legacy systems that require older operating system versions.
- Setting up isolated environments for security testing or development work.
-
Performance: QEMU can be run in two modes: full system emulation (simulating a complete hardware environment) or user-mode emulation (running Linux binaries on a different architecture). When combined with KVM (Kernel-based Virtual Machine), QEMU’s performance can be significantly enhanced by utilizing hardware virtualization features.
System Requirements
Before installing QEMU on Windows 11, ensure that your system meets the following requirements:
- Operating System: Windows 11 (64-bit).
- Processor: A CPU with hardware virtualization support (Intel VT-x or AMD-V).
- Memory: At least 4 GB of RAM (8 GB or more recommended for better performance).
- Disk Space: Sufficient storage for installation and the virtual machines you plan to create. A minimum of 20 GB is recommended.
- Virtualization Support: Ensure that virtualization is enabled in your BIOS settings.
Downloading QEMU
-
Official Website: The first step in the installation process is downloading QEMU. The official QEMU website provides pre-built binaries for Windows. You can visit the QEMU download page at QEMU Official Downloads.
-
Choose the Package: Depending on your needs, QEMU provides several packages. For most users, the «Windows Binaries» option is sufficient. Follow the link for the latest release.
-
Select the Architecture: Choose the appropriate version based on your architecture (most likely «x86_64» for modern processors). Download the .zip file.
Installing QEMU on Windows 11
Once you have downloaded the QEMU binaries, you can proceed with the installation process:
-
Extract the Files:
- Navigate to the folder in which you downloaded the QEMU .zip file.
- Right-click the .zip file and choose «Extract All.»
- Select a destination folder where you want to extract the files (e.g.,
C:Program FilesQEMU). - Click «Extract.»
-
Add QEMU to the System PATH:
Adding QEMU to the system PATH allows you to run QEMU commands from the Command Prompt without needing to navigate to the QEMU directory each time.- Right-click the Start button and select «System.»
- Click «About» in the left sidebar.
- Scroll down and click on «Advanced system settings.»
- In the System Properties window, click on the «Environment Variables…» button.
- In the «System variables» section, find and select the variable named «Path,» then click «Edit.»
- Click «New» and enter the path to the QEMU installation directory (e.g.,
C:Program FilesQEMU). - Click «OK» to close all dialogs.
-
Verify Installation:
- Open the Command Prompt by typing
cmdin the Windows search bar and pressing Enter. - Type
qemu-system-x86_64 --versionand press Enter. If QEMU is installed correctly, you should see the version number displayed.
- Open the Command Prompt by typing
Configuring QEMU for Virtualization
When installing QEMU on Windows, there are several configuration steps to ensure smooth operation:
-
Download Additional Components:
Depending on your intended use, you may want to download additional drivers or software, such as the VirtIO driver ISO. This package helps improve the performance of guest operating systems, particularly Windows guests.- Download the VirtIO drivers from the Fedora Project.
-
Creating a Virtual Machine:
To create a new virtual machine, use the following command in the Command Prompt:qemu-system-x86_64 -m 2048 -hda /path/to/your/vm/image.qcow2 -cdrom /path/to/your/installer.iso -boot dReplace
/path/to/your/vm/image.qcow2with the file path where you want to store the virtual machine’s image and/path/to/your/installer.isowith the path to your OS installation ISO. -
Adjusting Resources: Change the
-mparameter to allocate more memory to your virtual machines as needed. The-hdaflag specifies your hard disk image, and you can create an image with the following command:qemu-img create -f qcow2 /path/to/your/vm/image.qcow2 30GHere, replace
30Gwith the size you want for your virtual hard drive.
Managing Virtual Machines
Once you have set up QEMU and created a virtual machine, you’ll need to manage it efficiently. Some basic commands and options are:
-
Start a Virtual Machine: Use the command provided in the previous section. You can customize options as per your requirements.
-
Accessing the Console: To use a console directly in your virtual machine, you can modify your command by adding the
-nographicoption. -
Network Configuration: To enable internet access within your virtual machine, additional configurations such as user-mode networking or TAP devices may be required.
Common Troubleshooting Tips
While most installations proceed without issues, problems can arise. Here are some common problems and their solutions:
-
QEMU Not Recognized: If your command prompt returns a «command not found» error, ensure that QEMU is added to the PATH correctly and that you have reopened the Command Prompt session.
-
Virtualization Not Enabled: If your virtual machines are running slowly or fail to launch, check your BIOS settings to confirm that Intel VT-x or AMD-V support is enabled.
-
Network Issues: If you cannot connect to the internet from a virtual machine, revisit your network settings and ensure the correct drivers are installed.
-
Performance Issues: If you experience performance issues, consider allocating more system resources (CPU, RAM) to your virtual machines, and ensure virtualization is enabled in the BIOS.
Advanced Configurations
For users looking to optimize their virtual machines, several advanced configurations can be implemented:
-
Using QEMU with KVM: For users who require better performance, understanding how to enable and utilize KVM as a backend for QEMU can yield significant performance improvements. Note that KVM runs only on Linux hosts but offers a powerful virtualization capability when combined with QEMU.
-
Creating Snapshots: QEMU allows users to create snapshots of virtual machines. This is especially useful for testing software or system configurations without risking the main setup. You can create a snapshot using:
qemu-img snapshot -c snapshot_name /path/to/your/vm/image.qcow2 -
Direct Access to Host Devices: QEMU provides options for passing through devices from the host to the guest using the
-deviceand-driveoptions. This capability allows users to interact with hardware directly from within their virtual machines. -
Scripting with QEMU: Automate your QEMU management by creating scripts. Common tasks like starting virtual machines, taking snapshots, and managing configurations can be scripted to streamline processes and enhance your workflow.
Conclusion
Installing and configuring QEMU on Windows 11 provides a valuable tool for anyone interested in virtualization. From running different operating systems to testing software in isolated environments, QEMU proves to be an effective and efficient solution. With the step-by-step guide presented in this article, users can navigate through the installation process, troubleshoot common issues, and explore advanced functionalities to maximize their virtualization needs.
Virtualization is an essential skill in today’s technology landscape, whether you’re a developer, tester, or an enthusiast. Using QEMU, your Windows 11 system can become a robust platform for simulating different computing environments. By following the outlined steps diligently, you can accelerate your learning curve and enhance your technical capabilities with QEMU in a Windows 11 setup.
Provide feedback
Saved searches
Use saved searches to filter your results more quickly
Sign up