
Installation
You can install from PyPI:
$ pip install TA-Lib
Or checkout the sources and run setup.py yourself:
$ python setup.py install
Troubleshooting Install Errors
func.c:256:28: fatal error: ta-lib/ta_libc.h: No such file or directory
compilation terminated.
If you get build errors like this, it typically means that it can’t find the
underlying TA-Lib library and needs to be installed:
Dependencies
To use TA-Lib for python, you need to have the TA-Lib
already installed:
Mac OS X
$ brew install ta-lib
Windows
Download ta-lib-0.4.0-msvc.zip
and unzip to C:\ta-lib
Linux
Download ta-lib-0.4.0-src.tar.gz and:
$ tar zxvf ta-lib-0.4.0-src.tar.gz
$ cd ta-lib
$ ./configure --prefix=/usr
$ make
$ sudo make install
If you build
TA-Libusingmake -jXit will fail but that’s OK!
Simply rerunmake -jXfollowed by[sudo] make install.
Documentation Index
Next: Using the Function API
TA-Lib
This is a Python wrapper for TA-LIB based on Cython
instead of SWIG. From the homepage:
TA-Lib is widely used by trading software developers requiring to perform
technical analysis of financial market data.
- Includes 150+ indicators such as ADX, MACD, RSI, Stochastic, Bollinger
Bands, etc.- Candlestick pattern recognition
- Open-source API for C/C++, Java, Perl, Python and 100% Managed .NET
The original Python bindings included with TA-Lib use
SWIG which unfortunately are difficult to install and
aren’t as efficient as they could be. Therefore this project uses
Cython and Numpy to efficiently
and cleanly bind to TA-Lib — producing results 2-4 times faster than the
SWIG interface.
In addition, this project also supports the use of the
Polars and Pandas
libraries.
Versions
The upstream TA-Lib C library released version 0.6.1 and changed the library
name to -lta-lib from -lta_lib. After trying to support both via
autodetect and having some issues, we have decided to currently support three
feature branches:
ta-lib-python0.4.x (supportsta-lib0.4.x andnumpy1)ta-lib-python0.5.x (supportsta-lib0.4.x andnumpy2)ta-lib-python0.6.x (supportsta-lib0.6.x andnumpy2)
Installation
You can install from PyPI:
$ python -m pip install TA-Lib
Or checkout the sources and run setup.py yourself:
$ python setup.py install
It also appears possible to install via
Conda Forge:
$ conda install -c conda-forge ta-lib
Dependencies
To use TA-Lib for python, you need to have the TA-Lib
already installed. You should probably follow their installation
directions for your platform, but some
suggestions are included below for reference.
Some Conda Forge users have reported success installing the underlying TA-Lib C
library using the libta-lib package:
$ conda install -c conda-forge libta-lib
Mac OS X
You can simply install using Homebrew:
If you are using Apple Silicon, such as the M1 processors, and building mixed
architecture Homebrew projects, you might want to make sure it’s being built
for your architecture:
$ arch -arm64 brew install ta-lib
And perhaps you can set these before installing with pip:
$ export TA_INCLUDE_PATH="$(brew --prefix ta-lib)/include"
$ export TA_LIBRARY_PATH="$(brew --prefix ta-lib)/lib"
You might also find this helpful, particularly if you have tried several
different installations without success:
$ your-arm64-python -m pip install --no-cache-dir ta-lib
Windows
For 64-bit Windows, the easiest way is to get the executable installer:
- Download ta-lib-0.6.4-windows-x86_64.msi.
- Run the Installer or run
msiexecfrom the command-line.
Alternatively, if you prefer to get the libraries without installing, or
would like to use the 32-bit version:
- Intel/AMD 64-bit ta-lib-0.6.4-windows-x86_64.zip
- Intel/AMD 32-bit ta-lib-0.6.4-windows-x86_32.zip
Linux
Download
ta-lib-0.6.4-src.tar.gz
and:
$ tar -xzf ta-lib-0.6.4-src.tar.gz
$ cd ta-lib-0.6.4/
$ ./configure --prefix=/usr
$ make
$ sudo make install
If you build
TA-Libusingmake -jXit will fail but that’s OK!
Simply rerunmake -jXfollowed by[sudo] make install.
Note: if your directory path includes spaces, the installation will probably
fail with No such file or directory errors.
Troubleshooting
If you get a warning that looks like this:
setup.py:79: UserWarning: Cannot find ta-lib library, installation may fail.
warnings.warn('Cannot find ta-lib library, installation may fail.')
This typically means setup.py can’t find the underlying TA-Lib
library, a dependency which needs to be installed.
If you installed the underlying TA-Lib library with a custom prefix
(e.g., with ./configure --prefix=$PREFIX), then when you go to install
this python wrapper you can specify additional search paths to find the
library and include files for the underlying TA-Lib library using the
TA_LIBRARY_PATH and TA_INCLUDE_PATH environment variables:
$ export TA_LIBRARY_PATH=$PREFIX/lib
$ export TA_INCLUDE_PATH=$PREFIX/include
$ python setup.py install # or pip install ta-lib
Sometimes installation will produce build errors like this:
talib/_ta_lib.c:601:10: fatal error: ta-lib/ta_defs.h: No such file or directory
  601 | #include "ta-lib/ta_defs.h"
      |          ^~~~~~~~~~~~~~~~~~
compilation terminated.
or:
common.obj : error LNK2001: unresolved external symbol TA_SetUnstablePeriod
common.obj : error LNK2001: unresolved external symbol TA_Shutdown
common.obj : error LNK2001: unresolved external symbol TA_Initialize
common.obj : error LNK2001: unresolved external symbol TA_GetUnstablePeriod
common.obj : error LNK2001: unresolved external symbol TA_GetVersionString
This typically means that it can’t find the underlying TA-Lib library, a
dependency which needs to be installed. On Windows, this could be caused by
installing the 32-bit binary distribution of the underlying TA-Lib library,
but trying to use it with 64-bit Python.
Sometimes installation will fail with errors like this:
talib/common.c:8:22: fatal error: pyconfig.h: No such file or directory
 #include "pyconfig.h"
                      ^
compilation terminated.
error: command 'x86_64-linux-gnu-gcc' failed with exit status 1
This typically means that you need the Python headers, and should run
something like:
$ sudo apt-get install python3-dev
Sometimes building the underlying TA-Lib library has errors running
make that look like this:
../libtool: line 1717: cd: .libs/libta_lib.lax/libta_abstract.a: No such file or directory
make[2]: *** [libta_lib.la] Error 1
make[1]: *** [all-recursive] Error 1
make: *** [all-recursive] Error 1
This might mean that the directory path to the underlying TA-Lib library
has spaces in the directory names. Try putting it in a path that does not have
any spaces and trying again.
Sometimes you might get this error running setup.py:
/usr/include/limits.h:26:10: fatal error: bits/libc-header-start.h: No such file or directory
#include <bits/libc-header-start.h>
         ^~~~~~~~~~~~~~~~~~~~~~~~~~
This is likely an issue with trying to compile for 32-bit platform but
without the appropriate headers. You might find some success looking at the
first answer to this question.
If you get an error on macOS like this:
code signature in <141BC883-189B-322C-AE90-CBF6B5206F67>
'python3.9/site-packages/talib/_ta_lib.cpython-39-darwin.so' not valid for
use in process: Trying to load an unsigned library)
You might look at this question
and use xcrun codesign to fix it.
If you wonder why STOCHRSI gives you different results than you expect,
probably you want STOCH applied to RSI, which is a little different
than the STOCHRSI which is STOCHF applied to RSI:
>>> import talib
>>> import numpy as np
>>> c = np.random.randn(100)

# this is the library function
>>> k, d = talib.STOCHRSI(c)

# this produces the same result, calling STOCHF
>>> rsi = talib.RSI(c)
>>> k, d = talib.STOCHF(rsi, rsi, rsi)

# you might want this instead, calling STOCH
>>> rsi = talib.RSI(c)
>>> k, d = talib.STOCH(rsi, rsi, rsi)
If the build appears to hang, you might be running on a VM with not enough
memory — try 1 GB or 2 GB.
It has also been reported that using a swapfile could help, for example:
$ sudo fallocate -l 1G /swapfile
$ sudo chmod 600 /swapfile
$ sudo mkswap /swapfile
$ sudo swapon /swapfile
If you get «permission denied» errors such as this, you might need to give
your user access to the location where the underlying TA-Lib C library is
installed — or install it to a user-accessible location.
talib/_ta_lib.c:747:28: fatal error: /usr/include/ta-lib/ta_defs.h: Permission denied
 #include "ta-lib/ta-defs.h"
                            ^
compilation terminated
error: command 'gcc' failed with exit status 1
If you’re having trouble compiling the underlying TA-Lib C library on ARM64,
you might need to configure it with an explicit build type before running
make and make install, for example:
$ ./configure --build=aarch64-unknown-linux-gnu
This is caused by old config.guess file, so another way to solve this is
to copy a newer version of config.guess into the underlying TA-Lib C library
sources:
$ cp /usr/share/automake-1.16/config.guess /path/to/extracted/ta-lib/config.guess
And then re-run configure:
If you’re having trouble using PyInstaller and
get an error that looks like this:
...site-packages\PyInstaller\loader\pyimod03_importers.py", line 493, in exec_module
    exec(bytecode, module.__dict__)
  File "talib\__init__.py", line 72, in <module>
ModuleNotFoundError: No module named 'talib.stream'
Then, perhaps you can use the --hidden-import argument to fix this:
$ pyinstaller --hidden-import talib.stream "replaceToYourFileName.py"
If you want to use numpy<2, then you should use ta-lib<0.5.
If you want to use numpy>=2, then you should use ta-lib>=0.5.
If you have trouble getting the code autocompletions to work in Visual
Studio Code, a suggestion was made to look for the Python extension
settings, and an option for Language Server, and change it from
Default (which means Pylance if it is installed, Jedi otherwise, to
manually set Jedi and the completions should work. It is possible that
you might need to install it
manually for this to
work.
Function API
Similar to TA-Lib, the Function API provides a lightweight wrapper of the
exposed TA-Lib indicators.
Each function returns an output array and have default values for their
parameters, unless specified as keyword arguments. Typically, these functions
will have an initial «lookback» period (a required number of observations
before an output is generated) set to NaN.
For convenience, the Function API supports both numpy.ndarray and
pandas.Series and polars.Series inputs.
All of the following examples use the Function API:
import numpy as np
import talib

close = np.random.random(100)
Calculate a simple moving average of the close prices:
output = talib.SMA(close)
Calculating bollinger bands, with triple exponential moving average:
from talib import MA_Type

upper, middle, lower = talib.BBANDS(close, matype=MA_Type.T3)
Calculating momentum of the close prices, with a time period of 5:
output = talib.MOM(close, timeperiod=5)
NaN’s
The underlying TA-Lib C library handles NaN’s in a sometimes surprising manner
by typically propagating NaN’s to the end of the output, for example:
>>> c = np.array([1.0, 2.0, 3.0, np.nan, 4.0, 5.0, 6.0])

>>> talib.SMA(c, 3)
array([nan, nan,  2., nan, nan, nan, nan])
You can compare that to a Pandas rolling mean, where their approach is to
output NaN until enough «lookback» values are observed to generate new outputs:
>>> c = pandas.Series([1.0, 2.0, 3.0, np.nan, 4.0, 5.0, 6.0])

>>> c.rolling(3).mean()
0    NaN
1    NaN
2    2.0
3    NaN
4    NaN
5    NaN
6    5.0
dtype: float64
Abstract API
If you’re already familiar with using the function API, you should feel right
at home using the Abstract API.
Every function takes a collection of named inputs, either a dict of
numpy.ndarray or pandas.Series or polars.Series, or a
pandas.DataFrame or polars.DataFrame. If a pandas.DataFrame or
polars.DataFrame is provided, the output is returned as the same type
with named output columns.
For example, inputs could be provided for the typical «OHLCV» data:
import numpy as np

# note that all ndarrays must be the same length!
inputs = {
    'open': np.random.random(100),
    'high': np.random.random(100),
    'low': np.random.random(100),
    'close': np.random.random(100),
    'volume': np.random.random(100)
}
Functions can either be imported directly or instantiated by name:
from talib import abstract

# directly
SMA = abstract.SMA

# or by name
SMA = abstract.Function('sma')
From there, calling functions is basically the same as the function API:
from talib.abstract import *

# uses close prices (default)
output = SMA(inputs, timeperiod=25)

# uses open prices
output = SMA(inputs, timeperiod=25, price='open')

# uses close prices (default)
upper, middle, lower = BBANDS(inputs, 20, 2.0, 2.0)

# uses high, low, close (default)
slowk, slowd = STOCH(inputs, 5, 3, 0, 3, 0) # uses high, low, close by default

# uses high, low, open instead
slowk, slowd = STOCH(inputs, 5, 3, 0, 3, 0, prices=['high', 'low', 'open'])
Streaming API
An experimental Streaming API was added that allows users to compute the latest
value of an indicator. This can be faster than using the Function API, for
example in an application that receives streaming data, and wants to know just
the most recent updated indicator value.
import talib
from talib import stream

close = np.random.random(100)

# the Function API
output = talib.SMA(close)

# the Streaming API
latest = stream.SMA(close)

# the latest value is the same as the last output value
assert (output[-1] - latest) < 0.00001
Supported Indicators and Functions
We can show all the TA functions supported by TA-Lib, either as a list or
as a dict sorted by group (e.g. «Overlap Studies», «Momentum Indicators»,
etc):
import talib

# list of functions
for name in talib.get_functions():
    print(name)

# dict of functions by group
for group, names in talib.get_function_groups().items():
    print(group)
    for name in names:
        print(f"  {name}")
Indicator Groups
- Overlap Studies
- Momentum Indicators
- Volume Indicators
- Volatility Indicators
- Price Transform
- Cycle Indicators
- Pattern Recognition
Overlap Studies
BBANDS               Bollinger Bands
DEMA                 Double Exponential Moving Average
EMA                  Exponential Moving Average
HT_TRENDLINE         Hilbert Transform - Instantaneous Trendline
KAMA                 Kaufman Adaptive Moving Average
MA                   Moving average
MAMA                 MESA Adaptive Moving Average
MAVP                 Moving average with variable period
MIDPOINT             MidPoint over period
MIDPRICE             Midpoint Price over period
SAR                  Parabolic SAR
SAREXT               Parabolic SAR - Extended
SMA                  Simple Moving Average
T3                   Triple Exponential Moving Average (T3)
TEMA                 Triple Exponential Moving Average
TRIMA                Triangular Moving Average
WMA                  Weighted Moving Average
Momentum Indicators
ADX                  Average Directional Movement Index
ADXR                 Average Directional Movement Index Rating
APO                  Absolute Price Oscillator
AROON                Aroon
AROONOSC             Aroon Oscillator
BOP                  Balance Of Power
CCI                  Commodity Channel Index
CMO                  Chande Momentum Oscillator
DX                   Directional Movement Index
MACD                 Moving Average Convergence/Divergence
MACDEXT              MACD with controllable MA type
MACDFIX              Moving Average Convergence/Divergence Fix 12/26
MFI                  Money Flow Index
MINUS_DI             Minus Directional Indicator
MINUS_DM             Minus Directional Movement
MOM                  Momentum
PLUS_DI              Plus Directional Indicator
PLUS_DM              Plus Directional Movement
PPO                  Percentage Price Oscillator
ROC                  Rate of change : ((price/prevPrice)-1)*100
ROCP                 Rate of change Percentage: (price-prevPrice)/prevPrice
ROCR                 Rate of change ratio: (price/prevPrice)
ROCR100              Rate of change ratio 100 scale: (price/prevPrice)*100
RSI                  Relative Strength Index
STOCH                Stochastic
STOCHF               Stochastic Fast
STOCHRSI             Stochastic Relative Strength Index
TRIX                 1-day Rate-Of-Change (ROC) of a Triple Smooth EMA
ULTOSC               Ultimate Oscillator
WILLR                Williams' %R
Volume Indicators
AD                   Chaikin A/D Line
ADOSC                Chaikin A/D Oscillator
OBV                  On Balance Volume
Cycle Indicators
HT_DCPERIOD          Hilbert Transform - Dominant Cycle Period
HT_DCPHASE           Hilbert Transform - Dominant Cycle Phase
HT_PHASOR            Hilbert Transform - Phasor Components
HT_SINE              Hilbert Transform - SineWave
HT_TRENDMODE         Hilbert Transform - Trend vs Cycle Mode
Price Transform
AVGPRICE             Average Price
MEDPRICE             Median Price
TYPPRICE             Typical Price
WCLPRICE             Weighted Close Price
Volatility Indicators
ATR                  Average True Range
NATR                 Normalized Average True Range
TRANGE               True Range
Pattern Recognition
CDL2CROWS            Two Crows
CDL3BLACKCROWS       Three Black Crows
CDL3INSIDE           Three Inside Up/Down
CDL3LINESTRIKE       Three-Line Strike
CDL3OUTSIDE          Three Outside Up/Down
CDL3STARSINSOUTH     Three Stars In The South
CDL3WHITESOLDIERS    Three Advancing White Soldiers
CDLABANDONEDBABY     Abandoned Baby
CDLADVANCEBLOCK      Advance Block
CDLBELTHOLD          Belt-hold
CDLBREAKAWAY         Breakaway
CDLCLOSINGMARUBOZU   Closing Marubozu
CDLCONCEALBABYSWALL  Concealing Baby Swallow
CDLCOUNTERATTACK     Counterattack
CDLDARKCLOUDCOVER    Dark Cloud Cover
CDLDOJI              Doji
CDLDOJISTAR          Doji Star
CDLDRAGONFLYDOJI     Dragonfly Doji
CDLENGULFING         Engulfing Pattern
CDLEVENINGDOJISTAR   Evening Doji Star
CDLEVENINGSTAR       Evening Star
CDLGAPSIDESIDEWHITE  Up/Down-gap side-by-side white lines
CDLGRAVESTONEDOJI    Gravestone Doji
CDLHAMMER            Hammer
CDLHANGINGMAN        Hanging Man
CDLHARAMI            Harami Pattern
CDLHARAMICROSS       Harami Cross Pattern
CDLHIGHWAVE          High-Wave Candle
CDLHIKKAKE           Hikkake Pattern
CDLHIKKAKEMOD        Modified Hikkake Pattern
CDLHOMINGPIGEON      Homing Pigeon
CDLIDENTICAL3CROWS   Identical Three Crows
CDLINNECK            In-Neck Pattern
CDLINVERTEDHAMMER    Inverted Hammer
CDLKICKING           Kicking
CDLKICKINGBYLENGTH   Kicking - bull/bear determined by the longer marubozu
CDLLADDERBOTTOM      Ladder Bottom
CDLLONGLEGGEDDOJI    Long Legged Doji
CDLLONGLINE          Long Line Candle
CDLMARUBOZU          Marubozu
CDLMATCHINGLOW       Matching Low
CDLMATHOLD           Mat Hold
CDLMORNINGDOJISTAR   Morning Doji Star
CDLMORNINGSTAR       Morning Star
CDLONNECK            On-Neck Pattern
CDLPIERCING          Piercing Pattern
CDLRICKSHAWMAN       Rickshaw Man
CDLRISEFALL3METHODS  Rising/Falling Three Methods
CDLSEPARATINGLINES   Separating Lines
CDLSHOOTINGSTAR      Shooting Star
CDLSHORTLINE         Short Line Candle
CDLSPINNINGTOP       Spinning Top
CDLSTALLEDPATTERN    Stalled Pattern
CDLSTICKSANDWICH     Stick Sandwich
CDLTAKURI            Takuri (Dragonfly Doji with very long lower shadow)
CDLTASUKIGAP         Tasuki Gap
CDLTHRUSTING         Thrusting Pattern
CDLTRISTAR           Tristar Pattern
CDLUNIQUE3RIVER      Unique 3 River
CDLUPSIDEGAP2CROWS   Upside Gap Two Crows
CDLXSIDEGAP3METHODS  Upside/Downside Gap Three Methods
Statistic Functions
BETA                 Beta
CORREL               Pearson's Correlation Coefficient (r)
LINEARREG            Linear Regression
LINEARREG_ANGLE      Linear Regression Angle
LINEARREG_INTERCEPT  Linear Regression Intercept
LINEARREG_SLOPE      Linear Regression Slope
STDDEV               Standard Deviation
TSF                  Time Series Forecast
VAR                  Variance
By Ishan Shah, Rekhit Pachanekar and Gaurav Singh
Pre-requisite blogs:
- An Introduction to Python for Trading: Benefits, Strategies, and More
- Setting Up Python On Your System
Level of this blog: Foundation/Beginner
Technical indicators are calculated using historical price and volume data to predict the market direction. These indicators are added on charts using which you can set your entry and exit signals.
Won’t it be amazing if you can compute these technical indicators in python in a few lines of code and backtest the performance of it on many financial securities?
What started off as a hobby by Mario Fortier, Ta-Lib python library quickly rose to become one of the most famous libraries for technical analysis of stocks and other financial securities. Ta-lib includes 150+ indicators such as ADX, MACD, RSI and Bollinger Bands and candlestick pattern recognition.
However, it is difficult and sometimes frustrating to install Ta-Lib in your python. But don’t worry, in this article, we will simplify the installation for you so that you can focus on creating and backtesting strategies.
We will cover the following topics in this Ta-Lib installation tutorial.
-
Easier Method
- Install Ta-Lib Across Platforms Using Anaconda Prompt
-
Alternate Method
- Install Ta-Lib on Windows PC
- Install Ta-Lib on MacOS
- Install Ta-Lib on Linux
- Technical Indicators using Python Ta-Lib
- FAQs for TA-Lib Installation
Before we begin, why was Python Ta-Lib created in the first place? Let us think about the reason functions were made. It was realised that instead of writing the same code, we could create a function and reduce the code length by a huge margin. It is the same logic we apply to Ta-Lib. Instead of writing a few lines of code to first find the upper and lower bands and then the Bollinger band, we use Ta-Lib and input just one line of code to get the result. That is all! Keeping that in mind, let us begin with the tutorial on Python Ta-Lib.
Easier Method
Install Ta-Lib Across Platforms Using Anaconda Prompt
Anaconda is an open-source Python distribution platform that helps individuals, as well as commercial enterprises, implement their Python codes easily. It also makes life easier when it comes to installing various Python libraries.
For this process, we had created a virtual environment with the name “my_project”.

If you want to create a virtual environment which has all the required libraries used for data analysis, you can head on over to the tutorial: Setting Up Python On Your System.
To install Ta-Lib, you will first install Anaconda and then open the Anaconda prompt.
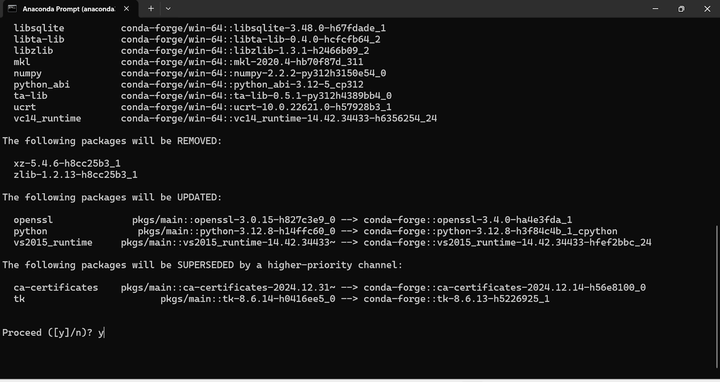
You would then write the code, “conda install -c conda-forge ta-lib”, and press the “Enter” key.

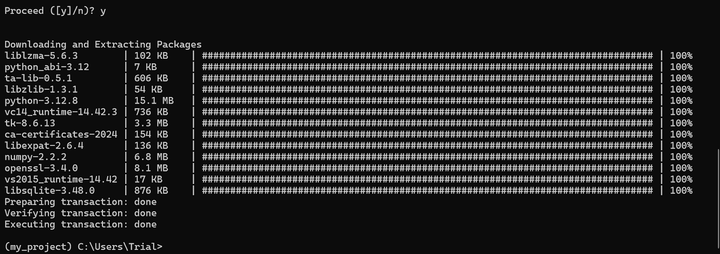
Note: The packages are first downloaded from the respective web location. You will then be prompted to confirm the installation process by pressing “y” on the keyboard. This acts as a confirmation for the installer to install the necessary files.
After a few moments, the ta-lib package will be installed.
That’s all there is to it. Most of the time this method would help you install the package, but if you still face any problems, read on to find the installation instructions as per the operating system.
Alternate Method
Install Ta-Lib on Windows PC
Step 0: We suggest the Anaconda installer for installing Python as it is easier to work with when it comes to programming in Python.
Step 1: Once you have installed Anaconda, you will use the Anaconda prompt window to install the relevant files.
Before we download the Python Ta-Lib files, we have to verify the Python version as well as the Windows System architecture (32-bit or 64-bit) on our computer.
You can find the version installed in your system by simply writing the following code in the Anaconda prompt window: python —version
You will get the output as shown below:

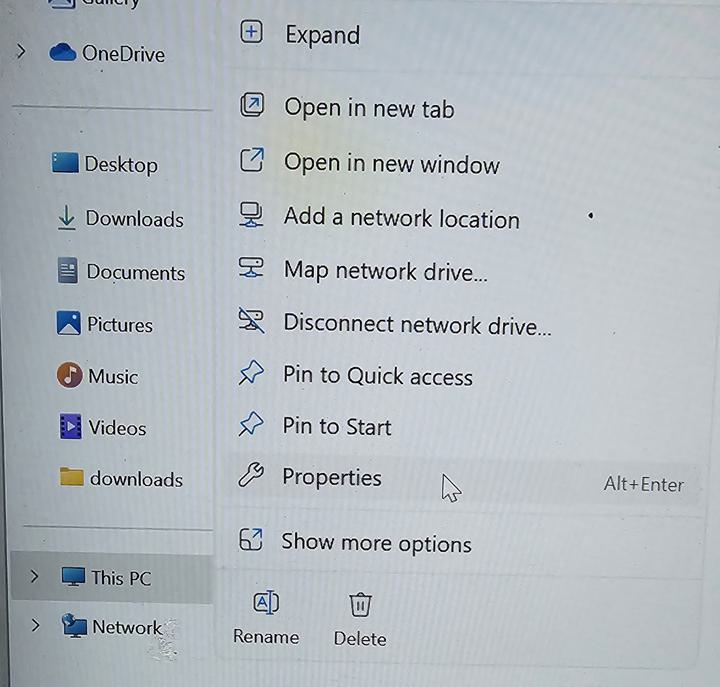
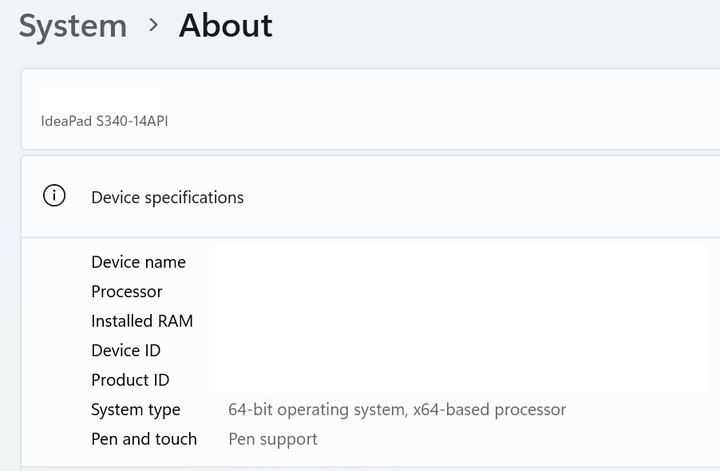
For the windows architecture, you can simply right-click on your «computer» (usually named as «This-PC» or «My Computer») icon and click properties and your system details will be displayed.
Step 2: We cannot directly use the «pip install» command when it comes to installing Ta-Lib. Thus, we will first install the «whl» file which can be found on this link.
The website is a useful resource for a lot of Python extensions, but we are concerned about Ta-Lib installation for now.
You can scroll down to the section where we will find the relevant links, as shown below:
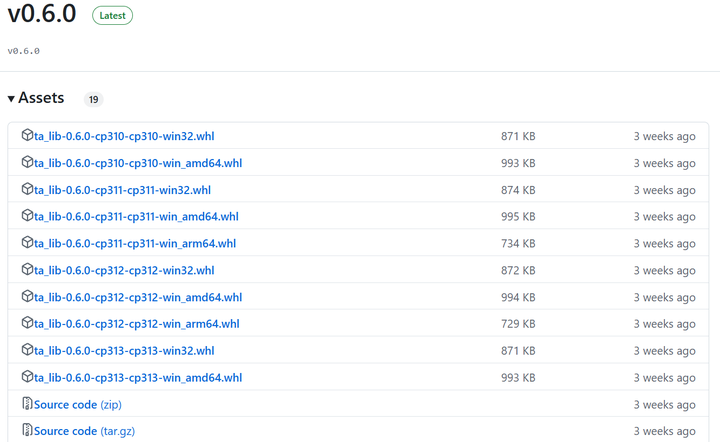
One should note that you should download the file keeping your Python version and Windows architecture (32 bit or 64 bit) in mind. E.g. Since we have the python version 3.13 installed and 64 bit Windows 11 system, we will download the file, “ta_lib-0.6.0-cp313-cp313-win_amd64.whl”.
As you might have guessed “cp313” implies Python version 3.13 and “win_amd64” implies Windows 64 bit operating system.
By default, the «whl» file gets downloaded in the «Downloads» folder. Since we have used Anaconda installer for Python, we will place the file in the same folder location which is shown on the Anaconda prompt.
For eg: C:\Users\Trial
And now comes the easy part.
In the Anaconda prompt, use the pip install command with the file name of the downloaded file.
Since we have downloaded the file, “ta_lib-0.6.0-cp313-cp313-win_amd64.whl”, the command would be, pip install ta_lib-0.6.0-cp313-cp313-win_amd64.whl
If there is no error, then it implies that we have successfully installed Ta-Lib. You should get a screen confirming the installation is done.
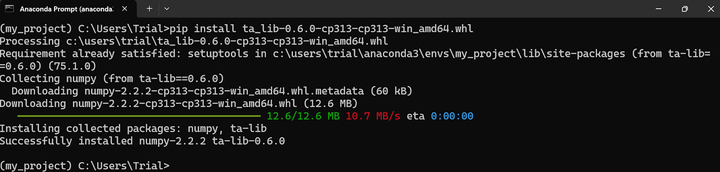
Great! We have just finished installing the Ta-Lib Python library.
But how do we check if it is correctly installed?
On the Anaconda command prompt, you will first type “python” to interpret the program.

We will then type the following command, “import talib” and then press Enter.
If there are no errors, then it means that the python Ta-Lib library has been successfully installed on your computer.

Alternatively, you can also open Jupyter notebook (or Spyder) and try to run the same code to check if the Python Ta-Lib is installed correctly.

Install Ta-Lib on MacOS
In comparison to the windows installation, Python Ta-Lib installation is relatively straightforward and easy on the MacOS. But before we talk about the installation of Ta-Lib, we have to make sure the python environment is installed as well.
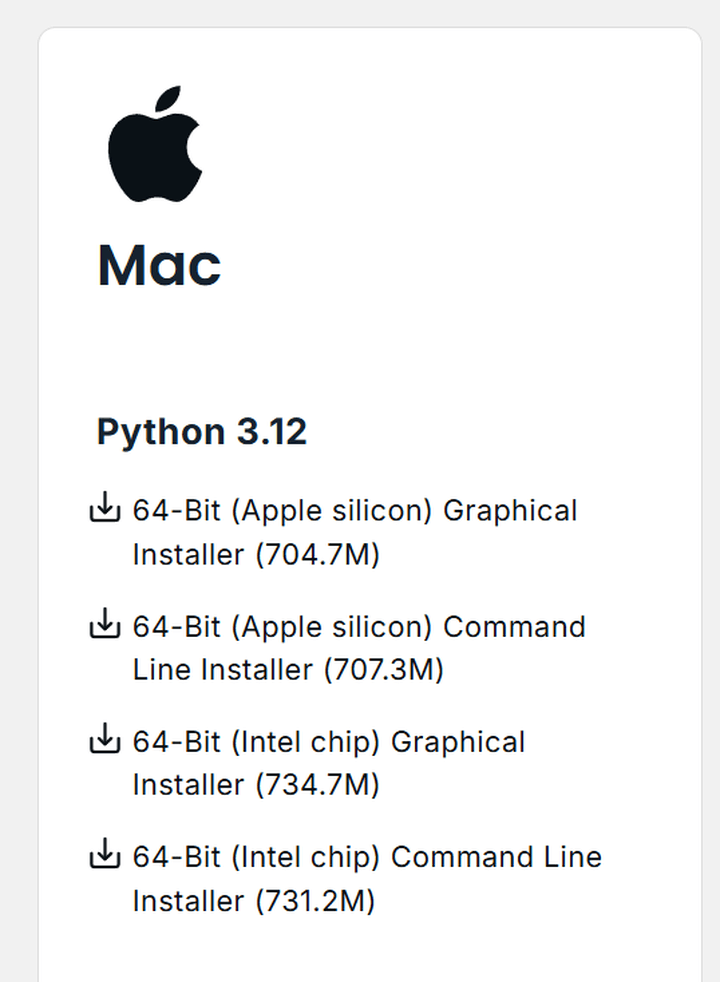
You can install Anaconda from the following link or download Python from the following link. In our opinion, it is generally a good idea to install Anaconda as it helps build an environment for your python code to be executed seamlessly.
Depending on the hardware and OS version you can pick the relevant option for downloading the Anaconda installer.
You will then be greeted with the following dialog box.
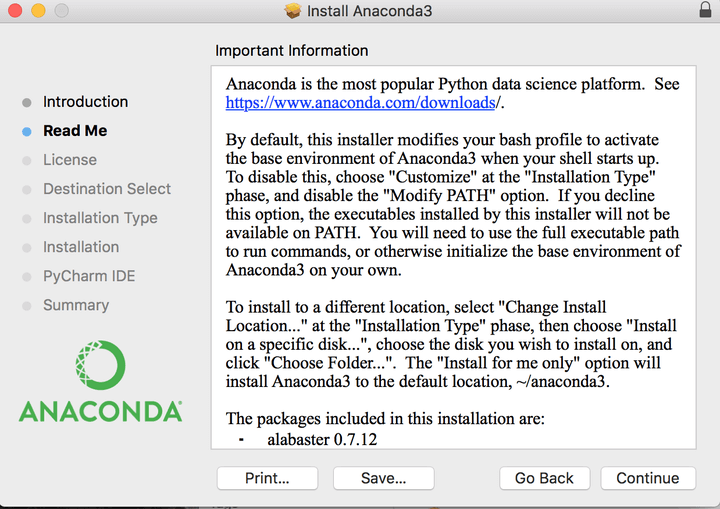
Select “Continue” tab and choose the appropriate install destination and you will finish installation in a short time.
All right, now we move on to the main event, i.e. Python Ta-lib installation. Ok, there is one small step you need to do before the main install.
Check if you can use the ‘brew’ command. For this tutorial on how to install Ta-Lib, let us assume that the ‘brew’ command throws an error. To rectify this, we install the necessary package by using the following line of code in the MacOS shell:
ruby -e «$(curl -fsSL https://raw.githubusercontent.com/Homebrew/install/master/install)»
If it is successful, you will see the following messages:
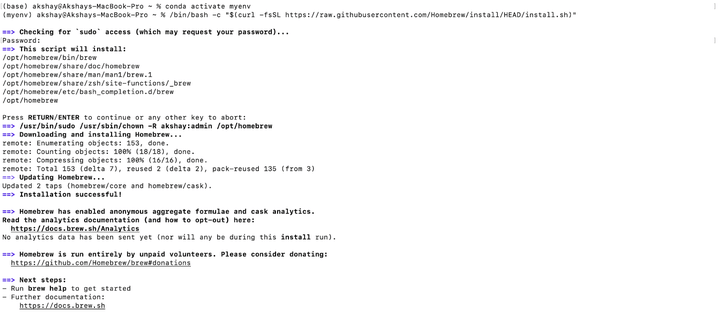
Of course, you will get a prompt which asks you to press “Return” to continue the installation or any other key to cancel the installation. If you are curious about the ‘brew’ command, you can always visit the following website to know more.
Great! Now that the brew command is installed, use the following code to install the Ta-Lib operating system dependencies:
You will see the following screen.

Now, we use the familiar command i.e. “pip” to install Ta-Lib on our MacOS. The command is as follows:
You see the following files being installed on your system.
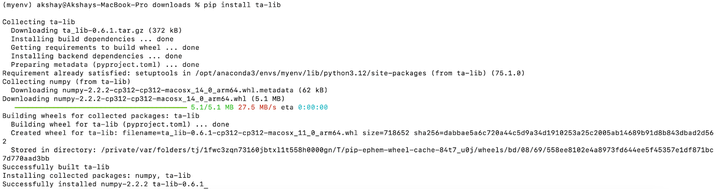
Great! We have been successful in our quest to install Ta-Lib on MacOS.
But how do we check if it is correctly installed on the system? Simple, we use the following commands.
First, we call the python language by simply writing “python” in the terminal.

We then use the following command to import the Ta-Lib library.
If there is no error, then we should be able to see the following screen

Install Ta-Lib on Linux
The Ta-lib installation in Linux can be a bit tricky. The libraries necessary for the Ta-lib installation should be installed first before you install the Python wrapper.
But don’t worry! We have provided comprehensive steps on how to install the Ta-lib library in your Linux system.
Step 0: Install Anaconda in your Linux system. You can follow the documentation or execute the commands as shared below.
The following command installs the Anaconda software and creates an environment named ‘quantra’. You can use this environment for your Quantra related coding projects!
- Install the prerequisites
- Install Anaconda on your system
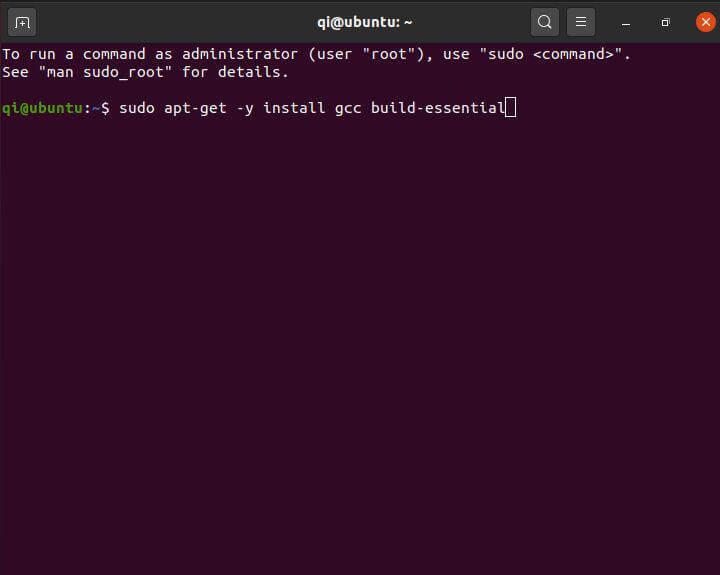

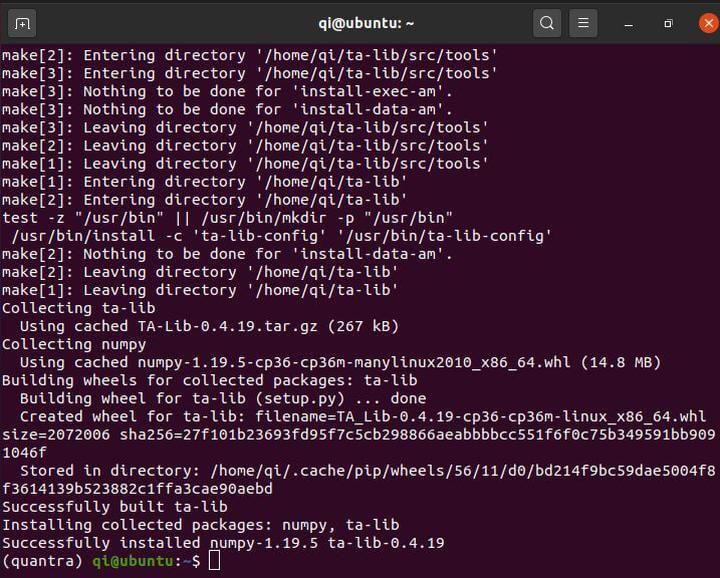
Step 1: Install the Ta-lib dependencies and Python wrapper by executing the following command.
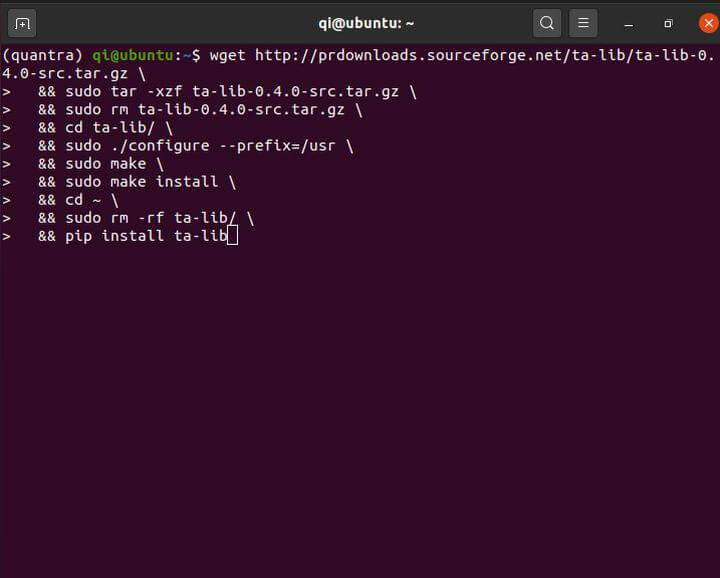
This will take a couple of minutes and install all the libraries necessary for using Ta-lib.
Step 2: Test the Ta-lib installation by executing a sample script. We take some data and try to find the moving average using the Ta-lib libraries.
- Install yfinance library if you do not have it already
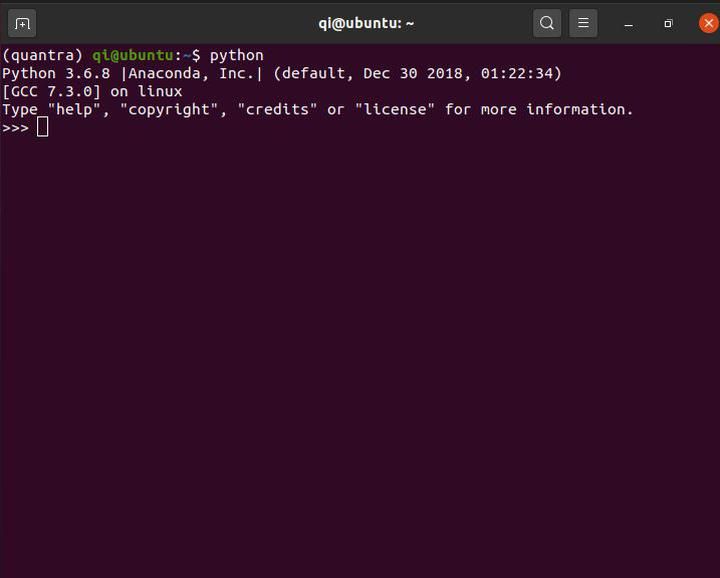
- Run Python in the terminal
- Paste the following code lines to check if Ta-lib is working properly or not.
- You should see a Simple MA and EMA column similar to the screenshot below.

The Ta-lib library is now installed in the ‘quantra’ environment! To know how to activate and switch environments, please refer to the Conda resource here.
Awesome! We have now been successful in installing Python Ta-Lib on Windows, MacOS and Linux. But can we really stop here? In the next section, we try a simple code using the Ta-Lib library.
Technical Indicators using Python Ta-Lib
We will first import the Python Ta-Lib library since we are using it to work out different indicators. Along with that, we use the python matplotlib to draw their graphs for analysis. Since we are going to be working on the stock prices, we will import the data from Yahoo Finance.
Thus, the code will be as follows:
In the above example, we have imported the stock price data of Apple from 1 January 2024 to 24 January 2025.
Let us start off with something simple. We will find the Simple Moving Average and the Exponential Moving Average of Apple stock data. We will use the following code:
The output is as follows:
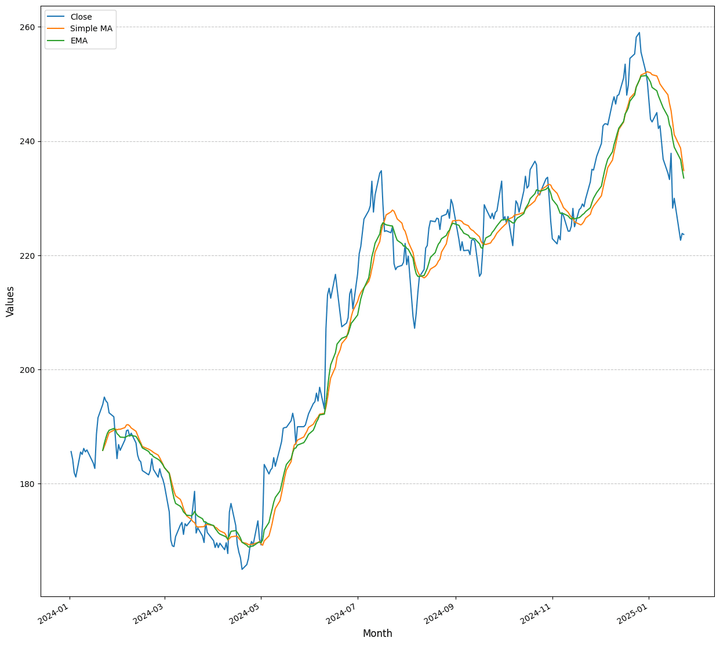
That was simple, wasn’t it?
Recall that at the start of this tutorial on Installing Python Ta-Lib, we talked about Bollinger Bands. Well, let’s try that one now.
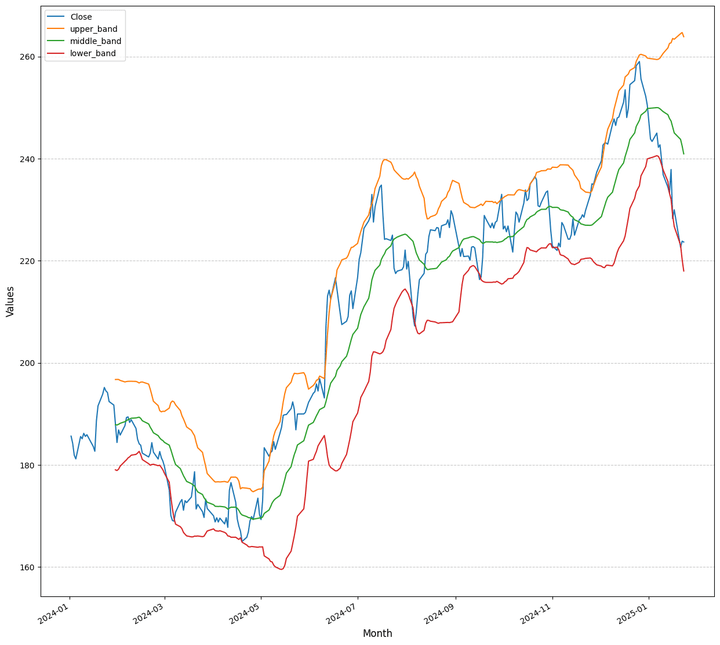
Wasn’t it easy? We are sure you are getting it but let us break down the line and see how Python Ta-Lib worked out the Bollinger Bands.
To create the Bollinger bands, we simply passed the Closing Price ie the “Close” column and defined a time period of 20 for the moving average. This is done using the “ta.BBANDS()” function. As the Bollinger bands consist of three bands, we store the data in the following three columns, “upper_band”, “middle_band” and “lower_band.
Now, can you figure out from the code below, what are the parameters passed?
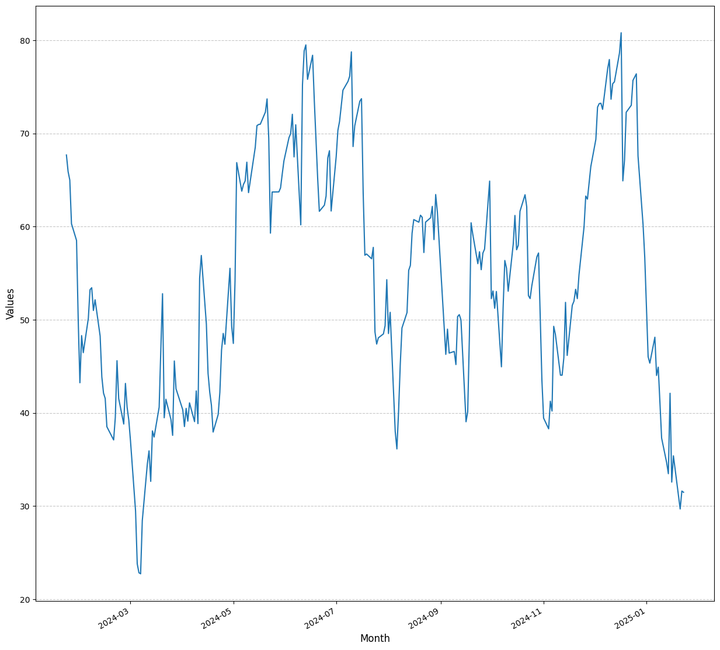
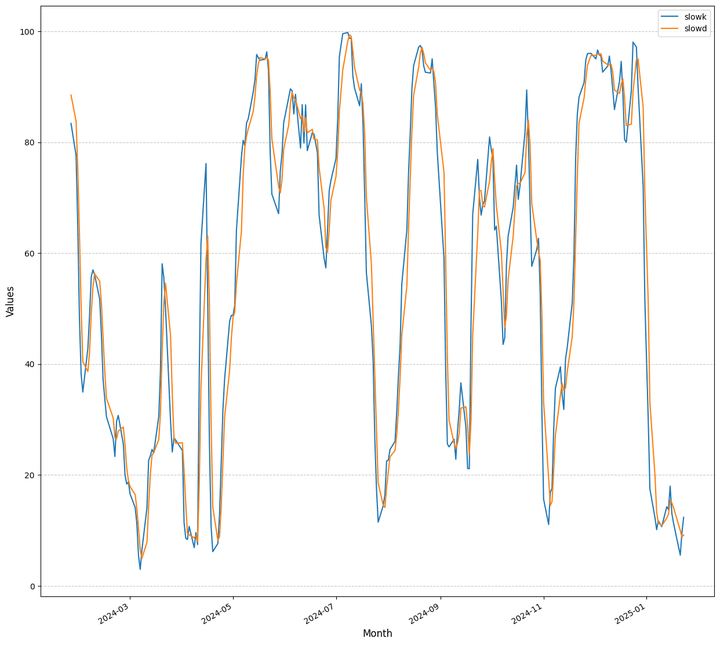
As a bonus, we plotted the Stochastic oscillators as well, the code is given below:
FAQs for TA-Lib Installation
Question: I installed TALib-0.4.21-cp37-cp37m-winamd64
However, it gives below error.
ValueError: numpy.ndarray size changed, may indicate binary incompatibility. Expected 88 from C header, got 80 from PyObject
Answer: The error you’re encountering is due to a compatibility issue between the installed version of TA-Lib and the version of NumPy being used.
To resolve this issue, you can try the following steps:
- Upgrade NumPy: Open the Anaconda prompt or terminal and execute the following command: pip install —upgrade numpy
- Reinstall TALib: After updating NumPy, uninstall and reinstall the current TALib installation as explained.
Conclusion
Thus, we have gone through the Tutorial on how to install Python Ta-Lib on Windows, MacOS as well as Linux. We have also found how to create a few technical indicators using Ta-Lib and plot them.
If you want to learn various aspects of Algorithmic trading and automated trading systems, then check out the Executive Programme in Algorithmic Trading (EPAT®). The course covers training modules like Statistics & Econometrics, Financial Computing & Technology, and Algorithmic & Quantitative Trading. EPAT® equips you with the required skill sets to build a promising career in algorithmic trading. Enroll now!
Further readings or next blogs to read:
- How to Use Technical Indicators for Trading?
- Building Technical Indicators in Python
- How to optimise a trading strategy based on indicators
- Five Indicators To Build Trend-Following Strategies
Disclaimer: All data and information provided in this article are for informational purposes only. QuantInsti® makes no representations as to accuracy, completeness, currentness, suitability, or validity of any information in this article and will not be liable for any errors, omissions, or delays in this information or any losses, injuries, or damages arising from its display or use. All information is provided on an as-is basis..
Instructions are for installing the C/C++ shared, static libraries and headers on your system.
Latest release is 0.6.4 on Github
For python users, see instead ta-lib-python
-
Windows
- Executable Installer (recommended)
- Binaries
- Build from source
-
macOS
- Homebrew (recommended)
- Build from source
-
Linux
- Debian packages
- Build from source
Windows
Executable Installer (recommended)
-
Download latest ta-lib-0.6.4-windows-x86_64.msi
-
Run the Installer:
- Double-click the downloaded
.msifile. - Follow the on-screen instructions.
To update, just repeat the installation (older version is automatically uninstalled).
If you choose to uninstall, us the Add/Remove Apps in windows settings.
- Double-click the downloaded
If you prefer a non-interactive installation, you can use msiexec from the command line.
Windows Binaries
Use the .zip packages when you prefer to get the libraries without installing (e.g. to embed the TA-Lib binaries in your own installer).
| Platform | Download |
|---|---|
| Intel/AMD 64-bits | ta-lib-0.6.4-windows-x86_64.zip |
| Intel/AMD 32-bits | ta-lib-0.6.4-windows-x86_32.zip |
| ARM64 | Not yet available. |
Windows Build from Source
Install VSCode 2022 community and do:
C:\ta-lib> "C:\Program Files\Microsoft Visual Studio\2022\Community\VC\Auxiliary\Build\vcvarsall.bat" x64
C:\ta-lib> mkdir build
C:\ta-lib> cd build
C:\ta-lib\build> cmake ..
C:\ta-lib\build> cmake --build .
You might need to adjust the vcvarsall.bat command depending on your VSCode installation and platform.
macOS
macOS Homebrew (recommended)
See the homebrew formula for the latest supported release and platforms.
macOS Build from Source
Ensure you have the required dependencies: brew install automake && brew install libtool
-
Download latest ta-lib-0.6.4-src.tar.gz (or, alternatively, clone down https://github.com/ta-lib/ta-lib/ and checkout the main branch)
-
Extract the Tarball if you downloaded the source manually:
tar -xzf ta-lib-0.6.4-src.tar.gz cd ta-lib-0.6.4 -
Build and Install:
chmod +x autogen.sh  # ensure the permissions are set to generate the configure file
./autogen.sh         # generate the configure file
./configure
make
sudo make install
Follow the same procedure for an update (the older version is overwritten, no need to uninstall).
If you choose to uninstall do:
Linux
Linux Debian Packages
Recommended for all debian-based distributions (e.g. Ubuntu, Mint…)
-
Download the
.debpackage matching your platform:Platform Download Intel/AMD 64-bits ta-lib_0.6.4_amd64.deb ARM64 (e.g. Raspberry Pi) ta-lib_0.6.4_arm64.deb Intel/AMD 32-bits ta-lib_0.6.4_i386.deb -
Install or Update:
# For Intel/AMD (64 bits)
sudo dpkg -i ta-lib_0.6.4_amd64.deb
# or
sudo dpkg -i ta-lib_0.6.4_arm64.deb
# or
sudo dpkg -i ta-lib_0.6.4_i386.deb
If you choose to uninstall do:
Linux Build from Source
-
Download latest ta-lib-0.6.4-src.tar.gz (or, alternatively, clone down https://github.com/ta-lib/ta-lib/ and checkout the main branch)
-
Extract the Tarball if you downloaded the source manually:
tar -xzf ta-lib-0.6.4-src.tar.gz cd ta-lib-0.6.4 -
Build and Install:
./configure
make
sudo make install
Follow the same procedure for an update (the older version is overwritten, no need to uninstall).
If you choose to uninstall do:
Last Updated :
28 Jun, 2024
Ta-Lib (Technical Analysis Library) is a widely used open-source library that provides technical analysis of financial market data. It includes over 150 technical indicators such as moving averages, RSI, MACD, and Bollinger Bands. This guide covers the installation of Ta-Lib on different operating systems, including Windows, macOS, and Linux.
Prerequisites
Before installing Ta-Lib on Windows, ensure you have the following prerequisites:
- Python (3.x is recommended)
- PIP (Python package installer)
- Visual Studio Build Tools (for compiling C extensions)
Install Ta-Lib for Python
- What is Ta-Lib in Python?
- Installing Ta-Lib on Windows
- Installing Ta-Lib on macOS
- Installing Ta-Lib on Linux
- Troubleshooting Common Installation Issues
- Example Usage
- Conclusion
What is Ta-Lib in Python?
Ta-Lib is a library for technical analysis of financial market data. Traders, developers, and analysts use it to perform various technical analysis tasks on stock, forex, and cryptocurrency data. The library is written in C and can be used in multiple programming languages, including Python, Java, and .NET.
Installing Ta-Lib on Windows
Download Ta-Lib Binary
Download the precompiled binary files for Windows from the Ta-Lib GitHub repository or the official Ta-Lib website.
Install Ta-Lib Binary:
Open a Command Prompt with administrative privileges.
Navigate to the directory where you downloaded the Ta-Lib binary.
Run the following command to install the binary:
pip install ta-lib-<version>-cp<python_version>-cp<python_version>m-win_amd64.whl
Verify Installation
Open Python and try importing Ta-Lib:
import talib
Installing Ta-Lib on macOS
Install Xcode Command Line Tools:
Open Terminal and run the following command:
xcode-select --install
Install Homebrew (if not already installed):
Homebrew is a package manager for macOS. Install it by running:
/bin/bash -c "$(curl -fsSL https://raw.githubusercontent.com/Homebrew/install/HEAD/install.sh)"
Install Ta-Lib via Homebrew:
Run the following commands in Terminal:
brew install ta-lib
pip install ta-lib
Verify Installation:
Open Python and try importing Ta-Lib:
import talib
Installing Ta-Lib on Linux
Install Build Tools:
Open Terminal and run the following command based on your Linux distribution:For Debian/Ubuntu:
sudo apt-get update
sudo apt-get install build-essential
For Fedora:
sudo dnf groupinstall "Development Tools"
Install Ta-Lib Dependencies:
Install the dependencies required by Ta-Lib:
sudo apt-get install python3-dev
sudo apt-get install libta-lib0-dev
Install Ta-Lib:
Run the following command in Terminal:
pip install ta-lib
Verify Installation:
Open Python and try importing Ta-Lib:
import talib
Troubleshooting Common Installation Issues
Missing C Compiler
Ensure you have a C compiler installed on the system. For Windows we might need to the install Visual Studio Build Tools. For macOS, we can install Xcode Command Line Tools using:
xcode-select —install
Library Not Found
If errors related to missing Ta-Lib libraries, ensure the library paths are correctly set. On Linux and macOS we might need to export library paths:
export TA_INCLUDE_PATH=/usr/local/include
export TA_LIBRARY_PATH=/usr/local/lib
Verifying the Installation
To verify that Ta-Lib is installed correctly open a Python interpreter and try importing the library:
import talib
print(talib.get_functions())
If the import is successful and the list of functions is printed the installation was successful.
Example Usage
Here’s a basic example of the how to use Ta-Lib to calculate a simple moving average (SMA):
Python
import numpy as np
import talib

# Generate random closing prices
close_prices = np.random.random(100)
# Calculate the 20-period SMA
sma = talib.SMA(close_prices, timeperiod=20)
print(sma)
Output
Hangup (SIGHUP)
Traceback (most recent call last):
  File "Solution.py", line 2, in <module>
    import talib
ModuleNotFoundError: No module named 'talib'
Conclusion
Installing Ta-Lib for Python involves ensuring the necessary C libraries are available and correctly configured. By following the steps outlined for the operating system we should be able to install and use the Ta-Lib without issues. Whether you’re on Windows, macOS or Linux this guide provides the clear path to getting Ta-Lib up and running for the technical analysis needs.