
Last Updated :
27 Nov, 2024
In this article, we will look into the various methods of installing Tkinter on a Windows machine.
Note : For Python 3 tkinter should already be included with your Python installation. However, if it’s not available or you’re encountering issues, you can install or reinstall it using the following steps:
For Windows:
If you don’t have tkinter installed, the easiest way is to reinstall Python from the official website and ensure that the tkinter package is included during installation.
- Download the latest Python version from python.org.
- During installation, ensure the “Tcl/Tk and IDLE” option is selected.
However, if you want to ensure all dependencies are managed via pip (though tkinter is part of the Python standard library in most cases), you can install the tk package using pip.
For PIP Users:
Open up the command prompt and use the below command to install Tkinter:
pip install tk
This installs the Python tk bindings, which is what tkinter depends on. The following message will be displayed once the installation is completed:

To verify the installation use the tk._test() function. Use the below screenshots for reference:
Python
import tkinter
tkinter._test()
Output:
For conda Users:
Conda users can open up the Anaconda Power Shell and use the below command to install Tkinter:
conda install -c anaconda tk
You will get the following message once the installation is completed:

To verify the installation run the below code:
Python
import tkinter
tkinter._test()
Output:
-
Install Tkinter on Windows
-
Install Tkinter on Linux
-
Install Tkinter on Mac Operating System
-
Install Tkinter in Pycharm
This tutorial will demonstrate how to install Tkinter on multiple platforms. Every platform has individual commands to install Tkinter in Python.
Install Tkinter on Windows
Tkinter offers multiple GUI libraries to develop GUI applications. The Tkinter is one of the popular libraries to build GUI system interfaces.
To install Tkinter, we have to install Python; if it is already installed, we can move on to install Tkinter. When we start the installation of Python, we can check td or tk and IDLE Tkinter during installation.
This way, this Tkinter will come along with Python packages, and we do not need to install it separately. However, if we lose installing Tkinter during the installation of Python, we can do it later using the pip command.
We can confirm the Python version using this command.
python --version
Pip’s version is checked using this command.
pip -V
Now we are ready to install Tkinter.
pip install tk
Now we can use the tkinter library. To confirm the tkinter library is installed, write the code in the shell.
import tkinter
tkinter._test()
If you are an Anaconda user, you can use the following command.
conda install -c anaconda tk
Install Tkinter on Linux
There are different variants of the Linux operating system. This section will learn how to install Tkinter in multiple variants.
Use this command if you’re using a Debian-based Linux operating system.
# python2 user
sudo apt-get install python-tk
# python3 user
sudo apt-get install python3-tk
Use this command if you’re using one of these: RHEL, CentOS, Oracle Linux.
sudo yum install -y tkinter tk-devel
The Fedora-based Linux operating system uses this command.
sudo pacman -S tk
Use this command to confirm the tkinter library is installed successfully.
python -m Tkinter
Install Tkinter on Mac Operating System
There are two ways to install the tkinter library in MacOS. The Mac user will follow these steps.
Run the below command to check that python3 is installed.
python3 --version
Run the below command to check that pip3 is installed.
pip3 --version
If your pip is outdated, please upgrade your pip using the below command.
pip3 install --upgrade pip
We will use pip3 as the first method. Write the following command to install Tkinter.
pip3 install tk
The second method needs a setup.py file to install the Tkinter.
We have to download the latest version of Tkinter in python3 using this command.
curl https://files.pythonhosted.org/packages/a0/81/
742b342fd642e672fbedecde725ba44db44e800dc4c936216c3c6729885a/tk-0.1.0.tar.gz > tk.tar.gz
Write the following command to extract the downloaded package.
tar -xzvf tk.tar.gz
Go to the extracted folder and run this command.
python3 setup.py install
To ensure the tkinter library is installed, run this code in the Python terminal.
import tk
Install Tkinter in Pycharm
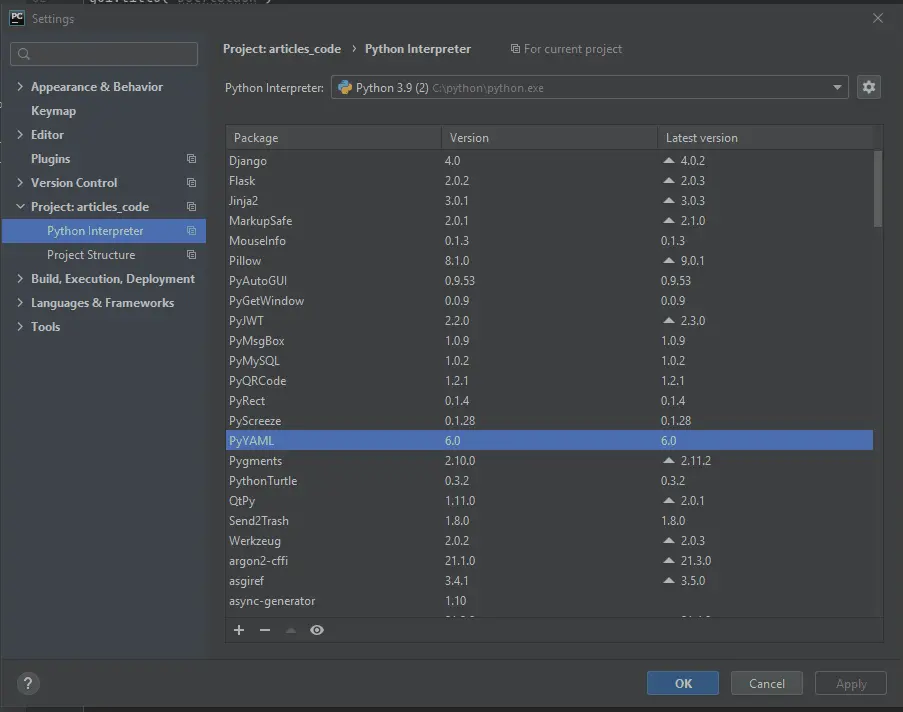
The installation process is very simple in Pycharm IDLE. Pycharm IDLE is more convenient for users.
There is an interface to install the tkinter library without running a command.
Go to File>Settings>Project>Python Interpreter and click the + button, search tk, and click the Install Package button. You can select the specific version.
Click here to read more about Tkinter.
Enjoying our tutorials? Subscribe to DelftStack on YouTube to support us in creating more high-quality video guides. Subscribe
Before you start building GUI applications with Tkinter you will need a working installation of Python & Tkinter on your computer.
Helpfully, Tkinter is installed by default with every Python installation on Windows, so you don’t need to install it separately. Just download
and install Python and you will have Tkinter available to you.
See below for instructions on how to install Python if you do not already have it set up.
Go to the official Python website’s Windows downloads page and download one of the Stable Releases of Python.
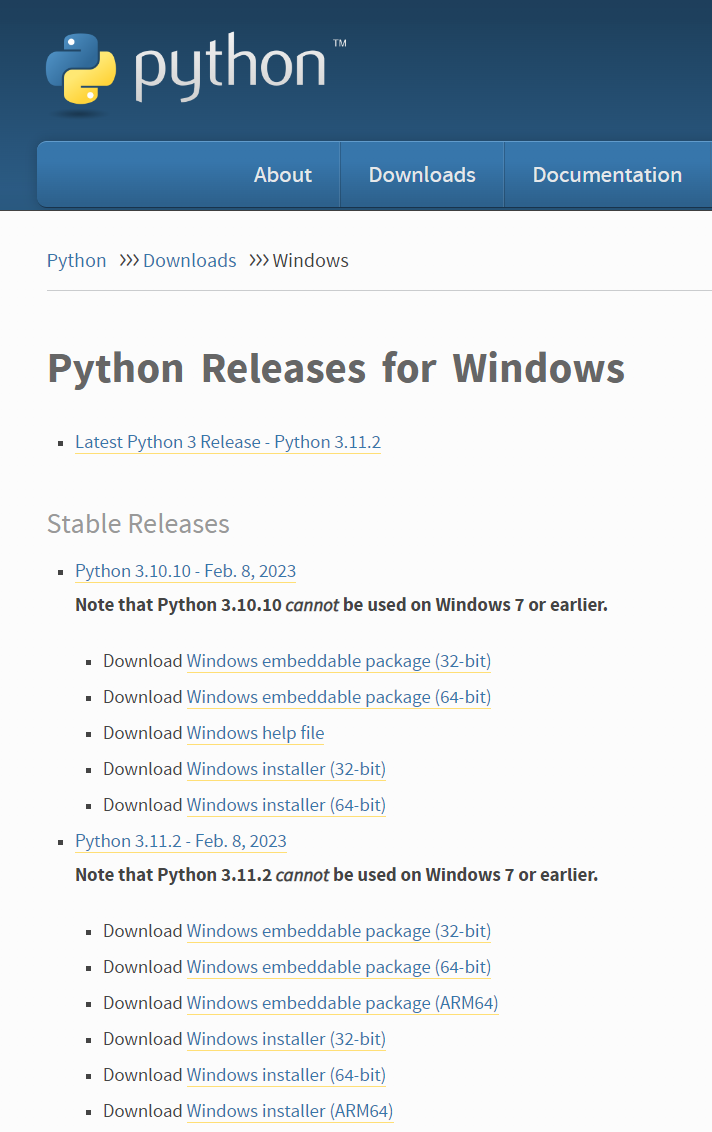
You can download any of the stable versions.
You typically want to download the Windows Installer (64-bit) for modern hardware. Unless you know you need the 32 bit version, try the 64-bit first.
Once the download is complete, double click the installer to launch it.
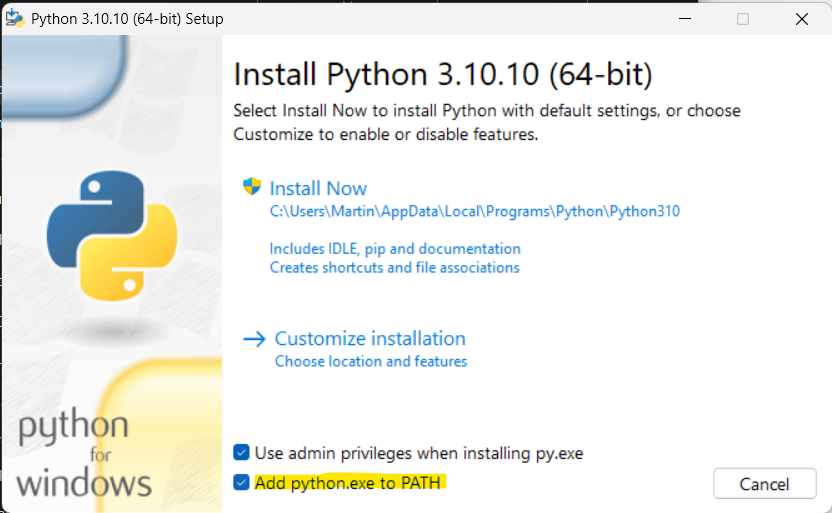
The Python for Windows installer. Ensure sure Add python.exe to PATH is checked.
1:1 Coaching & Tutoring for your Python GUIs project
You’ll see the installer welcome screen which describes what the installer will do.
Make sure that Add python.exe to PATH is checked in the installer. This makes it easier to use Python from the command prompt — you just need to
enter «python» to start, rather than the full path to the executable.
When you are ready to being the installation you can click Install Now.
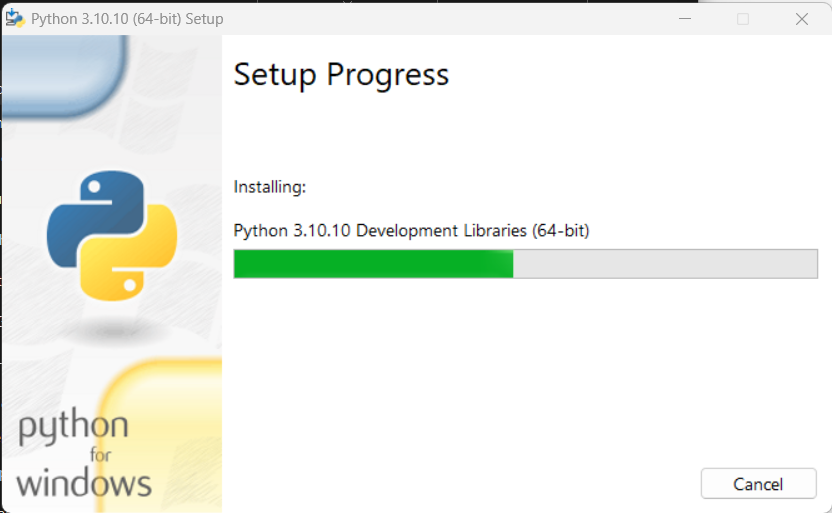
Installing Python.
The install will proceed as normal, installing all the required libraries (including Tcl/Tk for Tkinter). Once complete you can exit the installer.
Open a command prompt and start python by entering python. This will start the Python REPL, where you can enter interactive Python code.
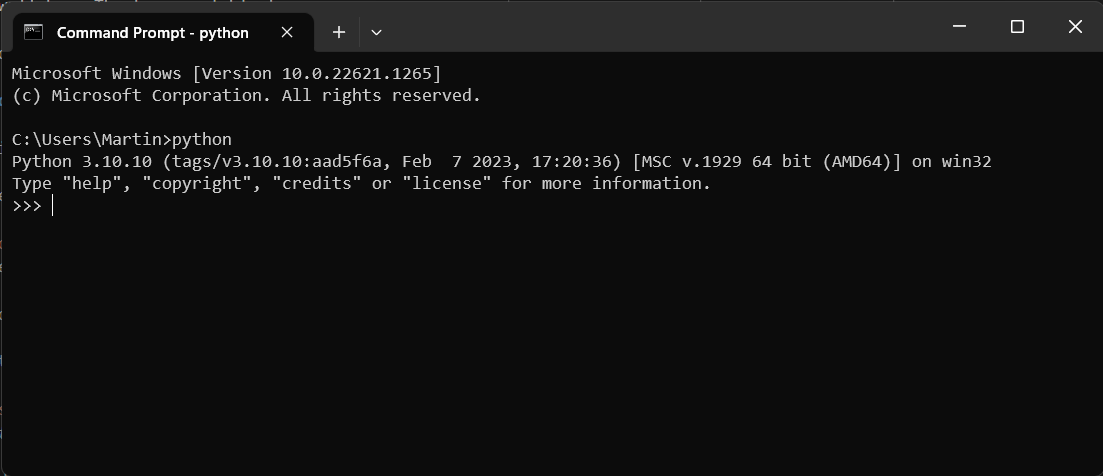
The Python REPL for our newly installed Python installation.
You can enter from tkinter import * to confirm that Tkinter has been installed and create a window with Window = Tk() to confirm it is usable.
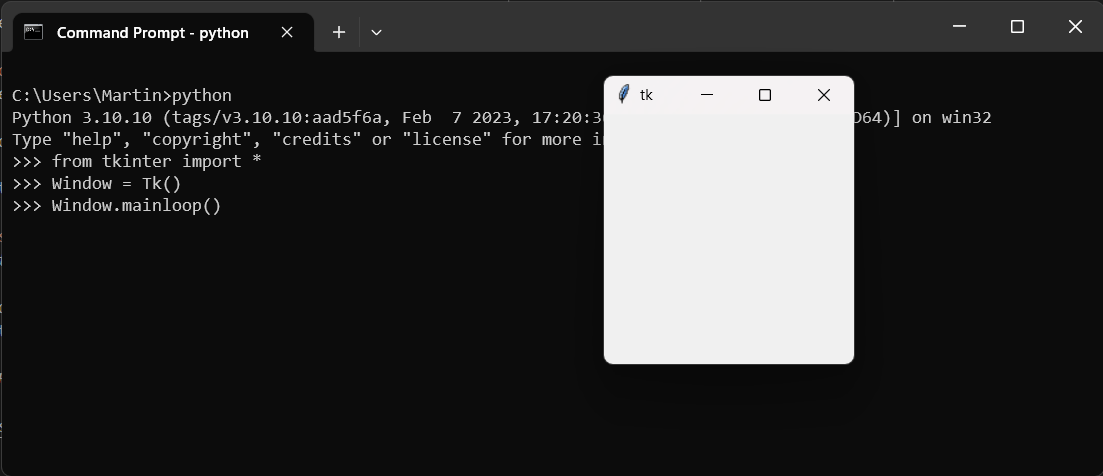
Importing Tkinter and creating a window in the Python REPL.
You can run Python scripts from the command prompt by entering python followed by the script name. Create a file in your code editor and enter the following simple Tkinter example:
python
from tkinter import *
Window = Tk()
Window.mainloop()
Save the file as my_tkinter_app.py in your home folder /Users/<your username>. You can now launch this from the command prompt — as long as you are in the same folder as the script — using python my_tkinter_app.py.
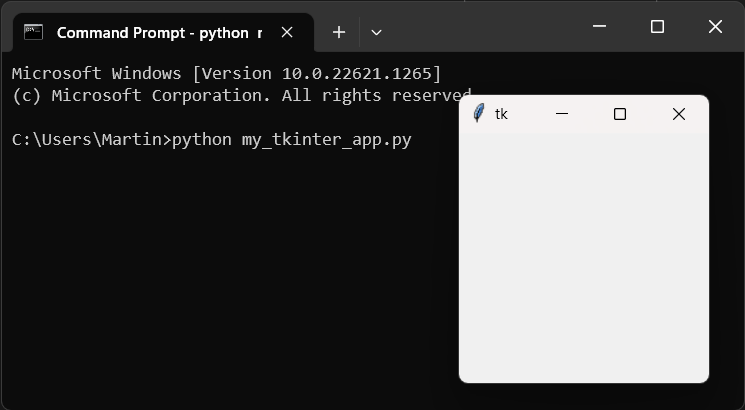
Running a Tkinter script from the command line.
That’s it! You can now continue to the Tkinter tutorial to
start creating your own Tkinter applications!
Пройдите тест, узнайте какой профессии подходите
Работать самостоятельно и не зависеть от других
Работать в команде и рассчитывать на помощь коллег
Организовывать и контролировать процесс работы
Быстрый ответ
Чтобы приступить к созданию графического интерфейса пользователя (GUI) на Python с применением библиотеки tkinter, выполните следующие действия:
- На Linux/macOS введение в терминале команды:
sudo apt-get install python3-tk - Всем пользователям Windows важно знать, что tkinter уже включен в базовую поставку Python.
Если вспомнить — команды для установки даже не потребовались! Задача решена с усмешкой 😁.
- Если вы используете Virtualenv на любой операционной системе, запомните такую команду:
pip install tk
Воспользуйтесь таким тестовым примером для проверки установки:

Установка tkinter в разных дистрибутивах Linux
Установка tkinter в меру отличается, в зависимости от выбранного вами дистрибутива Linux:
-
Поклонникам Debian и пользователям Ubuntu:
-
Пользователям Fedora:
-
Адептам Arch Linux:
-
Если у вас возникла ошибка no module named _tkinter:
Визуализация
Смело представляйте процесс установки tkinter как процесс сборки конструктора LEGO® для вашего GUI-приложения на Python:
После import tkinter as tk реализуется следующая цепочка: найден недостающий элемент (❓) ➡ он добавляется в арсенал инструментов! 🛠️
И посмотрите на получившийся результат:
Откиньтесь на спинку стула, расслабьтесь и позвольте tkinter творить чудеса GUI! 🪄🐍
Бестормозная установка tkinter: лучшие практики
Чтобы установка tkinter состоялась без проблем, следуйте этому руководству:
- Проверяйте названия пакетов – важно, чтобы вы точно знали, что вводить в командную строку.
- Используйте пакетный менеджер – забудьте о сложностях сборки из исходного кода.
- Следите за соответствием версии Python с версией пакета tkinter.
- После установки выполните тест, чтобы гарантировать работоспособность tkinter.
Использование графического пакетного менеджера Synaptic
Для тех, кто предпочитает графический интуитивно понятный интерфейс, пакетный менеджер Synaptic для систем на базе Debian предлагает удобный способ установки tkinter:
- Используйте функцию поиска для нахождения
python3-tk. - Выберите пакет для установки.
-
Завершите процесс нажатием на кнопку Применить изменения.
Всё просто, безопасно и эффективно.
Распространенные ошибки и методы их решения
Ошибка ModuleNotFoundError
Если вы столкнулись с ошибкой ModuleNotFoundError: No module named '_tkinter', не паникуйте:
- Убедитесь, что версия пакета tkinter соответствует версии Python.
- Попробуйте переустановить пакет, чтобы исправить возможные неполадки.
Ошибка ImportError
Если на экране появляется сообщение ImportError: No module named tkinter, проверьте следующее:
- Убедитесь в правильности написания
import tkinter(только для Python 3). - Внимательно следите за настройкой виртуальных окружений, tk может потребовать установки через
pip install tk.
Отдельная установка: когда это необходимо
Иногда бывает необходимо взяться за установку самостоятельно. Для компиляции и установки tcl/tk из исходных кодов нужно выполнить такие шаги:
- Скачать и использовать исходные коды tcl и tk.
- Следуйте инструкциям в файле README для компиляции.
-
Установите собранные модули с помощью команд:
-
Используйте ключ
--prefix, чтобы задать путь установки.
Множественная установка Tkinter: эффективные методы
При возникновении необходимости установить tkinter на несколько систем пользуйтесь следующими приёмами:
- Автоматизируйте процесс – создавайте скрипты для упрощения задачи.
- Контейнеризация – через Docker упакуйте свою среду, облегчив таким образом развертывание tkinter.
- Используйте системы управления конфигурацией, такие как Ansible, чтобы с легкостью копировать вашу установку tkinter на другие машины.
Полезные материалы
- TkInter – Python Wiki — ваш надежный источник информации о tkinter.
- TkDocs Tutorial — пошаговый путеводитель по созданию GUI в tkinter.
- «Frequent ‘tkinter’ Questions – Stack Overflow — изучайте часто встречающиеся вопросы и набирайтесь опыта.
- Welcome to Python.org — статья Python, посвященная tkinter.
- Программирование GUI на Python с помощью Tkinter – Real Python — подробнеющее руководство с примерами.
- tkinter — Python interface to Tcl/Tk — Python 3.12.2 documentation — официальная документация Python, посвященная tkinter.
- Tkinter GUI Programming by Example | Packt — изучение tkinter через практические примеры и практическое применение.
Tkinter является стандартной библиотекой Python, предоставляющей инструменты для создания графического пользовательского интерфейса (GUI). Эта мощная библиотека позволяет разработчикам создавать интерактивные приложения с использованием различных виджетов и компонентов.
В этой статье мы рассмотрим процесс установки и настройки Tkinter на вашей системе, чтобы вы могли начать создавать собственные GUI-приложения на Python. Мы также предоставим примеры кода, чтобы вы могли легко следовать инструкциям.
Tkinter является стандартной библиотекой Python, поэтому вам не нужно устанавливать его отдельно. Он включен в стандартный набор инструментов Python и должен быть доступен в вашей установке Python.
Однако, если вы используете старую версию Python или если Tkinter не был включен в вашу установку Python по какой-либо причине, вам придется установить его. Вот как это сделать:
- Установка на Windows:
- Перейдите на официальный сайт Python (https://www.python.org) и загрузите установщик Python для Windows.
- Запустите установщик и следуйте инструкциям на экране.
- Убедитесь, что опция «Add Python to PATH» отмечена, чтобы Python был доступен из командной строки.
- Завершите установку.
- Установка на macOS:
- Перейдите на официальный сайт Python (https://www.python.org) и загрузите установщик Python для macOS.
- Запустите установщик и следуйте инструкциям на экране.
- Завершите установку.
- Установка на Linux:
- Большинство дистрибутивов Linux поставляются с предустановленным Python. Однако, если Tkinter не установлен, вы можете установить его с помощью менеджера пакетов вашего дистрибутива.
- Откройте терминал и выполните следующую команду:
sudo apt-get install python3-tk
Это установит пакет Tkinter для Python 3.
Проверка установки
Чтобы проверить, правильно ли установлен Tkinter, откройте интерпретатор Python или запустите командную строку Python и введите следующую команду:
import tkinter
print(tkinter.TkVersion)
Если вы видите номер версии Tkinter, то установка прошла успешно.
Настройка Tkinter
После установки Tkinter нет необходимости в какой-либо особенной настройке. Однако, если вы хотите изменить внешний вид вашего приложения или настроить определенные параметры, вы можете использовать функции настройки Tkinter.
Вот пример кода, демонстрирующий настройку фона и шрифта в Tkinter:
import tkinter as tk

root = tk.Tk()
root.configure(background='white')
root.option_add('*Font', 'Arial 12')

# Дополнительный код для создания интерфейса

root.mainloop()
В этом примере мы создаем главное окно (root) и используем функции configure и option_add для настройки фона и шрифта по умолчанию для всех виджетов в окне.
Заключение
В этой статье мы рассмотрели процесс установки и настройки Tkinter для разработки графического пользовательского интерфейса на Python. Вы узнали, как установить Tkinter на различных операционных системах и как настроить определенные параметры.
Tkinter предоставляет огромное количество возможностей для создания интерактивных приложений на Python. Используйте эти знания и примеры кода в своих проектах, чтобы разрабатывать эффективные и интуитивно понятные пользовательские интерфейсы.