
The syntax of the pyinstaller command is:
pyinstaller[options] script [script …] | specfile
In the most simple case,
set the current directory to the location of your program myscript.py
and execute:
PyInstaller analyzes myscript.py and:
-
Writes
myscript.specin the same folder as the script. -
Creates a folder
buildin the same folder as the script if it does not exist. -
Writes some log files and working files in the
buildfolder. -
Creates a folder
distin the same folder as the script if it does not exist. -
Writes the
myscriptexecutable folder in thedistfolder.
In the dist folder you find the bundled app you distribute to your users.
Normally you name one script on the command line.
If you name more, all are analyzed and included in the output.
However, the first script named supplies the name for the
spec file and for the executable folder or file.
Its code is the first to execute at run-time.
For certain uses you may edit the contents of myscript.spec
(described under Using Spec Files).
After you do this, you name the spec file to PyInstaller instead of the script:
pyinstaller myscript.spec
The myscript.spec file contains most of the information
provided by the options that were specified when
pyinstaller (or pyi-makespec)
was run with the script file as the argument.
You typically do not need to specify any options when running
pyinstaller with the spec file.
Only a few command-line options
have an effect when building from a spec file.
You may give a path to the script or spec file, for example
pyinstalleroptions…~/myproject/source/myscript.py
or, on Windows,
pyinstaller "C:\Documents and Settings\project\myscript.spec"
Options
A full list of the pyinstaller command’s options are as follows:
Positional Arguments
- scriptname
-
Name of scriptfiles to be processed or exactly one
.spec file. If a .spec file is specified, most options
are unnecessary and are ignored.
Options
- -h, —help
-
show this help message and exit
- -v, —version
-
Show program version info and exit.
- —distpath DIR
-
Where to put the bundled app (default: ./dist)
- —workpath WORKPATH
-
Where to put all the temporary work files, .log, .pyz
and etc. (default: ./build)
- -y, —noconfirm
-
Replace output directory (default:
SPECPATH/dist/SPECNAME) without asking for
confirmation
- —upx-dir UPX_DIR
-
Path to UPX utility (default: search the execution
path)
- —clean
-
Clean PyInstaller cache and remove temporary files
before building.
- —log-level LEVEL
-
Amount of detail in build-time console messages. LEVEL
may be one of TRACE, DEBUG, INFO, WARN, DEPRECATION,
ERROR, FATAL (default: INFO). Also settable via and
overrides the PYI_LOG_LEVEL environment variable.
What To Generate
- -D, —onedir
-
Create a one-folder bundle containing an executable
(default)
- -F, —onefile
-
Create a one-file bundled executable.
- —specpath DIR
-
Folder to store the generated spec file (default:
current directory)
- -n, —name NAME
-
Name to assign to the bundled app and spec file
(default: first script’s basename)
- —contents-directory CONTENTS_DIRECTORY
-
For onedir builds only, specify the name of the directory in which all
supporting files (i.e. everything except the executable itself) will be
placed in. Use “.” to re-enable old onedir layout without contents
directory.
What To Bundle, Where To Search
- —add-data SOURCE:DEST
-
Additional data files or directories containing data files to be added to
the application. The argument value should be in form of “source:dest_dir”,
where source is the path to file (or directory) to be collected, dest_dir
is the destination directory relative to the top-level application
directory, and both paths are separated by a colon (:). To put a file in
the top-level application directory, use . as a dest_dir. This option can
be used multiple times.
- —add-binary SOURCE:DEST
-
Additional binary files to be added to the executable. See the
--add-dataoption for the format. This option can be used multiple
times.
- -p, —paths DIR
-
A path to search for imports (like using PYTHONPATH).
Multiple paths are allowed, separated by':', or
use this option multiple times. Equivalent to
supplying thepathexargument in the spec file.
- —hidden-import, —hiddenimport MODULENAME
-
Name an import not visible in the code of the script(s). This option can be
used multiple times.
- —collect-submodules MODULENAME
-
Collect all submodules from the specified package or module. This option
can be used multiple times.
- —collect-data, —collect-datas MODULENAME
-
Collect all data from the specified package or module. This option can be
used multiple times.
- —collect-binaries MODULENAME
-
Collect all binaries from the specified package or module. This option can
be used multiple times.
- —collect-all MODULENAME
-
Collect all submodules, data files, and binaries from the specified package
or module. This option can be used multiple times.
- —copy-metadata PACKAGENAME
-
Copy metadata for the specified package. This option can be used multiple
times.
- —recursive-copy-metadata PACKAGENAME
-
Copy metadata for the specified package and all its dependencies. This
option can be used multiple times.
- —additional-hooks-dir HOOKSPATH
-
An additional path to search for hooks. This option can be used multiple
times.
- —runtime-hook RUNTIME_HOOKS
-
Path to a custom runtime hook file. A runtime hook is code that is bundled
with the executable and is executed before any other code or module to set
up special features of the runtime environment. This option can be used
multiple times.
- —exclude-module EXCLUDES
-
Optional module or package (the Python name, not the path name) that will
be ignored (as though it was not found). This option can be used multiple
times.
- —splash IMAGE_FILE
-
(EXPERIMENTAL) Add an splash screen with the image
IMAGE_FILE to the application. The splash screen can
display progress updates while unpacking.
How To Generate
- -d, —debug {all,imports,bootloader,noarchive}
-
Provide assistance with debugging a frozen application. This argument may
be provided multiple times to select several of the following options. —
all: All three of the following options. — imports: specify the -v option
to the underlying Python interpreter, causing it to print a message
each time a module is initialized, showing the place (filename or
built-in module) from which it is loaded. See
https://docs.python.org/3/using/cmdline.html#id4. — bootloader: tell the
bootloader to issue progress messages while initializing and starting the
bundled app. Used to diagnose problems with missing imports. —
noarchive: instead of storing all frozen Python source files as an
archive inside the resulting executable, store them as files in the
resulting output directory.
- —optimize LEVEL
-
Bytecode optimization level used for collected python
modules and scripts. For details, see the section
“Bytecode Optimization Level” in PyInstaller manual.
- —python-option PYTHON_OPTION
-
Specify a command-line option to pass to the Python interpreter at runtime.
Currently supports “v” (equivalent to “–debug imports”), “u”, “W <warning
control>”, “X <xoption>”, and “hash_seed=<value>”. For details, see the
section “Specifying Python Interpreter Options” in PyInstaller manual.
- -s, —strip
-
Apply a symbol-table strip to the executable and
shared libs (not recommended for Windows)
- —noupx
-
Do not use UPX even if it is available (works
differently between Windows and *nix)
- —upx-exclude FILE
-
Prevent a binary from being compressed when using upx.
This is typically used if upx corrupts certain
binaries during compression. FILE is the filename of
the binary without path. This option can be used
multiple times.
Windows And Macos Specific Options
- -c, —console, —nowindowed
-
Open a console window for standard i/o (default). On Windows this option
has no effect if the first script is a ‘.pyw’ file.
- -w, —windowed, —noconsole
-
Windows and macOS: do not provide a console window for standard i/o. On
macOS this also triggers building a macOS .app bundle. On Windows this
option is automatically set if the first script is a ‘.pyw’ file. This
option is ignored on *NIX systems.
- —hide-console {hide-late,hide-early,minimize-late,minimize-early}
-
Windows only: in console-enabled executable, have bootloader automatically
hide or minimize the console window if the program owns the console window
(i.e., was not launched from an existing console window).
- -i, —icon <FILE.ico or FILE.exe,ID or FILE.icns or Image or «NONE»>
-
FILE.ico: apply the icon to a Windows executable. FILE.exe,ID: extract the
icon with ID from an exe. FILE.icns: apply the icon to the .app bundle on
macOS. If an image file is entered that isn’t in the platform format (ico
on Windows, icns on Mac), PyInstaller tries to use Pillow to translate the
icon into the correct format (if Pillow is installed). Use “NONE” to not
apply any icon, thereby making the OS show some default (default: apply
PyInstaller’s icon). This option can be used multiple times.
- —disable-windowed-traceback
-
Disable traceback dump of unhandled exception in windowed (noconsole) mode
(Windows and macOS only), and instead display a message that this feature
is disabled.
Windows Specific Options
- —version-file FILE
-
Add a version resource from FILE to the exe.
- —manifest <FILE or XML>
-
Add manifest FILE or XML to the exe.
- -m <FILE or XML>
-
Deprecated shorthand for –manifest.
- -r, —resource RESOURCE
-
Add or update a resource to a Windows executable. The RESOURCE is one to
four items, FILE[,TYPE[,NAME[,LANGUAGE]]]. FILE can be a data file or an
exe/dll. For data files, at least TYPE and NAME must be specified. LANGUAGE
defaults to 0 or may be specified as wildcard * to update all resources of
the given TYPE and NAME. For exe/dll files, all resources from FILE will be
added/updated to the final executable if TYPE, NAME and LANGUAGE are
omitted or specified as wildcard *. This option can be used multiple
times.
- —uac-admin
-
Using this option creates a Manifest that will request
elevation upon application start.
- —uac-uiaccess
-
Using this option allows an elevated application to
work with Remote Desktop.
Macos Specific Options
- —argv-emulation
-
Enable argv emulation for macOS app bundles. If
enabled, the initial open document/URL event is
processed by the bootloader and the passed file paths
or URLs are appended to sys.argv.
- —osx-bundle-identifier BUNDLE_IDENTIFIER
-
macOS .app bundle identifier is used as the default unique program name for
code signing purposes. The usual form is a hierarchical name in reverse DNS
notation. For example: com.mycompany.department.appname (default: first
script’s basename)
- —target-architecture, —target-arch ARCH
-
Target architecture (macOS only; valid values: x86_64, arm64, universal2).
Enables switching between universal2 and single-arch version of frozen
application (provided python installation supports the target
architecture). If not target architecture is not specified, the current
running architecture is targeted.
- —codesign-identity IDENTITY
-
Code signing identity (macOS only). Use the provided identity to sign
collected binaries and generated executable. If signing identity is not
provided, ad- hoc signing is performed instead.
- —osx-entitlements-file FILENAME
-
Entitlements file to use when code-signing the collected binaries (macOS
only).
Rarely Used Special Options
- —runtime-tmpdir PATH
-
Where to extract libraries and support files in onefile mode. If this
option is given, the bootloader will ignore any temp-folder location
defined by the run-time OS. The_MEIxxxxxx-folder will be created here.
Please use this option only if you know what you are doing. Note that on
POSIX systems, PyInstaller’s bootloader does NOT perform shell-style
environment variable expansion on the given path string. Therefore, using
environment variables (e.g.,~or$HOME) in path will NOT work.
- —bootloader-ignore-signals
-
Tell the bootloader to ignore signals rather than forwarding them to the
child process. Useful in situations where for example a supervisor process
signals both the bootloader and the child (e.g., via a process group) to
avoid signalling the child twice.
Shortening the Command
Because of its numerous options, a full pyinstaller command
can become very long.
You will run the same command again and again as you develop
your script.
You can put the command in a shell script or batch file,
using line continuations to make it readable.
For example, in GNU/Linux:
pyinstaller --noconfirm --log-level=WARN \
    --onefile --nowindow \
    --add-data="README:." \
    --add-data="image1.png:img" \
    --add-binary="libfoo.so:lib" \
    --hidden-import=secret1 \
    --hidden-import=secret2 \
    --upx-dir=/usr/local/share/ \
    myscript.spec
Or in Windows, use the little-known BAT file line continuation:
pyinstaller --noconfirm --log-level=WARN ^
    --onefile --nowindow ^
    --add-data="README:." ^
    --add-data="image1.png:img" ^
    --add-binary="libfoo.so:lib" ^
    --hidden-import=secret1 ^
    --hidden-import=secret2 ^
    --icon=..\MLNMFLCN.ICO ^
    myscript.spec
Running PyInstaller from Python code
If you want to run PyInstaller from Python code, you can use the run function
defined in PyInstaller.__main__. For instance, the following code:
import PyInstaller.__main__

PyInstaller.__main__.run([
    'my_script.py',
    '--onefile',
    '--windowed'
])
Is equivalent to:
pyinstaller my_script.py --onefile --windowed
Using UPX
UPX is a free utility for compressing executable files and libraries.
It is available for most operating systems and can compress a large number
of executable file formats. See the UPX home page for downloads, and for
the list of supported file formats.
When UPX is available, PyInstaller uses it to individually compress
each collected binary file (executable, shared library, or python
extension) in order to reduce the overall size of the frozen application
(the one-dir bundle directory, or the one-file executable). The frozen
application’s executable itself is not UPX-compressed (regardless of one-dir
or one-file mode), as most of its size comprises the embedded archive that
already contains individually compressed files.
PyInstaller looks for the UPX in the standard executable path(s) (defined
by PATH environment variable), or in the path specified via the
--upx-dir command-line option. If found, it is used automatically.
The use of UPX can be completely disabled using the --noupx
command-line option.
Note
UPX is currently used only on Windows. On other operating systems,
the collected binaries are not processed even if UPX is found. The
shared libraries (e.g., the Python shared library) built on modern
linux distributions seem to break when processed with UPX, resulting
in defunct application bundles. On macOS, UPX currently fails to
process .dylib shared libraries; furthermore the UPX-compressed files
fail the validation check of the codesign utility, and therefore
cannot be code-signed (which is a requirement on the Apple M1 platform).
Excluding problematic files from UPX processing
Using UPX may end up corrupting a collected shared library. Known examples
of such corruption are Windows DLLs with Control Flow Guard (CFG) enabled, as well as Qt5 and Qt6
plugins. In such cases,
individual files may be need to be excluded from UPX processing, using
the --upx-exclude option (or using the upx_exclude argument
in the .spec file).
Changed in version 4.2: PyInstaller detects CFG-enabled DLLs and automatically excludes
them from UPX processing.
Changed in version 4.3: PyInstaller automatically excludes Qt5 and Qt6 plugins from
UPX processing.
Although PyInstaller attempts to automatically detect and exclude some of
the problematic files from UPX processing, there are cases where the
UPX excludes need to be specified manually. For example, 32-bit Windows
binaries from the PySide2 package (Qt5 DLLs and python extension modules)
have been reported
to be corrupted by UPX.
Changed in version 5.0: Unlike earlier releases that compared the provided UPX-exclude names
against basenames of the collect binary files (and, due to incomplete
case normalization, required provided exclude names to be lowercase
on Windows), the UPX-exclude pattern matching now uses OS-default
case sensitivity and supports the wildcard (*) operator. It also
supports specifying (full or partial) parent path of the file.
The provided UPX exclude patterns are matched against source (origin)
paths of the collected binary files, and the matching is performed from
right to left.
For example, to exclude Qt5 DLLs from the PySide2 package, use
--upx-exclude "Qt*.dll", and to exclude the python extensions
from the PySide2 package, use --upx-exclude "PySide2\*.pyd".
Splash Screen (Experimental)
Note
This feature is incompatible with macOS. In the current design, the
splash screen operates in a secondary thread, which is disallowed by
the Tcl/Tk (or rather, the underlying GUI toolkit) on macOS.
Some applications may require a splash screen as soon as the application
(bootloader) has been started, because especially in onefile mode large
applications may have long extraction/startup times, while the bootloader
prepares everything, where the user cannot judge whether the application
was started successfully or not.
The bootloader is able to display a one-image (i.e. only an image) splash
screen, which is displayed before the actual main extraction process starts.
The splash screen supports non-transparent and hard-cut-transparent images as background
image, so non-rectangular splash screens can also be displayed.
Note
Splash images with transparent regions are not supported on Linux due to
Tcl/Tk platform limitations. The -transparentcolor and -transparent wm attributes
used by PyInstaller are not available to Linux.
This splash screen is based on Tcl/Tk, which is the same library used by the Python
module tkinter. PyInstaller bundles the dynamic libraries of tcl and tk into the
application at compile time. These are loaded into the bootloader at startup of the
application after they have been extracted (if the program has been packaged as an
onefile archive). Since the file sizes of the necessary dynamic libraries are very small,
there is almost no delay between the start of the application and the splash screen.
The compressed size of the files necessary for the splash screen is about 1.5 MB.
As an additional feature, text can optionally be displayed on the splash screen. This
can be changed/updated from within Python. This offers the possibility to
display the splash screen during longer startup procedures of a Python program
(e.g. waiting for a network response or loading large files into memory). You
can also start a GUI behind the splash screen, and only after it is completely
initialized the splash screen can be closed. Optionally, the font, color and
size of the text can be set. However, the font must be installed on the user
system, as it is not bundled. If the font is not available, a fallback font is used.
If the splash screen is configured to show text, it will automatically (as onefile archive)
display the name of the file that is currently being unpacked, this acts as a progress bar.
The pyi_splash Module
The splash screen is controlled from within Python by the pyi_splash module, which can
be imported at runtime. This module cannot be installed by a package manager
because it is part of PyInstaller and is included as needed.
This module must be imported within the Python program. The usage is as follows:
import pyi_splash

# Update the text on the splash screen
pyi_splash.update_text("PyInstaller is a great software!")
pyi_splash.update_text("Second time's a charm!")

# Close the splash screen. It does not matter when the call
# to this function is made, the splash screen remains open until
# this function is called or the Python program is terminated.
pyi_splash.close()
Of course the import should be in a try ... except block, in case the program is
used externally as a normal Python script, without a bootloader.
For a detailed description see pyi_splash Module (Detailed).
Supporting Multiple Platforms
If you distribute your application for only one combination of OS and Python,
just install PyInstaller like any other package and use it in your
normal development setup.
Supporting Multiple Python Environments
When you need to bundle your application within one OS
but for different versions of Python and support libraries – for example,
a Python 3.6 version and a Python 3.7 version;
or a supported version that uses Qt4 and a development version that uses Qt5 –
we recommend you use venv.
With venv you can maintain different combinations of Python
and installed packages, and switch from one combination to another easily.
These are called virtual environments or venvs in short.
-
Use venv to create as many different development environments as you need,
each with its unique combination of Python and installed packages. -
Install PyInstaller in each virtual environment.
-
Use PyInstaller to build your application in each virtual environment.
Note that when using venv, the path to the PyInstaller commands is:
-
Windows: ENV_ROOT\Scripts
-
Others: ENV_ROOT/bin
Under Windows, the pip-Win package makes it
especially easy to set up different environments and switch between them.
Under GNU/Linux and macOS, you switch environments at the command line.
See PEP 405
and the official Python Tutorial on Virtual Environments and Packages
for more information about Python virtual environments.
Supporting Multiple Operating Systems
If you need to distribute your application for more than one OS,
for example both Windows and macOS, you must install PyInstaller
on each platform and bundle your app separately on each.
You can do this from a single machine using virtualization.
The free virtualBox or the paid VMWare and Parallels
allow you to run another complete operating system as a “guest”.
You set up a virtual machine for each “guest” OS.
In it you install
Python, the support packages your application needs, and PyInstaller.
A File Sync & Share system like NextCloud is useful with virtual machines.
Install the synchronization client in each virtual machine,
all linked to your synchronization account.
Keep a single copy of your script(s) in a synchronized folder.
Then on any virtual machine you can run PyInstaller thus:
cd ~/NextCloud/project_folder/src # GNU/Linux, Mac -- Windows similar
rm *.pyc # get rid of modules compiled by another Python
pyinstaller --workpath=path-to-local-temp-folder  \
            --distpath=path-to-local-dist-folder  \
            ...other options as required...       \
            ./myscript.py
PyInstaller reads scripts from the common synchronized folder,
but writes its work files and the bundled app in folders that
are local to the virtual machine.
If you share the same home directory on multiple platforms, for
example GNU/Linux and macOS, you will need to set the PYINSTALLER_CONFIG_DIR
environment variable to different values on each platform otherwise
PyInstaller may cache files for one platform and use them on the other
platform, as by default it uses a subdirectory of your home directory
as its cache location.
It is said to be possible to cross-develop for Windows under GNU/Linux
using the free Wine environment.
Further details are needed, see How to Contribute.
Capturing Windows Version Data
A Windows app may require a Version resource file.
A Version resource contains a group of data structures,
some containing binary integers and some containing strings,
that describe the properties of the executable.
For details see the Microsoft Version Information Structures page.
Version resources are complex and
some elements are optional, others required.
When you view the version tab of a Properties dialog,
there’s no simple relationship between
the data displayed and the structure of the resource.
For this reason PyInstaller includes the pyi-grab_version command.
It is invoked with the full path name of any Windows executable
that has a Version resource:
pyi-grab_versionexecutable_with_version_resource
The command writes text that represents
a Version resource in readable form to standard output.
You can copy it from the console window or redirect it to a file.
Then you can edit the version information to adapt it to your program.
Using pyi-grab_version you can find an executable that displays the kind of
information you want, copy its resource data, and modify it to suit your package.
The version text file is encoded UTF-8 and may contain non-ASCII characters.
(Unicode characters are allowed in Version resource string fields.)
Be sure to edit and save the text file in UTF-8 unless you are
certain it contains only ASCII string values.
Your edited version text file can be given with the --version-file
option to pyinstaller or pyi-makespec.
The text data is converted to a Version resource and
installed in the bundled app.
In a Version resource there are two 64-bit binary values,
FileVersion and ProductVersion.
In the version text file these are given as four-element tuples,
for example:
filevers=(2, 0, 4, 0),
prodvers=(2, 0, 4, 0),
The elements of each tuple represent 16-bit values
from most-significant to least-significant.
For example the value (2, 0, 4, 0) resolves to
0002000000040000 in hex.
You can also install a Version resource from a text file after
the bundled app has been created, using the pyi-set_version command:
pyi-set_versionversion_text_file executable_file
The pyi-set_version utility reads a version text file as written
by pyi-grab_version, converts it to a Version resource,
and installs that resource in the executable_file specified.
For advanced uses, examine a version text file as written by pyi-grab_version.
You find it is Python code that creates a VSVersionInfo object.
The class definition for VSVersionInfo is found in
utils/win32/versioninfo.py in the PyInstaller distribution folder.
You can write a program that imports versioninfo.
In that program you can eval
the contents of a version info text file to produce a
VSVersionInfo object.
You can use the .toRaw() method of that object to
produce a Version resource in binary form.
Or you can apply the unicode() function to the object
to reproduce the version text file.
Building macOS App Bundles
Under macOS, PyInstaller always builds a UNIX executable in
dist.
If you specify --onedir, the output is a folder named myscript
containing supporting files and an executable named myscript.
If you specify --onefile, the output is a single UNIX executable
named myscript.
Either executable can be started from a Terminal command line.
Standard input and output work as normal through that Terminal window.
If you specify --windowed with either option, the dist folder
also contains a macOS app bundle named myscript.app.
Note
Generating app bundles with onefile executables (i.e., using the
combination of --onefile and --windowed options),
while possible, is not recommended. Such app bundles are inefficient,
because they require unpacking on each run (and the unpacked content
might be scanned by the OS each time). Furthermore, onefile executables
will not work when signed/notarized with sandbox enabled (which
is a requirement for distribution of apps through Mac App Store).
As you are likely aware, an app bundle is a special type of folder.
The one built by PyInstaller always contains a folder named
Contents, which contains:
A file named
Info.plistthat describes the app.A folder named
MacOSthat contains the program executable.A folder named
Frameworksthat contains the collected binaries
(shared libraries, python extensions) and nested .framework bundles.
It also contains symbolic links to data files and directories from
theResourcesdirectory.A folder named
Resourcesthat contains the icon file and all
collected data files. It also contains symbolic links to binaries
and directories from theResourcesdirectory.
Note
The contents of the Frameworks and Resources directories
are cross-linked between the two directories in an effort to
maintain an illusion of a single content directory (which is required
by some packages), while also trying to satisfy the Apple’s file
placement requirements for codesigning.
Use the --icon argument to specify a custom icon for the application.
It will be copied into the Resources folder.
(If you do not specify an icon file, PyInstaller supplies a
file icon-windowed.icns with the PyInstaller logo.)
Use the --osx-bundle-identifier argument to add a bundle identifier.
This becomes the CFBundleIdentifier used in code-signing
(see the PyInstaller code signing recipe
and for more detail, the Apple code signing overview technical note).
You can add other items to the Info.plist by editing the spec file;
see Spec File Options for a macOS Bundle below.
Platform-specific Notes
GNU/Linux
Making GNU/Linux Apps Forward-Compatible
Under GNU/Linux, PyInstaller does not bundle libc
(the C standard library, usually glibc, the Gnu version) with the app.
Instead, the app expects to link dynamically to the libc from the
local OS where it runs.
The interface between any app and libc is forward compatible to
newer releases, but it is not backward compatible to older releases.
For this reason, if you bundle your app on the current version of GNU/Linux,
it may fail to execute (typically with a runtime dynamic link error) if
it is executed on an older version of GNU/Linux.
The solution is to always build your app on the oldest version of
GNU/Linux you mean to support.
It should continue to work with the libc found on newer versions.
The GNU/Linux standard libraries such as glibc are distributed in 64-bit
and 32-bit versions, and these are not compatible.
As a result you cannot bundle your app on a 32-bit system and run it
on a 64-bit installation, nor vice-versa.
You must make a unique version of the app for each word-length supported.
Note that PyInstaller does bundle other shared libraries that are discovered
via dependency analysis, such as libstdc++.so.6, libfontconfig.so.1,
libfreetype.so.6. These libraries may be required on systems where older
(and thus incompatible) versions of these libraries are available. On the
other hand, the bundled libraries may cause issues when trying to load a
system-provided shared library that is linked against a newer version of the
system-provided library.
For example, system-installed mesa DRI drivers (e.g., radeonsi_dri.so)
depend on the system-provided version of libstdc++.so.6. If the frozen
application bundles an older version of libstdc++.so.6 (as collected from
the build system), this will likely cause missing symbol errors and prevent
the DRI drivers from loading. In this case, the bundled libstdc++.so.6
should be removed. However, this may not work on a different distribution
that provides libstdc++.so.6 older than the one from the build system; in
that case, the bundled version should be kept, because the system-provided
version may lack the symbols required by other collected binaries that depend
on libstdc++.so.6.
Windows
The developer needs to take
special care to include the Visual C++ run-time .dlls:
Python 3.5+ uses Visual Studio 2015 run-time, which has been renamed into
“Universal CRT“
and has become part of Windows 10.
For Windows Vista through Windows 8.1 there are Windows Update packages,
which may or may not be installed in the target-system.
So you have the following options:
-
Build on Windows 7 which has been reported to work.
-
Include one of the VCRedist packages (the redistributable package files)
into your application’s installer. This is Microsoft’s recommended way, see
“Distributing Software that uses the Universal CRT“ in the above-mentioned
link, numbers 2 and 3. -
Install the Windows Software Development Kit (SDK) for Windows 10 and expand the
.spec-file to include the required DLLs, see “Distributing Software that
uses the Universal CRT“ in the above-mentioned link, number 6.If you think, PyInstaller should do this by itself, please help
improving PyInstaller.
macOS
Making macOS apps Forward-Compatible
On macOS, system components from one version of the OS are usually compatible
with later versions, but they may not work with earlier versions. While
PyInstaller does not collect system components of the OS, the collected
3rd party binaries (e.g., python extension modules) are built against
specific version of the OS libraries, and may or may not support older
OS versions.
As such, the only way to ensure that your frozen application supports
an older version of the OS is to freeze it on the oldest version of the
OS that you wish to support. This applies especially when building with
Homebrew python, as its binaries usually explicitly target the
running OS.
For example, to ensure compatibility with “Mojave” (10.14) and later versions,
you should set up a full environment (i.e., install python, PyInstaller,
your application’s code, and all its dependencies) in a copy of macOS 10.14,
using a virtual machine if necessary. Then use PyInstaller to freeze
your application in that environment; the generated frozen application
should be compatible with that and later versions of macOS.
Building 32-bit Apps in macOS
Note
This section is largely obsolete, as support for 32-bit application
was removed in macOS 10.15 Catalina (for 64-bit multi-arch support
on modern versions of macOS, see here).
However, PyInstaller still supports building 32-bit bootloader,
and 32-bit/64-bit Python installers are still available from
python.org for (some) versions of Python 3.7 which PyInstaller dropped
support for in v6.0.
Older versions of macOS supported both 32-bit and 64-bit executables.
PyInstaller builds an app using the the word-length of the Python used to execute it.
That will typically be a 64-bit version of Python,
resulting in a 64-bit executable.
To create a 32-bit executable, run PyInstaller under a 32-bit Python.
To verify that the installed python version supports execution in either
64- or 32-bit mode, use the file command on the Python executable:
$ file /usr/local/bin/python3
/usr/local/bin/python3: Mach-O universal binary with 2 architectures
/usr/local/bin/python3 (for architecture i386):     Mach-O executable i386
/usr/local/bin/python3 (for architecture x86_64):   Mach-O 64-bit executable x86_64
The OS chooses which architecture to run, and typically defaults to 64-bit.
You can force the use of either architecture by name using the arch command:
$ /usr/local/bin/python3
Python 3.7.6 (v3.7.6:43364a7ae0, Dec 18 2019, 14:12:53)
[GCC 4.2.1 (Apple Inc. build 5666) (dot 3)] on darwin
Type "help", "copyright", "credits" or "license" for more information.
>>> import sys; sys.maxsize
9223372036854775807

$ arch -i386 /usr/local/bin/python3
Python 3.7.6 (v3.7.6:43364a7ae0, Dec 18 2019, 14:12:53)
[GCC 4.2.1 (Apple Inc. build 5666) (dot 3)] on darwin
Type "help", "copyright", "credits" or "license" for more information.
>>> import sys; sys.maxsize
2147483647
Note
PyInstaller does not provide pre-built 32-bit bootloaders for
macOS anymore. In order to use PyInstaller with 32-bit python,
you need to build the bootloader
yourself, using an XCode
version that still supports compiling 32-bit. Depending on the
compiler/toolchain, you may also need to explicitly pass
--target-arch=32bit to the waf command.
Getting the Opened Document Names
When user double-clicks a document of a type that is registered with
your application, or when a user drags a document and drops it
on your application’s icon, macOS launches your application
and provides the name(s) of the opened document(s) in the
form of an OpenDocument AppleEvent.
These events are typically handled via installed event handlers in your
application (e.g., using Carbon API via ctypes, or using
facilities provided by UI toolkits, such as tkinter or PyQt5).
Alternatively, PyInstaller also supports conversion of open
document/URL events into arguments that are appended to sys.argv.
This applies only to events received during application launch, i.e.,
before your frozen code is started. To handle events that are dispatched
while your application is already running, you need to set up corresponding
event handlers.
For details, see this section.
AIX
Depending on whether Python was build as a 32-bit or a 64-bit executable
you may need to set or unset
the environment variable OBJECT_MODE.
To determine the size the following command can be used:
$ python -c "import sys; print(sys.maxsize <= 2**32)"
True
When the answer is True (as above) Python was build as a 32-bit
executable.
When working with a 32-bit Python executable proceed as follows:
$ unset OBJECT_MODE
$ pyinstaller <your arguments>
When working with a 64-bit Python executable proceed as follows:
$ export OBJECT_MODE=64
$ pyinstaller <your arguments>
Cygwin
Cygwin-based Frozen Applications and cygwin1.dll
Under Cygwin, the PyInstaller’s bootloader executable (and therefore the
frozen application’s executable) ends up being dynamically linked against
the cygwin1.dll. As noted under Q 6.14 of the Cygwin’s FAQ,
the Cygwin library cannot be statically linked into an executable in
order to obtain an independent, self-contained executable.
This means that at run-time, the cygwin1.dll needs to be available
to the frozen application’s executable for it to be able to launch.
Depending on the deployment scenario, this means that it needs to be
either available in the environment (i.e., the environment’s search path)
or a copy of the DLL needs to be available next to the executable.
On the other hand, Cygwin does not permit more than one copy of
cygwin1.dll; or rather, it requires multiple copies of the DLL
to be strictly separated, as each instance constitutes its own Cygwin
installation/environment (see Q 4.20 of the Cygwin FAQ).
Trying to run an executable with an adjacent copy of the DLL from an
existing Cygwin environment will likely result in the application crashing.
In practice, this means that if you want to create a frozen application
that will run in an existing Cygwin environment, the application
should not bundle a copy of cygwin1.dll. On the other hand, if you
want to create a frozen application that will run outside of a Cygwin
environment (i.e., a “stand-alone” application that runs directly under
Windows), the application will require a copy of cygwin1.dll – and
that copy needs to be placed next to the program’s executable, regardless
of whether onedir or onefile build mode is used.
As PyInstaller cannot guess the deployment mode that you are pursuing,
it makes no attempt to collect cygwin1.dll. So if you want your
application to run outside of an externally-provided Cygwin environment,
you need to place a copy of cygwin1.dll next to the program’s
executable and distribute them together.
Note
If you plan to create a “stand-alone” Cygwin-based frozen application
(i.e., distribute cygwin1.dll along with the executable), you will
likely want to build the bootloader with statically linked zlib
library, in order to avoid a run-time dependency on cygz.dll.
You can do so by passing --static-zlib option to waf when
manually building the bootloader before installing PyInstaller
from source, or by adding the option to PYINSTALLER_BOOTLOADER_WAF_ARGS
environment variable if installing directly via pip install.
For details, see Building the Bootloader.
- Version:
-
PyInstaller 6.13.0
- Homepage:
-
https://pyinstaller.org/
- Contact:
-
pyinstaller@googlegroups.com
- Authors:
-
David Cortesi, based on structure by Giovanni Bajo & William Caban, based on Gordon McMillan’s manual
- Copyright:
-
This document has been placed in the public domain.
PyInstaller bundles a Python application and all its dependencies into a single package.
The user can run the packaged app without installing a Python interpreter or any modules.
PyInstaller supports Python 3.8 and newer, and correctly bundles many major Python packages
such as numpy, matplotlib, PyQt, wxPython, and others.
PyInstaller is tested against Windows, macOS, and Linux.
However, it is not a cross-compiler; to make a Windows app you run PyInstaller on Windows,
and to make a Linux app you run it on Linux, etc.
x
PyInstaller has been used successfully with AIX, Solaris, FreeBSD and OpenBSD but testing
against them is not part of our continuous integration tests, and the development team offers
no guarantee (all code for these platforms comes from external contributions)
that PyInstaller will work on these platforms or that they will continue to be supported.
Quickstart
Make sure you have the Requirements installed, and then install PyInstaller from PyPI:
pip install -U pyinstaller
Open a command prompt/shell window, and navigate to the directory where your .py file is
located, then build your app with the following command:
pyinstaller your_program.py
Your bundled application should now be available in the dist folder.
Contents:
- Requirements
- Windows
- macOS
- GNU/Linux
- AIX, Solaris, FreeBSD and OpenBSD
- License
- How To Contribute
- Some ideas how you can help
- How to Install PyInstaller
- Installing from the source archive
- Troubleshooting missing PyInstaller command
- Installed commands
- What PyInstaller Does and How It Does It
- Analysis: Finding the Files Your Program Needs
- Bundling to One Folder
- How the One-Folder Program Works
- Bundling to One File
- How the One-File Program Works
- Using a Console Window
- Hiding the Source Code
- Using PyInstaller
- Options
- Shortening the Command
- Running PyInstaller from Python code
- Using UPX
- Splash Screen (Experimental)
- The
pyi_splashModule - Defining the Extraction Location
- Supporting Multiple Platforms
- Capturing Windows Version Data
- Building macOS App Bundles
- Platform-specific Notes
- Common Issues and Pitfalls
- Requirements Imposed by Symbolic Links in Frozen Application
- Launching External Programs from the Frozen Application
- Multi-processing
- Using
sys.executableto spawn subprocesses that outlive the application process / Implementing application restart sys.stdin,sys.stdout, andsys.stderrinnoconsole/windowedApplications (Windows only)
- Run-time Information
- Using
__file__ - Using
sys.executableandsys.argv[0] - LD_LIBRARY_PATH / LIBPATH considerations
- Using
- Using Spec Files
- Spec File Operation
- Adding Files to the Bundle
- Specifying Python Interpreter Options
- Spec File Options for a macOS Bundle
- POSIX Specific Options
- The
SplashTarget - Multipackage Bundles
- Globals Available to the Spec File
- Adding parameters to spec files
- Using shared code and configuration in spec files
- Notes about specific Features
- Ctypes Dependencies
- SWIG support
- Cython support
- Bytecode Optimization Level
- macOS multi-arch support
- macOS binary code signing
- macOS event forwarding and argv emulation in app bundles
- Signal handling in console Windows applications and onefile application cleanup
- Automatic hiding and minimization of console window under Windows
- When Things Go Wrong
- Recipes and Examples for Specific Problems
- Finding out What Went Wrong
- Helping PyInstaller Find Modules
- Getting the Latest Version
- Asking for Help
- Advanced Topics
- The Bootstrap Process in Detail
- Environment Variables Used by Frozen Applications
pyi_splashModule (Detailed)- The Table of Contents (TOC) lists and the Tree Class
- Inspecting Archives
- Inspecting Executables
- Creating a Reproducible Build
- Understanding PyInstaller Hooks
- How a Hook Is Loaded
- Providing PyInstaller Hooks with your Package
- Hook Global Variables
- Useful Items in
PyInstaller.compat - Useful Items in
PyInstaller.utils.hooks - Subprocess isolation with
PyInstaller.isolated - The
hook(hook_api)Function - The
pre_find_module_path( pfmp_api )Method - The
pre_safe_import_module( psim_api )Method
- Hook Configuration Options
- Supported hooks and options
- Adding an option to the hook
- Building the Bootloader
- Building for GNU/Linux
- Building for macOS
- Building for Windows
- Building for AIX
- Building for FreeBSD
- Vagrantfile Virtual Machines
- Changelog for PyInstaller
- 6.13.0 (2025-04-15)
- 6.12.0 (2025-02-08)
- 6.11.1 (2024-11-10)
- 6.11.0 (2024-10-15)
- 6.10.0 (2024-08-10)
- 6.9.0 (2024-07-06)
- 6.8.0 (2024-06-08)
- 6.7.0 (2024-05-21)
- 6.6.0 (2024-04-13)
- 6.5.0 (2024-03-09)
- 6.4.0 (2024-02-10)
- 6.3.0 (2023-12-10)
- 6.2.0 (2023-11-11)
- 6.1.0 (2023-10-13)
- 6.0.0 (2023-09-22)
- 5.13.2 (2023-08-29)
- 5.13.1 (2023-08-26)
- 5.13.0 (2023-06-24)
- 5.12.0 (2023-06-08)
- 5.11.0 (2023-05-13)
- 5.10.1 (2023-04-14)
- 5.10.0 (2023-04-11)
- 5.9.0 (2023-03-13)
- 5.8.0 (2023-02-11)
- 5.7.0 (2022-12-04)
- 5.6.2 (2022-10-31)
- 5.6.1 (2022-10-25)
- 5.6 (2022-10-23)
- 5.5 (2022-10-08)
- 5.4.1 (2022-09-11)
- 5.4 (2022-09-10)
- 5.3 (2022-07-30)
- 5.2 (2022-07-08)
- 5.1 (2022-05-17)
- 5.0.1 (2022-04-25)
- 5.0 (2022-04-15)
- 4.10 (2022-03-05)
- 4.9 (2022-02-03)
- 4.8 (2022-01-06)
- 4.7 (2021-11-10)
- 4.6 (2021-10-29)
- 4.5.1 (2021-08-06)
- 4.5 (2021-08-01)
- 4.4 (2021-07-13)
- 4.3 (2021-04-16)
- 4.2 (2021-01-13)
- 4.1 (2020-11-18)
- 4.0 (2020-08-08)
- Older Versions
- Credits
- Contributions to PyInstaller 6.13.0
- Contributions to PyInstaller 6.12.0
- Contributions to PyInstaller 6.11.1
- Contributions to PyInstaller 6.11.0
- Contributions to PyInstaller 6.10.0
- Contributions to PyInstaller 6.9.0
- Contributions to PyInstaller 6.8.0
- Contributions to PyInstaller 6.7.0
- Contributions to PyInstaller 6.6.0
- Contributions to PyInstaller 6.5.0
- Contributions to PyInstaller 6.4.0
- Contributions to PyInstaller 6.3.0
- Contributions to PyInstaller 6.2.0
- Contributions to PyInstaller 6.1.0
- Contributions to PyInstaller 6.0.0
- Contributions to PyInstaller 5.13.2
- Contributions to PyInstaller 5.13.1
- Contributions to PyInstaller 5.13.0
- Contributions to PyInstaller 5.12.0
- Contributions to PyInstaller 5.11.0
- Contributions to PyInstaller 5.10.1
- Contributions to PyInstaller 5.10.0
- Contributions to PyInstaller 5.9.0
- Contributions to PyInstaller 5.8.0
- Contributions to PyInstaller 5.7.0
- Contributions to PyInstaller 5.6.2
- Contributions to PyInstaller 5.6.1
- Contributions to PyInstaller 5.6
- Contributions to PyInstaller 5.5
- Contributions to PyInstaller 5.4.1
- Contributions to PyInstaller 5.4
- Contributions to PyInstaller 5.3
- Contributions to PyInstaller 5.2
- Contributions to PyInstaller 5.1
- Contributions to PyInstaller 5.0.1
- Contributions to PyInstaller 5.0
- Contributions to PyInstaller 4.10
- Contributions to PyInstaller 4.9
- Contributions to PyInstaller 4.8
- Contributions to PyInstaller 4.7
- Contributions to PyInstaller 4.6
- Contributions to PyInstaller 4.5.1
- Contributions to PyInstaller 4.5
- Contributions to PyInstaller 4.4
- Contributions to PyInstaller 4.3
- Contributions to PyInstaller 4.2
- Contributions to PyInstaller 4.1
- Contributions to PyInstaller 4.0
- Contributions to PyInstaller 3.6
- Contributions to PyInstaller 3.5
- Contributions to PyInstaller 3.4
- Contributions to PyInstaller 3.3.1
- Contributions to PyInstaller 3.3
- Contributions to PyInstaller 3.2.1
- Contributions to PyInstaller 3.2
- Contributions to PyInstaller 3.1.1
- Contributions to PyInstaller 3.1
- Contributions to PyInstaller 3.0
- Contributions to PyInstaller 2.1 and older
- Man Pages
- pyinstaller
- pyi-makespec
- Development Guide
- Quickstart
- New to GitHub or Git?
- Coding conventions
- Running the Test Suite
- Guidelines for Commits
- Improving and Building the Documentation
- Creating Pull-Requests
- Changelog Entries
- pyenv and PyInstaller
- PyInstaller’s Branch Model
Indices and tables
-
Index
-
Module Index
-
Search Page
Уровень сложностиПростой
Время на прочтение3 мин
Количество просмотров194K
Вы изучаете данные и хотите поделиться своим кодом Python с другими, не раскрывая исходный код и не требуя от них установки Python и других компонентов? Если да, то вам может быть интересна конвертация вашего скрипта Python в исполняемый файл.

Исполняемый файл — это файл, который может быть установлен или запущен на компьютере без использования дополнительного программного обеспечения или библиотек. Он имеет расширение .exe и обычно используется для программных приложений в Windows. Конвертируя свой сценарий Python в исполняемый файл, вы можете защитить свой код от изменения или кражи, облегчить другим людям использование вашей программы и сделать автоматическим выполнение задач.
В этой статье я покажу вам два простых метода конвертации файла Python в исполняемый файл с помощью PyInstaller и auto-py-to-exe. Это две популярные библиотеки Python, которые позволяют создавать автономные исполняемые файлы из скриптов Python. Для работы вам понадобится Python 3.6 или выше.
Способ 1: С помощью библиотеки PyInstaller:
Ссылка
PyInstaller — это библиотека Python, которая может анализировать ваш код и компоновать его с необходимыми модулями и библиотеками в один исполняемый файл. Она поддерживает множество платформ, включая Windows, Linux и Mac OS X. PyInstaller также может обрабатывать сложные случаи, такие как импорт файлов данных, скрытый импорт, приложения с графическим интерфейсом и т.д.
Чтобы использовать PyInstaller, вам нужно сначала установить его с помощью pip:
pip install pyinstallerЗатем вам нужно написать свой скрипт Python и сохранить его с расширением .py. В этом примере я буду использовать простой сценарий, который печатает «Hello World» и сохраняет его под именем hello.py:
print("Hello World")Далее необходимо открыть командную строку и перейти в каталог, где находится ваш скрипт. Затем необходимо выполнить следующую команду:
pyinstaller hello.pyВ результате вы создадите папку dist, содержащая исполняемый файл hello.exe. Вы можете дважды щелкнуть на этом файле, чтобы запустить его или поделиться им с другими.
Если вы хотите создать однофайловый исполняемый файл, не требующий дополнительных файлов или папок, вы можете использовать ключ —onefile:
pyinstaller --onefile hello.pyВ папке dist будет создан один файл hello.exe, содержащий все необходимые коды и ресурсы.
Если вы хотите скрыть окно консоли при запуске исполняемого файла, вы можете использовать опцию —noconsole:
pyinstaller --noconsole --onefile hello.pyБудет создан исполняемый файл, работающий в фоновом режиме.
Вы также можете настроить другие аспекты исполняемого файла, такие как иконка, имя, версия и т.д., используя различные опции или создав файл спецификации. За более подробной информацией вы можете обратиться к документации PyInstaller.
Способ 2: С помощью auto-py-to-exe:
Ссылка
auto-py-to-exe — это еще одна библиотека Python, которая может конвертировать скрипты Python в исполняемые файлы. Она основана на PyInstaller, но имеет графический интерфейс для пользователя (GUI), что делает ее более простой в работе. Вы можете просто выбрать свой скрипт, подобрать параметры и нажать кнопку, чтобы сгенерировать исполняемый файл.
Чтобы использовать auto-py-to-exe, вам нужно сначала установить его с помощью pip:
pip install auto-py-to-exeЗатем необходимо выполнить следующую команду для запуска графического интерфейса пользователя:
auto-py-to-exeОткроется окно, которое выглядит следующим образом:

Здесь вы можете выбрать свой скрипт, нажав на кнопку Browse рядом с Script Location. Вы также можете выбрать, хотите ли вы получить исполняемый файл в одном файле или в одной папке, выбрав One File или One Directory в разделе Output Options.
Вы также можете изменить другие настройки, такие как иконка, имя, окно консоли и т.д., перейдя на вкладку Advanced и изменив поля Additional Files или Window Based Options.
После того как вы закончите с настройками, нажмите на кнопку Convert .py to .exe в нижней части окна. Это запустит процесс преобразования и покажет результат на вкладке Консоль.
После завершения преобразования вы сможете найти исполняемый файл в папке вывода, указанной в разделе Output Options. Вы можете запустить его или поделиться им с другими пользователями.
От редакции
28 августа начнется новый поток по языку программирования Python. На нем мы разберем: Библиотеки Python и решение конкретных задач DevOps; Правила эффективного и поддерживаемого кода; Принципы автоматизации: Docker, Gitlab, Prometheus, K8S и многое другое.
Узнать больше о потоке вы можете на нашем сайте: https://slurm.io/course-python-for-ops
Установка PyInstaller не отличается от установки любой другой библиотеки Python.
pip install PyInstaller
Вот так можно проверить версию PyInstaller.
pyinstaller --versionЯ использую PyInstaller версии 4.2.
Создание exe файла с помощью PyInstaller
PyInstaller собирает в один пакет Python-приложение и все необходимые ему библиотеки следующим образом:
- Считывает файл скрипта.
- Анализирует код для выявления всех зависимостей, необходимых для работы.
- Создает файл spec, который содержит название скрипта, библиотеки-зависимости, любые файлы, включая те параметры, которые были переданы в команду PyInstaller.
- Собирает копии всех библиотек и файлов вместе с активным интерпретатором Python.
- Создает папку BUILD в папке со скриптом и записывает логи вместе с рабочими файлами в BUILD.
- Создает папку DIST в папке со скриптом, если она еще не существует.
- Записывает все необходимые файлы вместе со скриптом или в одну папку, или в один исполняемый файл.
Если использовать параметр команды onedir или -D при генерации исполняемого файла, тогда все будет помещено в одну папку. Это поведение по умолчанию. Если же использовать параметр onefile или -F, то все окажется в одном исполняемом файле.
Возьмем в качестве примера простейший скрипт на Python c названием simple.py, который содержит такой код.
import time
name = input("Введите ваше имя ")
print("Ваше имя ", name)
time.sleep(5)
Создадим один исполняемый файл. В командной строке введите:
pyinstaller --onefile simple.py
После завершения установки будет две папки, BUILD и DIST, а также новый файл с расширением .spec. Spec-файл будет называться так же, как и файл скрипта.
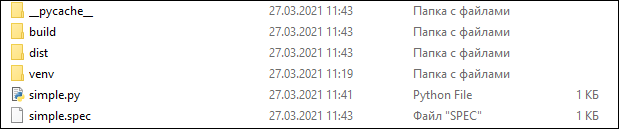
Python создает каталог распространения, который содержит основной исполняемый файл, а также все динамические библиотеки.
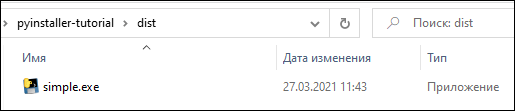
Вот что произойдет после запуска файла.
Добавление файлов с данными, которые будут использоваться exe-файлом
Есть CSV-файл netflix_titles.csv, и Python-script, который считывает количество записей в нем. Теперь нужно добавить этот файл в бандл с исполняемым файлом. Файл Python-скрипта назовем просто simple1.py.
import time
# pip install pandas
import pandas as pd


def count_records():
    data = pd.read_csv('netflix_titles.csv')
    print("Всего фильмов:", data.shape[0])


if __name__ == "__main__":
    count_records()
    time.sleep(5)
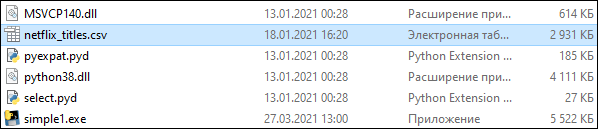
Создадим исполняемый файл с данными в папке.
pyinstaller --add-data "netflix_titles.csv;." simple1.py
Параметр --add-data позволяет добавить файлы с данными, которые нужно сохранить в одном бандле с исполняемым файлом. Этот параметр можно применить много раз.
Синтаксис add-data:
- add-data <source;destination> — Windows.
- add-data <source:destination> — Linux.
Можно увидеть, что файл теперь добавляется в папку DIST вместе с исполняемым файлом.
Также, открыв spec-файл, можно увидеть раздел datas, в котором указывается, что файл netflix_titles.csv копируется в текущую директорию.
...
a = Analysis(['simple1.py'],
             pathex=['E:\\myProject\\pyinstaller-tutorial'],
             binaries=[],
             datas=[('netflix_titles.csv', '.')],
...
Запустим файл simple1.exe, появится консоль с выводом: Всего фильмов: 7787.
Добавление файлов с данными и параметр onefile
Если задать параметр --onefile, то PyInstaller распаковывает все файлы в папку TEMP, выполняет скрипт и удаляет TEMP. Если вместе с add-data указать onefile, то нужно считать данные из папки. Путь папки меняется и похож на «_MEIxxxxxx-folder».
import time
import sys
import os
# pip install pandas
import pandas as pd


def count_records():
    os.chdir(sys._MEIPASS)
    data = pd.read_csv('netflix_titles.csv')
    print("Всего фильмов:", data.shape[0])


if __name__ == "__main__":
    count_records()
    time.sleep(5)
Скрипт обновлен для чтения папки TEMP и файлов с данными. Создадим exe-файл с помощью onefile и add-data.
pyinstaller --onefile --add-data "netflix_titles.csv;." simple1.pyПосле успешного создания файл simple1.exe появится в папке DIST.
Можно скопировать исполняемый файл на рабочий стол и запустить, чтобы убедиться, что нет никакой ошибки, связанной с отсутствием файла.
Дополнительные импорты с помощью Hidden Imports
Исполняемому файлу требуются все импорты, которые нужны Python-скрипту. Иногда PyInstaller может пропустить динамические импорты или импорты второго уровня, возвращая ошибку ImportError: No module named…
Для решения этой ошибки нужно передать название недостающей библиотеки в hidden-import.
Например, чтобы добавить библиотеку os, нужно написать вот так:
pyinstaller --onefile --add-data "netflix_titles.csv;." — hidden-import "os" simple1.pyФайл spec
Файл spec — это первый файл, который PyInstaller создает, чтобы закодировать содержимое скрипта Python вместе с параметрами, переданными при запуске.
PyInstaller считывает содержимое файла для создания исполняемого файла, определяя все, что может понадобиться для него.
Файл с расширением .spec сохраняется по умолчанию в текущей директории.
Если у вас есть какое-либо из нижеперечисленных требований, то вы можете изменить файл спецификации:
- Собрать в один бандл с исполняемым файлы данных.
- Включить другие исполняемые файлы: .dll или .so.
- С помощью библиотек собрать в один бандл несколько программы.
Например, есть скрипт simpleModel.py, который использует TensorFlow и выводит номер версии этой библиотеки.
import time
import tensorflow as tf


def view_model():
    print(tf.__version__)


if __name__ == "__main__" :
    model = view_model()
    time.sleep(5)
Компилируем модель с помощью PyInstaller:
pyinstaller -F simpleModel.pyПосле успешной компиляции запускаем исполняемый файл, который возвращает следующую ошибку.
...
File "site-packages\tensorflow_core\python_init_.py", line 49, in ImportError: cannot import name 'pywrap_tensorflow' from 'tensorflow_core.python'
Исправим ее, обновив файл spec. Одно из решений — создать файл spec.
$ pyi-makespec simpleModel.py -F
wrote E:\pyinstaller-tutorial\simpleModel.spec
now run pyinstaller.py to build the executable
Команда pyi-makespec создает spec-файл по умолчанию, содержащий все параметры, которые можно указать в командной строке. Файл simpleModel.spec создается в текущей директории.
Поскольку был использован параметр --onefile, то внутри файла будет только раздел exe.
...
exe = EXE(pyz,
          a.scripts,
          a.binaries,
          a.zipfiles,
          a.datas,
          [],
          name='simpleModel',
          debug=False,
          bootloader_ignore_signals=False,
          strip=False,
          upx=True,
          upx_exclude=[],
          runtime_tmpdir=None,
          console=True )
Если использовать параметр по умолчанию или onedir, то вместе с exe-разделом будет также и раздел collect.
Можно открыть simpleModel.spec и добавить следующий текст для создания хуков.
# -*- mode: python ; coding: utf-8 -*-

block_cipher = None
import os
spec_root = os.path.realpath(SPECPATH)
options = []
from PyInstaller.utils.hooks import collect_submodules, collect_data_files
tf_hidden_imports = collect_submodules('tensorflow_core')
tf_datas = collect_data_files('tensorflow_core', subdir=None, include_py_files=True)

a = Analysis(['simpleModel.py'],
             pathex=['E:\\myProject\\pyinstaller-tutorial'],
             binaries=[],
             datas=tf_datas + [],
             hiddenimports=tf_hidden_imports + [],
             hookspath=[],
...
Создаем хуки и добавляем их в hidden imports и раздел данных.
Хуки
Файлы хуков расширяют возможность PyInstaller обрабатывать такие требования, как необходимость включать дополнительные данные или импортировать динамические библиотеки.
Обычно пакеты Python используют нормальные методы для импорта своих зависимостей, но в отдельных случаях, как например TensorFlow, существует необходимость импорта динамических библиотек. PyInstaller не может найти все библиотеки, или же их может быть слишком много. В таком случае рекомендуется использовать вспомогательный инструмент для импорта из PyInstaller.utils.hooks и собрать все подмодули для библиотеки.
Скомпилируем модель после обновления файла simpleModel.spec.
pyinstaller simpleModel.spec
Скопируем исполняемый файл на рабочий стол и увидим, что теперь он корректно отображает версию TensorFlow.
Вывод:
PyInstaller предлагает несколько вариантов создания простых и сложных исполняемых файлов из Python-скриптов:
- Исполняемый файл может собрать в один бандл все требуемые данные с помощью параметра
--add-data. - Исполняемый файл и зависимые данные с библиотеками можно собрать в один файл или папку с помощью
--onefileили--onedirсоответственно. - Динамические импорты и библиотеки второго уровня можно включить с помощью
hidden-imports. - Файл spec позволяет создать исполняемый файл для обработки скрытых импортов и других файлов данных с помощью хуков.
Работает везде, собирается быстро

Обновлено 16.10.2024
easy
Обычно для запуска Python-скрипта нужно установить Python, потом все библиотеки, потом проверить зависимости и только потом можно запускать. Сегодня научимся собирать всё это в один файл — его можно будет запустить на любом компьютере, даже если там нет Python.
🤔 Что делаем: превращаем Python-скрипт в исполняемый файл, который можно потом будет запустить на любом компьютере.
🕔 Время: 5 минут.
✅ Понадобится: библиотека pyInstaller.
👉 Коротко суть. С помощью библиотеки pyInstaller можно собрать все файлы, модули и зависимости в одном месте, привязать к ним интерпретатор Python, а потом обернуть это в один файл. Это значит, что мы получаем как бы виртуальный контейнер, в котором уже есть всё, что нужно для запуска скрипта, — без установки на свой компьютер.
Как установить Python на компьютер и начать на нём писать
Ставим pyInstaller
В командной строке или в терминале VS Code пишем команду. Командную строку после этого не закрываем — она нам ещё пригодится:
pip install pyinstaller

Переходим в папку со скриптом
Чтобы было проще собирать скрипт в один файл, нам нужно перейти в ту папку, где лежит наш исходный скрипт. Для этого в той же командной строке используем команду cd, после которой пишем полный путь к папке. Например, если скрипт лежит в папке Downloads, то команда будет выглядеть так:
cd /Users/mihailpolanin/Downloads
Если всё прошло штатно, мы увидим название папки в конце приветствия командной строки:

Как работает скрипт, собранный в один файл
Есть два варианта работы библиотеки: собрать всё в одну папку или упаковать всё в один файл. Но на самом деле это всё примерно одно и то же, потому что итоговый файл работает так:
- Создаёт виртуальную папку.
- Распаковывает из себя все библиотеки, служебные файлы и исполняемый файл Python.
- На основе этого создаёт виртуальную среду и подключает все нужные библиотеки.
- Запускает Python и уже в нём выполняет наш скрипт.
Получается, что на самом деле мы просто создаём оболочку для скрипта, а внутри всё работает точно так же, как если бы мы запускали этот скрипт по старинке.
Вам может быть интересно:
Превращаем скрипт в исполняемый файл
Единственный параметр, который нам нужно указать при запуске — то, что результат нужен в виде единого файла. Для этого используется параметр --onefile — если его не будет, то библиотека сделает нам одну папку вместо одного файла.
Проверим работу упаковщика на примере скрипта из статьи про графический интерфейс в Python. Для этого нужно написать pyinstaller и через пробел — имя скрипта. Если скрипт называется gui.py, то команда будет выглядеть так:
pyinstaller --onefile gui.py
После запуска в папке со скриптом появятся две новых папки — build и dist. Первая нам не нужна, поэтому заходим в dist — там и лежит наш готовый файл. Если это делать в Windows, там будет лежать файл для Windows. Если делать на Mac OS, получится приложение для Mac OS.

Проверяем работу
Запускаем файл — просто дважды щёлкаем на нём мышкой и смотрим, что произойдёт.
После запуска открывается терминал, где видны служебные сообщения от программы графического интерфейса. Через несколько секунд (когда подключатся все библиотеки) мы видим новое окошко с графическим интерфейсом — значит, мы всё сделали правильно и этот файл можно запускать независимо от того, есть Python на компьютере или нет.
Если почитать документацию, можно тонко настроить работу сборщика — например, чтобы не было консоли.

Вёрстка:
Кирилл Климентьев