
Реализация DI в PHP
Jason-Webb 13.05.2025
Когда я начинал писать свой первый крупный PHP-проект, моя архитектура напоминала запутаный клубок спагетти. Классы создавали другие классы внутри себя, зависимости жостко прописывались в коде, а о. . .
Обработка изображений в реальном времени на C# с OpenCV
stackOverflow 13.05.2025
Объединение библиотеки компьютерного зрения OpenCV с современным языком программирования C# создаёт симбиоз, который открывает доступ к впечатляющему набору возможностей. Ключевое преимущество этого. . .
POCO, ACE, Loki и другие продвинутые C++ библиотеки
NullReferenced 13.05.2025
В C++ разработки существует такое обилие библиотек, что порой кажется, будто ты заблудился в дремучем лесу. И среди этого многообразия POCO (Portable Components) – как маяк для тех, кто ищет. . .
Паттерны проектирования GoF на C#
UnmanagedCoder 13.05.2025
Вы наверняка сталкивались с ситуациями, когда код разрастается до неприличных размеров, а его поддержка становится настоящим испытанием. Именно в такие моменты на помощь приходят паттерны Gang of. . .
Создаем CLI приложение на Python с Prompt Toolkit
py-thonny 13.05.2025
Современные командные интерфейсы давно перестали быть черно-белыми текстовыми программами, которые многие помнят по старым операционным системам. CLI сегодня – это мощные, интуитивные и даже. . .
Конвейеры ETL с Apache Airflow и Python
AI_Generated 13.05.2025
ETL-конвейеры – это набор процессов, отвечающих за извлечение данных из различных источников (Extract), их преобразование в нужный формат (Transform) и загрузку в целевое хранилище (Load). . . .
Выполнение асинхронных задач в Python с asyncio
py-thonny 12.05.2025
Современный мир программирования похож на оживлённый мегаполис – тысячи процессов одновременно требуют внимания, ресурсов и времени. В этих джунглях операций возникают ситуации, когда программа. . .
Работа с gRPC сервисами на C#
UnmanagedCoder 12.05.2025
gRPC (Google Remote Procedure Call) — открытый высокопроизводительный RPC-фреймворк, изначально разработанный компанией Google. Он отличается от традиционых REST-сервисов как минимум тем, что. . .
CQRS (Command Query Responsibility Segregation) на Java
Javaican 12.05.2025
CQRS — Command Query Responsibility Segregation, или разделение ответственности команд и запросов. Суть этого архитектурного паттерна проста: операции чтения данных (запросы) отделяются от операций. . .
Шаблоны и приёмы реализации DDD на C#
stackOverflow 12.05.2025
Когда я впервые погрузился в мир Domain-Driven Design, мне показалось, что это очередная модная методология, которая скоро канет в лету. Однако годы практики убедили меня в обратном. DDD — не просто. . .
Skip to content
- Products
- DymaxIO
- Undelete
- Partners
- Partners
- Channel Partner Home
- Partner Program Overview
- Partners Login
- Find a Condusiv Reseller
- Resources
- DymaxIO
- Data Sheet
- White Papers
- Videos
- Webinars
- Case Studies
- Undelete
- Data Sheet
- White Papers
- Videos
- Webinars
- Case Studies
- What Is Defragmentation?
- DymaxIO
- Blog
- Help Center
- Contact
- Buy Now
- DymaxIO
- Undelete
- My Account
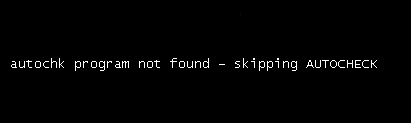
Program not found – skipping AUTOCHECK – revisited
This is a reposting of a prior (and popular) blog entry that unfortunately was “chopped” when we migrated to our new platform. Here it is in full:
Preface: this article refers to making direct edits to the Windows Registry. If you are not experienced with this subject, ask your company’s IT Administrator or a computer-expert friend/neighbor for help.
Our Tech Support group has seen a few reports of this error (Program not found – skipping AUTOCHECK) from customers when running Diskeeper’s bootime defrag. The error starts early in the boot process while the Session Manager process (smss.exe) is busy getting the system up and running. Smss.exe is critical to loading the paging file, initializing the registry and loading kernel components. But, before it does any of that it looks to a registry key called BootExecute. At that location it launches any applications listed. Session Manager then looks to the Windows system32 folder for particular executables it has been instructed to launch. By default there is only one program listed here – autochk.exe, the boot-time version of chkdsk, which will run if there are any file system inconsistency flags detected (i.e. volume dirty bit is set).
Read on for the solution…
Software vendors who need exclusive access to a volume (such as a defragmenter) will name proprietary executables at this registry location (and place the programs in the Windows system32 folder). Using this system is how Diskeeper is able to safely defragment files that could not be defragmented when the system is up and running.
However, malware creators have also used this BootExecute location to load their spyware/virus crap.
If you uninstall a legitimate program that has written into this BootExecute registry you may see this message. The uninstall will typically delete the executable from the system32 program, but not edit the registry. In most cases, the registry change is only a temporary one. For example: if you set Diskeeper to run a Bootime defrag “on next reboot” but uninstall it before the reboot, you can create the same issue. Once the Diskeeper Bootime defrag completes, it removes this string from the registry. Other applications are likely to behave similarly. It is also possible that a program, during install, writes data into this key, but then does not remove it on uninstall.
Another possibility is if you have run an anti-malware program that has removed the referenced executable from the system32 folder, but not changed the BootExecute registry to remove the “pointer” to that file. In that case you will also see this message.
When the program named is from a removed third-party vendor, the message is harmless. You should only be concerned if the default autochk program itself does not run.
If you do get this error and want to clean it up, here’s what you need to do:
Look in the registry at:
“HKEY_LOCAL_MACHINE\SYSTEM\CurrentControlSet\Control\Session Manager” and remove the string [the name referenced in the message on system startup] from the BootExecute value.
Under normal circumstances only the following would be present:
autocheck autochk *
This is what it might look like with added values:
autocheck autochk * autocheck stera
You can change the value back to the default (as shown in the first example above), but understand that it may possibly impact a legitimate program listed here.
Stera.exe (link https://web.archive.org/web/20071012134957/https://research.sunbelt-software.com/threatdisplay.aspx?threatid=44353) is part of an adware program that pretends to be an anti-adware program!
As always, you need to be very careful editing the registry. If you see anything else listed here other than the executable named in the error message, look at named file’s properties in the system32 folder or do a web search on it. A legitimate vendor can advise you on what to do to avoid potential conflict.
For Diskeeper it would look like:
autocheck autochk * autocheck AUTONTFS E: PAGE=KEEP DIRS=NONE MFT=MIN
(where E: represents the drive letter on which to run the bootime).
You can also reset it back to the default (autocheck autochk *) without issue. That is the safest bet with Diskeeper. You’ll simply need to go back into Diskeeper and reset the Bootime job.
Diskeeper customers are always welcome to contact our support team for assistance.
Related Posts
Page load link
-
Home
-
News
- 2 Simple Ways to Fix Autochk Not Found on Windows 11/10/8/7
2 Simple Ways to Fix Autochk Not Found on Windows 11/10/8/7
By Ariel | Follow |
Last Updated
Many users encounter the autochk program not found skipping autocheck error during a reboot. What is autochk.exe? How to fix autochk not found on Windows 11/10/8/7? Now, let’s explore the answers together with MiniTool Partition Wizard.
I am getting This error «autochk program not found — skipping autocheck » and then my System Reboot, this problem is making me angry…. how do I solve this? I tried every solution available on Google but none of them worked.https://answers.microsoft.com/en-us/windows/forum/all/autochk-program-not-found-skipping-autocheck/fff09068-69a2-44ff-b4d2-af15406d0661
What Is Autochk.exe
What is autochk.exe? Autochk.exe is a version of CHKDSK that only runs on NTFS hard disks and runs before the Windows system starts. This utility can be used to perform automatic disk checks during Windows system startup. It scans the file system errors and tries repairing them on the hard drive. It cannot run directly from Command Prompt but run CHKDSK on the boot drive.
However, a lot of users receive the “autochk program not found skipping autocheck” error during the system reboots. How to fix autochk not found during startup? Let’s keep reading the following part.
After investigating extensive user reports, we summarize 2 common ways to get rid of the autochk.exe not found error. Let’s start trying.
# 1. Use an Alternative to Autochk.exe – MiniTool Partition Wizard
As discussed above, Autochk.exe only runs automatic disk checks during startup. If you encounter the “autochk not found during reboot” error, you can use a professional disk checker – MiniTool Partition Wizard. It can help you check file system errors and bad sectors on a hard disk during reboot. Besides, it can check disk performance, recover data, migrate OS to SSD, convert MBR to GPT, etc.
Here’s how to check the hard disk using MiniTool Partition Wizard bootable version.
MiniTool Partition Wizard DemoClick to Download100%Clean & Safe
Step 1. Plug the prepared USB into a working computer or insert a USB drive or CD/DVD.
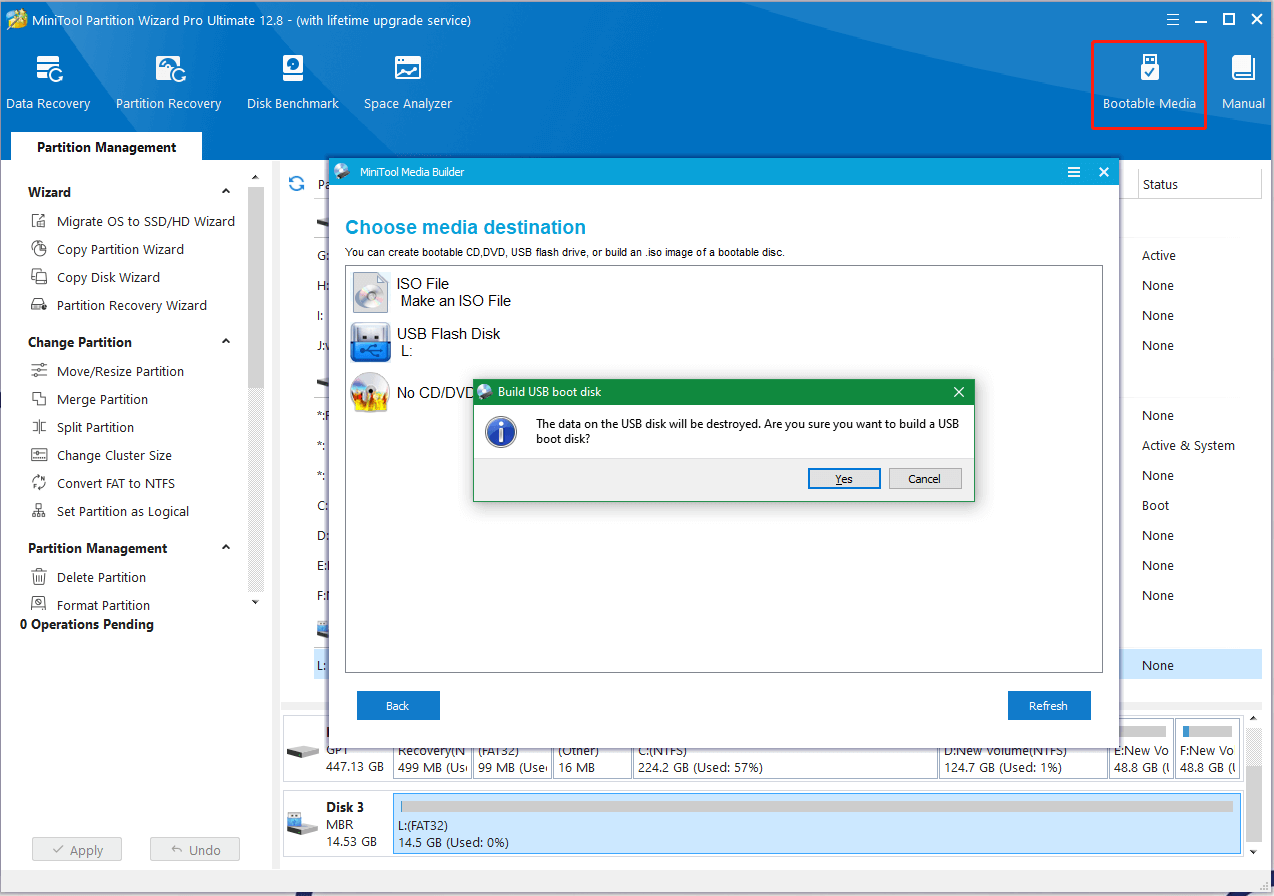
Step 2. Launch the MiniTool software to access its main interface. Click Bootable Media in the upper right corner and follow the on-screen instructions to create a bootable USB drive.
Step 3. Insert the bootable USB into the original computer, restart your computer, and press F2 or Delete keys to enter BIOS, change boot order, and make your computer boot from the USB drive.
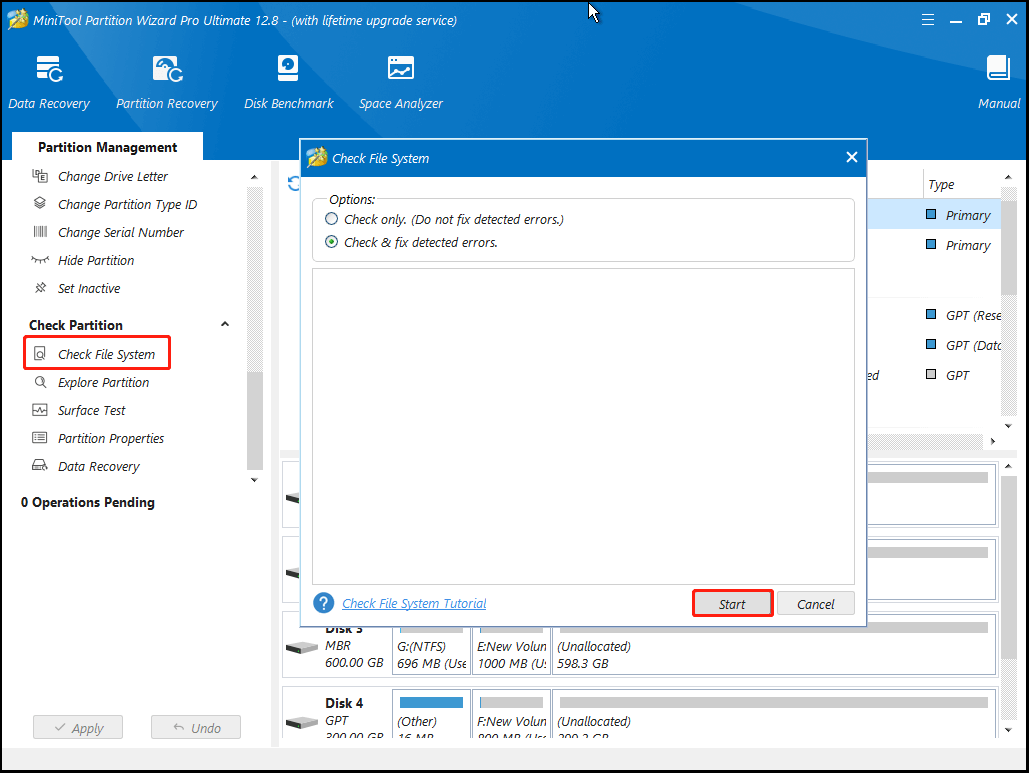
Step 4. In the main interface of MiniTool Partition Wizard, select the drive that you want to check, and click on Check File System from the left action panel.
Step 5. In the pop-up window, select the Check & fix detected errors option and click on Start to begin the repair.
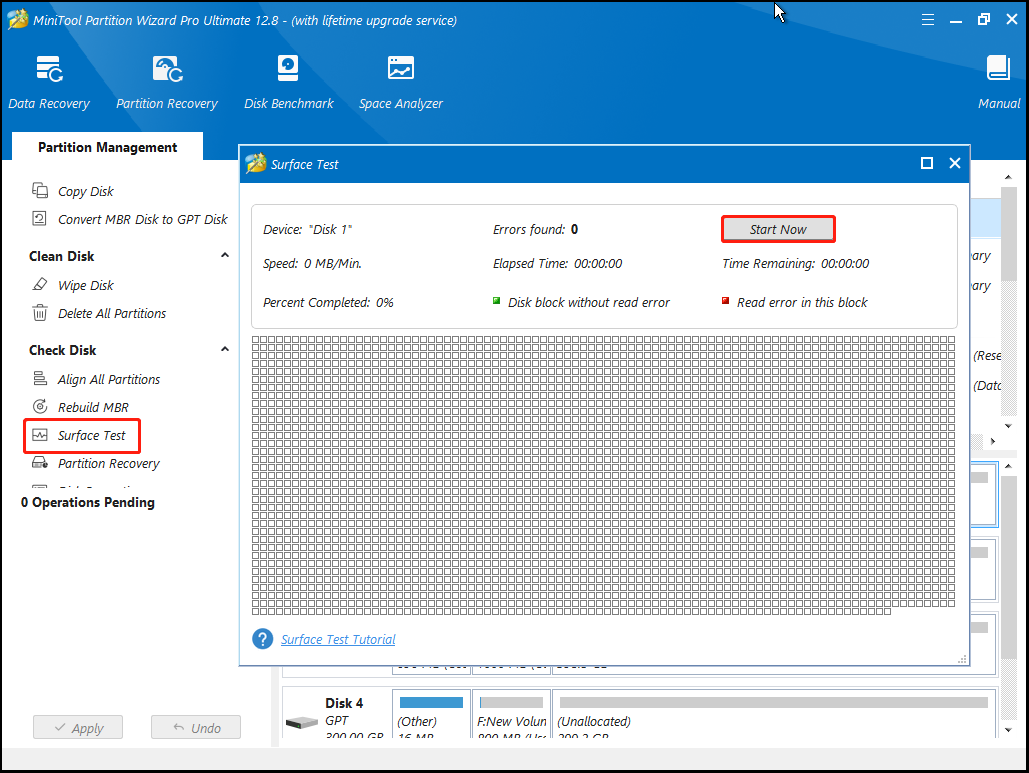
Step 6. To check bad sectors, select the hard disk and click Surface Test from the left panel. Then click Start Now to scan the disk for errors. If any blocks are marked with red color, it indicates that your hard drive is failing and you may consider replacing it with a new one.
Once done, reboot your computer and see if the “autochk.exe could not found” error disappears.
# 2. Use Registry Editor to Repair the Autochk.exe Not Found Error
Some users from the superuser.com forum reported that the “autochk not found during startup” error can be solved by using Registry Editor. Let’s have a try.
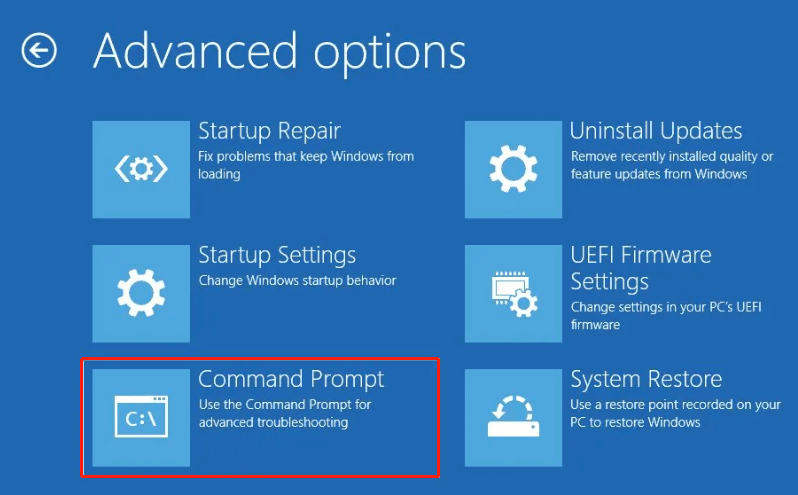
Step 1. Make sure your computer boots into WinRE. In the Startup Recovery Environment mode, select Command Prompt, type regedit, and press Enter.
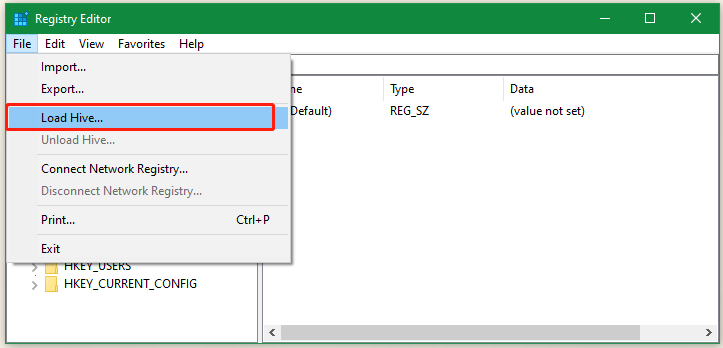
Step 2. In the Registry Editor window, select the HKEY_Local_Machine folder, click File from the top menu, and select Load Hive.
Step 3. Locate the Windowssystem32config path search the new drive or partition you have cloned, and select the file named SYSTEM.
Step 4. Give a new name for the hive that will be displayed in Registry Editor. Then navigate to the following path and search for an entry named DosDevices\C:.
Step 5. If you don’t have the MountedDevice entry, create it manually. Type diskpart in the Command Prompt window and run the following commands in order.
- list disk
- select disk x (x represent the new disk number)
- uniqueid disk to see the disk ID
Step 6. Once you find the new disk ID, compare it to the volume IDs from the Registry Editor window and find one that matches.
Step 7. Right-click Registry, and select the new-binary volume, and name it DosDevice\C:.
Step 8. Double-click the entry with ??Volume and copy the first line. Then paste it into the new entry C:, and repeat the same procedure for the second line.
Step 9. Select the system_new hive and click on File >Unload to save the changes in the Registry Editor window.
Now, you can reboot your computer and see if the “autochk not found during reboot” error disappears.
About The Author
Position: Columnist
Ariel has been working as a highly professional computer-relevant technology editor at MiniTool for many years. She has a strong passion for researching all knowledge related to the computer’s disk, partition, and Windows OS. Up till now, she has finished thousands of articles covering a broad range of topics and helped lots of users fix various problems. She focuses on the fields of disk management, OS backup, and PDF editing and provides her readers with insightful and informative content.
Если Вы столкнулись с этим
Я опишу вам способ решения проблемы который недавно нашел и проверил сам, на иностранном форуме, после многочасового серфинга по просторам интернета в поисках решения
- Нам понадобится дистрибутив той редакции которая у вас сейчас стоит (x86 не совместима с x64 и наоборот)
- Нам понадобится MsDaRT[nnm-club.ru] (Если же он уже встроен в образ как было в моем случае, можно опустить этот шаг)
- После того как MsDaRT встроили в образ и развернули на диск\флешку переходим непосредственно к восстановлению системы.
- Загружаемся с диска\флешки выбираем «Восстановление системы»ждем пока менеджер найдет и исправит ошибки перезагружаемся если нашел и исправил ошибки\
- Снова грузимся с флешки\диска и выбираем «Восстановление системы» теперь выбираем другие способы восстановления и в списке выбираем MsDaRT после чего мы видим его главное окно.
- Выбираем как выделено на картинке «Редактор реестра» — это открывает реестр вашей системы.
- Переходим по реестру в HKEY_LOCAL_MACHINE\SYSTEM\CurrentControlSet\services\mountmgr
- Находим там ключ NoAutoMount и ставим его значение = 0
- Закрываем «Редактор реестра», перезагружаем компьютер и смотрим на результат проделанной работы. Если система загрузилась значит вы все сделали правильно теперь надо вернуть ключу NoAutoMount его родное значение = 1