
On Windows 10 you can do many customizations to personalize it according to your preference. One such option is to change or replace the icons. Windows 10 comes with many in-built icons that you can apply by knowing their location.
In this article, we will show you where to find icons in Windows 10 so that you can easily access them. The good news is that the location is very similar to Windows 8 and 7, which should make it easy for you to find your way around. Let’s get started.
To fix various Windows 10/11 problems, we recommend Outbyte PC Repair:
This software will repair common computer errors, protect you from file loss, malware damage, hardware failure, and optimise your computer for peak performance. In three simple steps, you can resolve PC issues and remove virus damage:
- Download Outbyte PC Repair Software
- Click Start Scan to detect Windows 10/11 issues that may be causing PC issues.
- Click Repair All to fix issues with your computer’s security and performance.
This month, Outbyte has been downloaded by 23,167 readers.
How are Windows 10 icons stored?
Icons are usually available in the .ico file format. However, with Windows 10, things are different. Windows 10 has lots of applications, folders, files, and shortcuts, and many of them have unique icons. So, if Windows had an ICO file for each icon it uses, that would make for a considerable number of icon files.
To fix this, Windows 10 categorize icons and store them in the Dynamic Link Library (DLL) files. The advantage of a DLL file is that it can hold a large number of icons. So when you want to change the icon of a particular type, for example, File Explorer, just browse the DLL file where the file explorer icons are located and choose the suitable icons.
Where is the Windows 10 Icon Location?
As mentioned, Windows icons are categorized into different DLL files based on their types. All these DLL files are located in C:\Windows\System32. Here is the location where different icons are stored:
Default Icons (Imageres.dll)
The icons which are by default applied on the Windows are stored on this location: C:\Windows\System32\imageres.dll. This is the biggest icon library on Windows 10.
Retro Icons (Pifmgr.dll)
Windows 10 also comes with the icons of the previous Windows version. So, if you want to apply the retro icons to get the feel of Windows XP or Windows 7, navigate to this location when changing the icon: C:\Windows\System32\pifmgr.dll.
Accessibility Icons (Accessibilitycpl.dll)
On the System32 folder, there is also a set of accessibility icons that consists of icons of people, mouse cursors, magnifying glass, keyboard, and more. To apply one of these icons browse this location: C:\Windows\System32\accessibilitycpl.dll.
Hardware Device Icons (DDORes.dll)
The icons for hardware devices such as speakers, headphones, mice and keyboards, screens, computers, remotes, gaming pads, cameras, printers, and so on are available at this location: C:\Windows\System32\DDORes.dll. With these icons, you can change the default hardware icons on Windows.
Management Settings Icons (Mmcndmgr.dll)
If you require to change your management settings icon for example networks, folders, authentication, time, computers, and servers, you can access them from this path: C:\Windows\System32\mmcndmgr.dll.
Old Programing Language Icons (Moricons.dll)
Windows 10 also stores the icons of MS-DOS and old programming languages such as Turbo Pascal, FoxPro, and more. These icons will take your system back in time and give it a retro look. To apply these icons navigate to this location: C:\Windows\System32\moricons.dll
Audio Resource Icons (Mmres.dll)
To give a new look to your Audio resource icons, you can use the audio resource icons present at this location: C:\Windows\System32\mmres.dll. Here you will get icons like speakers, headphones, microphones, and a webcam.
Network Icons (Netshell.dll)
The network connection and peripherals icons like Bluetooth, wireless routers, network adapters, and more can be found at: C:\Windows\System32\netshell.dll.
Multimedia Icons (Wpdshext.dll)
If you are bored with the default multimedia icons of your Windows 10 like media devices, music, video files, CD, DVD, and many more, then you can give them a new look by choosing the multimedia icons from the following path: C:\Windows\System32\wpdshext.dll
File Explorer Icons (Explorer.exe)
Explorer.exe file contains the icons that are used by File Explorer. From here you can set or change the icons for things like printers, messenger apps, mail, folders, actions, and others. You can find these icons at: C:\Windows\System32\explorer.exe.
How to change Windows 10 Icons?
After knowing the Windows 10 icon location, you can now modify them as per your preference. Here is how to do that.
Change the Desktop Icons
To change the Desktop icons such as Recycle Bin, Network, and others, follow these steps:
- Click on the Start button and select Settings from the list.
- Choose Personalization settings from the list.
- Switch to the Themes tab from the left pane.
- Scroll down and under Related Settings, click on Desktop icon settings.

- Next, select the icon you want to change and click on the Change Icon.

- Select a new icon from the available ones.

Change the Folder Icons
On Windows 10, you can easily change any folder icon. Here are the steps to do that:
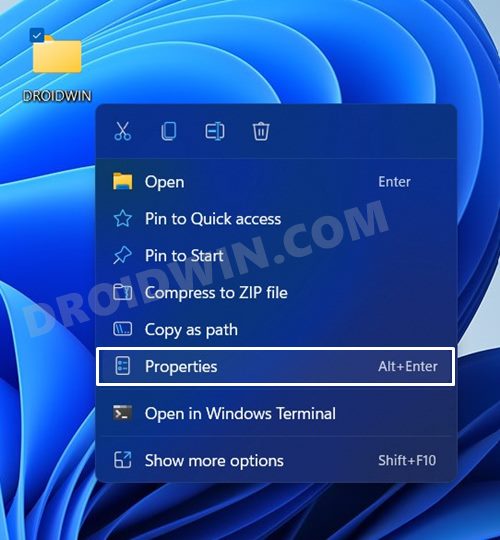
- Right-click on the folder whose icon you want to change and select Properties.
- Switch to Customize tab and click on the Change Icon button.
- Select the new icon for your folder from the available options.
Change Desktop Shortcut Icons
Like Folder icons, you can also change the icons of the app’s shortcuts. Follow these instructions:
- Right-click on the shortcut whose icon you want to change and select Properties.
- Under the Shortcut tab, click on the Change icon.
- Select a new icon from the available ones.
Conclusion
So as you can see, the Windows 10 icon location is fixed but they are scattered all over the System32 folder. However, with a little research and exploration, you can find any type of icon that you are looking for to change the look of your system. Just be careful not to delete or rename any essential files while hunting for those desired icons.
Where are my default program icons located?
The default program icons are usually stored in the C:\Program Files\Windows NT folder. However, this may vary depending on your system settings and the programs that you have installed.
How do I change an icon for a file or folder on Windows?
There are a few ways to do this. One way is to right-click on the file or folder and select “Properties.” Then click on the “Customize” tab and select from one of the available icons. Another way is to open File Explorer and navigate to the desired file or folder. Right-click on it and select “Change Icon.” A window will pop up with a list of available icons. Select the one you want and click “OK.”
Can I create my own Windows icon?
Yes, you can create your own Windows icon using an icon editor such as Microsoft Paint or Adobe Photoshop. Once you have created the icon, you can save it in the ICO format and then use it on your system.
Peter is an Electrical Engineer whose primary interest is tinkering with his computer. He is passionate about Windows 10 Platform and enjoys writing tips and tutorials about it.
Icons in Windows 11 are stored in a specific location that plays a crucial role in the visual experience of the operating system. These small graphical representations hold significant meaning as they represent various applications, files, and system functions. They serve as visual cues, allowing users to quickly identify and access their desired functions or programs. But have you ever wondered where exactly these icons are stored on your Windows 11 device?
The icons in Windows 11 are primarily stored in the system’s DLL (Dynamic Link Library) files, which contain a collection of functions and resources that can be utilized by multiple programs. These DLL files house a wide range of resources, including icons, which can be accessed by different applications across the operating system. It is an efficient way of centralizing the storage of icons, ensuring consistency and easy accessibility throughout the Windows environment. This approach not only saves disk space but also allows for easy updates and customization of icons without needing to modify each individual application. So, the next time you see those visually appealing icons on your Windows 11 interface, remember that they reside within the DLL files, ready to enhance your user experience.
In Windows 11, icons are stored in the «System32» folder. To access the icons, follow these steps:
1. Press the Windows key + R to open the Run dialog box.
2. Type «C:\Windows\System32» and press Enter.
3. Look for the «imageres.dll» file, which contains a variety of system icons.
4. Double-click the file to open it and explore the available icons.
5. To use an icon, right-click it, select «Copy,» and paste it in your desired location.
Remember to be cautious when modifying system files to avoid any unwanted changes.
Understanding the Location of Icons in Windows 11
Icons are an essential part of the Windows operating system, providing visual representations for various files, folders, and applications. They make it easier for users to identify and access different elements of the system. In Windows 11, the location of icons has undergone some changes compared to previous versions, and understanding where they are stored can be helpful for customization purposes or troubleshooting issues. This article will explore the different locations where icons are stored in Windows 11 and provide detailed information on accessing and modifying them.
1. System Icons
In Windows 11, system icons, such as the icons for the Recycle Bin, Control Panel, and This PC, are stored in a specific DLL file called «imageres.dll.» This file contains a collection of icons used by the operating system and various applications. The imageres.dll file is located in the System32 folder, which is typically found in the C:\Windows directory. To access the imageres.dll file, follow these steps:
- Navigate to the C:\Windows\System32 folder.
- Locate the imageres.dll file.
Once you have found the imageres.dll file, you can extract the icons using specialized software or use them directly within applications that allow for icon customization.
Modifying System Icons
If you wish to modify the system icons in Windows 11, it is recommended to create a backup copy of the imageres.dll file before making any changes. This will allow you to restore the original icons if needed. You can use an icon editor or a resource extraction tool to modify or replace individual icons within the imageres.dll file. Once you have made the desired modifications, save the changes and use the updated imageres.dll file in your system. It is important to note that modifying system files can potentially cause issues with your operating system, so proceed with caution and be sure to create backups.
2. Application Icons
Application icons in Windows 11 are typically stored within the installation directories of the respective applications. When you install an application, it often creates a dedicated folder on the system drive where the program files are stored. Within this folder, you can usually find an «Icons» or «Resources» folder that contains the icons associated with the application. To locate and access application icons in Windows 11, follow these steps:
- Navigate to the installation directory of the application.
- Look for a folder named «Icons» or «Resources.»
- Within the folder, you should find the icons used by the application.
Application icons can be modified or replaced by editing the icon files directly or using an icon editor. However, it is important to respect any licensing restrictions or terms of use associated with the application and its icons.
System-Wide Application Icons
Sometimes, applications have icons that are used system-wide, such as the icons appearing in the taskbar or the Start menu. These icons are usually stored in a centralized location to ensure consistency across the system. In Windows 11, these system-wide application icons can be found in the following directory:
C:\ProgramData\Microsoft\Windows\AppRepository\iconcache
The iconcache folder contains cached copies of the system-wide application icons, which are used to display the icons in various parts of the Windows user interface. However, modifying these cached icons directly is not recommended, as it may lead to system instability or other unexpected behavior. If you need to customize these icons, it is best to explore the application’s settings or customization options provided by the operating system.
3. File and Folder Icons
File and folder icons in Windows 11 are determined by file associations and the chosen icon themes. By default, Windows 11 uses generic icons for different file types, such as documents, images, and folders. However, users can customize these icons to their preferences.
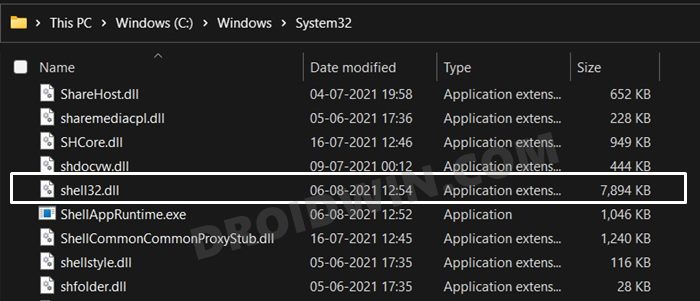
%SystemRoot%\System32\SHELL32.dll
The icon files associated with file types and folders are stored in the SHELL32.dll file, which is located in the System32 folder (typically C:\Windows\System32) as well. To access the file and folder icons, you can follow these steps:
- Navigate to the C:\Windows\System32 folder.
- Locate the SHELL32.dll file.
Similar to system icons, it is recommended to create a backup copy of the SHELL32.dll file before making any changes. You can use an icon editor or a resource extraction tool to modify or replace the file and folder icons within the SHELL32.dll file.
Customizing File and Folder Icons
To customize the icons for specific file types or folders, you can use the built-in icon customization options in Windows 11. Follow these steps:
- Right-click on the file or folder you want to customize.
- Select «Properties» from the context menu.
- In the Properties window, go to the «Customize» tab.
- Click on the «Change Icon» button.
- Choose a new icon from the available options or browse for a custom icon.
- Apply the changes and click «OK.»
By following these steps, you can customize the icons of individual files and folders without modifying system files.
Exploring Alternate Icon Sources in Windows 11
In addition to the default icon locations mentioned above, Windows 11 provides alternate sources for icons that can be accessed and utilized to enhance the visual appearance of your system.
1. Icon Packs
Icon packs are collections of icons created by designers and enthusiasts that offer alternative icon styles for various elements of the operating system, such as icons for files, folders, and applications. These icon packs can be found on various websites and can be downloaded and installed to replace the default icons in Windows 11.
DeviantArt and IconArchive are popular websites where you can find a wide range of icon packs for Windows 11.
After downloading an icon pack, you can use customization tools or tweak various settings in Windows 11 to apply the new icons to your system. Keep in mind that installing third-party icon packs may require additional steps and software, so it is important to follow the instructions provided with the specific icon pack.
2. Custom Icon Libraries
Windows 11 allows users to create and use custom icon libraries where they can store and organize their preferred icons. These custom icon libraries can be created and accessed using specialized software or through manual configuration.
Axialis IconWorkshop and IcoFX are examples of software tools that enable users to create and manage custom icon libraries in Windows 11.
Once the custom icon library is created, you can import icons from various sources, including icon packs or individual icon files. These custom icon libraries provide a convenient way to access and switch between different icons based on your preferences and organizational needs.
3. Online Icon Repositories
Online icon repositories are platforms where designers and users share and exchange icons. These repositories provide a vast collection of icons covering various styles and categories. You can browse through these repositories and download individual icons or icon sets to use in Windows 11.
Flaticon and Iconfinder are popular online icon repositories that offer a wide selection of icons for Windows 11.
When using icons from online repositories, it is important to check the licensing terms and usage restrictions associated with each icon. Some icons may require attribution or have limitations on commercial use.
Enhancing Your Windows 11 Experience with Icon Customization
Windows 11 provides various options and resources for icon customization, allowing users to personalize their system’s appearance and create a visually pleasing desktop environment. By understanding the locations of different icons and utilizing alternate icon sources, you can transform the look and feel of your Windows 11 experience. Whether it’s modifying system icons, customizing application icons, or exploring third-party icon packs, the possibilities for icon customization in Windows 11 are virtually limitless.
Icon Storage Locations in Windows 11
Windows 11 stores icons in various locations on your computer. Here are the main storage locations where you can find icons:
| Location | Description |
| System32 folder | Contains system-related icons used by Windows and installed applications. |
| %ProgramData%\Microsoft\Windows\Start Menu\Programs folder | This folder stores icons that appear in the Start menu for installed programs. |
| %ProgramData%\Microsoft\Windows\Start Menu\Programs\Startup folder | Icons in this folder represent programs that start automatically when Windows starts. |
| %AppData%\Microsoft\Windows\Start Menu\Programs folder | This folder contains icons for programs installed specifically for the current user. |
It is worth noting that there may be additional icon storage locations depending on the software installed on your computer. To access these locations, you can navigate to the specified paths using File Explorer.
Key Takeaways: Where Are Icons Stored in Windows 11
- Icons in Windows 11 are stored in the «System32» folder.
- You can find the System32 folder by navigating to «C:\Windows\System32».
- The icons are stored as .ico files, which stands for icon files.
- You can access the icons directly by going to «C:\Windows\System32\imageres.dll».
- If you want to customize icons, it’s recommended to create a copy in another directory.
Frequently Asked Questions
In this section, we will answer some commonly asked questions about where icons are stored in Windows 11.
1. How do I find the location of icons in Windows 11?
To find the location of icons in Windows 11, follow these steps:
1. Right-click on the desktop and select «Personalize» from the context menu.
2. In the Personalization settings, click on «Themes» in the left sidebar.
3. Scroll down and click on «Desktop icon settings» located under the «Related Settings» section on the right side.
4. A new window will open, showing the location of the icons. You can also change the icons by selecting a different icon file.
2. Can I customize the icons in Windows 11?
Yes, you can customize the icons in Windows 11. Here’s how:
1. Right-click on the desktop and select «Personalize» from the context menu.
2. In the Personalization settings, click on «Themes» in the left sidebar.
3. Scroll down and click on «Desktop icon settings» located under the «Related Settings» section on the right side.
4. In the new window, you can select a different icon file for each desktop icon or choose from the available default icons.
3. Are all icons stored in the same location?
No, all icons are not stored in the same location in Windows 11. The location of icons can vary depending on the application or program.
Some icons are stored in system folders, while others are located within the application’s installation folder. It is recommended to check the documentation provided by the specific application or program to determine the location of its icons.
4. How can I create my own custom icons in Windows 11?
To create your own custom icons in Windows 11, follow these steps:
1. Open an image editing software (such as Adobe Photoshop or Microsoft Paint) and design your custom icon.
2. Save the icon file in a format that is compatible with Windows, such as .ico or .png.
3. Right-click on the desktop and select «Personalize» from the context menu.
4. In the Personalization settings, click on «Themes» in the left sidebar.
5. Scroll down and click on «Desktop icon settings» located under the «Related Settings» section on the right side.
6. In the new window, click on «Browse» and select your custom icon file to replace the default icon.
5. Can I restore the default icons in Windows 11?
Yes, you can restore the default icons in Windows 11 by following these steps:
1. Right-click on the desktop and select «Personalize» from the context menu.
2. In the Personalization settings, click on «Themes» in the left sidebar.
3. Scroll down and click on «Desktop icon settings» located under the «Related Settings» section on the right side.
4. In the new window, click on the «Restore Default» button to restore the default icons for all desktop icons.
To sum up, in Windows 11, icons are stored in specific system folders. The main folder for system icons is the «C:\Windows\system32\shell32.dll» file. This file contains a vast collection of icons that are used for various system functions and applications.
Additionally, icons for individual programs or applications can be stored within their respective installation directories. These icons are usually in the form of «.ico» or «.exe» files and are placed in the program’s folder for easy access and usage.
In this guide, we will make you aware of the location of the Windows 11 default icon files. The latest iteration of Windows has bought in a plethora of new and noteworthy changes. But the biggest among them is the major UI overhaul that it underwent. Be it the new taskbar, new Start menu, or the new icon styles, there’s a lot to forward to.
Talking about icon styles, the OS has always allowed you to change the default icon styles of its folders. While the icons are generally stored in ICO files, but that is not the case with Windows. This is due to the reason that one ICO file could only hold one icon. But since the OS has a plethora of icon styles, Windows would have required thousands of ICO files. To keep it simple, Windows instead opted for the DLL file.
The biggest advantage of this file format is that it is capable enough to hold hundreds of icons within itself (imageres.dll and shell32.dll are the perfect examples of the same). However, the biggest issue lies in finding the location of these DLL files. Well, in this guide, we will help you with just that. Given hereby are detailed instructions that shall help you find the location of the Windows 11 default icon files.
Table of Contents
We have broken down this guide into separate sections, based on the icon categories. So you may directly go to the required one. Moreover, while these icons are stored in DLL file format, but you wouldn’t need a DLL Extractor software. This is because Windows would directly be able to read the contents of the concerned DLL file and then bring up all the icons present inside that file.
You could then easily select and apply the desired one [Instructions for the same are given at the end of this guide]. So with that in mind, let’s get started with the journey to find the location of the Windows 11 default icon files. Follow along.
Folders/Hardware Devices/Peripherals/Actions Icons
File Name: imageres.dll
File Location: %systemroot%\system32\imageres.dll
Internet, Devices, Networks, Peripherals, Folders, etc
File Name: shell32.dll
File Location: %systemroot%\system32\shell32.dll
Windows 95 and Windows 98 Icon Packs
File Name: pifmgr.dll
File Location: %systemroot%\system32\pifmgr.dll
Icons used by File Explorer [New and Old]
File Name: explorer.exe
File Location: %systemroot%\explorer.exe
Accessibility Features Icons
File Name: accessibilitycpl.dll
File Location: %systemroot%\system32\accessibilitycpl.dll
Hardware Devices Icons
File Name: ddores.dll
File Location: %systemroot%\system32\ddores.dll
Old Programming Language Icons
File Name: moricons.dll
File Location: %systemroot%\system32\moricons.dll
Old Computer Management Icons
File Name: mmcndmgr.dll
File Location: %systemroot%\system32\mmcndmgr.dll
Audio Devices Icons
File Name: mmres.dll
File Location: %systemroot%\system32\mmres.dll
Network Icons
File Name: netcenter.dll
File Location: %systemroot%\system32\netcenter.dll
Network Connections and Associated Hardware Icons
File Name: netshell.dll
File Location: %systemroot%\system32\netshell.dll
Network Devices Icons
File Name: networkexplorer.dll
File Location: %systemroot%\system32\networkexplorer.dll
Network Related Settings Icons
File Name: pnidui.dll
File Location: %systemroot%\system32\pnidui.dll
Sensors Icons
File Name: sensorscpl.dll
File Location: %systemroot%\system32\sensorscpl.dll
Setup Wizard Icons
File Name: setupapi.dll
File Location: %systemroot%\system32\setupapi.dll
Multimedia Icons
File Name: wmploc.dll
File Location: %systemroot%\system32\wmploc.dll
Portable Devices Icons
File Name: wpdshext.dll
File Location: %systemroot%\system32\wpdshext.dll
Old Windows Hardware Icons
File Name: compstui.dll
File Location: %systemroot%\system32\compstui.dll
Internet Explorer Icons
File Name: ieframe.dll
File Location: %systemroot%\system32\ieframe.dll
Disk Management Icons
File Name: dmdskres.dll
File Location: %systemroot%\system32\dmdskres.dll
Network Services Icons
File Name: dsuiext.dll
File Location: %systemroot%\system32\dsuiext.dll
Remote Desktop Connections Icons
File Name: mstscax.dll
File Location: %systemroot%\system32\mstscax.dll
Imaging Hardware Devices Icons
File Name: wiashext.dll
File Location: %systemroot%\system32\wiashext.dll
Actions Icons
File Name: comres.dll
File Location: %systemroot%\system32\comres.dll
Network Related Icons
File Name: mstsc.exe
File Location: %systemroot%\system32\mstsc.exe
Action Center/Error/Info/Website/Users Icons
File Name: actioncentercpl.dll, aclui.dll, autoplay.dll, comctl32.dll, xwizards.dll, ncpa.cpl, url.dll
File Location: all the files are present in %systemroot%\system32 directory
How to Apply Icons from the DLL files in Windows
As mentioned before, you don’t need any standalone DLL File Extractor to get hold of the associated icons. Rather, you could directly do so via the Windows ‘Change Icons’ menu. Here’s how:
- To begin with, right-click on the desired folder whose icon you need to change and select Properties.

- Then go to the Customize tab and click on the Change Icon button.

- Now just copy-paste the desired DLL file address from the ones listed above and hit Enter.
- Windows will now bring up all the icons associated with that DLL file.
- Select the desired one from the menu and click OK. Now refresh the desktop once for the icon change to take place.
That’s it. These were the steps to find the location of the Windows 11 default icon files. Likewise, we have also listed all the icon’s DLL files and their locations. If you have any queries concerning the aforementioned steps, do let us know in the comments. We will get back to you with a solution at the earliest.
- How to Change the Default Browser in Windows 11
- How to Get Back the Windows 10 Start Menu on Windows 11
- Remove Recommended Section from Windows 11 Start Menu
- How to Uninstall Apps using Command Prompt (CMD) or Powershell in Windows 11
Все способы:
- Меняем иконки в Windows 10
- Вариант 1: 7tsp GUI
- Вариант 2: IconPackager
- Вариант 3: iPack
- Вариант 4: Файлы ICO и PNG
- Заключение
- Вопросы и ответы: 2
Многие пользователи после установки операционной системы остаются недовольными внешним видом интерфейса. Специально для таких целей в Windows предусмотрена возможность изменения тем оформления. Но как быть, если требуется не только сменить стиль окон, но и установить новые элементы, в частности, иконки. В этой статье мы расскажем, как это сделать.
Меняем иконки в Windows 10
В контексте сегодняшней статьи иконки – это значки, которыми визуально обозначаются различные элементы интерфейса Виндовс. К ним относятся папки, файлы разных форматов, жесткие диски и так далее. Иконки, подходящие для решения нашей задачи, распространяются в нескольких видах.
- Пакеты для 7tsp GUI;
- Файлы для использования в программе IconPackager;
- Автономные пакеты iPack;
- Отдельные файлы формата ICO и (или) PNG.
Для каждого приведенного выше вида есть отдельные инструкции по установке. Далее мы подробно разберем четыре варианта действий. Обратите внимание, что все операции необходимо выполнять в учетной записи с администраторскими правами. Программы также нужно запускать от имени администратора, так как мы планируем редактировать системные файлы.
Вариант 1: 7tsp GUI
Для установки данных пакетов иконок необходимо скачать и инсталлировать на свой ПК программу 7tsp GUI.
Первым делом необходимо подстраховаться и создать точку восстановления системы.
Подробнее: Как создать точку восстановления в Windows 10
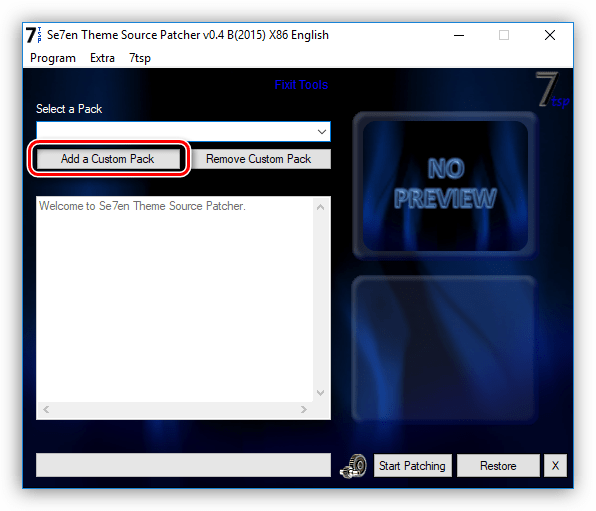
- Запускаем программу и нажимаем кнопку «Add a Custom Pack».

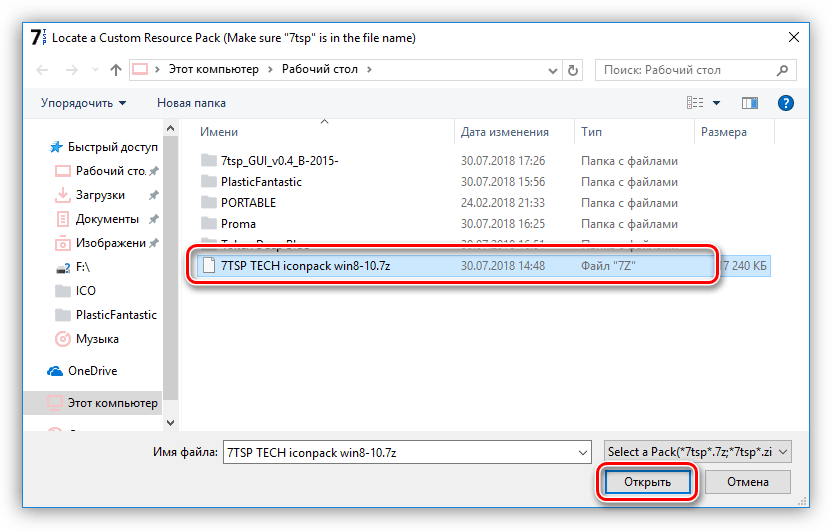
- Ищем на диске пакет иконок 7tsp, скачанный из интернета, и жмем «Открыть». Имейте в виду, что необходимые для работы файлы могут быть упакованы в архив ZIP или 7z. В данном случае ничего распаковывать не нужно – просто указываем архив в качестве пакета.

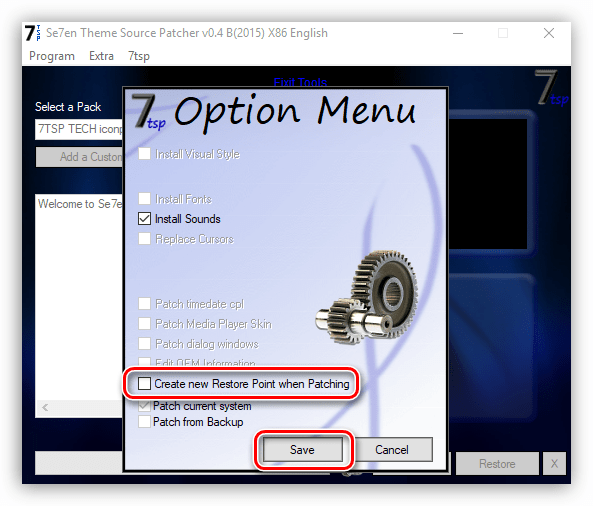
- Переходим к опциям.
Здесь ставим флажок в чекбоксе, указанном на скриншоте. Это заставит софт создать дополнительную точку восстановления. Не стоит пренебрегать этой настройкой: в процессе могут возникнуть различные ошибки, в том числе и системные.

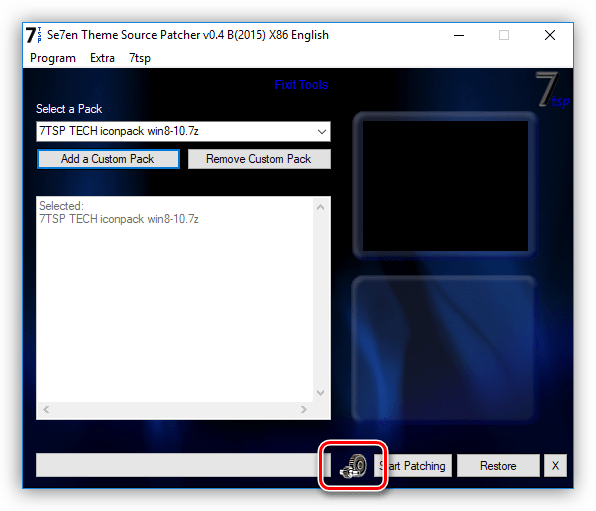
- Нажимаем «Start Patching» и ждем завершения операции установки.
- На завершающем этапе программа потребует выполнить перезагрузку. Нажимаем «Да».

- После перезагрузки мы увидим новые иконки.


Для того чтобы вернуть систему в исходное состояние, достаточно выполнить восстановление из созданной ранее точки. В программе имеется свой инструмент для отката изменений, но он не всегда работает корректно.
Подробнее: Как восстановить систему Windows 10
Вариант 2: IconPackager
Этот вариант также подразумевает использование специальной программы – IconPackager, которая способна устанавливать иконки из пакетов с расширением IP. Программа является платной с 30-дневным пробным периодом.
Скачать IconPackager
Перед тем как начать, не забудьте cоздать точку восстановления.
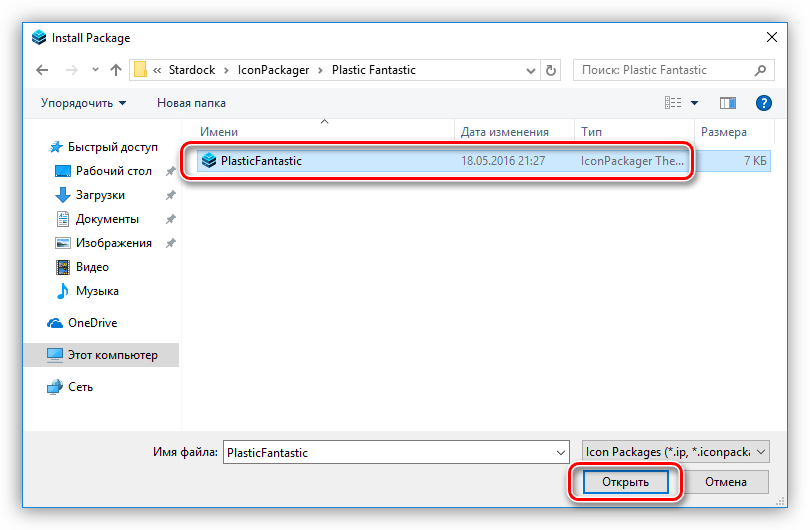
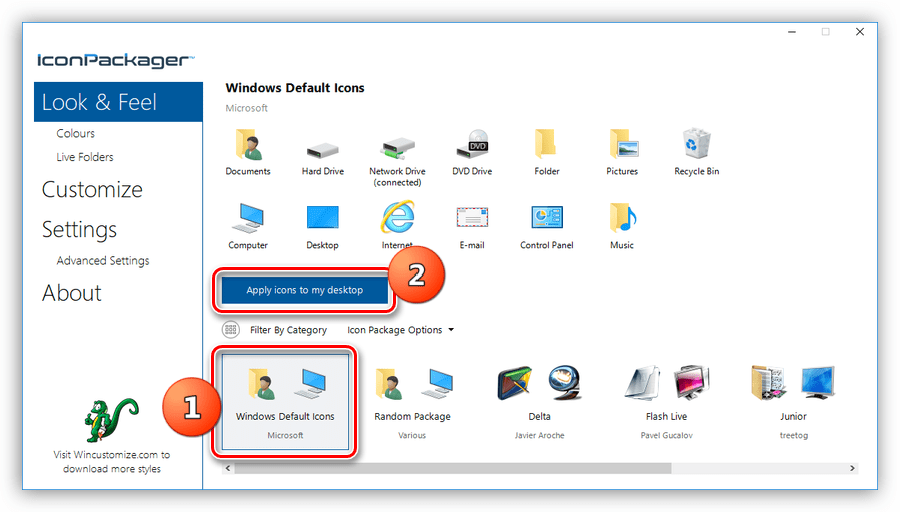
- Запускаем IconPackager и нажимаем на ссылку «Icon Package Options». Далее наводим курсор на пункт «Add Icon Package» и кликаем по «Install From Disk».

- Находим заранее распакованный файл с пакетом иконок и жмем «Открыть».

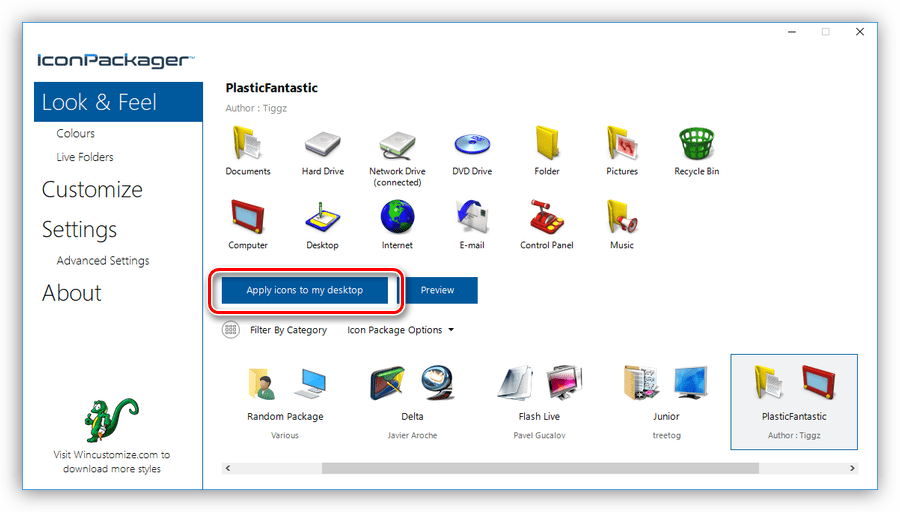
- Нажимаем кнопку «Apply icons to my desktop».
- Программа на время заблокирует рабочий стол, после чего иконки будут изменены. Перезагрузка не требуется.

Для отката к старым значкам нужно выбрать «Windows Default Icons» и снова нажать кнопку «Apply icons to my desktop».
Вариант 3: iPack
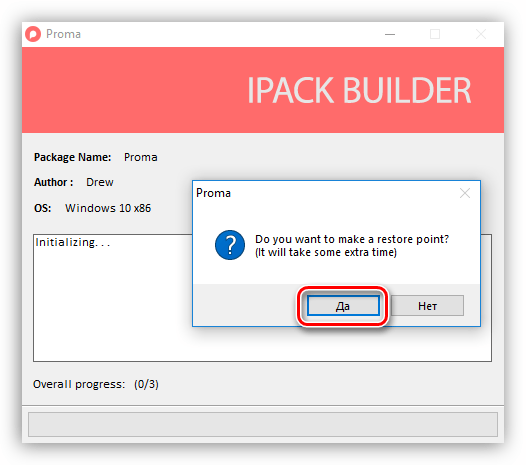
Такие пакеты представляют собой упакованный установщик со всеми необходимыми файлами. Для их использования дополнительный программы не требуются, кроме того, инсталлятор автоматически создает точку восстановления и резервирует системные файлы, подлежащие изменению.
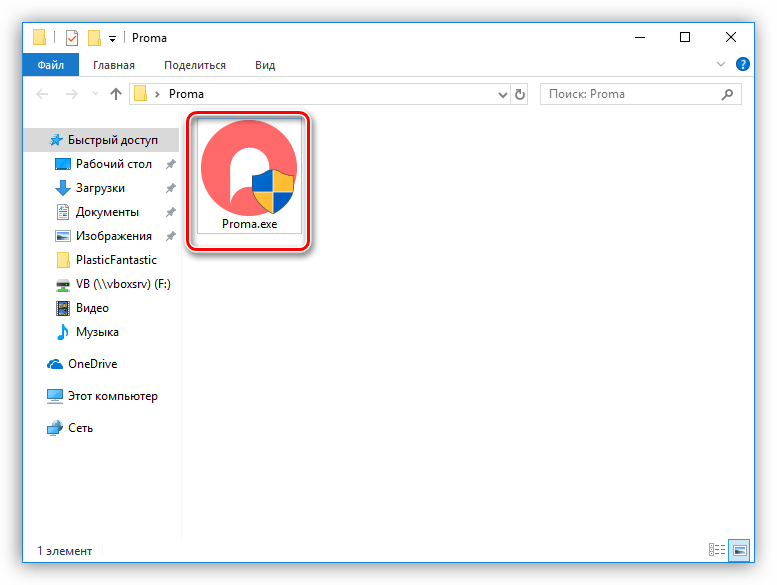
- Для установки необходимо просто запустить файл с расширением EXE. Если вы скачали архив, то его нужно будет предварительно распаковать.

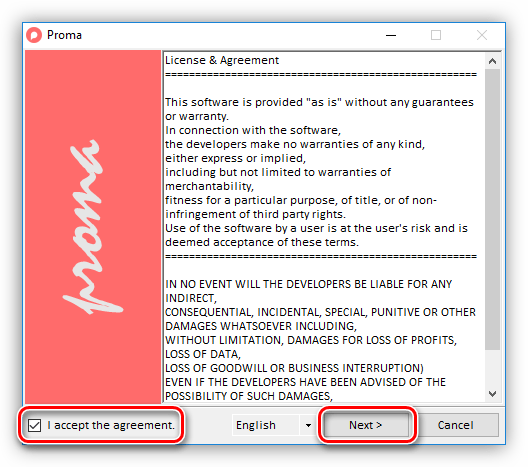
- Ставим галку, показанную на скриншоте, и жмем «Next».

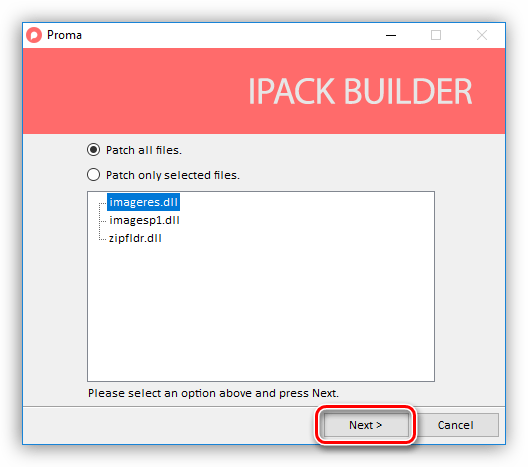
- В следующем окне оставляем все как есть и снова нажимаем «Next».
- Установщик предложит создать точку восстановления. Согласимся, нажав «Да».

- Ждем завершения процесса.
Откат выполняется с помощью точки восстановления.
Вариант 4: Файлы ICO и PNG
Если у нас имеются только отдельные файлы в формате ICO или PNG, то придется немного повозиться с их установкой в систему. Для работы нам понадобится программа IconPhile, а если наши картинки имеют формат PNG, то их еще будет необходимо конвертировать.
Подробнее: Как конвертировать PNG в ICO
Перед началом установки иконок создайте точку восстановления.
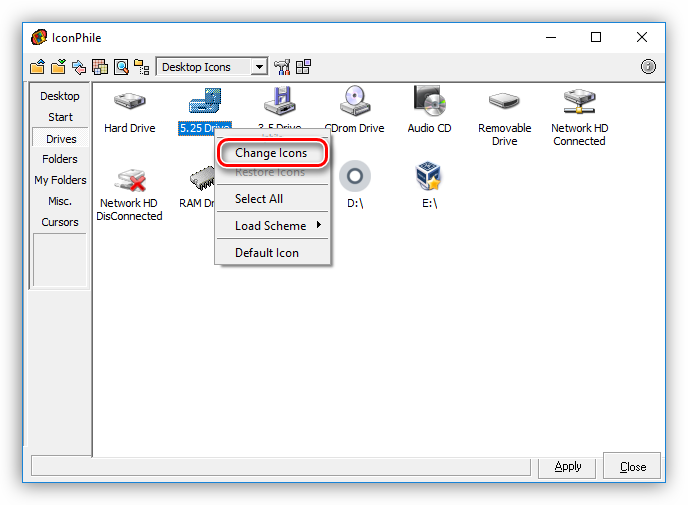
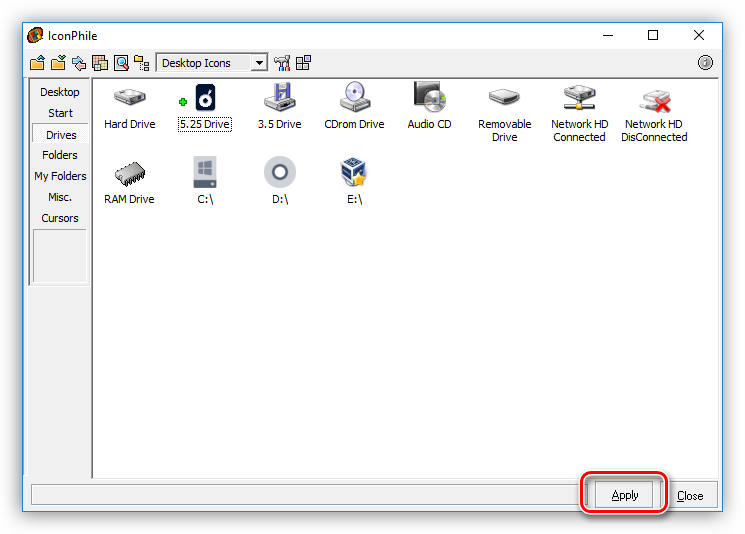
- Запускаем IconPhile, выбираем группу в выпадающем списке и кликаем по одному из пунктов в правой части интерфейса. Пусть это будет группа «Desktop Icons», а пункт выберем «Drives» — диски и приводы.

- Далее жмем ПКМ по одному из элементов и активируем пункт «Change Icons».
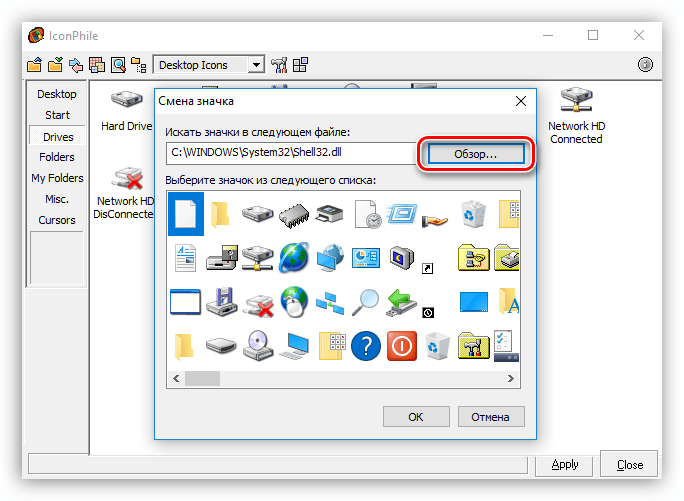
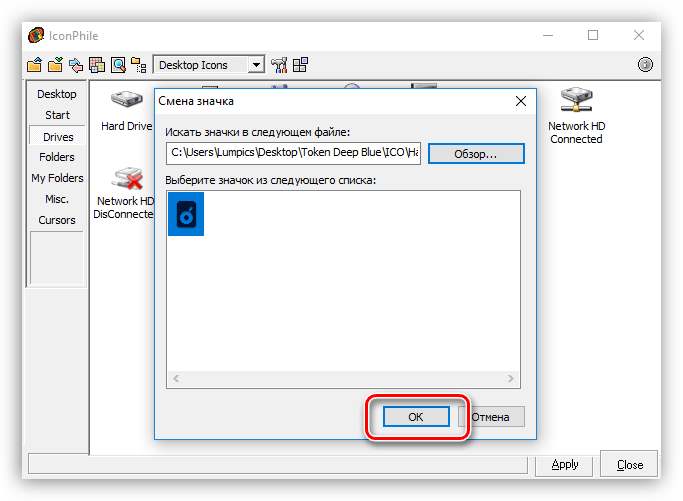
- В окне «Смена значка» нажимаем «Обзор».

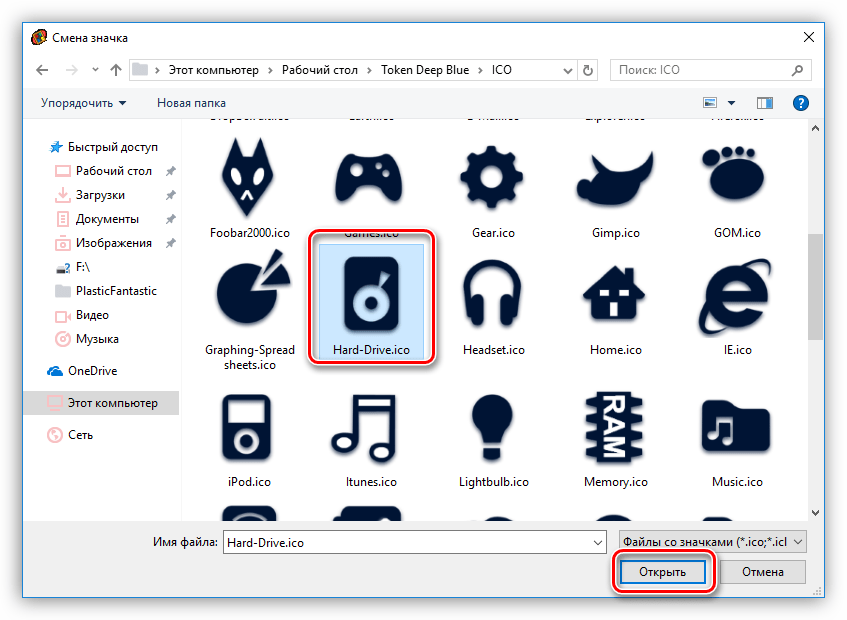
- Находим нашу папку с иконками, выбираем нужную и нажимаем «Открыть».

Нажимаем ОК.

- Применяем изменения кнопкой «Apply».

Возврат исходных значков осуществляется при помощи восстановления системы из точки.

Данный вариант хоть и подразумевает ручную замену значков, но имеет один неоспоримый плюс: используя эту программу, можно установить любые самостоятельно созданные иконки.
Заключение
Изменение внешнего вида Windows – процесс увлекательный, но не стоит забывать, что при этом происходит замена или редактирование системных файлов. После подобных действий могут начаться проблемы с нормальным функционированием ОС. Если решились на эту процедуру, то не забывайте создавать точки восстановления для того, чтобы можно было откатить систему в случае неприятностей.
Наша группа в TelegramПолезные советы и помощь

Если Вы хотите использовать одну из иконок (значков) Windows 7, то большую их
часть Вы можете найти в следующих файлах:
C:\Windows\System32\shell32.dll
C:\Windows\System32\imageres.dll
C:\Windows\System32\ddores.dll
Для извлечения необходимой Вам иконки:
1) Откройте один из предложенных
файлов, с помощью программы Restorator.
2) В панели Дерево ресурсов откройте
папку Иконка
3) Выберите любую из понравившихся Вам иконок.
4) В
панели Дерево ресурсов щелкните правой кнопкой мыши на данном ресурсе и
выберите Извлечь… → Извлечь как «имя_ресурса.ico»
5) Выберите папку
для извлечения и нажмите Сохранить
Вы также можете извлечь все
иконки сразу, для этого:
6) В панели Дерево ресурсов щелкните правой
кнопкой мыши на папке Иконка и выберите Извлечь… → Извлечь все как
тип «Иконка»
7) Выберите папку для извлечения и нажмите OK