
Add USB Device for passthrough from the client
Add an audio device to a VM
Introduction
SPICE (Simple Protocol for Independent Computing Environments) is an open remote computing solution built for virtual environments which allows users to view a computing «desktop» environment. The integrating of Spice into Proxmox VE provides a solution for interaction with virtualized desktop devices, like keyboard, mouse, audio and video. Interaction between front-end and back-end is done using Virtual Device Interfaces (VDI).
Spice achieves a user experience similar to an interaction with a local machine. It is suitable for both LAN and WAN usage, without compromising on the user experience.
Using Spice on Proxmox VE is easy and secure. It is integrated in the cluster environment, the user- and authentication system — and of course, all traffic is fully encrypted.
Spice was first introduced with Proxmox VE 3.1.
Requirements for SPICE
In order to use Spice you need the following:
- Spice client on your desktop OS
- Spice drivers inside your VM (VirtIO, QXL Graphic card drivers)
SPICE client
- Windows: virt-viewer 0.5.6 or higher, http://www.spice-space.org/download.html
- Linux: virt-viewer 0.5.6 or higher
- OS X (not yet working as expected): virt-viewer 0.5.7 or higher, https://www.spice-space.org/osx-client.html
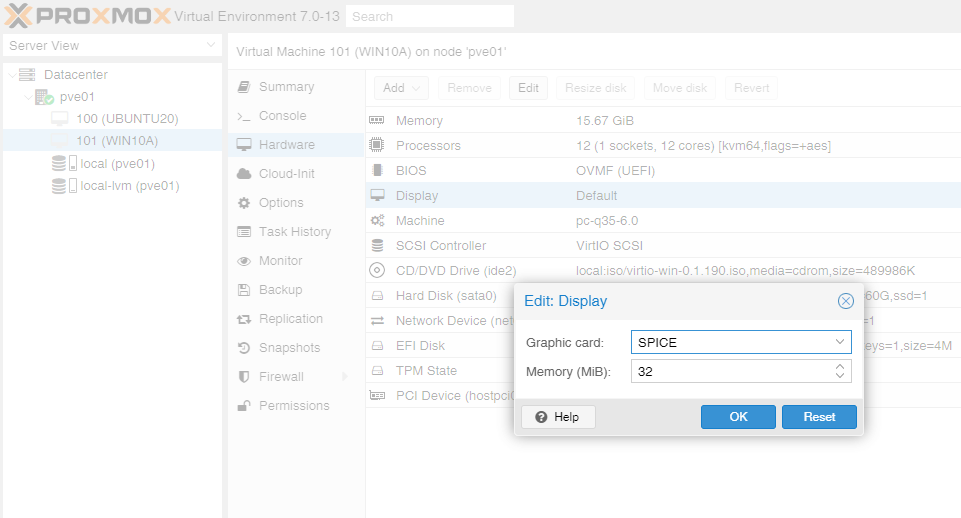
Enable SPICE for a VM
Spice is not enabled by default. To enable it set the Display in the Hardware section of the VM to Spice (shown in the screenshot at the top). Increase the memory if you intend to use SPICE with high resolutions. 32 MiB is plenty for 4K resolutions.
Caution
Before changing the Display setting to SPICE check the following section. You may need to install QXL/SPICE drivers depending on the guest OS.
OS specific settings for VM
Windows
Windows 7/8/10 and Windows 2012/2016
Fully supported. Before you switch the Display to SPICE install the Windows SPICE guest tools 0.132 or higher (spice-guest-tools-0.132.exe or higher)
- http://www.spice-space.org/download.html
Linux
All Linux distributions released after 2011 have the necessary qxl driver included as a part of the Xorg package.
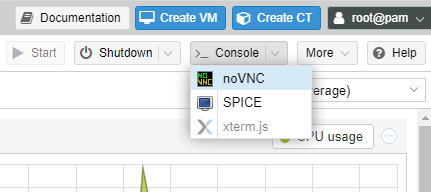
Start your SPICE session
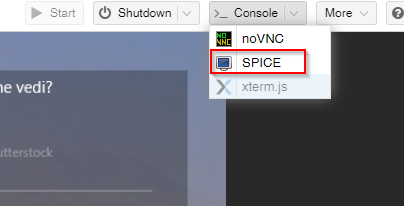
A Spice session can be started by clicking directly on the Console button or by opening the Console sub menu and selecting Spice explicitly. This will trigger the download of the connection config file.
Open this file with Remote Viewer to start the session.
The association is automatic for Chrome and Internet Explorer (they use the mime type association from the OS).
For Firefox, the association must be done manually, as Firefox has his own internal mime type association (See Options/Applications).
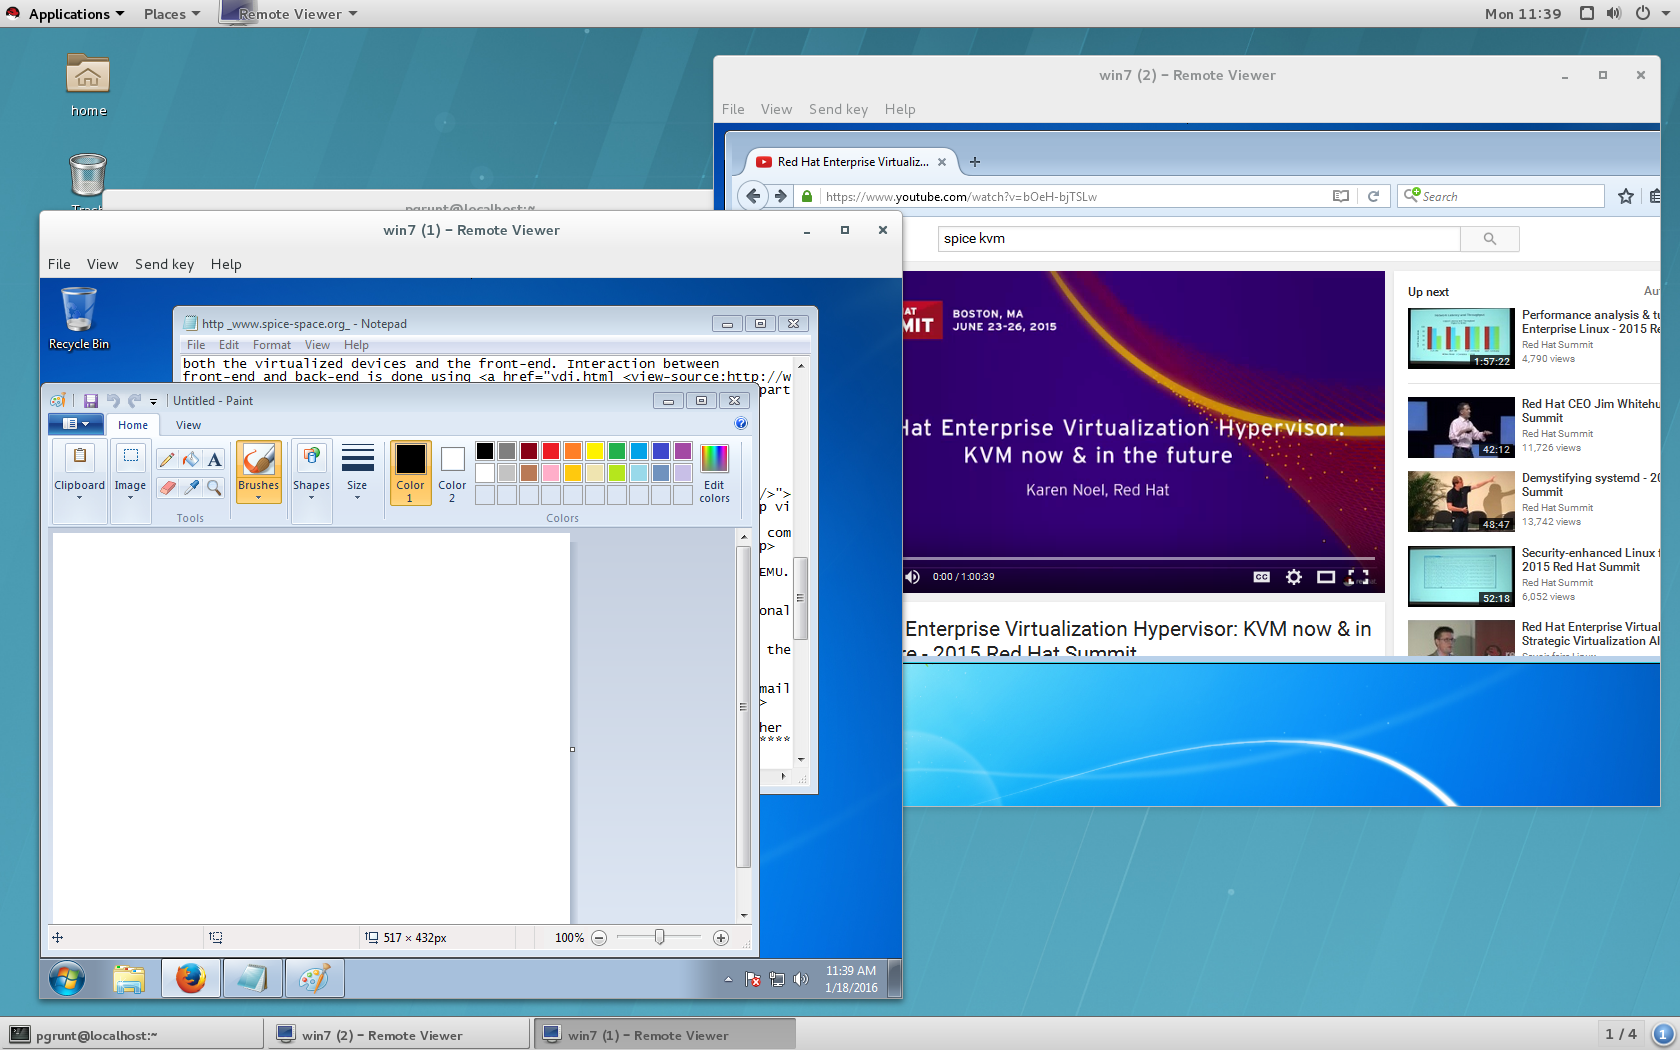
Using client USB devices
You can pass USB devices from the client into the VM. Add a USB device of the type Spice Port in the Hardware section of the VM.
Old methods of editing the config file directly are not necessary anymore with recent versions of Proxmox VE.
Caution
- The Windows version of the virt-viewer does not support it.
Using Audio
Audio devices can be added in the Hardware section of the VM. Three audio devices are supported:
- ich9-intel-hda: emulates Intel HDA Audio on ICH9 chipsets
- intel-hda: emulates Intel HDA Audio on ICH6 chipsets. Use if the ICH9 one does not work properly
- AC97: useful for older OS`s like Windows XP
Manually editing the config file of the VM is not necessary with recent versions of Proxmox VE.
SPICE Enhancements
SPICE Enhancements are optional features that can improve the remote viewer experience.
They can be enabled in the Options panel of a VM.
Two enhancements are currently available:
- Foldersharing
- Videostreaming
Foldersharing enables you to share a local folder with the VM you are connecting to. The «spice-webdavd» daemon needs to be installed in the VM.
HINT: only the Linux version of Virt-viewer (remote-viewer) supports this.
Videostreaming will encode fast refreshing areas in a lossy video stream. A general recommendation cannot be given but depending on your situation this can greatly improve the performance.
More information can be found in the reference manual by clicking the «Help» button in the dialog to enable the enhancements.
Troubleshooting
Can’t start Spice session
If you can’t start a Spice session from the PVE Web gui, you can try the following shell script:
https://git.proxmox.com/?p=pve-manager.git;a=blob_plain;f=spice-example-sh;hb=HEAD
Guest resolution does not resize to Remote Viewer window
Make sure the spice-vdagent service is installed and running in the VM.
If the guest stops resizing once you go higher than a certain size it is possible that the video memory is not enough. Increase the Memory settings of the Display in the Hardware section of the VM by a few MiB. For the changes to take effect you have to shutdown the VM and do a clean start.
Alternatives
Depending on your situation SPICE might not be the best solution.
Alternatives are:
- RDP (Remote Desktop Protocol) for Windows Guests
- X2GO for Linux Guests
Video Tutorials
- Proxmox VE Youtube channel
Contents :
- 1-What is SPICE?
- 2-The features
- 3-Activating options
- 4-Driver installation
- 5-Installing the Virt-Viewer client
1-What’s SPICE?
SPICE (Simple Protocol for Independent Computing Environments) is an open-source remote display protocol originally developed by Qumranet (creator of KVM) that enables remote control of virtual machines.
It is designed for client/server architecture.
Home
Following Red Hat’s acquisition of Qumranet in 2008, the originally closed code was released under an open-source license.
Virtualisation : Red Hat libère le protocole de visualisation SPICE | Silicon
Red Hat SPICE se veut un concurrent des technologies Citrix ICA et Microsoft RDP. La compagnie espère booster le développement de cette solution moderne, en la plaçant sous licence open source.
SiliconDavid Feugey
This is one of the display protocols offered by Proxmox VE with NoVNC.

2-Features
It enables 4 things in particular:
- Display video (logical) from a dedicated driver (Red Hat QXL controller)
- Transmit sound from host server audio devices
- Transfer files (drag’n drop)
- Connect USB peripherals from your client workstation,
It’s an excellent alternative to the Windows RDP protocol. In the Linux world, it’s the best there is.
Its only drawback is that it cannot be displayed via a web browser.
Now let’s see how to install it.
3-Activating options
Start by enabling your virtual machine’s SPICE options.
In Hardware\Display\Graphic card, select SPICE in «Graphic card».
Then, in «Options», go to «spice_enhancement» and enable file sharing (drag’ drop) as well as video encoding by setting it to «all».
Finally, add the audio device. I choose «ich9-intel-hda» (hda for High Definition Audio), which is the motherboard’s audio driver.
Leave SPICE as the default backend.
Finally, go to «USB Device» and add the «SPICE Port» option.
We’ve finished configuring the options.
Now let’s take a look at the «Red Hat QXL Controller» display driver.
4-Driver installation
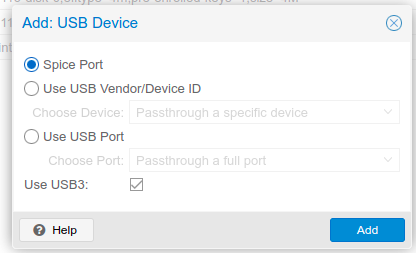
The driver is automatically installed in Linux distributions, but you need to install it on Windows by downloading it from the following link:
https://www.spice-space.org/download/windows/spice-guest-tools/spice-guest-tools-latest.exe
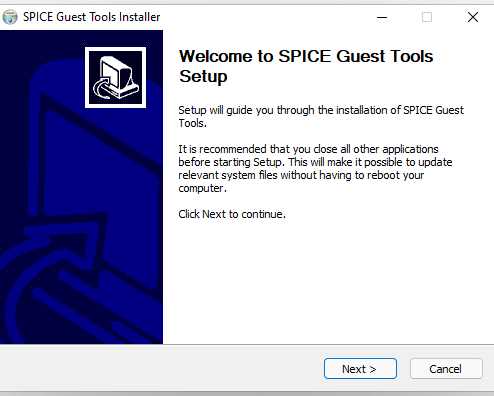
Double-click on the executable.
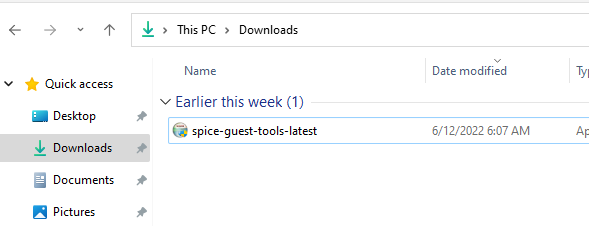
Click on «Yes» (I’m abusing the system, but you never know if a newbie comes across my blog).
- Click on «Next»
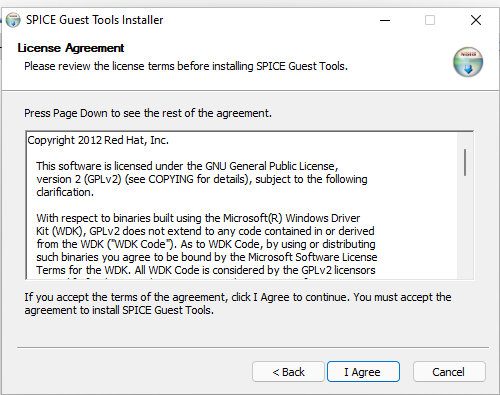
- Accept the terms and conditions by clicking on «I agree»
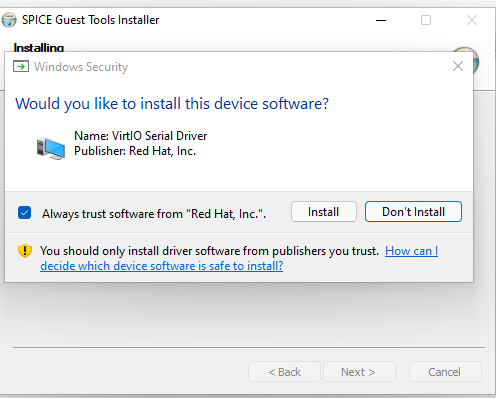
Then, when it asks you to install the drivers (Serial Driver, Ballon driver, SCSI controller, SCSI pass through controller, Ethernet Adapter), click «Don’t Install».
Why not? Because if you’ve followed both parts of my tutorial, you’ve already installed the latest drivers. And above all, there’s no indication of which driver version you’re being offered.
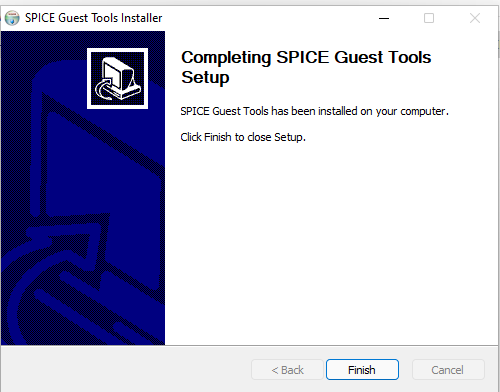
With the SPICE driver installed, click on «Finish».
Finally, install the Virt-Viewer client.
5-Installing the Virt-Viewer client
To access your virtual machine, you need to install the «virt-viewer» client:
On Fedora, Debian, Gentoo and OpenBSD :
# yum install virt-manager (Fedora)
# apt-get install virt-manager (Debian)
# emerge virt-manager (Gentoo)
# pkg_add virt-manager (OpenBSD)
On Windows :
https://releases.pagure.org/virt-viewer/virt-viewer-x64-11.0-1.0.msi
Double-click on the .msi file (silent installation).

Then type «remote viewer» in the search bar.
He presents himself as such.
The easiest way to do this is to download the .vv file to your Proxmox VE server.
In the top right-hand corner, click on «Console» and then on «SPICE».
Choose the save location (it doesn’t matter, it’ll disappear automatically).
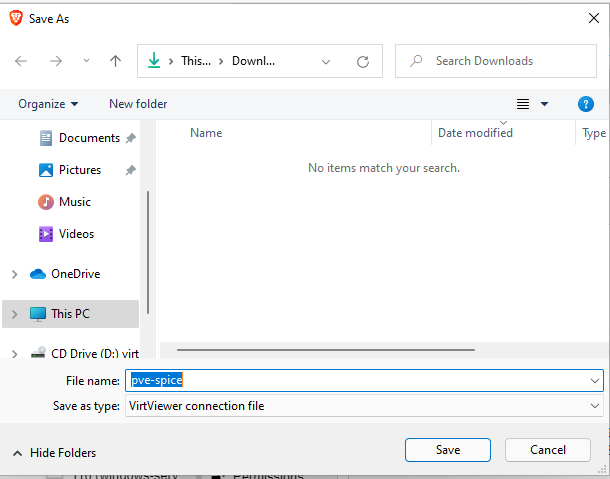
Then click on «pve-spice.vv».
And admire the result!!!

And the icing on the cake. In Virt-Viewer, click on the «Files» tab and «USB device selection».
You’ll now be able to assign one of the devices to your client workstation. On my laptop, I can assign the virtual machine :
- My micro-SD card reader
- My 32 GB Sandisk USB key
- My Logitech mouse
- My webcam
So I’m going to assign it my USB key.
And you can see that my key is recognized inside my virtual machine, without me having to plug it into the server for USB passthrough.
So your desktop will automatically adapt to the size of your window, you’ll have sound, the ability to transfer files via drag’n drop and connect USB peripherals. Ain’t life grand? Handsome or not?

When using Proxmox as your favorite virtualization platform, you will come across the need to connect to your VMs. In case of a Windows VM, the classic way to do it may be to activate RDP from within your Windows VM and connect through it. But a more open source solution can be to configure the Spice protocol to access to your development machines.
Spice Protocol
To keep it super simple and basic, it’s composed of four elements:
- a graphic server
- a client
- and two … hemm let’s say … “connectors”, that will fill the gap between host and guest OSes.
Windows Guest Configuration
Befor activating the Spice Protocol, be sure have installed the necessary drivers on your windows guest.
To do so, install the spice-guest-tools that you can find at the following link:
https://www.spice-space.org/download.html
Windows Host
To connect to your Windows VM from your Windows machine, you will need a “Spice Viewer”.
To do so, you can download and install the virt-viewer for you windows from the following link:
https://virt-manager.org/download/
Proxmox Configuration
At this point, turn off you guest to make some virtual hardware changes.
In your Proxmox Ve web portal navigate to your
your VM -> Hardware -> Display
Select Spice from dropdown menu and 32 MB of video memory, the click OK
You can the start your VM, and once its up and running, click on Console -> Spice to start the remote session.
Next up, performance optimization.
Provide feedback
Saved searches
Use saved searches to filter your results more quickly
Sign up
Appearance settings
To install Windows 10 VM on Proxmox VE
This tutorial shows how to install a Windows 10 VM with spice client and VirtIO Drivers on Proxmox VE. Spice is a client software, which runs under spice protocol created for virtualization environment to allow remote sessions very fast. And VirtIO Drivers is a hard disk bus type which is faster than IDE and SCSI type.
Installing Windows 10 VM
Log into your Proxmox and click Create VM from your Proxmox Node.
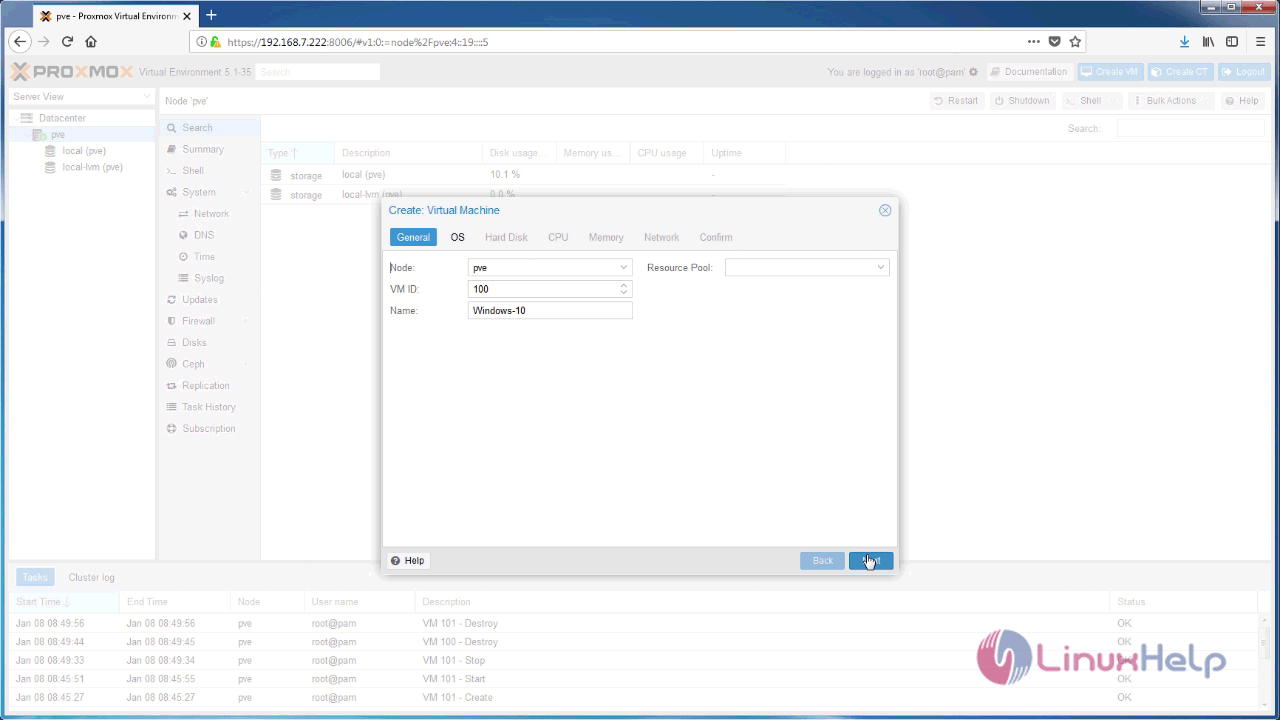
In the OS configuration, you need to choose your storage and ISO file.

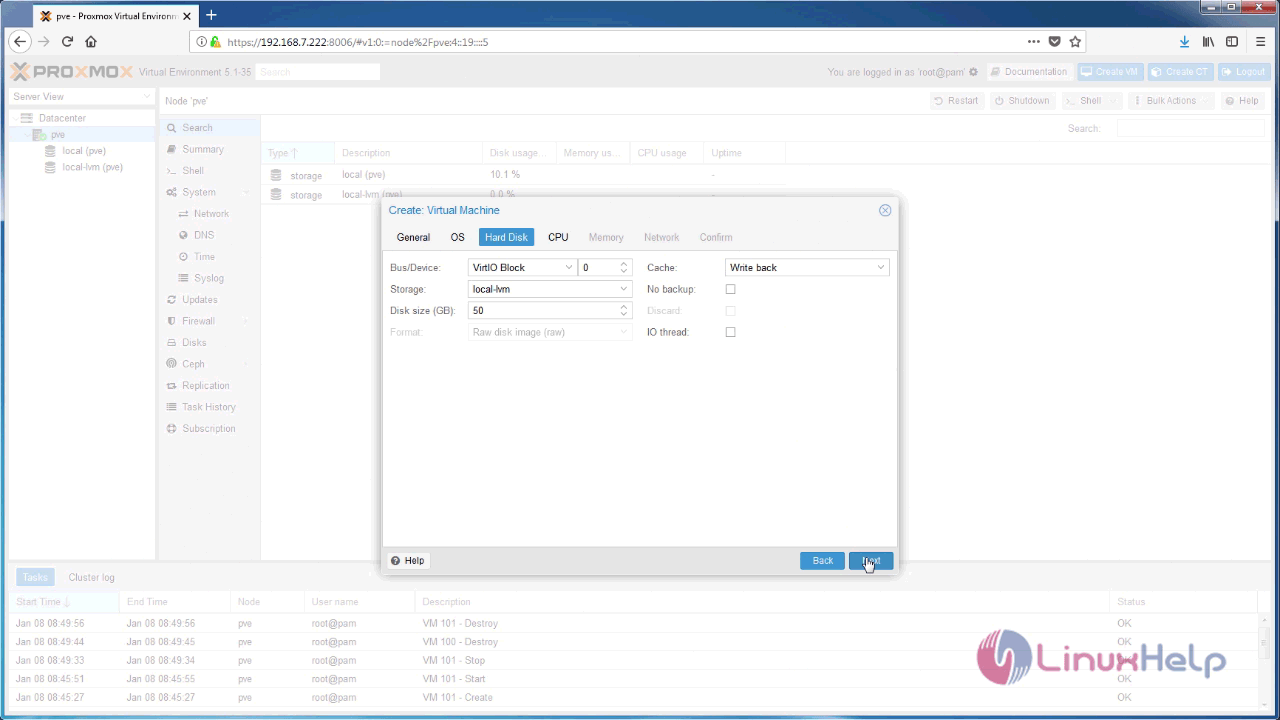
And then, choose Hard disk Bus Device as VirtIO Block and cache as Write-back.
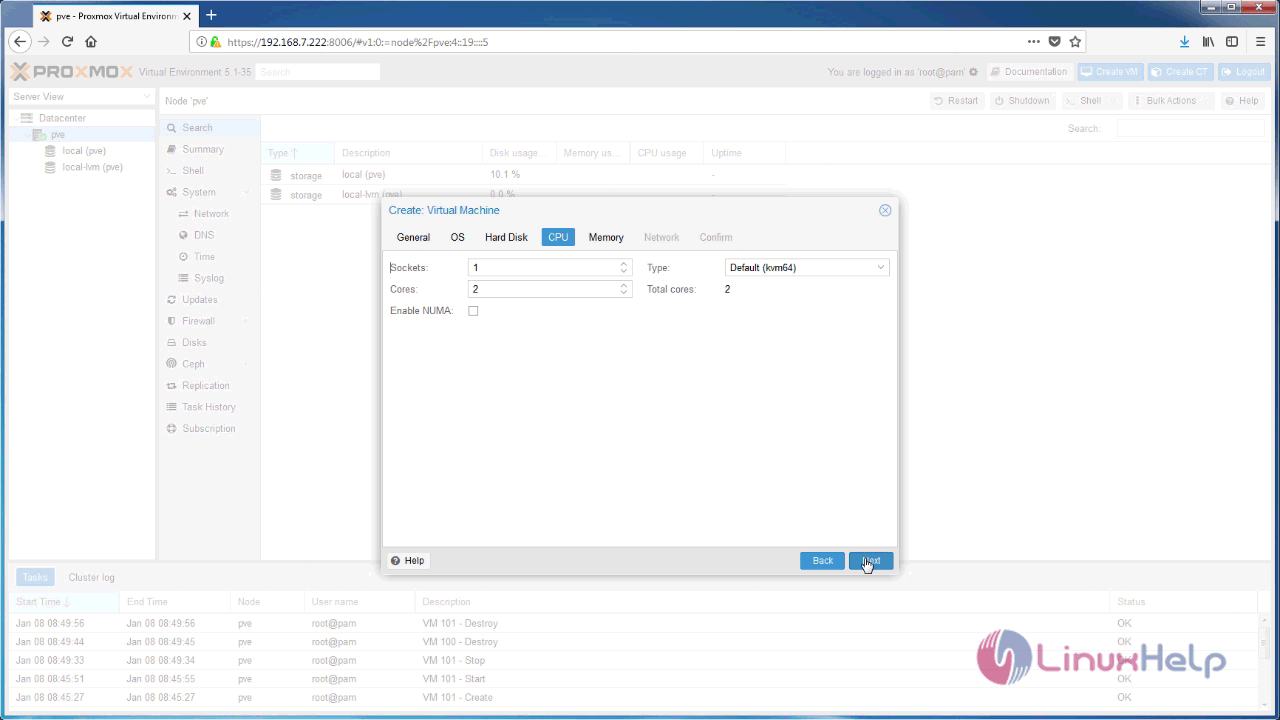
After that, you need to configure CPU and proceed further.
Later, in the next step, you need to configure your Memory by choosing the kind of memory you want.
And then, you need to configure your network interface and proceed further to next step.
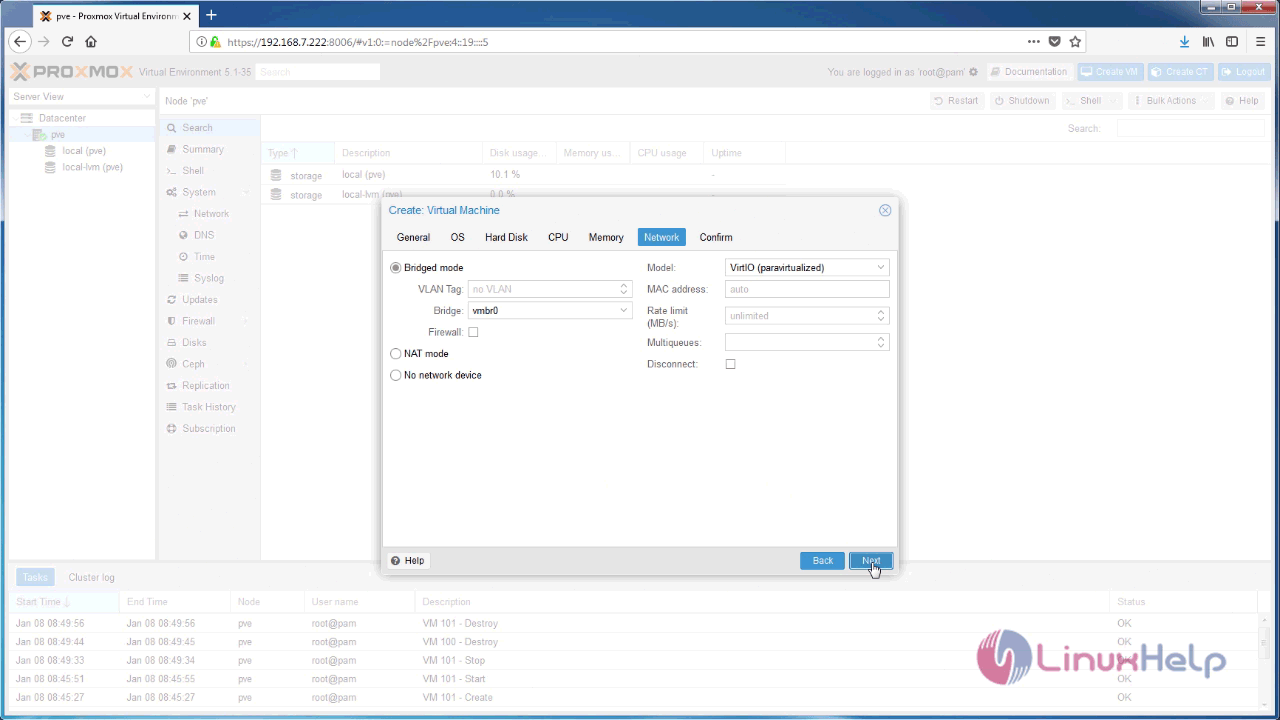
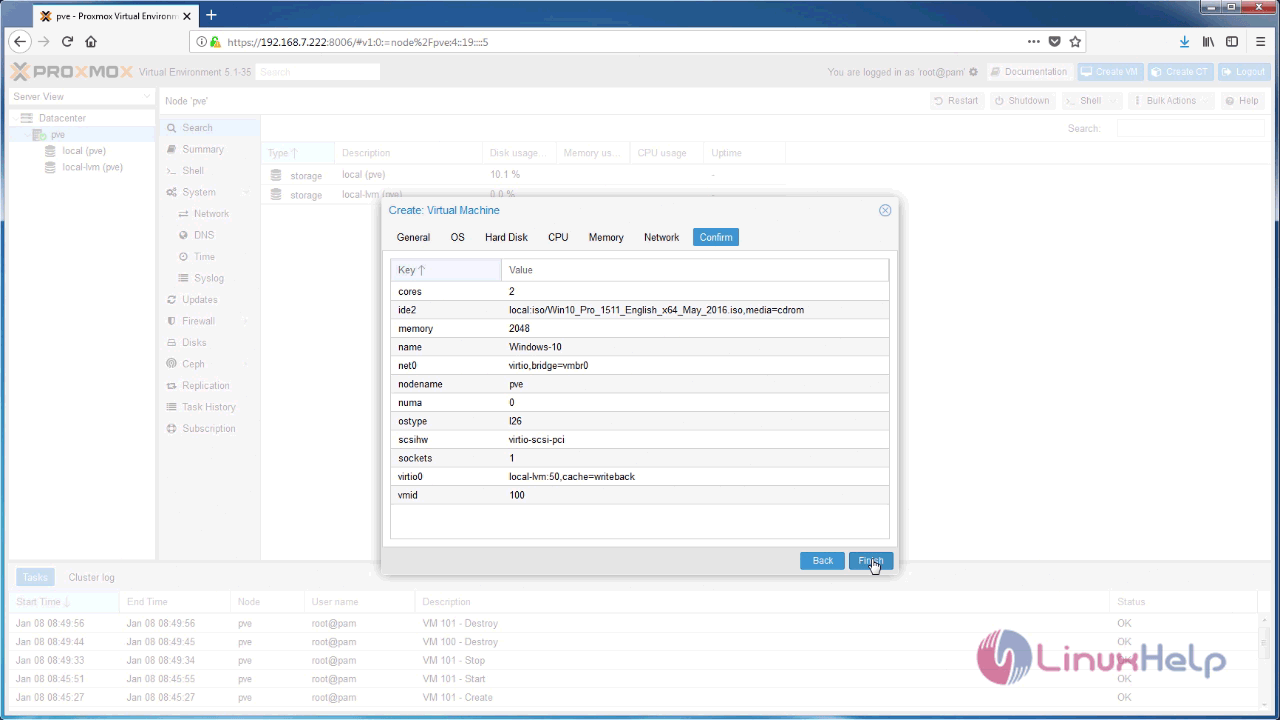
And now, check all the details and click on the Finish button.
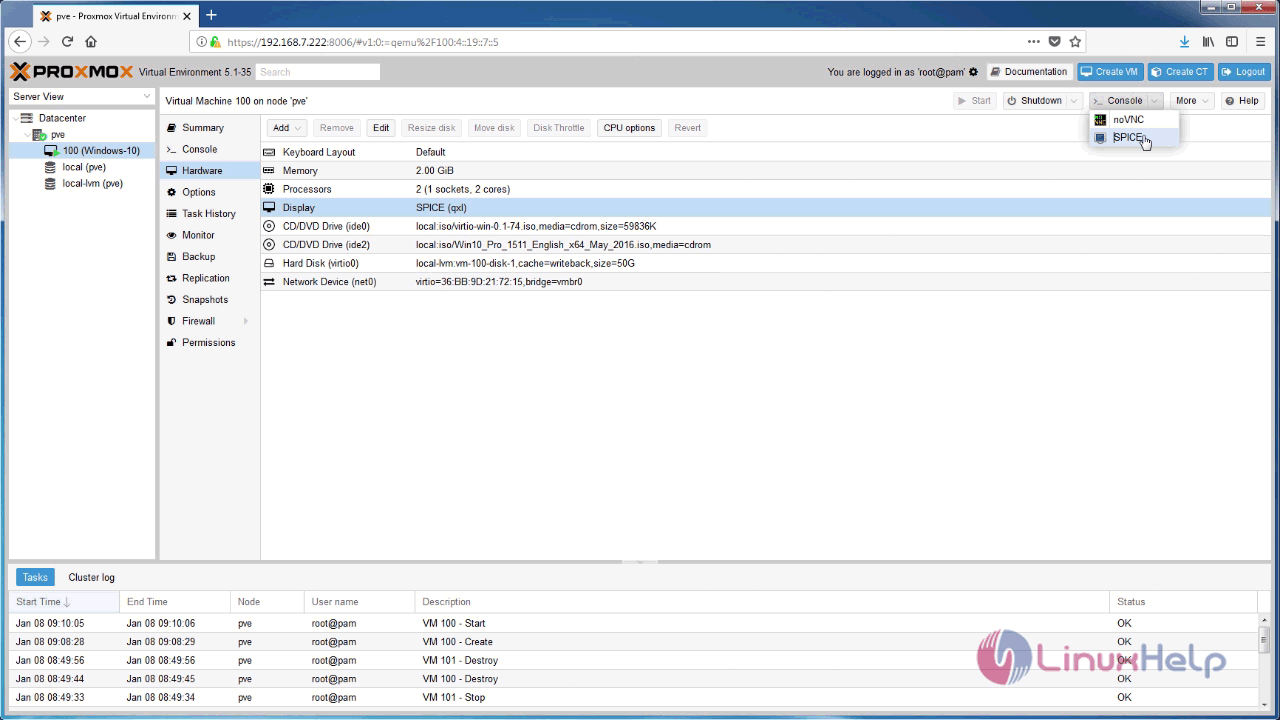
Afterwards, click display and choose your display type as SPICE.
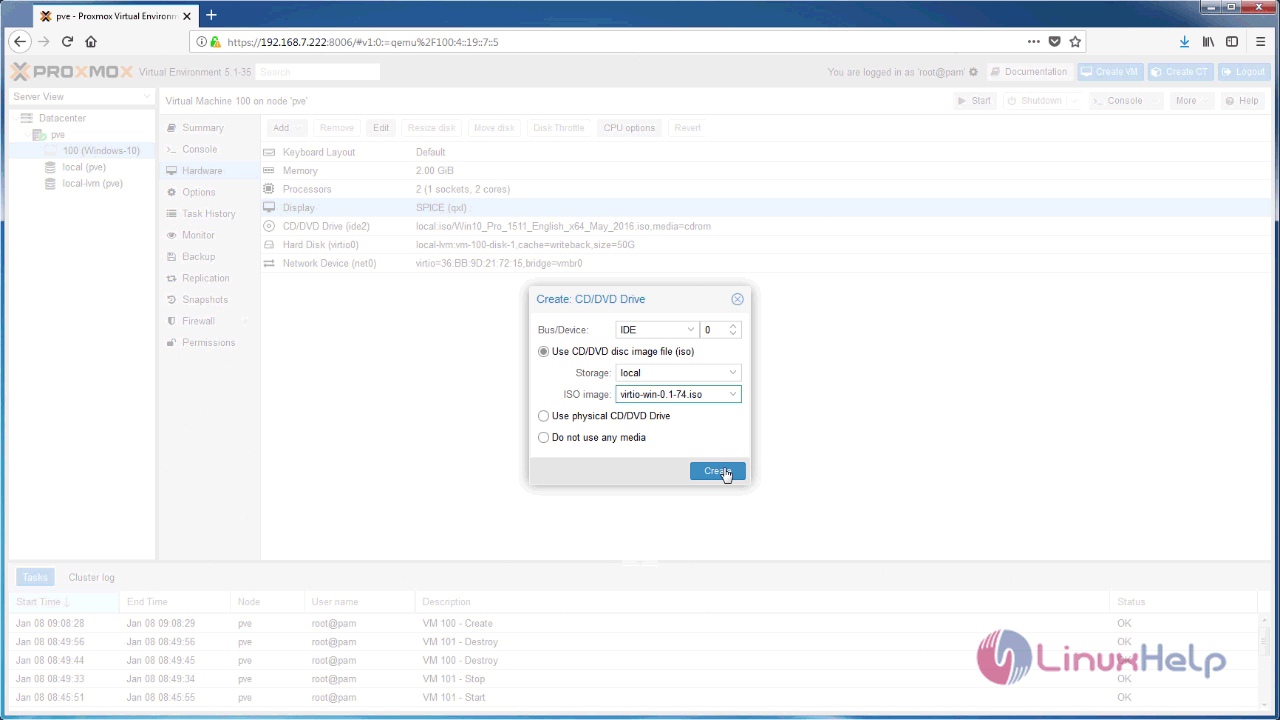
Now, You need to add the secondary DVD Drive for inserting VirtIO Drivers ISO.
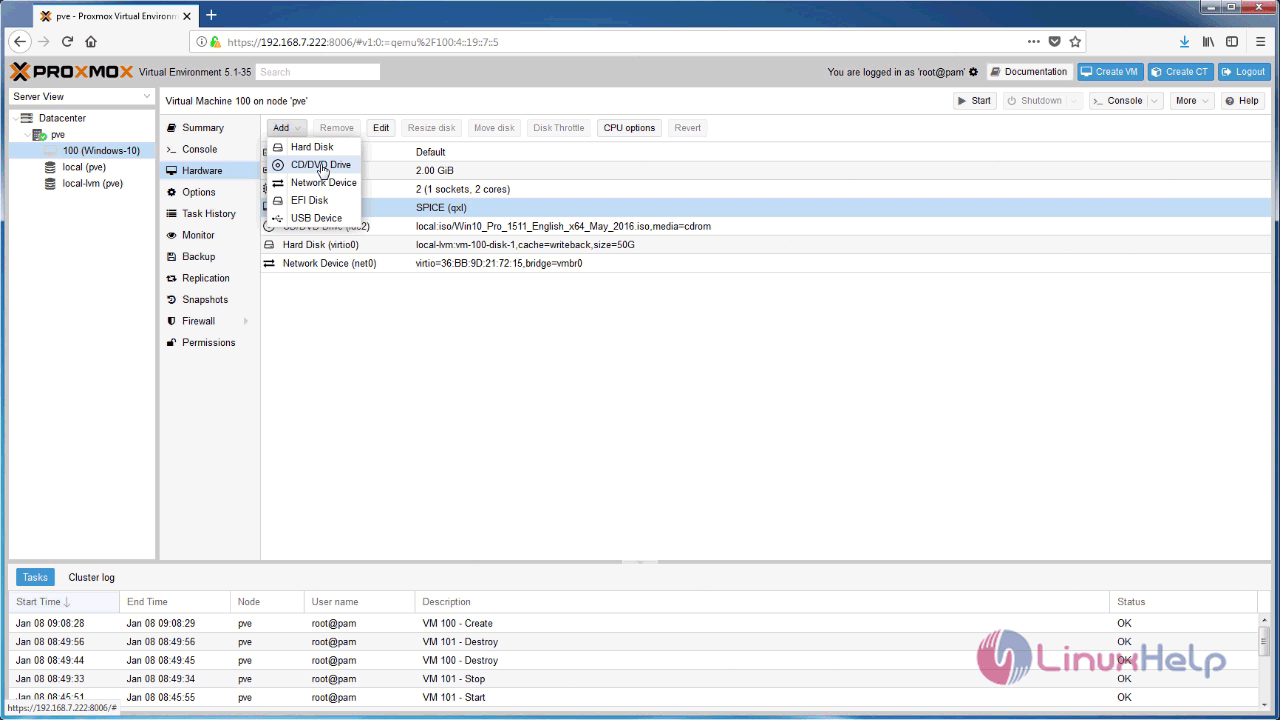
After that, you need to choose your VirtIO drivers.ISO
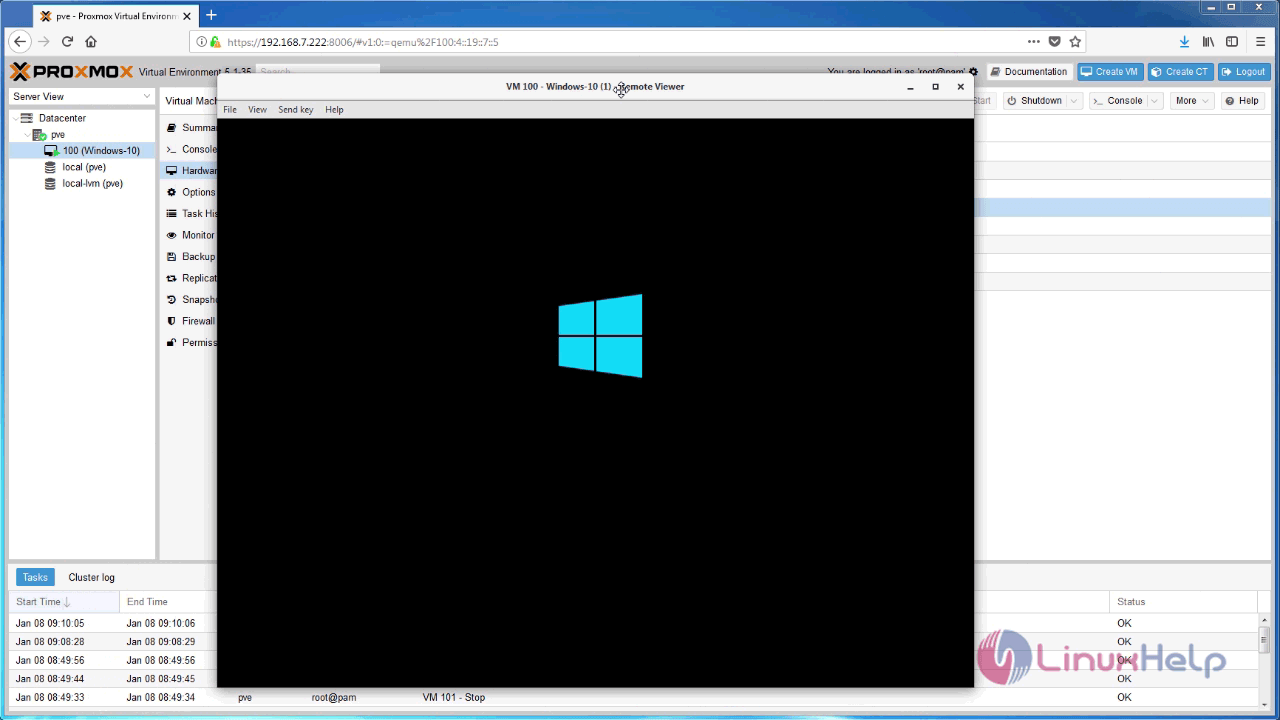
And then, click “ Start” to power on your VM, and choose the Console as SPICE.
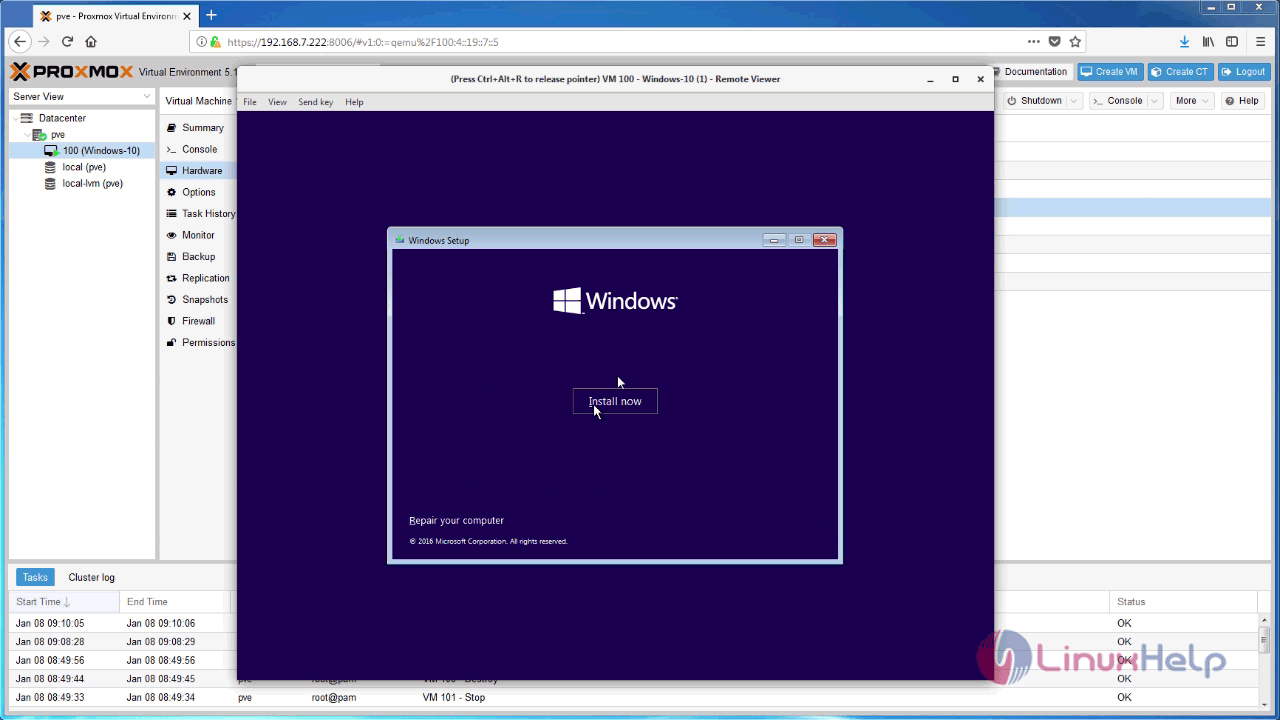
You shall now go on with the installation of the Windows.
Click on the Install Now button.
Specify the location.
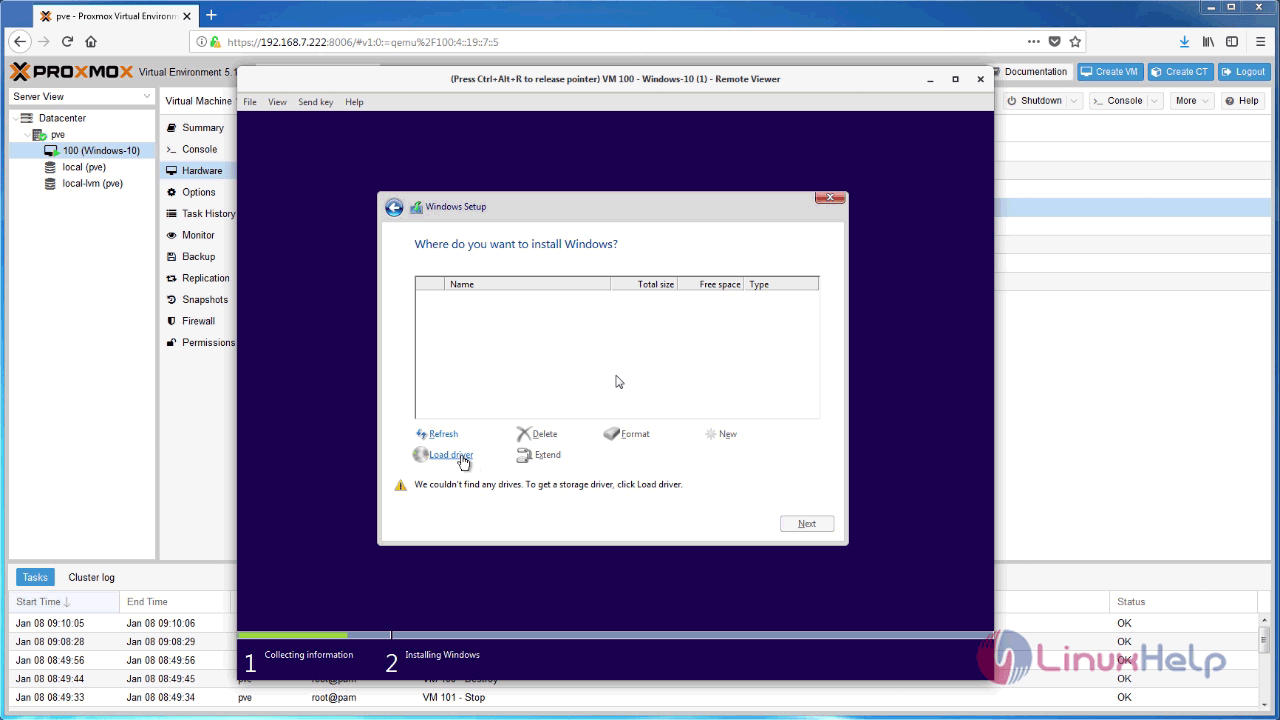
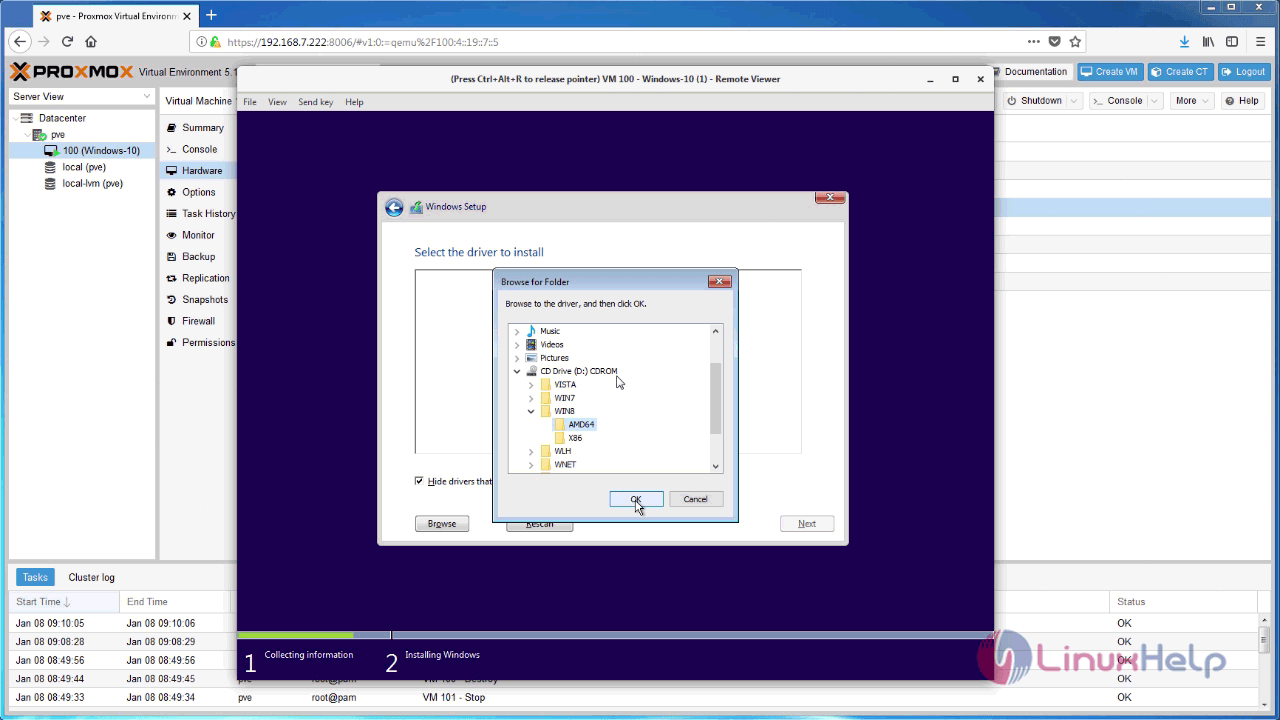
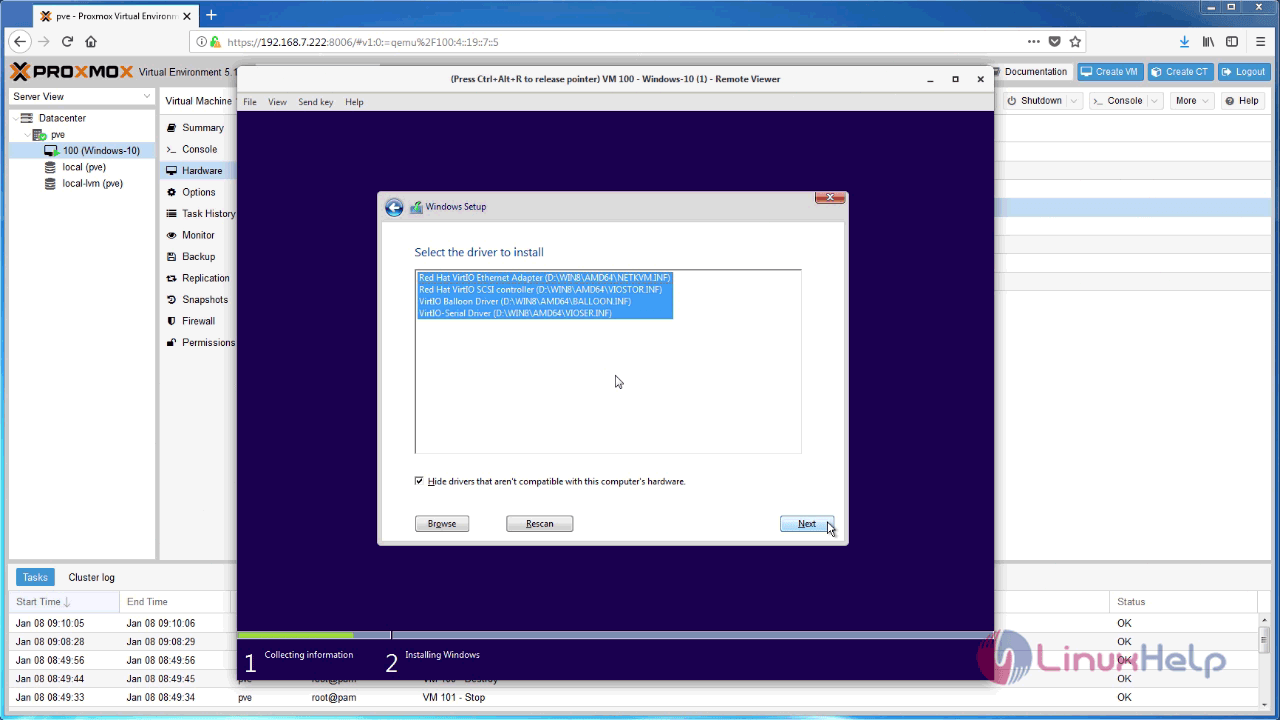
Now, select the driver to install.
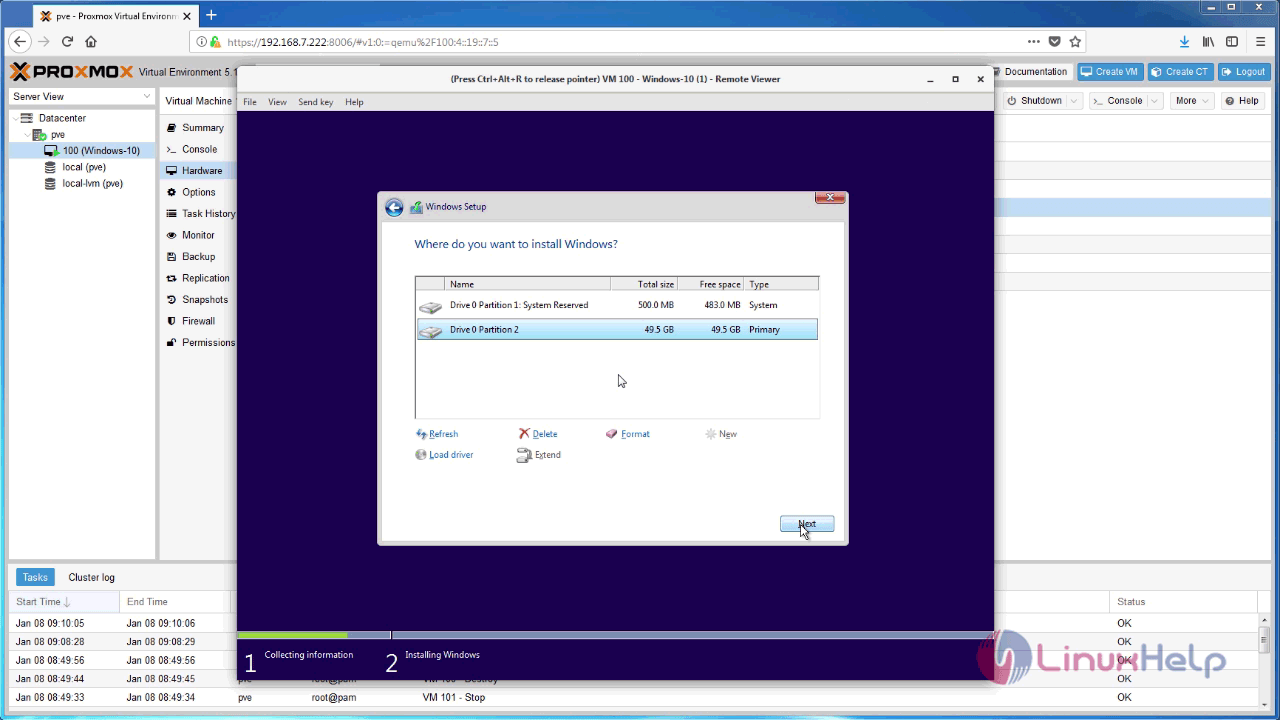
Now, you can find your hard disk, and partition it for Windows 10 installation.
You are now in the penultimate stage of your Windows 7 installation.
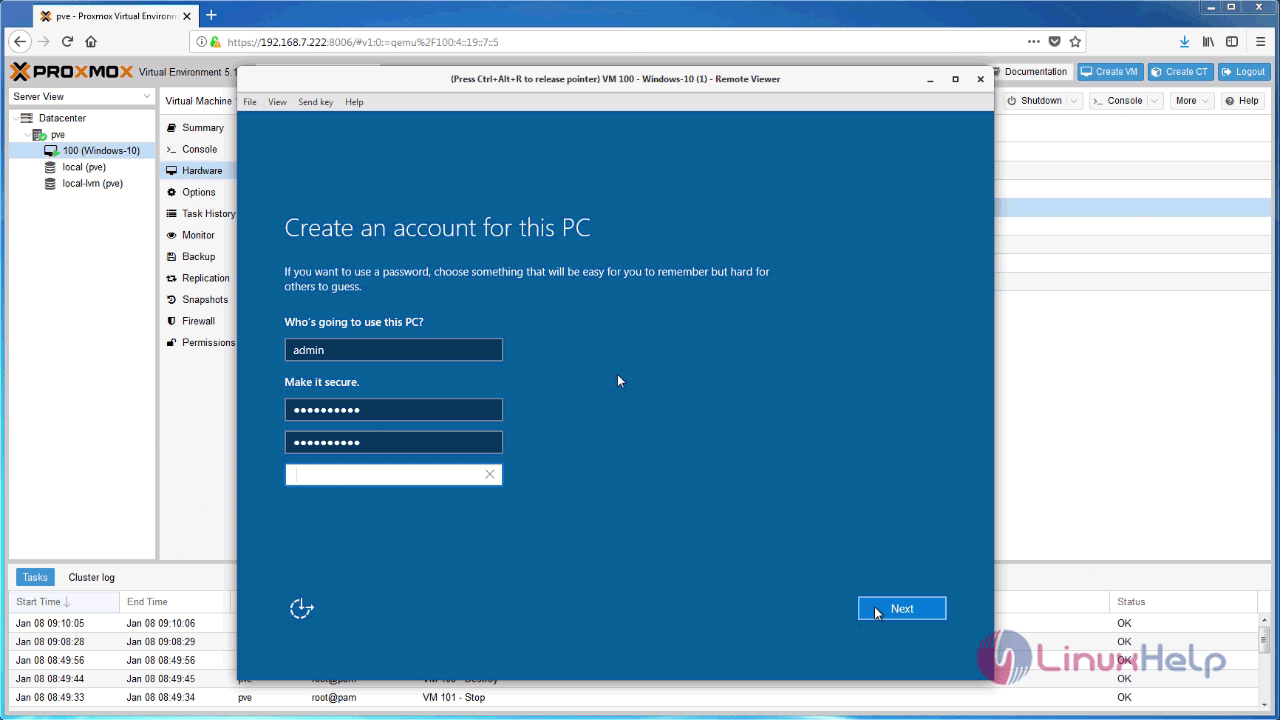
You are now asked to set up the windows. Give the necessary credentials.
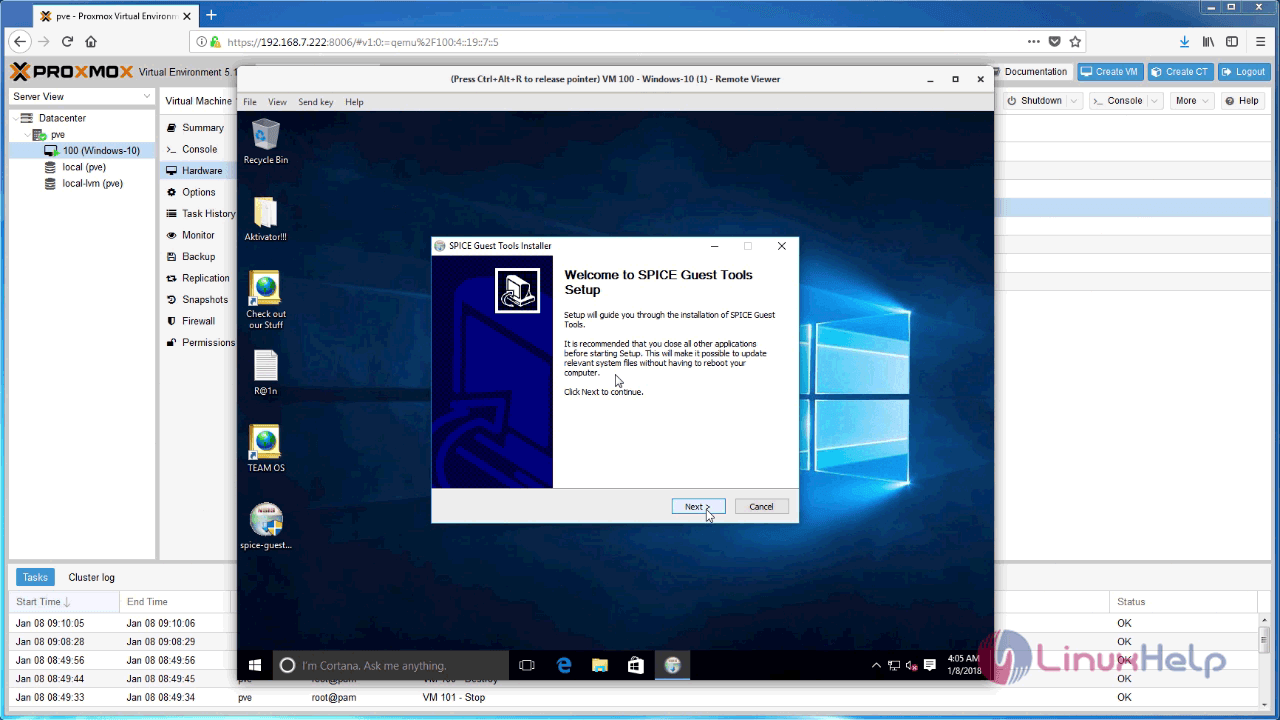
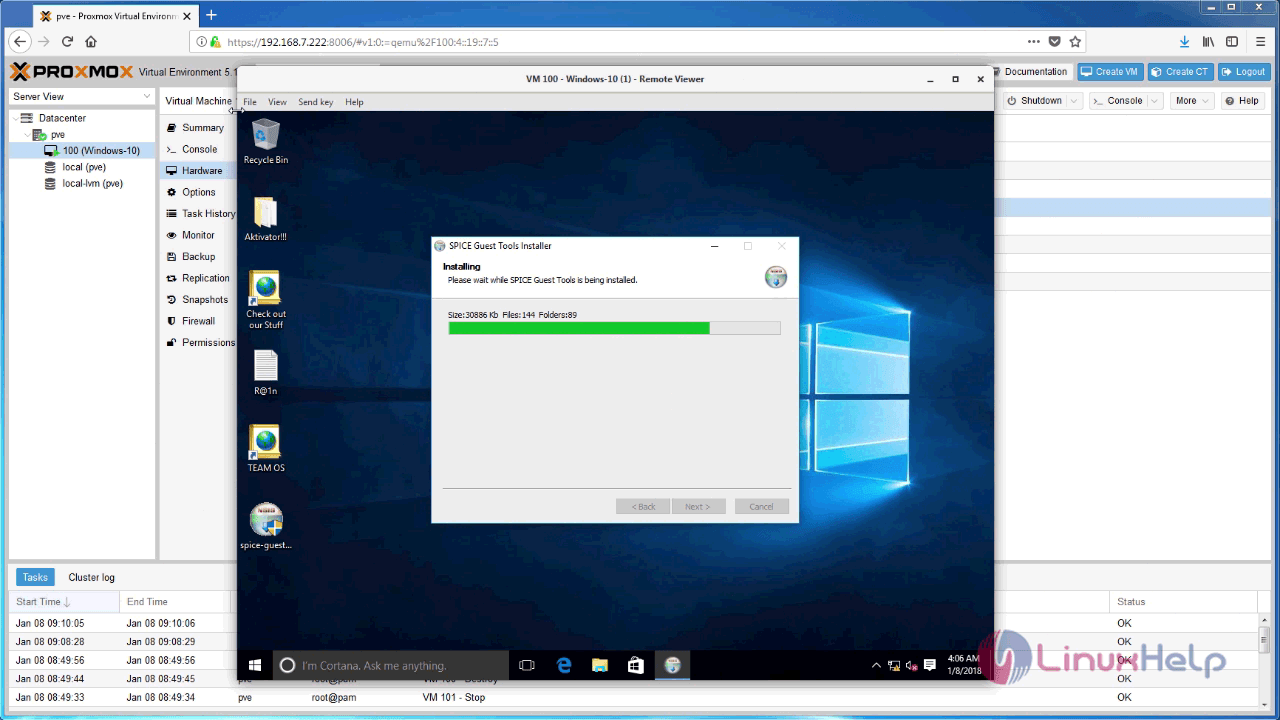
You will be asked to install SPICE guest tools. Proceed with the installation.
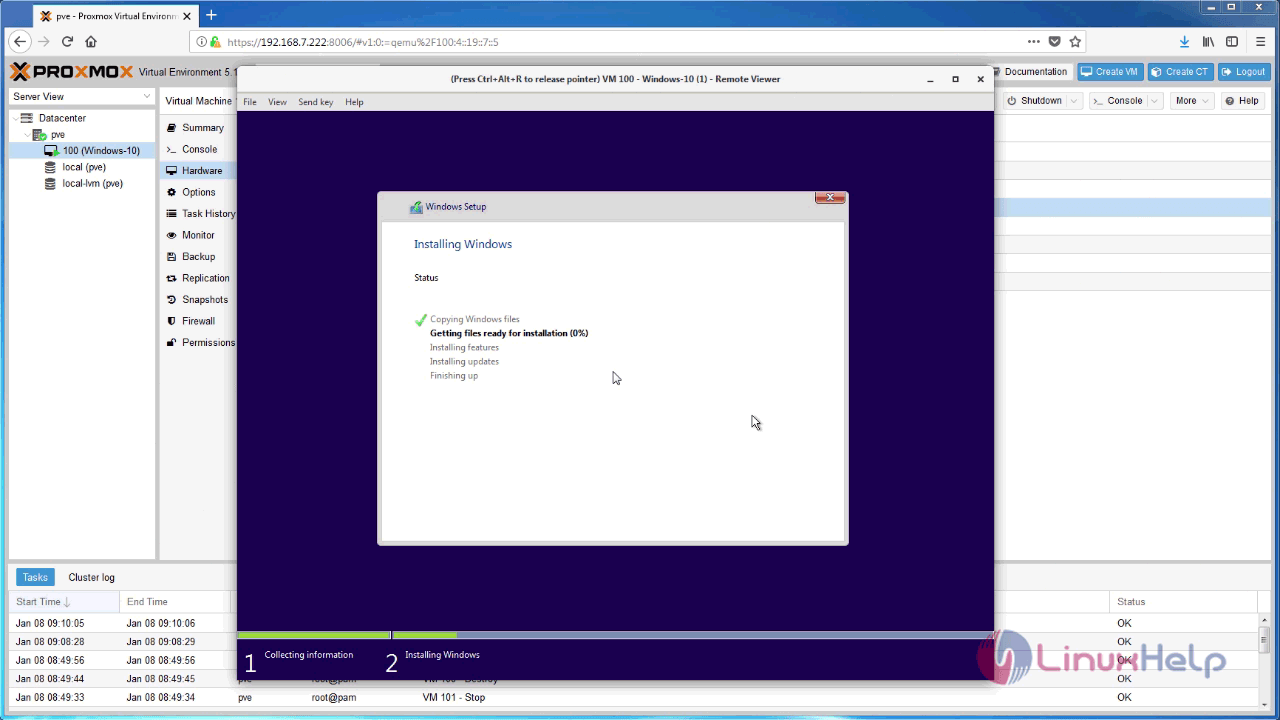
The installation is almost over. Click on the finish button.
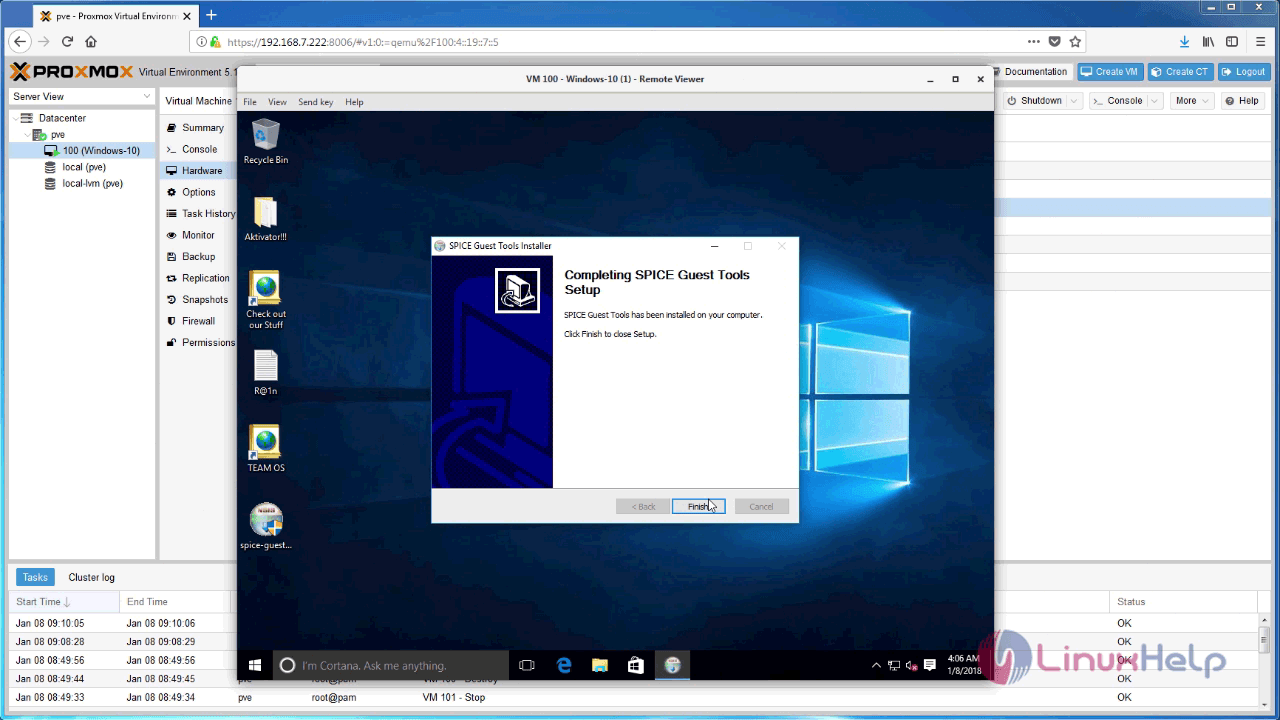
The setup is now done.
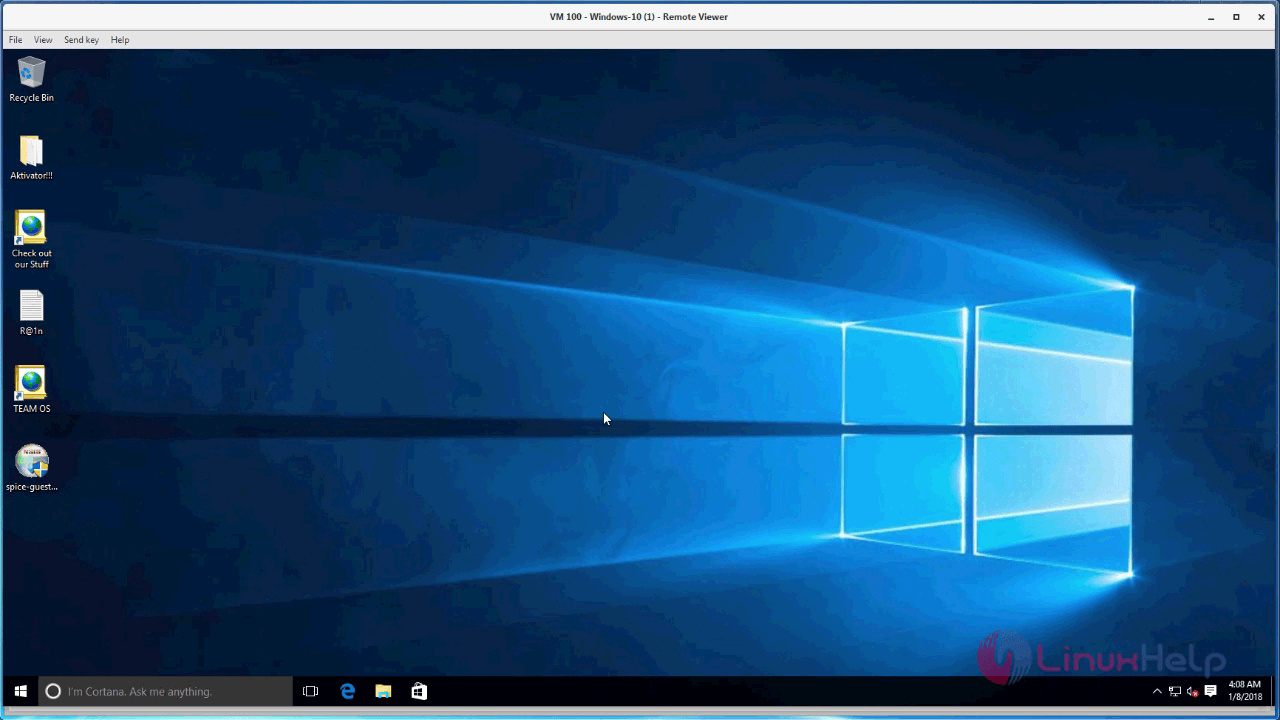
With this, the installation gets complete.