
Free Download Proteus Professional 8 — Proteus combines ease of use with powerful features to help you design, test and layout professional PCBs
Overview of Proteus Professional 8:
Proteus is a software package for computer-aided design of electronic circuits. The package is a system of circuit simulation based on models of electronic components adopted in PSpice. A distinctive feature of the Proteus Professional package is the ability to simulate the operation of programmable devices: microcontrollers, microprocessors, DSP, and more. Additionally, the Proteus package includes a PCB design system. Proteus Professional can simulate the following microcontrollers: 8051, ARM7,AVR,Motorola, PIC, Basic Stamp. The component library contains reference data.
Supports MK: PIC, 8051, AVR, HC11, MSP430, ARM7 / LPC2000 and other common processors. Over 6,000 analog and digital device models. Works with most compiler and assembler.PROTEUS VSM allows you to very reliably simulate and debug quite complex devices that can contain several MKs simultaneously and even different families in one device! Add. Information : Installation instructions in readme.txt Performance tested in wine-3.0.3 on Debian 9 with 32-bit WINEPREFIX. It works more stably than 8.8 (there were problems with saving projects).
For academics and the maker market, Proteus Visual Designer allows Arduino programs to be written with simple flowcharting methods and Arduino shields to be placed on the schematic with a mouse click. The entire Arduino system can then be simulated, tested and debugged in software. Proteus IoT builder then adds the ability to create a user interface for your phone or tablet to interact with the Arduino electronics. You can even test this by controlling the running simulation from your mobile device.
Details:
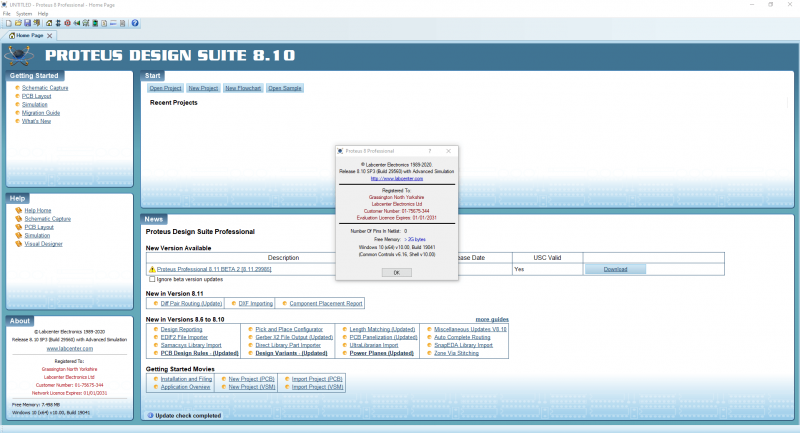
- Proteus Design Suite 8.9 SP2 Release
- Version:8.9 SP2 Build 28501
- Developer:Labcenter Electronics
- Tabletka:present.
Features of Proteus 8:
- Proteus PCB design seamlessly combines Schematic Capture and PCB layout to provide a powerful, integrated and easy to use suite of tools for professional PCB Design.
- Visual Designer for Arduino combines world class Proteus VSM simulation with a new flowchart engine to provide a truly integrated and intuitive development environment.
- The Proteus Design Suite is wholly unique in offering the ability to co-simulate both high and low-level micro-controller code in the context of a mixed-mode SPICE circuit simulation.
System Requirements:
- Supported OS: Windows 7/8/10
- CPU: 2.2GHz Dual Core
- RAM: 4 GB RAM
- Free Hard Disk Space: 1 GB or more.
Автор
проекта
Виниченко А.В.
Стабильная версия Proteus Professional 8.4 SP0 без глюков и вылетов (проверено на windows 7).
Proteus Professional представляет собой систему схемотехнического моделирования, базирующуюся на основе моделей электронных компонентов принятых в PSpice. Отличительной чертой пакета Proteus является возможность моделирования работы программируемых устройств: микроконтроллеров, микропроцессоров, DSP и прочее. Дополнительно в пакет Proteus Pro входит система проектирования печатных плат. Proteus Professional может симулировать работу следующих микроконтроллеров: 8051, ARM7, AVR, Motorola, PIC, MSP430, Basic Stamp. Библиотека компонентов содержит справочные данные.
Proteus 8 состоит из 6 основных модулей:
Application Framework. Теперь Proteus 8 состоит из одного приложения с большим количеством модулей (ISIS, BOM, ARES, 3D Viewer и т.д.). Модули можно открывать во вкладках в окне приложения, можно перетаскивать и создавать дополнительные окна, а также просматривать несколько вкладок сразу. Это позволяет работать не только с ISIS и ARES, как это было в предыдущих версиях, но и с другими модулями, например ISIS и VSM Studio для отладки, ISIS и спецификация для отчета, ARES и 3D Viewer для проверки.
Common Parts Database. Единая база данных компонентов обеспечивает обмен данными между модулями Proteus в текущем проекте. Элементы представляют собой физические компоненты на печатной плате и в то же время представляют собой логические элементы на схеме.
Live Netlisting. Живой список соединений доступный всем модулям, позволяет отражать изменения в реальном времени. Изменения схемы приводят к изменениям печатной платы и в свою очередь, к изменению спецификации.
3D Viewer. При 3D просмотре, помимо OpenGL поддерживается графика DirectX, добавлена многопоточность для увеличения скорости визуализации. Также используется живой список соединений, поэтому изменения внесенные в ARES отображаются в 3D Viewer.
Bill of Materials. Абсолютно новый модуль работы с документацией к проекту. Возможность сохранять спецификации в популярных форматах PDF, HTML и Excel.
VSM Studio. Встроенная среда разработки, позволяющая моделировать и отлаживать свой проект в Proteus VSM, а также автоматически настроить компилятор под конкретную прошивку.
PROTEUS VSM великолепно работает с популярными компиляторами Си для МК:
- CodeVisionAVR (для МК AVR)
- IAR (для любых МК)
- ICC (для МК AVR, msp430, ARM7, Motorola )
- WinAVR (для МК AVR)
- Keil (для МК архитектуры 8051 и ARM)
- HiTECH (для МК архитектуры 8051 и PIC от Microchip)
Активация:
- При установке Proteus 8.4 SP0, выбрать тип установки «Custom»
- В качестве лицензионного файла указать на «Grassington North Yorkshire.lxk»
- Применить патч «Update Proteus 8.4 SP0 Demo to PRO ENG v1.0.exe»
Скачать файл с внешнего сервера MEGA-DRIVE: Proteus Professional 8.4 SP0 или торрент-файл
Proteus 8 Professional is a powerful electronic design automation (EDA) software that allows you to simulate, design, and test electronic circuits. If you’re a student, hobbyist, or professional in the field of electronics, learning how to install Proteus 8 Professional on Windows 10 can be highly beneficial. This tutorial will guide you through the process, step by step.
Step 1: Download the Proteus 8 Professional installer from the official website. Make sure to choose the correct version based on your Windows 10 operating system (32-bit or 64-bit).
Step 2: Once the download is complete, locate the downloaded installer file and double-click on it to run the installation wizard.
Step 3: The installation wizard will guide you through the installation process. Click on «Next» to proceed.
Step 4: Read and accept the End-User License Agreement (EULA) to continue with the installation.
Step 5: Choose the destination folder where you want to install Proteus 8 Professional or leave the default folder selected.
Step 6: Select the components you want to install. By default, all components are selected, but you can customize the installation by unchecking unnecessary components.
Step 7: Click on «Install» to start the installation process. Be patient as it may take a few minutes to complete.
Once the installation is finished, you can launch Proteus 8 Professional from the Start menu or desktop shortcut. You’re now ready to start designing and simulating electronic circuits.
| Pros | Cons |
|---|---|
| 1. Powerful and comprehensive EDA software for electronic circuit design and simulation. | 1. Requires a moderate amount of system resources and may not perform well on low-end machines. |
| 2. Provides a vast library of components and models for easy circuit design. | 2. The learning curve can be steep for beginners without prior experience in circuit design. |
| 3. Offers real-time simulation and debugging tools for accurate analysis. | 3. The cost of the Professional version may be prohibitive for some individuals or organizations. |
Installing Proteus 8 Professional on Windows 10 allows you to unleash your creativity in the field of electronics and explore circuit design and simulation with ease. With its powerful features and user-friendly interface, Proteus is an essential tool for any electronics enthusiast or professional. So grab a copy of Proteus 8 Professional and start creating amazing electronic circuits today!
Video Tutorial:Is Proteus 8 free?
Proteus is a popular software tool used for designing and simulating electronic circuits. If you are interested in installing Proteus on your PC, here is a step-by-step guide:
Step 1: Download the Installer
Visit the official website of Proteus and navigate to the Downloads section. Look for the appropriate installer based on your system specifications, such as the operating system version (Windows 10, for example) and the bit architecture (32-bit or 64-bit).
Step 2: Run the Installer
Once the installer is downloaded, locate the file and run it. This will start the installation process. You may need to grant administrative privileges to proceed.
Step 3: Accept License Agreement
Read and accept the license agreement terms if prompted. It’s important to understand the terms and conditions before proceeding with the installation.
Step 4: Select Installation Components
During the installation process, you may be asked to select the components you want to install. Proteus provides a variety of tools and libraries, so choose the ones that best suit your needs. Typically, the default selection will suffice for most users.
Step 5: Choose Installation Path
Select the directory or folder where you want Proteus to be installed. The default installation path is usually fine, but you can choose a different location if desired.
Step 6: Install
After selecting the installation path, proceed with the installation process by clicking on the «Install» button. This will initiate the installation and may take a few minutes to complete.
Step 7: Launch Proteus
Once the installation is finished, you will see a prompt to launch Proteus. You can choose to launch it immediately or do it later by selecting the appropriate option. If you choose to launch Proteus now, the software will open, and you can start utilizing its features.
That’s it! You have successfully installed Proteus on your PC. Now you can start designing and simulating electronic circuits using this powerful tool. Remember to explore the user interface, documentation, and online resources to make the most out of Proteus’s capabilities.
What are the minimum requirements for Proteus 8 professional?
Proteus 8 Professional is a popular electronics design and simulation software used by professionals and hobbyists alike. To ensure the smooth installation and functioning of Proteus 8 Professional, the following minimum system requirements should be met:
1. Operating System: Proteus 8 Professional is compatible with various versions of Windows. It supports Windows 10, Windows 8, and Windows 7 operating systems. Ensure that your computer meets the minimum requirements for the specific version of Windows you are running.
2. Processor: Proteus 8 Professional requires a compatible processor with a satisfactory clock speed. An Intel Core i3 processor or higher is recommended for optimal performance. However, a lower-spec processor may work, but it may affect the software’s responsiveness and overall speed.
3. RAM: Sufficient memory is essential for running Proteus 8 Professional smoothly. A minimum of 4GB RAM is required, although 8GB or more is recommended for better performance.
4. Hard Disk Space: The software installation requires a certain amount of disk space. Allocate at least 3GB of free space on your hard drive for Proteus 8 Professional to install and function properly.
5. Graphics Card: Proteus 8 Professional utilizes graphic rendering capabilities, so having a compatible graphics card is important. Ensure that your computer has a graphics card with DirectX 9 support or above. This will ensure that the software’s graphical interface and simulations run smoothly.
6. Display: A screen resolution of 1024×768 or higher is recommended to view the Proteus 8 Professional interface and schematics clearly.
7. Additional Requirements: Proteus 8 Professional also requires an active internet connection for licensing and updates. Make sure that your computer has internet connectivity during installation and for subsequent updates.
By meeting these minimum requirements, you should be able to install and use Proteus 8 Professional without any major issues. Remember that these are the minimum requirements, and for optimal performance, it’s advisable to have a computer with higher specifications whenever possible.
How do I download Proteus 8.11 Professional?
To download Proteus 8.11 Professional, follow these steps:
1. Visit the official website: Go to the official website of Proteus, which is Labcenter Electronics’ website. You can search for «Proteus Labcenter Electronics» on your preferred search engine to find the correct website.
2. Navigate to the download page: Once you’re on the Labcenter Electronics’ website, navigate to the «Downloads» or «Download Proteus» section. Look for the version labeled «Proteus 8.11 Professional.«
3. Choose the appropriate download option: Depending on your operating system, you may have different download options, such as Windows, macOS, or Linux. Select the option that corresponds to your system.
4. Select the desired edition: Proteus offers different editions, such as Professional, Standard, and Lite. Make sure you choose the «Proteus 8.11 Professional» edition for your download.
5. Provide necessary details and accept terms: Some websites require you to create an account or provide certain details before allowing the download. Follow the instructions on the website and accept any terms or agreements if prompted.
6. Start the download: Once you have completed the necessary steps, click on the download button or link provided to initiate the download process for Proteus 8.11 Professional.
7. Install Proteus: After the download is complete, locate the downloaded file on your computer and run the installer. Follow the on-screen instructions to install Proteus 8.11 Professional on your system.
Please note that the steps provided may vary slightly depending on the specific website or changes made by the software developer. It is always recommended to refer to the official website for the most up-to-date and accurate download instructions.
How to connect Windows 8 to Windows 10?
To connect a computer running Windows 8 to a computer running Windows 10, you can follow these steps:
Step 1: Check Network Connection
Ensure that both computers are connected to the same network, either through a local area network (LAN) or wirelessly.
Step 2: Enable File and Printer Sharing
On both computers, enable file and printer sharing so that they can communicate and share resources. To do this, follow these steps on each computer:
– Open the Control Panel.
– Go to «Network and Sharing Center.«
– Click on «Change advanced sharing settings.«
– Under the «Private» network profile, enable the following settings:
– Turn on network discovery
– Turn on file and printer sharing
– Turn off password protected sharing (optional)
– Allow Windows to manage homegroup connections (optional)
Step 3: Share Folders or Drives (optional)
If you want to access specific folders or drives on one computer from the other, you can share them. To share a folder or drive, follow these steps:
– Right-click on the folder or drive you want to share.
– Select «Properties.«
– Go to the «Sharing» tab.
– Click on «Advanced Sharing.«
– Check the box «Share this folder» or «Share this drive.«
– Configure the necessary permissions for accessing the shared resource.
Step 4: Access Shared Resources
To access shared resources from either Windows 8 or Windows 10, follow these steps:
– Open File Explorer (Windows Key + E).
– In the address bar, type the network path of the shared resource using the following format: \\computername\sharedfolder (replace «computername» with the actual name of the computer, and «sharedfolder» with the name of the shared folder).
– Press Enter.
– If prompted for credentials, enter the username and password of an account on the computer hosting the shared resource.
– You should now be able to access the shared files or folders.
It’s important to note that these steps assume both computers are on the same network and are not hindered by any network restrictions or security configurations. If you encounter any difficulties, ensure that your network settings are correctly configured and that both Windows 8 and Windows 10 systems have compatible network protocols enabled.
How to simulate Arduino in Proteus 8?
To simulate Arduino in Proteus 8, you can follow the steps below:
Step 1: Open Proteus 8
Launch Proteus 8 on your computer. If you don’t have it installed, make sure to download and install the latest version from the official Labcenter Electronics website.
Step 2: Create a New Project
Click on the «File» menu and select «New Project» to create a new project. Choose a suitable name and location for your project, and click «Save«.
Step 3: Add Arduino Library to Proteus
To simulate Arduino, you need to add the Arduino library to Proteus. Start by downloading the Arduino library files («.RAR» or «.ZIP«) from the official Arduino website or other reliable sources. Extract the contents of the file.
In Proteus, click on the «Library» menu and select «Library Manager«. In the Library Manager, click on the «Import» button and navigate to the folder where you extracted the Arduino library files. Select the library file (with the «.LIBRARY» extension), and click «Open«. The Arduino library will now be added to Proteus.
Step 4: Add Arduino Components to the Circuit
Now that you have the Arduino library added to Proteus, you can add Arduino components to your circuit. Click on the «P» icon in the Proteus toolbar to open the component library browser.
In the component library browser, scroll down to find the «Arduino» folder. Expand the folder and you will see a list of Arduino models available. Select the appropriate Arduino model for your simulation (e.g., Arduino Uno, Arduino Mega, etc.) and drag it onto the workspace.
Step 5: Connect Components and Write Code
Once you have placed the Arduino board on the workspace, you can start connecting other components like LEDs, sensors, or motors to it. Use the necessary wires and components from the Proteus library to build your circuit.
Next, you can write the Arduino code for your project. Double-click on the Arduino board to open the code editor window. Write or paste your code into the editor.
Step 6: Simulate the Circuit
To start the simulation, click on the «Play» button in Proteus or press the «P» key on your keyboard. The simulation will begin, and you will be able to observe the behavior of your circuit and code.
During the simulation, you can interact with the circuit by providing input or changing values. You can also monitor the output and observe how your code functions in the virtual environment.
By following these steps, you can successfully simulate Arduino in Proteus 8 and test your projects before implementation on the actual hardware.
-
Buy Now
Proteus Demo Features
The Proteus Professional demonstration is intended for prospective customers who wish to evaluate our professional level products. It includes all features offered by the professional system including netlist based PCB design with auto-placement, auto-routing and graph based simulation.
-
No time limit on PCB Layout evaluation, 14 day on Microcontroller Simulation. -
Extensive set of sample designs included to help you evaluate all aspects of the software. -
You can write your own software to run on existing sample designs for evaluation purposes. -
You can only print Schematics and Layouts from the sample designs. -
You cannot save your work. -
You cannot simulate your own microcontroller designs.
How does the download work?
An email will be sent to a valid email address with a link to download the demo. This link will expire after 2 hours. The download is currently around 600mb. Using a download manager or accelerator may corrupt the file. We do not store any details unless specified.

Q1
How long can I use it for?
You can evaluate the schematic capture and PCB layout tools for as long as you need. Due to widespread abuse the evaluation period for microcontroller simulation in the demo version is 14 days. If you need longer or want to test drive the software with no restrictions please don’t hesitate to contact us for an evaluation license.
Q2
How do I get started?
Download the demo version from the link above. Then head over to our tutorials page where you’ll find a plenty of how-to videos alongside end to end tutorial movies. Alternatively, launch the Getting Started Guides from the top left of the home page in Proteus and work through the printed tutorials there. You’ll also find a host of useful information in the blog section of our website.
Q3
Do you offer a fully featured evaluation?
Absolutely. Just get in touch with our sales and support team, tell us what product you’re interested in and we’ll organise an evaluation license for you. You’ll also get a direct point of contact for any follow on questions or product advice.
Q4
How do I get a quote?
Commercial customers can use the product configurator to find the best package for your budget. Or, if you know the products you want, you can quickly add them from the main pricelist.
If you are an educational institute interested in multi-user discount pricing or if you just want some help choosing products then please contact us and we’ll be happy to help.
Q5
Can I talk with someone?
Absolutely, yes. Regardless of where you are in the world you can contact head office. Often however it will be easier to speak with your local distributor for language, currency and time zone convenience.
Proteus Help
Learn more about Proteus and take a look at our resources page. There you will find links to video tutorials, blog articles, other downloads, our support forum and much more.
Proteus Pricing
Ready to take the next step after trying Proteus? Why not take a look at the links to the right to find out more about pricing and the benefits of using Proteus.
Ask An Expert
Have a Question? Ask one of Labcenters’ expert technical team directly.
Proteus is a specialized software to design electronic circuits. It comes with circuit simulation capability to make sure that an electronic circuit works like it should be, an invaluable capability that saves both money and time.
Proteus was first released in 1988. This proprietary software was developed for DOS at that time before eventually ported to Windows operating system a few years later after the Schematic Capture functionality became a part of it.
Features and Highlights
Creating schematic components takes a long time and can be a frustating experience. Proteus provides thousands of library parts along with a search function to find any part you need. It also comes with an integrated web search that you can use to gain access to millions of parts.
At first Proteus will try to find the part you’re looking for in its installed libraries. If it doesn’t find any match, the web search takes over the search. If the web search finds matches, you can download and import those parts into Proteus.
The libraries in Proteus are really helpful to get the jobs done more quickly, but they need to be properly managed. Proteus provides a library management function. With it, users can move specific parts from a library to another existing library. Users can also create a new library and then move the parts to it.
Design Explorer is just as useful as the libraries. It features a simple interface that is easy to work with, a spreadsheet like view, and comprehensive search tool. The spreadsheet like view makes it easier to analyze a design. The search tool is armed with the capability to filter the search result to help users in making targeted changes.
Project documentation is necessary when handling a complex electronic design. Proteus provides a time-saving feature called Project Notes to handle the documentation more efficiently. It is a text editor equipped with data objects and ready-made templates. Some of the templates are Engineering Change Order, Design Rule Report, Component Placement Report, Length Matching Report, and Single Pin Net Report. Users can create reports as many as needed.
In order to improve productivity as much as possible, Proteus also offers Project Clips that allows users to collect parts of a project and reuse them for other projects in the future. This way you won’t have to create the parts again and again. Just choose the most suitable part from your collection.
Proteus Free Download for Windows
Years of efforts have been devoted to Proteus. It keeps getting improvements. Existing features are refined to gain better performance and new features are added when necessary to extend its capability. The developer, Labcenter Electronics, manages to do all of these without making the user interface looks overcrowded.
The consistency in improving Proteus makes it a powerful tool to design electronic circuits. Many users are pleased with its versatility and recommend it to everyone they know. Eventually Proteus becomes a popular software that is hard not to notice. You can click the link below to download Proteus for Windows:
How to Install and Activate Proteus 8 Professional (Click Here)