
Proteus is a specialized software to design electronic circuits. It comes with circuit simulation capability to make sure that an electronic circuit works like it should be, an invaluable capability that saves both money and time.
Proteus was first released in 1988. This proprietary software was developed for DOS at that time before eventually ported to Windows operating system a few years later after the Schematic Capture functionality became a part of it.
Features and Highlights
Creating schematic components takes a long time and can be a frustating experience. Proteus provides thousands of library parts along with a search function to find any part you need. It also comes with an integrated web search that you can use to gain access to millions of parts.
At first Proteus will try to find the part you’re looking for in its installed libraries. If it doesn’t find any match, the web search takes over the search. If the web search finds matches, you can download and import those parts into Proteus.
The libraries in Proteus are really helpful to get the jobs done more quickly, but they need to be properly managed. Proteus provides a library management function. With it, users can move specific parts from a library to another existing library. Users can also create a new library and then move the parts to it.
Design Explorer is just as useful as the libraries. It features a simple interface that is easy to work with, a spreadsheet like view, and comprehensive search tool. The spreadsheet like view makes it easier to analyze a design. The search tool is armed with the capability to filter the search result to help users in making targeted changes.
Project documentation is necessary when handling a complex electronic design. Proteus provides a time-saving feature called Project Notes to handle the documentation more efficiently. It is a text editor equipped with data objects and ready-made templates. Some of the templates are Engineering Change Order, Design Rule Report, Component Placement Report, Length Matching Report, and Single Pin Net Report. Users can create reports as many as needed.
In order to improve productivity as much as possible, Proteus also offers Project Clips that allows users to collect parts of a project and reuse them for other projects in the future. This way you won’t have to create the parts again and again. Just choose the most suitable part from your collection.
Proteus Free Download for Windows
Years of efforts have been devoted to Proteus. It keeps getting improvements. Existing features are refined to gain better performance and new features are added when necessary to extend its capability. The developer, Labcenter Electronics, manages to do all of these without making the user interface looks overcrowded.
The consistency in improving Proteus makes it a powerful tool to design electronic circuits. Many users are pleased with its versatility and recommend it to everyone they know. Eventually Proteus becomes a popular software that is hard not to notice. You can click the link below to download Proteus for Windows:
How to Install and Activate Proteus 8 Professional (Click Here)
Last Updated :
14 Feb, 2023
Proteus is Software used to draw and design and integrate electronic circuits. After designing circuits by taking various parts like Switch, Microcontrollers, LED it also provides to simulate and test designed circuit. After testing in real-time we can go to make this circuit practically in our physical world. If we talk about the history of this Proteus software the first version of Proteus (PC-B) was made by John Jamesonthenthe chairman of Labcenter Electronics in 1988. It has many libraries and features to design and simulate modern electronic gadgets.
System Requirements
- Proteus Software (Proteus 8.13)
- Operating System (Windows 7/8/10)
- RAM – 3GB
- Installation Wizard (Online/Offline)
Steps to Install Proteus Software in Windows 10
Step 1: First we need to Download Proteus. Here we are going to install Proteus 8.13. Let’s For Downloading Click on Download. It will show the following interface now click on Download.

Step 2: In the case of google drive it may show the following interface just click on Download anyway.

Step 3: It will start to download the zip file. Based on your internet speed it will take some time. Wait until the download process is completed.

Step 4: When downloading is completed and then going to the download folder it will show the zip file.

Step 5: Now on right-click the file and extract this using whatever software you have to extract the zip file and select the destination. Here, browse the location where you want to save.

Step 6: Extracted folder will look like this.

Step 7: Now open Proteus 8.13 SP0 Pro Folder and click on the .exe file. It will ask to run. Click on Run.

Step 8: In case select you don’t have an installation wizard then first it will ask the Click an install wizard. Click next and mark check on Agree. Then it will install the wizard, it is an optional process, if you already have this wizard then it will go to the next step directly.

Step 9: Next it will show the following interface and we need to select the location where we want to install this software. Click on Next.

Step 10: Now it will show the following interface. Simply click on Next.

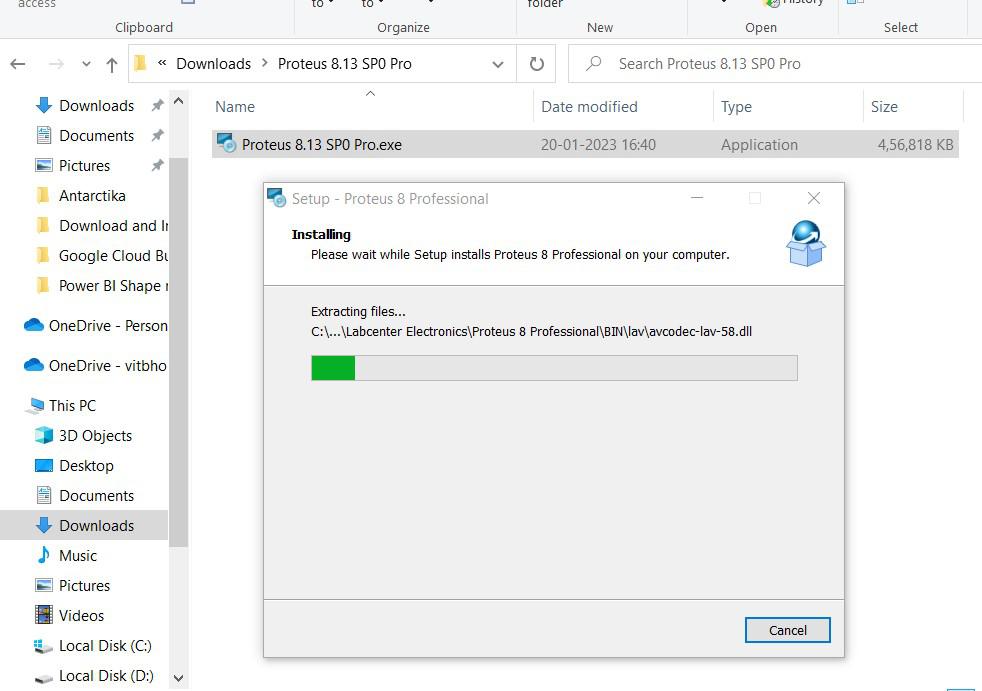
Step 11: Now it will start to install. It will take some time.
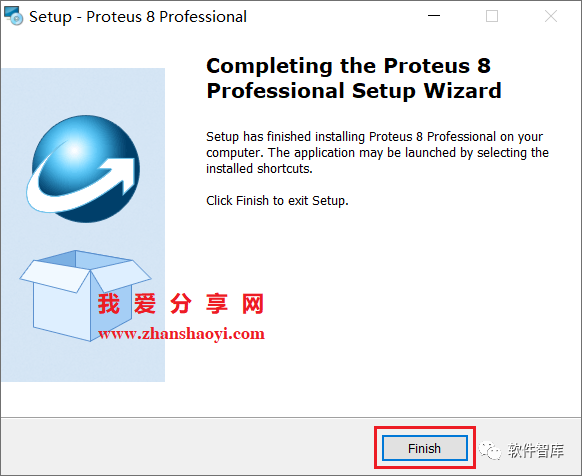
Step 12: After Completion of Installation it will show the following interface. Simply Click on Finish. Our Proteus 8.13 is installed in our Windows 10.

Step 13: In the desktop icon of this software will show like this. For checking whether it is installed perfectly or not, click on Proteus Professional Icon.

Step 14: It is opening correctly and now we can start to work with this Proteus.

This was the Installation process of Proteus 8.13 in Windows 10.
Advantages of Proteus
- It can be used to simulate and test physical devices.
- It provides an interface to make circuits in Two -D and how we want to make it also provides this functionality.
- It takes very less time to test any specific type of circuit compared to physical wire and devices.
- We can test many tools, and circuits that are very expensive in the physical world.
- There is no possibility of damaging any physical thing if the circuit is not designed perfectly.

Proteus 8.9 (32/64-bit) download link:
www.zhanshaoyi.com/14398.html
(Long press to copy the download link and paste it into your browser)
Software Introduction:
Proteus is a renowned EDA tool (simulation software) that offers everything from schematic layout, code debugging, to MCU and peripheral circuit co-simulation, seamlessly switching to PCB design, truly achieving a complete design from concept to product. It is the only design platform that integrates circuit simulation software, PCB design software, and virtual model simulation software into one. It is a great tool for simulating microcontrollers and peripheral devices, widely favored by MCU enthusiasts, educators, and researchers. (This tutorial is for educational and communication purposes only)
Pre-installation Notes:
1. It is recommended to disconnect the computer from the internet during the installation process;
2. Before extracting and installing, please turn off all antivirus software such as 360, and PC Manager to prevent false positives that could lead to patch failure;
3. Proteus 8.9 is suitable for Win7/8.1/10 (32/64-bit) systems, tested and confirmed to work!
Proteus 8.9 WIN10 64-bit Installation Steps:
1. First, use the “Baidu Cloud Disk Client” to download the PTUS8.9_x32 software installation package to a folder with an English path on your computer, extract it, disconnect the internet, then find Setup.exe, right-click and select [Run as Administrator]

2. Choose the software installation path, the default installs to C drive, click [Browse] to modify the installation path, note: the folder name in the installation path cannot contain Chinese characters! Here, I will install the software in a folder named Proteus8.9 on D drive (you need to create a folder named Proteus8.9 on D drive in advance), then click [Next]
Friendly Reminder: Please remember the software installation path, as it will be needed in subsequent steps.


3. By default, click [Next]

4. Installing, it will take about 5 minutes, please be patient…

5. Installation complete, click [Finish]
6. Next, we start the language pack installation. Open the software installation path D:\Proteus8.9\Proteus8 Professional folder, and copy a copy of the Translations folder

7. Return to the original software installation package, copy and paste the Translations folder into the software installation directory (see Step 2) to replace the original folder

8. Click [Replace files in the target]

9. Return to the desktop, find the Proteus8 icon, right-click and select [Run as Administrator]

10. Loading, please wait a moment

11. Open the Proteus8.9 software, the Chinese version interface is as follows:

END
If you find it useful, feel free to share it with your friends!
Software Library
Installation · Learning · Technology · Innovation

·↑Long press this QR code to follow ↑·
WeChat ID: rjzkgzh
Click here to enter I Love Sharing website for more resources
Proteus 8 Professional is a powerful electronic design automation (EDA) software that allows you to simulate, design, and test electronic circuits. If you’re a student, hobbyist, or professional in the field of electronics, learning how to install Proteus 8 Professional on Windows 10 can be highly beneficial. This tutorial will guide you through the process, step by step.
Step 1: Download the Proteus 8 Professional installer from the official website. Make sure to choose the correct version based on your Windows 10 operating system (32-bit or 64-bit).
Step 2: Once the download is complete, locate the downloaded installer file and double-click on it to run the installation wizard.
Step 3: The installation wizard will guide you through the installation process. Click on «Next» to proceed.
Step 4: Read and accept the End-User License Agreement (EULA) to continue with the installation.
Step 5: Choose the destination folder where you want to install Proteus 8 Professional or leave the default folder selected.
Step 6: Select the components you want to install. By default, all components are selected, but you can customize the installation by unchecking unnecessary components.
Step 7: Click on «Install» to start the installation process. Be patient as it may take a few minutes to complete.
Once the installation is finished, you can launch Proteus 8 Professional from the Start menu or desktop shortcut. You’re now ready to start designing and simulating electronic circuits.
| Pros | Cons |
|---|---|
| 1. Powerful and comprehensive EDA software for electronic circuit design and simulation. | 1. Requires a moderate amount of system resources and may not perform well on low-end machines. |
| 2. Provides a vast library of components and models for easy circuit design. | 2. The learning curve can be steep for beginners without prior experience in circuit design. |
| 3. Offers real-time simulation and debugging tools for accurate analysis. | 3. The cost of the Professional version may be prohibitive for some individuals or organizations. |
Installing Proteus 8 Professional on Windows 10 allows you to unleash your creativity in the field of electronics and explore circuit design and simulation with ease. With its powerful features and user-friendly interface, Proteus is an essential tool for any electronics enthusiast or professional. So grab a copy of Proteus 8 Professional and start creating amazing electronic circuits today!
Video Tutorial:Is Proteus 8 free?
Proteus is a popular software tool used for designing and simulating electronic circuits. If you are interested in installing Proteus on your PC, here is a step-by-step guide:
Step 1: Download the Installer
Visit the official website of Proteus and navigate to the Downloads section. Look for the appropriate installer based on your system specifications, such as the operating system version (Windows 10, for example) and the bit architecture (32-bit or 64-bit).
Step 2: Run the Installer
Once the installer is downloaded, locate the file and run it. This will start the installation process. You may need to grant administrative privileges to proceed.
Step 3: Accept License Agreement
Read and accept the license agreement terms if prompted. It’s important to understand the terms and conditions before proceeding with the installation.
Step 4: Select Installation Components
During the installation process, you may be asked to select the components you want to install. Proteus provides a variety of tools and libraries, so choose the ones that best suit your needs. Typically, the default selection will suffice for most users.
Step 5: Choose Installation Path
Select the directory or folder where you want Proteus to be installed. The default installation path is usually fine, but you can choose a different location if desired.
Step 6: Install
After selecting the installation path, proceed with the installation process by clicking on the «Install» button. This will initiate the installation and may take a few minutes to complete.
Step 7: Launch Proteus
Once the installation is finished, you will see a prompt to launch Proteus. You can choose to launch it immediately or do it later by selecting the appropriate option. If you choose to launch Proteus now, the software will open, and you can start utilizing its features.
That’s it! You have successfully installed Proteus on your PC. Now you can start designing and simulating electronic circuits using this powerful tool. Remember to explore the user interface, documentation, and online resources to make the most out of Proteus’s capabilities.
What are the minimum requirements for Proteus 8 professional?
Proteus 8 Professional is a popular electronics design and simulation software used by professionals and hobbyists alike. To ensure the smooth installation and functioning of Proteus 8 Professional, the following minimum system requirements should be met:
1. Operating System: Proteus 8 Professional is compatible with various versions of Windows. It supports Windows 10, Windows 8, and Windows 7 operating systems. Ensure that your computer meets the minimum requirements for the specific version of Windows you are running.
2. Processor: Proteus 8 Professional requires a compatible processor with a satisfactory clock speed. An Intel Core i3 processor or higher is recommended for optimal performance. However, a lower-spec processor may work, but it may affect the software’s responsiveness and overall speed.
3. RAM: Sufficient memory is essential for running Proteus 8 Professional smoothly. A minimum of 4GB RAM is required, although 8GB or more is recommended for better performance.
4. Hard Disk Space: The software installation requires a certain amount of disk space. Allocate at least 3GB of free space on your hard drive for Proteus 8 Professional to install and function properly.
5. Graphics Card: Proteus 8 Professional utilizes graphic rendering capabilities, so having a compatible graphics card is important. Ensure that your computer has a graphics card with DirectX 9 support or above. This will ensure that the software’s graphical interface and simulations run smoothly.
6. Display: A screen resolution of 1024×768 or higher is recommended to view the Proteus 8 Professional interface and schematics clearly.
7. Additional Requirements: Proteus 8 Professional also requires an active internet connection for licensing and updates. Make sure that your computer has internet connectivity during installation and for subsequent updates.
By meeting these minimum requirements, you should be able to install and use Proteus 8 Professional without any major issues. Remember that these are the minimum requirements, and for optimal performance, it’s advisable to have a computer with higher specifications whenever possible.
How do I download Proteus 8.11 Professional?
To download Proteus 8.11 Professional, follow these steps:
1. Visit the official website: Go to the official website of Proteus, which is Labcenter Electronics’ website. You can search for «Proteus Labcenter Electronics» on your preferred search engine to find the correct website.
2. Navigate to the download page: Once you’re on the Labcenter Electronics’ website, navigate to the «Downloads» or «Download Proteus» section. Look for the version labeled «Proteus 8.11 Professional.«
3. Choose the appropriate download option: Depending on your operating system, you may have different download options, such as Windows, macOS, or Linux. Select the option that corresponds to your system.
4. Select the desired edition: Proteus offers different editions, such as Professional, Standard, and Lite. Make sure you choose the «Proteus 8.11 Professional» edition for your download.
5. Provide necessary details and accept terms: Some websites require you to create an account or provide certain details before allowing the download. Follow the instructions on the website and accept any terms or agreements if prompted.
6. Start the download: Once you have completed the necessary steps, click on the download button or link provided to initiate the download process for Proteus 8.11 Professional.
7. Install Proteus: After the download is complete, locate the downloaded file on your computer and run the installer. Follow the on-screen instructions to install Proteus 8.11 Professional on your system.
Please note that the steps provided may vary slightly depending on the specific website or changes made by the software developer. It is always recommended to refer to the official website for the most up-to-date and accurate download instructions.
How to connect Windows 8 to Windows 10?
To connect a computer running Windows 8 to a computer running Windows 10, you can follow these steps:
Step 1: Check Network Connection
Ensure that both computers are connected to the same network, either through a local area network (LAN) or wirelessly.
Step 2: Enable File and Printer Sharing
On both computers, enable file and printer sharing so that they can communicate and share resources. To do this, follow these steps on each computer:
– Open the Control Panel.
– Go to «Network and Sharing Center.«
– Click on «Change advanced sharing settings.«
– Under the «Private» network profile, enable the following settings:
– Turn on network discovery
– Turn on file and printer sharing
– Turn off password protected sharing (optional)
– Allow Windows to manage homegroup connections (optional)
Step 3: Share Folders or Drives (optional)
If you want to access specific folders or drives on one computer from the other, you can share them. To share a folder or drive, follow these steps:
– Right-click on the folder or drive you want to share.
– Select «Properties.«
– Go to the «Sharing» tab.
– Click on «Advanced Sharing.«
– Check the box «Share this folder» or «Share this drive.«
– Configure the necessary permissions for accessing the shared resource.
Step 4: Access Shared Resources
To access shared resources from either Windows 8 or Windows 10, follow these steps:
– Open File Explorer (Windows Key + E).
– In the address bar, type the network path of the shared resource using the following format: \\computername\sharedfolder (replace «computername» with the actual name of the computer, and «sharedfolder» with the name of the shared folder).
– Press Enter.
– If prompted for credentials, enter the username and password of an account on the computer hosting the shared resource.
– You should now be able to access the shared files or folders.
It’s important to note that these steps assume both computers are on the same network and are not hindered by any network restrictions or security configurations. If you encounter any difficulties, ensure that your network settings are correctly configured and that both Windows 8 and Windows 10 systems have compatible network protocols enabled.
How to simulate Arduino in Proteus 8?
To simulate Arduino in Proteus 8, you can follow the steps below:
Step 1: Open Proteus 8
Launch Proteus 8 on your computer. If you don’t have it installed, make sure to download and install the latest version from the official Labcenter Electronics website.
Step 2: Create a New Project
Click on the «File» menu and select «New Project» to create a new project. Choose a suitable name and location for your project, and click «Save«.
Step 3: Add Arduino Library to Proteus
To simulate Arduino, you need to add the Arduino library to Proteus. Start by downloading the Arduino library files («.RAR» or «.ZIP«) from the official Arduino website or other reliable sources. Extract the contents of the file.
In Proteus, click on the «Library» menu and select «Library Manager«. In the Library Manager, click on the «Import» button and navigate to the folder where you extracted the Arduino library files. Select the library file (with the «.LIBRARY» extension), and click «Open«. The Arduino library will now be added to Proteus.
Step 4: Add Arduino Components to the Circuit
Now that you have the Arduino library added to Proteus, you can add Arduino components to your circuit. Click on the «P» icon in the Proteus toolbar to open the component library browser.
In the component library browser, scroll down to find the «Arduino» folder. Expand the folder and you will see a list of Arduino models available. Select the appropriate Arduino model for your simulation (e.g., Arduino Uno, Arduino Mega, etc.) and drag it onto the workspace.
Step 5: Connect Components and Write Code
Once you have placed the Arduino board on the workspace, you can start connecting other components like LEDs, sensors, or motors to it. Use the necessary wires and components from the Proteus library to build your circuit.
Next, you can write the Arduino code for your project. Double-click on the Arduino board to open the code editor window. Write or paste your code into the editor.
Step 6: Simulate the Circuit
To start the simulation, click on the «Play» button in Proteus or press the «P» key on your keyboard. The simulation will begin, and you will be able to observe the behavior of your circuit and code.
During the simulation, you can interact with the circuit by providing input or changing values. You can also monitor the output and observe how your code functions in the virtual environment.
By following these steps, you can successfully simulate Arduino in Proteus 8 and test your projects before implementation on the actual hardware.
Electronic circuit and microprocessor simulator
Proteus isn’t a name that rings a bell. If you work in the medical field you’ve probably heard of it because it’s a bacteria genre that includes different species such as mirabilis or vulgaris that reside in our digestive tract. But beyond microbiology, in the software sector, if you download Proteus for PC you’ll be getting your hands on one of the most acclaimed electronic design programs by engineering students and electronics professionals, capable of offering us an advanced simulation of electronic circuits and microprocessors.
Electronic design and simulation from your PC.
It’s one of the most complete electronic tool packs on the market as in its version 8.5 (the newest of them all), it allows us to create from our PC all sorts of PCBs or printed circuit boards using almost 800 different microprocessors, and simulate their real-life functioning straight from the circuit’s schematics. And as couldn’t be otherwise taking into account modern times, it integrates tools with which we can design and simulate within the Arduino environment, one of the most popular boards at present.
The main components of Proteus Design Suite
This software includes two main components around which the program’s entire functioning revolves:
- ISIS: the acronym of Intelligent Schematic Input System. The program allows us to carry out the electric design of the circuit, including all sorts of components such as resistors, coils, capacitors, power supplies, and even microprocessors.
- ARES: the acronym of Advanced Routing and Editing Software. It’s the tool aimed at the design of printed circuit boards or PCBs, with routing, location, and editing functions for electronic components.
Where can I download ISIS and ARES? Well, you can’t get hold of them as standalone applications, so to be able to make the most of all their features you’ll have to download Proteus for PC that, despite having to pay for it, comes along with a trial version of the official Labcenter Electronics website so that you can try out all its functions before deciding whether to purchase it or not.
Apart from these two programs, this software comes along with different modules like VSM that, integrated into ISIS, allows us to simulate different features of integrated circuits in real-time, or Electra, the self-routing module that allows us to trace routes automatically between components, searching for the optimal path to improve the circuit’s speed.
Which one’s better? Proteus or Multisim?
That’s the eternal doubt for students and electronics professionals when it comes to choosing a program to simulate electronic circuits and, as always, there’s no such thing as a universal answer that satisfies them all because it basically depends on the use given to the application.
For instance, if you’re looking for a program for the analog and digital simulation of circuits, the product developed by National Instruments Corporation may suit your needs since it’s the best software in this category. However, if you’re more into simulating microprocessors, Multisim probably lacks the basics you’re looking for and that’s where Proteus comes in since it includes loads of libraries that allow you to simulate different models. So each one is good at different things and it’s up to you to choose.
What’s new in the latest version
- It includes several new tools such as the Diff Pair Configurator, new Align and Distribute commands, a new manufacturing rule, and many other new features.
Requirements and additional information:
- The trial version has certain limitations.