
В Windows Server 2008/2012 для установки различных «пользовательских» элементов системы, таких как темы оформления, проигрыватель Media Player, Disk Cleanup, стандартная утилита просмотр изоражений (Photo Viewer) было необходимо устанавливать отдельный компонент Desktop Experience. В Windows Server 2016 отдельного компонента Desktop Experience нет, и подразумевается, что при установке ОС в режиме Server with GUI, этот компонент уже включен в состав системы. Однако в ОС кроме Paint (с ним ассоциированы все графические файлы) отсутствует другие просмотрщики изображений.
Все бы ничего, но что делать в случае использования сервера в качестве хоста RDSH (Remote Desktop Services Host), ведь в силу своей профессиональной деятельности некоторым пользователям просто необходим простой и удобный просмотрщик графических файлов. Конечно, можно установить стороннее приложение, типа IrfanView или аналогов, но неужели нельзя реализовать это штатными средствами системы ?!
На самом деле в Windows Server 2016, как и в Windows 10 имеются необходимые библиотеки Windows Photo Viewer, но отсутствуют нужные файловые ассоциации. Чтобы исправить это недочет, можно воспользоваться небольшими reg файлами, которые ассоциируют jpeg и png файлы с библиотекой Windows Photo Viewer,
Скачать ZIP архив с reg файлами для ассоциации четырех типов расширений (*.jpg,*.jpeg,*.jpe и *.png) можно по ссылке: PhotoViewer2016.zip
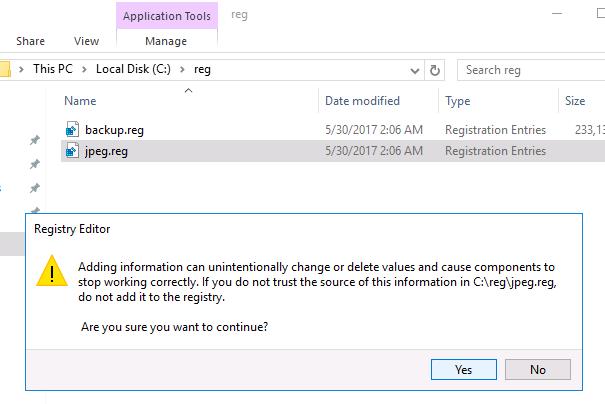
После этого достаточно распаковать архив, дважды щелкнуть по каждому файлу и импортировать содержимое reg файлов в реестр системы.
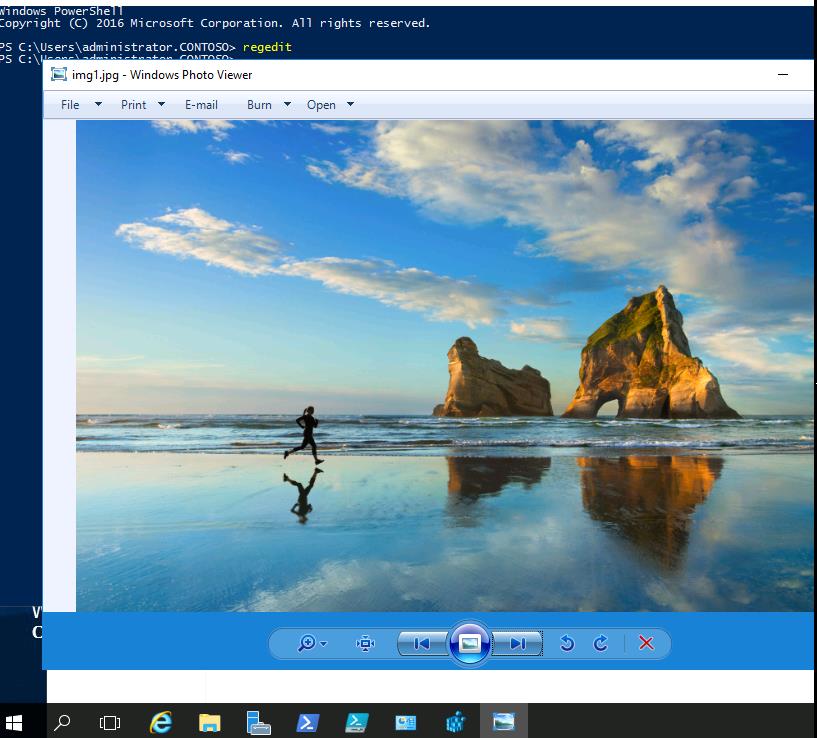
Сразу после этого (не нужно перезагружать сервер), при попытке открыть графический файл в сессии Windows Server 2016 будет автоматически открываться знакомое окно стандартного Windows Photo Viewer.
Примечание. На основе данных файлов можно настроить ассоциации Photo Viewer и для других расширений файлов с графикой (tif, bmp и т.д.). Достаточно открыть любой из reg файлов в текстовом редакторе, заменить к примеру jpeg на bmp и импортирвать новый reg файл в реестр.
In the realm of Windows Server 2016 and 2019 operating systems, many of the features and functionalities are streamlined for security and efficiency, with non-essential features often disabled or hidden by default. One such feature is the nostalgic Windows Photo Viewer. Many IT professionals and administrators are fond of this tool due to its simplicity and responsiveness. If you’re one of them and you’re looking to enable Windows Photo Viewer on a Windows Server OS, this article will guide you through the steps. By default, browsing through folders, you don’t see thumbnails (for a faster image view). Moreover, JPG, TIF, BMP, PNG images are opened in Microsoft Paint – which is useless.
Introduction:
Windows Photo Viewer was the default image viewer for Windows 7 and earlier versions. However, with the advent of Windows 10 and subsequent server versions, Microsoft introduced the Photos app, relegating Windows Photo Viewer to the background. While the Photos app offers a modern UI and additional functionalities, the simplicity and reliability of the Windows Photo Viewer still appeal to many.
Prerequisites:
Before diving into the steps, ensure you have:
- Administrative rights on the Windows Server.
- A backup or system restore point. This is always a good practice when making changes to the system registry. Actions from this article was successfully tested on Windows Server 2016 and Windows Server 2019 editions without any issues.
Enabling Windows Photo Viewer:
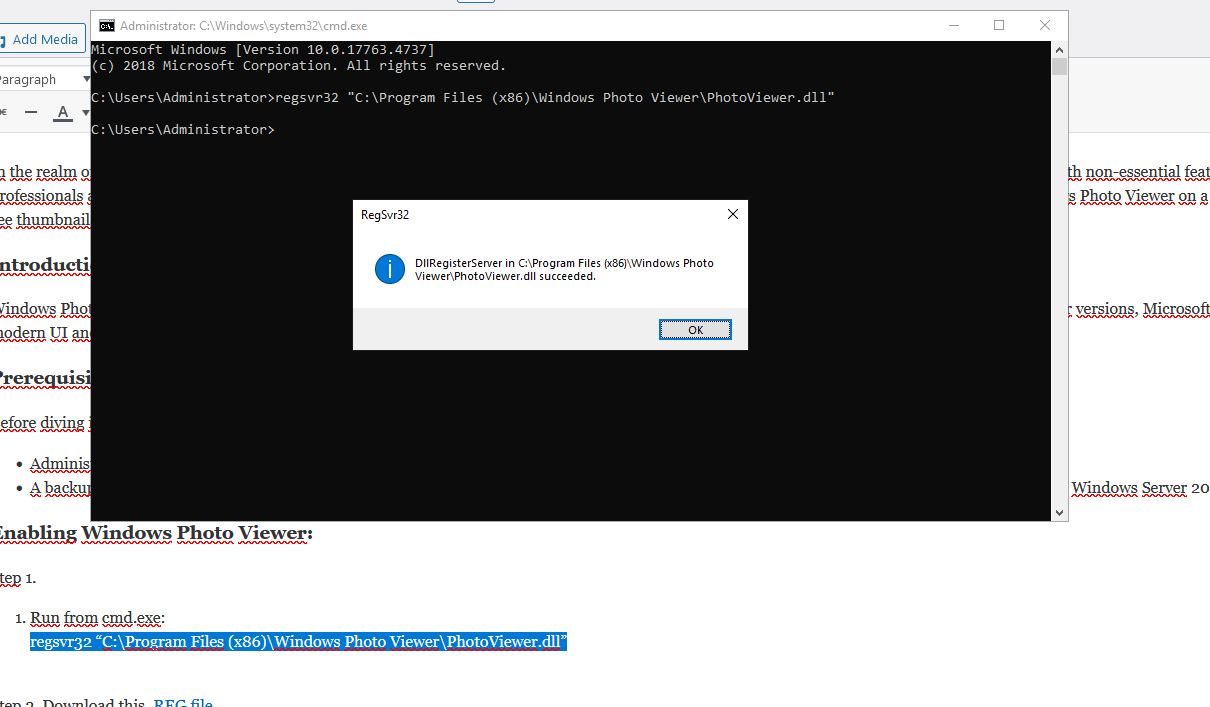
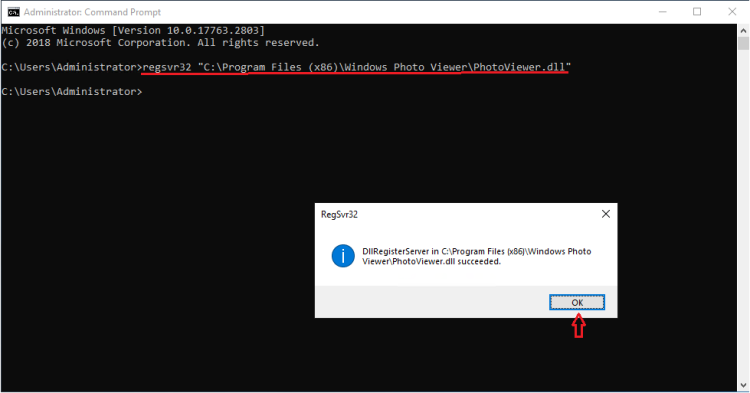
Step 1. Run from cmd.exe:
regsvr32 “C:\Program Files (x86)\Windows Photo Viewer\PhotoViewer.dll”
Step 2. Download this .REG file.
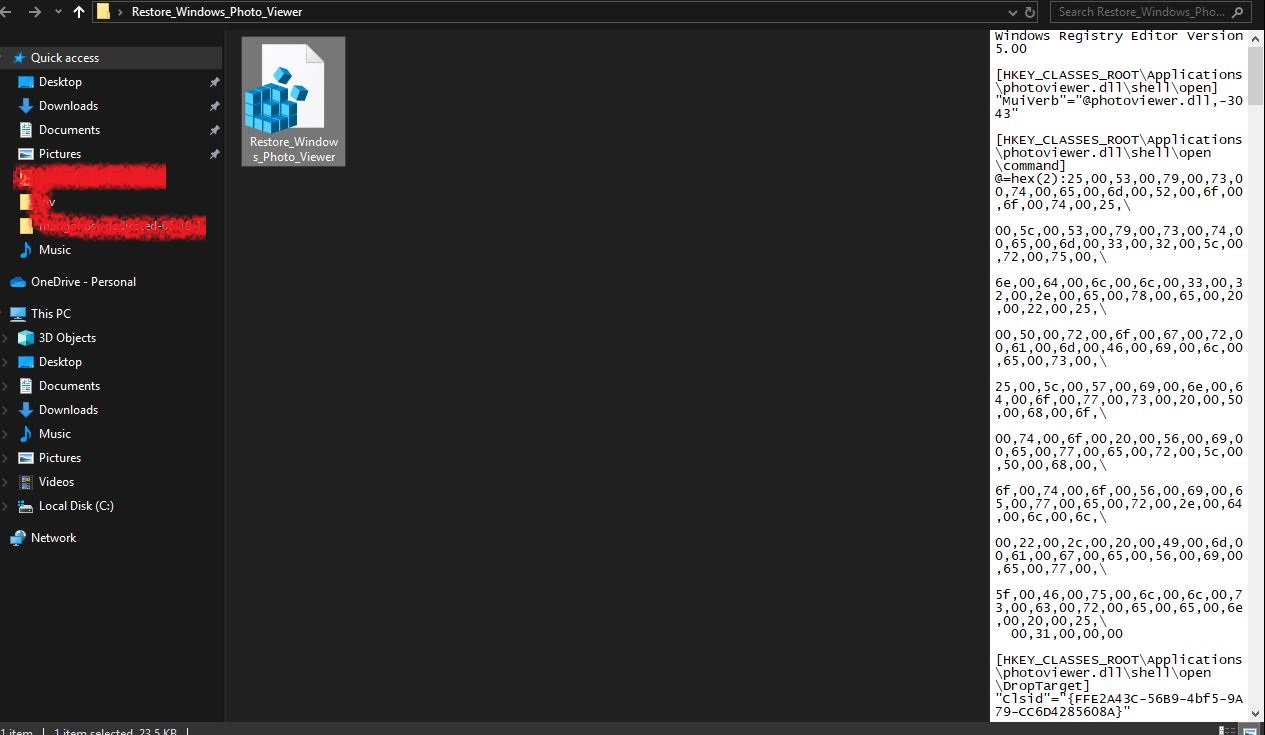
Step 3. Double click “Restore_Windows_Photo_Viewer.reg” and accept any User Account Control prompts ( if you are not logged as Administrator). Confirm you wish to import the settings
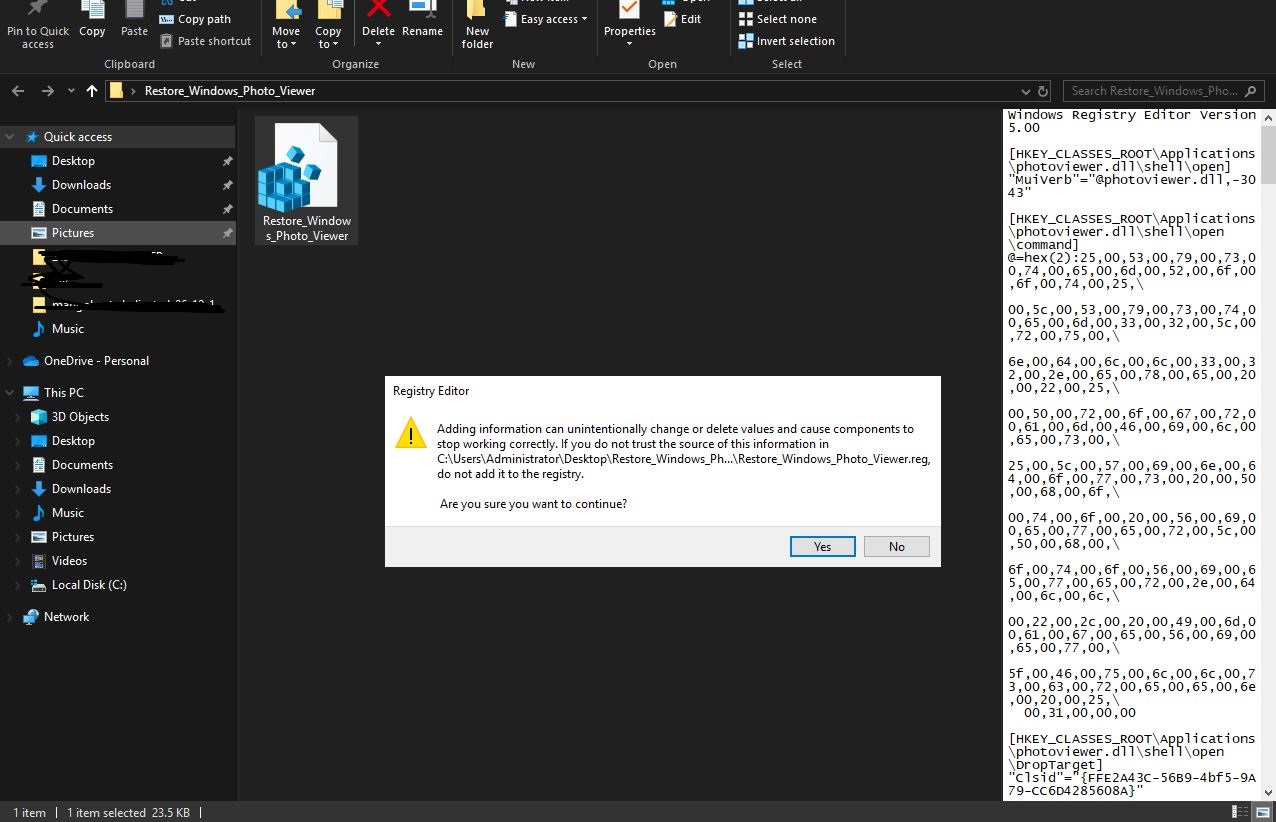
Caution: Editing the Windows Registry can be risky. Always backup your registry settings before making any changes.

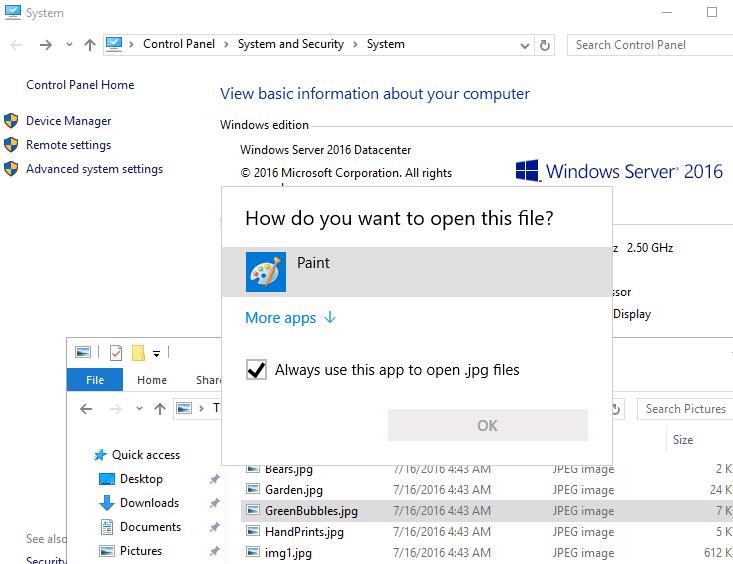
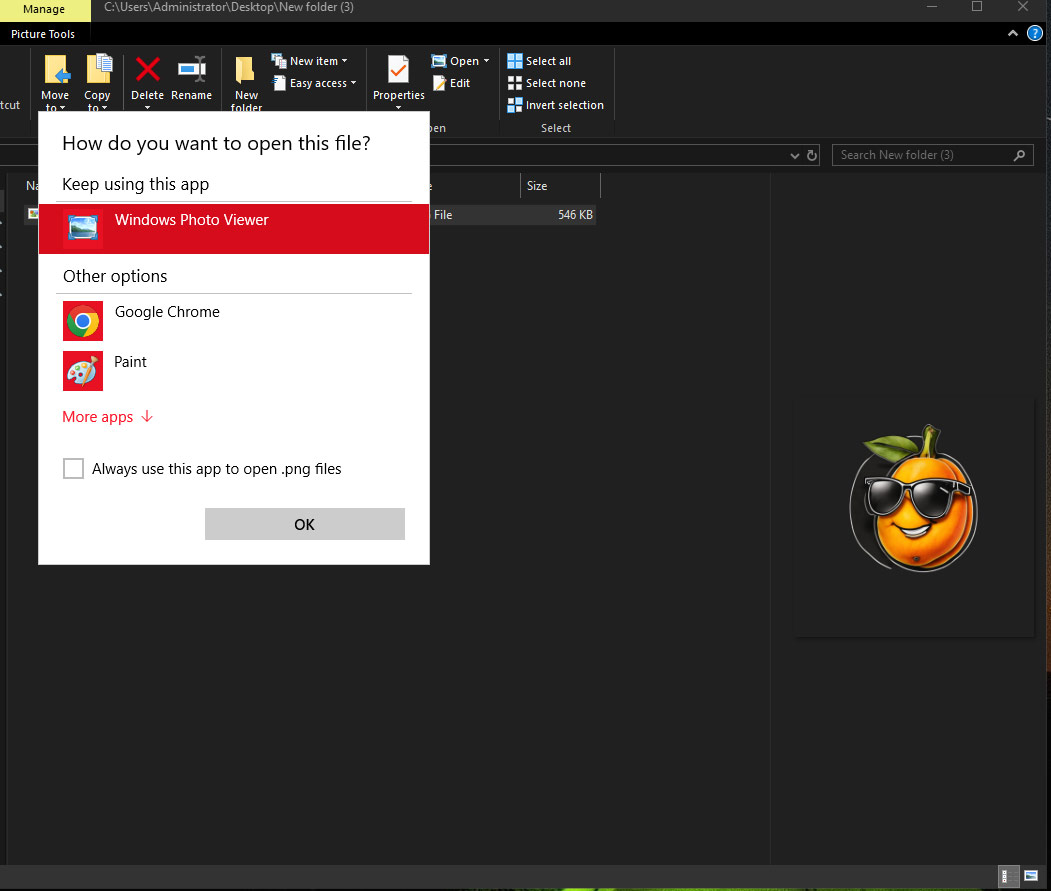
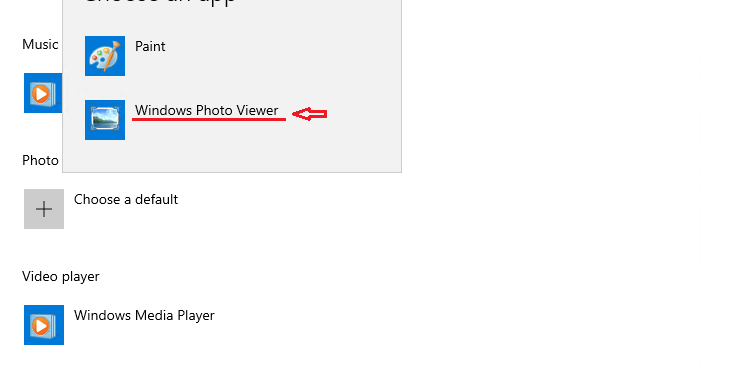
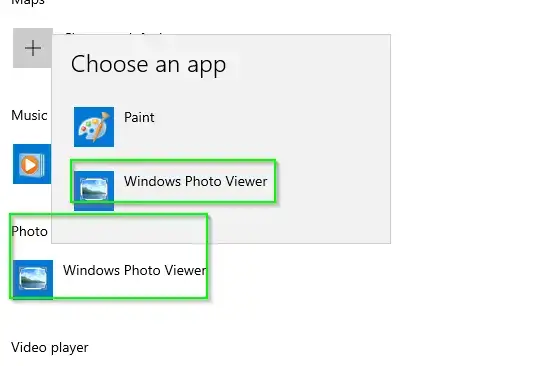
Now when you double click a picture type for the first time; you will be asked which application you want to open it with in the future by default (double-click). Select “Windows Photo Viewer” and check the “Always use this app to open … files” box:
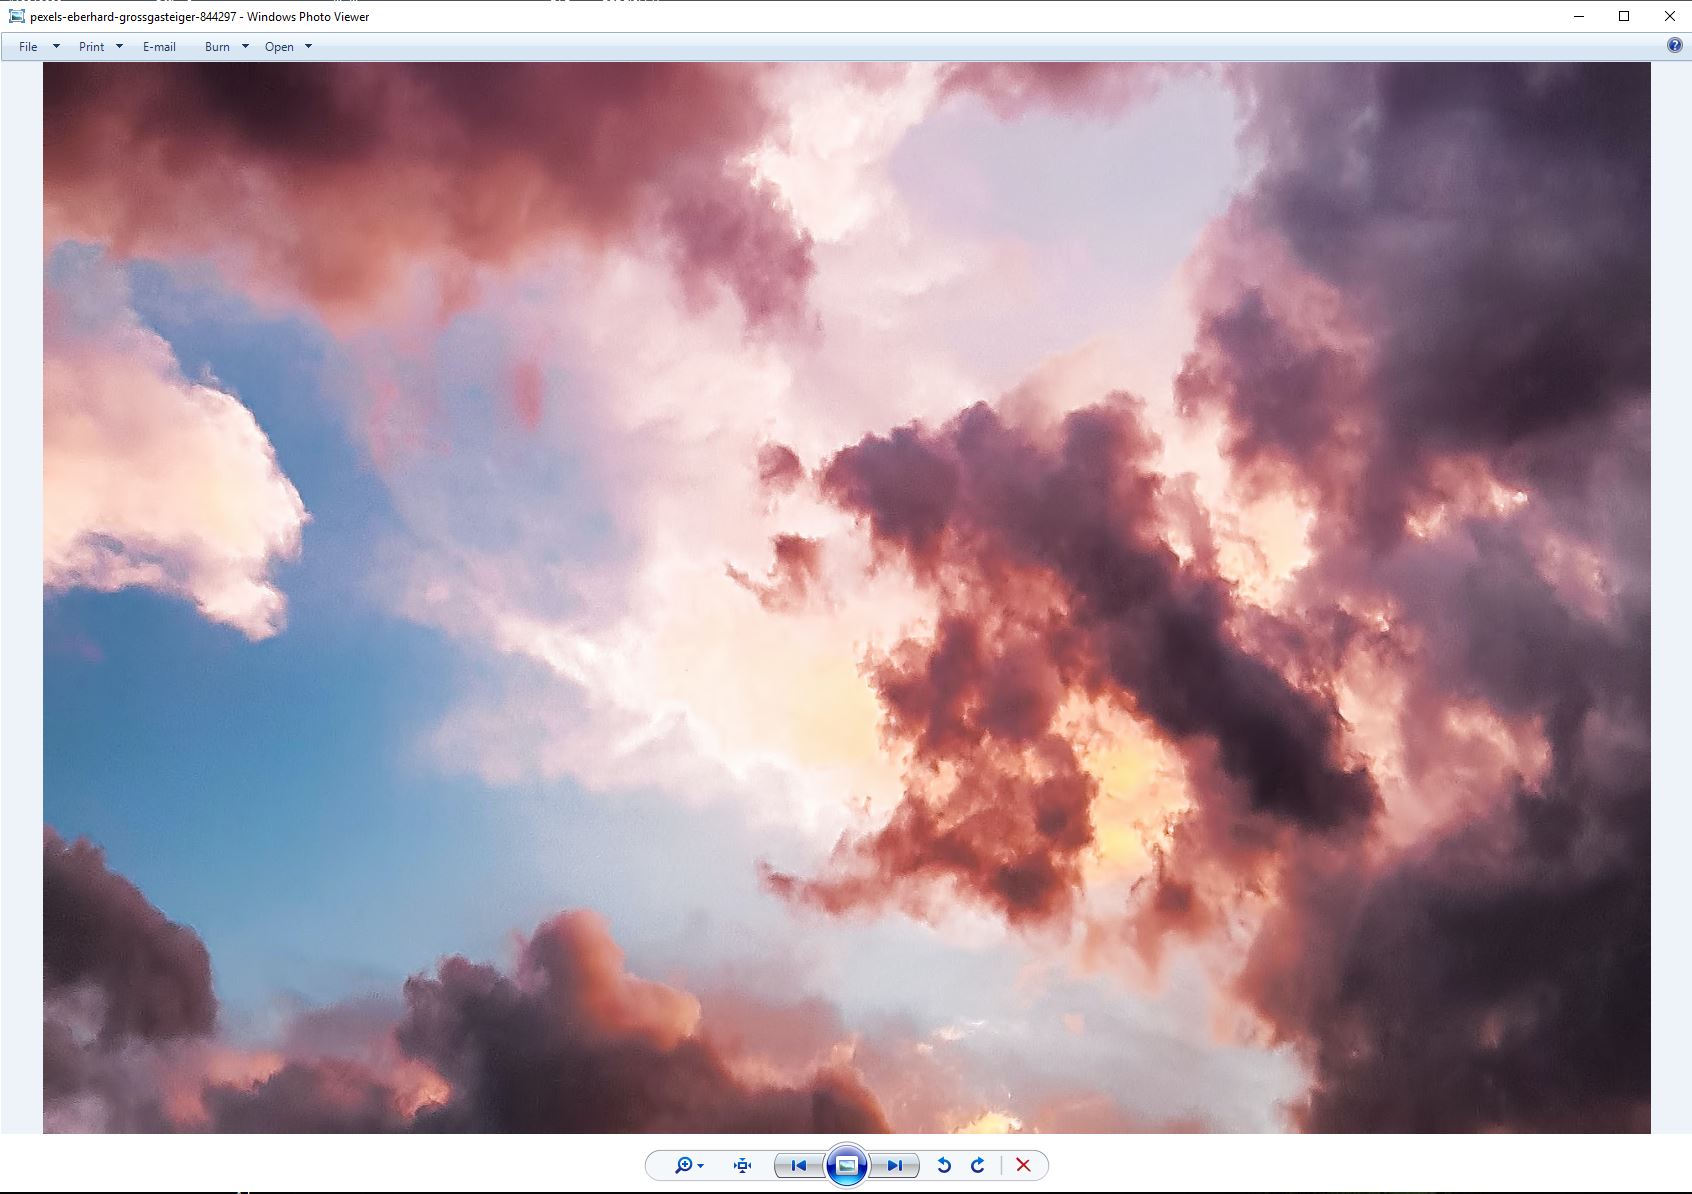
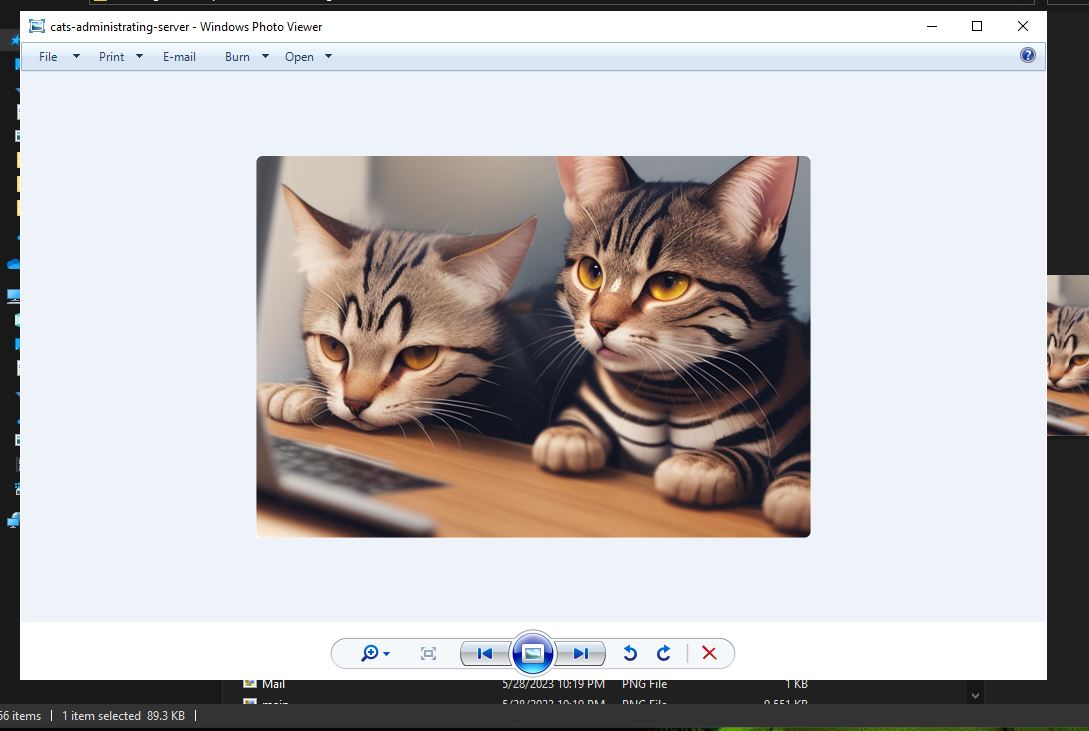
Step 4 (final). And we have it, a very grainy photo of some AI-generated cats opened in Windows Photo Viewer:
By following the above steps, you should now have successfully enabled and set the Windows Photo Viewer as the default viewer for your desired image file types on your Windows Server OS. This can be a boon for those who miss the older, more straightforward tool or for those who find it better suited to their needs on a server environment. Regardless of your reasons, enjoy the seamless experience of viewing images with the classic viewer!

This article incorporates information and material from various online sources. We acknowledge and appreciate the work of all original authors, publishers, and websites. While every effort has been made to appropriately credit the source material, any unintentional oversight or omission does not constitute a copyright infringement. All trademarks, logos, and images mentioned are the property of their respective owners. If you believe that any content used in this article infringes upon your copyright, please contact us immediately for review and prompt action.
This article is intended for informational and educational purposes only and does not infringe on the rights of the copyright owners. If any copyrighted material has been used without proper credit or in violation of copyright laws, it is unintentional and we will rectify it promptly upon notification.
Please note that the republishing, redistribution, or reproduction of part or all of the contents in any form is prohibited without express written permission from the author and website owner. For permissions or further inquiries, please contact us.
Estimated reading: 3 minutes
1803 views
As a sysadmin, I’ve become really proficient with Windows operating systems, Powershell, Hyper-V, PFsense, etc, so I figured moving to a known OS would simplify things for me in the long run. However, I soon learned that there are a few things I wasn’t aware of on Server 2019. In particular, one of the things I learned was that the default “photo viewer” is set to Paint.
Fortunately, this was a quick fix. Follow the steps below if you’ve ran into the same issue.
How to Enable Photo Viewer in Windows Server 2019
By default, Photo Viewer isn’t installed or active. The first thing we need to do is check whether or not the DLL’s exist on the server.
Step 1: Check if Photo Viewer DLL’s Exist
Browse to C:Program Files (x86)Windows Photo Viewer on the server. If you see .dll files there, that means the files exist but aren’t registered. It should look like this:
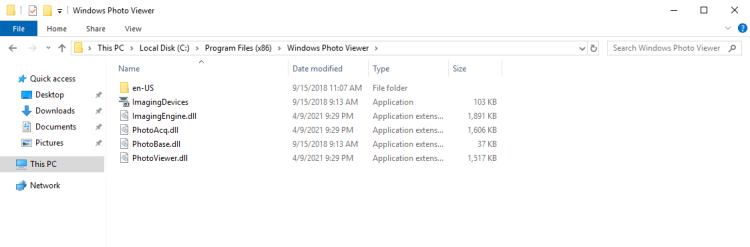
If you don’t see those files, simply browse to the path above from a Windows PC & copy the folder contents to the same path on your server.
Step 2: Register the DLL’s
Now that we know the necessary files are present, we need to register them.
Open Command Prompt (type CMD into Start) and right-click to Run as Administrator. Then copy and paste the following code:
regsvr32 “C:Program Files (x86)Windows Photo ViewerPhotoViewer.dll”
Step 3: Download PhotoViewer Registry Keys
Now that the .dll’s are registered, we need to import the registry keys. This allows us to “Open With…” from File Explorer and choose Windows Photo Viewer, as well as set default file associations for various file types, such as .jpg, .jpe, or .jpeg.
Download registry files from here: MS Photoviewer Registry Files.zip
Once downloaded, right-click the .zip file and extract it to a temporary location.
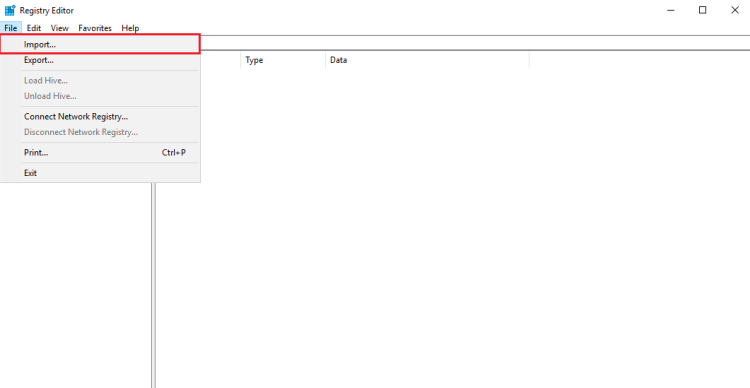
Step 4: Import Registry Keys
From Start, open Regedit.
File > Import > browse to the location you extracted the 4 registry files. You will need to import all 4 of them.
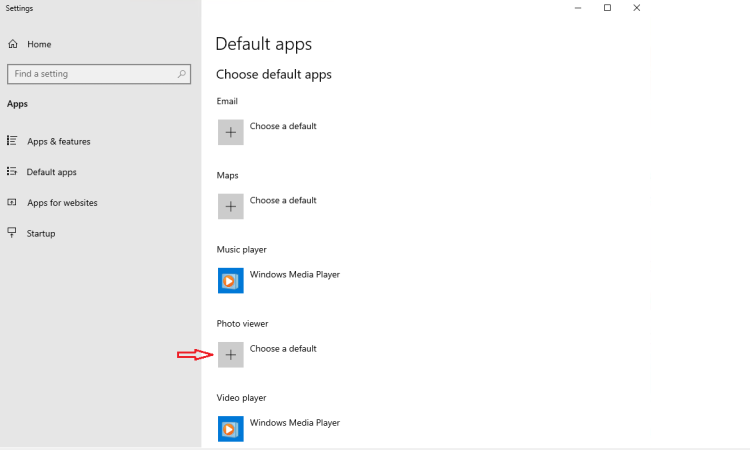
Step 5: Set Photo Viewer as Default App
If you’d like to make Photo Viewer your default photo viewing application, search Windows for “Default Apps” and then change Photos to Windows Photo Viewer.
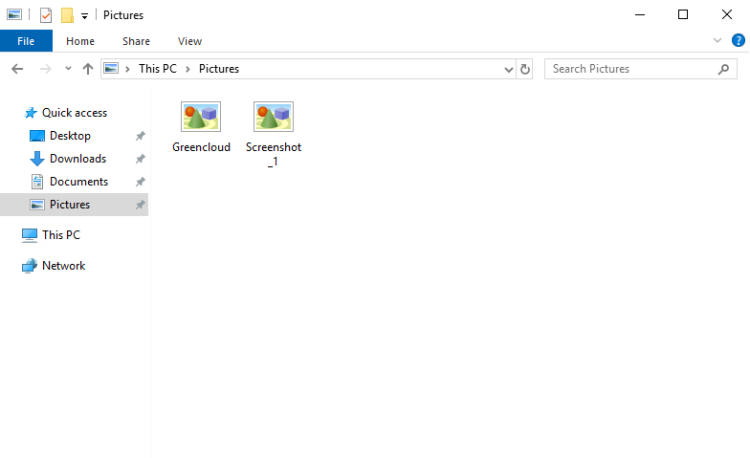
Step 6: Allow Images in Thumbnails
This step is optional, but if you’d like to see a preview of the images from File Explorer (instead of just icons), you can do that by changing the File Explorer options.
Search Windows for Folder Options. Change to the View tab and uncheck “Always show icons, never thumbnails”.
That will change it from looking like this:
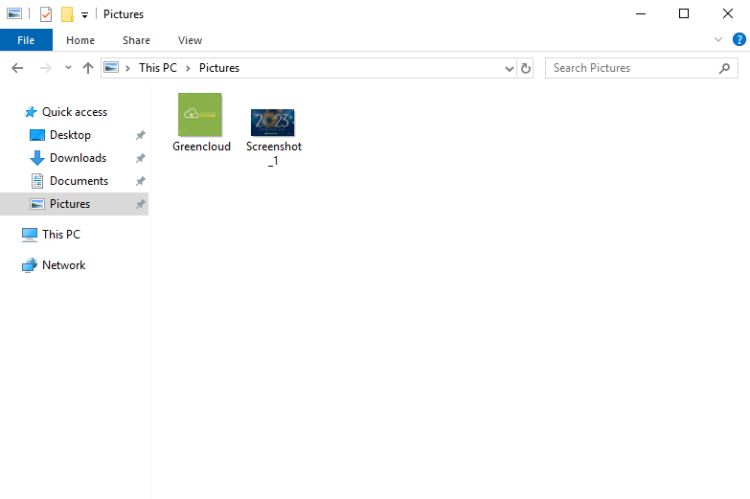
to looking like this:
That’s all there is to it! Hopefully this guide helped you out.
Good Luck!

By default, Photo Viewer isn’t installed or active. The first thing we need to do is check whether or not the DLL’s exist on the server.
Step 1: Check if Photo Viewer DLL’s Exist
Browse to C:\Program Files (x86)\Windows Photo Viewer on the server. If you see .dll files there, that means the files exist but aren’t registered. It should look like this:
If you don’t see those files, simply browse to the path above from a Windows 10 PC & copy the folder contents to the same path on your server.
Step 2: Register the DLL’s
Now that we know the necessary files are present, we need to register them.
Open Command Prompt (type CMD into Start) and right-click to Run as Administrator. Then copy and paste the following code:
regsvr32 “C:\Program Files (x86)\Windows Photo Viewer\PhotoViewer.dll”Step 3: Download PhotoViewer Registry Keys
Now that the .dll’s are registered, we need to import the registry keys. This allows us to “Open With…” from File Explorer and choose Windows Photo Viewer, as well as set default file associations for various file types, such as .jpg, .jpe, or .jpeg.
Download registry files from here: MS Photoviewer Registry Files.zip
Once downloaded, right-click the .zip file and extract it to a temporary location.
Step 4: Import Registry Keys
From Start, open Regedit.
File > Import > browse to the location you extracted the 4 registry files. You will need to import all 4 of them.
You should now be able to right-click an image file and Open With Windows Photo Viewer!
Step 5: Set Photo Viewer as Default App
If you’d like to make Photo Viewer your default photo viewing application, search Windows for “Default Apps” and then change Photos to Windows Photo Viewer.
Step 6: Allow Images in Thumbnails
This step is optional, but if you’d like to see a preview of the images from File Explorer (instead of just icons), you can do that by changing the File Explorer options.
Search Windows for Folder Options. Change to the View tab and uncheck “Always show icons, never thumbnails”.
That will change it from looking like this:
to looking like this:
That’s all there is to it! Hopefully this guide helped you out.
Несмотря на то, что в Windows 11 нет встроенного интерфейса просмотра индекса производительности системы, который присутствовал в «семёрке», инструменты оценки всё ещё присутствуют в системе и дают нам возможность узнать результат.
В этой простой инструкции способы посмотреть индекс производительности системы Windows 11 используя лишь встроенные средства ОС или с помощью простой сторонней утилиты. Учитывайте, что относиться к вычисленному индексу серьёзно и делать какие-то выводы на его основе не стоит.
Запуск анализа производительности
Прежде чем мы сможем узнать индекс производительности системы, потребуется запустить встроенный тест: если ранее он выполнялся автоматически, то в Windows 11 это может не происходить.
Для выполнения анализа используйте следующие шаги:
- Запустите командную строку, лучше (но не обязательно) сделать это от имени администратора, подробнее: Как запустить командную строку от имени администратора в Windows 11. В Windows PowerShell команда также будет исправно работать.
- Введите команду
winsat formal -restart clean
и нажмите Enter.

- Дождитесь завершения оценки производительности системы.

Теперь в файлах системы будут сохранены данные проведённого встроенного теста, на основании которого и высчитывается индекс производительности системы, а у пользователя есть возможность посмотреть полученные результаты.
Узнаем индекс производительности Windows 11
Для того, чтобы узнать вычисленный индекс производительности системы можно использовать несколько способов.
Просмотр средствами системы
Первый, не предполагающий использования каких-либо сторонних инструментов — команда PowerShell:
- Запустите Windows PowerShell. Можно использовать поиск в панели задач, а можно нажать правой кнопкой по кнопке «Пуск» и открыть «Терминал Windows», по умолчанию в нём открывается окно PowerShell.
- Введите команду
Get-CimInstance Win32_WinSAT
- После выполнения команды вы получите список рассчитанных индикаторов производительности. Наименьшее из значений (без учета пункта WinSATAssesmentState) и будет индексом производительности, оно же отображается в пункте WinSPRLevel.


Перевод каждого из пунктов в отчёте в соответствии с тем, как они были представлены в предыдущих версиях системы:
- CPUScore — процессор
- D3DScore — графика для игр и 3D приложений (на современных системах почти всегда максимум, независимо от видеокарты)
- DiskScore — производительность диска HDD или SSD
- GraphicsScore — графика рабочего стола
- MemoryScore — оперативная память
Эти же данные можно посмотреть вручную, заглянув в папку
C:\Windows\Performance\WinSAT\DataStore
и открыв файл
Formal.Assessment (Recent).WinSAT.xml
с помощью любого текстового редактора или браузера.

Внутри этого xml-файла в разделе WinSPR представлены все указанные данные, а общий индекс производительности виден в разделе SystemScore.
Утилита Winaero WEI Tool
Небольшая сторонняя бесплатная программа позволяет посмотреть индекс производительности Windows 11 в более знакомом графическом интерфейсе: данные она берёт из того же системного файла, а при желании, с помощью этой же программы можно перезапустить тест производительности (Re-run the assessment).

Официальная страница, где можно скачать Winaero WEI Tool — https://winaero.com/download-winaero-wei-tool/ (будьте внимательны, текстовая ссылка на загрузку находится ближе к концу страницы).
Видео инструкция
Напомню то, о чём уже шла речь выше: полученный индекс производительности системы производится по шкале, которой уже много лет, и может быть не вполне объективным для современных систем.