
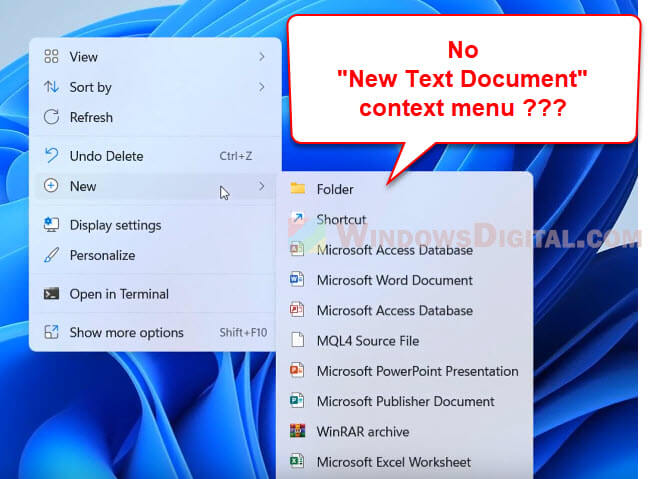
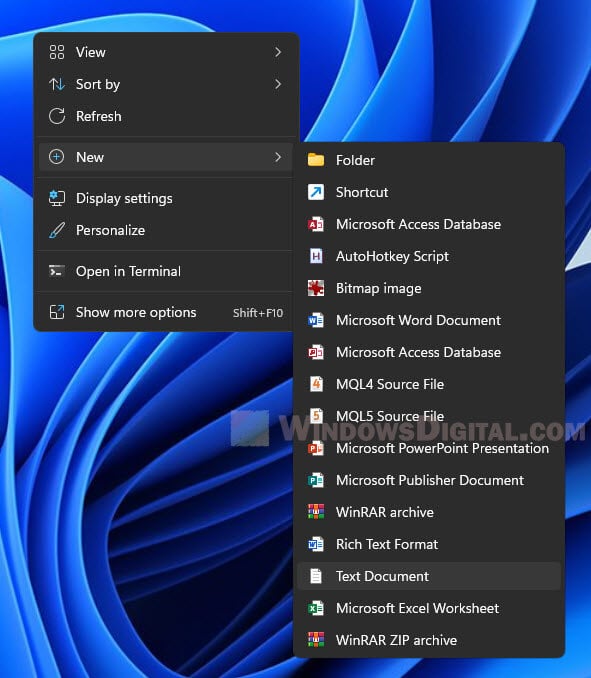
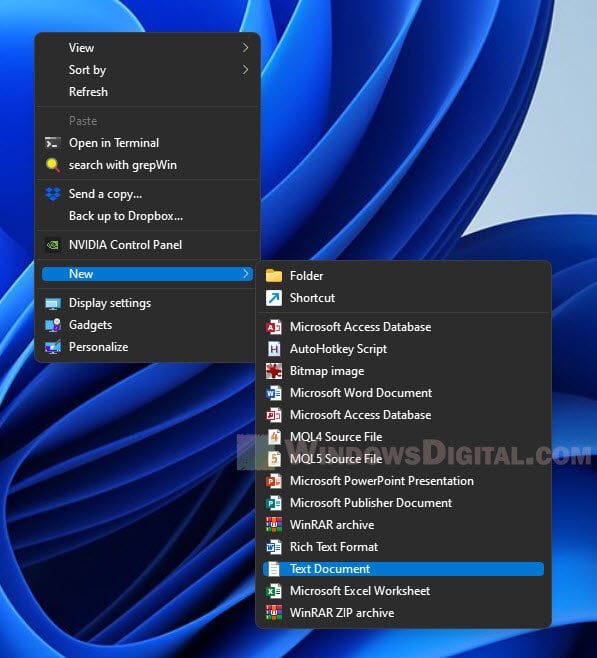
In Windows 11, when you right-click the desktop and select the New option in the context menu, you will normally see an option called “New Text Document” which allows you to create a new text file right away.
If you can’t make a new text file (TXT extension file) because the new text document option is missing from the right-click context menu, this guide will show you how to fix the issue and restore the new text document option in Windows 11.
Also see: How to Customize Right-Click Menu in Windows 11
Fix: Cannot create new text file in Windows 11
Use registry fix to restore new text document option
You can use the registry file below to add the “New Text Document” item back to the context menu in Windows 11 or Windows 10. This particular registry file will restore the “text document” option in the context menu if it was removed. To do so, follow the steps below.
- Before you use the registry file, it is recommended that you create a system restore point, which will back up your registry. In case something goes wrong, you will be able to restore your Windows to the system restore point you created.
- Download the registry file here: Restore New Text Document.
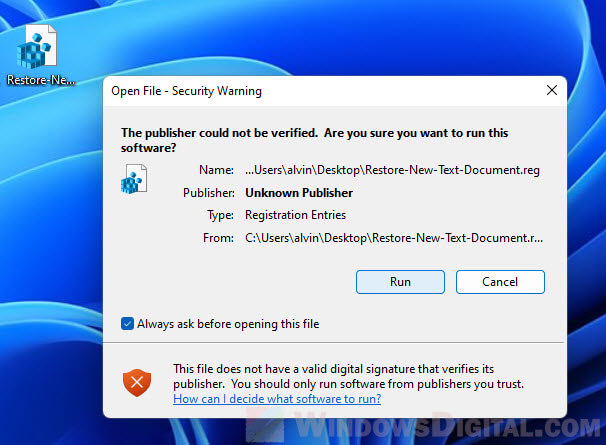
- Once the file is downloaded, open the Restore-New-Text-Document.reg file. When prompted with a security warning, click Run to continue.

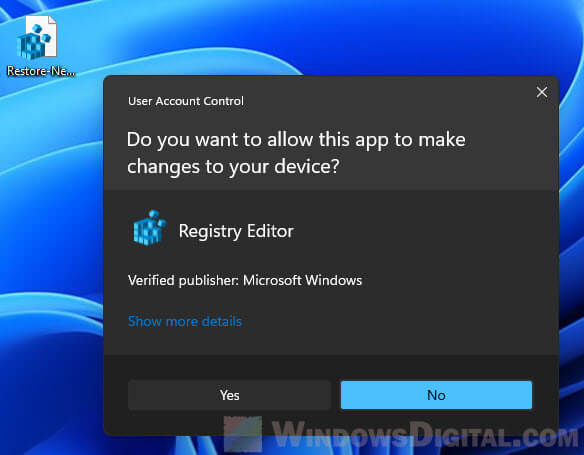
- Next, click Yes when UAC asks for confirmation.

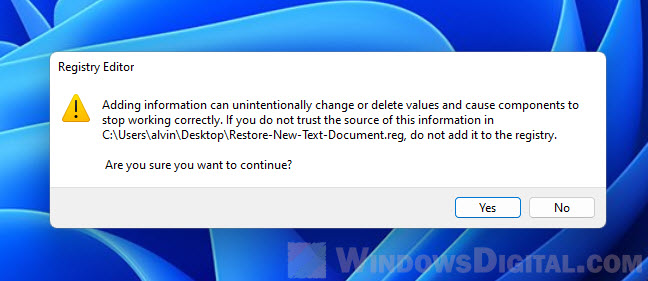
- In the next warning by Registry Editor regarding adding the reg file to the registry, click Yes to proceed.

- That’s it! The “Text Document” should now be added to the “New” context menu.
After you’ve completed all the steps above, retry right-clicking the desktop and see if you can see the “Text document” option when you hover your mouse cursor over the “New” option in the context menu.
If there are other items missing under the “New” option in the Windows 11 context menu, you can use the following registry file to restore all default items in the “New” option menu: Restore default context menu items under New.
Related: How to Remove Items from Right-Click Menu in Windows 11
Bring back the Windows 10 context menu
An alternative solution to the missing new text file option is to change the Windows 11 context menu back to what it looks like in Windows 10. There is a very popular tool called ExplorerPatcher that allows you to restore not only the old context menu, but also many other features such as old taskbar (ungroup taskbar items), old classic Start menu, etc.
By bringing back the old context menu, it might also restore the missing new text file option in the “New” option menu. In addition, since it’ll be the same as Windows 10 context menu, you no longer need to click the “Show more options” to view all context menu items.
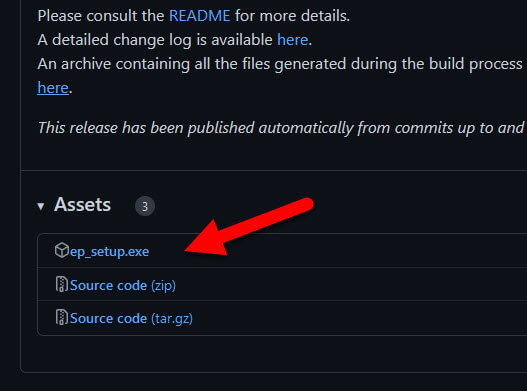
- First, download and install ExplorerPatcher (from GitHub).

- When you run the installer, Windows will prompt you with a security warning that says the installer is from an unknown source. This tool is still in the early stages of its release (read the GitHub page for more info), but it has been tested to work well in Windows 11. However, please proceed at your own risk. To continue, click Run anyway to proceed installing the app.
- The installer does not have a wizard or any window that indicates the process and completion of the installation. Once you run the installer, it should be installed right away.
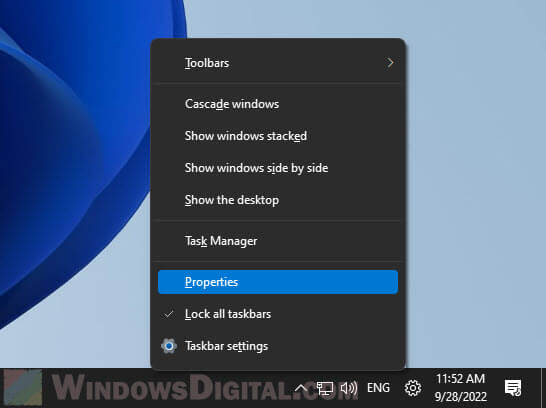
- Next, right-click the taskbar and select Properties.

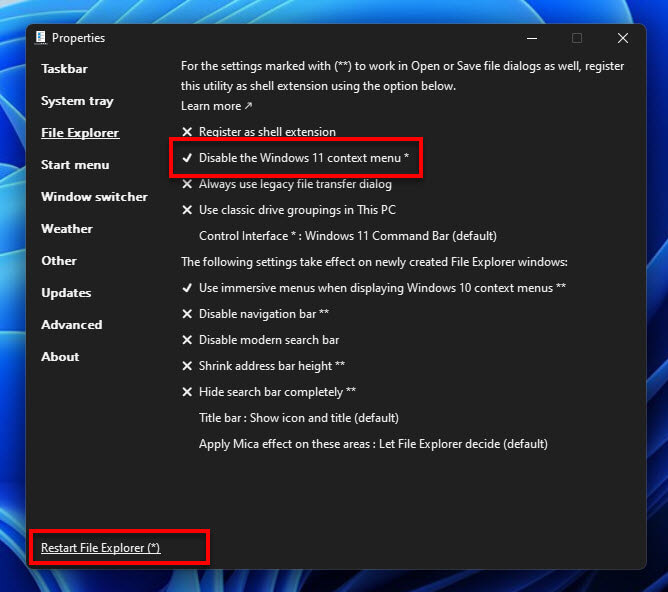
- From the left pane, select File Explorer.
- Then, click the “Disable the Windows 11 context menu” option to enable it. A tick next to the option indicates the option is enabled.
- Finally, click the “Restart File Explorer” at the bottom of the properties window for the changes to take effect immediately.

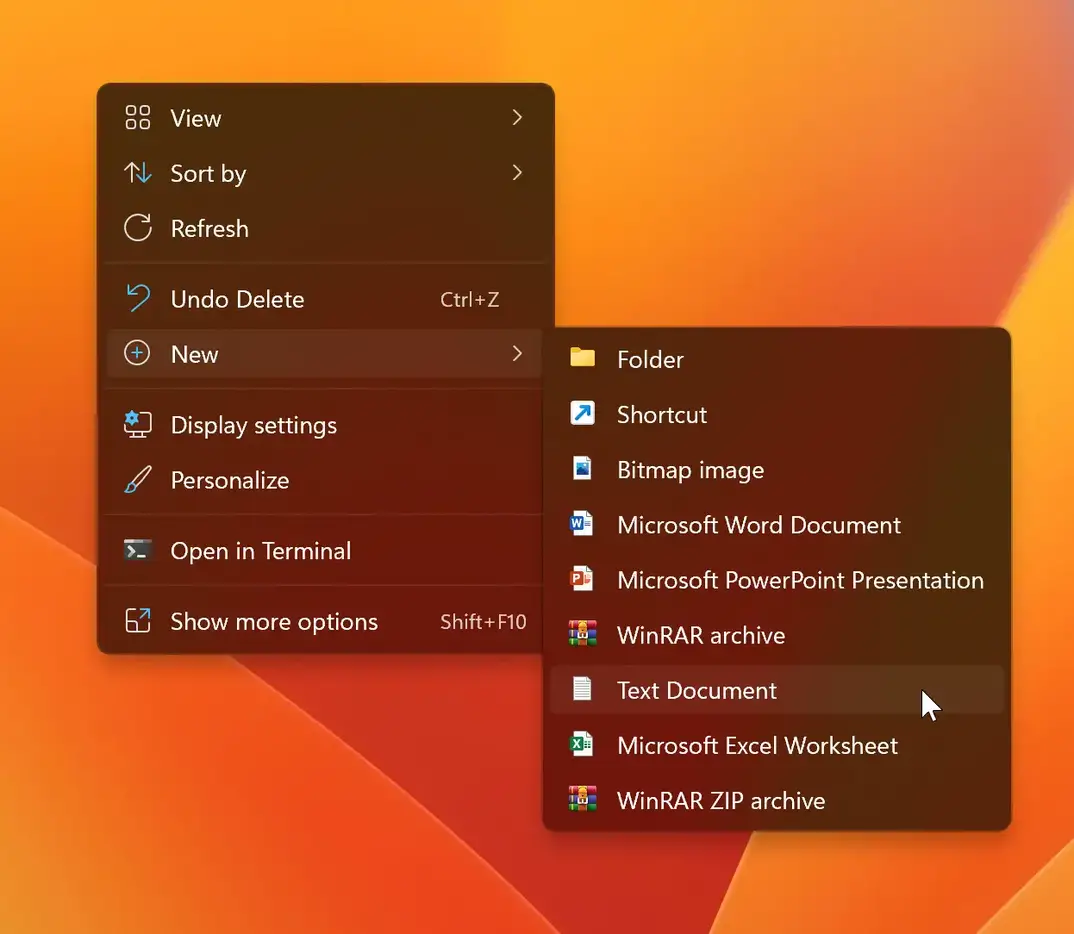
Once the explorer is restarted, when you right-click on the desktop, you should see the classic context menu. Hover the mouse cursor over the “New” option and see if the new text document option exists in the menu.
Windows Registry Editor Version 5.00

; Text Document

[-HKEY_CLASSES_ROOT\.txt\ShellNew]

[HKEY_CLASSES_ROOT\.txt\ShellNew]

"ItemName"=hex(2):40,00,25,00,53,00,79,00,73,00,74,00,65,00,6d,00,52,00,6f,00,\

  6f,00,74,00,25,00,5c,00,73,00,79,00,73,00,74,00,65,00,6d,00,33,00,32,00,5c,\

  00,6e,00,6f,00,74,00,65,00,70,00,61,00,64,00,2e,00,65,00,78,00,65,00,2c,00,\

  2d,00,34,00,37,00,30,00,00,00

"NullFile"=""

[-HKEY_CLASSES_ROOT\.txt]

[HKEY_CLASSES_ROOT\.txt]

@="txtfile"

"Content Type"="text/plain"

"PerceivedType"="text"

[HKEY_CLASSES_ROOT\.txt\PersistentHandler]

@="{5e941d80-bf96-11cd-b579-08002b30bfeb}"

[HKEY_CLASSES_ROOT\.txt\ShellNew]

"ItemName"=hex(2):40,00,25,00,53,00,79,00,73,00,74,00,65,00,6d,00,52,00,6f,00,\

  6f,00,74,00,25,00,5c,00,73,00,79,00,73,00,74,00,65,00,6d,00,33,00,32,00,5c,\

  00,6e,00,6f,00,74,00,65,00,70,00,61,00,64,00,2e,00,65,00,78,00,65,00,2c,00,\

  2d,00,34,00,37,00,30,00,00,00

"NullFile"=""

[-HKEY_CLASSES_ROOT\SystemFileAssociations\.txt]

[HKEY_CLASSES_ROOT\SystemFileAssociations\.txt]

"PerceivedType"="document"

[-HKEY_CLASSES_ROOT\txtfile]

[HKEY_CLASSES_ROOT\txtfile]

@="Text Document"

"EditFlags"=dword:00210000

"FriendlyTypeName"=hex(2):40,00,25,00,53,00,79,00,73,00,74,00,65,00,6d,00,52,\

  00,6f,00,6f,00,74,00,25,00,5c,00,73,00,79,00,73,00,74,00,65,00,6d,00,33,00,\

  32,00,5c,00,6e,00,6f,00,74,00,65,00,70,00,61,00,64,00,2e,00,65,00,78,00,65,\

  00,2c,00,2d,00,34,00,36,00,39,00,00,00

[HKEY_CLASSES_ROOT\txtfile\DefaultIcon]

@=hex(2):25,00,53,00,79,00,73,00,74,00,65,00,6d,00,52,00,6f,00,6f,00,74,00,25,\

  00,5c,00,73,00,79,00,73,00,74,00,65,00,6d,00,33,00,32,00,5c,00,69,00,6d,00,\

  61,00,67,00,65,00,72,00,65,00,73,00,2e,00,64,00,6c,00,6c,00,2c,00,2d,00,31,\

  00,30,00,32,00,00,00

[HKEY_CLASSES_ROOT\txtfile\shell\open\command]

@=hex(2):25,00,53,00,79,00,73,00,74,00,65,00,6d,00,52,00,6f,00,6f,00,74,00,25,\

  00,5c,00,73,00,79,00,73,00,74,00,65,00,6d,00,33,00,32,00,5c,00,4e,00,4f,00,\

  54,00,45,00,50,00,41,00,44,00,2e,00,45,00,58,00,45,00,20,00,25,00,31,00,00,\

  00

[HKEY_CLASSES_ROOT\txtfile\shell\print\command]

@=hex(2):25,00,53,00,79,00,73,00,74,00,65,00,6d,00,52,00,6f,00,6f,00,74,00,25,\

  00,5c,00,73,00,79,00,73,00,74,00,65,00,6d,00,33,00,32,00,5c,00,4e,00,4f,00,\

  54,00,45,00,50,00,41,00,44,00,2e,00,45,00,58,00,45,00,20,00,2f,00,70,00,20,\

  00,25,00,31,00,00,00

[HKEY_CLASSES_ROOT\txtfile\shell\printto\command]

@=hex(2):25,00,53,00,79,00,73,00,74,00,65,00,6d,00,52,00,6f,00,6f,00,74,00,25,\

  00,5c,00,73,00,79,00,73,00,74,00,65,00,6d,00,33,00,32,00,5c,00,6e,00,6f,00,\

  74,00,65,00,70,00,61,00,64,00,2e,00,65,00,78,00,65,00,20,00,2f,00,70,00,74,\

  00,20,00,22,00,25,00,31,00,22,00,20,00,22,00,25,00,32,00,22,00,20,00,22,00,\

  25,00,33,00,22,00,20,00,22,00,25,00,34,00,22,00,00,00

[-HKEY_CURRENT_USER\SOFTWARE\Microsoft\Windows\CurrentVersion\Explorer\FileExts\.txt]

[HKEY_CURRENT_USER\SOFTWARE\Microsoft\Windows\CurrentVersion\Explorer\FileExts\.txt\OpenWithList]

[HKEY_CURRENT_USER\SOFTWARE\Microsoft\Windows\CurrentVersion\Explorer\FileExts\.txt\OpenWithProgids]

"txtfile"=hex(0):

[HKEY_CURRENT_USER\SOFTWARE\Microsoft\Windows\CurrentVersion\Explorer\FileExts\.txt\UserChoice]

"Hash"="hyXk/CpboWw="

"ProgId"="txtfile"

[-HKEY_CURRENT_USER\SOFTWARE\Microsoft\Windows\Roaming\OpenWith\FileExts\.txt]

[HKEY_CURRENT_USER\SOFTWARE\Microsoft\Windows\Roaming\OpenWith\FileExts\.txt\UserChoice]

"Hash"="FvJcqeZpmOE="

"ProgId"="txtfile"
When you right-click on a free space on Windows 11 or 10, you see a “New” context menu item with various choices that lets you quickly create several types of new files such as Text Document, Bitmap image, etc. If you have installed Microsoft Office programs on your computer, you will find even more options, including Microsoft Word Document, Microsoft PowerPoint Presentation, etc.
The New context menu is worthwhile and lets you create new documents, including a folder, a text document, Microsoft Office file types, and even archives.
Some programs automatically add themselves to the New context menu after installation. However, sometimes things get messed up, and you notice some programs are missing from the New context menu, such as Text Document.
In this gearupwindows article, we will guide you on restoring the missing new text document context menu in Windows 11 and 10.
How to Restore Missing New > Text Document in Context Menu on Windows 11 or 10?
Since this method involves editing the Registry, we recommend you create a full backup of the registry and then proceed with the steps. You can restore your computer to its previous working state if something goes wrong.
To restore the missing New Text Document in the Context menu on Windows 11 or 10, use these steps:-
Step 1. Open Registry Editor.
To do that, click the Start button and type Registry Editor. In the available search results, select the Registry Editor app to open the same.
Step 2. Then, copy and paste the following path into the address bar and hit Enter key on the keyboard:-
Computer\HKEY_CLASSES_ROOT\Directory\Background\shellex\ContextMenuHandlers\New

Step 3. On the right sidebar, you will find a (Default) REG_SZ. Double-click on this REG_SZ and set its “Value data” to the following:-
{D969A300-E7FF-11d0-A93B-00A0C90F2719}
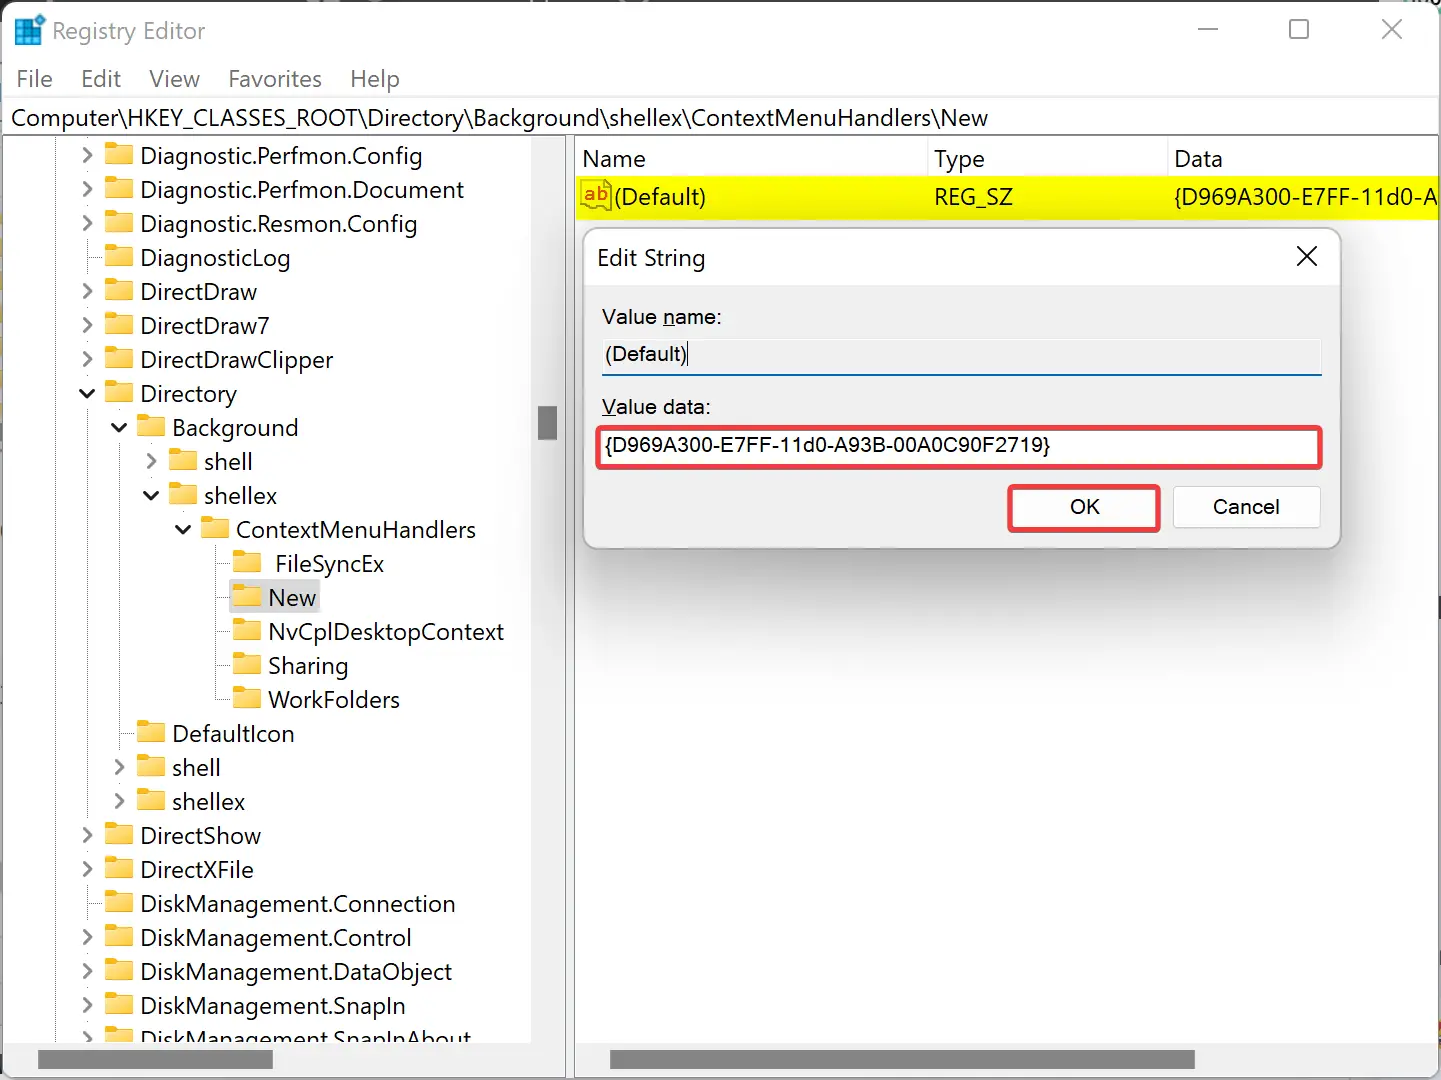
Step 4. Click OK.
Step 5. Finally, reboot your PC to apply the changes.
Once you complete the above steps, the New > Text Document context menu should appear on Windows 11 or 10.
Conclusion
In conclusion, the New Context menu is a handy feature on Windows 11 and 10 that allows users to create different types of files quickly. However, sometimes programs can go missing from the menu, which can be frustrating. Fortunately, with the steps provided in this gearupwindows article, users can easily restore the missing “New Text Document” option in the context menu. By editing the registry, users can ensure that this option is available, along with other programs that may have been missing. Remember to always backup your registry before making any changes to ensure that your computer can be restored to its previous state if anything goes wrong. With these steps, users can continue to enjoy the convenience of the New Context menu on their Windows 11 or 10 operating system.
Время на прочтение4 мин
Количество просмотров5.5K
Журналисты Windows Latest рассказали, как восстановить классическую версию «Блокнота» в Windows 11 24H2 без функций искусственного интеллекта с помощью нескольких настроек.

Шаг 1. Проверьте, установлен ли на ПК классический «Блокнот».
Для этого нужно открыть приложение «Параметры», нажать «Система» и прокрутить экран вниз, чтобы найти «Дополнительные функции».

В поле поиска потребуется ввести «Блокнот».

Если приложение не установлено, то требуется нажать «Просмотр функций» в меню «Добавить дополнительную функцию» вверху. После этого можно найти «Блокнот» и установить его.
Шаг 2. Удалите связь notepad.exe с новым «Блокнотом».
Чтобы убедиться, что notepad.exe перенаправляется на старый «Блокнот», нужно внести изменения в псевдонимы выполнения приложений. Для этого потребуется:
-
щёлкнуть меню «Приложения» в «Параметрах»;
-
открыть «Дополнительные параметры приложения» и нажать «Псевдонимы выполнения приложений»;


-
прокрутить страницу вниз до Store Notepad и выключить переключатель.

Теперь старый «Блокнот» стал приложением по умолчанию для notepad.exe. Чтобы проверить это, можно открыть диалоговое окно «Выполнить», нажав клавиши Windows + R. Затем нужно ввести «notepad».

Шаг 3. Добавьте ассоциацию файла .txt к устаревшему «Блокноту».
Для этого потребуется:
-
открыть диалоговое окно «Выполнить» (Win + R), ввести «regedit» и нажать Enter;

-
нажать «Да», когда появится всплывающее окно с вопросом, стоит ли разрешить этому приложению вносить изменения в раздел;
-
скопировать путь «HKEY_LOCAL_MACHINE\SOFTWARE\Classes\txtfilelegacy» и вставить его в адресную строку. Нажать Enter, и слева появится папка «txtfilelegacy»;


-
щёлкнуть правой кнопкой мыши по папке; в опции «New» выбрать «Key»;

-
назвать новый ключ «Shell». Он содержит команды, связанные с типом файла .txt;

-
кликнуть правой кнопкой мыши «Shell», навести указатель мыши на опцию «New» и выбрать «Key»;

-
назвать его «Open». Цель этого ключа — указать действие, которое следует выполнить при открытии файла типа .txt;

-
чтобы задать команду для выполнения при открытии файла .txt, нужно щёлкнуть правой кнопкой мыши ключ «Open», выбрать «New», затем «Key». Переименовать ключ в «Command»;

-
дважды кликнуть значок с (по умолчанию) на панели ключей «Command»;
-
появится всплывающее меню. В текстовой области под «Значение:» нужно вставить следующее: «c:\windows\system32\notepad.exe». Затем добавить пробел и ввести «%1», как показано на изображении ниже. Нажать «ОК»;

-
значение по умолчанию для клавиши Command установлено на «c:\windows\system32\notepad.exe %1». Таким образом, ПК теперь будет открывать устаревший «Блокнот» (notepad.exe) с выбранным файлом («%1») в качестве параметра при открытии файла .txt.
Шаг 4. Сделайте классический «Блокнот» приложением по умолчанию для открытия файлов .txt.
Для этого потребуется:
-
создать случайный текстовый документ в «Блокноте» и сохранить его. Это можно сделать как в старой, так и в новой версии;
-
закрыть приложение. Щёлкнуть правой кнопкой мыши по текстовому файлу. Выбрать «Открыть с помощью» и нажать «Выбрать другое приложение»;

-
появится меню, предлагающее выбрать между старой и новой версиями «Блокнота». При выборе старой потребуется нажать «Всегда».

Теперь, если дважды кликнуть по файлу .txt, то он будет открываться в классическом «Блокноте». Но даже в этом случае нужно будет искать приложение в командной строке.
Шаг 5. Создайте ярлык в меню «Пуск» для старого «Блокнота».
Для этого:
-
кликаем правой кнопкой мыши по обоям рабочего стола, выбираем «Создать» и нажимаем «Ярлык»;

-
вставляем «файл C:\Windows\System32\notepad.exe» в поле пути. Нажимаем «Далее». Называем ярлык «Блокнот» и нажимаем «Ввод»;

-
нажимаем Win + R, вводим «shell:Common Start Menu». Нажимаем «Ввод»;

-
появится «Проводник» с папкой под названием «Программы». Нужно открыть её по двойному клику;

-
возвращаемся к ярлыку, который создан для «Блокнота». Вырезаем его и вставляем в папку «Программы». Нажимаем «Продолжить»;

-
открываем меню «Пуск», прокручиваем его вниз, до старого «Блокнота». Он получит метку «Новый» внизу.

Теперь можно использовать как новый, так и старый Notepad. Однако текстовые файлы будут открываться непосредственно в старой версии.

Как вернуть новый «Блокнот»?
Тем, кто захочет пересмотреть установку «Блокнота», может потребоваться восстановить версию по умолчанию в Windows 11.
Для этого нужно:
-
перейти в «Проводник» и вставить в адресную строку следующий путь: «C:\ProgramData\Microsoft\Windows\Start Menu\Programs». Это откроет папку «Программы», в которую скопировали старый ярлык «Блокнота». Его нужно удалить;

-
нажать Win + R, ввести regedit и нажать Enter. В адресной строке редактора реестра вставить путь: «HKEY_LOCAL_MACHINE\SOFTWARE\Classes\txtfilelegacy». Затем удалить подраздел «Open»;
-
открыть приложение «Параметры» и перейти в раздел «Приложения». Выбрать «Дополнительные параметры приложения» и открыть «Псевдонимы выполнения приложений». Включить переключатель «Блокнот».
Между тем Microsoft выпустила обновление для «Блокнота» с поддержкой функции Rewrite во всех регионах. Это опция, которая использует ChatGPT для перефразирования контента, настройки тона и изменения длины текстов. Функция Rewrite работает только при наличии подписки на Microsoft 365 Personal и Family.
Download Windows Speedup Tool to fix errors and make PC run faster
If the Create New Text Document item is missing from the right-click context menu in Windows 11 or Windows 10, then this post may be able to help you restore it.

This issue can occur if the Registry items have become corrupted or if you installed and uninstalled some software and that corrupted the context menu. If you face this issue, this is what you can do!
- First backup your Registry and create a restore point
- Next download this file from our servers
- Extract its contents
- Click on the .reg file to add its contents to your Registry
- This will add the missing New Text document item back to the Context Menu.
- Restart your PC and check.
If the changes are not to your expectations, you may restore your registry or restore your computer.
Related read: How to Edit, Add, Restore, Remove items from New Context Menu.
How to restore the entire New context menu to default in Windows?
- If you wish to restore the entire New context menu to Windows default, download this registry fix from our servers.
- Extract its contents and click on the .reg file to add its contents to your Context Menu.
- Make sure to back up your Registry and create a system restore point first.
Also read: How to restore missing NEW context menu item in File Explorer.
Anand Khanse is the Admin of TheWindowsClub.com, a 10-year Microsoft MVP (2006-16) & a Windows Insider MVP (2016-2022). Please read the entire post & the comments first, create a System Restore Point before making any changes to your system & be careful about any 3rd-party offers while installing freeware.