
Подскажите кто сталкивался, подключаю airpods 2 по синезубу к виндовс 10. До самого блютус передатчика в системнике максимум 40см расстояние. Звук бывает пропадает или заикается и лечится не на долго переключением с одного устройства вывода на другое в микшере windows. Пробовал обновлять драйвера, другие наушники работают без проблем. Может какие то опредленные настройки нужны или установка другого драйвера?
Intel(R) Wireless Bluetooth(R)
20.100.5.1
-
Вопрос задан
-
12649 просмотров
Пригласить эксперта
Это происходит из-за точек WIFI, как именно, пока не понятно. Если рядом лежит модем раздающий WIFI, звук начинает плавать… Должно быть фикс на аппаратном уровне, либо более новая версия блютуса.
Добрый день, была такая же проблема, мне помогло включение в настройках устройства (свойства наушников) пространственного звука (Windows Sonic) и Bass Boost в Enchancements (не знаю что конкретно помогло), но после этого наушники перестали «отклеиваться» и звук пропадать.
Добрый вечер пробуйте поменять адаптер на более высокую версию bluetooth.
Та же проблема на Win 10. В основном при просмотре видео на Youtube. Звук пропадает, но сразу возобновляется, если, например, поставить видео на паузу и снова запустить. Кто-то сталкивался? Есть решение?
Войдите, чтобы написать ответ
-
Показать ещё
Загружается…
Минуточку внимания
In today’s tech-savvy world, AirPods offer unmatched convenience, superb sound quality, and seamless connectivity. However, they can encounter issues, such as sound problems with connected AirPods on Windows 11. In this comprehensive guide, we’ll explore these common issues and provide step-by-step solutions.
Ensuring your Windows 11 system and connected devices run smoothly is vital. That’s where DriverSupport, an innovative software solution, comes into play. This user-friendly tool simplifies driver management, enhancing your overall computing experience and ensuring compatibility between your AirPods and Windows 11.
Now, let’s dive into troubleshooting the persistent ‘AirPods connected but no sound’ issue on Windows 11 and discover how DriverSupport can be a valuable ally in this endeavor. Give DriverSupport | ONE a try today!
Checking Audio Output Settings
We begin with the most straightforward aspect of the problem. It’s possible that your Windows 11 system isn’t directing audio output to your AirPods. To resolve this, follow these steps:
- Selecting the Default Playback Device:
Right-click the volume icon in the Windows taskbar, select ‘Open Sound settings,’ and ensure your AirPods are set as the default playback device under ‘Output.’ By designating your AirPods as the default playback device, you effectively tackle the ‘AirPods connected but no sound’ issue on Windows 11. This action instructs your computer to route audio output seamlessly through your AirPods. - Device Properties:
After selecting your AirPods, click ‘Device properties’ to verify that the device is enabled and functioning correctly. The Device properties window provides various settings related to your AirPods, including driver status and connection status. - Testing Sound:
Click ‘Test’ to confirm that sound is indeed directed to your AirPods. This step allows you to ensure that audio output functions as expected through your AirPods.
By following these steps, you can promptly eliminate the possibility of a simple settings issue causing the sound problem, ensuring that your AirPods are set up correctly as the preferred audio output device on your Windows 11 system.
Updating Bluetooth Drivers
Outdated or incompatible Bluetooth drivers can lead to connectivity issues between your AirPods and Windows 11. To tackle this potential problem, follow these steps:
- Accessing Device Manager:
To begin, press the ‘Windows’ key + ‘X’ on your keyboard to open the Quick Link menu. Then, select ‘Device Manager,’ which serves as a vital tool for managing hardware components, including Bluetooth adapters. - Updating Bluetooth Drivers:
Within the Device Manager window, expand the ‘Bluetooth’ section by clicking the arrow icon next to it. Right-click on your Bluetooth adapter and select ‘Update driver.’ This action initiates the process of searching for the latest driver software. By updating your Bluetooth drivers, you ensure effective communication between your Windows 11 system and your AirPods, thereby resolving potential compatibility issues and ensuring a stable connection. - Driver Update Process:
Opt for ‘Search automatically for updated driver software,’ allowing Windows to search for and install the latest Bluetooth drivers. After the update is complete, restart your computer to apply the driver updates effectively.
Updating your Bluetooth drivers stands as a crucial step in troubleshooting the ‘AirPods connected but no sound’ issue. It not only resolves potential driver-related problems but also equips your system with the latest software necessary to support your AirPods effectively.

Resetting Your AirPods
At times, the issue may originate from your AirPods themselves. To eliminate any potential problems with the AirPods’ firmware or settings, you can perform a reset. Here’s how:
- Resetting AirPods:
Start by placing both AirPods in the charging case, ensuring they’re connected to power. Open the lid of the charging case and press and hold the setup button on the back of the case until the LED indicator flashes amber, then white. This reset process effectively clears any potential glitches in the AirPods’ configuration. - Reconnecting AirPods:
Your AirPods have now been reset. Reconnect them to your Windows 11 computer and check if the sound issue is resolved. Reconnecting your AirPods ensures a fresh and stable connection, potentially resolving any issues related to the initial pairing.
Resetting your AirPods becomes a valuable troubleshooting step, addressing potential software or configuration issues within the earbuds themselves. Performing a reset restores your AirPods to a clean state, preparing them for a successful connection and ensuring optimal audio performance.
Simplified Driver Maintenance with DriverSupport
In today’s dynamic tech landscape, maintaining up-to-date drivers for your connected devices is crucial. This is precisely where DriverSupport steps in, making your life easier. This software tool performs a comprehensive system scan, swiftly identifying outdated or missing drivers for various devices, such as graphics cards, audio devices, and printers. By offering automatic driver updates, it eliminates the need for manual searches, enhancing system stability, and significantly reducing the risk of driver-related issues. Moreover, DriverSupport includes a convenient backup and restore feature, allowing you to revert to previous driver versions if compatibility problems arise during updates. This ensures an extra layer of security during the update process.
Incorporating DriverSupport into your routine driver maintenance guarantees that not only your AirPods but all connected devices remain up to date and compatible with your Windows 11 system. By automating driver updates and optimizing system stability, DriverSupport contributes to a seamless computing experience, ensuring that your AirPods and other devices work flawlessly together.
Conclusion
Encountering AirPods connectivity issues in Windows 11 without sound can be frustrating. However, you can swiftly resolve this problem with effective troubleshooting. In this guide, we’ve outlined diverse solutions, from checking audio output settings to updating Bluetooth drivers, resetting your AirPods, and ensuring compatibility with audio codecs and exclusive mode settings. We’ve also stressed the importance of keeping your Windows 11 system updated and correctly pairing your AirPods.
By incorporating these steps and utilizing DriverSupport, you can experience a hassle-free computing journey, ensuring seamless harmony between your Windows 11 system and connected devices. Whether you’re addressing specific issues or proactively maintaining your system, these steps and tools serve as valuable assets for tech-savvy users.

Quick Tips
- Ensure your AirPods aren’t low on battery and check the audio balance on your phone or computer’s settings.
- Disabling automatic ear detection on your AirPods can also help fix this problem.
- If nothing works, you might want to head to the Genius Bar at the Apple Store.
Note: The solutions in this guide apply to all generations or editions of the Apple AirPods — AirPods 1, AirPods 2, AirPods 3, AirPods Pro, and the AirPods Pro 2nd Generation.
Try Basic Fixes
- Re-enable Bluetooth: Disabling and re-enabling Bluetooth on your phone or computer can also help fix temporary connectivity issues. This has worked for many.
- Disconnect other devices: In the case of multiple (or simultaneous) connections, make sure the AirPods is the primary audio output device. Go to your phone or PC’s Bluetooth settings menu and disconnect any unwanted devices.
Fix 1: Check the Battery Percentage
If your AirPods connect but there’s no sound, it could be that the battery level is critically low. On an iPhone or iPad, place both AirPods in the charging case, close the lids, and reopen them. You should see a card showing the battery status (in percentage) of both the AirPods and the charging case.
For Mac, click the Bluetooth icon on the menu bar and hover your cursor on the connected AirPods. The battery status for both left and right AirPods and the charging case will be displayed.
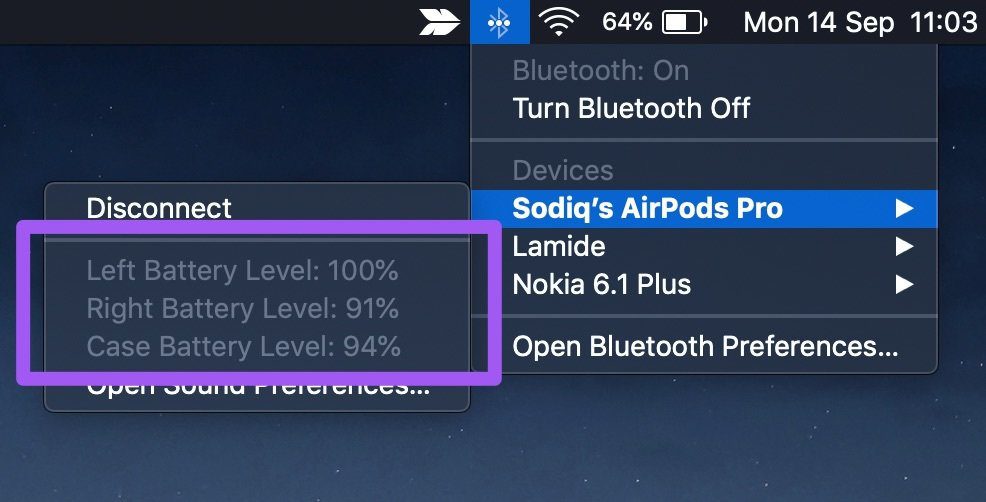
Note: There is no way to natively check the AirPods battery life on Android and Windows devices.
If the AirPods battery level is 10% or below, leave them in the charging case to charge and try again.
Fix 2: Adjust the Audio Balance
If you inadvertently routed the audio output volume to one AirPod more than the other, you could experience problems. Follow the steps below to adjust your device’s audio balance.
For iPhone
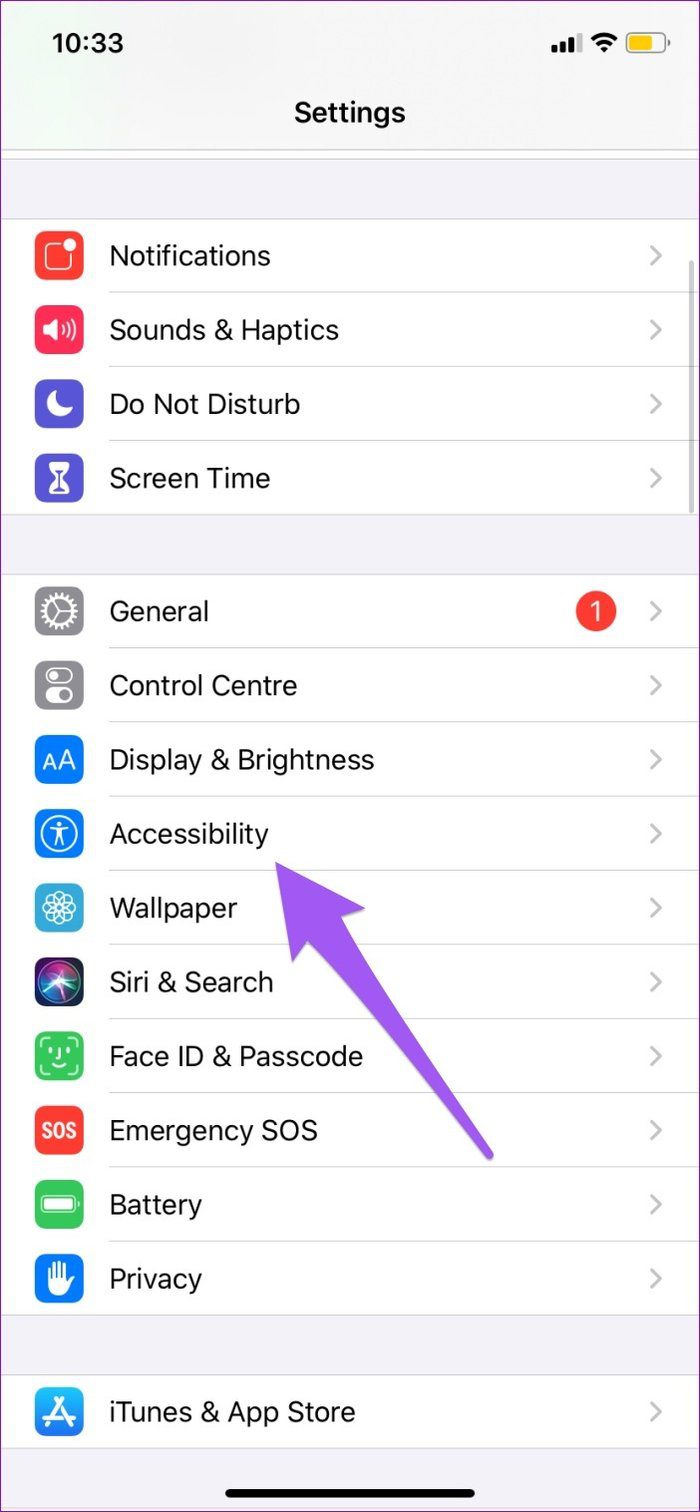
Step 1: Launch the Settings menu and head to Accessibility > Audio/Visual.
Step 2: Make sure the Balance slider is positioned in the middle.


For Android
Step 1: Launch the Settings menu and navigate to Accessibility > Hearing enhancements.
Step 2: Set the Connected audio and phone speakers sliders in the middle.


For Mac
Step 1: Click the Bluetooth icon on the Status menu, hover the cursor on your AirPods, and select Open Sound Preferences.

Step 2: Go to the Output tab and select the AirPods.
Step 3: Finally, adjust the Balance slider to the middle.

For Windows
Step 1: Press Windows + I to open the Settings app and head to System > Sound.
Step 2: In the Output section, ensure the AirPods are your preferred output device. Then, click on Device properties.

Step 3: Now set the audio balance for both left and right AirPods to 50. Additionally, make sure the Disable checkbox is left unchecked.

Fix 3: Disable Automatic Ear Detection
The audio output is automatically routed to the AirPods when placed in your ears on your iPhone and iPad. That is a cool feature, but it sometimes messes up the AirPods’ sound production. Some iPhone users who experienced this sound issue fixed it by disabling Automatic Ear Detection. Here’s how you can do it.
Connect the AirPods to your device and follow the steps below.
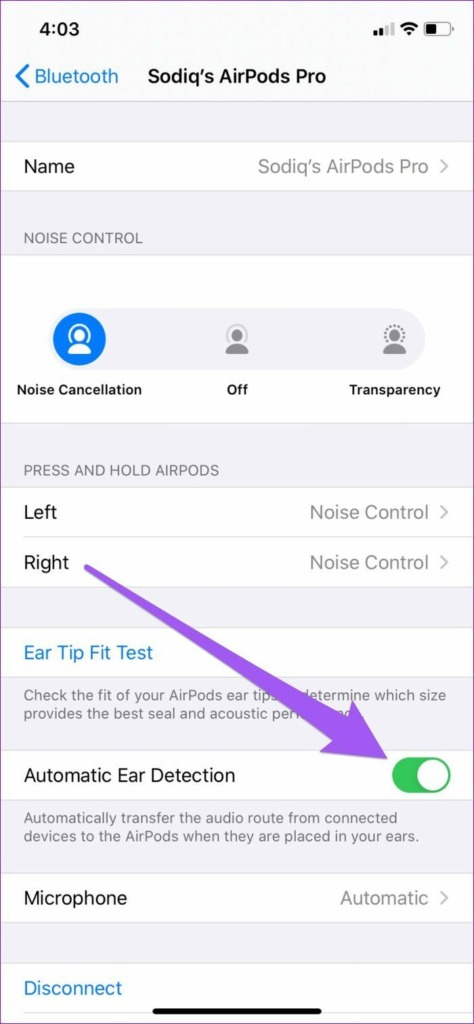
Step 1: Go to your iPhone’s Bluetooth menu and tap the info icon next to your AirPods.
Step 2: Toggle off Automatic Ear Detection.

Fix 4: Reset Your AirPods
If the AirPods still don’t produce sound after implementing all the solutions above, you should reset them. Place both AirPods back in the charging case and hold the setup button on the case for 10 seconds till the status light continuously blinks white. Now, go to your device’s Bluetooth settings menu and add the AirPods as a new device.
Was this helpful?
Thanks for your feedback!
The article above may contain affiliate links which help support Guiding Tech. The content remains unbiased and authentic and will never affect our editorial integrity.
I have a pair of AirPods (2nd gen) that I have problems with regarding the connection to both the work and personal laptop. While playing the music they sometimes go on mute not disconnecting however to the device (the volume settings do not change and the song is not put on pause, the headphones simply do not play the sound). Refreshing the page does not work the only thing that makes them work again for a little while is selecting the Hands Free option from the select playback device, then selecting the Stereo option again.
I have tried resetting the AirPods to both laptops (one of them is Dell, the other one Asus), but the problem keeps repeating and sometimes the headphones go on mute a couple of seconds after starting to play the music.
Both devices work on Windows 10. For the personal laptop I have tried to reinstall the audio and Bluetooth drivers again but is does not seem to solve the problem.
Has anyone else encountered this problem ?
Kind regards,
Catalina
Tired of Airpods audio issues on Windows 11?
AirPods are undoubtedly one of the greatest additions to the Apple ecosystem due to their efficient battery life and innovative noise cancellation technology. But are these enough to consider them the best wireless earbuds, especially when it comes to non-Apple systems?
Windows, in particular, has always posed unknown errors when it comes to Bluetooth audio devices. In Windows 11, the primary reason for these includes audio tasks being managed using Advanced Audio Coding. Although Windows 10 used SBC and aptX Bluetooth codecs instead, users still had to face similar problems.
With the update, we hoped the issue would have been resolved, but unfortunately, users are still finding a workaround. If you’ve landed on our page for the same reason, you’ll be relieved to hear we’ve got all that you need.
So what are you waiting for? Let’s start right away!
1. Restart Bluetooth Service.
Restarting the Bluetooth service on Windows will put everything back to default and hopefully get your Airpods working again. This should be the first step when facing Airpods audio issues on Windows 11.
To do so, follow the instructions below:
- To start, press the Windows key + R on your keyboard to open the Run dialog box.
- Type ‘services.msc’ and press the Enter key.
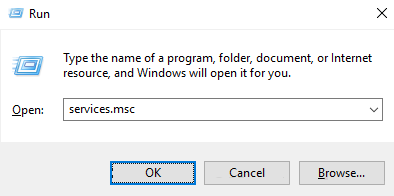
- Now, look for the services named Bluetooth Audio Gateway Service, Bluetooth Support Service, and Bluetooth User Support Service_NNNNN. Right-click on each, one by one and choose Restart from the context menu.
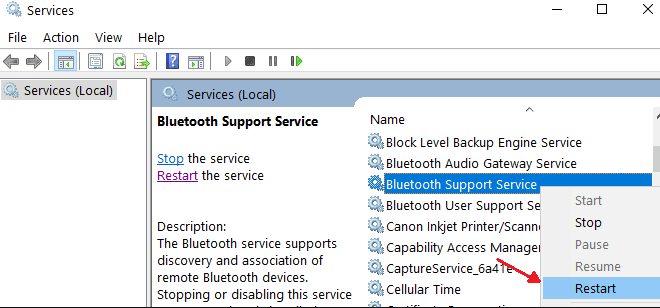
Afterwards, reconnect your AirPods and see if the issue resolves or not.
2. Reconnect Your AirPods.
Sometimes, your AirPods may have a hard time connecting to Windows 11 as it’s already paired to another device. In that case, you will have to manually unpair your AirPods from the connected device and pair it with your PC.
You may do this by following these steps:
- Long press the Setup button at the back of the AirPods case with the lid open.
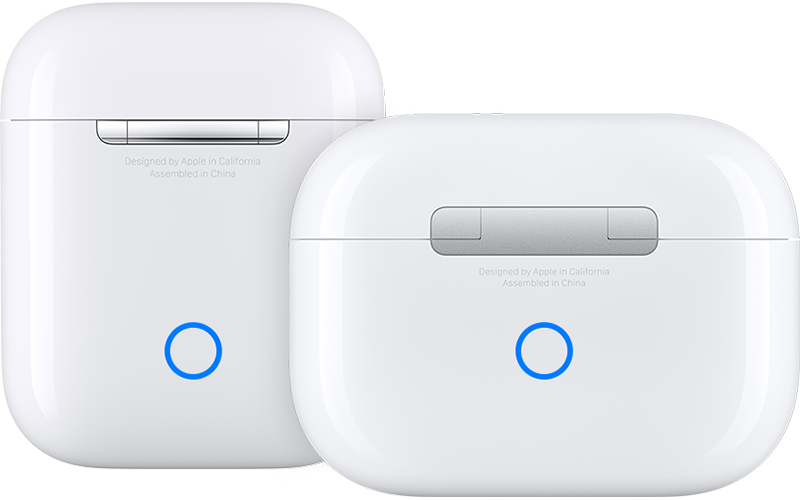
- Let go once a flashing white light appears.
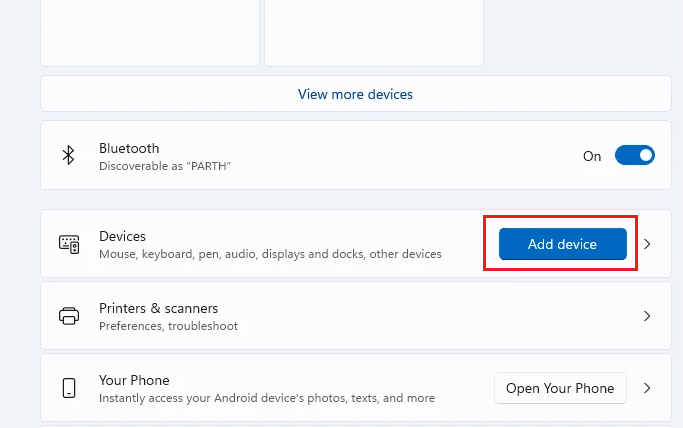
- Now, open the Action Center on your PC by pressing Windows key + A from your keyboard.
- Turn on the Bluetooth, if not already.
- Next, right-click on Bluetooth and select Go to Settings.
- When the window opens, click on Add device.
- From the options, go to Bluetooth.
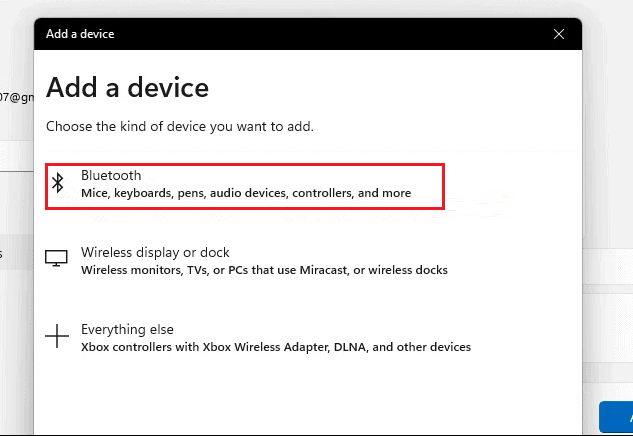
- Finally, click on your AirPods to connect to them.
3. Set AirPods As Your Default Device.
When connecting to AirPods on your system, make sure it is set as the default audio device. This will help your computer choose the preferred audio output. Having an external monitor set as default may cause no sound to be received through the AirPods.
Here are the steps you must follow:
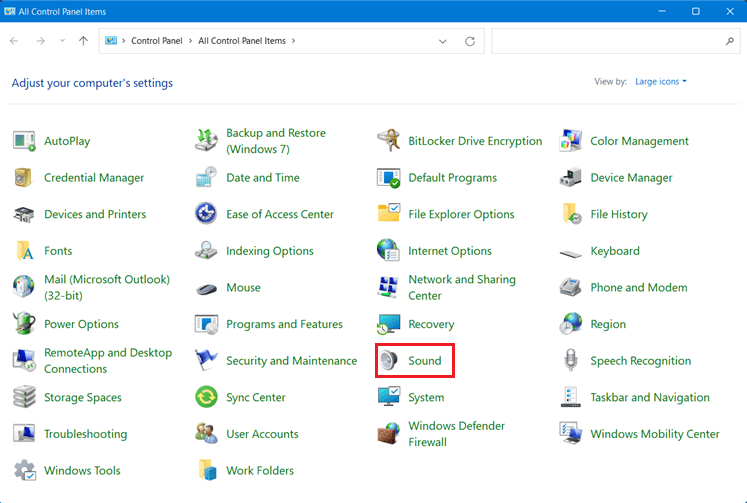
- To begin, type ‘control panel’ in the Search bar and click on Open from the right pane.
- Click on the Category drop-down arrow next to View by and choose Large icons.
- Then, click on Sound.
- On the pop-up box, go to the Playback tab.
- Ensure there’s a green checkmark next to your AirPods, indicating they are enabled. Select your AirPods, then click on Set Default.
- Now go to the Recording tab. Again choose your AirPods and click on Set Default.
- Click on OK to save these changes.
If you still face AirPods audio issues on Windows 11 but on some specific apps, check the in-app settings and ensure you have selected AirPods as the primary audio input and output device.
4. Enable Loudness Equalization.
Multiple users have reported that they were able to fix AirPods audio issues on Windows 11 by enabling Loudness Equalization. The feature either improved the audio quality or completely brought it back to normal.
If you want to do the same, follow these steps:
- Open the Control Panel on your computer and choose View by: Large icons.
- Then, go to Sound.
- Now, click on the Playback tab.
- Next, select your AirPods and click on Properties.
- Once the Headphone Properties window opens, go to the Enhancements tab.
- Finally, check the box next to Loudness Equalization and click on OK to save the changes.
5. Use An EQ App.
If none other method seems to be effective, consider taking help from an equalizer software. It is an audio filter that isolates frequencies and boosts the gain on your Airpods. Although it may require some effort from your end, you will be able to fix low audio quality or volume issues by utilizing filters, noise compressors, etc.
You’re recommended to use the OEM app from your manufacturer, especially if you use a pre-built system. For instance, ASUS laptops offer Sonic Audio for various audio enhancement options.
However, if your computer does not have a dedicated program, you can use a third-party app instead. One of the best third-party EQ is Equalizer APO. Being a completely free program, it is a reliable option considering the services and features that it offers.
6. Reset Your AirPods.
Before continuing with this method, understand that this may be quite a chore as you’ll be required to re-pair your device with all the connected devices. However, it may be worth all the effort since your AirPods will start afresh. This time, connect them to Windows 11 first so that everything works smoothly as intended.
Before starting, you will need to remove your AirPods from both the Control Panel and the Device Manager. Here’s what you need to do:
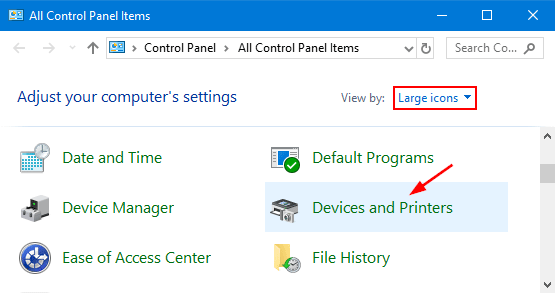
- First, open the Control Panel and choose View by: Large icons.
- Then, go to Devices and Printers.
- From there, right-click on your AirPods and select Remove device.
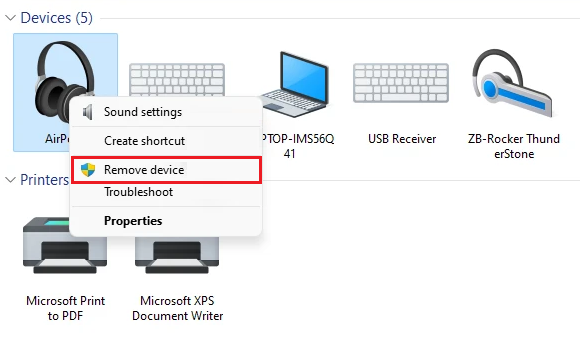
- Click on Yes to confirm your action.
- Now, press the Windows key + X from your keyboard and choose Device Manager.
- When it opens, click on View at the top and choose Show hidden devices.
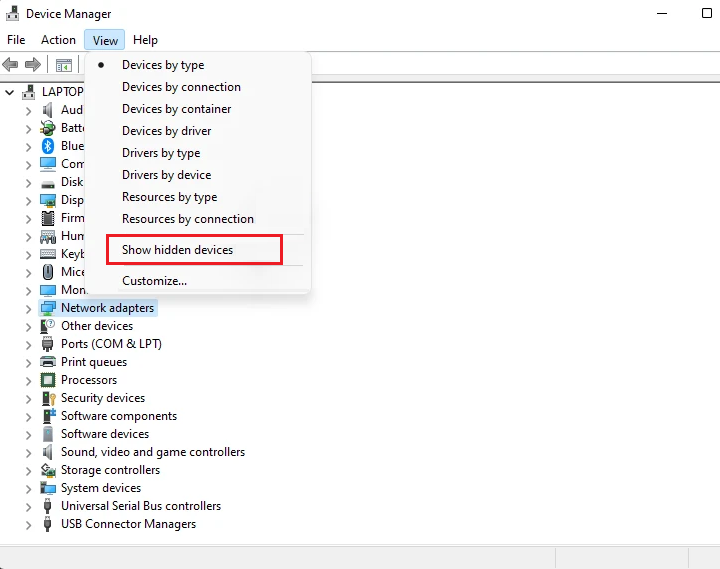
- Expand the list for Bluetooth.
- Right-click on AirPods and its related entries one by one and choose Uninstall device.
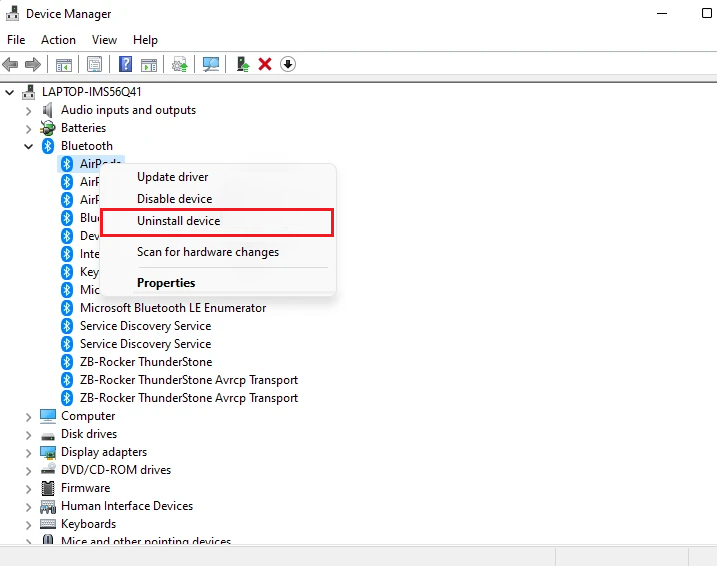
- Again, click on Uninstall for confirmation.
- Once done, open the AirPods case lid. Press and hold the Setup button at the back for almost 15 seconds.
- When you see the amber and white light flash, enter the pairing mode and reconnect your AirPods with your PC by following the steps mentioned earlier.
7. Set Disable Absolute Volume Value.
Windows 10 came out with a new audio feature known as Absolute Volume. With the help of this feature, users can enable the volume slider to manage the volume of speakers, headphones, or AirPods connected to the PC.
The value of DisableAbsouleVolume DWord Registry is set to 0. This value indicates that it is turned on. If you change the value to 1, the Absolute Value will be disabled. This method can fix AirPods audio issues on Windows 11.
Here’s what you need to do:
- Launch the Run command box by pressing Win + R from your keyboard.
- Next, type in regedit and click OK.

- After that, paste Computer\HKEY_LOCAL_MACHINE\SYSTEM\ControlSet001\Control\Bluetooth\Audio\AVRCP\CT into the address bar located at the top.
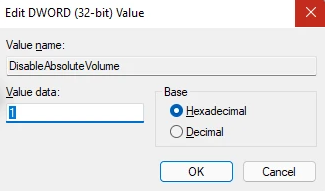
- Now, double-click on the DisableAbsoluteVolume.
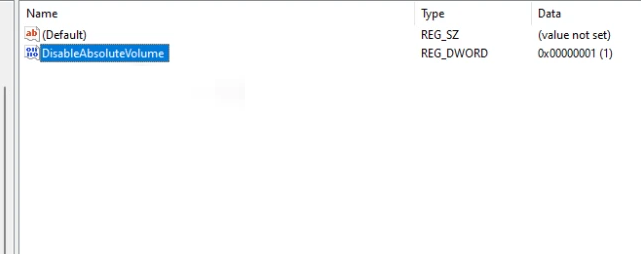
- Type 1 in the Value data box and click on OK.
Once done, make sure you connect your AirPods and check if they work or not.
8. Update BT Driver.
Apple releases new updates once in a while for all of its products to get rid of any bugs and enhance the user experience. Similarly, the BlueTooth driver on your computer also receives driver updates regularly. This ensures that the AirPods firmware and BlueTooth driver are running on the latest updates and are compatible with each other.
Another reason for your AirPods audio issues may be an outdated BT driver. You can check for the driver updates within Windows 11 by following the steps below:
- First, open Settings by pressing Win + i from your keyboard.
- Click on Windows Updates from the left pane.
- Now, select Advanced Options.
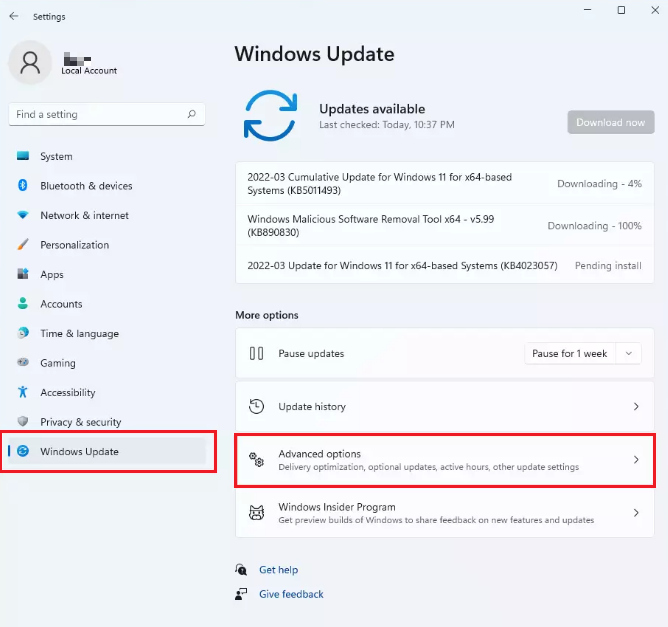
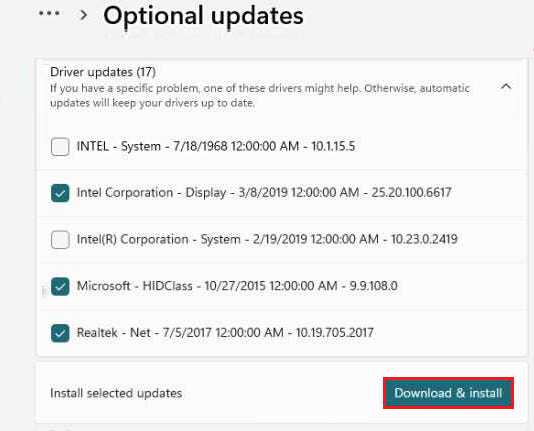
- Then, head to Optional Updates.
- Look for new updates under Driver updates.
- Lastly, select the updates you wish to install on your computer and then click on the Download & install button.
After the BT driver updates, connect your AirPods to the computer to find out whether the audio issue resolves.
This brings us to the end of our guide on how to fix AirPods audio issues on Windows 11. Hopefully, after trying any of the ways listed above, you were able to get your AirPods to work properly in Windows 11. If you still have more questions, feel free to let us know in the comments section below. We’ll try our best to provide further assistance.
If this guide helped you, please share it. 🙂
-
Aimen Choudhry is an architecture student who has always been fascinated by science. She now finds her therapy researching and writing about the latest technology and the issues that come alongside. Otherwise, you’ll find her playing video games, listening to music, or watching fantasy/sci-fi movies.
View all posts