
The Windows Update Error 8024200D (WU_E_UH_NEEDANOTHERDOWNLOAD) means that the Windows Update handled can’t install the update because the update downloaded is invalid and corrupted. This error is most commonly encountered on Windows 7.

If you are affected by this error code, you are likely to experience this behavior every time Windows Update attempt to install an update that has failed on the first try. This problem has been patched with newer Windows builds but remains prevalent with older builds.
The main reason why you’ll see this error is a WU inconsistency that can be fixed either by resetting the entire Windows component or by bypassing it entirely by downloading and installing the update manually using the Windows Update Catalog.
Update: This problem can also occur due to a corrupted Windows Update database.
Here’s a list of confirmed methods that you can use to troubleshoot this error:
1. Install the failing update manually
If you’re looking for a quick fix that will bypass a local issue that triggers the 8024200d error, use the Windows Update Catalog to install the failing update manually.
This method is only recommended if you only have one update that is throwing the 8024200d WU error when you attempt to install it.
Important: Keep in mind that going this route will not effectively address the root source of the issue. Even if this allows you to bypass the error and install the problematic update, it will not address the root cause of the issue. If you want to fix root the issue, continue troubleshooting with the remaining methods below even if this method allows you to install the failing update.
Here’s how to use the Windows Update Catalog to bypass the 8024200d error:
- Launch the homepage for the Microsoft Update Catalog in your web browser.
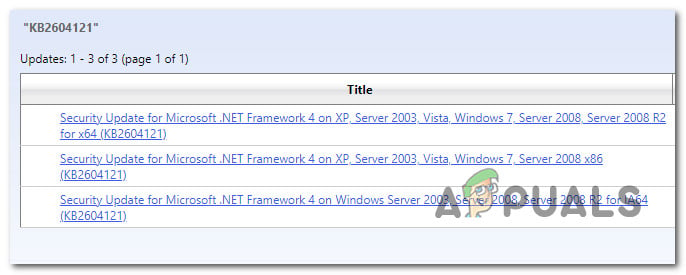
- Use the search box in the upper-right corner of the Microsoft Update Catalog page to discover the update that failed to install.

Searching for the failing update inside Windows Update Note: You can grab the update code from the WU error message inside the Windows Update page.
- From the list of results, identify the update applicable to your Windows version.

Identify the correct update Note: Consider the CPU architecture and Windows version while looking for an appropriate update, after analyzing the findings.
- After identifying the required update, click the Download option and wait until the download is complete.
- Once the download is complete, double-click the executable file you just downloaded from the Downloads folder.
- Follow the on-screen instructions to complete the sideloading of the next Windows update.
- Now that the update is installed, reboot your PC and see if the 8024200d has disappeared from the Windows update screen.

2. Run the Windows Update Troubleshooter
Running the Windows Update troubleshooter is a great way to try and fix this issue using the built-in tools provided by Microsoft.
If you are experiencing the 8024200D error due to a common WU inconsistency, running the Windows Update Troubleshooter and applying the recommended fix should help you resolve this issue.
Note: The Windows Update Troubleshooter provides a collection of automated repair strategies that may be used to treat the most common causes of a failing Windows update.
If Windows Update Troubleshooter manages to identify the cause of the error, follow the instructions to apply the recommended solution.
Here’s how to run the Windows Update Troubleshooter and apply the recommended fix:
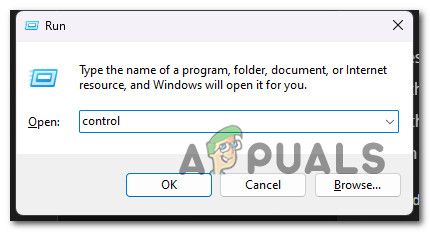
- Press the Windows key + R to open the Run dialog box.
- Type “control” and hit the Enter key to enter the Control Panel interface.

Open up the classic Control Panel interface - Click “Yes” when prompted by User Account Control to grant administrator permissions.
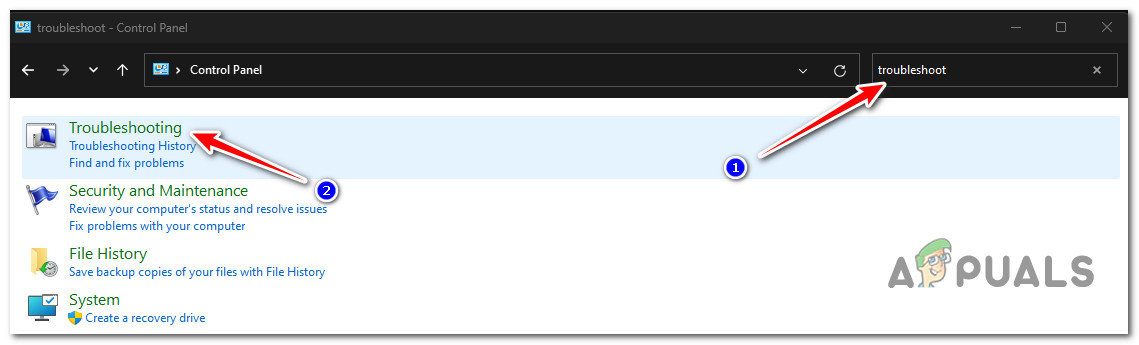
- Utilize the Control Panel’s search function to look for “troubleshoot” (top-right corner of the screen).
- From the list of search results, click on Troubleshooting.

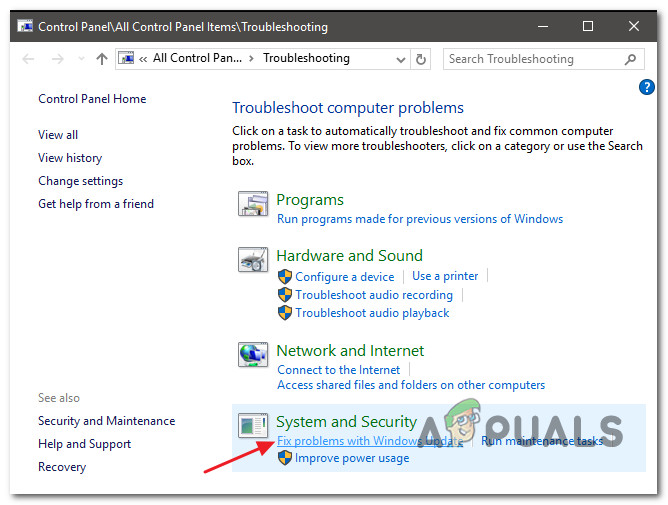
Open up the Troubleshooting tab - Under System and Security, click on Fix problems with Windows Update.

Find and Fix Problems with Windows Update Note: If you are running Windows 11, you may see different displays moving forward.
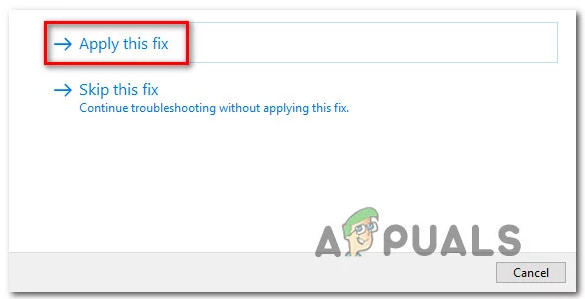
When asked by the Windows Update Troubleshooter, click Next and wait for the initial scan to complete. - Click Apply this Fix if you find a possible solution to implement it in the current situation.

Apply this fix - Once the solution is effective, restart your computer and attempt to reapply the unsuccessful update.
3. Reset the BITS & Cryptographic Services
Another scenario where you might see the 8024200d error when installing a pending Windows update is if two very important service dependencies (Background Intelligent Transfer Service and Cryptographic Service) do not receive content link headers.
Note: This is an old issue that is patched on Windows 11 and Windows 11 but still occring on Windows 7.
To fix this issue, you’ll need to reset both services & rename the two folders where Windows Update stores temporary Windows Files (Catroot 2 & Software Distribution). However, in order to complete this methods, you’ll also need to disable a series of additional WU dependencies to make sure there’s no interference.
Here’s a quick guide on how to do this:
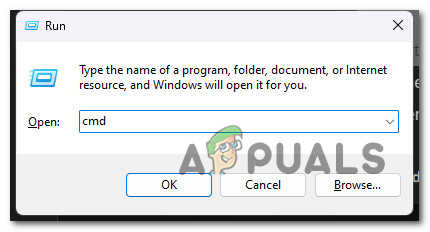
- To open the Run dialog box, press the Windows key + R.
- Then, to start a Command Prompt with elevated privileges, type “cmd” into the text box and press Ctrl + Shift + Enter.
Open up an elevated CMD prompt Note: Grant administrator access by choosing Yes when asked by the UAC (User Account Control) window.
- To stop all WU-related services, type the following commands in the following order at the elevated Command Prompt and press Enter after each command:
net stop wuauserv
net stop cryptSvc
net stop bits
net stop msiserver
Note: By following these steps, the Windows Update Service, MSI Installer, Cryptographic Service, and BITS Service will all be killed manually.
- Use the following commands to remove and rename the SoftwareDistribution and Catroot2 folders once all relevant services have been stopped:
ren C:\Windows\SoftwareDistribution SoftwareDistribution.old
ren C:\Windows\System32\catroot2 Catroot2.old
Important: These folders are responsible for storing updated files required by the WU component. If you rename these folders, your operating system will be compelled to build new, healthy copies.
- After the folders have been cleaned up, execute the following commands to enable the previously deactivated services:
net start wuauserv
net start cryptSvc
net start bits
net start msiserver
- Restart your computer when it has restarted to verify if the issue has been resolved.
4. Run SFC & DISM Scans
File corruption that interferes with the auto-updating capability of Windows installation is one of the most common reasons of the 8024200d error while attempting to install a pending system update.
In this case, it’s recommended to perform a few system file scans utilizing built-in tools System File Checker (SFC) and Deployment Image Servicing and Management (DISM).
Note: Although SFC and DISM are fairly similar, we recommend running both checks in short succession to enhance the likelihood of recovering corrupt system files.
Our recommendation is to start with a simple SFC scan. You can deploy this tool without an active connection to the internet.
Important: It is imperative to maintain the CMD window active after initiating this process, even if the application seems frozen. This is a common occurrence, especially on Windows 7. Stopping the operation before it’s finished, this might result in logical problems on your HDD or SSD.
Once the SFC scan is finished, follow it up with a DISM scan with admin access without restarting your PC. DISM uses a component of Windows Update to obtain healthy replacements to replace corrupt system files. Because of this, you’ll need to ensure that you have a stable internet connection before beginning this operation.
Before commencing this operation, you must thus ensure that you have access to a reliable Internet connection.
After the DISM scan is complete, restart your computer to verify if the 8024200d error has been addressed.
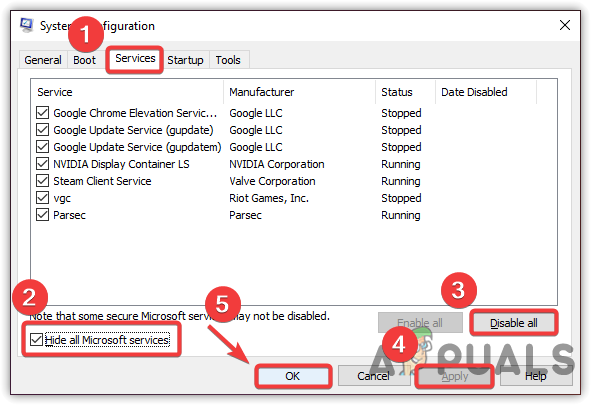
5. Install Update in Clean Boot Mode
It’s also possible that you’re dealing with this issue due to a scenario where a 3rd party application, startup item or service that is interfering with the Windows Update procedure.
If this scenario is applicable, one way to get around the 8024200d error is to is to achieve a clean boot state before attempting to install the update again.
Note: A clean boot forces your system to load just the required Windows apps and services. Once the clean boot state has been reached, no third-party services, processes, or starting items will be permitted to run.
Here’s a quick guide on achieving a clean boot state before reinstalling the problematic update that’s triggering the 8024200d error:
- Follow the steps outlined in this article to achieve a clean boot state.

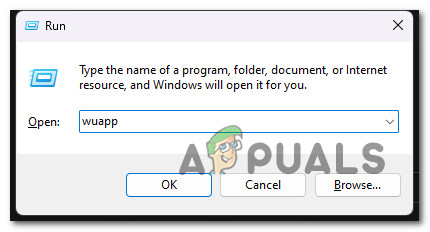
Achieve a clean boot state - Once you restart your PC in clean boot mode, press Windows key + R to open up a Run dialog box.
- Next, type ‘wuapp’ inside the text box of Run, then press Ctrl + Shift + Enter to open up an elevated Windows Update instance.
Open up the Windows update menu via Run box Note: This command will only work for Windows 7. If you’re on Windows 10 or Windows 11, use ‘ms-settings:windowsupdate’ instead.
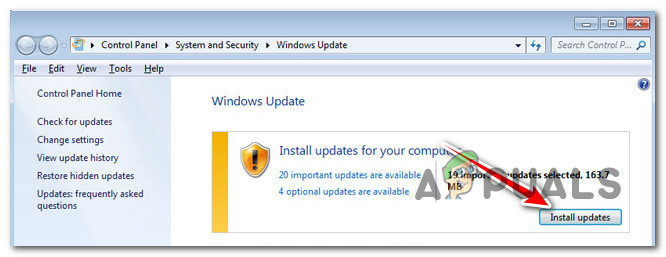
- Inside the Windows Update screen, click on Check for Updates.
- If the problematic update is available to install again, click on Install updates and see if it installs without the same 8024200d error.

Install pending updates
6. Delete Update logs & reinstall the update
Inconsistent WU log files can also cause this error. This is even more likely you have multiple updates that are all failing with the 8024200d and you started to experience this issue after an unexpected system shutdown while the update was installing.
In this case, you’re probably dealing with an issue affecting the integrity of servicing packages, manifests or WU underlying components.
To address this issue, you’ll need to access a series of hidden directories and delete the update logs before retrying the update.
Here’s how to do this:
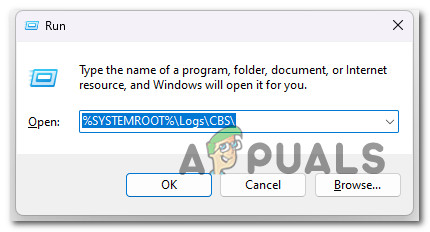
- Press Windows key + R to open up a Run dialog box.
- Next, type ‘%SYSTEMROOT%\Logs\CBS\’ and press Ctrl + Shift + Enter to the first hidden folder with admin access.
Open up the CBS folder - At the User Account Control (UAC), click Yes to grant admin access.
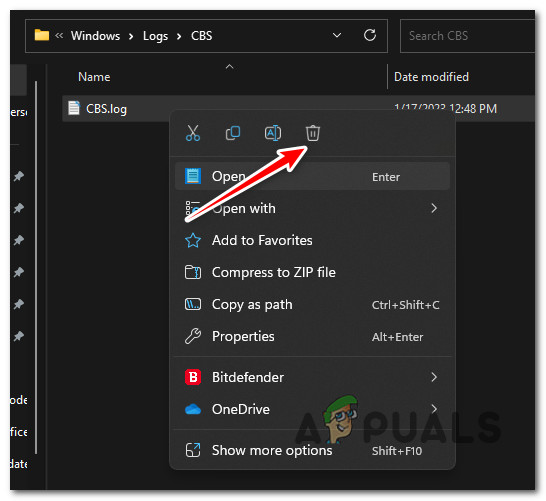
- Inside the location, delete the cbs.log by right-clicking on it and clicking Delete from the context menu.

Deleting the CBS log Note: If the CBS folder contains a secondary log file named CheckSUR.log delete that as well.
- Once both files have been deleted, restart your PC and see if the problem is now fixed.
7. Perform a repair install
If you’ve come this far and you still can get past the 8024200d and install the pending update, you are likely dealing with file corruption that you will not be able to fix without replacing the entire suite of Windows files.
In this case, doing an in-place repair (repair install) or a clean installation are your only options on getting back to a state where Windows is able to install pending updates automatically.
A clean installation is a simpler option, but the main disadvantage is that you cannot preserve your data – including applications, games, and personal files (unless you back them out first).
If you’re looking for a method to save you from losing data, go for a repair install procedure. The main advantage is that you get to keep your data, including applications, games, files present on the OS drive and even certain user preferences.
-
Home
-
News
- How to Repair Windows Update Error 8024200d on Your PC
By Alin |
Last Updated
Some users reported that they encountered the error code 8024200d when trying to install some Windows updates like KB2930275, KB2925418, KB2929961, or KB2929733. How to fix this issue? This post of MiniTool Partition Wizard will give you the answers.
I have been unsuccessful in installing Windows updates KB2925418, KB2929961, KB2930275, and KB2929733. All fail with error 8024200d.
—from Microsoft Community
The Windows update error 8024200d (WU_E_UH_NEEDANOTHERDOWNLOAD) most commonly appears on Windows 7, but it can also occur on other versions of Windows. It indicates that the Windows Update handler can’t install the update because the update downloaded is invalid and damaged.
What Causes the Error Code 8024200d
The Windows update error may occur for various reasons. Here, we summarize some possible causes, such as:
- Corrupted system files
- Corrupted Windows Distribution folder
- Problematic installation of programs
- Virus or malware attacks
You can try the methods below to fix the error code 8024200d.
Way 1. Disable Third-Party Security Software
Some antivirus programs or firewall settings may interfere with Windows updates and cause the error code 8024200d3. To fix this issue, you can temporarily disable your security software and try to install the update again.
Way 2. Run the Windows Update Troubleshooter
You can follow the steps below to run the Windows Update troubleshooter to diagnose and fix common problems with Windows updates.
Step 1. Go to Settings > Update & Security > Troubleshoot > Additional troubleshooters.
Step 2. Then click Windows Update and select Run the troubleshooter.
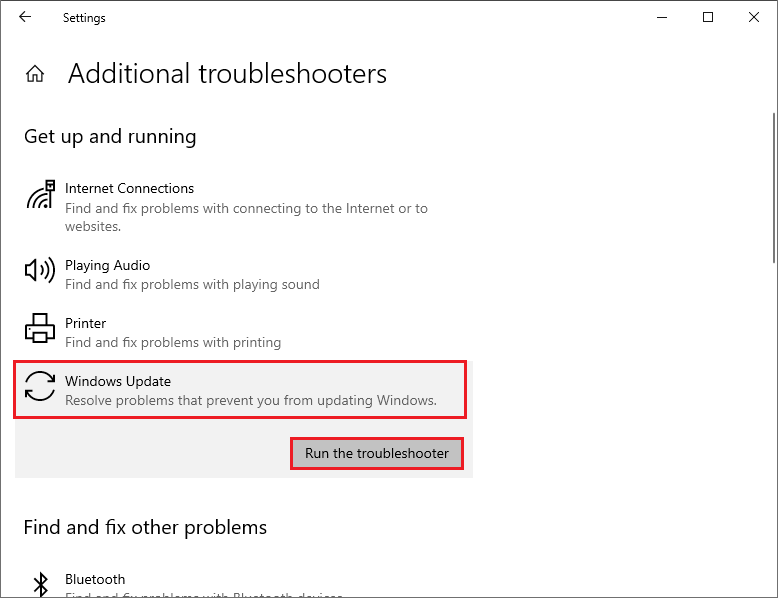
Step 3. In the pop-up window, follow the on-screen wizard to complete troubleshooting. Once done, restart your system and view if the error disappears.
Way 3. Run SFC and DISM
To get rid of the Windows update error 8024200d, you can run SFC and DISM to repair corrupted system files.
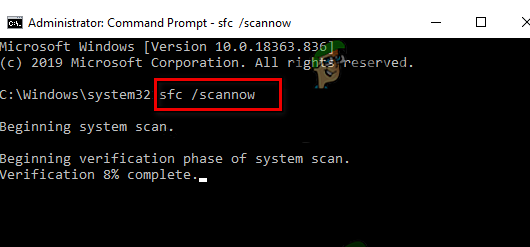
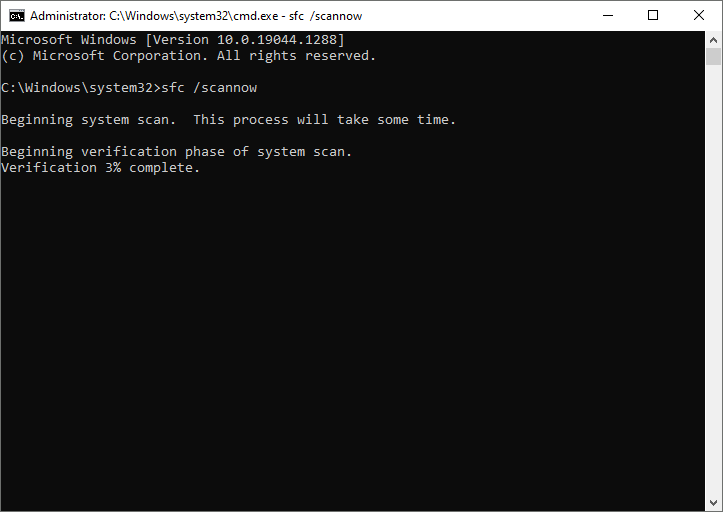
Step 1. Press Win + R to open the Run dialog box. Then type cmd and press Ctrl + Shift + Enter to run Command Prompt as administrator.
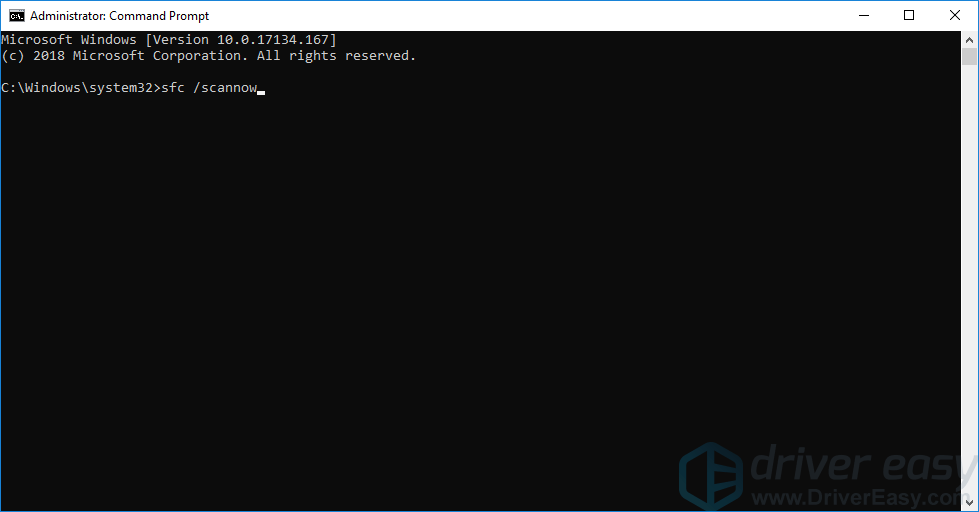
Step 2. Type sfc /scannow and press Enter to run SFC. Once the process ends up, reboot your computer.
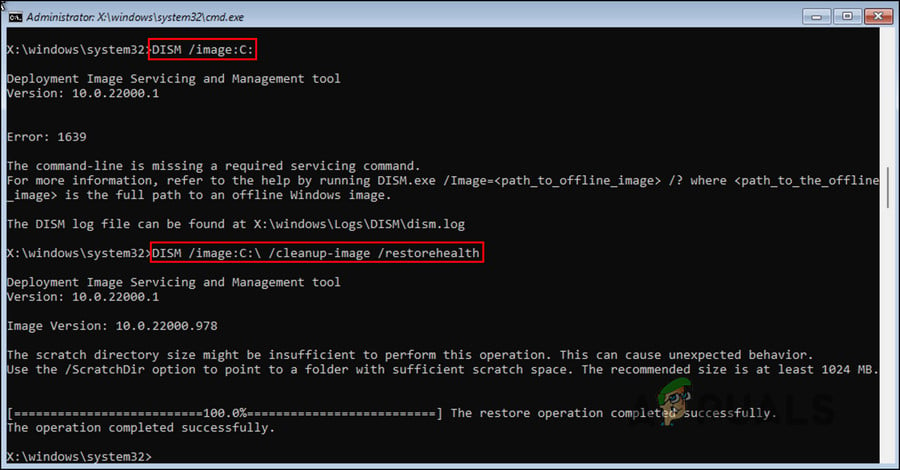
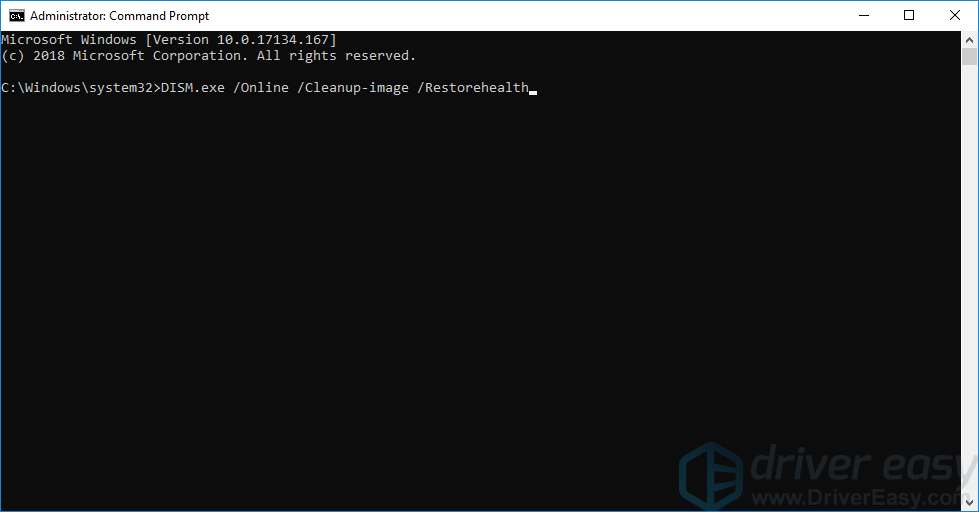
Step 3. If the issue still exists, run Command Prompt as administrator again, type the following commands, and press Enter after each one to run DISM.
DISM /Online /Cleanup-Image /CheckHealth
DISM /Online /Cleanup-Image /ScanHealth
DISM /Online /Cleanup-Image /RestoreHealth
Way 4. Reset the Windows Update Components
Another possible cause of the Windows update error 8024200d is that the services that handle the update and download process are not working properly. You can try to restart this service with this guide: How to Reset Windows Update Components in Windows 11/10?
Way 5. Clear and Expand the System Partition If Necessary
You can check if your system partition has enough free space to install the update. The system partition is usually labeled as C: in File Explorer. If it is almost full, the error code 8024200d may happen. You can use MiniTool Partition Wizard – a professional partition manager to resize your system partition and allocate more space to it.
Click the following button to download and install MiniTool Partition Wizard and then follow this guide: How to Make Windows System Partition Bigger? Solutions Are Here.
MiniTool Partition Wizard FreeClick to Download100%Clean & Safe
Way 6. Manually Download and Install the Update
If none of the above methods works, you can try manually downloading and installing the latest Windows updates by using Media Creation Tool or from Microsoft Update Catalog. You can follow this guide: [Tutorial] How to Download & Install Windows 10 Updates Manually.
In addition to the above methods, you can try installing the update in Clean Boot mode or uninstalling recently installed software to fix the error code 8024200d.
Conclusion
Is this post helpful to you? Do you have any suggestions or other nice methods to fix the Windows update error 8024200d? You can feel free to share them with us in the following comment part.
About The Author
Position: Columnist
Alin is a new member of MiniTool. Her articles are mainly about disk & partition management, data recovery, and hard disk issues. She is enthusiastic about acquiring computer knowledge and helping users to solve problems with computers. To provide more useful and professional solutions, she will keep learning and know more computer knowledge.
Ошибка 8024200D — системная ошибка, которая возникает при сбое в работе Центра обновления Windows.
Причиной ошибки 8024200D могут быть:
- Конфликт DNS;
- Конфликт системного уровня.
Иногда при индивидуальных настройках антивирусов или программ, выявляющих вредоносные ПО и блокирующих рекламу, можно заодно заблокировать установку обновлений Windows. В таком случае нужно временно отключить антивирус, вернуться к стандартным настройкам, либо переустановить программы.
Следующим шагом нужно сделать проверку системных файлов Windows для восстановления поврежденных или отсутствующих.
- Нажмите клавишу Windows на клавиатуре + R;
- Введите команду cmd;
- Нажмите «ОК».
Перед вами откроется консоль командной строки Windows. В ней введите команду:
Sfc / scannow
Просто скопируйте ее отсюда и вставьте, нажав после «ОК».
Если это не помогло воспользуйтесь следующими рекомендациями.
Проблемы
При попытке воспроизведения файла в формате AVI в проигрывателе Windows Media может появиться следующее сообщение об ошибке:
Ошибочный формат файла = 8004022F
Не удается воспроизвести файл. Формат не поддерживается. Error=80040265
Не удается воспроизвести поток видео: не удается найти подходящую программу сжатия. Error=80040255
Для отрисовки потока не может быть найдено сочетание фильтров. Error=80040218
Не удалось загрузить фильтр источника для этого файла. Error=80040241
Проигрывателю Windows Media не удается открыть файл. Для завершения установки загруженного компонента может потребоваться перезагрузка. Убедитесь, что путь и имя файла указаны правильно, и повторите попытку. Error=80004005
Не удалось найти один или несколько кодеков, необходимых для открытия этого содержимого. Error=C00D10D1
Видео недоступно, не удается найти декомпрессор «VID:XXXX«.
Не удается загрузить подходящую ошибку распаковки = 80040200
Данная статья рассчитана на начинающих пользователей компьютера и пользователей со средним уровнем подготовки.
Причина
Если вы создаете видеофайлы, их можно сжать, чтобы уменьшить размер файла с помощью программы (или компрессора), установленной на компьютере разработчика. При воспроизведении видеофайла на вашем компьютере должна быть установлена программа десжатия для чтения определенного формата сжатия. Эта программа называется кодеком. При попытке воспроизвести файл, использующий кодек, который не установлен на компьютере, проигрыватель Windows Media пытается загрузить кодек с сервера Microsoft. Если кодек доступен, проигрыватель Windows Media устанавливает его на свой компьютер, а затем воспроизводит файл. Тем не менее, если кодек недоступен на сервере (например, если кодек не был создан корпорацией Майкрософт), в проигрывателе Windows Media появляется сообщение о том, что на компьютере отсутствует кодек. В некоторых случаях файл, который вы хотите воспроизвести, использует кодек, недоступный или несовместимый с проигрывателем Windows Media. В этом случае вы не сможете использовать проигрыватель Windows Media для воспроизведения этого файла в формате AVI.
Решение
Чтобы устранить эту проблему, найдите и скачайте требуемый кодек. Прежде чем начать, необходимо знать, какая версия Windows установлена на компьютере. Чтобы определить, какая версия Windows установлена на компьютере. Чтобы убедиться в том, что вы вошли в Windows с помощью учетной записи администратора компьютера, посетите веб-сайт корпорации Майкрософт по следующему адресу:
http://support.microsoft.com/gp/adminЗатем вы должны знать версию проигрывателя Windows Media. Если вы используете Windows Vista, вы используете проигрыватель Windows Media 11. Если вы используете Windows XP, ознакомьтесь со справкой, которая входит в состав проигрывателя Windows Media и найдите ее версию. После того как вы определите, какая версия проигрывателя Windows Media установлена на вашем компьютере, перейдите к разделу для операционной системы и проигрывателя Windows Media.Примечание. Если вы используете версию проигрывателя Windows Media более ранней, чем 6,4, перейдите к маркеру «более ранние версии проигрывателя Windows Media» в разделе «дальнейшие действия», чтобы получить справку.
Если вы используете Windows Vista
В некоторых случаях сообщение об ошибке в проигрывателе Windows Media предоставит сведения о требуемом коде кодеков. Сообщение об ошибке также может содержать ссылку, которую можно щелкнуть, чтобы скачать файл кодека. Поэтому для устранения проблемы воспроизводите файл в формате AVI и проверяйте сообщение об ошибке с помощью проигрывателя Windows Media. Чтобы устранить эту проблему, выполните указанные ниже действия.
-
Дважды щелкните нужный файл в формате AVI, который будет воспроизводиться проигрывателем Windows Media. Появляется сообщение об ошибке, похожее на следующее:
Проигрыватель Windows Media обнаружил ошибку. Щелкните значок, чтобы получить дополнительные сведения
-
Нажмите кнопку сведения об ошибке , чтобы получить следующее сообщение:
Для воспроизведения этого файла требуется кодек
-
Нажмите кнопку Справка на веб-сайте , чтобы отобразить сведения о отсутствующем коде и соответствующей ссылке, если кодек доступен для загрузки.Примечание. Если ссылка на кодек недоступна, попробуйте найти нужный кодек в Интернете. Если вы не можете определить, какой кодек вам необходим, или вы не можете найти его, возможно, кодек недоступен. Или может быть несовместим с проигрывателем Windows Media. Таким образом, вы не можете использовать проигрыватель Windows Media для воспроизведения этого файла в формате AVI.
-
После загрузки соответствующего файла кодека воспроизводится в формате AVI, чтобы узнать, устранена ли проблема.
Если при воспроизведении файла в формате AVI по-прежнему возникают проблемы, перейдите к разделу «дальнейшие действия», чтобы найти другие ресурсы, которые помогут вам устранить эту проблему.
Если вы используете Windows XP с проигрывателем Windows Media 11, проигрывателем Windows Media 10 или проигрывателем Windows Media 9
В некоторых случаях сообщение об ошибке в проигрывателе Windows Media предоставит сведения о том, какой файл кодека требуется. Сообщение об ошибке также может содержать ссылку, которую можно щелкнуть, чтобы скачать файл кодека. Поэтому для устранения проблемы воспроизводите файл в формате AVI и проверяйте сообщение об ошибке с помощью проигрывателя Windows Media. Чтобы устранить эту проблему, выполните указанные ниже действия.
-
Дважды щелкните нужный файл в формате AVI, который будет воспроизводиться проигрывателем Windows Media.
-
В разделе сейчас воспроизведениищелкните правой кнопкой мыши восклицательный знак перед именем файла и выберите пункт сведения об ошибке.
-
Нажмите кнопку Справка на веб-сайте , чтобы отобразить сведения о отсутствующем коде и соответствующей ссылке, если кодек доступен для загрузки.Примечание. Если ссылка на кодек недоступна, попробуйте найти нужный кодек в Интернете. Если вы не можете определить, какой кодек вам необходим, или вы не можете найти его, возможно, кодек недоступен. Или может быть несовместим с проигрывателем Windows Media. Таким образом, вы не можете использовать проигрыватель Windows Media для воспроизведения этого файла в формате AVI.
-
После загрузки соответствующего файла кодека воспроизводится в формате AVI, чтобы узнать, устранена ли проблема.
Если при воспроизведении файлов в формате AVI по-прежнему возникают проблемы, ознакомьтесь с разделом «дальнейшие действия», чтобы найти другие ресурсы, которые помогут вам устранить эту проблему.
Если вы используете Windows XP с проигрывателем Windows Media 7,1, проигрывателем Windows Media 7 или проигрывателем Windows Media 6,4
В некоторых случаях сообщение об ошибке содержит идентификатор кодека, известный как идентификатор FourCC. Вы можете использовать идентификатор FourCC для поиска изготовителя, который создал кодек. Затем посмотрите, можете ли вы получить требуемый кодек от изготовителя. Чтобы устранить эту проблему, выполните указанные ниже действия.
-
В меню Пуск выберите пункт Выполнить. Скопируйте и вставьте (или введите) в поле Открыть указанную ниже команду и нажмите клавишу ВВОД.
mplay32.exe
-
В меню файл выберите команду Открыть, найдите нужный файл в формате AVI, а затем перетащите его в проигрыватель Windows Media.
-
При появлении сообщения об ошибке Проверьте идентификатор FourCC. Если доступен идентификатор FourCC, обратите внимание на его. Четыре символа, следующие за «VID:» или «vidc:» — уникальный идентификатор FourCC, который можно использовать для поиска кодека для этого конкретного файла. AVI. Например, если строка имеет значение «VID: VCR2», «VCR2» — идентификатор FourCC.Примечание. Если идентификатор FourCC не указан в сообщении об ошибке, к сожалению, вы не можете использовать проигрыватель Windows Media для воспроизведения этого файла в формате AVI.
-
Посетите веб-сайт, а затем щелкните Видеокодеки, расположенные в разделе Общие сведения о содержимом страницы.
http://www.fourcc.org/
-
С помощью идентификатора FourCC найдите изготовителя, который создал кодек. В действии 3 например, идентификатор FourCC был «VCR2». Следовательно, выполните поиск по слову «VCR2» в столбце FOURCC, чтобы найти кодек и производителя. В этом примере вы заметите, что в качестве имени кодека видеокодека ATI 2 отображается в виде названия, а в качестве владельца (или производителя) указаны «технологии ATI». Если вы не можете найти кодек или изготовителя, попробуйте воспользоваться идентификатором FourCC для поиска кодека и производителя в Интернете.Примечание. Имейте в виду, что не все производители предоставляют свои кодеки для загрузки. Если вам не удается получить требуемый кодек от производителя, вы не сможете использовать проигрыватель Windows Media для воспроизведения этого файла в формате AVI.
-
Если на этом веб-сайте указана ссылка на производителя, обратитесь за помощью к изготовителю для получения необходимого кодека. Если ссылка на производителя недоступна, попробуйте найти контактные данные производителя в базе знаний Майкрософт.Для получения сведений о том, как связаться с производителем, щелкните соответствующий номер статьи в приведенном ниже списке, чтобы просмотреть статью в базе знаний Майкрософт.
65416 Контактная информация поставщика оборудования и программного обеспечения60781 , Контактная информация поставщика оборудования и программного обеспечения, L-P60782 оборудования и программного обеспечения, Контактная информация, Q-Z.Корпорация Майкрософт предоставляет контактные данные третьих лиц, которые помогут вам найти техническую поддержку. Эти контактные данные могут быть изменены без предварительного уведомления. Корпорация Microsoft не гарантирует точность этой сторонней контактной информации. Если ссылка на изготовителя недоступна на веб-сайте Microsoft Knowledge Base, попробуйте найти ее в Интернете.
-
После загрузки соответствующего файла кодека воспроизводится в формате AVI, чтобы узнать, устранена ли проблема.
Если при воспроизведении файлов в формате AVI продолжает возникать проблемы, перейдите к разделу «дальнейшие действия», чтобы найти другие ресурсы, которые помогут вам устранить эту проблему.
ДАЛЬНЕЙШИЕ ДЕЙСТВИЯ
Если эти способы вам не помогли, вы можете попросить кого-то о помощи. Вы также можете посетить веб-сайт устранения неполадок для установленной версии проигрывателя Windows Media. Для получения дополнительных сведений об устранении неполадок проигрывателя Windows Media посетите указанные ниже веб-сайты Майкрософт.
-
Проигрыватель Windows Media 11 для Windows Vista
http://www.microsoft.com/windows/windowsmedia/player/windowsvista/troubleshooting.aspx
-
Проигрыватель Windows Media 11 для Windows XP
http://www.microsoft.com/windows/windowsmedia/player/11/troubleshooting.aspx
-
Проигрыватель Windows Media версии 10 и более ранних версий
http://www.microsoft.com/windows/windowsmedia/player/previousversions.aspx
Вы также можете использовать веб-сайт службы поддержки пользователей Майкрософт для поиска других решений проблемы. Ниже указаны некоторые услуги, которые предлагаются на этом веб-сайте.
-
База знаний с возможностью поиска: поиск технических сведений и рекомендаций по самостоятельному разрешению вопросов, связанных с продуктами Майкрософт.
-
Центры решений: список часто задаваемых вопросов и советов службы поддержки по отдельным продуктам.
-
Прочие виды поддержки: здесь можно отправить вопросы или отзывы, а также обратиться в службу поддержки пользователей Майкрософт через Интернет.
Если после посещения указанных веб-сайтов Майкрософт остались вопросы или не удалось найти решение на веб-сайте службы поддержки Майкрософт, свяжитесь со службой поддержки по следующей ссылке:
http://support.microsoft.com/contactus
Дополнительная информация
Имейте в виду, что файлы в формате AVI могут содержать несколько различных звуковых и видеофайлов. Для воспроизведения файла в формате AVI необходимо использовать проигрыватель файлов в формате AVI и подходящий файл кодека, чтобы распаковать AVI. Для получения дополнительной информации щелкните приведенные ниже номера статей базы знаний Майкрософт:
230687 Сообщение об ошибке: не удается загрузить подходящую программу сжатия
Корпорация Microsoft не поддерживает воспроизводимые файлы формата AVI, созданные с помощью кодека MPEG4 версии 3. Для получения дополнительной информации щелкните приведенные ниже номера статей базы знаний Майкрософт:
316992 Форматы файлов мультимедиа для проигрывателя Windows Media
230687 Сообщение об ошибке: не удается загрузить подходящую программу сжатия
291818 Автоматическая загрузка кодеков в проигрывателе Windows Media для Windows XP
842186 В проигрывателе Windows Media появляется сообщение об ошибке «не удается загрузить соответствующий декомпрессор»
If you’re seeing an error code 0x8024200d when performing a Windows update, you’re not alone. Many Windows users are reporting it. This error code usually appears when they try to update to a new build of the Windows system. The reason behind it is that some updated files are missing or corrupted.
The good news is you can fix it. You should be able to fix the problem quite easily using one of the solutions we’ve listed below. You may not have to try them all. Just work your way down the list until you find the one that works.
- Running the Windows Update Troubleshooter
- Restarting the Windows Update service
- Running System File Checker
- Downloading updates from Microsoft Update Catalog manually
Method 1: Running the Windows Update Troubleshooter
You can download and run the Windows Update Troubleshooter to automatically diagnose and resolve any issues regarding Windows Update.
1) Click here to download the Windows Update Troubleshooter.
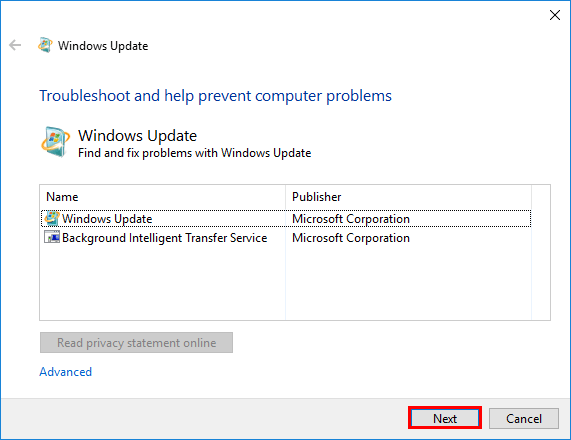
2) Double-click the downloaded file (WindowsUpdate.diagcab) to run the troubleshooter, and then click Next.
If your current operating system is Windows 7, you just need to wait until the troubleshooter finishes the process and shows you the process result. If your current operating system is Windows 8 or Windows 10, you may need to follow the steps below.
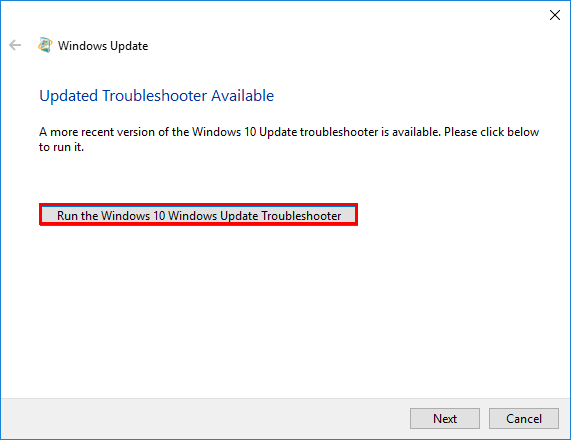
3) If there is a more recent version of Windows Update troubleshooter available, click to run it.
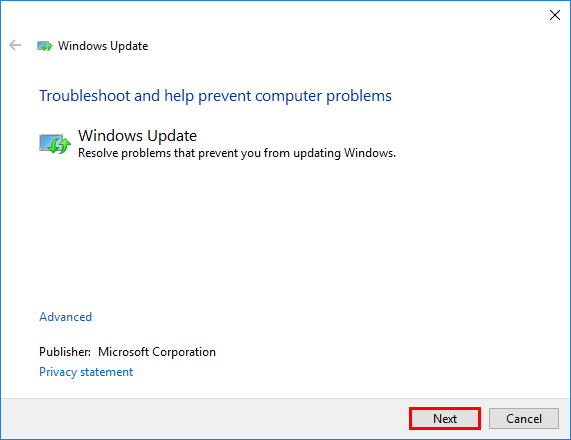
4) In the new version of Windows Update troubleshooter, Click Next. The troubleshooter will check the available updates for your machine.
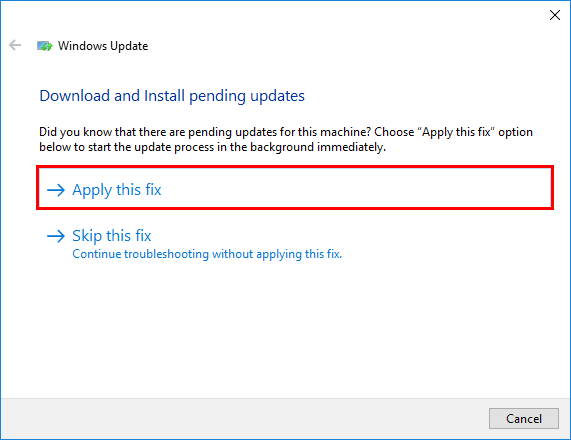
5) Click Apply this fix to start the update process in the background immediately.
The troubleshooter will try to fix the issue for you. You can restart your computer and try to perform the Windows update again. If it still doesn’t work, please try the next method.
Method 2: Restarting the Windows Update service
You may see this error code if there is something wrong with the Windows Update service. You can try to restart the Windows Update service to resolve this problem. Here’s how to do it:
1) On your keyboard, press the Windows Logo key and R at the same time to open the Run dialog, then type services.msc and press Enter to open the Services window.
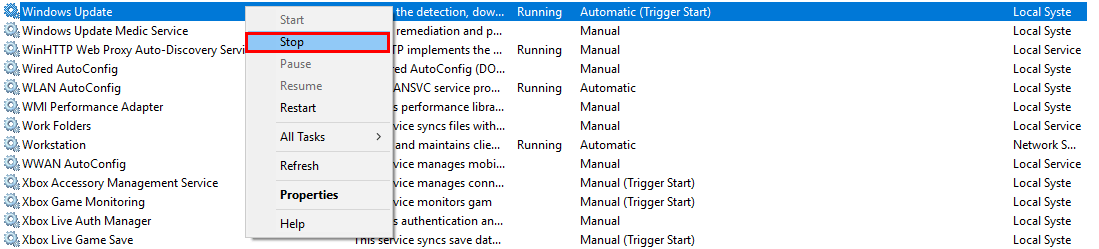
2) Right-click Windows Update and select Stop if its current status is “Running”. If the Windows Update service is not running, please skip this step.
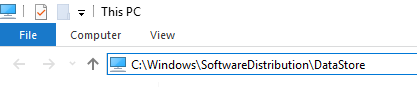
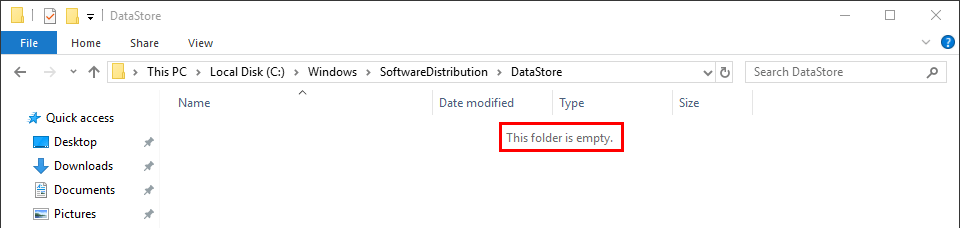
3) On your keyboard, press the Windows Logo Key and E at the same time to open File Explorer. Copy the path below and paste it into the address bar, then press Enter on your keyboard to go to the DataStore folder.
C:\Windows\SoftwareDistribution\DataStore
4) Delete all the files in the folder DataStore.
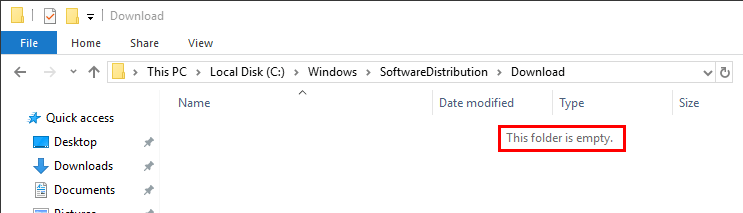
5) On your keyboard, press the Windows Logo Key and E at the same time to open File Explorer. Copy the path below and paste it into the address bar, then press Enter on your keyboard to open the Download folder.
C:\Windows\SoftwareDistribution\Download
6) Delete all the files in the folder Download.
7) In the Services window, right-click Windows Update and select Start.
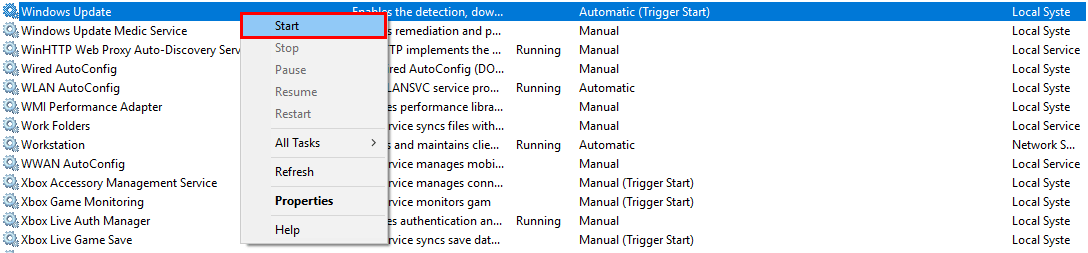
Go and check Windows Update again to see whether you can perform the Windows update or not. If it still doesn’t work, please try the next method.
Method 3: Running System File Checker
System File Checker can scan for corruptions in Windows system files and restore corrupted files. When you fail to install Windows updates, it may be caused by some corruption error. In this case, running System File Checker may help you resolve this issue.
1) On your keyboard, press the Windows Logo Key and then type cmd in the search box. When you see Command Prompt in the list of results, right-click it and then select Run as administrator. You will be prompted for permission. Click Ok to run the Command Prompt.
2) On your keyboard, type the command below and press Enter. If your current operating system is Windows 7, please skip this step.
DISM.exe /Online /Cleanup-image /Restorehealth
It may take several minutes for this command operation to be completed.
3) When this command operation is completed, on your keyboard, type the following command and press Enter.
sfc /scannow
It may take some time for the command operation to be completed.
4) When this command operation is completed, close the Command Prompt and run Windows Update again to check whether this method works or not. If you still fail to install updates for your Windows system, please try the next method.
Method 4: Downloading updates from Microsoft Update Catalog manually
If all the methods mentioned above still don’t work for you, you can try to download the updates you failed to install from Microsoft Update Catalog and install them manually.
1) On your keyboard, press the Windows Logo Key and type Windows Update, and then press Enter to open Windows Update.
2) Click View update history to check the updates you failed to install. For example, if you fail to install update KB3006137, you can download the update and install it manually.
3) Follow the instructions below to view your system type:
i. On your keyboard, press the Windows Logo key and R at the same time to open the Run dialog. Type cmd and press Enter to open the Command Prompt.
ii. Type the command line systeminfo and press Enter to view your system type.

“X64-based PC” indicates that your Windows OS is 64-bit; “X86-based PC” means that your Windows OS is 32-bit.
4) Visit Microsoft Update Catalog.
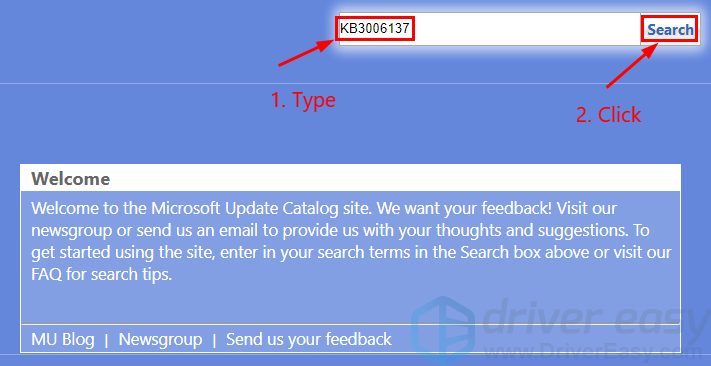
5) Type the update number that you want to download. In this example, type KB3006137 and then click Search.
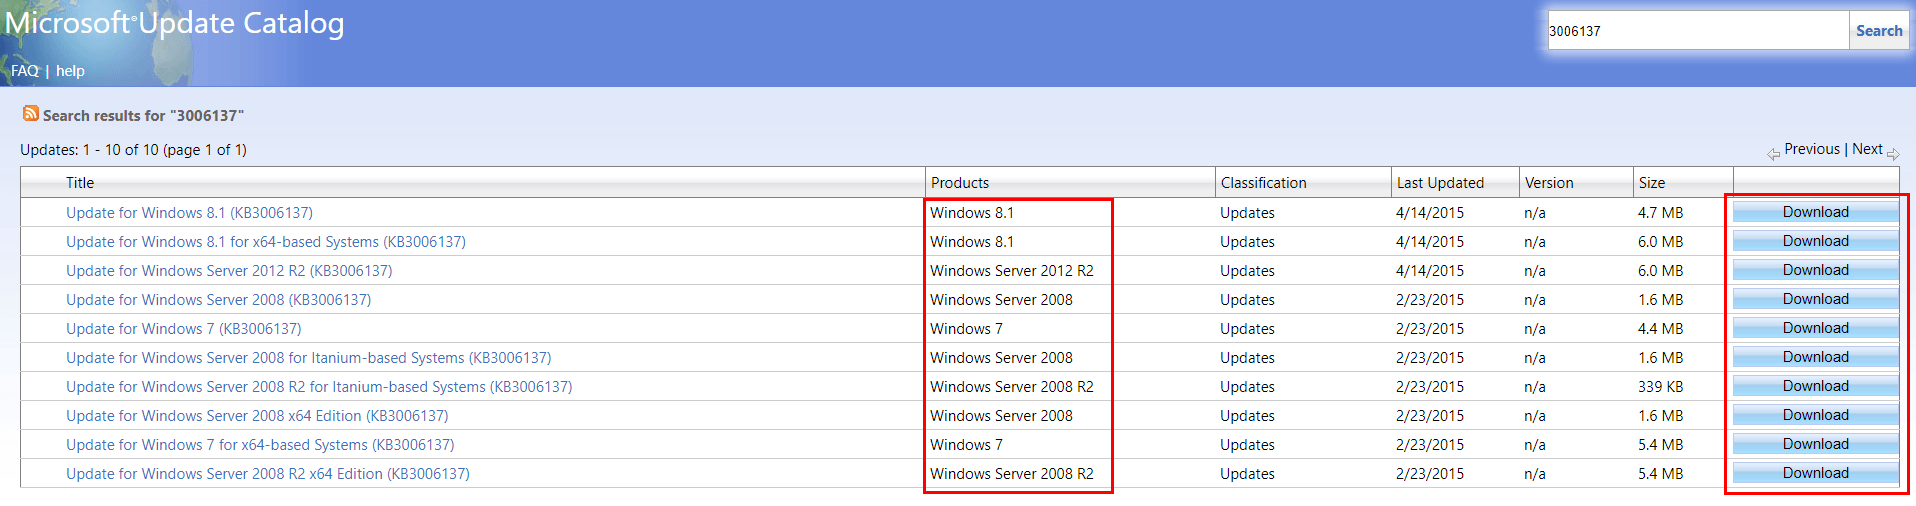
6) In the list of search results, select the right update for your operating system and click Download.
If your Windows OS is 64-bit, you should download the update whose name contains “x64-based”.
7) In the pop-up window, click the link to start downloading the updates.
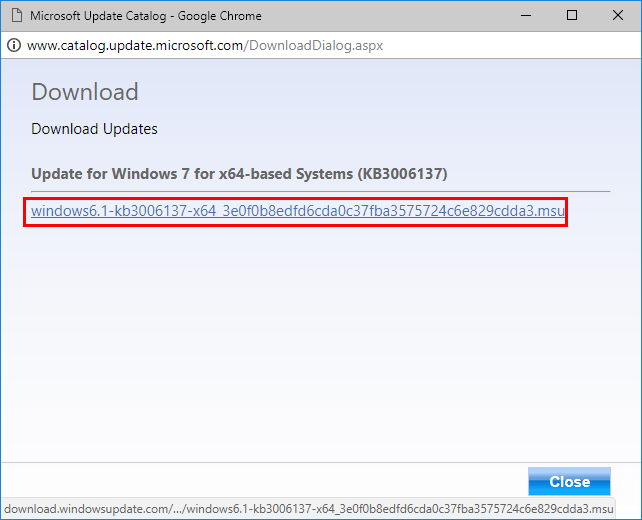
 Double-click the downloaded file and follow the on-screen instructions to install the update.