
Последнее обновление: 12.10.2023
NASM является кроссплатформенным ассемблером, который доступен в том числе и на Windows. Рассмотрим, как использовать NASM на Windows.
Установка
Для работы с NASM нам надо установить непосредственно сам ассемблер. Для этого на официальном сайте перейдем на страницу https://www.nasm.us/pub/nasm/releasebuilds/2.16.01/win64/,
где находятся файлы ассемблера NASM версии 2.16.01 для 64-разрядной версии Windows:
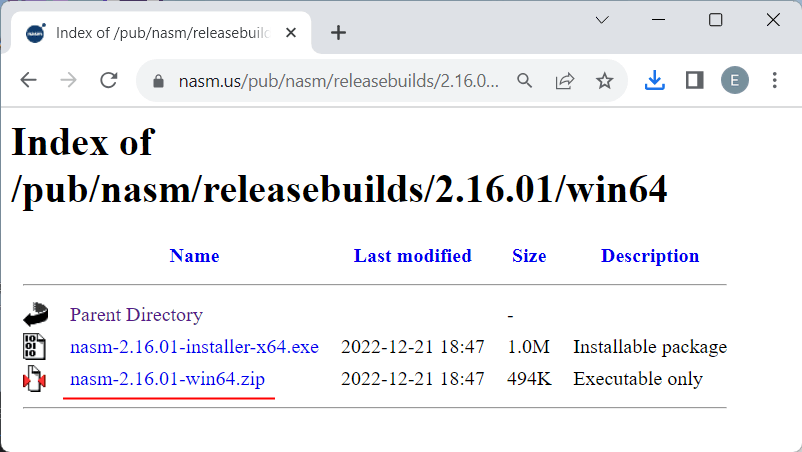
Здесь нам доступен ассемблер в виде двух пакетов. Один пакет установщика (nasm-2.16.01-installer-x64.exe), а второй — архив (nasm-2.16.01-win64.zip).
Загрузим zip-архив.. Например, загрузим zip-архив и после загрузки распакуем его. В папке распакованного архива мы можем найти два файла
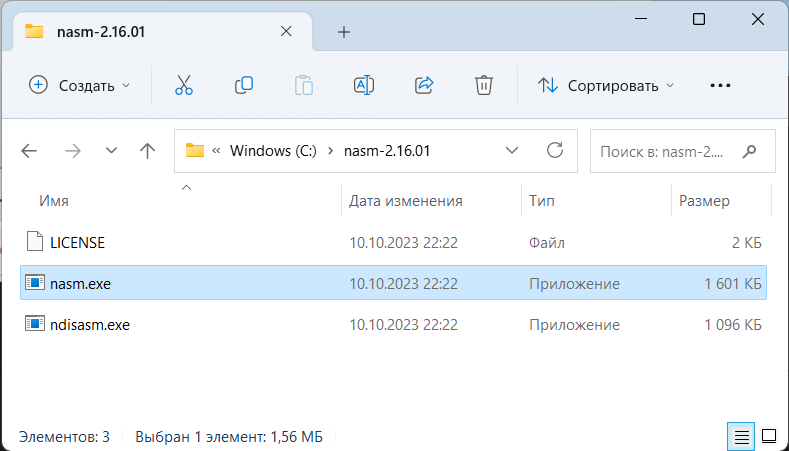
Это прежде всего сам ассемблер — файл nasm.exe и дизассемблер — файл ndisasm.exe
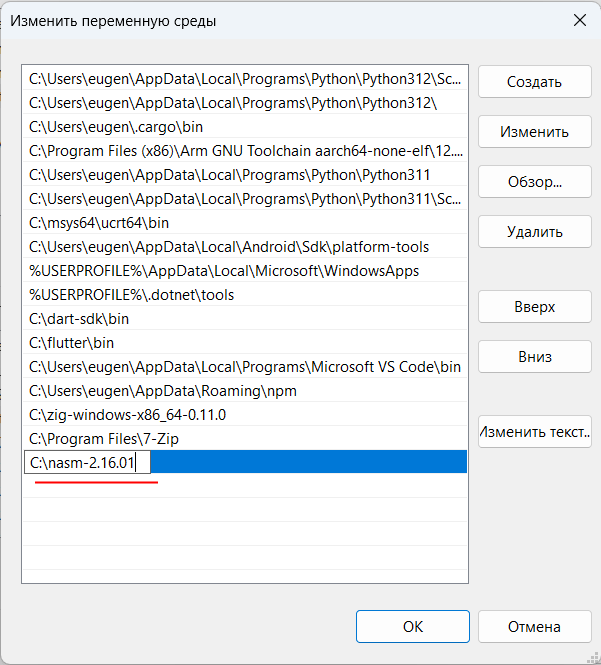
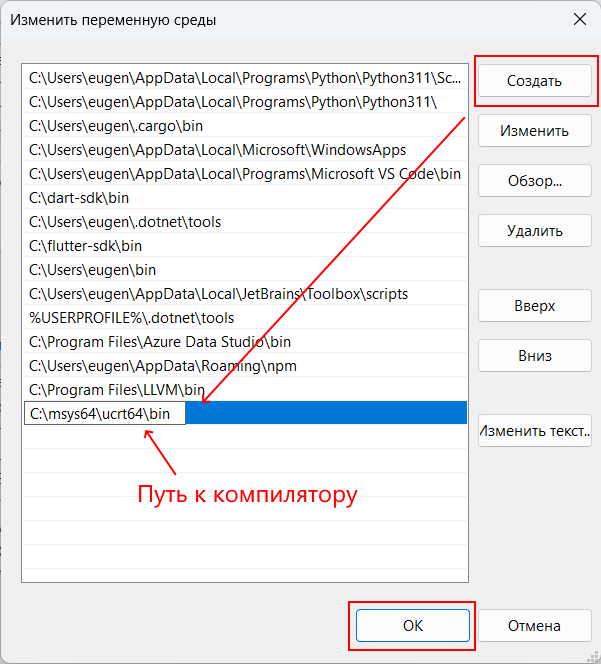
Чтобы не прописывать весь путь к ассемблеру, занесем его в переменные среды. Для этого можно в окне поиска в Windows ввести «изменение переменных среды текущего пользователя»:
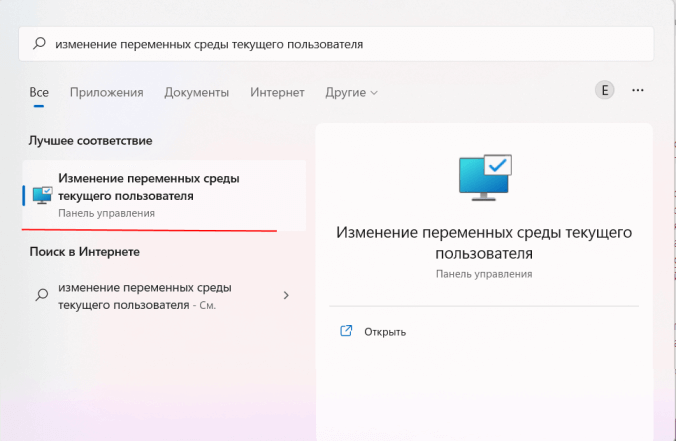
Нам откроется окно Переменныех среды:
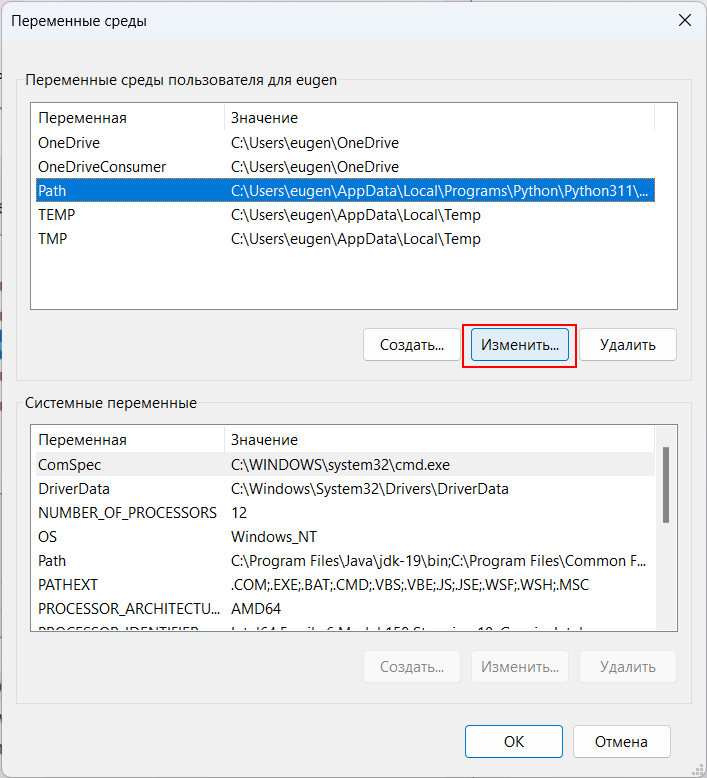
И добавим путь к ассемблеру. Например, в моем случае архив ассемблера распакован в папку C:\nasm-2.16.01, соответственно я указываю
в переменной Path среды эту папку:
Если все настроено правильно, то мы можем запустить командную строку и с помощью команды nasm -v узнать текущую версию ассемблера:
C:\Users\eugen>nasm -v
NASM version 2.16.01 compiled on Dec 21 2022

C:\Users\eugen>
Начало работы с NASM
Определим в файловой системе каталог для файлов с исходным кодом и создадим в нем следующий файл hello.asm:
global _start       ; делаем метку метку _start видимой извне

section .text       ; объявление секции кода
_start:             ; метка _start - точка входа в программу
    mov rax, 22     ; произвольный код возврата - 22
    ret             ; выход из программы
Рассмотрим поэтапно данный код. Вначале идет директива global:
global _start
Данная директива делает видимой извне определенную метку программы. В данном случае метку _start, которая является точкой входа в программу. Благодаря этому компоновщик при компоновке программы в исполняемый файл сможет увидеть данную метку.
Затем идет секция кода программы, которая и определяет выполняемые программой действия. Для определения секции применяется директива
section, после которой указывается имя секции. Причем секция кода программы должна называться .text.
section .text
Далее собственно идет код программы. И он начинается с определения метки _start, на которую собственно и проецируется
программа. Сама по себе метка представляет произвольное название, после которого идет двоеточие. После двоеточия могут идти инструкции программы или определения данных.
Метка _start выступает в качестве точки входа в программу. Название подобной метки произвольное, но обычно это или _start или _main
Наша программа не производит какой-то феноменальной работы. Все что она делает — это помещает в регистр rax число 22 и завершается. Для помещения числа в регистр применяется инструкция
mov:
mov rax, 22
Инструкция mov помещает в первый операнд — регистр rax значение из второго операнда — число 22.
Затем идет вызов инструкции ret, которая завершает программу
ret
Кроме директив и инструкций, которые определяют действия программы, также следует отметить комментарии. Комментарии начинаются с точки с запятой ;. Комментарии не учитываются при компиляции,
никак не влияют на объект или работоспособность программы и нужны лишь в качестве текстового описания отдельных строк или блоков программы.
global _start ; делаем метку метку _start видимой извне - это текст комментария
Компиляция
Для компиляции откроем командную строку, перейдем в ней к папке с исходным кодом (где располагается файл hello.asm) и выполним следующую команду
nasm -f win64 hello.asm -o hello.o
Здесь с помощью опции -f указывается формат файла, в который мы хотим скомпилировать код.
Для 64-разрядной ОС Windows это — win64. После этого указывается файл, который мы хотим скомпилировать — наш файл hello.asm.
Затем опция -o hello.o указывает на имя скомпилированного файла. В результате выполнения этой команды будет создан объектный файл hello.o
Однако файл hello.o — это объектный файл, а не исполняемый. Он содержит машинный код, который понимает компьютер, но чтобы его можно было запускать как обычную
программу, его надо скомпоновать в исполняемый файл. И для этого нужна программа компоновщика (он же линковщик/линкер или linker).
Недостатком NASM является то, что он не предоставляет встроенного компоновщика. И нам надо использовать внешнюю программу компоновки. Где ее взять?
Далее я рассмотрю два варианта — использование компоновщика из пакета GCC и использование компоновщика компилятора Visual C/C++, который идет вместе с Visual Studio. Оба варианта равноценны.
Компоновка с помощью GCC
Вначале нам надо установить пакет GCC. Пакет компиляторов GCC для Windows не имеет какого-то одного единого разработчика, разные организации могут выпускать свои сборки. Для Windows одной из наиболее популярных версий GCC является пакет средств для разработки от
некоммерческого проекта MSYS2. Следует отметить, что для MSYS2 требуется 64-битная версия Windows 7 и выше (то есть Vista, XP и более ранние версии не подходят)
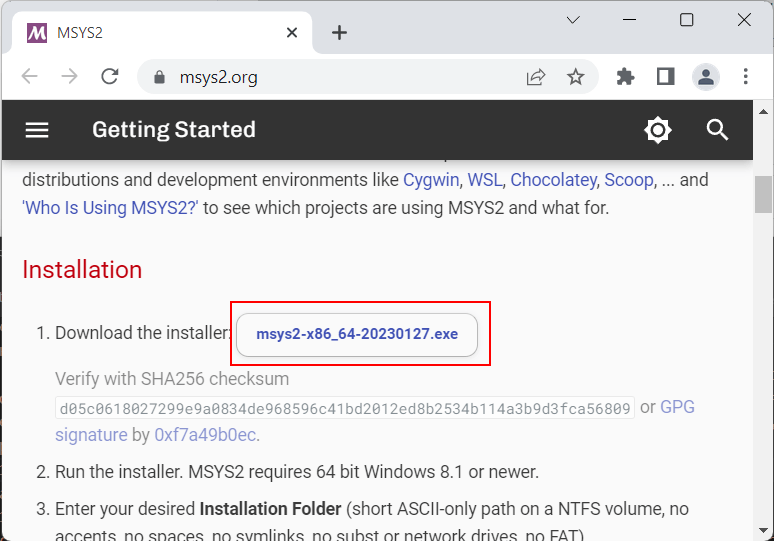
Итак, загрузим программу установки MSYS2 с официального сайта MSYS2:
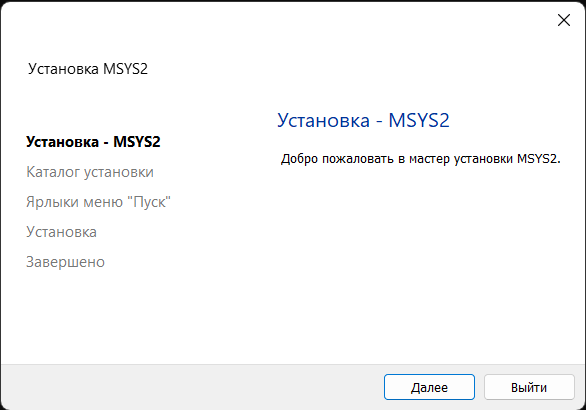
После загрузки запустим программу установки:
На первом шаге установки будет предложено установить каталог для установки. По умолчанию это каталог C:\msys64:
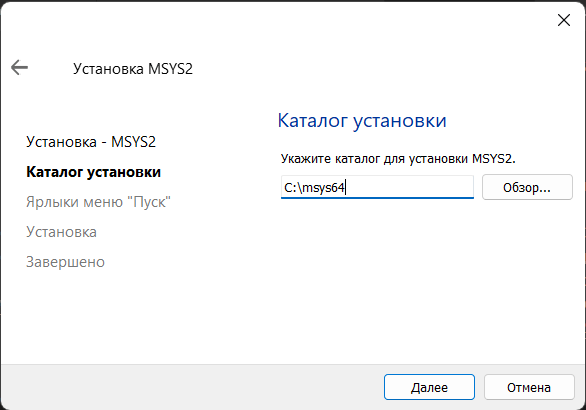
Оставим каталог установки по умолчанию (при желании можно изменить). На следующем шаге устанавливаются настройки для ярлыка для меню Пуск, и затем собственно будет произведена установка.
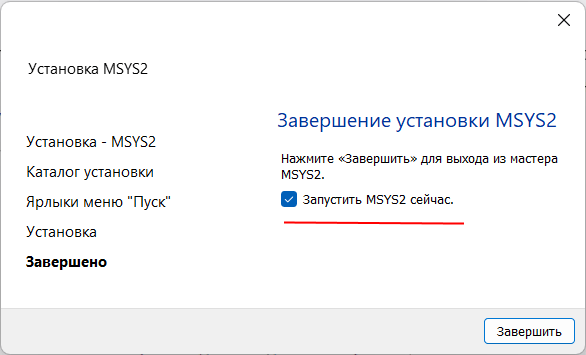
После завершения установки нам отобразить финальное окно, в котором нажмем на кнопку Завершить
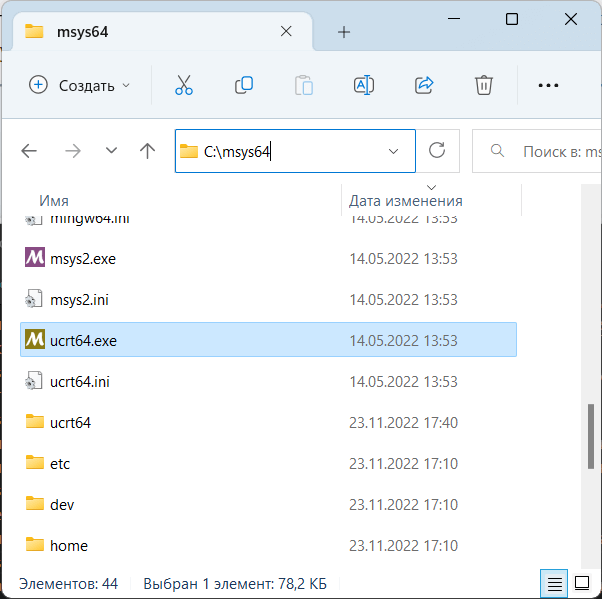
После завершения установки запустится консольное приложение MSYS2.exe. Если по каким-то причинам оно не запустилось,
то в папке установки C:/msys64 надо найти файл usrt_64.exe:
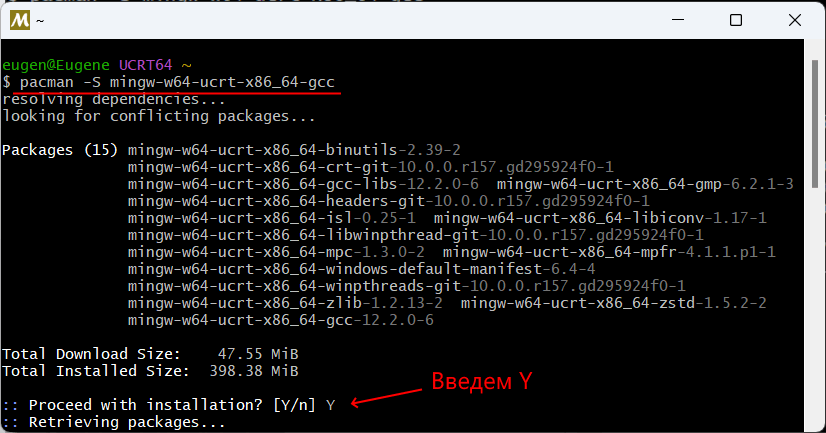
Теперь нам надо установить собственно набор компиляторов GCC. Для этого введем в этом приложении следующую команду:
pacman -S mingw-w64-ucrt-x86_64-gcc
Для управления пакетами MSYS2 использует пакетный менеджер Packman. И данная команда говорит пакетному менелжеру packman установить пакет mingw-w64-ucrt-x86_64-gcc,
который представляет набор компиляторов GCC (название устанавливаемого пакета указывается после параметра -S).
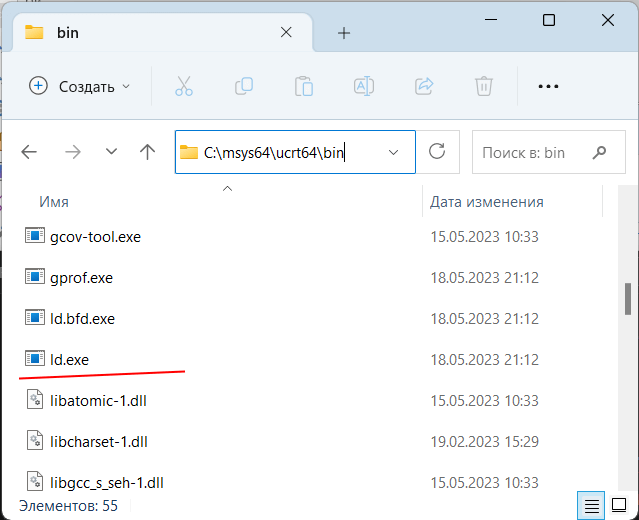
Если после завершения установки мы откроем каталог установки и зайдем в нем в папку C:\msys64\ucrt64\bin,
то найдем там файл компоновщика ld
Для упрощения запуска компоновщика мы можем добавить путь к нему в Переменные среды:
Чтобы убедиться, что нам доступен компоновщик GCC — программа ld, введем следующую команду:
ld --version
В этом случае нам должна отобразиться версия компоновщика
c:\asm>ld --version
GNU ld (GNU Binutils) 2.40
Copyright (C) 2023 Free Software Foundation, Inc.
This program is free software; you may redistribute it under the terms of
the GNU General Public License version 3 or (at your option) a later version.
This program has absolutely no warranty.

c:\asm>
Теперь скомпонуем файл hello.o в исполняемый файл hello.exe с помощью следующей команды:
ld hello.o -o hello.exe
Мы можем запустить этот файл, введя в консоли его название и нажав на Enter. Но наша программа ничего не выводит на консоль, поэтому после запуска программы мы ничего не увидим. Тем не менее
наша программа устанавливает регистр RAX. А значение этого регистра при завершении программы рассматривается в Windows как статусный код возврата, который сигнализирует, как завершилась программа (успешно или не успешно).
И мы можем этот статусный код получить, если после выполнения программы введем команду
echo %ERRORLEVEL%
И нам должно отобразится число 22 — значение регистра RAX. Полный консольный вывод:
c:\asm>nasm -f win64 hello.asm -o hello.o

c:\asm>ld hello.o -o hello.exe

c:\asm>hello.exe

c:\asm>echo %ERRORLEVEL%
22

c:\asm>
Установка компоновщика link.exe
Компоновщик от GCC — не единственный компоновщик, который можно использовать для компоновки программы на Windows. Еще один вариант представляет компоновщик
link.exe из пакета инструментов разработки для C/C++ для Visual Studio. Условным плюсом этого компоновщика может быть то, что его
разработчик — Microsoft, поэтому можно ожидать более лучшей интеграции с Windows. Поэтому также рассмотрим и этот способ.
Сперва нам надо установить для Visual Studio инструменты разработки для C/C++. Установщик для среды Visual Studio можно загрузить по следующему адресу:
Microsoft Visual Studio 2022. После загрузки программы установщика Visual Studio запустим ее и в окне устанавливаемых
опций выберем пункт Разработка классических приложений на C++:
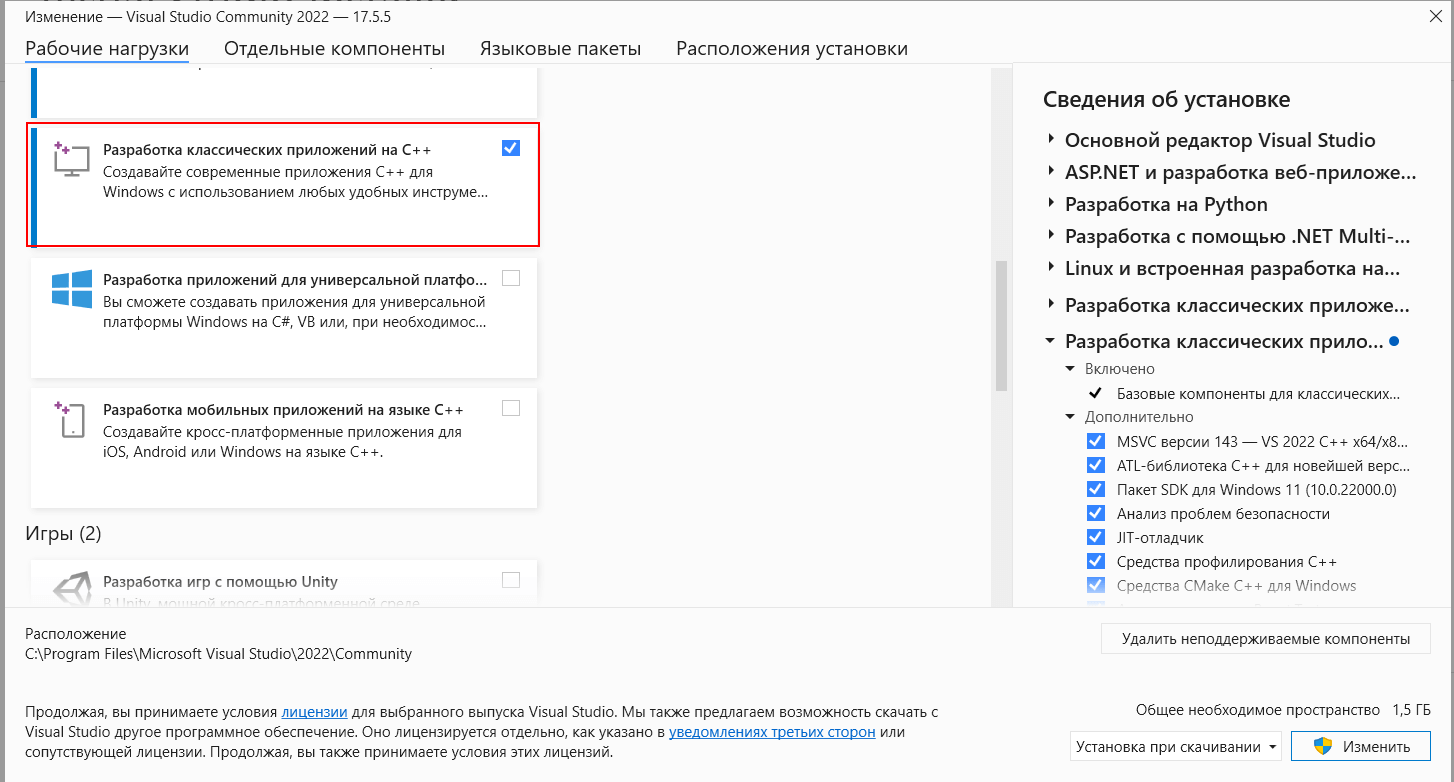
И нажмем на кнопку установки.
В зависимости от конкретной подверсии и номера сборки Visual Studio точное расположение файлов может варьироваться. Например, в моем случае это папка
C:\Program Files\Microsoft Visual Studio\2022\Community\VC\Tools\MSVC\14.37.32822\bin\Hostx64\x64\. И в этой папке можно найти программу компоновщика link.exe.
Причем при обновлениях Visual Studio этот расположение может измениться, так как при обновлении меняется и версия Visual Studio. Поэтому к конкретным путям можно не цепляться. Вместо этого
мы можем перейти к меню Пуск и в списке программ найти пункт Visual Studio и подпункт
x64 Native Tools Command Prompt for VS 2022
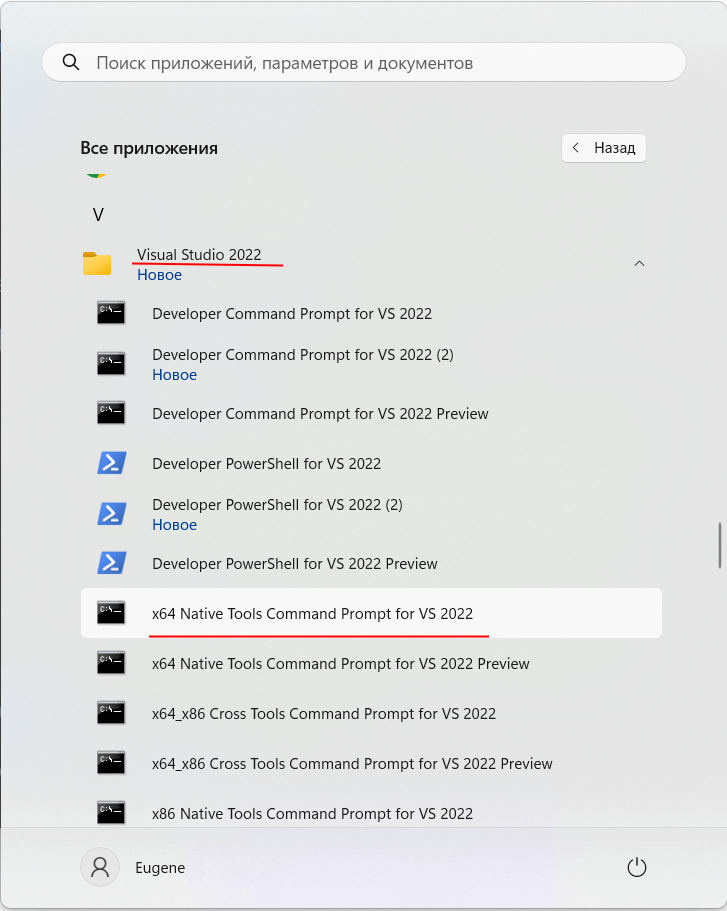
Нам должна открыться консоль. Введем в нее link, и нам отобразится версия ассемблера и некоторая дополнительная информация:
**********************************************************************
** Visual Studio 2022 Developer Command Prompt v17.7.4
** Copyright (c) 2022 Microsoft Corporation
**********************************************************************
[vcvarsall.bat] Environment initialized for: 'x64'

C:\Program Files\Microsoft Visual Studio\2022\Community>link
Microsoft (R) Incremental Linker Version 14.37.32824.0
Copyright (C) Microsoft Corporation.  All rights reserved.

 usage: LINK [options] [files] [@commandfile]

   options:

      /ALIGN:#
      /ALLOWBIND[:NO]
      /ALLOWISOLATION[:NO]
      /APPCONTAINER[:NO]
      /ASSEMBLYDEBUG[:DISABLE]
      /ASSEMBLYLINKRESOURCE:filename
      /ASSEMBLYMODULE:filename
      /ASSEMBLYRESOURCE:filename[,[name][,PRIVATE]]
      /BASE:{address[,size]|@filename,key}
      /CLRIMAGETYPE:{IJW|PURE|SAFE|SAFE32BITPREFERRED}
      /CLRLOADEROPTIMIZATION:{MD|MDH|NONE|SD}
      /CLRSUPPORTLASTERROR[:{NO|SYSTEMDLL}]
      /CLRTHREADATTRIBUTE:{MTA|NONE|STA}
      /CLRUNMANAGEDCODECHECK[:NO]
      /DEBUG[:{FASTLINK|FULL|NONE}]
    ............................
В частности, можно увидеть, что версия компоновщика — 14.37.32824.0 и все опции, которые можно передать программе при компоновке. Стоит отметить, что запуск этой этой утилиты фактически представляет запуск файла C:\Program Files\Microsoft Visual Studio\2022\Community\VC\Auxiliary\Build\vcvars64.bat —
он по сути вызывает другой файл — vcvarsall.bat, который собственно и настраивает окружение для выполнения ассемблера.
Используем этот компоновщик. Для этого откроем программу x64 Native Tools Command Prompt for VS 2022 и перейдем в ней к папке, где располагается объектный файл
hello.o. Затем выполним следующую команду
link hello.o /entry:_start /subsystem:console /out:hello2.exe
В данном случае компоновщику передаем ряд параметров:
-
собственно объектный файл hello.o, который будет компилироваться в исполняемое приложение
-
Параметр
/entry:_startуказывает компоновщику на точку входа в программу —
это наша метка «_start». -
Параметр
/subsystem:consoleуказывает компоновщику, что создается консольное (не графическое) приложение. -
Параметр
/out:hello2.exeустанавливает имя генерируемого файла приложение — оно будет называться «hello2.exe».
В результате будет создан файл hello2.exe, который мы также можем запускать:
c:\asm>link hello.o /entry:_start /subsystem:console /out:hello2.exe
Microsoft (R) Incremental Linker Version 14.37.32824.0
Copyright (C) Microsoft Corporation.  All rights reserved.


c:\asm>hello2.exe

c:\asm>echo %ERRORLEVEL%
22

c:\asm>
Создание первой программы на Windows
Теперь создадим более осмысленную программу, которая выводит на экран строку,kernel32.lib и для этого изменим файл hello.asm следующим образом:
global _start       ; делаем метку метку _start видимой извне

extern WriteFile        ; подключем функцию WriteFile
extern GetStdHandle     ; подключем функцию GetStdHandle

section .data   ; секция данных
message: db "Hello METANIT.COM!",10  ; строка для вывода на консоль

section .text       ; объявление секции кода
_start:             ; метка _start - точка входа в программу
    sub  rsp, 40   ; Для параметров функций WriteFile и GetStdHandle резервируем 40 байт (5 параметров по 8 байт)
    mov  rcx, -11  ; Аргумент для GetStdHandle - STD_OUTPUT
    call GetStdHandle ; вызываем функцию GetStdHandle
    mov  rcx, rax     ; Первый параметр WriteFile - в регистр RCX помещаем дескриптор файла - консоли
    mov  rdx, message    ; Второй параметр WriteFile - загружаем указатель на строку в регистр RDX
    mov  r8d, 18      ; Третий параметр WriteFile - длина строки для записи в регистре R8D
    xor  r9, r9       ; Четвертый параметр WriteFile - адрес для получения записанных байтов
    mov  qword [rsp + 32], 0  ; Пятый параметр WriteFile
    call WriteFile ; вызываем функцию WriteFile
    add  rsp, 40
    ret             ; выход из программы
Разберем эту программу. Для вывода строки на консоль нам надо использовать нативные функции GetStdHandle и WriteFile.
И чтобы воспользоваться этими функциями подключаем их с помощью директивы extern
extern WriteFile
extern GetStdHandle
Далее идет определение секции данных — секции .data:
section .data   ; секция данных
message: db "Hello METANIT.COM!",10  ; строка для вывода на консоль
В секции .data определена метка message, на которую проецируется строка. По сути message — это переменная, которая представляет строку.
После метки указывается тип данных. Строка в ассемблере — это просто набор байтов, поэтому имеет тип db. Затем в кавычках определяется собственно выводимая строка — "Hello METANIT.COM!",10. Обратите внимание на 10 после строки — это код символа перевода строки. То есть при выводе мы ожидаем, что будет происходить перевод на другую строку.
Затем идет секция кода — секция .text и метка _start — точка входа в программу
section .text       ; объявление секции кода
_start:             ; метка _start - точка входа в программу
В программе для вызова функций первым делом необходимо настроить стек. В частности, резервируем в стеке 40 байт для параметров функций GetStdHandle и WriteFile и при этом учитываем выравнивание
стека по 16-байтной границе. Указатель на верхушку стека хранится в регистре
rsp. Поэтому вычитаем с помощью инструкции sub из значения в регистре rsp 40 байт
sub rsp, 40
Почему 40? Прежде всего при вызове функций WinAPI (как в данном случае функций GetStdHandle и WriteFile) необходимо зарезервировать в стеке как минимум 32 байта — так называемое
«shadow storage» (теневое хранилище). Далее нам надо учитывать количество параметров функции. Пеовые 4 параметра функций передаются через регистры, а параметры начиная с 5-го передаются через стек.
Соответственно для 5-го и последующих параметров надо выделить в стеке область. Для каждого параметра вне зависимости от его размера выделяется 8 байт. Функция WriteFile как раз принимает 5 параметров, поэтому для нее надо выделить дополнительные 8 байт в стеке.
Поэтому получаем 32 байта + 8 байт (5-й параметр WriteLine) = 40 байт. Количество параметров смотрим по функции с наибольшим количеством параметров. Третий момент — нам надо учитывать, что перед вызовом функций WinAPI стек имел выравнивание по 16 байтовой границе, то есть значение в RSP
должно быть кратно 16. По умолчанию при вызове функции в стек помещается адрес возврата функии размером 8 байт. Поэтому наши 40 байт + 8 байт (адрес возврата из функции) дадут 48 байт — число кратное 16.
Вначале нам надо использовать встроенную функцию GetStdHandle(), которая позволяет получить дескриптор на устройство ввода-вывода. Она имеет следующее определение на C:
HANDLE WINAPI GetStdHandle(
  _In_ DWORD nStdHandle
);
Функция GetStdHandle() получает числовой код устройства, с которым мы хотим взаимодействовать. В нашем случае нам надо получить устройство стандартного вывода (для вывода строки), которым по умолчанию является консоль. Для обращения к консоли надо передать число -11, которое надо поместить в
регистр rcx:
mov rcx, -11 ; Аргумент для GetStdHandle - STD_OUTPUT
После установки параметра этой функции вызываем ее с помощью инструкции call:
call GetStdHandle
В результате выполнения функция GetStdHandle возвращает дескриптор — объект, через который мы можем взаимодействовать с консолью. Этот дескриптор помещается в регистр
rax. Получив этот дескриптор, используем его для вывода на консоль строки с помощью функции WriteFile. Для справки ее определение на С++
BOOL WriteFile(
  [in]                HANDLE       hFile,
  [in]                LPCVOID      lpBuffer,
  [in]                DWORD        nNumberOfBytesToWrite,
  [out, optional]     LPDWORD      lpNumberOfBytesWritten,
  [in, out, optional] LPOVERLAPPED lpOverlapped
);
Вызов функции GetStdHandle помещает в регистр rax дескриптор консоли. И для вывода строкии на консоль с помощью функции WriteFile нам надо поместить
этот дескриптор в регистр rcx
mov rcx, rax
Затем также с помощью инструкции mov загружаем в регистр rdx адрес выводимой строки
mov rdx, message
Далее в регистр r8d помещаем длину выводимой строки в байтах — в данном случае это 18 байт:
mov r8d, 18
Поскольку у нас строка с символами ASCII, и каждый символ эквивалентен 1 байту, то получаем, что в строке message с учетом последнего символа с числовым кодом 10 будет 18 байт.
Затем в регистре r9 устанавливаем адрес четвертого параметра функции WriteFile:
xor r9, r9
В данном случае нам не нужно количество считанных байтов, и с помощью инструкции xor обнуляем значение регистра r9.
Последний — пятый параметр функции WriteFile должен иметь значение NULL, по сути 0. Поэтому устанавливаем для него значение 0, смещаясь в стеке вперед на 32 байта (4 параметра * 8):
mov qword [rsp + 32], 0
Инструкция mov помещает значение в определенное место. Здесь в качестве значения служит число 0. А место определяется выражением
qword [rsp + 32]. qword указывает, что этот операнд описывает адрес размером в четыре слова, что означает 8 байтов (слово имеет длину 2 байта). То есть число 0 представляет 8-байтное значение и помещается по адресу rsp + 32.
И далее собственно вызываем функцию WriteFile:
call WriteFile
Этот вызов должен привести к выводу строки на консоль. После этого восстанавливаем значение верхушки стека. Для этого с помощью инструкции add прибавляем
к значению в регстре rsp ранее отнятые 40 байт:
add rsp, 40
И с помощью инструкции ret выходим из программы.
Компиляция
Поскольку теперь программа использует внешние функции WinApi — GetStdHandle и WriteFile, которые определены во внешней библиотеке kernel32.lib, то при компоновке
нам надо подключить эту библиотеку. В зависимости от используемого компоновщика/линкера этот процесс может немного отличаться. Например, при использовании компоновщика ld
из комплекта инструментов GCC все подключаемые библиотеки передаются с помощью опции -l:
ld hello.o -o hello.exe -l kernel32
Здесь последний параметр -l kernel32 как раз указывает, какую библиотеку надо подлючить, при чем название библиотеки указывается без расширения файла.
При использовании компоновщика link.exe от Microsoft подключаемая библиотека просто передается вместе с компонуемыми файлами:
link hello.o kernel32.lib /entry:_start /subsystem:console /out:hello2.exe
Итак, повторно скомпилируем файл и скомпонуем одним из компоновщиков. Затем запустим полученный исполняемый файл, и консоль должна вывести нам строку.
Полный процесс при использовании компоновщика ld из комплекта GCC:
c:\asm>nasm -f win64 hello.asm -o hello.o

c:\asm>ld hello.o -o hello.exe -l kernel32

c:\asm>hello.exe
Hello METANIT.COM!
c:\asm>
Полный процесс при использовании компоновщика link от Microsoft (компоновка выполняется в программе x64 Native Tools Command Prompt for VS 2022):
c:\asm>nasm -f win64 hello.asm -o hello.o

c:\asm>link hello.o kernel32.lib /entry:_start /subsystem:console /out:hello2.exe
Microsoft (R) Incremental Linker Version 14.37.32824.0
Copyright (C) Microsoft Corporation.  All rights reserved.


c:\asm>hello2.exe
Hello METANIT.COM!
c:\asm>
Introduction
Before telling you what this post is, let me tell you what this is not:
-
- It is not a step-by-step guide to Assembly language programming.
- It is not a step-by-step guide to Win32 programming.
- It is not a replacement for the official NASM documentation.
- It is not a replacement for the official GCC documentation.
Having said that, let me tell you what this post is: this post is a collection of my experiences, the sum total of my mistakes, hard earned, while trying to program in assembly, C and Win32. Hopefully, someone will find it useful.
In order to understand and gain the maximum use out of this series, you will need:
- Good experience in C programming
- Some experience in calling Win32 API (from within C/C++ or other language)
- Some exposure to assembly programming, hopefully in NASM
Assembly programming is hard. Win32 programming is hard. Mixing them both is harder. Add to that the 32-bit/64-bit mix-ups and it’s going to be a veritable nightmare. That is why this blog exists. It will outline where I’ve gone wrong, and why I’ve gone wrong. But most importantly, it will log how I’ve corrected those mistakes.
On we go, then.
Getting the Tools
Editors
I like to use Notepad++ as my primary editor, but when I’m doing multi-file Windows programming it makes much sense to use DevCPP. Keep in mind that DevCPP uses MinGW port of GCC under the hood. You might need that fact later.
Assembler
There are a good lot of assemblers out there. I was strongly tempted to try Microsoft Macro Assembler (MASM), but in the end I decided against it. After all, if I wanted it easy, I’d have gone for C#.NET: the whole purpose of this excursion was to take a deep dive. Reminding myself of that, I chose to go with Netwide Assembler. In all programs in this blog, I will be using version 2.11.05, but you’re free to download the latest version here.
Although I am not a big fan of the argument “Command line tools build character”, I decided not to go with IDE tools for assembly. However, there are good tools out there, and I can mention at least one here: SASM. You can download for Windows here.
C Compiler
GCC or MinGW? You can read all about the difference between GNU, GCC and MinGW in this excellent stackoverflow question (and this as well).
I decided to go with gcc, simply for the sake of trust on the community. I use version 5.1.0 in this document.
Linker
Since I chose the GCC suite, I already get ld for free. But if you want an alternative, I can suggest ALINK.
“Hello, World”–from NASM, the Wrong Way
I’m sure most of you have seen some version of the following code as the “first Hello, World” program.
1 2 3 4 5 6 7 8 9 10 11 12 13 14 15 |
section .text global _start _start: mov ecx,msg mov ebx,1 mov eax,4 int 0x80 mov eax,1 int 0x80 section .data msg db 'Hello, Windows!',0xa len equ $ - msg |
This will work fine in Linux and pretty much any *nix. But, the sad news is that this won’t work under Windows at all! Why? Because you’re calling the Linux interrupt code (syscall) 0x80, which doesn’t exist in Windows. In Windows (or rather, DOS), the correct interrupt function would be 0x21 (or 21h), but that would mean you’re forced to write in 16-bit. Either way, calling the kernel directly in Windows seems to be not the way forward.
If we cannot directly call the kernel, then what options are available to us? The obvious choice is C runtime libraries. And why not the trusted printf? Let’s see that version.
“Hello, Windows”–Take Two, with printf
This time, we call printf. We’ll have a deep look at the way the arguments are passed in Part 2 of this article.
1 2 3 4 5 6 7 8 9 10 11 |
global _main extern _printf section .text _main: push message call _printf add esp, 4 ret message: db 'Hello, World', 10, 0 |
You need to compile this with the following line.
C:\work>nasm -f win32 hello.asm
And then link it with gcc like so:
C:\work>gcc -m32 hello.obj -o hello.exe
Remember that both NASM and GCC succeed silently. That means, unless there’s an error, you get no output on console.
Couple of points to note here:
- It is important to use the flag -f win32 here. (Both -fwin32 and -f win32 will work.) Unless you do so, NASM will happily try to compile your assembly file into a binary format (*.bin), find that it has an external reference, and fail with “error: binary output does not support external references“.
- It is important to use the option -m32 with gcc here. (Unlike nasm, gcc will not let you put a space between -m and 32.) If you do not specify -m32, then gcc will try to build a 64-bit exe, fail, and complain that “i386 architecture of input file hello.obj is incompatible with i386:x86-64 output.” In addition, you’ll get an error saying “undefined reference to WinMain“.
- The -o option lets gcc know the name of the output file. Quite inconsistently, here, gcc will not mind the space between -o and hello.exe. If you don’t specify the output file name, you’ll get a file called “a.exe”.
Assuming everything went right, you should get a file called “hello.exe” in your directory, which you can execute like so:
C:\work>hello
Hello, World
C:\work>
Cheers! You just called a C library routine from assembly, and made some basic I/O work happen.
However, note that we’re still using DOS subsystem. Our aim was to program for Win32, not call a C routine. Let’s do so now.
“Hello, World”–Take Three, with _WriteFile@20
This time, we’re going to use Win32 API to directly access the console.
1 2 3 4 5 6 7 8 9 10 11 12 13 14 15 16 17 18 19 20 21 22 23 24 25 26 27 28 29 30 31 32 33 34 |
global _main extern _GetStdHandle@4 extern _WriteFile@20 extern _ExitProcess@4 section .text _main: ; DWORD bytes; mov ebp, esp sub esp, 4 ; hStdOut = GetstdHandle( STD_OUTPUT_HANDLE) push -11 call _GetStdHandle@4 mov ebx, eax ; WriteFile( hstdOut, message, length(message), &bytes, 0); push 0 lea eax, [ebp-4] push eax push (message_end - message) push message push ebx call _WriteFile@20 ; ExitProcess(0) push 0 call _ExitProcess@4 ; never here hlt message: db 'Hello, World', 10 message_end: |
Like in the previous examples, you have to assemble, link and run. However, let me introduce another way to do all 3 in one line:
1 |
C:\work>nasm -fwin32 hellow.asm && gcc -m32 hellow.obj -o hellow.exe && hellow |
If all went well, you should see something like this:
1 2 3 |
C:\work>nasm -fwin32 hellow.asm && gcc -m32 hellow.obj -o hellow.exe && hellow Hello, World C:\work> |
Again, couple of important points:
- Where is GetStdHandle declared in? The answer is, Kernel32.dll. The immediate next question is, how did gcc know to link with Kernel32.lib? Aren’t we supposed to get an error like this? The short answer is, because we specified the -m32 flag.
- Why the funny names, like _GetStdHandle@4? The answer has to do something with the way method names are mangled or decorated in Win32. That’s juicy material for a next article. For now, remember that the calling convention for Win32 is known as __stdcall, which defines the way functions are made available to public after compilation. Specifically, the MSDN article says, that under __stdcall, “an underscore (_) is prefixed to the name. The name is followed by the at sign (@) followed by the number of bytes (in decimal) in the argument list.“
- Why the constant (-11)? That’s how we tell _GetStdHandle@4 to get us the “Standard Output” (which in this case, is the screen). Consider this the equivalent way of grabbing a handle to stdout in C, and cout in C++.
Again, knowing how a Win32 function is mangled, or decorated after compiling seems like far too much to expect at this level. After all, all C programmers get to happily write “ExitProcess” instead of “_ExitProcess@4”.
In the next step, we will look at how this can be done.
“Hello, World”–Take Four, with WriteFile
I would like to warn you beforehand: we’ll run into a (rather annoying) known issue with NASM here. This will force us to so something out of the ordinary. Also, this will force us to use ALINK instead of gcc/ld as our linker.
Here’s the code:
1 2 3 4 5 6 7 8 9 10 11 12 13 14 15 16 17 18 19 20 21 22 23 24 25 26 27 28 29 30 31 32 33 34 35 36 37 38 |
[BITS 32] extern ExitProcess import ExitProcess kernel32.dll extern GetStdHandle import GetStdHandle kernel32.dll extern WriteFile import WriteFile kernel32.dll segment .data use32 Text db "Hello, World",0 segment .code use32 ..start: push -11 call [GetStdHandle] mov ebx, eax ; WriteFile( hstdOut, message, length(message), &bytes, 0); push dword 0 lea eax, [ebp-4] push eax push (message_end - message) push message push ebx call [WriteFile] ; ExitProcess(0) push dword 0 call [ExitProcess] ; never here hlt message: db 'Hello, World', 10 message_end: |
Couple of things to note:
- Note that this is identical to the previous version, Take #3, except for this section:
1
2
3
4
5
6
7
8
extern ExitProcess
import ExitProcess kernel32.dll

extern  GetStdHandle
import GetStdHandle kernel32.dll

extern  WriteFile
import WriteFile kernel32.dll
What this does is to import function names directly as defined in the DLLs, thereby freeing us from having to mangle the function names ourselves.
- Note that we’re using the function names within square brackets, like to: [ExitProcess]
However, if you try to assemble this with NASM in the usual way, using -fwin32, NASM will throw an error:
C:\work>nasm -fwin32 hellow2.asm
hellow2.asm:4: error: parser: instruction expected
hellow2.asm:7: error: symbol `import' redefined
hellow2.asm:7: error: parser: instruction expected
hellow2.asm:10: error: symbol `import' redefined
hellow2.asm:10: error: parser: instruction expected
Unfortunately, there is nothing we can do about this, so we will use a workaround. We are going to use -fobj instead of -fwin32. At least this will give us an obj file.
C:\work>nasm -fobj hellow2.asm
Now, if we use our usual way of gcc to link this, we will get an error.
C:\work>gcc -m32 hellow2.obj -o hellow2.exe
hellow2.obj: file not recognized: File format not recognized
collect2.exe: error: ld returned 1 exit status
This means that ld (which is the linker under the hood of gcc) did not like our obj format. And it’s right. We did indeed supply a wrong file format. What we should now do is to find a less restricting linker that will overlook this fact. Enter alink.
C:\work>alink -subsys console -oPE hellow2.obj
ALINK v1.6 (C) Copyright 1998-9 Anthony A.J. Williams.
All Rights Reserved

Loading file hellow2.obj
matched Externs
matched ComDefs
Generating PE file hellow2.exe

C:\work>
Here, -subsys can have two values: console and gui. Since this is a console application, we will go with -subsys console. Also, similar to -m32 in gcc, we will need to specify that we want a Win32 PE format executable file: hence the flag -oPE.
If all went well, you should get an output like so:
C:\work>hellow2
Hello, World
C:\work>
Good!
Now, we will finally look at how to go to the other mode, the GUI mode. The simplest way of displaying text output in Win32 is MessageBox function, which comes in 2 flavors: MessageBoxA for ANSI strings and MessageBoxW for UNICODE strings. We will go with ANSI version for now.
“Hello, World”–Take Five, with WriteConsoleA
In the previous example, we used the function WriteFile as the method to write to the console. Technically, the console is a logical file, so there is nothing wrong with that. However, there is a dedicated routine to write text to the console, known as WriteConsoleA. Let us use that now.
1 2 3 4 5 6 7 8 9 10 11 12 13 14 15 16 17 18 19 20 21 22 23 24 25 26 27 28 29 30 31 |
[BITS 32] extern ExitProcess import ExitProcess kernel32.dll extern GetStdHandle import GetStdHandle kernel32.dll extern WriteConsoleA import WriteConsoleA kernel32.dll segment .data use32 msg db "Hello, World",0 written dword ? segment .code use32 ..start: push -11 call [GetStdHandle] mov ebx, eax push 0 lea eax, written push eax push 13 push offset msg push ebx call [WriteConsoleA] push 0 call [ExitProcess] |
“Hello, World”–Take Six, with MessageBoxA
1 2 3 4 5 6 7 8 9 10 11 12 13 14 15 16 17 18 19 20 21 |
[BITS 32] extern ExitProcess import ExitProcess kernel32.dll extern MessageBoxA import MessageBoxA user32.dll segment .data use32 Caption db 'From Assembly',0 Text db "Hello, World",0 segment .code use32 ..start: push dword 0 push dword Caption push dword Text push dword 0 call [MessageBoxA] push dword 0 call [ExitProcess] |
We assemble, link and execute in one step, like so:
I:\Work\Shellcode\Samples\0>nasm -fobj hellowin.asm && alink -subsys gui -oPE he
llowin.obj && hellowin
ALINK v1.6 (C) Copyright 1998-9 Anthony A.J. Williams.
All Rights Reserved

Loading file hellowin.obj
matched Externs
matched ComDefs
Generating PE file hellowin.exe

I:\Work\Shellcode\Samples\0>
Note the flag -subsys -gui to alink. There will be no console output, but you should see a familiar message box popping up.
This concludes the first part. In the next part, we’ll take a deeper look at interfacing with C library functions, with special attention to what are known as calling conventions.
NASM Tutorial
Yep, it’s a tutorial.
Scope of the Tutorial
This tutorial will show you how to write assembly language programs on the x86-64 architecture.
You will write both (1) standalone programs and (2) programs that integrate with C.
Don’t worry, we won’t get too fancy.
Your First Program
Before learning any details, let’s make sure you can type in and run programs.
Make sure both nasm and gcc are installed. Save one of the following programs as hello.asm, depending on your machine platform. Then run the program according to the given instructions.
If you are on a Linux-based OS:
hello.asm
; ----------------------------------------------------------------------------------------
; Writes "Hello, World" to the console using only system calls. Runs on 64-bit Linux only.
; To assemble and run:
;
;     nasm -felf64 hello.asm && ld hello.o && ./a.out
; ----------------------------------------------------------------------------------------

          global    _start

          section   .text
_start:   mov       rax, 1                  ; system call for write
          mov       rdi, 1                  ; file handle 1 is stdout
          mov       rsi, message            ; address of string to output
          mov       rdx, 13                 ; number of bytes
          syscall                           ; invoke operating system to do the write
          mov       rax, 60                 ; system call for exit
          xor       rdi, rdi                ; exit code 0
          syscall                           ; invoke operating system to exit

          section   .data
message:  db        "Hello, World", 10      ; note the newline at the end
$ nasm -felf64 hello.asm && ld hello.o && ./a.out
Hello, World
If you are on macOS:
hello.asm
; ----------------------------------------------------------------------------------------
; Writes "Hello, World" to the console using only system calls. Runs on 64-bit macOS only.
; To assemble and run:
;
;     nasm -fmacho64 hello.asm && ld hello.o && ./a.out
; ----------------------------------------------------------------------------------------

          global    start

          section   .text
start:    mov       rax, 0x02000004         ; system call for write
          mov       rdi, 1                  ; file handle 1 is stdout
          mov       rsi, message            ; address of string to output
          mov       rdx, 13                 ; number of bytes
          syscall                           ; invoke operating system to do the write
          mov       rax, 0x02000001         ; system call for exit
          xor       rdi, rdi                ; exit code 0
          syscall                           ; invoke operating system to exit

          section   .data
message:  db        "Hello, World", 10      ; note the newline at the end
$ nasm -fmacho64 hello.asm && ld hello.o && ./a.out
Hello, World
Exercise: Identify the differences between the two programs.
Structure of a NASM Program
NASM is line-based. Most programs consist of directives followed by one or more sections. Lines can have an optional label. Most lines have an instruction followed by zero or more operands.
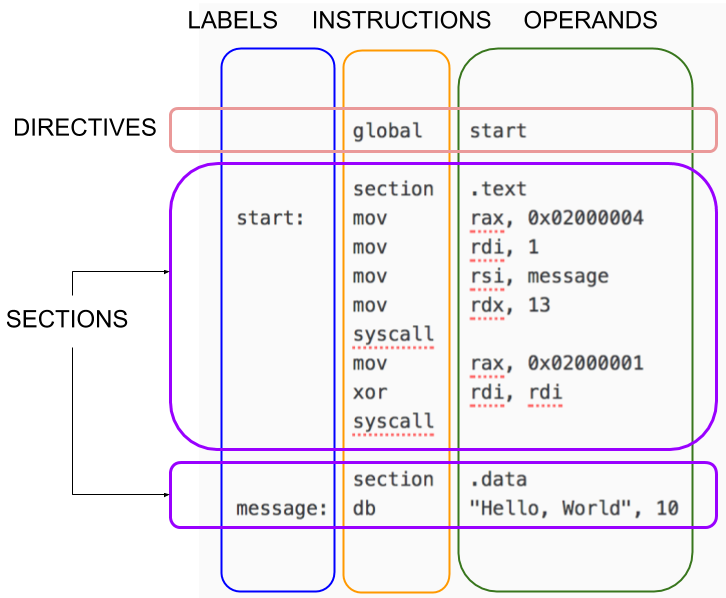
Generally, you put code in a section called .text and your constant data in a section called .data.
Details
NASM is an awesome assembler, but assembly language is complex. You need more than a tutorial. You need details. Lots of details. Be ready to consult:
- The NASM Manual, which is pretty good!
- The Intel Processor Manuals
Your First Few Instructions
There are hundreds of instructions. You can’t learn them all at once. Just start with these:
| Instruction | Description |
|---|---|
| $\mathtt{mov}\;x,y$ | $x \leftarrow y$ |
| $\mathtt{and}\;x,y$ | $x \leftarrow x \wedge y$ |
| $\mathtt{or}\;x,y$ | $x \leftarrow x \vee y$ |
| $\mathtt{xor}\;x,y$ | $x \leftarrow x \bigoplus y$ |
| $\mathtt{add}\;x,y$ | $x \leftarrow x + y$ |
| $\mathtt{sub}\;x,y$ | $x \leftarrow x — y$ |
| $\mathtt{inc}\;x$ | $x \leftarrow x + 1$ |
| $\mathtt{dec}\;x$ | $x \leftarrow x — 1$ |
| $\mathtt{syscall}\;n$ | Invoke operating system routine $n$ |
| $\mathtt{db}$ | A pseudo-instruction that declares bytes that will be in memory when the program runs |
The Three Kinds of Operands
It helps to know these cold. Get ready to memorize them. How can you remember things? Nicky Case can help you with this!
Register Operands
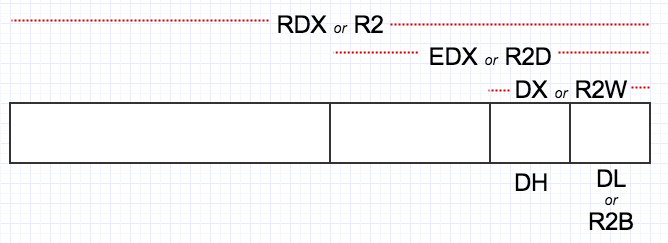
In this tutorial we only care about the integer registers, the flag register, and the xmm registers. (If you are familiar with the x86 architecture, you will know that this means we are skipping the FP, MMX, YMM, segment, control, debug, test, and protected mode registers.) Hopefully you have already been introduced to the x86-84 architecture, in which case, this is a quick review. The 16 integer registers are 64 bits wide and are called:
R0
aka
RAX
R1
aka
RCX
R2
aka
RDX
R3
aka
RBX
R4
aka
RSP
R5
aka
RBP
R6
aka
RSI
R7
aka
RDI
R8
R9
R10
R11
R12
R13
R14
R15
(Note that 8 of the registers have alternate names.) You can treat the lowest 32-bits of each register as a register itself but using these names:
R0D
aka
EAX
R1D
aka
ECX
R2D
aka
EDX
R3D
aka
EBX
R4D
aka
ESP
R5D
aka
EBP
R6D
aka
ESI
R7D
aka
EDI
R8D
R9D
R10D
R11D
R12D
R13D
R14D
R15D
You can treat the lowest 16-bits of each register as a register itself but using these names:
R0W
aka
AX
R1W
aka
CX
R2W
aka
DX
R3W
aka
BX
R4W
aka
SP
R5W
aka
BP
R6W
aka
SI
R7W
aka
DI
R8W
R9W
R10W
R11W
R12W
R13W
R14W
R15W
You can treat the lowest 8-bits of each register as a register itself but using these names:
R0B
aka
AL
R1B
aka
CL
R2B
aka
DL
R3B
aka
BL
R4B
aka
SPL
R5B
aka
BPL
R6B
aka
SIL
R7B
aka
DIL
R8B
R9B
R10B
R11B
R12B
R13B
R14B
R15B
For historical reasons, bits 15 through 8 of R0..R3 are named:
And finally, there are 16 XMM registers, each 128 bits wide, named:
XMM0
XMM1
XMM2
XMM3
XMM4
XMM5
XMM6
XMM7
XMM8
XMM9
XMM10
XMM11
XMM12
XMM13
XMM14
XMM15
Study this picture; hopefully it helps:
Memory Operands
These are the basic forms of addressing:
[ number ][ reg ][ reg + reg*scale ]scale is 1, 2, 4, or 8 only[ reg + number ][ reg + reg*scale + number ]
The number is called the displacement; the plain register is called the base; the register with the scale is called the index.
Examples:
[750]                  ; displacement only
[rbp]                  ; base register only
[rcx + rsi*4]          ; base + index * scale
[rbp + rdx]            ; scale is 1
[rbx - 8]              ; displacement is -8
[rax + rdi*8 + 500]    ; all four components
[rbx + counter]        ; uses the address of the variable 'counter' as the displacement
Immediate Operands
These can be written in many ways. Here are some examples from the official docs.
200          ; decimal
0200         ; still decimal - the leading 0 does not make it octal
0200d        ; explicitly decimal - d suffix
0d200        ; also decimal - 0d prefex
0c8h         ; hex - h suffix, but leading 0 is required because c8h looks like a var
0xc8         ; hex - the classic 0x prefix
0hc8         ; hex - for some reason NASM likes 0h
310q         ; octal - q suffix
0q310        ; octal - 0q prefix
11001000b    ; binary - b suffix
0b1100_1000  ; binary - 0b prefix, and by the way, underscores are allowed
Instructions with two memory operands are extremely rare
In fact, we’ll not see any such instruction in this tutorial. Most of the basic instructions have only
the following forms:
- $\mathtt{add}\;reg, reg$
- $\mathtt{add}\;reg, mem$
- $\mathtt{add}\;reg, imm$
- $\mathtt{add}\;mem, reg$
- $\mathtt{add}\;mem, imm$
Defining Data and Reserving Space
These examples come from Chapter 3 of the docs. To place data in memory:
      db    0x55                ; just the byte 0x55
      db    0x55,0x56,0x57      ; three bytes in succession
      db    'a',0x55            ; character constants are OK
      db    'hello',13,10,'$'   ; so are string constants
      dw    0x1234              ; 0x34 0x12
      dw    'a'                 ; 0x61 0x00 (it's just a number)
      dw    'ab'                ; 0x61 0x62 (character constant)
      dw    'abc'               ; 0x61 0x62 0x63 0x00 (string)
      dd    0x12345678          ; 0x78 0x56 0x34 0x12
      dd    1.234567e20         ; floating-point constant
      dq    0x123456789abcdef0  ; eight byte constant
      dq    1.234567e20         ; double-precision float
      dt    1.234567e20         ; extended-precision float
There are other forms; check the NASM docs. Later.
To reserve space (without initializing), you can use the following pseudo instructions. They
should go in a section called .bss (you’ll get an error if you try to use them in
a .text section):
buffer:         resb    64              ; reserve 64 bytes
wordvar:        resw    1               ; reserve a word
realarray:      resq    10              ; array of ten reals
Another Example
Here’s a macOS program to study:
triangle.asm
; ----------------------------------------------------------------------------------------
; This is an macOS console program that writes a little triangle of asterisks to standard
; output. Runs on macOS only.
;
;     nasm -fmacho64 triangle.asm && gcc hola.o && ./a.out
; ----------------------------------------------------------------------------------------

          global    start
          section   .text
start:
          mov       rdx, output             ; rdx holds address of next byte to write
          mov       r8, 1                   ; initial line length
          mov       r9, 0                   ; number of stars written on line so far
line:
          mov       byte [rdx], '*'         ; write single star
          inc       rdx                     ; advance pointer to next cell to write
          inc       r9                      ; "count" number so far on line
          cmp       r9, r8                  ; did we reach the number of stars for this line?
          jne       line                    ; not yet, keep writing on this line
lineDone:
          mov       byte [rdx], 10          ; write a new line char
          inc       rdx                     ; and move pointer to where next char goes
          inc       r8                      ; next line will be one char longer
          mov       r9, 0                   ; reset count of stars written on this line
          cmp       r8, maxlines            ; wait, did we already finish the last line?
          jng       line                    ; if not, begin writing this line
done:
          mov       rax, 0x02000004         ; system call for write
          mov       rdi, 1                  ; file handle 1 is stdout
          mov       rsi, output             ; address of string to output
          mov       rdx, dataSize           ; number of bytes
          syscall                           ; invoke operating system to do the write
          mov       rax, 0x02000001         ; system call for exit
          xor       rdi, rdi                ; exit code 0
          syscall                           ; invoke operating system to exit

          section   .bss
maxlines  equ       8
dataSize  equ       44
output:   resb      dataSize
$ nasm -fmacho64 triangle.asm && ld triangle.o && ./a.out
*
**
***
****
*****
******
*******
********
New things in this example:
cmpdoes a comparisonjejumps to a label if the previous comparison was equal. We also havejne(jump if not equal),jl(jump if less),jnl(jump if not less),jg(jump if greater),jng(jump if not greater),jle(jump if less or equal),jnle(jump if not less or equal),jge(jump if greater or equal),jnge(jump if not greater or equal), and many more.equis actually not a real instruction. It simply defines an abbreviation for the assembler itself to use. (This is a profound idea.)- The
.bsssection is for writable data.
Using a C Library
Writing standalone programs with just system calls is cool, but rare. We would like to use the good stuff in the C library.
Remember how in C execution “starts” at the function main? That’s because the C library actually has the _start label inside itself! The code at _start does some initialization, then it calls main, then it does some clean up, then it issues the system call for exit. So you just have to implement main. We can do that in assembly!
If you have Linux, try this:
hola.asm
; ----------------------------------------------------------------------------------------
; Writes "Hola, mundo" to the console using a C library. Runs on Linux.
;
;     nasm -felf64 hola.asm && gcc hola.o && ./a.out
; ----------------------------------------------------------------------------------------

          global    main
          extern    puts

          section   .text
main:                                       ; This is called by the C library startup code
          mov       rdi, message            ; First integer (or pointer) argument in rdi
          call      puts                    ; puts(message)
          ret                               ; Return from main back into C library wrapper
message:
          db        "Hola, mundo", 0        ; Note strings must be terminated with 0 in C
$ nasm -felf64 hola.asm && gcc hola.o && ./a.out
Hola, mundo
Under macOS, it will look a little different:
hola.asm
; ----------------------------------------------------------------------------------------
; This is an macOS console program that writes "Hola, mundo" on one line and then exits.
; It uses puts from the C library.  To assemble and run:
;
;     nasm -fmacho64 hola.asm && gcc hola.o && ./a.out
; ----------------------------------------------------------------------------------------

          global    _main
          extern    _puts

          section   .text
_main:    push      rbx                     ; Call stack must be aligned
          lea       rdi, [rel message]      ; First argument is address of message
          call      _puts                   ; puts(message)
          pop       rbx                     ; Fix up stack before returning
          ret

          section   .data
message:  db        "Hola, mundo", 0        ; C strings need a zero byte at the end
$ nasm -fmacho64 hola.asm && gcc hola.o && ./a.out
Hola, mundo
In macOS land, C functions (or any function that is exported from one module to another, really) must be prefixed with underscores. The call stack must be aligned on a 16-byte boundary (more on this later). And when accessing named variables, a rel prefix is required.
Understanding Calling Conventions
How did we know the argument to puts was supposed to go in RDI?
Answer: there are a number of conventions that are followed regarding calls.
When writing code for 64-bit Linux that integrates with a C library, you must follow the
calling conventions explained in the
AMD64 ABI Reference.
You can also get this information from
Wikipedia.
The most important points are:
- From left to right, pass as many parameters as will fit in registers. The order in which
registers are allocated, are:- For integers and pointers,
rdi,rsi,rdx,
rcx,r8,r9. - For floating-point (float, double),
xmm0,xmm1,xmm2,
xmm3,xmm4,xmm5,xmm6,xmm7.
- For integers and pointers,
- Additional parameters are pushed on the stack, right to left, and
are to be removed by the caller after the call. - After the parameters are pushed, the call instruction is
made, so when the called function gets control, the return
address is at[rsp], the first memory parameter is at
[rsp+8], etc. - The stack pointer
rspmust be aligned to a 16-byte boundary
before making a call. Fine, but the process of making a call pushes the return address (8 bytes) on
the stack, so when a function gets control,rspis not aligned. You have to make
that extra space yourself, by pushing something or subtracting 8 fromrsp. - The only registers that the called function is required to preserve (the calle-save registers)
are:rbp,rbx,r12,r13,r14,r15.
All others are free to be changed by the called function. - The callee is also supposed to save the control bits of the XMCSR and the x87 control word,
but x87 instructions are rare in 64-bit code so you probably don’t have to worry about this. - Integers are returned in
raxorrdx:rax, and floating point values are returned
inxmm0orxmm1:xmm0.
Got that? No? What’s need is more examples, and practice.
Here is a program that illustrates how registers have to be saved and restored:
fib.asm
; -----------------------------------------------------------------------------
; A 64-bit Linux application that writes the first 90 Fibonacci numbers. To
; assemble and run:
;
;     nasm -felf64 fib.asm && gcc fib.o && ./a.out
; -----------------------------------------------------------------------------

        global  main
        extern  printf

        section .text
main:
        push    rbx                     ; we have to save this since we use it

        mov     ecx, 90                 ; ecx will countdown to 0
        xor     rax, rax                ; rax will hold the current number
        xor     rbx, rbx                ; rbx will hold the next number
        inc     rbx                     ; rbx is originally 1
print:
        ; We need to call printf, but we are using rax, rbx, and rcx.  printf
        ; may destroy rax and rcx so we will save these before the call and
        ; restore them afterwards.

        push    rax                     ; caller-save register
        push    rcx                     ; caller-save register

        mov     rdi, format             ; set 1st parameter (format)
        mov     rsi, rax                ; set 2nd parameter (current_number)
        xor     rax, rax                ; because printf is varargs

        ; Stack is already aligned because we pushed three 8 byte registers
        call    printf                  ; printf(format, current_number)

        pop     rcx                     ; restore caller-save register
        pop     rax                     ; restore caller-save register

        mov     rdx, rax                ; save the current number
        mov     rax, rbx                ; next number is now current
        add     rbx, rdx                ; get the new next number
        dec     ecx                     ; count down
        jnz     print                   ; if not done counting, do some more

        pop     rbx                     ; restore rbx before returning
        ret
format:
        db  "%20ld", 10, 0
$ nasm -felf64 fib.asm && gcc fib.o && ./a.out
                   0
                   1
                   1
                   2
                   .
                   .
                   .
  679891637638612258
 1100087778366101931
 1779979416004714189
We just saw some new instructions:
| Instruction | Description |
|---|---|
| $\mathtt{push}\;x$ | Decrement rsp by the size of the operand, then store $x$ in [rsp]
|
| $\mathtt{pop}\;x$ | Move [rsp] into $x$, then increment rsp by the size of the operand
|
| $\mathtt{jnz}\;\mathit{label}$ | If the processor’s Z (zero) flag is set, jump to the given label |
| $\mathtt{call}\;\mathit{label}$ | Push the address of the next instruction, then jump to the label |
| $\mathtt{ret}$ | Pop into the instruction pointer |
Mixing C and Assembly Language
This program is just a simple function that takes in three
integer parameters and returns the maximum value.
maxofthree.asm
; -----------------------------------------------------------------------------
; A 64-bit function that returns the maximum value of its three 64-bit integer
; arguments.  The function has signature:
;
;   int64_t maxofthree(int64_t x, int64_t y, int64_t z)
;
; Note that the parameters have already been passed in rdi, rsi, and rdx.  We
; just have to return the value in rax.
; -----------------------------------------------------------------------------

        global  maxofthree
        section .text
maxofthree:
        mov     rax, rdi                ; result (rax) initially holds x
        cmp     rax, rsi                ; is x less than y?
        cmovl   rax, rsi                ; if so, set result to y
        cmp     rax, rdx                ; is max(x,y) less than z?
        cmovl   rax, rdx                ; if so, set result to z
        ret                             ; the max will be in rax
Here is a C program that calls the assembly language function.
callmaxofthree.c
/*
 * A small program that illustrates how to call the maxofthree function we wrote in
 * assembly language.
 */

#include <stdio.h>
#include <inttypes.h>

int64_t maxofthree(int64_t, int64_t, int64_t);

int main() {
    printf("%ld\n", maxofthree(1, -4, -7));
    printf("%ld\n", maxofthree(2, -6, 1));
    printf("%ld\n", maxofthree(2, 3, 1));
    printf("%ld\n", maxofthree(-2, 4, 3));
    printf("%ld\n", maxofthree(2, -6, 5));
    printf("%ld\n", maxofthree(2, 4, 6));
    return 0;
}
$ nasm -felf64 maxofthree.asm && gcc callmaxofthree.c maxofthree.o && ./a.out
1
2
3
4
5
6
Conditional Instructions
After an arithmetic or logic instruction, or the compare instruction, cmp,
the processor sets or clears bits in its rflags. The most interesting flags
are:
s(sign)z(zero)c(carry)o(overflow)
So after doing, say, an addition instruction, we can perform a jump, move, or set,
based on the new flag settings. For example:
| Instruction | Description |
|---|---|
| $\mathtt{jz}\;\mathit{L}$ | Jump to label $L$ if the result of the operation was zero |
| $\mathtt{cmovno}\;x,y$ | $x \leftarrow y$ if the last operation did not overflow |
| $\mathtt{setc}\;x$ | $x \leftarrow 1$ if the last operation had a carry, but $x \leftarrow 0$ otherwise ($x$ must be a byte-size register or memory location) |
The conditional instructions have three base forms: j for conditional jump,
cmov for conditional move, and set for conditional set.
The suffix of the instruction has one of the 30 forms:
s ns z nz c nc o no p np pe po e ne l nl le nle g ng ge nge a na ae nae b nb.
be nbe
Command Line Arguments
You know that in C, main is just a plain old function, and it has a couple parameters of its own:
int main(int argc, char** argv)
So, you guessed it, argc will end up in rdi, and argv (a pointer) will end up in rsi. Here is a program that uses this fact to simply echo the command line arguments to a program, one per line:
echo.asm
; -----------------------------------------------------------------------------
; A 64-bit program that displays its command line arguments, one per line.
;
; On entry, rdi will contain argc and rsi will contain argv.
; -----------------------------------------------------------------------------

        global  main
        extern  puts
        section .text
main:
        push    rdi                     ; save registers that puts uses
        push    rsi
        sub     rsp, 8                  ; must align stack before call

        mov     rdi, [rsi]              ; the argument string to display
        call    puts                    ; print it

        add     rsp, 8                  ; restore %rsp to pre-aligned value
        pop     rsi                     ; restore registers puts used
        pop     rdi

        add     rsi, 8                  ; point to next argument
        dec     rdi                     ; count down
        jnz     main                    ; if not done counting keep going

        ret
$ nasm -felf64 echo.asm && gcc echo.o && ./a.out dog 22 -zzz "hi there"
./a.out
dog
22
-zzz
hi there
A Longer Example
Note that as far as the C Library is concerned, command line arguments are always strings. If you want to treat them as integers, call atoi. Here’s a neat program to compute $x^y$.
power.asm
; -----------------------------------------------------------------------------
; A 64-bit command line application to compute x^y.
;
; Syntax: power x y
; x and y are (32-bit) integers
; -----------------------------------------------------------------------------

        global  main
        extern  printf
        extern  puts
        extern  atoi

        section .text
main:
        push	r12                     ; save callee-save registers
        push	r13
        push	r14
        ; By pushing 3 registers our stack is already aligned for calls

        cmp     rdi, 3                  ; must have exactly two arguments
        jne     error1

        mov     r12, rsi                ; argv

; We will use ecx to count down form the exponent to zero, esi to hold the
; value of the base, and eax to hold the running product.

        mov     rdi, [r12+16]           ; argv[2]
        call    atoi                    ; y in eax
        cmp     eax, 0                  ; disallow negative exponents
        jl      error2
        mov     r13d, eax               ; y in r13d

        mov     rdi, [r12+8]            ; argv
        call	atoi                    ; x in eax
        mov     r14d, eax               ; x in r14d

        mov     eax, 1                  ; start with answer = 1
check:
        test    r13d, r13d              ; we're counting y downto 0
        jz      gotit                   ; done
        imul    eax, r14d               ; multiply in another x
        dec     r13d
        jmp     check
gotit:                                  ; print report on success
        mov     rdi, answer
        movsxd  rsi, eax
        xor     rax, rax
        call    printf
        jmp     done
error1:                                 ; print error message
        mov     edi, badArgumentCount
        call    puts
        jmp     done
error2:                                 ; print error message
        mov     edi, negativeExponent
        call    puts
done:                                   ; restore saved registers
        pop     r14
        pop     r13
        pop     r12
        ret

answer:
        db      "%d", 10, 0
badArgumentCount:
        db      "Requires exactly two arguments", 10, 0
negativeExponent:
        db      "The exponent may not be negative", 10, 0
$ nasm -felf64 power.asm && gcc -o power power.o
$ ./power 2 19
524288
$ ./power 3 -8
The exponent may not be negative
$ ./power 1 500
1
$ ./power 1
Requires exactly two arguments
Floating Point Instructions
Floating-point arguments go int the xmm registers. Here is a simple function for summing
the values in a double array:
sum.asm
; -----------------------------------------------------------------------------
; A 64-bit function that returns the sum of the elements in a floating-point
; array. The function has prototype:
;
;   double sum(double[] array, uint64_t length)
; -----------------------------------------------------------------------------

        global  sum
        section .text
sum:
        xorpd   xmm0, xmm0              ; initialize the sum to 0
        cmp     rsi, 0                  ; special case for length = 0
        je      done
next:
        addsd   xmm0, [rdi]             ; add in the current array element
        add     rdi, 8                  ; move to next array element
        dec     rsi                     ; count down
        jnz     next                    ; if not done counting, continue
done:
        ret                             ; return value already in xmm0
Note the floating point instructions have an sd suffix; that’s the
most common one, but we’ll see some other ones later. Here is a C program that calls it:
callsum.c
/*
 * Illustrates how to call the sum function we wrote in assembly language.
 */

#include <stdio.h>
#include <inttypes.h>

double sum(double[], uint64_t);

int main() {
    double test[] = {
        40.5, 26.7, 21.9, 1.5, -40.5, -23.4
    };
    printf("%20.7f\n", sum(test, 6));
    printf("%20.7f\n", sum(test, 2));
    printf("%20.7f\n", sum(test, 0));
    printf("%20.7f\n", sum(test, 3));
    return 0;
}
$ nasm -felf64 sum.asm && gcc sum.o callsum.c && ./a.out
          26.7000000
          67.2000000
           0.0000000
          89.1000000
Data Sections
The text section is read-only on most operating systems, so
you might find the need for a data section. On most operating systems,
the data section is only for initialized data, and you have a special
.bss section for uninitialized data. Here is a program that averages
the command line arguments, expected to be integers, and displays the
result as a floating point number.
average.asm
; -----------------------------------------------------------------------------
; 64-bit program that treats all its command line arguments as integers and
; displays their average as a floating point number.  This program uses a data
; section to store intermediate results, not that it has to, but only to
; illustrate how data sections are used.
; -----------------------------------------------------------------------------

        global   main
        extern   atoi
        extern   printf
        default  rel

        section  .text
main:
        dec      rdi                    ; argc-1, since we don't count program name
        jz       nothingToAverage
        mov      [count], rdi           ; save number of real arguments
accumulate:
        push     rdi                    ; save register across call to atoi
        push     rsi
        mov      rdi, [rsi+rdi*8]       ; argv[rdi]
        call     atoi                   ; now rax has the int value of arg
        pop      rsi                    ; restore registers after atoi call
        pop      rdi
        add      [sum], rax             ; accumulate sum as we go
        dec      rdi                    ; count down
        jnz      accumulate             ; more arguments?
average:
        cvtsi2sd xmm0, [sum]
        cvtsi2sd xmm1, [count]
        divsd    xmm0, xmm1             ; xmm0 is sum/count
        mov      rdi, format            ; 1st arg to printf
        mov      rax, 1                 ; printf is varargs, there is 1 non-int argument

        sub      rsp, 8                 ; align stack pointer
        call     printf                 ; printf(format, sum/count)
        add      rsp, 8                 ; restore stack pointer

        ret

nothingToAverage:
        mov      rdi, error
        xor      rax, rax
        call     printf
        ret

        section  .data
count:  dq       0
sum:    dq       0
format: db       "%g", 10, 0
error:  db       "There are no command line arguments to average", 10, 0
$ nasm -felf64 average.asm && gcc average.o && ./a.out 19 8 21 -33
3.75
$ nasm -felf64 average.asm && gcc average.o && ./a.out
There are no command line arguments to average
This program highlighted some processor instructions that convert between integers and floating point values. A few of the most common are:
| Instruction | Description |
|---|---|
| $\mathtt{cvtsi2sd}\;\mathit{xmmreg},\mathit{r/m32}$ | $\mathit{xmmreg}[63..0] \leftarrow \mathrm{intToDouble}(\mathit{r/m32})$ |
| $\mathtt{cvtsi2ss}\;\mathit{xmmreg},\mathit{r/m32}$ | $\mathit{xmmreg}[31..0] \leftarrow \mathrm{intToFloat}(\mathit{r/m32})$ |
| $\mathtt{cvtsd2si}\;\mathit{reg32},\mathit{xmmr/m64}$ | $\mathit{reg32} \leftarrow \mathrm{doubleToInt}(\mathit{xmmr/m64})$ |
| $\mathtt{cvtss2si}\;\mathit{reg32},\mathit{xmmr/m32}$ | $\mathit{reg32} \leftarrow \mathrm{floatToInt}(\mathit{xmmr/m32})$ |
Recursion
Perhaps surprisingly, there’s nothing out of the ordinary required
to implement recursive functions. You just have to be careful to save
registers, as usual. Pushing and popping around the recursive call
is a typical strategy.
factorial.asm
; ----------------------------------------------------------------------------
; An implementation of the recursive function:
;
;   uint64_t factorial(uint64_t n) {
;       return (n <= 1) ? 1 : n * factorial(n-1);
;   }
; ----------------------------------------------------------------------------

        global  factorial

        section .text
factorial:
        cmp     rdi, 1                  ; n <= 1?
        jnbe    L1                      ; if not, go do a recursive call
        mov     rax, 1                  ; otherwise return 1
        ret
L1:
        push    rdi                     ; save n on stack (also aligns %rsp!)
        dec     rdi                     ; n-1
        call    factorial               ; factorial(n-1), result goes in %rax
        pop     rdi                     ; restore n
        imul    rax, rdi                ; n * factorial(n-1), stored in %rax
        ret
An example caller:
callfactorial.c
/*
 * An application that illustrates calling the factorial function defined elsewhere.
 */

#include <stdio.h>
#include <inttypes.h>

uint64_t factorial(uint64_t n);

int main() {
    for (uint64_t i = 0; i < 20; i++) {
        printf("factorial(%2lu) = %lu\n", i, factorial(i));
    }
    return 0;
}
$ nasm -felf64 factorial.asm && gcc -std=c99 factorial.o callfactorial.c && ./a.out
factorial( 0) = 1
factorial( 1) = 1
factorial( 2) = 2
factorial( 3) = 6
factorial( 4) = 24
factorial( 5) = 120
factorial( 6) = 720
factorial( 7) = 5040
factorial( 8) = 40320
factorial( 9) = 362880
factorial(10) = 3628800
factorial(11) = 39916800
factorial(12) = 479001600
factorial(13) = 6227020800
factorial(14) = 87178291200
factorial(15) = 1307674368000
factorial(16) = 20922789888000
factorial(17) = 355687428096000
factorial(18) = 6402373705728000
factorial(19) = 121645100408832000
SIMD Parallelism
The XMM registers can do arithmetic on floating point values one operation at a time (scalar) or multiple operations at a time (packed). The operations have the form:
$\mathit{op}\;\mathit{xmmreg\_or\_memory}, \mathit{xmmreg}$
For floating point addition, the instructions are:
| Instruction | Description |
|---|---|
| $\mathtt{addpd}$ | Do two double-precision additions in parallel (add packed double) |
| $\mathtt{addsd}$ | Do just one double-precision addition, using the low 64-bits of the register (add scalar double) |
| $\mathtt{addps}$ | Do four single-precision additions in parallel (add packed single) |
| $\mathtt{addss}$ | Do just one single-precision addition, using the low 32-bits of the register (add scalar single) |
Here’s a function that adds four floats at once:
add_four_floats.asm
; void add_four_floats(float x[4], float y[4])
; x[i] += y[i] for i in range(0..4)

        global   add_four_floats
        section  .text

add_four_floats:
        movdqa   xmm0, [rdi]            ; all four values of x
        movdqa   xmm1, [rsi]            ; all four values of y
        addps    xmm0, xmm1             ; do all four sums in one shot
        movdqa   [rdi], xmm0
        ret
and a caller:
test_add_four_floats.c
#include <stdio.h>
void add_four_floats(float[], float[]);

int main() {
    float x[] = {-29.750, 244.333, 887.29, 48.1E22};
    float y[] = {29.750,  199.333, -8.29,  22.1E23};
    add_four_floats(x, y);
    printf("%f\n%f\n%f\n%f\n", x[0], x[1], x[2], x[3]);
    return 0;
}
Also see this nice little x86 floating-point slide deck from Ray Seyfarth.
Saturated Arithmetic
The XMM registers can also do arithmetic on integers. The instructions have the form:
$\mathit{op}\;\mathit{xmmreg\_or\_memory}, \mathit{xmmreg}$
For integer addition, the instructions are:
| Instruction | Description |
|---|---|
| $\mathtt{paddb}$ | Do 16 byte-additions |
| $\mathtt{paddw}$ | Do 8 word-additions |
| $\mathtt{paddd}$ | Do 4 dword-additions |
| $\mathtt{paddq}$ | Do 2 qword-additions |
| $\mathtt{paddsb}$ | Do 16 byte-additions with signed saturation (80..7F) |
| $\mathtt{paddsw}$ | Do 8 word-additions with signed saturation (8000..7F) |
| $\mathtt{paddusb}$ | Do 16 byte-additions with unsigned saturation (00..FF) |
| $\mathtt{paddusw}$ | Do 8 word-additions with unsigned saturation (00..FFFF) |
Here’s an example. It also illustrates how you load the XMM registers. You can’t load immediate values; you have to use movaps to move from memory. There are other ways, but we’re not covering everything in this tutorial.
satexample.asm
; ----------------------------------------------------------------------------------------
; Example of signed saturated arithmetic.
; ----------------------------------------------------------------------------------------

        global  main
        extern  printf

        section .text
main:
        push    rbp
        movaps  xmm0, [arg1]
        movaps  xmm1, [arg2]
        paddsw  xmm0, xmm1
        movaps  [result], xmm0

        lea     rdi, [format]
        mov     esi, dword [result]
        mov     edx, dword [result+4]
        mov     ecx, dword [result+8]
        mov     r8d, dword [result+12]
        xor     rax, rax
        call    printf
        pop     rbp
        ret
        section .data
        align   16
arg1:   dw      0x3544,0x24FF,0x7654,0x9A77,0xF677,0x9000,0xFFFF,0x0000
arg2:   dw      0x7000,0x1000,0xC000,0x1000,0xB000,0xA000,0x1000,0x0000
result: dd      0, 0, 0, 0
format: db      '%x%x%x%x',10,0
Graphics
Any C program can be “ported” to assembly language. That goes for graphics programs, too.
This program probably does not work.
I last tested this in 2003. Back in the old-school OpenGL days. Used Win32. Pre-GLSL days. Used GLUT. I haven’t had access to a Windows box in a while and I’m not even sure it will work anymore. This is presented here for historical interest only. If you can modify it to work under modern OpenGL, please let me know. I’ll update the program and cite your contribution, of course!
triangle.asm
; ----------------------------------------------------------------------------
; triangle.asm
;
; A very simple *Windows* OpenGL application using the GLUT library.  It
; draws a nicely colored triangle in a top-level application window.  One
; interesting thing is that the Windows GL and GLUT functions do NOT use the
; C calling convention; instead they use the "stdcall" convention which is
; like C except that the callee pops the parameters.
; ----------------------------------------------------------------------------

	global	_main
	extern	_glClear@4
	extern	_glBegin@4
	extern	_glEnd@0
	extern	_glColor3f@12
	extern	_glVertex3f@12
	extern	_glFlush@0
	extern	_glutInit@8
	extern	_glutInitDisplayMode@4
	extern	_glutInitWindowPosition@8
	extern	_glutInitWindowSize@8
	extern	_glutCreateWindow@4
	extern	_glutDisplayFunc@4
	extern	_glutMainLoop@0

	section	.text
title:	db	'A Simple Triangle', 0
zero:	dd	0.0
one:	dd	1.0
half:	dd	0.5
neghalf:dd	-0.5

display:
	push	dword 16384
	call	_glClear@4		; glClear(GL_COLOR_BUFFER_BIT)
	push	dword 9
	call	_glBegin@4		; glBegin(GL_POLYGON)
	push	dword 0
	push	dword 0
	push	dword [one]
	call	_glColor3f@12		; glColor3f(1, 0, 0)
	push	dword 0
	push	dword [neghalf]
	push	dword [neghalf]
	call	_glVertex3f@12		; glVertex(-.5, -.5, 0)
	push	dword 0
	push    dword [one]
	push	dword 0
	call	_glColor3f@12		; glColor3f(0, 1, 0)
	push	dword 0
	push	dword [neghalf]
	push	dword [half]
	call	_glVertex3f@12		; glVertex(.5, -.5, 0)
	push	dword [one]
	push	dword 0
	push	dword 0
	call	_glColor3f@12		; glColor3f(0, 0, 1)
	push	dword 0
	push	dword [half]
	push	dword 0
	call	_glVertex3f@12		; glVertex(0, .5, 0)
	call	_glEnd@0		; glEnd()
	call	_glFlush@0		; glFlush()
	ret

_main:
	push	dword [esp+8]		; push argv
	lea	eax, [esp+8]		; get addr of argc (offset changed :-)
	push	eax
	call	_glutInit@8		; glutInit(&argc, argv)
	push	dword 0
	call	_glutInitDisplayMode@4
	push	dword 80
	push	dword 80
	call	_glutInitWindowPosition@8
	push	dword 300
	push	dword 400
	call	_glutInitWindowSize@8
	push	title
	call	_glutCreateWindow@4
	push	display
	call	_glutDisplayFunc@4
	call	_glutMainLoop@0
	ret
Local Variables and Stack Frames
First, please read Eli
Bendersky’s article. That overview is more complete than my brief notes.
When a function is called the caller will first put the parameters in the correct registers then issue the call instruction. Additional parameters beyond those covered by the registers will be pushed on the stack prior to the call. The call instruction puts the return address on the top of stack. So if you have the function:
int64_t example(int64_t x, int64_t y) {
    int64_t a, b, c;
    b = 7;
    return x * b + y;
}
Then on entry to the function, $x$ will be in edi, $y$ will be in esi, and the return address will be on the top of the stack. Where can we put the local variables? An easy choice is on the stack itself, though if you have enough regsters, use them! Registers tend to be faster anyway.
If you are running on a machine that respect the standard ABI, you can leave rsp where it is and access the “extra parameters” and the local variables directly from rsp for example:
rsp-24
a
rsp-16
b
rsp-8
c
rsp
retaddr
rsp+8
caller’s
stack
frame
So our function looks like this:
        global  example
        section .text
example:
        mov     qword [rsp-16], 7
        mov     rax, rdi
        imul    rax, [rsp+8]
        add     rax, rsi
        ret
If our function were to make another call, you would have to adjust rsp to get out of the way
at that time.
On Windows you can’t use this scheme because if an interrupt were to occur, everything above the stack pointer gets plastered. This doesn’t happen on most other operating systems because there is a red zone of 128 bytes past the stack pointer which is safe from these things. In this case, you can make room on the stack immediately:
example:
        sub rsp, 24
so our stack looks like this:
rsp
a
rsp+8
b
rsp+16
c
rsp+24
retaddr
rsp+32
caller’s
stack
frame
Here’s the function now. Note that we have to remember to replace the stack pointer before
returning!
        global  example
        section .text
example:
        sub     rsp, 24
        mov     qword [rsp+8], 7
        mov     rax, rdi
        imul    rax, [rsp+8]
        add     rax, rsi
        add     rsp, 24
        ret
Using NASM on macOS
Hopefully you’ve gone through the whole tutorial above using a Linux-based operating
system (or perhaps more correctly, and ELF64 system). There are pretty much only five
thing to know to get these examples working under a 64-bit macOS system:
- This object file format is
macho64, notelf64. - The system call numbers are totally different.
- Symbols shared between modules will be prefixed by underscores.
- It seems that the gcc linker in macOS doesn’t allow absolute addressing unless
you tweak some settings. So adddefault relwhen you are referencing
labeled memory locations, and always useleato get your addresses. - Also, it appears that sometimes under Linux, the 16-bit stack alignment requirement
is not enforced, but it appears to be always enforced under macOS.
So here’s the average program from above, written for macOS.
average.asm
; -----------------------------------------------------------------------------
; 64-bit program that treats all its command line arguments as integers and
; displays their average as a floating point number.  This program uses a data
; section to store intermediate results, not that it has to, but only to
; illustrate how data sections are used.
;
; Designed for OS X.  To assemble and run:
;
;     nasm -fmacho64 average.asm && gcc average.o && ./a.out
; -----------------------------------------------------------------------------

        global   _main
        extern   _atoi
        extern   _printf
        default  rel

        section  .text
_main:
        push     rbx                    ; we don't ever use this, but it is necesary
                                        ; to align the stack so we can call stuff
        dec      rdi                    ; argc-1, since we don't count program name
        jz       nothingToAverage
        mov      [count], rdi           ; save number of real arguments
accumulate:
        push     rdi                    ; save register across call to atoi
        push     rsi
        mov      rdi, [rsi+rdi*8]       ; argv[rdi]
        call     _atoi                  ; now rax has the int value of arg
        pop      rsi                    ; restore registers after atoi call
        pop      rdi
        add      [sum], rax             ; accumulate sum as we go
        dec      rdi                    ; count down
        jnz      accumulate             ; more arguments?
average:
        cvtsi2sd xmm0, [sum]
        cvtsi2sd xmm1, [count]
        divsd    xmm0, xmm1             ; xmm0 is sum/count
        lea      rdi, [format]          ; 1st arg to printf
        mov      rax, 1                 ; printf is varargs, there is 1 non-int argument
        call     _printf                ; printf(format, sum/count)
        jmp      done

nothingToAverage:
        lea      rdi, [error]
        xor      rax, rax
        call     _printf

done:
        pop      rbx                    ; undoes the stupid push at the beginning
        ret

        section  .data
count:  dq       0
sum:    dq       0
format: db       "%g", 10, 0
error:  db       "There are no command line arguments to average", 10, 0
$ nasm -fmacho64 average.asm && gcc average.o && ./a.out
There are no command line arguments to average
$ nasm -fmacho64 average.asm && gcc average.o && ./a.out 54.3
54
$ nasm -fmacho64 average.asm && gcc average.o && ./a.out 54.3 -4 -3 -25 455.1111
95.4
Using NASM on Windows
I’m not sure what the system calls are on Windows, but I do know that if you want to assemble and link with the C library, you have to understand the x64 conventions. Read them. You will learn such things as:
- The first four integer parameters are passed in RCX, RDX, R8, and R9. The rest are to be pushed on the stack.
- The callee must preserve RBX, RBP, RDI, RSI, RSP, R12, R13, R14, and R15.
- The first four floating point parameters are passed in, you guessed it, XMM0, XMM1, XMM2, and XMM3.
- Return values go in RAX or XMM0.
IMPORTANT: There’s one thing that’s really hard to find in any documentation: the x64 calling convention requires you to allocate 32 bytes of shadow space before each call, and remove it after your call. This means your “hello world” program looks like this:
hello.asm
; ----------------------------------------------------------------------------------------
; This is a Win64 console program that writes "Hello" on one line and then exits.  It
; uses puts from the C library.  To assemble and run:
;
;     nasm -fwin64 hello.asm && gcc hello.obj && a
; ----------------------------------------------------------------------------------------

        global  main
        extern  puts
        section .text
main:
        sub     rsp, 28h                        ; Reserve the shadow space
        mov     rcx, message                    ; First argument is address of message
        call    puts                            ; puts(message)
        add     rsp, 28h                        ; Remove shadow space
        ret
message:
        db      'Hello', 0                      ; C strings need a zero byte at the end
Did you notice we actually reserved 40 bytes? Thirty-two bytes of shadow space is a minimum requirement. In our main function, we are calling another function, so our stack must be aligned on a 16-byte boundary. When main is called, the return address (8 bytes) was pushed, so we have to “add” an extra 8 bytes to the shadow space.
Summary
We’ve covered:
- How to run a NASM program
- The structure of a NASM program
- The most basic instructions
- Instruction formats
- Mixing C and assembly language
- Floating point, saturated arithmetic, and parallel instructions
- Calls, calling conventions, and recursion
- Some platform-specific details
Время на прочтение5 мин
Количество просмотров176K
В данной статье я хочу рассмотреть вопросы, которые могут возникнуть у человека, приступившего к изучению ассемблера, связанные с установкой различных трансляторов и трансляцией программ под Windows и Linux, а также указать ссылки на ресурсы и книги, посвященные изучению данной темы.
MASM
Используется для создания драйверов под Windows.
По ссылке переходим на сайт и скачиваем пакет (masm32v11r.zip). После инсталляции программы на диске создается папка с нашим пакетом C:\masm32. Создадим программу prog11.asm, которая ничего не делает.
.586P
.model flat, stdcall
_data segment
_data ends
_text segment
start:
ret
_text ends
end start
Произведём ассемблирование (трансляцию) файла prog11.asm, используя ассемблер с сайта masm32.
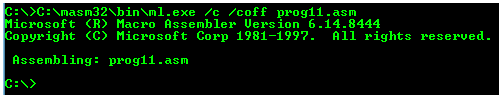
Ключ /coff используется здесь для трансляции 32-битных программ.
Линковка производится командой link /subsystem:windows prog11.obj (link /subsystem:console prog11.obj)
Как сказано в Википедии
MASM — один из немногих инструментов разработки Microsoft, для которых не было отдельных 16- и 32-битных версий.
Также ассемблер версии 6. можно взять на сайте Кипа Ирвина kipirvine.com/asm, автора книги «Язык ассемблера для процессоров Intel».
Кстати, вот ссылка на личный сайт Владислава Пирогова, автора книги “Ассемблер для Windows”.
MASM с сайта Microsoft
Далее скачаем MASM (версия 8.0) с сайта Microsoft по ссылке. Загруженный файл носит название «MASMsetup.exe». При запуске этого файла получаем сообщение -«Microsoft Visual C++ Express Edition 2005 required».
Открываем этот файл архиватором (например 7zip). Внутри видим файл setup.exe, извлекаем его, открываем архиватором. Внутри видим два файла vc_masm.msi,vc_masm1.cab. Извлекаем файл vc_masm1.cab, открываем архиватором. Внутри видим файл FL_ml_exe_____X86.3643236F_FC70_11D3_A536_0090278A1BB8. Переименовываем его в файл fl_ml.exe, далее, произведём ассемблирование файла prog11.asm, используя ассемблер fl_ml.exe.

MASM в Visual Studio
Также MASM можно найти в папке с Visual Studio (у меня VS 10) вот здесь: C:\Program Files\Microsoft Visual Studio 10.0\VC\bin\ml.exe.

Для того, чтобы запустить на 32- или 64-разрядной системе и создавать программы, работающие как под 32-, так и под 64-разрядной Windows, подходит MASM32 (ml.exe, fl_ml.exe). Для того, чтобы работать на 32- и 64-разрядных системах и создавать программы, работающие под 64-разрядной Windows, но неработающие под 32-разрядной нужен ассемблер ml64.exe. Лежит в папке C:\Program Files\Microsoft Visual Studio 10.0\VC\bin\amd64 и вот здесь — C:\Program Files\Microsoft Visual Studio 10.0\VC\bin\x86_amd64.
TASM
Программный пакет компании Borland, предназначенный для разработки программ на языке ассемблера для архитектуры x86. В настоящее время Borland прекратила распространение своего ассемблера.
Скачать можно, например, здесь. Инсталлятора нет, просто извлекаем программу. Вот исходник из книги Питера Абеля (рис. 3.2) «Язык Ассемблера для IBM PC и программирования».
stacksg segment para stack 'stack'
    db 12 dup ('stackseg')
stacksg ends
codesg segment para 'code'
begin proc far
 assume ss:stacksg,cs:codesg,ds:nothing
 push ds
 sub ax,ax
 push ax
 mov ax, 0123h
 add ax, 0025h
 mov bx,ax
 add bx,ax
 mov cx,bx
 sub cx,ax
 sub ax,ax
 nop
 ret
begin endp
codesg ends
 end begin
Выполним ассемблирование (трансляцию) файла abel32.asm.
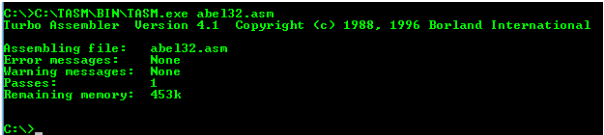
Корректность работы программы можно проверить, произведя линковку (tlink.exe) объектного файла и запустив полученный файл в отладчике.
Как было сказано выше, MASM можно использовать для работы с 16-битными программами. Выполним ассемблирование (трансляцию) программы abel32.asm с помощью ассемблера MASM:

Ключ /coff здесь не используется.
Линковка производится файлом link16.exe
Вот здесь приводится порядок действий, которые необходимо выполнить для запуска TASM в DOSbox. Для линковки понадобится файл DPMI16BI.OVL
FASM
В статье Криса Касперски «Сравнение ассемблерных трансляторов» написано, что «FASM — неординарный и весьма самобытный, но увы, игрушечный ассемблер. Пригоден для мелких задач типа „hello, world“, вирусов, демок и прочих произведений хакерского творчества.»
Скачаем FASM с официального сайта. Инсталлятора нет, просто извлекаем программу. Откроем fasm editor — C:\fasm\fasmw.exe. В папке C:\fasm\EXAMPLES\HELLO есть файл HELLO.asm.
include 'win32ax.inc'
.code
  start:
 invoke    MessageBox,HWND_DESKTOP,"Hi! I'm the example program!",invoke GetCommandLine,MB_OK
    invoke    ExitProcess,0
.end start
Откроем файл HELLO.asm из fasmw.exe. Изменим строку include ‘win32ax.inc’ на строку include ‘c:\fasm\INCLUDE\WIN32AX.INC’. Запускаем из меню Run → Run.

Вот ссылки на ресурсы, посвященные FASM:
→ FASM на Cyberforum’е
→ FASM на asmworld .com программы под Dos
→ Цикл статей «Ассемблер под Windows для чайников»
→ Сайт на narod’е
FASM в Linux
Для того, использовать FASM в Linux (у меня Ubuntu), скачаем соответствующий дистрибутив (fasm-1.71.60.tgz), распакуем его, в папке у нас будет бинарный файл fasm, копируем этот файл в /usr/local/bin для того, чтобы можно было запускать его из консоли, как любую другую команду.Выполним ассемблирование программы hello.asm из папки fasm/examples/elfexe/hello.asm.

Корректность работы программы можно проверить в отладчике.
Nasm
Nasm успешно конкурирует со стандартным в Linux- и многих других UNIX-системах ассемблером Gas.
Nasm в Linux можно установить с помощью менеджера пакетов или из командной строки: в дистрибутиве Debian (Ubuntu) командой apt-get install nasm, в дистрибутивах Fedora, CentOS, RedHat командой yum install nasm.
Создадим программу, которая 5 раз выводит сообщение “Hello”. Пример взят из книги Андрея Викторовича Столярова “Программирование на языке ассемблера NASM для ОС UNIX”. Учебник, а также библиотека “stud_io.inc” есть на личном сайте автора.
%include "stud_io.inc"
global _start
section .text
_start: mov eax, 0
again:  PRINT "Hello"
PUTCHAR 10
inc eax
cmp eax, 5
jl again
FINISH
Выполним ассемблирование и линковку и запустим файл hello.asm.
$ nasm -f elf hello.asm
$ ld hello.o -o hello
$ ./hello
Для 64bit необходимо использовать команду nasm -f elf64 hello.asm
NASM для Windows
NASM для Windows можно установить, скачав соответствующий дистрибутив с соответствующего сайта.
Ассемблирование:
nasm -f bin имя_файла.asm -o имя_файла.com
Ссылки на ресурсы, посвященные Nasm:
→ Сайт А.В. Столярова
→ Сайт, на котором лежит электронный учебник (в архиве)
→ То же самое
AS
Стандартный ассемблер практически во всех разновидностях UNIX, в том числе Linux и BSD. Свободная версия этого ассемблера называется GAS (GNU assembler). Позволяет транслировать программы с помощью компилятора GCC.
Из учебников удалось найти только книгу на английском «Programming from the ground up». На русском удалось найти только одну главу из книги С. Зубкова «Assembler для DOS, Windows и UNIX».
Возьмем пример программы, которая ничего не делает, с сайта. Создадим программу gas.s
.section .text
   .globl _start
   _start:
      movl  $1, %eax
      movl  $2, %ebx
      int   $0x80
Выполним ассемблирование (трансляцию), линковку и запуск программы:
$ as -o gas.o gas.s
$ ld -o gas gas.o
$ ./gas
Если в данной программе изменить _start на main, то можно выполнить ассемблирование (трансляцию) и линковку компилятором gcc.
.section .text
   .globl main
   main:
      movl  $1, %eax
      movl  $2, %ebx
      int   $0x80
Выполним ассемблирование (трансляцию), линковку и запуск программы:
$ gcc gas.s -o gas
$ ./gas
Выводы: если вы изучаете программирование под Windows, то вы можете остановить свой выбор на Masm; Tasm больше не поддерживается, но для обучения по старым классическим учебникам подойдёт.
Под Linux Gas подойдет тем, кто использует GCC, а тем, кому не нравится синтаксис Gas, подойдёт Nasm.
P.S. Про обработку строк в ассемблере на примере создания транслятора простого «эзотерического» языка можно прочитать здесь.
P.P.S. Упрощенный ограниченный набор ассемблерных инструкций используется в учебной модели компьютера Little Man Computer, которому у меня также посвящено несколько статей ссылка.
12 Sep 2015
In this post, I’ll walk through the steps required to bootstrap your development experience against the Win32 API using the Netwide Assembler.
Prerequisites
Before starting, you’ll need some software. I’ve used the following software set, however you can use any linker and resource compiler that you like.
- Nasm
- ALink
- Gorc
- Win32 include file
You’ll use Nasm to reduce your assembly source code into COFF object files. Gorc will take your resource scripts and produce linkable object files from these. Finally, ALink will bind all of your object files into a windows executable.
Finally, you’re going to need a copy of the include file for the Win32 API. The API itself is huge; the number of constants and structures is mind boggling. The link above handles all of these for you.
Test program
Probably the easiest thing to accomplish, is showing a message box. You need to show the message box and then return control back to Windows. You do this with calls to MessageBoxA and ExitProcess. The “A” in MessageBoxA as we’re not dealing with the wide-char version of these functions.
Here’s the code.
%include "win32n.inc"

extern MessageBoxA
import MessageBoxA user32.dll

extern ExitProcess
import ExitProcess kernel32.dll

segment .data USE32

	title	db "A message for you", 0
	message db "This is your first message", 0

segment	.bss USE32

segment .code USE32

..start:

	; show the message box
	push MB_OK
	push title
	push message
	push 0
	call [MessageBoxA]

	; return control back to windows
	push 0
	call [ExitProcess]
Functions are imported from the api using import, and are called in a very assembler-traditional fashion here. Taking a look at the definition for the MessageBox function, we can see the order of parameters:
int WINAPI MessageBox(
  HWND    hWnd,
  LPCTSTR lpText,
  LPCTSTR lpCaption,
  UINT    uType
);
Arguments are pushed to the stack in reverse order.
Assembling and linking
Now that you’ve got your source file, hello.asm you can produce an object file with the following:
C:\src> nasm -i c:\nasm\include -f obj hello.asmYou can now link the object file into an executable with the following:
C:\src> alink -c -oPE -subsys gui helloReady to go.
Making things a little more high-level
You can make your assembly code a little more high-level by using the nagoa+.inc include file. This include file provides your programs with some really handy constructs (as well as the win32 api bindings), so function invocations now look like this:
call MessageBoxA, 0, message, title, MB_OK
call ExitProcess, 0
Conclusion
This will get you started at least with Nasm in Windows development. Here is a great resource, full of links on assembly development.